Using Visual Studio to develop Linux apps
This tutorial demonstrates how to build and debug Linux applications using Visual Studio.
To proceed with the tutorial you will need a Windows machine and a Linux machine. You can use 2 physical computers, a Windows computer running Linux inside VirtualBox/VMWare or vice versa.
To create, build and debug a simple Linux app using VisualGDB, please follow these steps:
- Please download and install the latest VisualGDB.
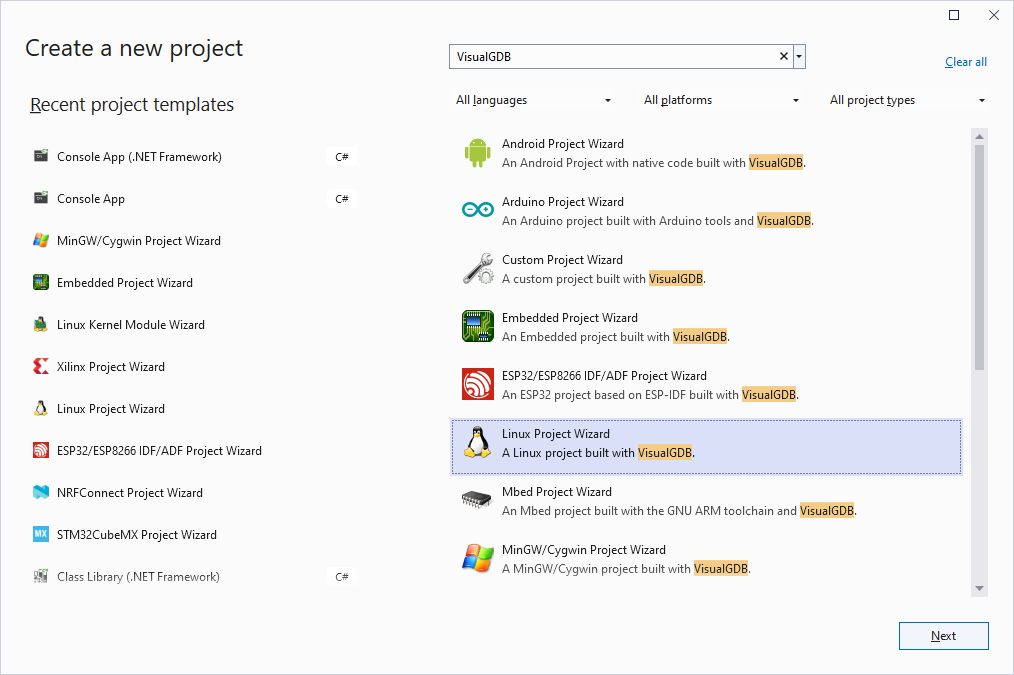
- On your Windows machine start Visual Studio, select “File->New project”. Then select the “VisualGDB Linux Project Wizard”:
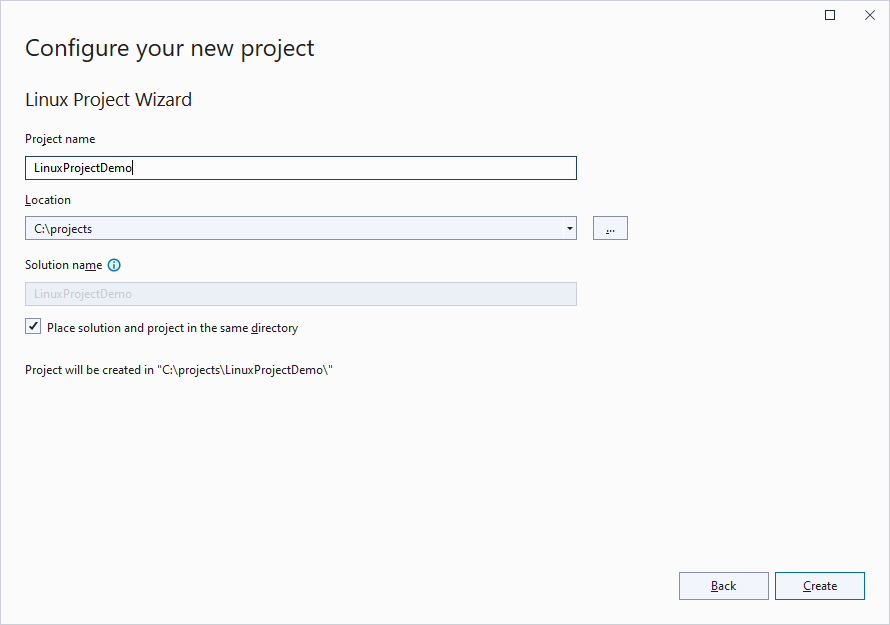
- . Specify project location and press “OK”:
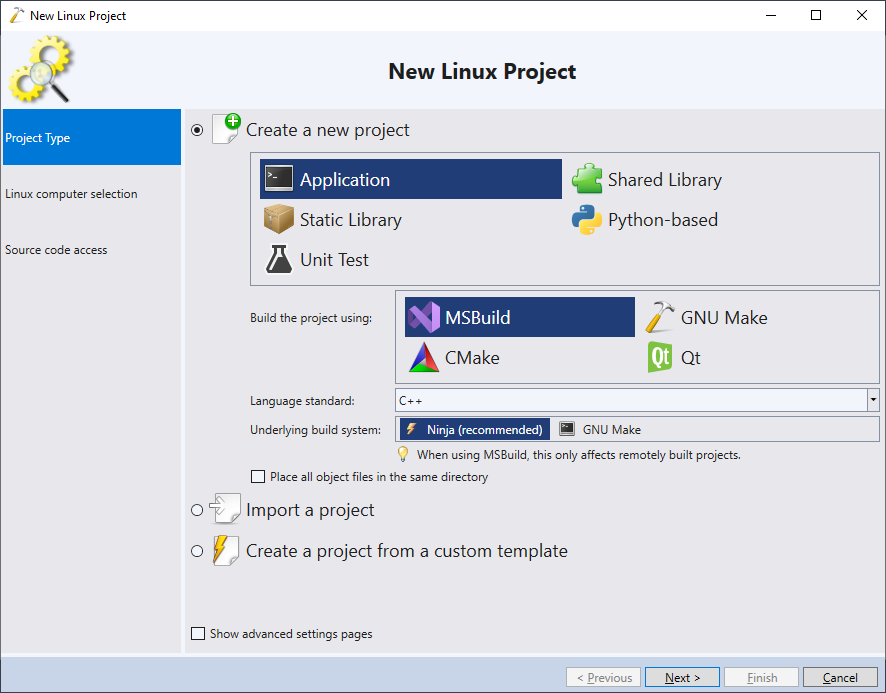
- The VisualGDB Linux Project Wizard will start. VisualGDB supports 4 different build subsystems when creating Linux projects. For users familiar with classic Visual Studio projects we recommend using MSBuild that will provide the most native look-and-feel. The VisualGDB MSBuild backend is heavily optimized and will only take moments to retransfer files to the Linux machine and build them. It will also handle all dependency resolution on the Linux machine itself, minimizing delays even for slow connections. If you are planning to build your project from the Linux machine directly where no Visual Studio is available, follow this tutorial instead to create a CMake-based project. If your project uses Qt, you can select “Use Qt” to use QMake. Finally, if you want to use the simple GNU Make, VisualGDB supports it as well (it will let you edit the Makefile via the VisualGDB GUI and will configure IntelliSense automatically). In this tutorial we will use the MSBuild subsystem recommended for most new projects:
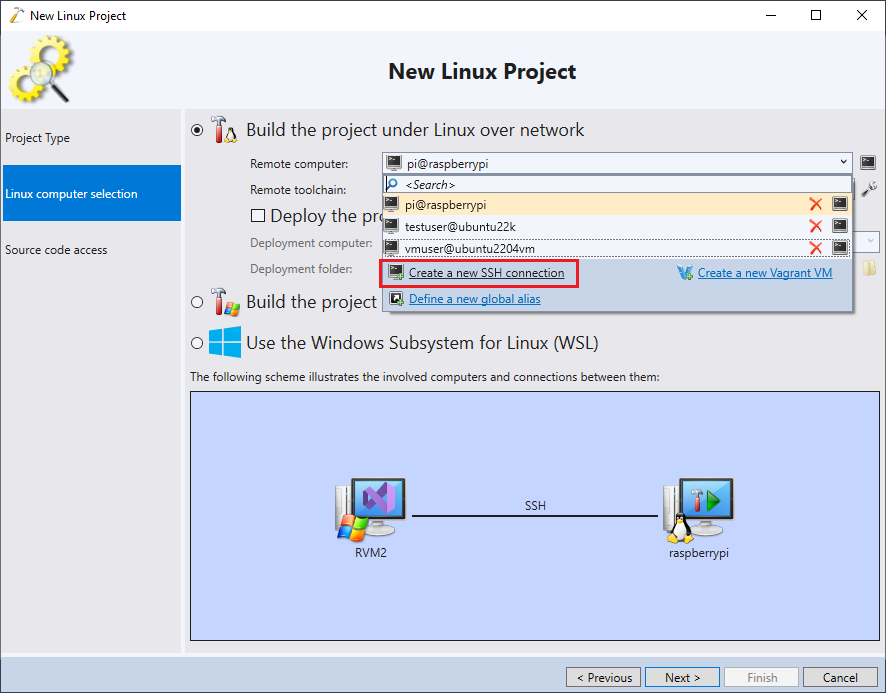
- If you have not created any projects before, select “Create a new SSH connection” on the next page:
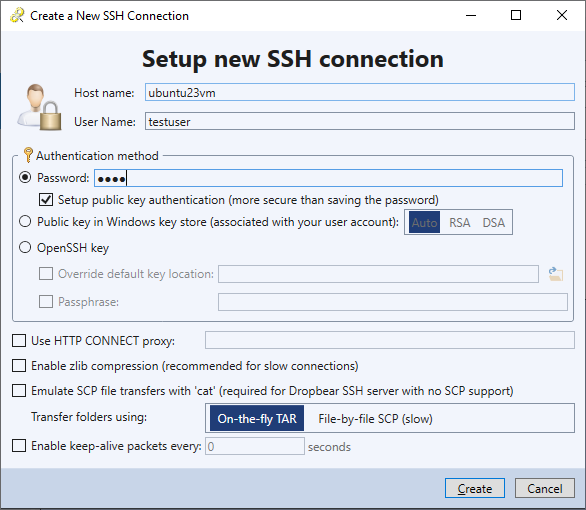
- Provide the host name, user name and password. It is recommended to check the “setup public key” checkbox, so that VisualGDB will automatically generate an public/private keypair, store it in your Windows account’s key container and setup the remote Linux machine to use it. If you don’t enable public key authentication, VisualGDB will remember your password for this connection. The stored passwords are encrypted using a key stored in your Windows account. Thus, the password will only be available once you login using your Windows account:
- If you want to use a different toolchain (e.g. LLVM), you can select if from the toolchain list. The button to the right of the toolchain list allows customizing individual tools, such as the compiler:
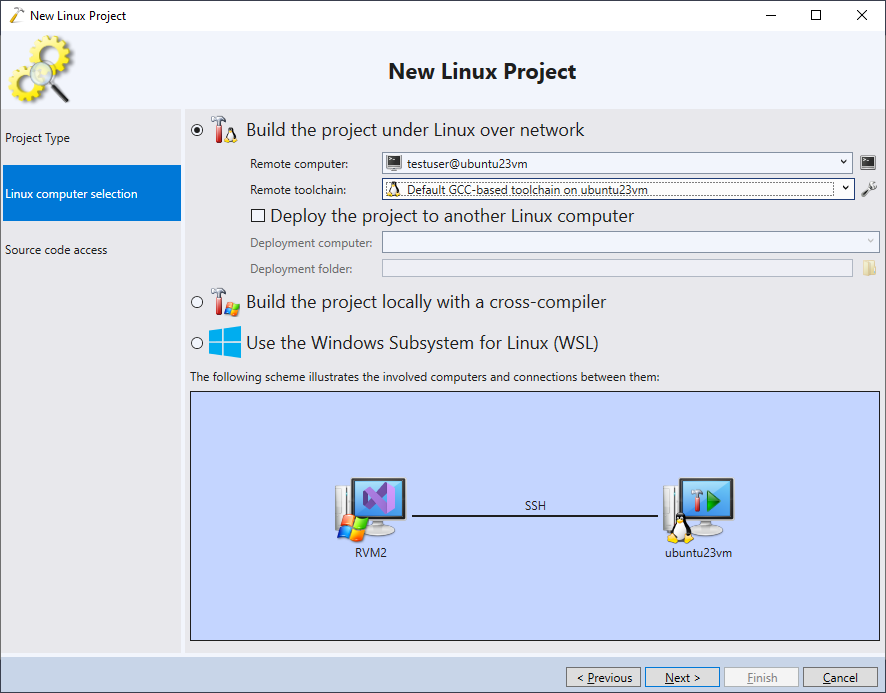 You can also select a cross-compiler here or specify a different deployment machine. Use the diagram at the bottom of the page to check the correctness of your setup:
- The hammer icon corresponds to the machine where the compiler is run.
- The “play” icon corresponds to the machine where the debugged program is launched.
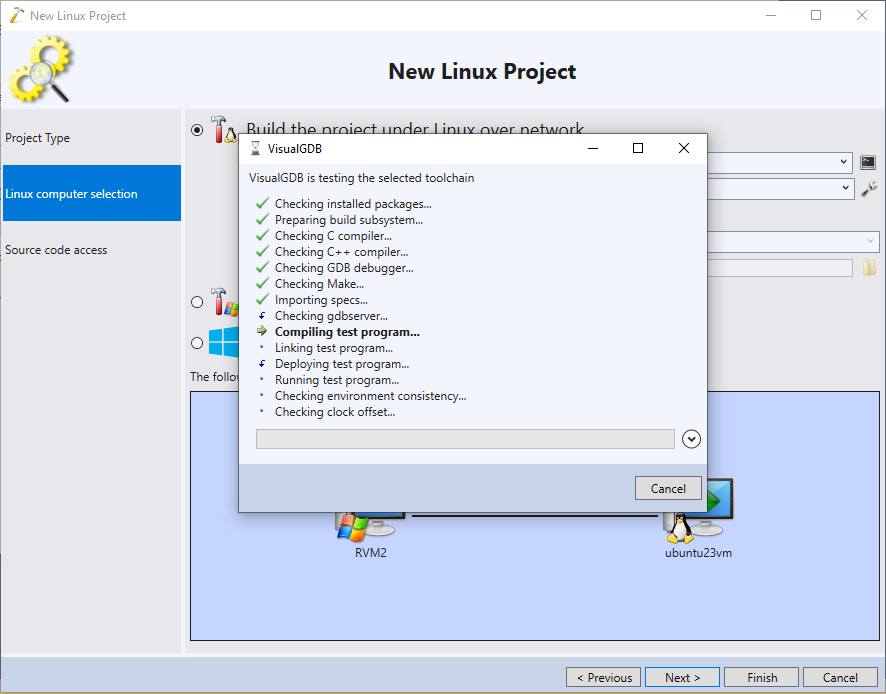
- When you press “Next”, VisualGDB will test your toolchain by trying to compile and run a trivial program. If any errors are detected at this stage, you will see a detailed error log with further troubleshooting information.
- As the same source code will be edited under Windows and then compiled under Linux, VisualGDB will need to keep the sources synchronized. The easiest way is to use automatic file uploading via SSH. Alternatively, VisualGDB can setup shared folders (that would require root password).
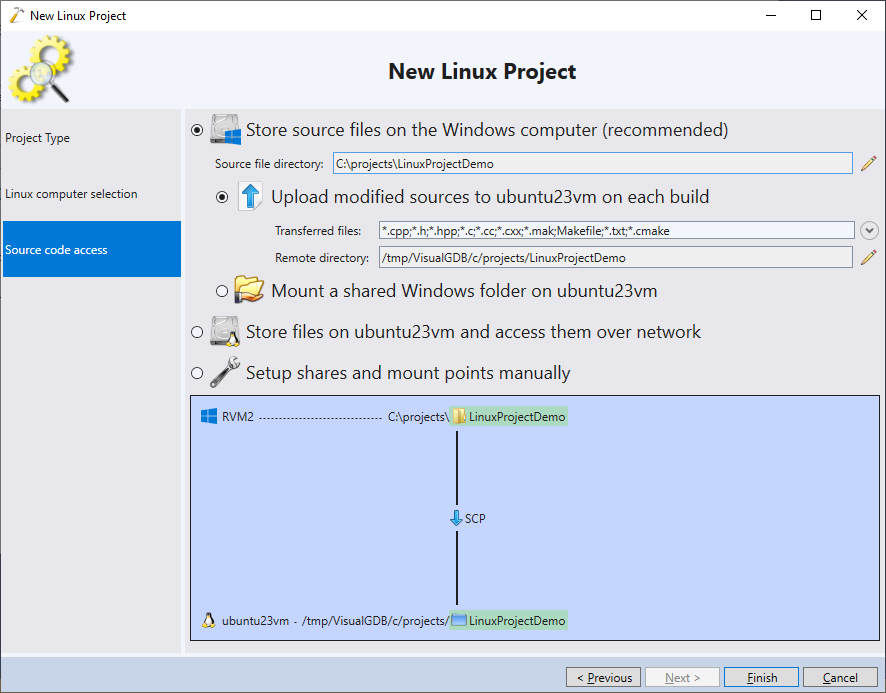 If you are using CMake, you can also configure VisualGDB to access the sources on the Linux machine directly over SSH as if they were located on Windows. Follow this tutorial for a detailed example.
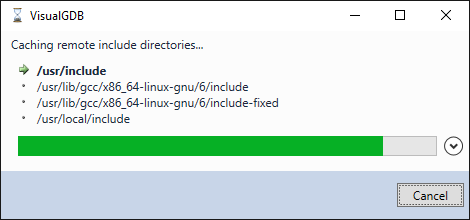
 - Press Finish to complete the wizard. If you are setting up your first project using this Linux machine, VisualGDB will make local caches of the include directories to make them available through IntelliSense.
- Congratulations! The project has been created. You can now build your project, set a breakpoint on the “cout” line and start debugging with F5.
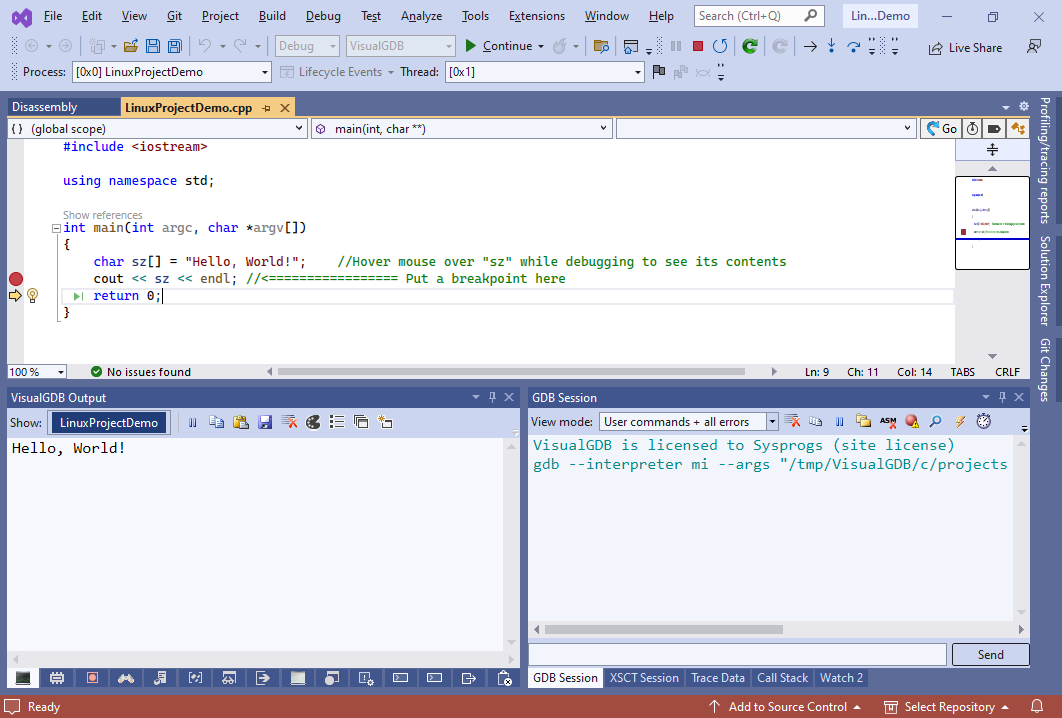 You can switch between the white and black theme for the remote console via Tools->Options->VisualGDB->General->GUI->use classic black and white color scheme for consoles.
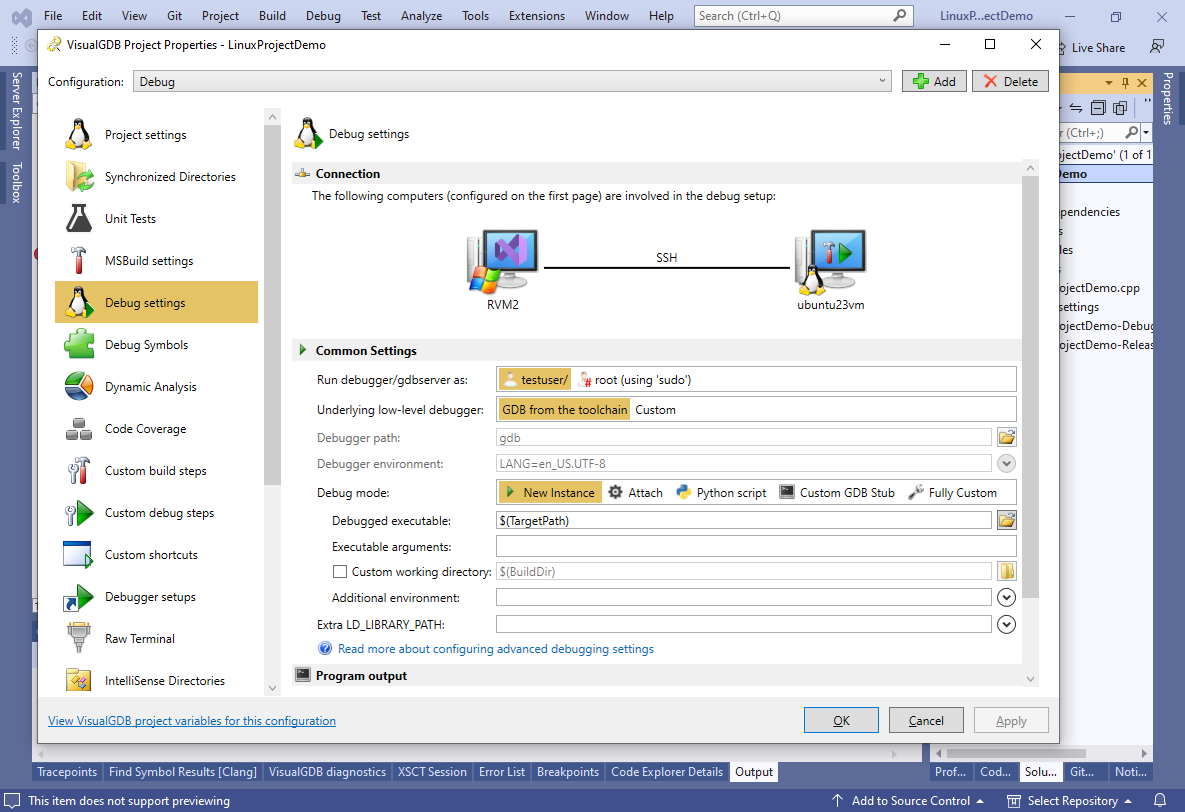
 - You can always change various debugging settings by right-clicking at the project in Solution Explorer and selecting “VisualGDB Project Properties”. The properties window allows changing various settings and also copying settings between configurations:
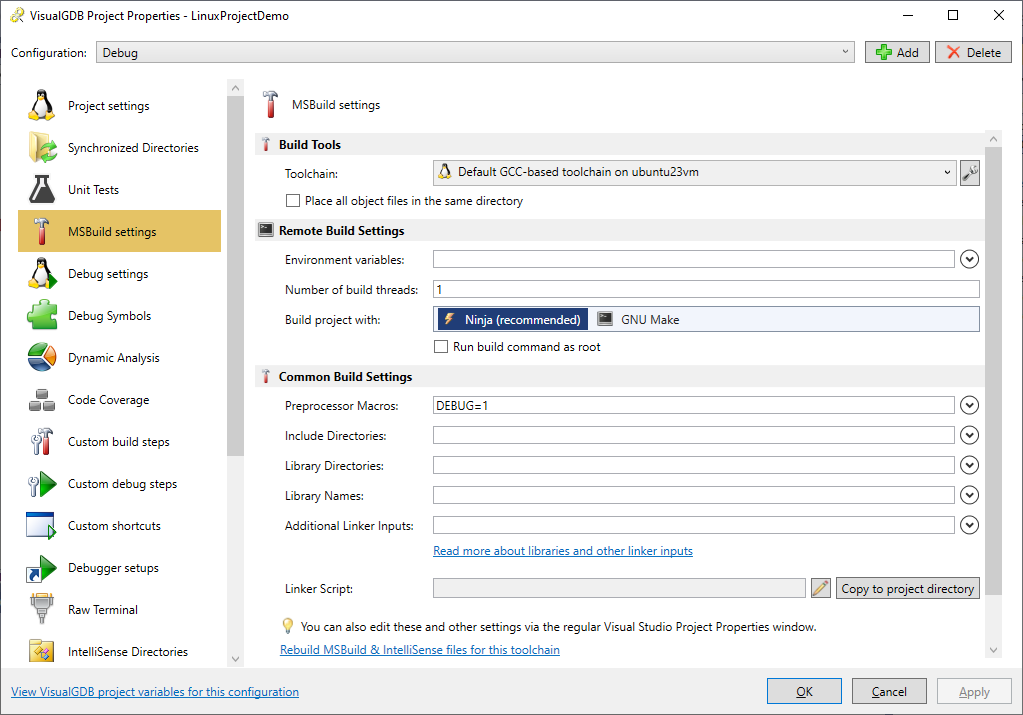
- VisualGDB provides convenient shortcuts to common settings like “Include directories” (with easy browsing on the remote machine) via the “MSBuild Settings page”:
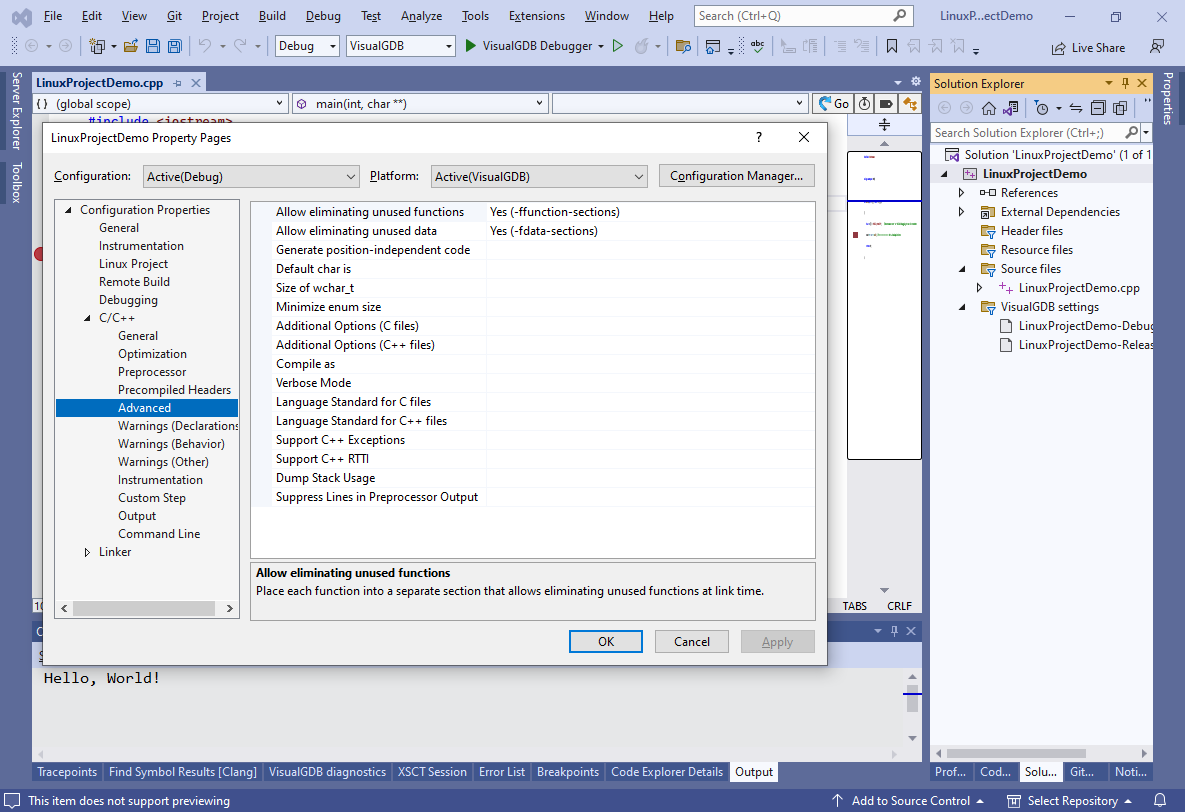
- Alternatively you can use the regular Visual Studio properties to set properties for the entire project or individual files:
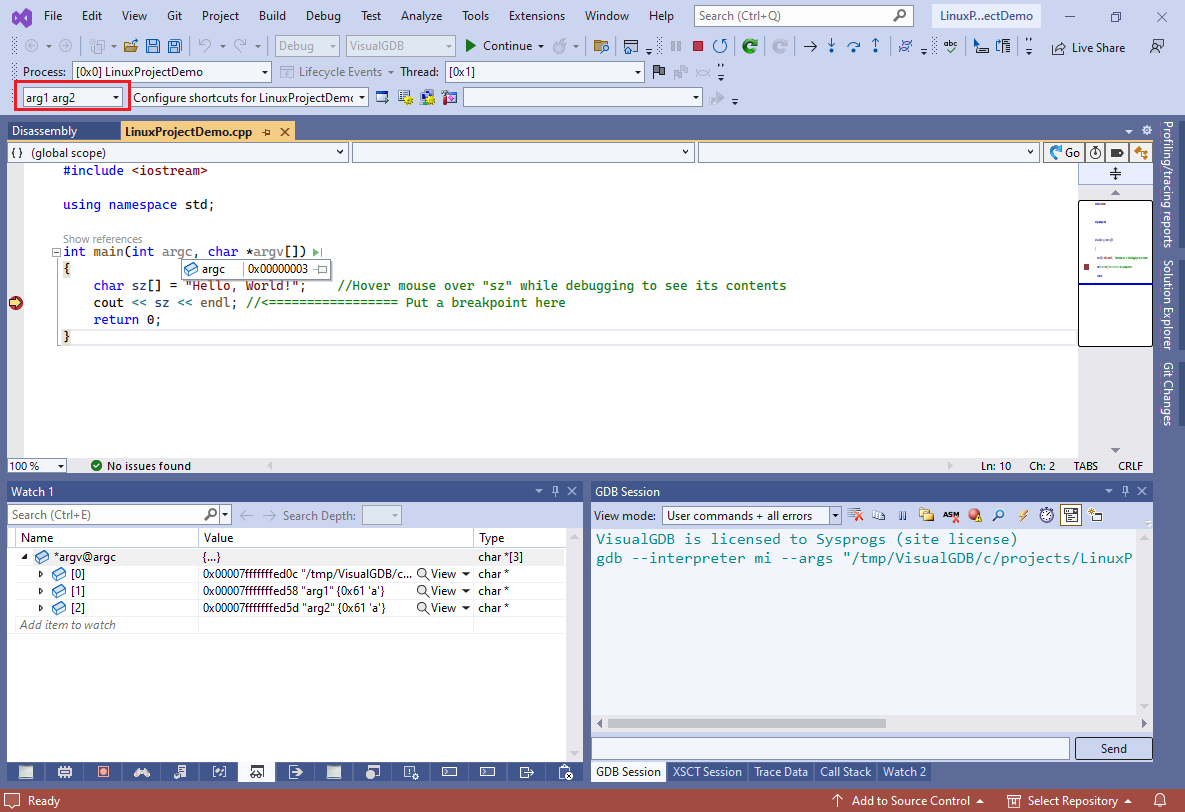
- You can also right-click inside Visual Studio menu bar and enable the VisualGDB toolbar. It provides shortcuts to commonly used functionality (e.g. changing the program arguments for next launch):
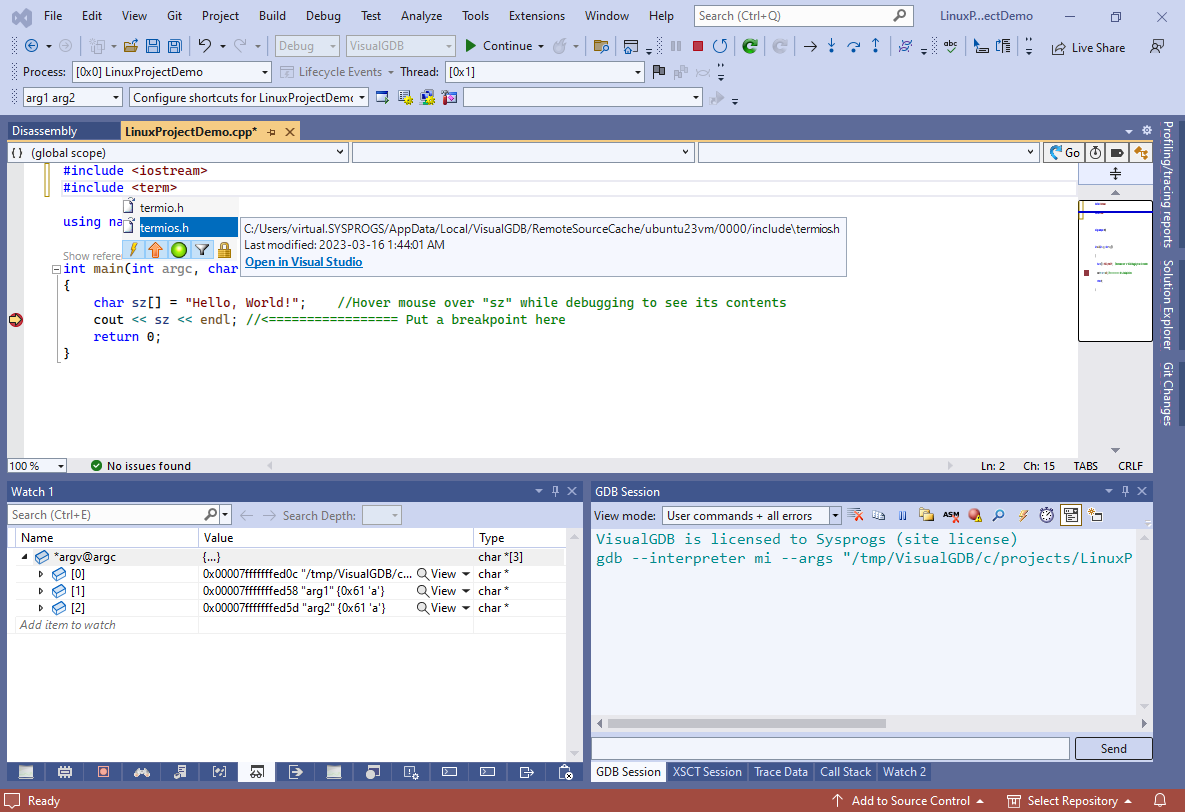
- VisualGDB uses the exact header files from the Linux machine to get the most accurate IntelliSense. The headers for each remote machine are cached separately under %LOCALAPPDATA%:
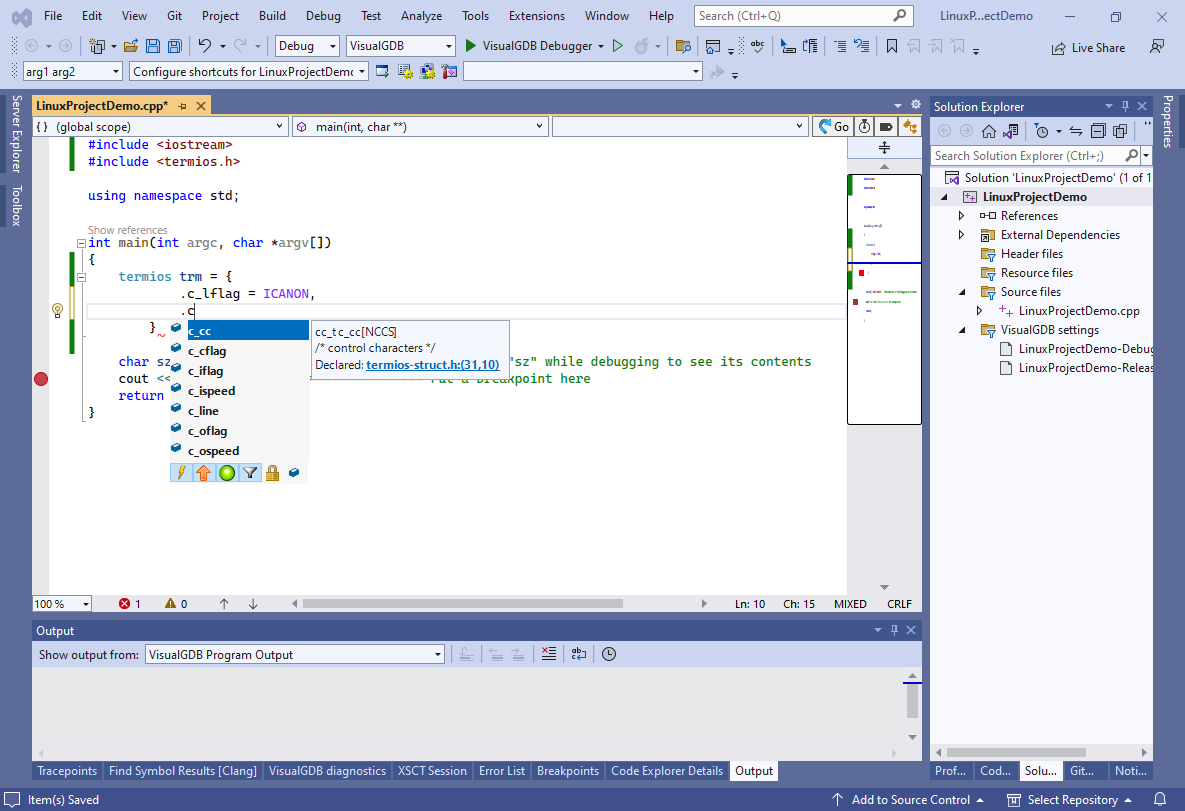
- VisualGDB 5.0 and later includes a Clang-based IntelliSense engine that supports GNU C/C++ extensions, such as struct initializers:
- It also supports refactoring features like “Create from use” and detailed C/C++ code map and CodeJumps. Try calling a non-existing function, then open the smart tag menu and select “Create function/method stub”:
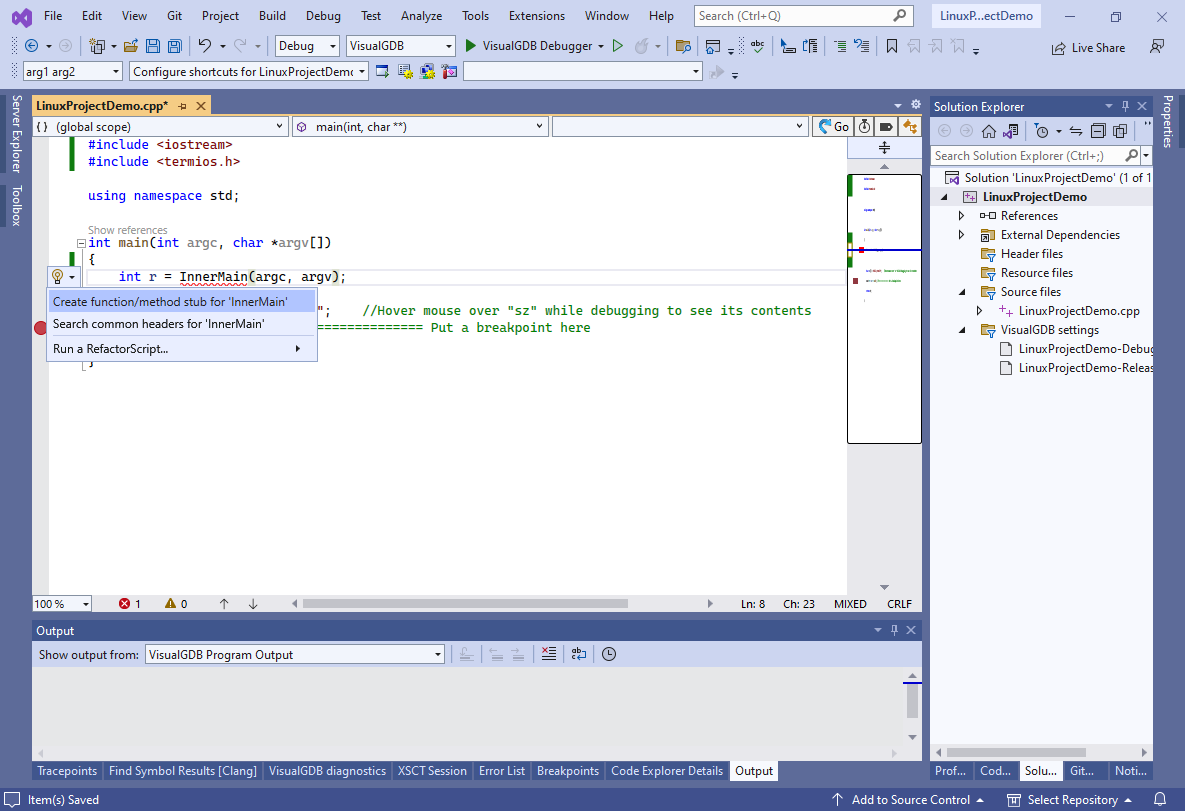
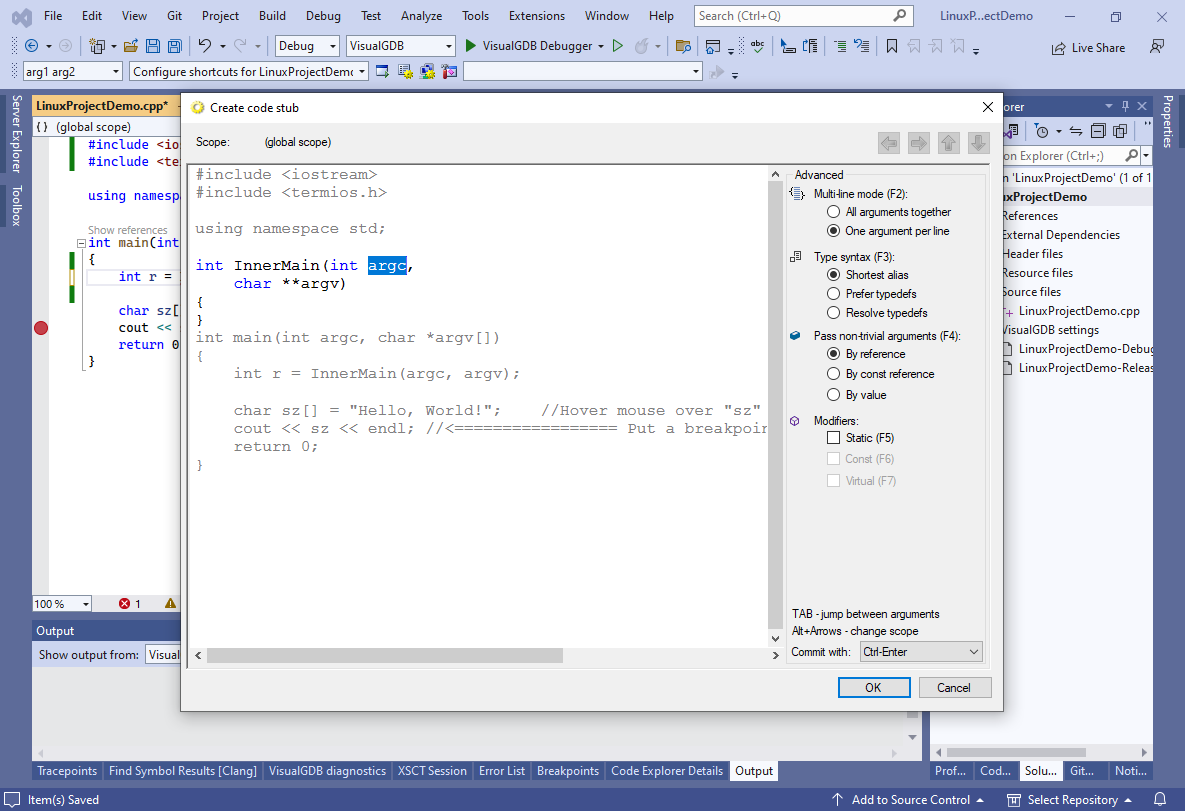
- VisualGDB will automatically detect the types of the arguments and will let you choose the place for the generated function stub:
That was it for the basic project. If you want a more advanced example, check out our new CMake Subsystem tutorial.
