Managing Multi-Target Embedded Projects with VisualGDB
This project shows how to setup a large multi-target embedded project consisting of an executable, several static libraries, and multiple platforms (STM32 and Win32). We will use the Advanced CMake Project Subsystem that allows easily managing multiple configurations and reusing project-level settings between all targets. The final target layout will consist of the application itself, a basic cross-platform library, and an OS abstraction layer hiding the differences between Win32 and STM32 targets. The diagram below illustrates the layout: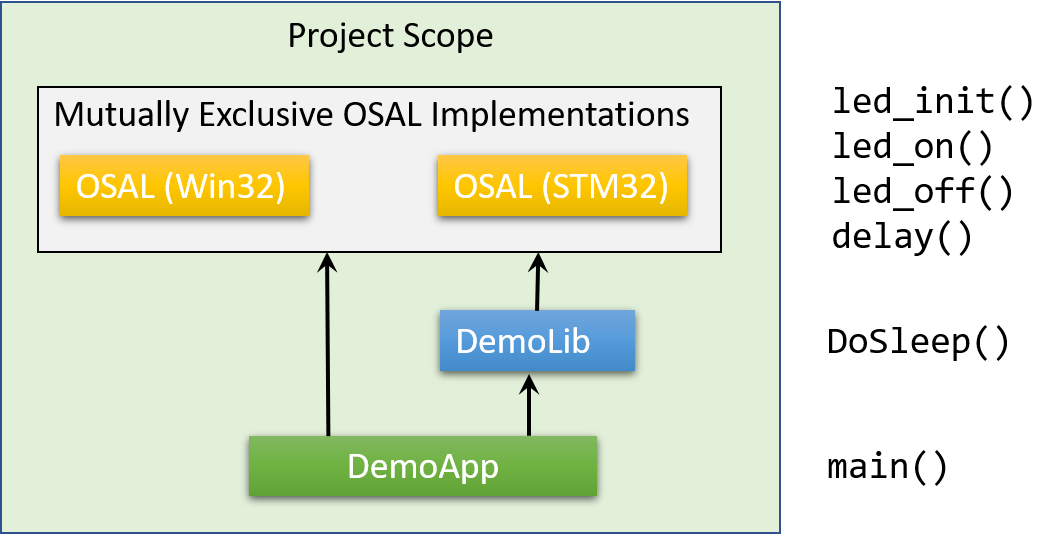
- Start Visual Studio and open the VisualGDB Embedded Project Wizard:

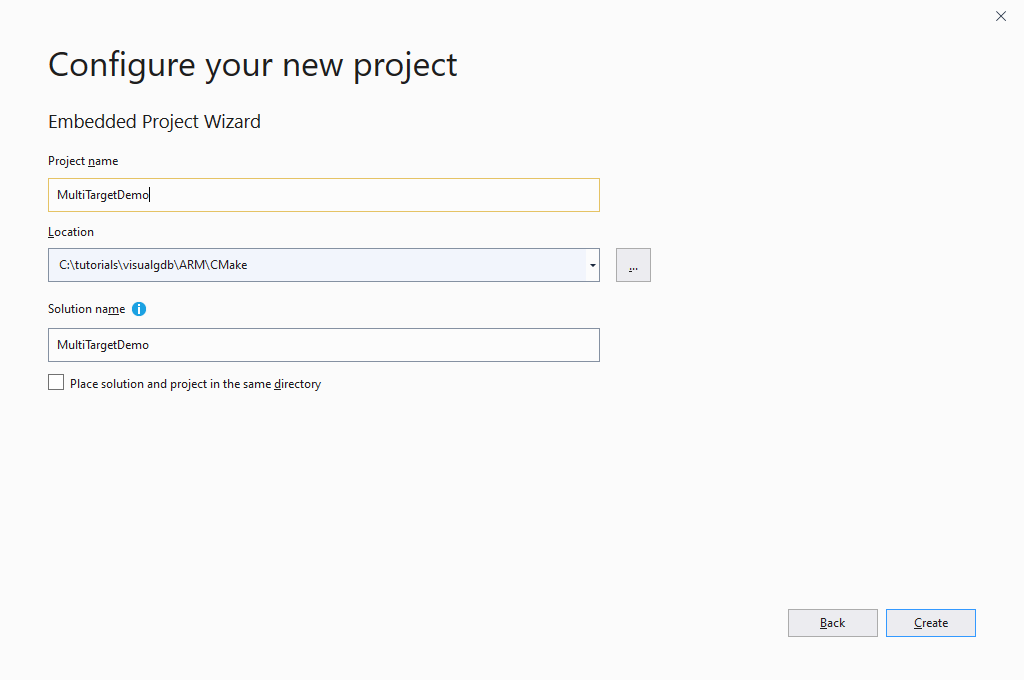
- Enter the name and location for the project, then click “Create” to start VisualGDB-specific part of the wizard:
- On the first page of the wizard, select “Create a new project -> Embedded Binary -> Advanced CMake”:

- On the next page select your embedded toolchain and the target device. In this tutorial we will use the GCC ARM toolchain, however the Embedded CMake projects also support IAR and Keil compilers:

- Pick the default “LEDBlink” sample and click “Next”:

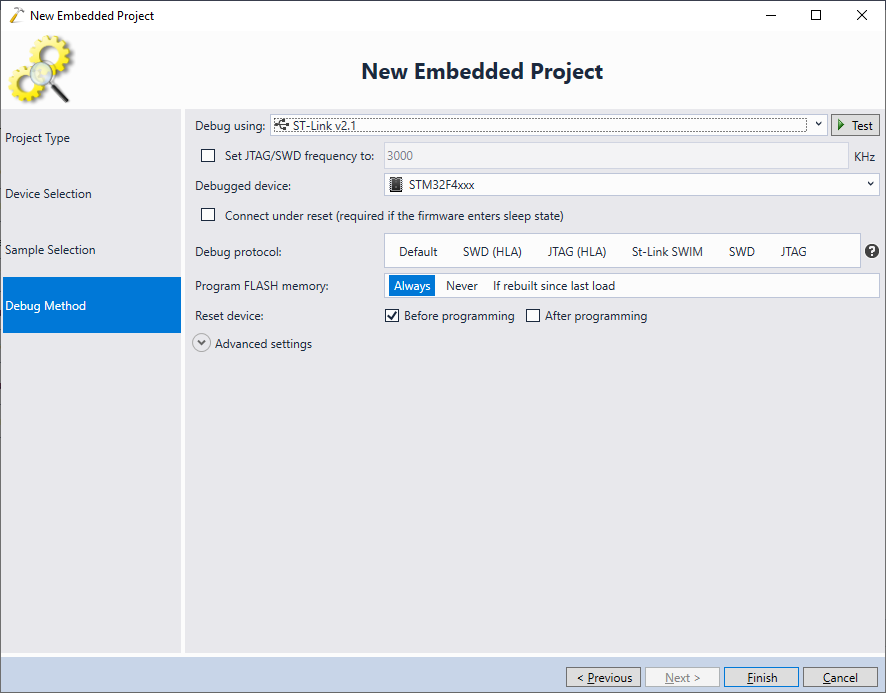
- Finally, select debugging settings that will work with your target and click “Finish” to generate the project:
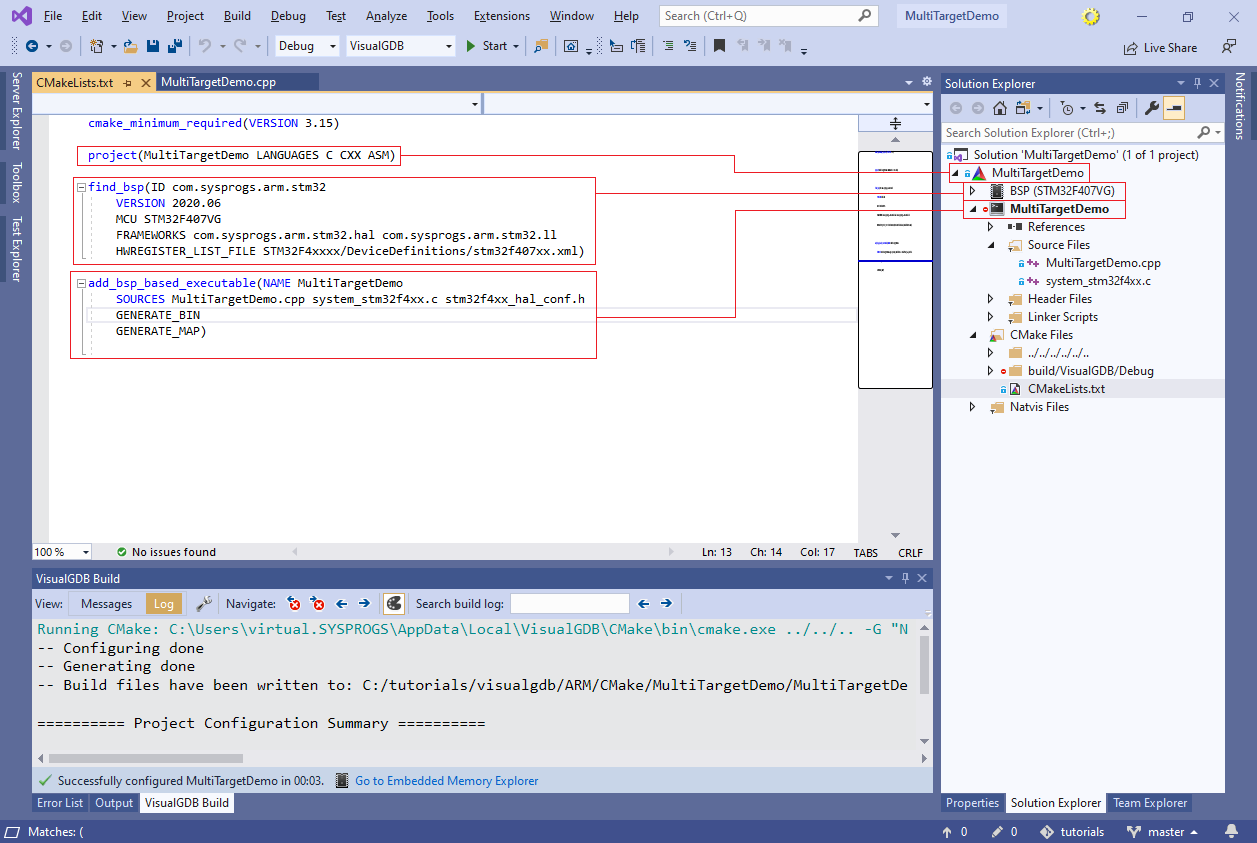
- Once the project is generated, check the contents of Solution Explorer:
 The project will consist of the top-level node (1), the BSP (2) and the main executable (3):
- The top-level node corresponds to the project itself. It defines common properties (e.g. toolchain, or debug settings) that affect all targets inside the project.
- The BSP target is a special meta-library automatically managed by VisualGDB. It contains the base support files (e.g. startup file and linker script) for the target device, and also additional frameworks (such as the STM32 HAL). The exact list of files included in BSP is managed by VisualGDB, and cannot be edited directly, unless you convert it to a stand-alone BSP. Instead, you can change various BSP parameters via VisualGDB Project Properties (e.g. whether to include the USB library) and VisualGDB will automatically recompute the necessary files.
- The main executable works just like a regular VS project. You can pick the sources included in it, and also set various compiler parameters. BSP-based executables inherit compiler settings from the BSP they reference, so in most of the cases we advise editing those ones instead.
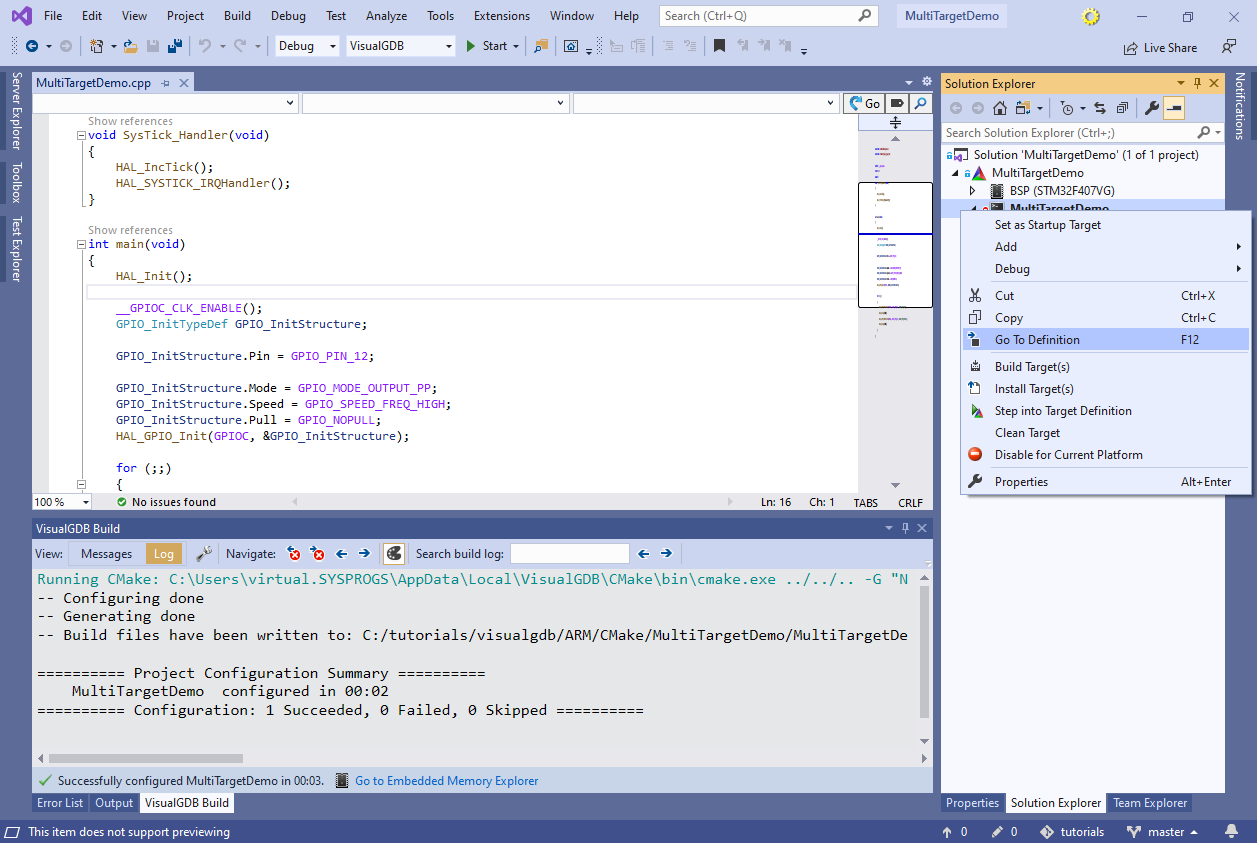
- We will now show how the targets are defined internally. Right-click on the main executable (3) and select “Go To Definition”:
- This will open the CMakeLists.txt file in the project directory, defining the project and the 2 targets. See how each target in Solution Explorer has a CMake statement corresponding to it:
- You can step through the CMake configuration process. Right-click on the project node in Solution Explorer and select “Launch CMake Debugger”:
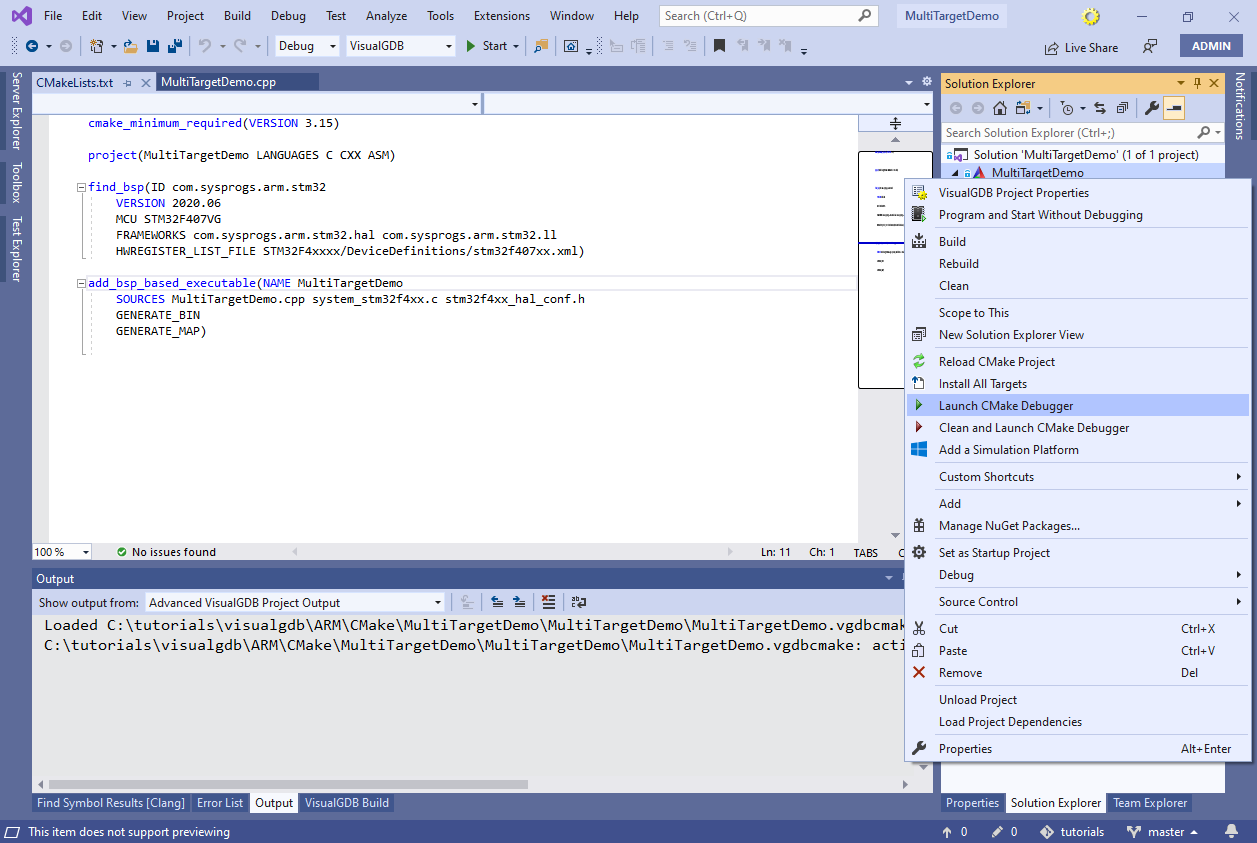
- You can use the regular debugging commands (e.g. F10 to step over or F11 to step in) to follow the CMake configuration process:
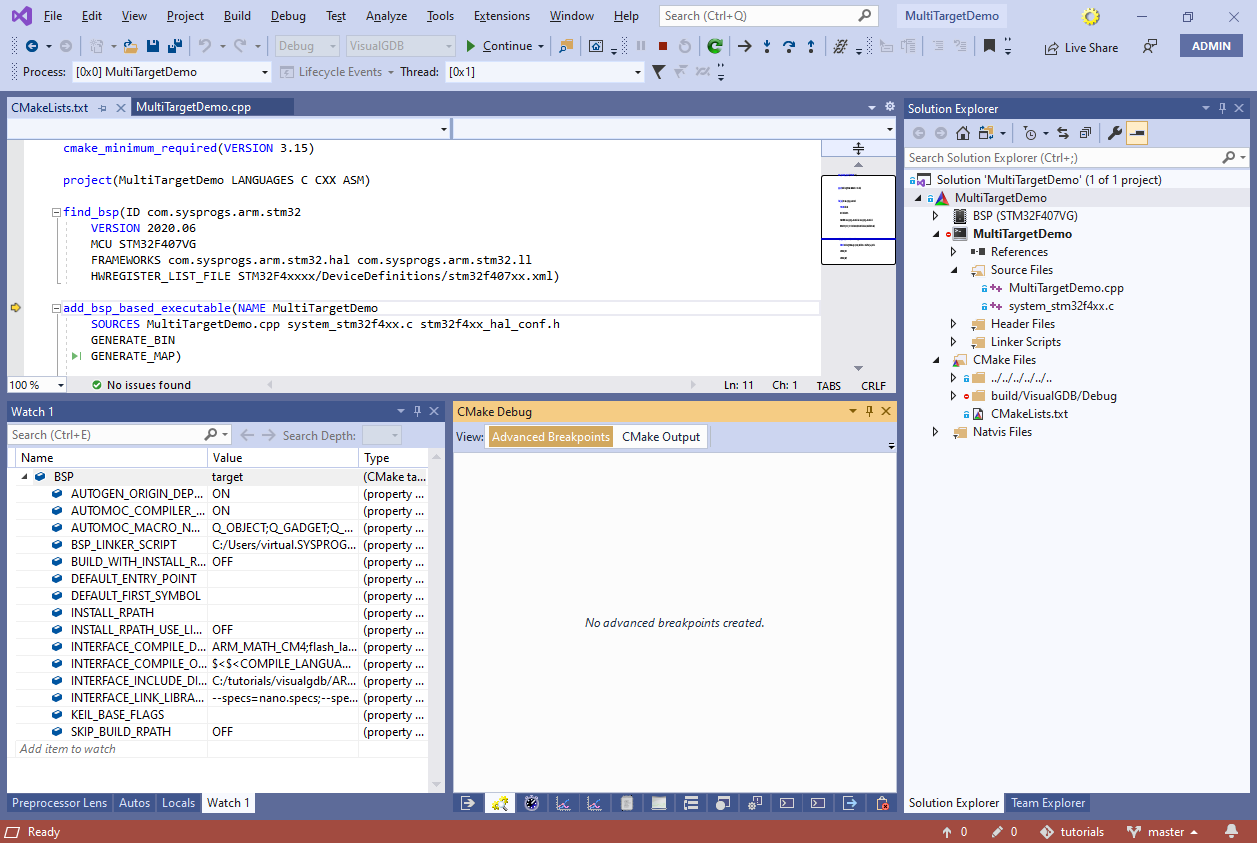
- Try stepping over find_bsp() and into add_bsp_based_executable() to see how it is implemented:

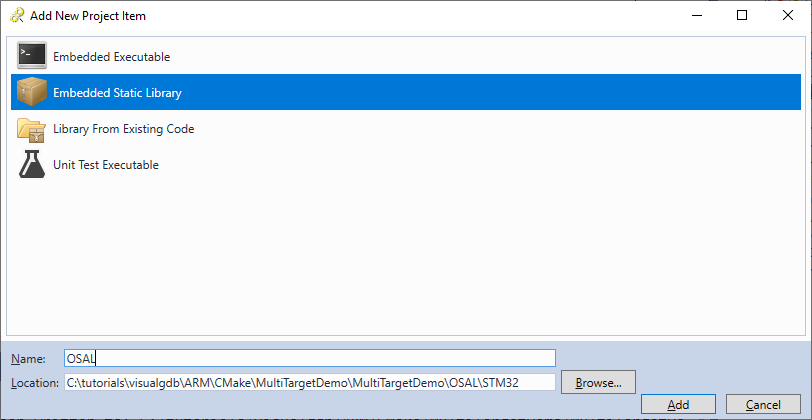
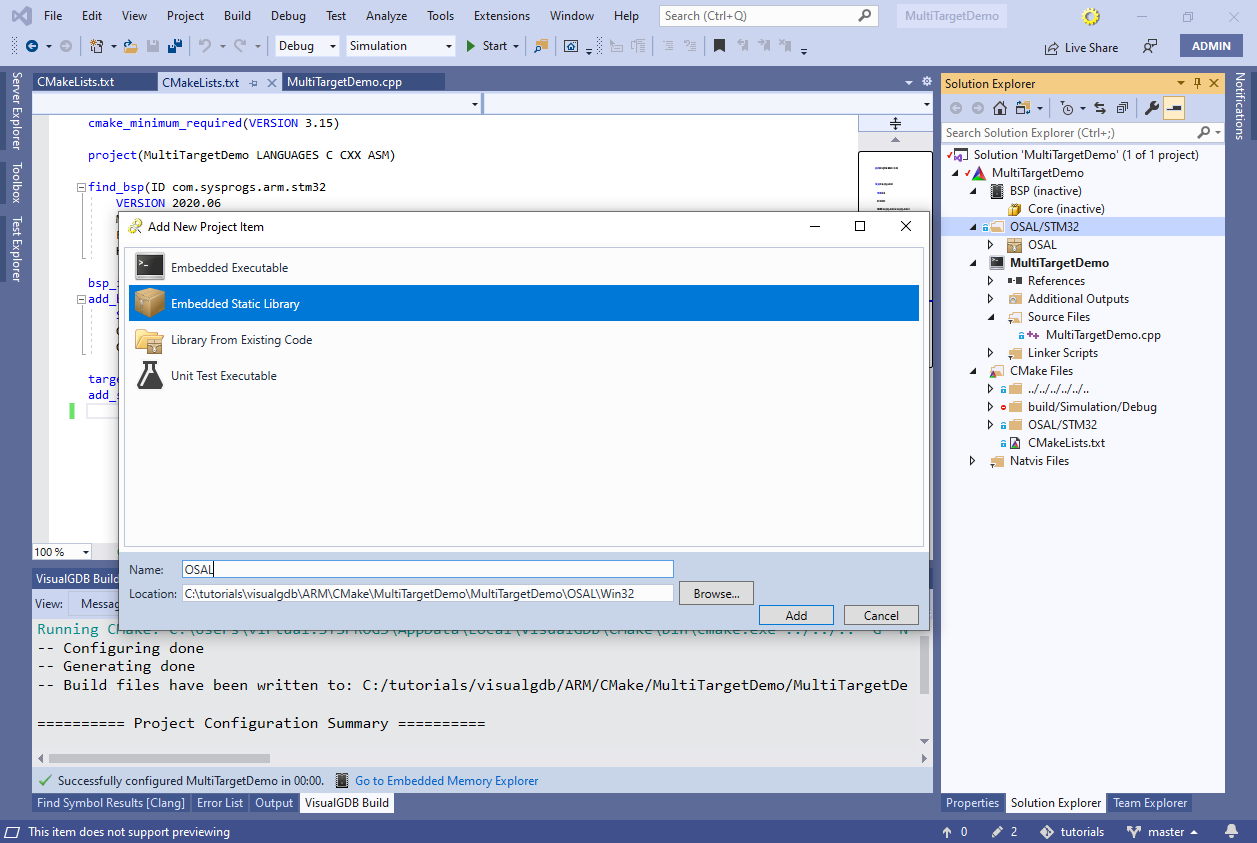
- Now we will move all STM32-specific code into a separate OS Abstraction Layer (OSAL) library. Right-click on the project node in Solution Explorer and select Add->New Item. Then proceed with adding a new static library in the OSAL/STM32 subdirectory:
- Once you add the library, VisualGDB will create another CMakeLists.txt file in the OSAL\STM32 subdirectory, and will reference it from the main file:
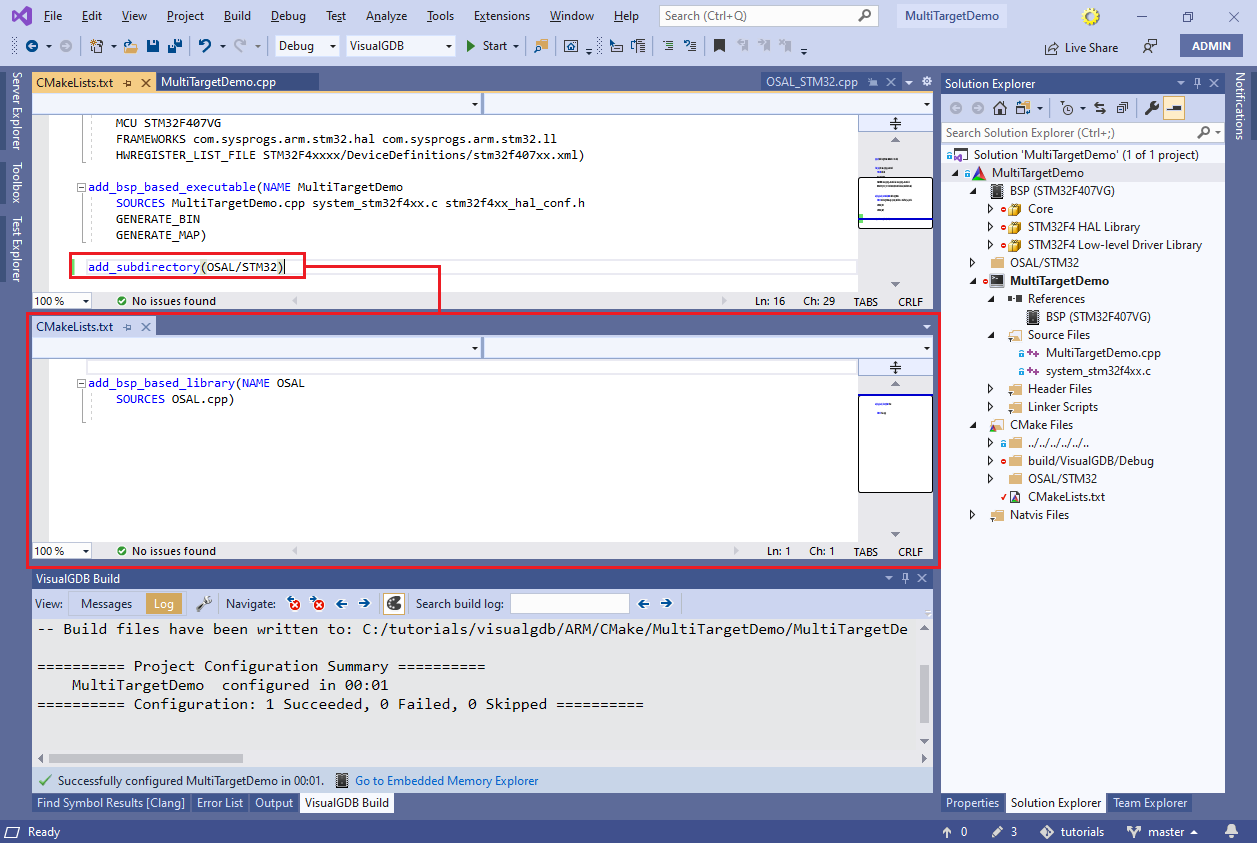 Note that the second CMakeLists.txt file doesn’t have a project() statement because it’s included from the top-level file. You can have an arbitrary hierarchy of CMakeLists.txt files including each other.
 - Locate the OSAL library in Solution Explorer and add a new header file (OSAL.h):

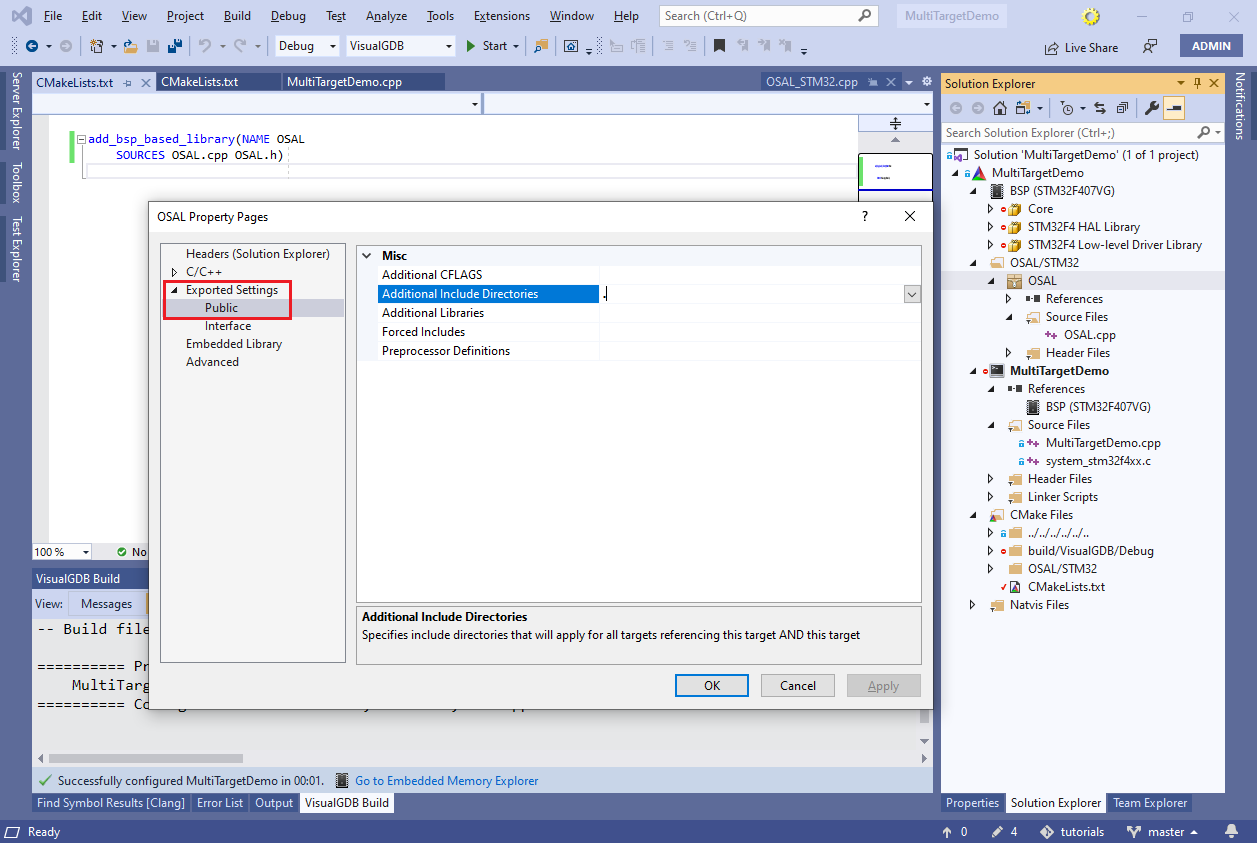
- Every target referencing the OSAL library should be able to just include the <OSAL.h> file to get going, so add the current directory (“.”) to the exported include directories of the OSAL library:
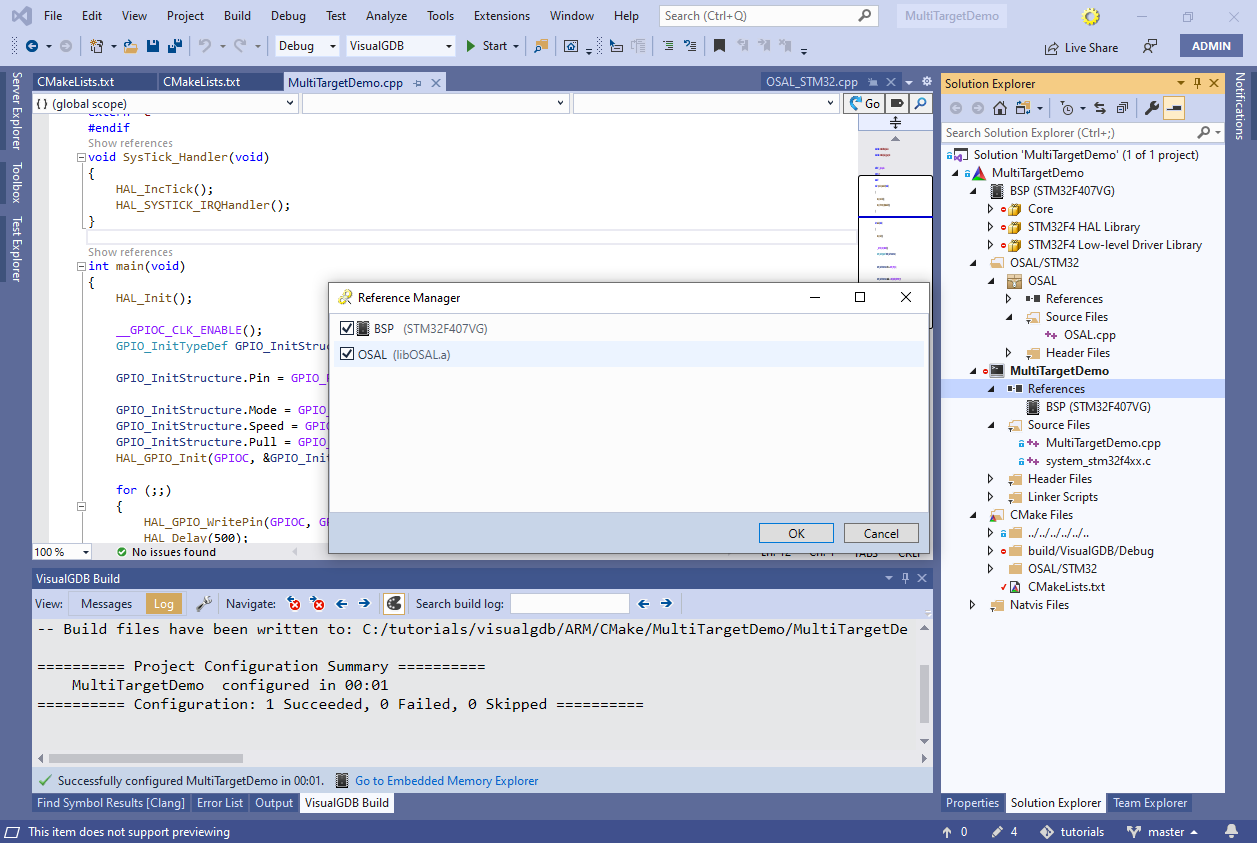
- Finally, reference the OSAL library from MultiTargetDemo:
 Note that in each of the steps above, VisualGDB will automatically edit CMakeLists.txt files to apply the changes you made. You can easily roll them back using the Undo command in VS, and save them to trigger a reload of Solution Explorer contents.
 - Using Windows Explorer, move the system_stm32xxxx.c and stm32xxxx_hal_conf.h files to the directory of the OSAL library. Then, edit CMakeLists.txt files manually to move the file references:
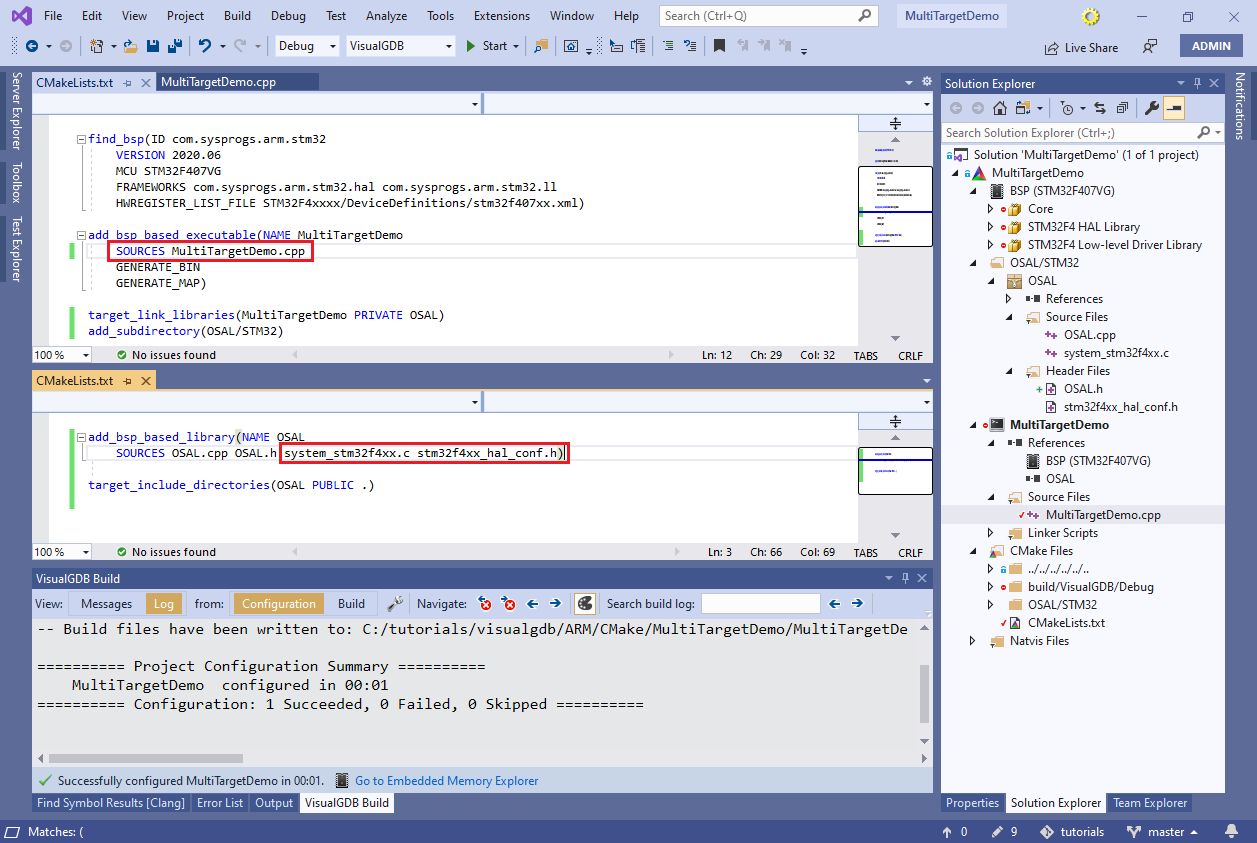 You could also use the Remove and Add->Existing Item commands in Solution Explorer so that VisualGDB would edit CMakeLists.txt for you.
 - If you try building the project now, it will fail with the missing HAL configuration file:
 This happens because the MultiTargetDemo target does reference OSAL, however the BSP itself does not. You can resolve it by adding OSAL/STM32 to the include directories underthe BSP settings:
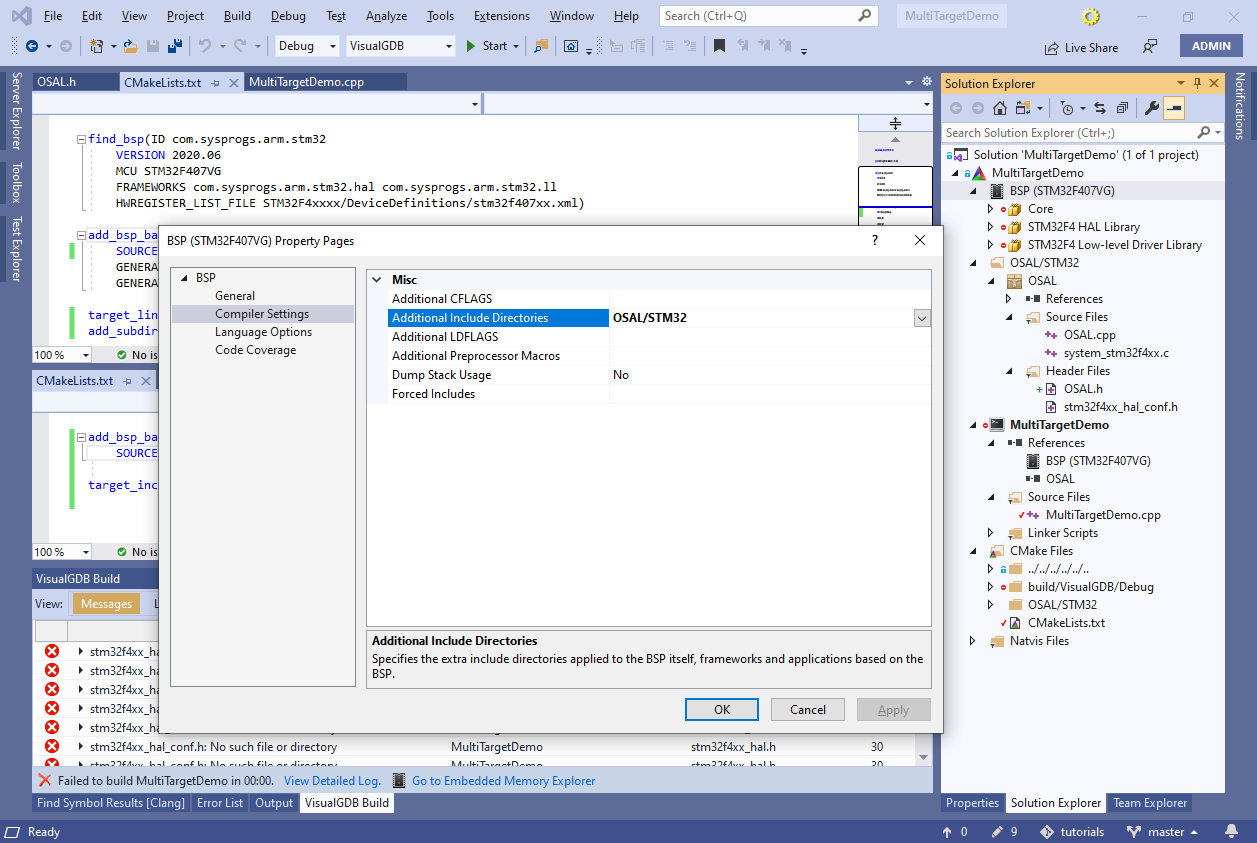
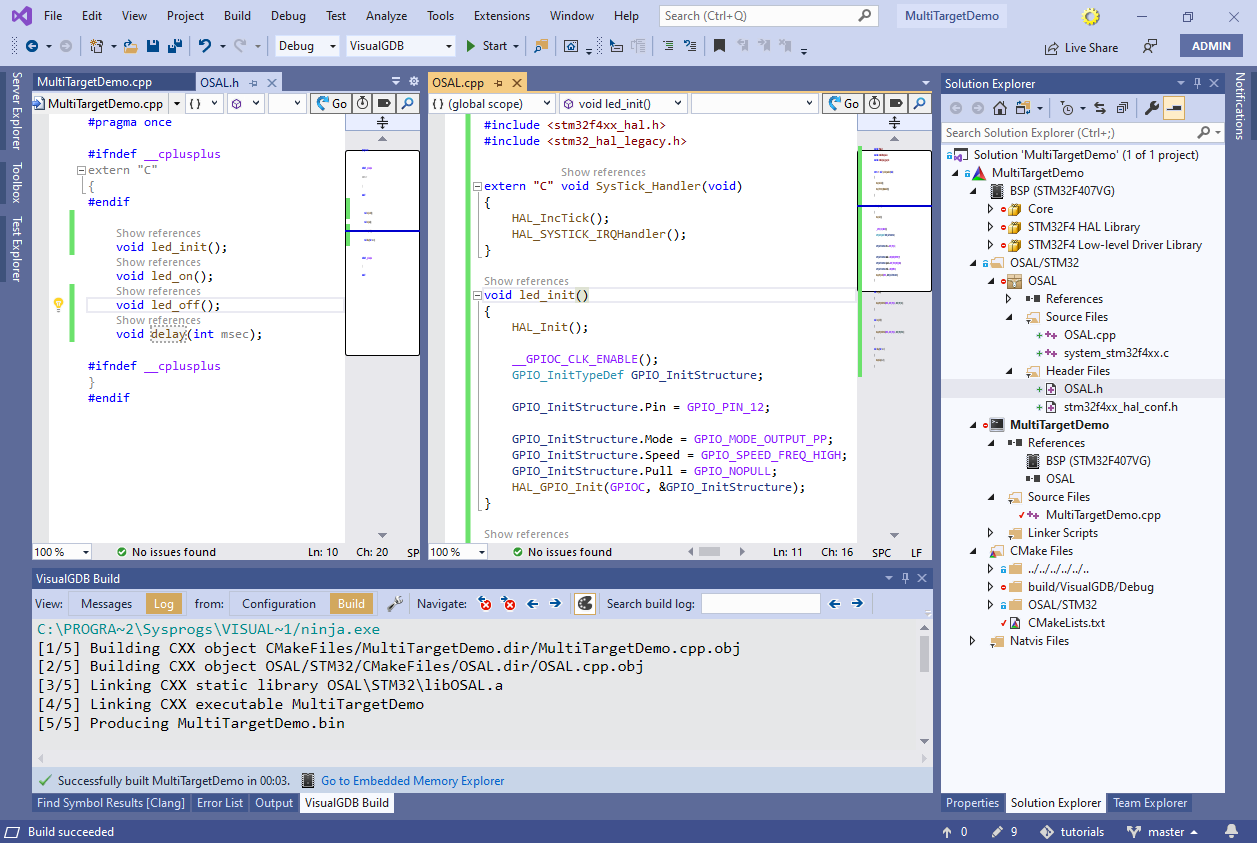
- Update the source code of the following files, separating the STM32-specific part from the high-level logic:
OSAL.h:#pragma once #ifndef __cplusplus extern "C" { #endif void led_init(); void led_on(); void led_off(); void delay(int msec); #ifndef __cplusplus } #endif
OSAL.cpp:
#include "OSAL.h"
#include <stm32f4xx_hal.h>
#include <stm32_hal_legacy.h>

extern "C" void SysTick_Handler(void)
{
    HAL_IncTick();
    HAL_SYSTICK_IRQHandler();
}

void led_init()
{
    HAL_Init();

    __GPIOC_CLK_ENABLE();
    GPIO_InitTypeDef GPIO_InitStructure;
    GPIO_InitStructure.Pin = GPIO_PIN_12;
    GPIO_InitStructure.Mode = GPIO_MODE_OUTPUT_PP;
    GPIO_InitStructure.Speed = GPIO_SPEED_FREQ_HIGH;
    GPIO_InitStructure.Pull = GPIO_NOPULL;
    HAL_GPIO_Init(GPIOC, &GPIO_InitStructure);
}
void led_on()
{
    HAL_GPIO_WritePin(GPIOC, GPIO_PIN_12, GPIO_PIN_SET);
}

void led_off()
{
    HAL_GPIO_WritePin(GPIOC, GPIO_PIN_12, GPIO_PIN_RESET);
}

void delay(int msec)
{
    HAL_Delay(msec);
}
MultiTargetDemo:
#include <OSAL.h>

int main(void)
{
    led_init();
    for (;;)
    {
    	led_on();
    	delay(500);
    	led_off();
    	delay(500);
    }
}
Now the project will build successfully:
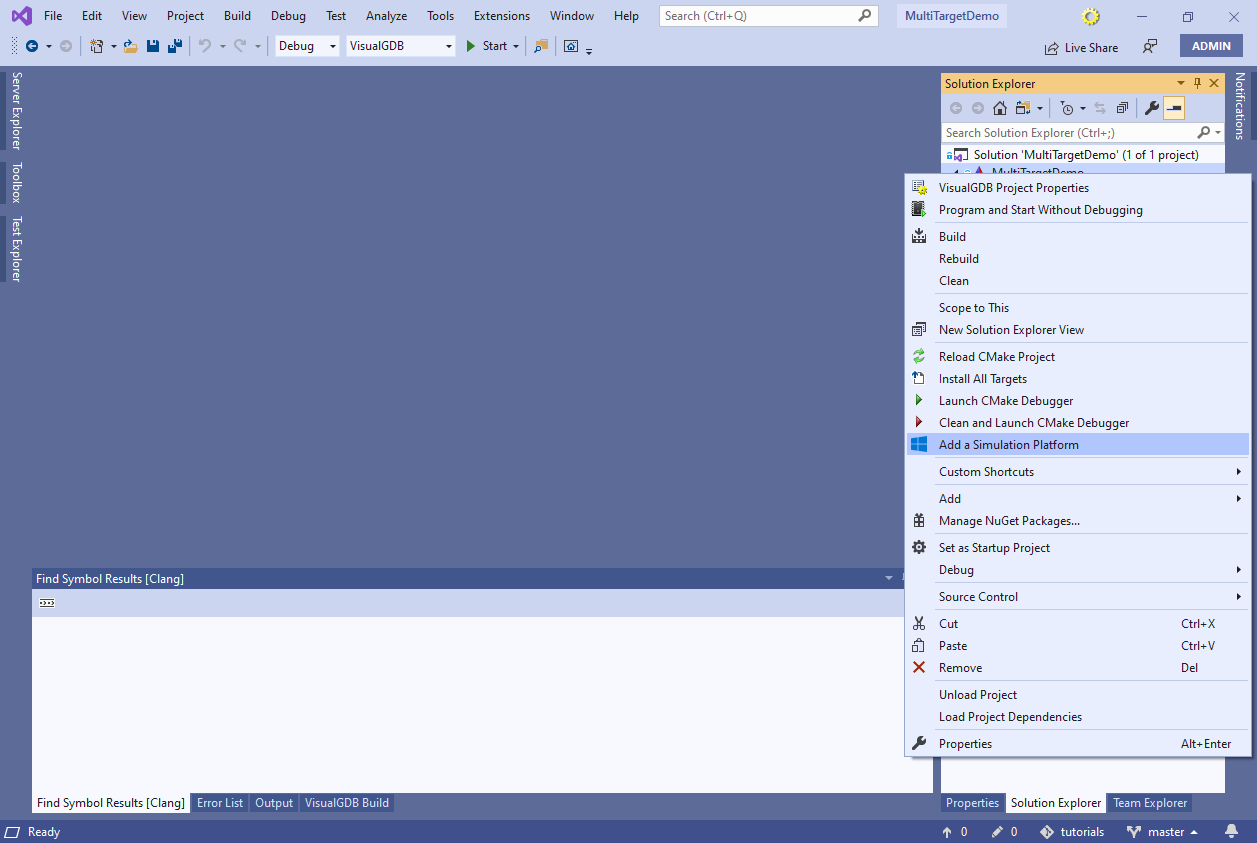
- Now that we have separated the platform-specific part from the main application, we can add another platform for running the code on Windows. Right-click on the project node in Solution Explorer and select “Add Simulation Platform”:
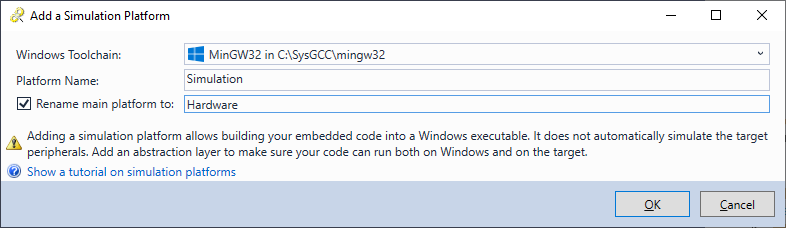
- Pick the MinGW32 toolchain and proceed with the default platform names:
- Right-click on the OSAL/STM32 folder and select “Add->New Item”. Create another OSAL library, but change the location to <project>\OSAL\Win32:
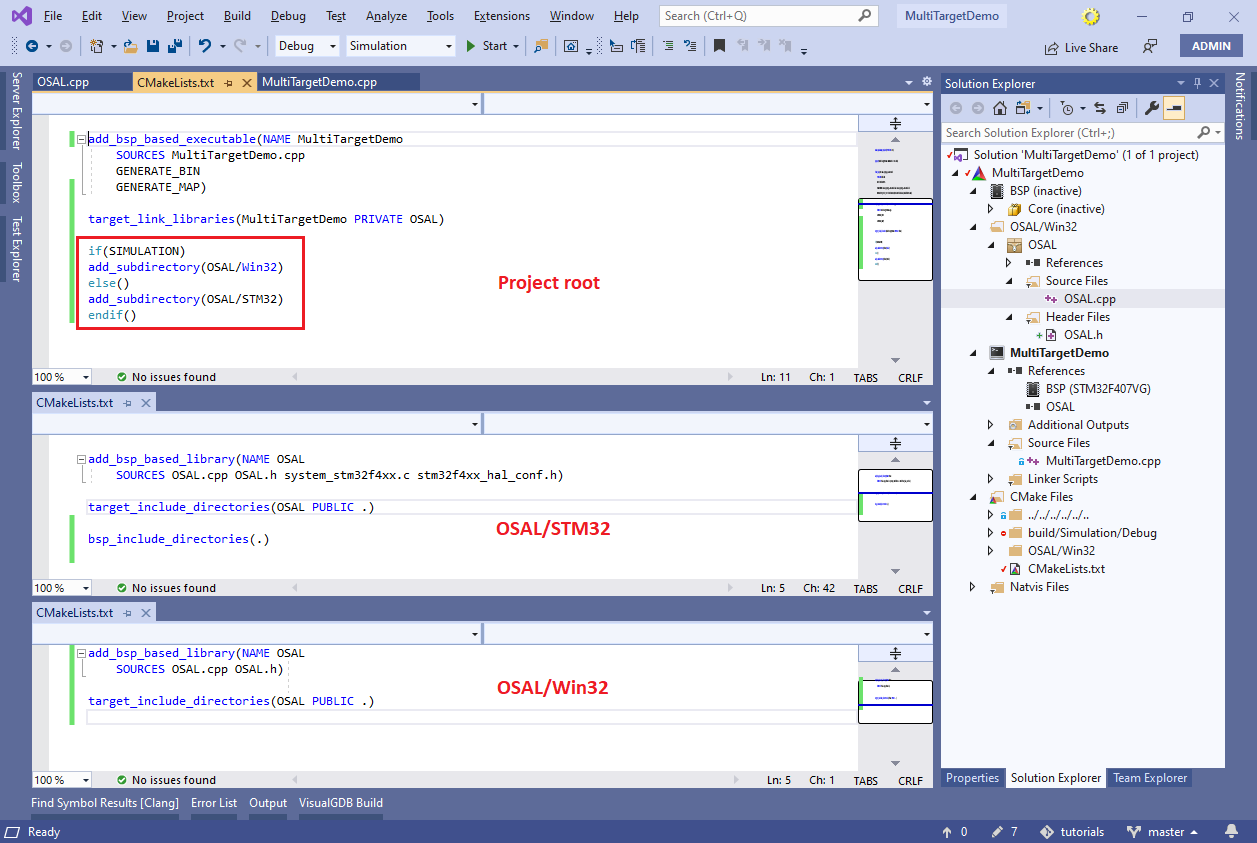
- As we now have 2 libraries called “OSAL”, the project won’t build successfully unless we make them mutually exclusive. The easiest way to achieve it would be to make the add_subdirectory() statements in main CMakeLists.txt file conditional:
if(SIMULATION)
add_subdirectory(OSAL/Win32)
else()
add_subdirectory(OSAL/STM32)
endif()
Also, make the bsp_include_directories() statement conditional, or move it inside the OSAL/STM32/CMakeLists.txt file (you would need to change the path to ‘.’ in that case). Now you will be able to switch between the OSAL/Win32 and OSAL/STM32 libraries by selecting the Hardware or Simulation platform:
- Add another copy of OSAL.h in the OSAL/Win32 directory with the same content, export the “.” include directory similarly to OSAL/STM32 and replace the contents of WIN32/OSAL.cpp file with the Win32 implementation:
#include <windows.h>
#include <stdio.h>

extern "C" void SysTick_Handler(void)
{
}

void led_init()
{
}

void led_on()
{
    printf("[LED ON]\n");
}

void led_off()
{
    printf("[LED OFF]\n");
}

void delay(int msec)
{
    Sleep(msec);
}
Now you will be able to build both the Win32 and STM32 versions of the project. Note that referencing the original OSAL library added the following code to the main CMakeLists.txt:
target_link_libraries(MultiTargetDemo PRIVATE OSAL)
It references the OSAL library regardless of the actual place where it’s defined, making it possible to have several mutually exclusive versions of it.
- Try running the project. See how the Win32 implementation of LED and sleep functions get invoked:
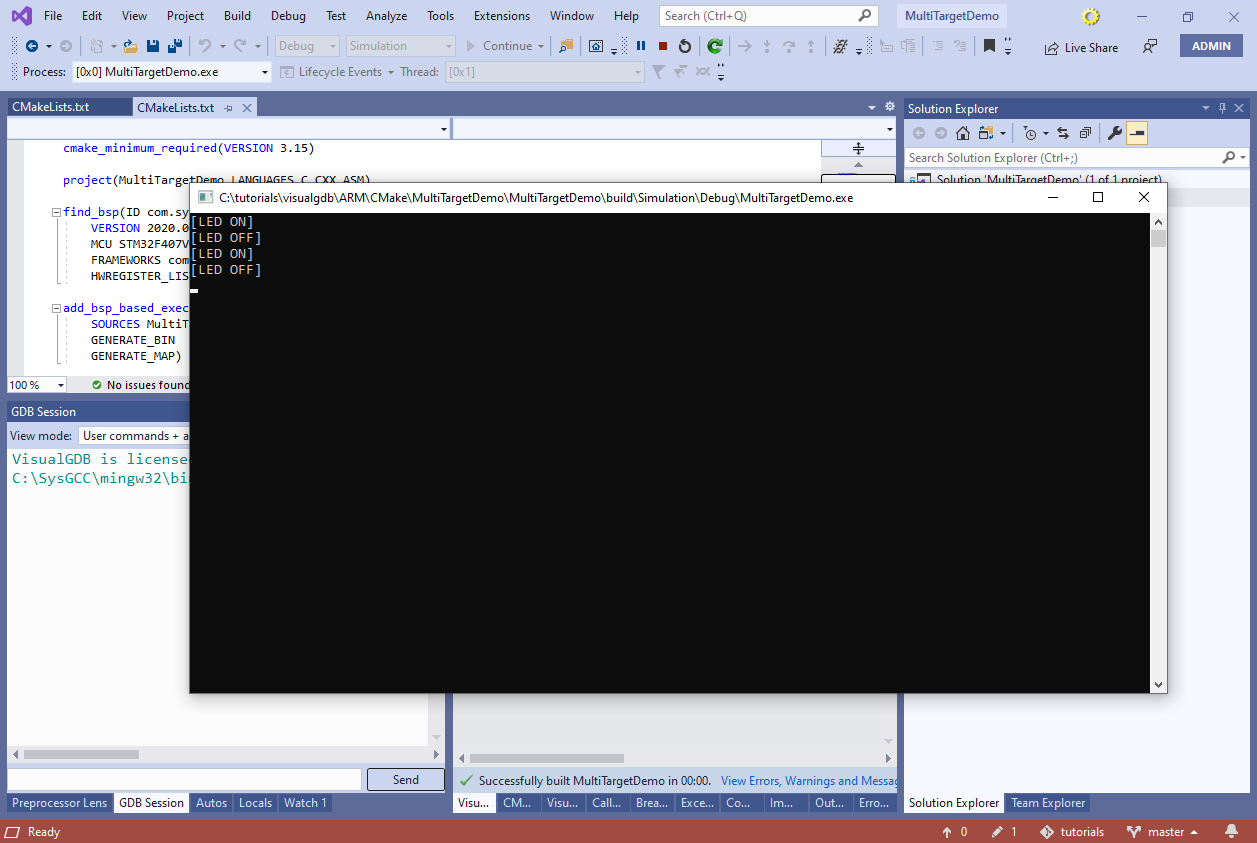 Note that switching to the simulation platform automatically inactivated the BSP library. All device-specific options (e.g. STM32 libraries) will be ignored while building the simulation platform, and the BSP library will always be empty.
 - Finally, we will show how to add a platform-independent library. Right-click on the project node in Solution Explorer and add another library in the “libs” subdirectory:
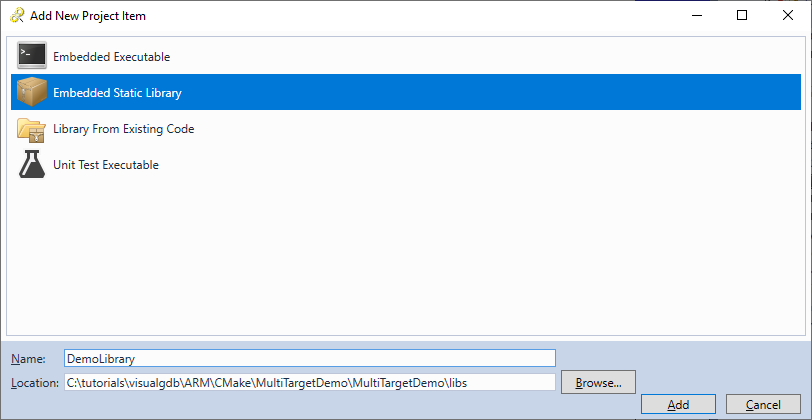
- Reference the OSAL library from DemoLibrary and replace the main source file with the following code:
#include <OSAL.h>

void DoSleep()
{
    delay(500);
}
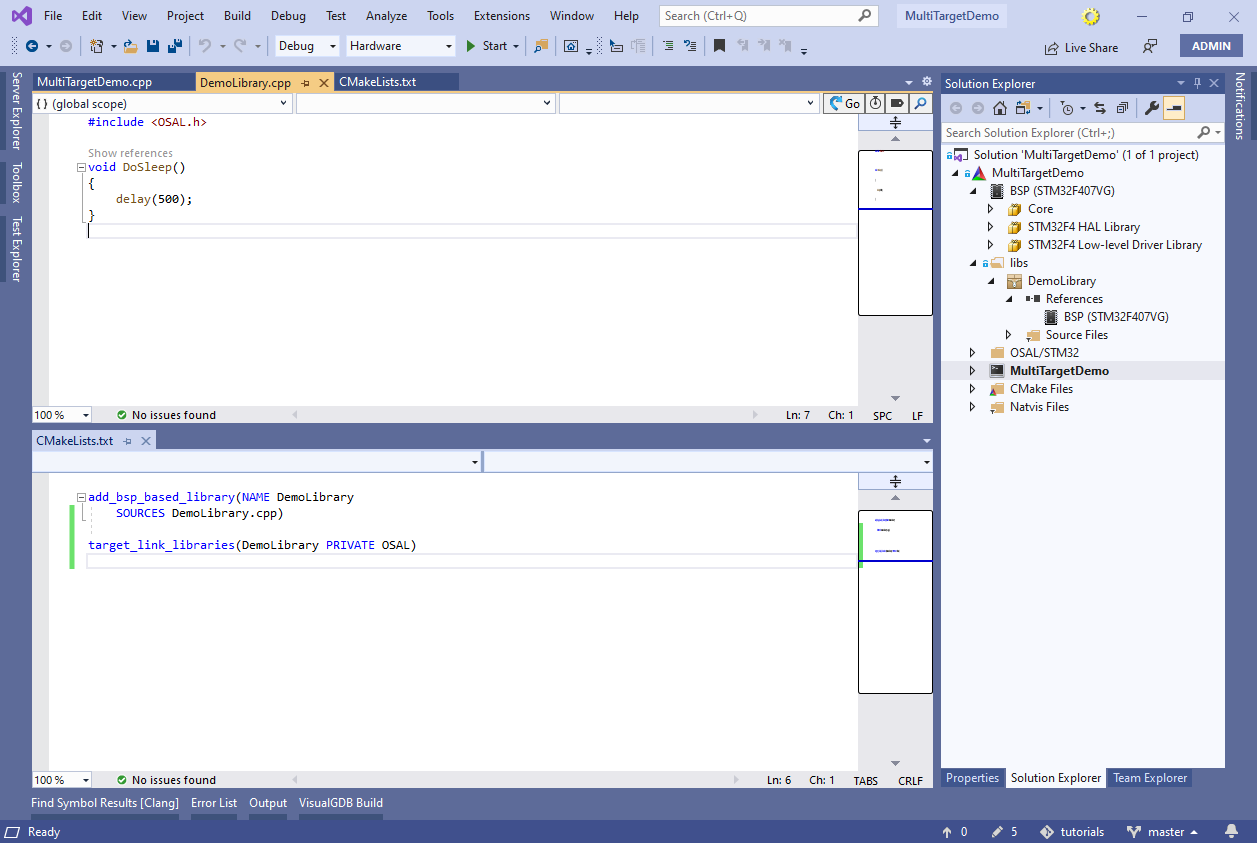
- Declare DoSleep() in the main file (we do it to avoid creating a new header file) and call it instead of calling delay() directly. Reference DemoLibrary from MultiTargetDemo and the project will build successfully:

- You can define various target properties conditionally by tweaking CMakeLists.txt files after VisualGDB edits them. Try adding MYMACRO to preprocessor definitions of DemoLibrary:
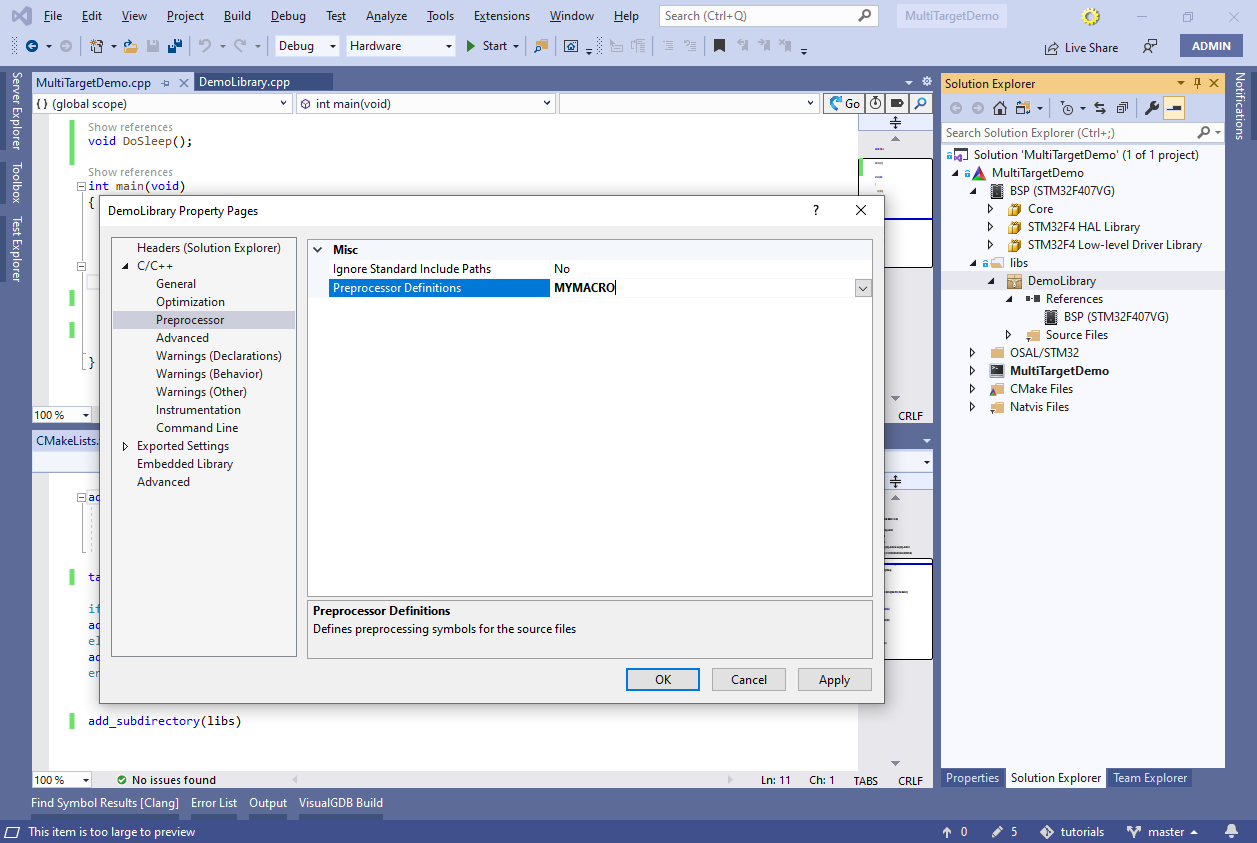
- VisualGDB will automatically insert the following statement in CMakeLists.txt:
target_compile_definitions(DemoLibrary PRIVATE MYMACRO)
One way to make it conditional would be by wrapping it in an if() block, e.g.:
if (NOT SIMULATION)
target_compile_definitions(DemoLibrary PRIVATE MYMACRO)
endif()
However, that would get very confusing, since skipped statements won’t be shown in target properties. Instead use the temporary MY_MACROS variable combined with an unconditional target_compile_definitions() to achieve the same effect:
if (NOT SIMULATION)
set(MY_MACROS MYMACRO)
else()
set(MY_MACROS)
endif()

target_compile_definitions(DemoLibrary PRIVATE ${MY_MACROS})
 Now MYMACRO will be defined when building DemoLibrary for the hardware, but not for simulation.
You can find the project shown in this tutorial in our GitHub repository.