Debugging the hello-gl2 project with Visual Studio
This quickstart guide shows how to build and debug a simple Android App with a native library.
Before you begin, please install VisualGDB 2.0 or later (ensure that “Android Edition” is checked in the installer). If you are not familiar with VisualGDB, please first go through the Android Quickstart tutorial.
Warning! The Android Emulator does
not support OpenGL. You will need a real device for this
tutorial.
- Start Visual Studio. Select File->New project->VisualGDB->Android Project Wizard.
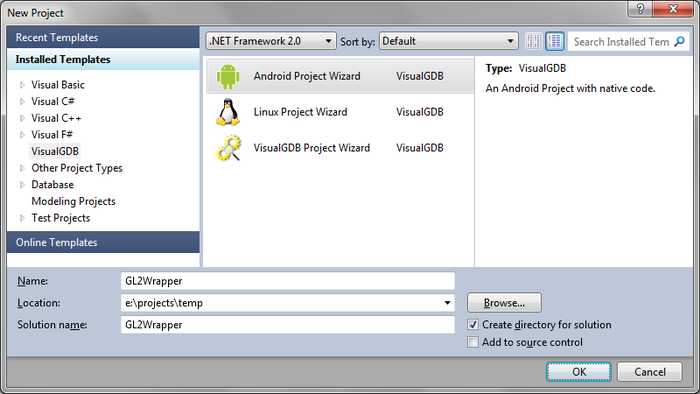
- Select the directory for the project, enter a project name (e.g. GL2Wrapper) and press OK.
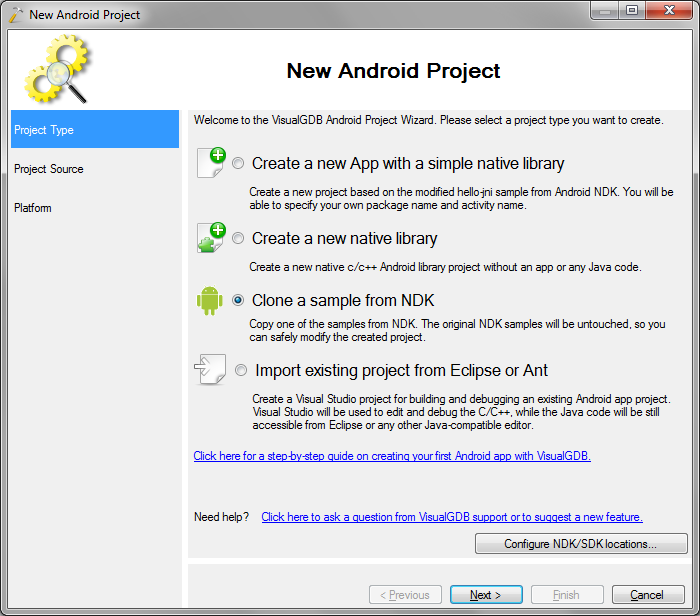
- Select “Clone a sample from NDK”:
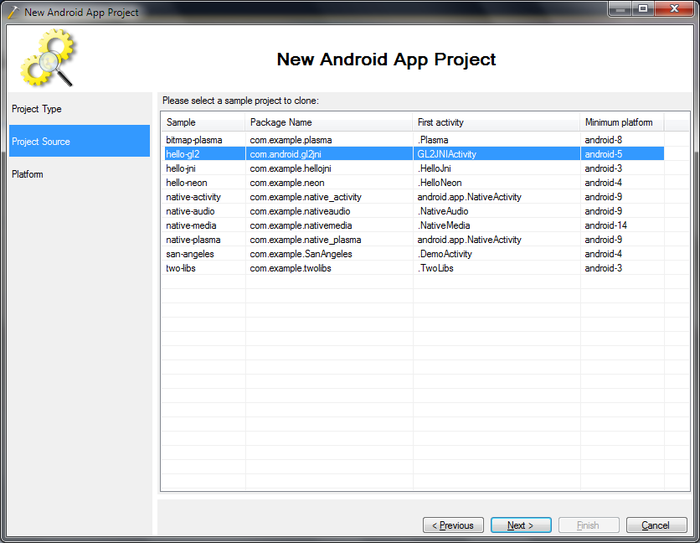
- Select the hello-gl2 project from the list:
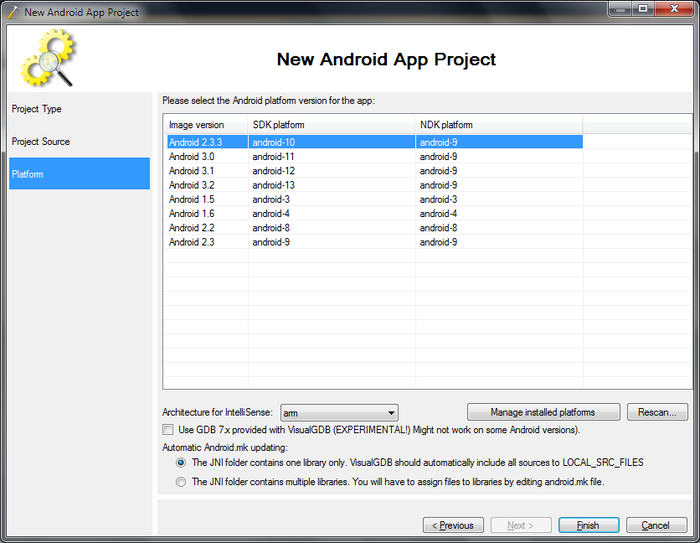
- Select a platform for the newly created project (in this example we select Android 2.3.3):
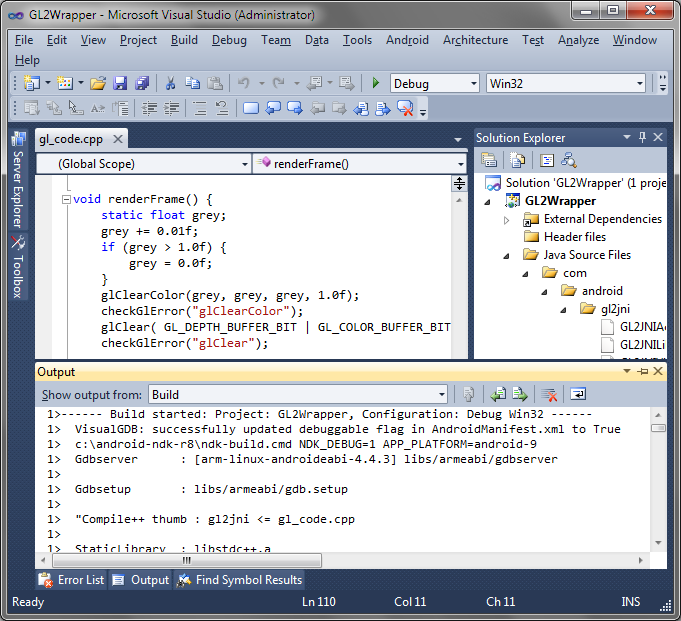
- When done, press the Finish button. A new Visual Studio project will be created. Select Build->Build Solution to build the project:
- Plug in your Android Device. Do not use the Android emulator as it does not support OpenGL. Enable USB debugging and install the USB driver if needed. See this guide for more details.
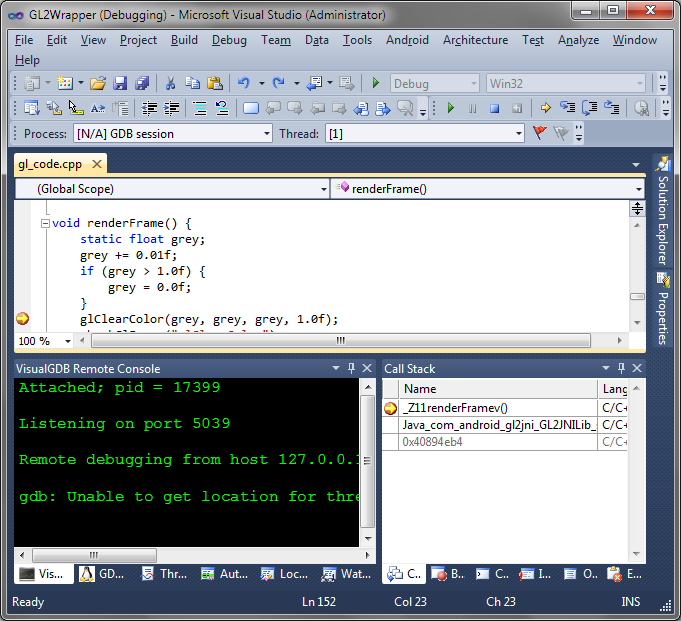
- Put a breakpoint on the line containing the glClearColor() call inside the renderFrame() function.
- Start debugging by selecting Debug -> Start Debugging with GDB in VIsual Studio.
- The app will be automatically deployed and launched and the breakpoint will be hit:
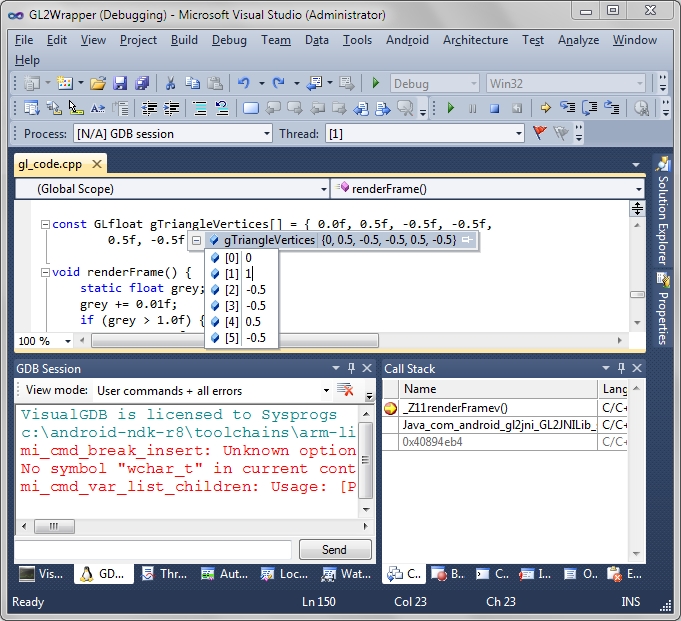
- Hover the mouse over the glTriangleVertices definition above renderFrame(). Then click on the “+” symbol. Finally, click on the “0.5” value so that Visual Studio starts editing it.
- Replace “0.5” with “1” and press Enter:
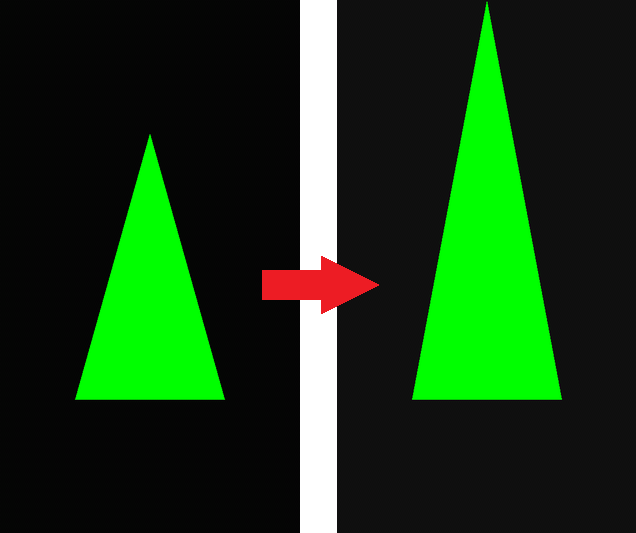
- Remove the breakpoint and press F5 to continue running the App.
- Observe that the triangle shape has changed after we have modified glTriangleVertices:
- When done, press Shift+F5 to stop the debugging session.


