Developing for legacy ARM devices with VisualGDB
This tutorial shows how to develop and debug firmware for legacy ARM devices that are not directly supported by the VisualGDB wizard. Most of the modern ARM Cortex-based devices are supported directly and can be simply selected in the VisualGDB wizard. However if you are targeting an older device that we don’t support directly, follow the instructions below to get it to work.
In order to build the firmware for your ARM-based device you can use the ARM toolchain that comes with VisualGDB, but you will need to locate and provide the following information:
- Compiler flags.
These flags tell the compiler which ARM core to target (e.g. -mcpu=arm7tdmi). The flags relevant to the target are -mcpu, -mfpu, -march, -mfloat, -meabi. The relevant flags can also include preprocessor macro definitions (-D flag), include paths (-I flag) entry point specification (–entry flag) and additional libraries (-l flag). - Peripheral header files for your device.
These headers define the locations of the peripheral registers so that your program can refer to them by structured names like PIOA->PIO_ODR instead of raw addresses. - Startup code.
This is typically an assembly (sometimes C) file that does basic initialization of your device: copying initial values of variables from FLASH to RAM, defining interrupt handler tables, sometimes even setting up the system clocks. - Linker scripts.
These scripts define how to place code and data in memory. They typically consist of a device-specific section defining the addresses and sizes of RAM and FLASH and a generic section defining that sections like .text go to FLASH, sections like .data – to RAM, and so on. The linker script typically has the extension of .lds, .ld or .x and is passed to GCC via the -T flag. - Driver library (optional).
Often the device manufacturer provides a library wrapping the register-level operations into higher-level function. E.g. a call to manufacturer-provided USART_Configure() function can replace manual computation of prescalers and mode flags put in the hardware registers.
All components listed above can be typically extracted from the code example packages provided by the device manufacturer. If the manufacturer provides samples for different compilers, download the ones targeted for GCC (sometimes referred to as GNU).
We will now show how to setup a project for the AT91SAM9G25 device using the sample files obtained from the Atmel website:
- Clone the Atmel Software Package repository into a directory on your computer:
git clone https://github.com/atmelcorp/atmel-software-package/
- If you don’t have our ARM toolchain installed yet, download and install it now.
- Open the examples\usart folder and examine its contents. It contains a source file and a Makefile. The easiest way to get all GCC flags in one line is to build it by running make from command line:
set PATH=%PATH%;c:\SysGCC\arm-eabi\bin
cd E:\SDKs\atmel-software-package\examples\usart
make TARGET=sam9g25-ek VARIANT=ddram V=1 > log.txt 2>&1
Note that the latest version of the Atmel SDK depends on Linux-style tools and may not build out-of-the-box on Windows. The easiest way around it is to obtain the build log via a Linux VM or WSL:
sudo apt install gcc-arm-none-eabi
cd /mnt/e/SDKs/atmel-software-package/examples/usart
make TARGET=sam9g25-ek VARIANT=ddram V=1 > log.txt 2>&1
The log will use Linux-style paths that can be translated back to Windows-style ones, but will otherwise contain all the necessary information.
- The build will fail due to missing libraries, but the log.txt file will contain the GCC arguments:
arm-none-eabi-gcc -W<...> -Dprintf=iprintf -ffunction-sections -fdata-sections
-std=gnu99 -Os -g3 -mcpu=arm926ej-s -mfloat-abi=soft
 -I../../arch -I../../utils -I../../target/common
-I../../target/sam9xx5 -I../../drivers -I../../lib
-DSOFTPACK_VERSION="\"2.17_v2.17-175-ge0428c7c\"" -DTRACE_LEVEL=5 -DVARIANT_DDRAM
 -DCONFIG_ARCH_ARMV5TE -DCONFIG_<...> -MM ../../examples/usart/main.c
-MT build/sam9g25-ek/ddram/examples/usart/main.o -o build/sam9g25-ek/ddram/examples/usart/main.d

arm-none-eabi-gcc --specs=nano.specs -Wl,--cref -Wl,--check-sections
-Wl,--gc-sections -Wl,--unresolved-symbols=report-all -Wl,--warn-common
 -Wl,--sort-section=alignment -lgcc -lc -mcpu=arm926ej-s -mfloat-abi=soft
-T../../target/sam9xx5/toolchain/gnu/ddram.ld -Wl,-Map,./build/sam9g25-ek/ddram/usart.map
 -o build/sam9g25-ek/ddram/usart.elf ./build/sam9g25-ek/ddram/target/sam9xx5/toolchain/gnu/cstartup.o ./build/sam9g25-ek/ddram/examples/usart/main.o
-Wl,--start-group ./build/sam9g25-ek/ddram/arch/arch.a
You can also extract those flags by looking through the Makefile.
- We will now group the extracted GCC arguments according to their meaning:
Argument Value Include directories <SDK root>/arch
<SDK root>/utils
<SDK root>/target/common
<SDK root>/target/sam9xx5
<SDK root>/drivers
<SDK root>/libPreprocessor macros printf=iprintf
SOFTPACK_VERSION=”\”2.17_v2.17-175-ge0428c7c\””
TRACE_LEVEL=5
VARIANT_DDRAM
CONFIG_ARCH_ARMV5TE
<30 other CONFIG_…> macrosExtra linker flags -Wl,–cref
-Wl,–check-sections
-Wl,–unresolved-symbols=report-all
-Wl,–sort-section=alignmentLinker script <SDK root>/target/sam9xx5/toolchain/gnu/ddram.ld Additional libraries gcc c arch.a utils.a target.a drivers.a CPU type flags -mcpu=arm926ej-s -mfloat-abi=soft We will simplify the build process and instead of building separate utils, arch, target and drivers libraries we’ll include their source files into the project.
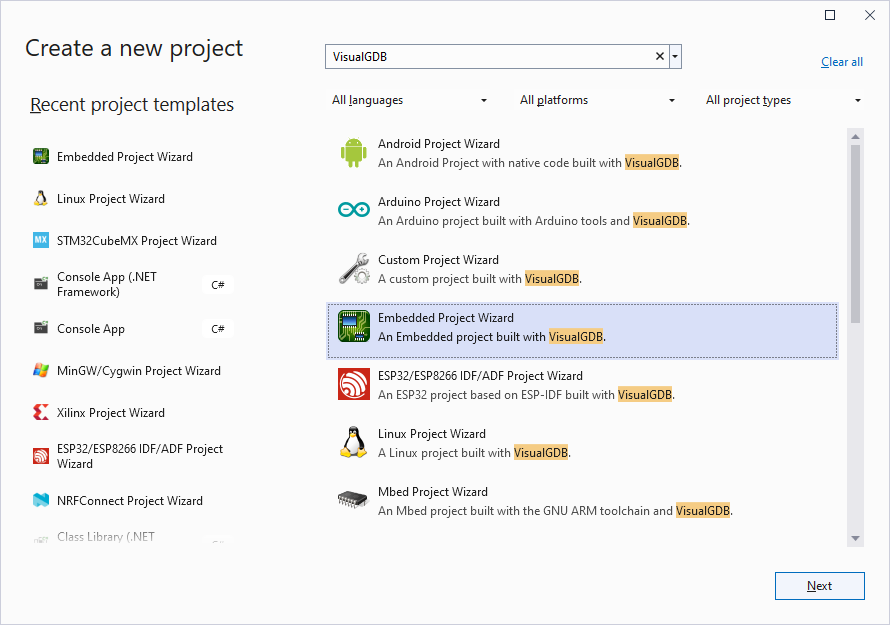
- Now that we have all the necessary flags (except the startup code) we can create a Visual Studio project. Start Visual Studio and use the VisualGDB Embedded Project Wizard:
- Enter the name and location of the project:

- Continue with the default settings on the first page:
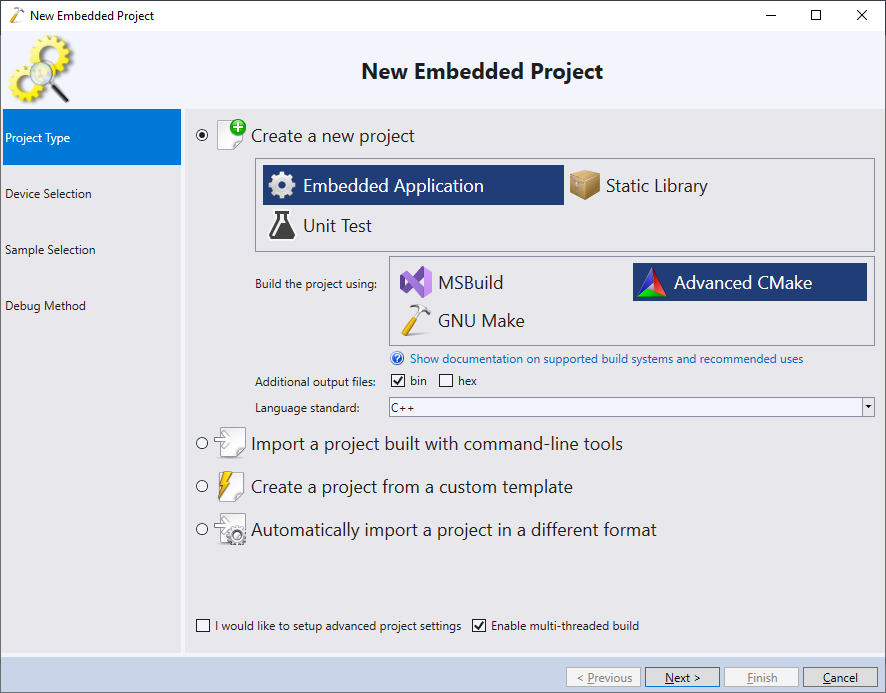 We normally recommend using the Advanced CMake build subsystem for new projects, however if you are familiar with MSBuild, you can use it as well. GNU Make-based projects are generally considered deprecated, but will work nonetheless.
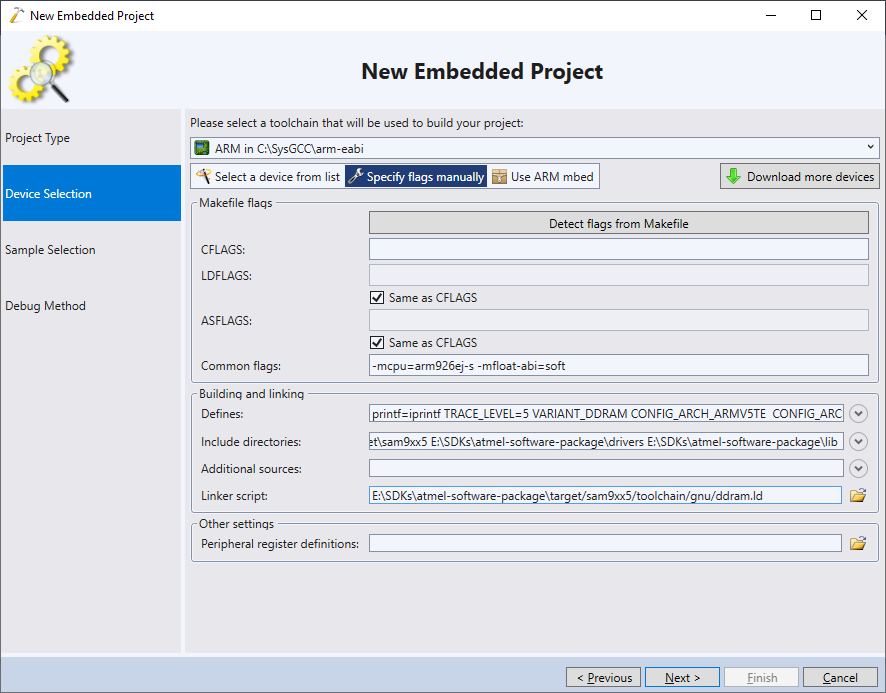
 - On the next page choose the ARM toolchain (VisualGDB will install it automatically if missing) select “Specify flags manually” and enter the flags extracted from the Makefile:
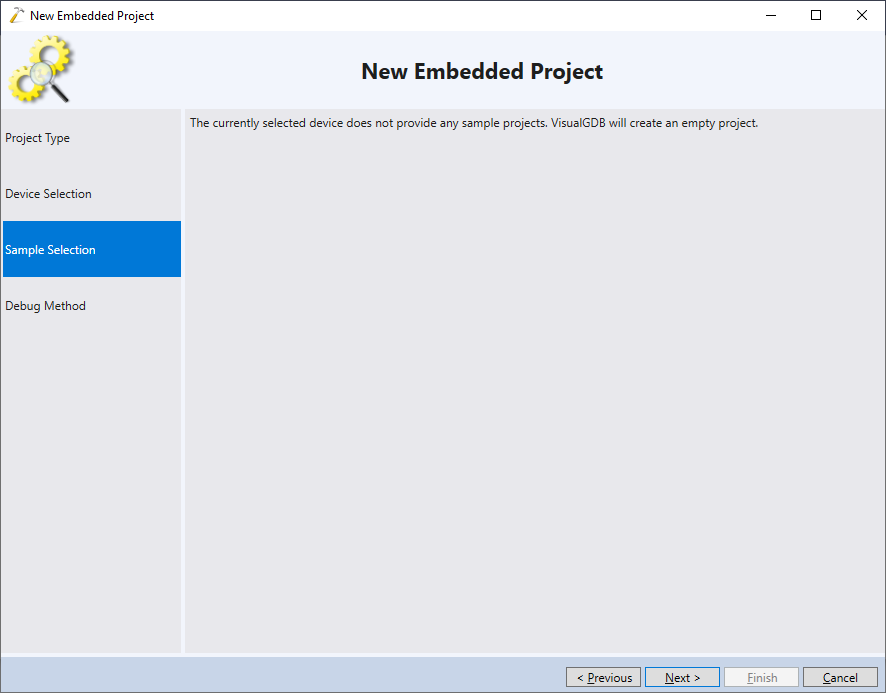
- On the next page proceed with the default empty sample:
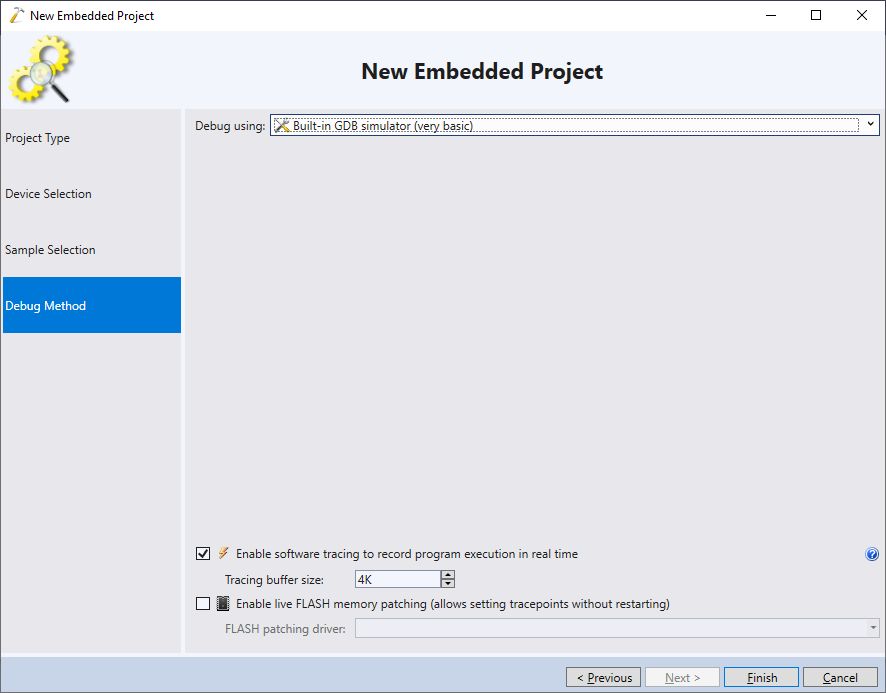
- On the Debug Method page select “GDB Simulator”. We will later configure OpenOCD to do real JTAG debugging, but first we’ll get the project to build:
- Press Finish to generate the project. Delete the default CPP file and add main.c from the usart example. Build the project:
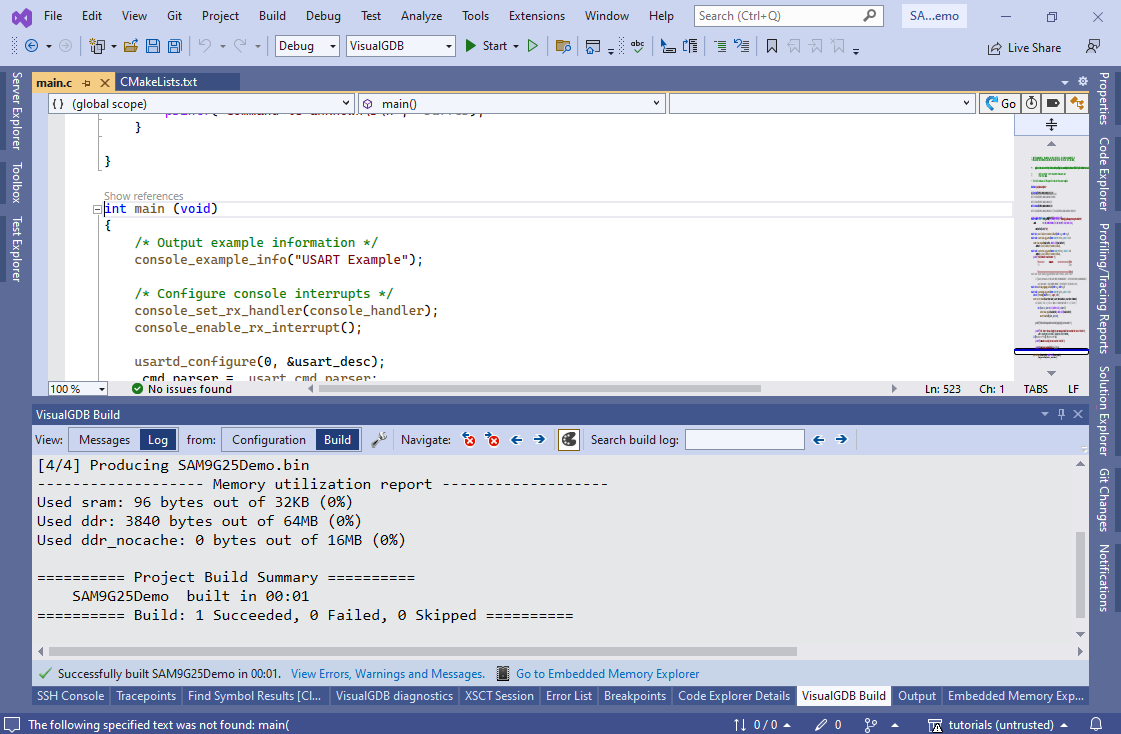
- Although the build succeeds, the resulting image won’t be usable because the linker could not find the entry point and hence discarded all other code as unreferenced. This happened because we did not include the startup code into our project. If you search the build log for files containing the word “entry” or “startup”, you will find the target\sam9xx5\toolchain\gnu\cstartup.s file. Add it to the project and build it again:
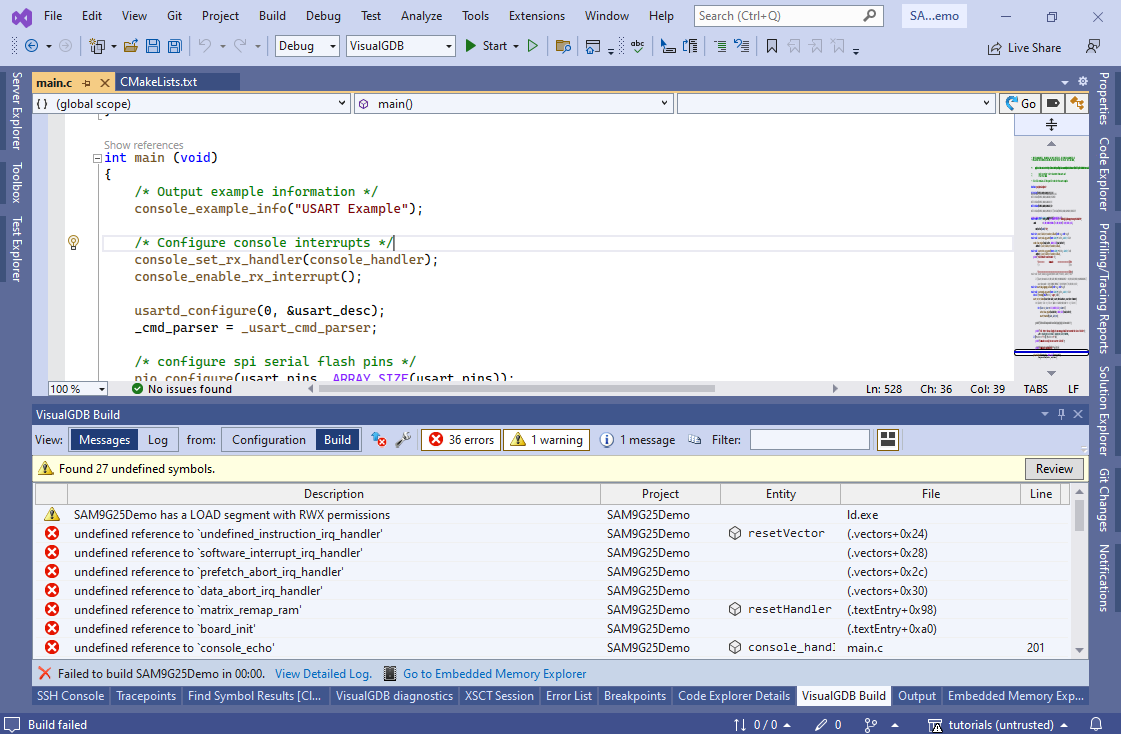
- Now we will get several “unresolved reference” errors because we did not include the files from the chip and board libraries yet. We will now add the source files from those libraries to our project. As some of the files from the libraries are meant for other devices, we can use one of 3 ways to determine the necessary files:
- Add all files and then remove those that don’t compile
- Add files that define functions reported as undefined
- Extract the exact list of source files from the build log
We will use the last approach here. Open the build log in notepad++ and do a regex-based replacement of “.*([ ^ ]+\.c).*” with “\1“:
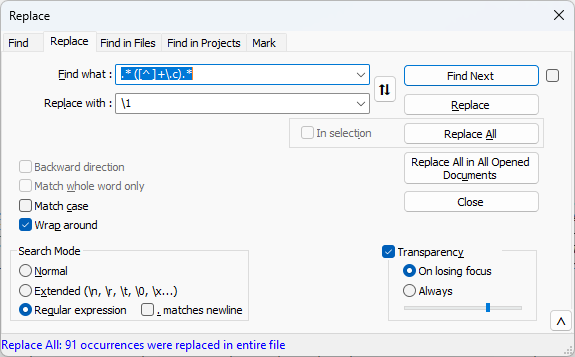 This will cleanup every line containing “<space><one or more characters without spaces>.c”, only leaving the part without spaces (i.e. path of the .c file).
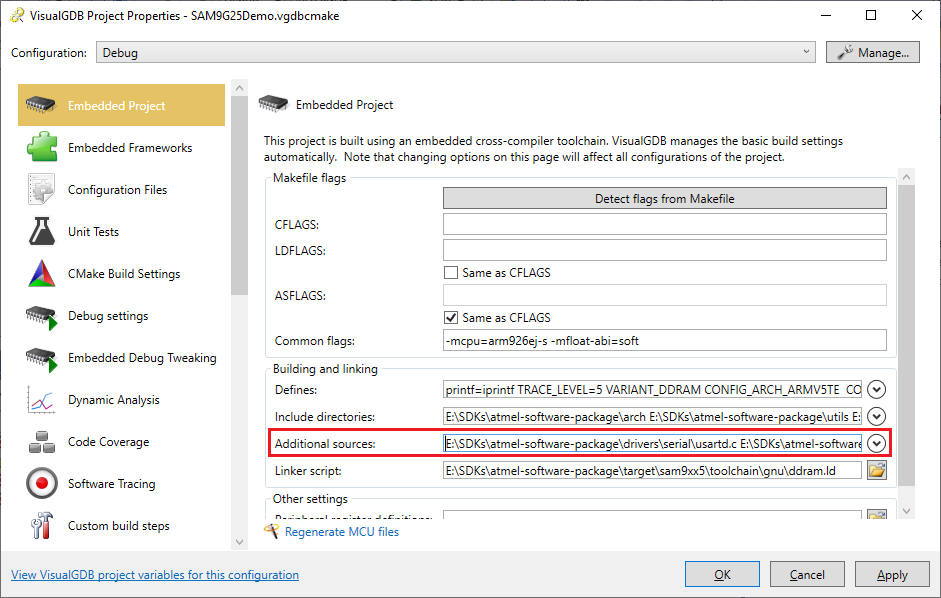
 - Do another “replace all” to convert relative paths to absolute and paste them into VisualGDB Project Properties -> Embedded Project -> Additional Sources:
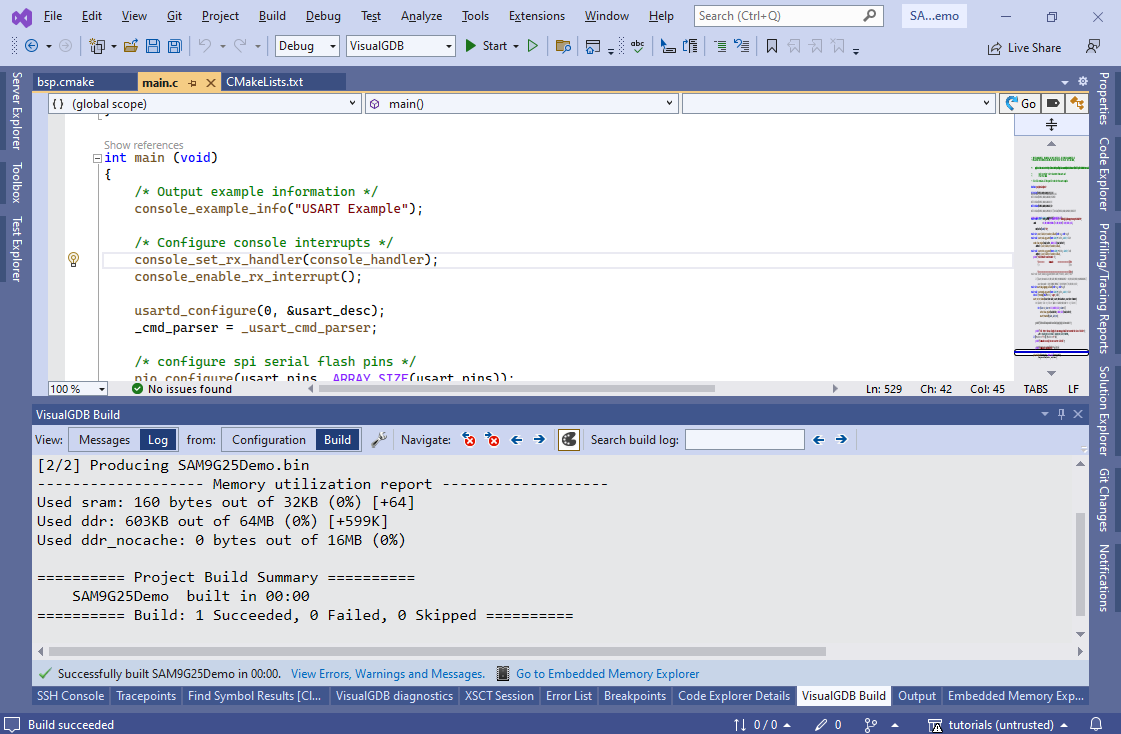
- Now you should be finally able to build the sample project:
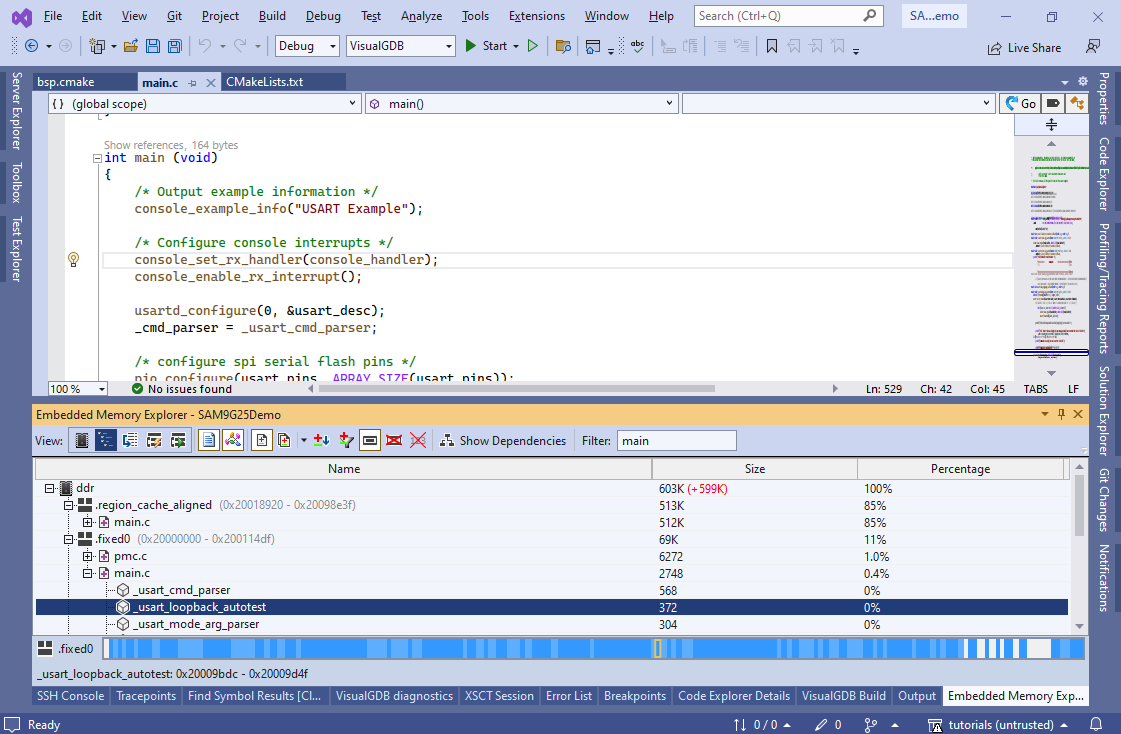
- You can use Embedded Memory Explorer to verify that the relevant functions are present in the ELF file and have reasonable addresses:
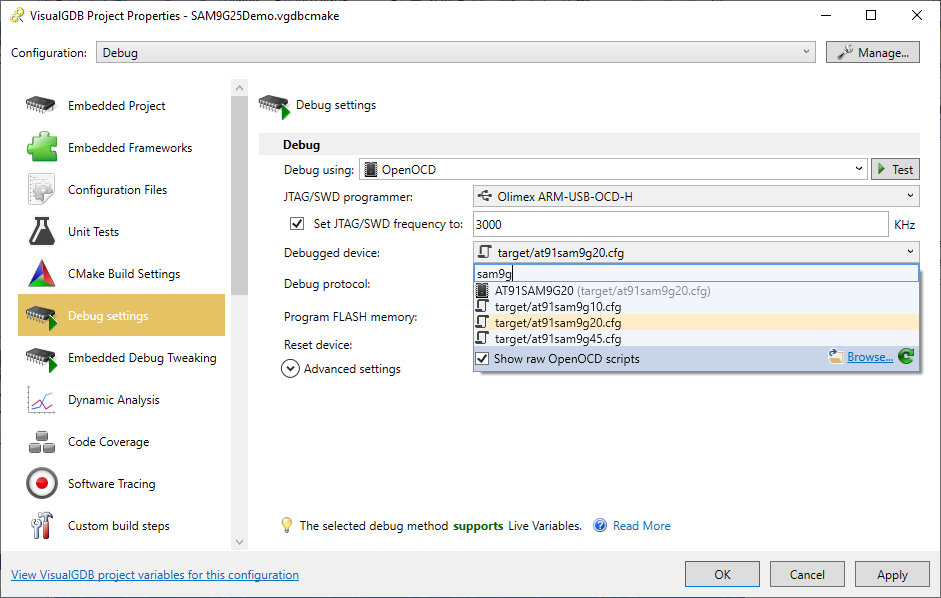
- Now we will configure JTAG debugging. Open VisualGDB Project Properties, go to the Debug Settings and select OpenOCD there. Then specify the interface and target scripts according to your setup:
- The Atmel source package also provides the GDB initialization script that configures DDRAM. Add a command calling it (source <full-path-to-ddram.gdb>) to the post-target-selection commands:
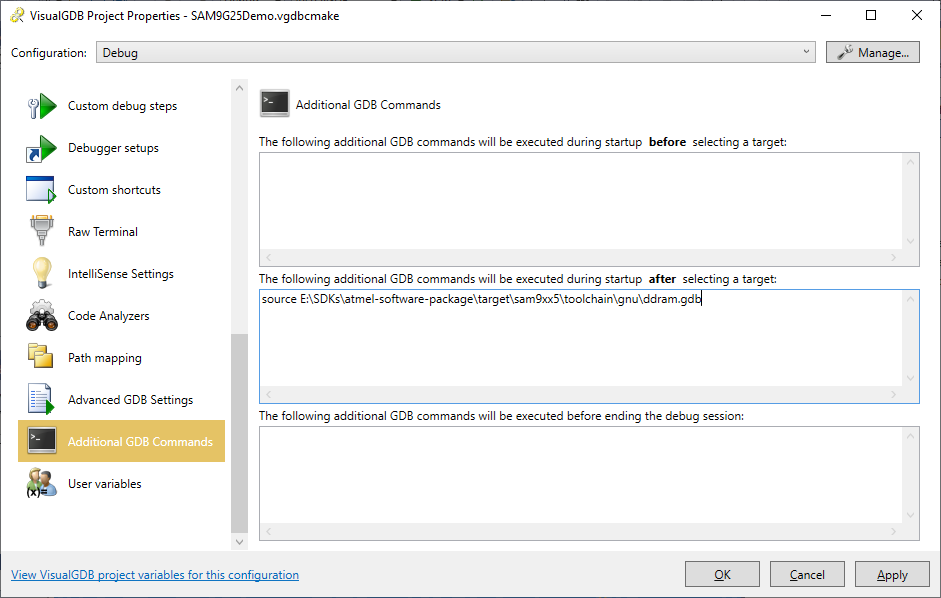 Press OK to save the settings. Now you should be able to debug your device using VisualGDB.
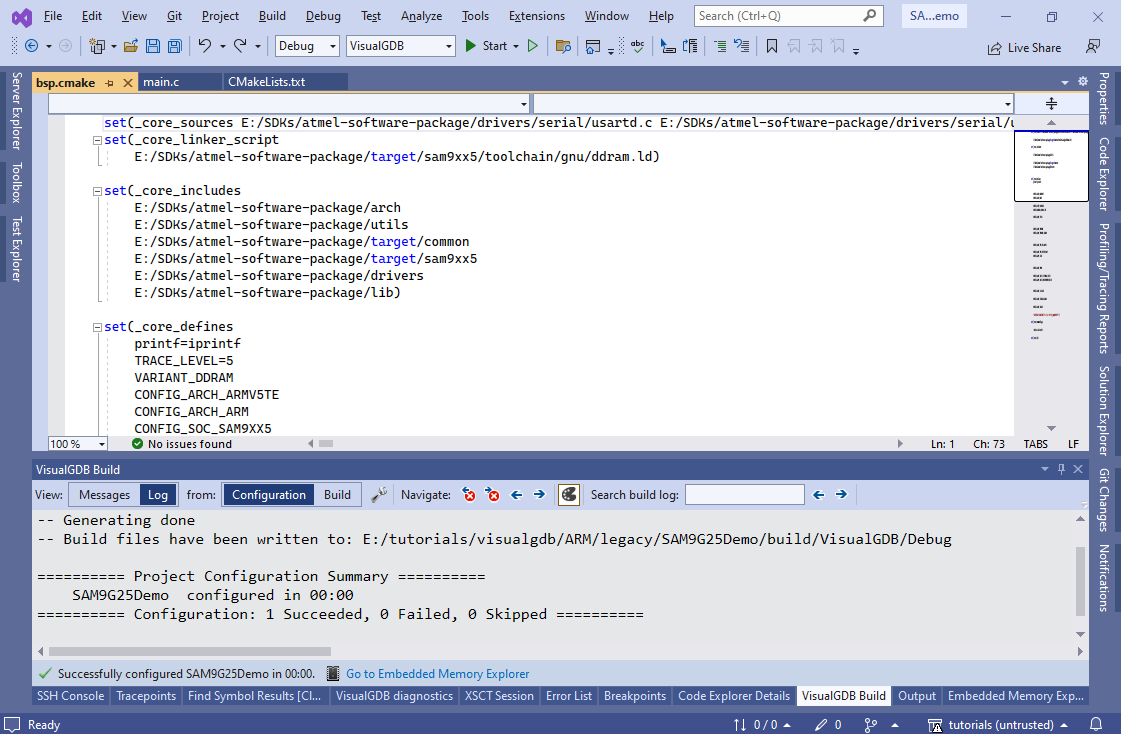
 - If you are using Advanced CMake, the device-specific settings you entered via GUI will be saved in the BSP.cmake file where you can review them or change them programmatically:
 You can also export the custom BSP into a reusable package as shown in this tutorial, so you won’t need to re-enter them for every created project.