Debugging Nordic nRF51822 Beacon Kit Firmware
This tutorial shows how to build and debug Bluetooth LE beacon firmware for the nRF51 Beacon Kit. We will use Segger J-Link together with a Tag Connect cable to debug the beacon. We will show how to use an Android phone with the Nordic nRF Toolbox App to search for the nearby beacons.
Before you begin, install Visual Studio and VisualGDB 5.0 or later.
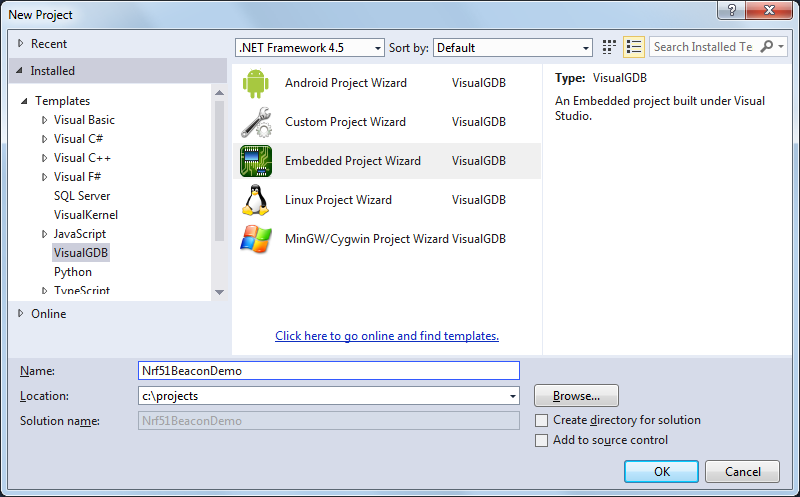
- Launch Visual Studio and open the VisualGDB Embedded Project wizard:
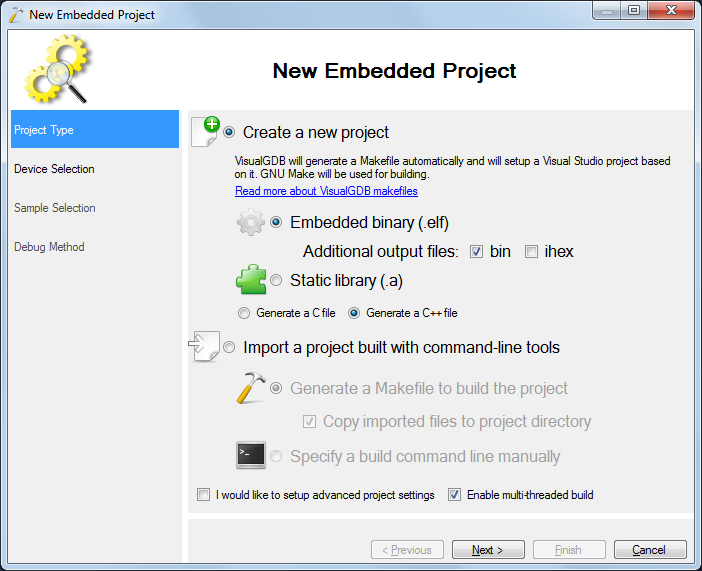
- Proceed with the default settings on the first page:
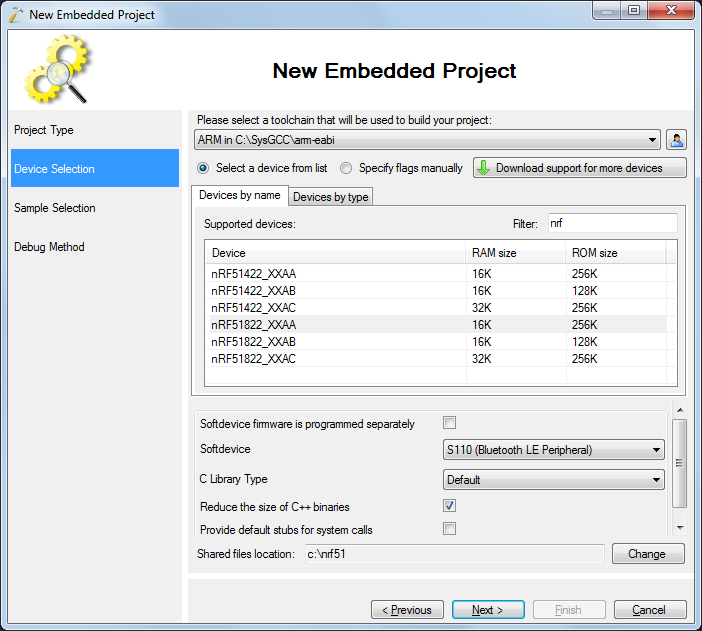
- Select the ARM toolchain and pick the nRF51822_XXAA device. Then select the S110 softdevice:
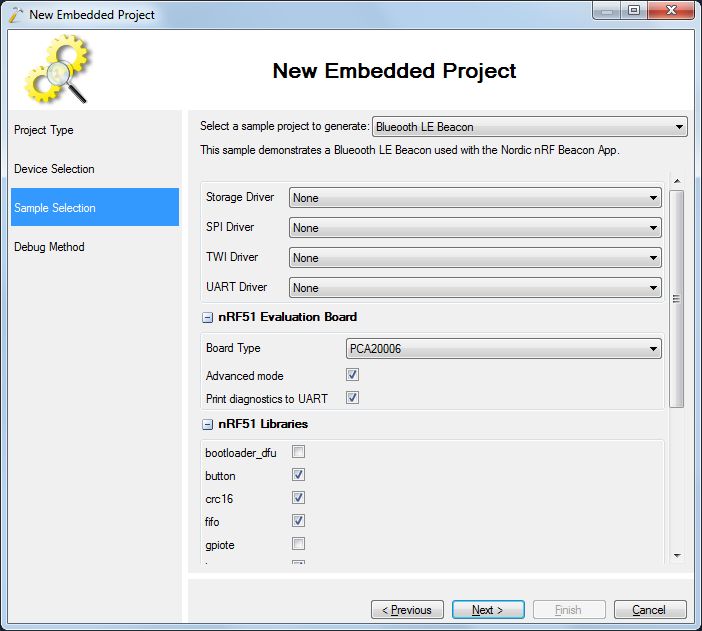
- On the next page select the Bluetooth LE Beacon sample and choose the PCA20006 board (the beacon kit board number is PCA10006, but the Nordic SDK does not include definition for it, so we choose a similar PCA200006 board):
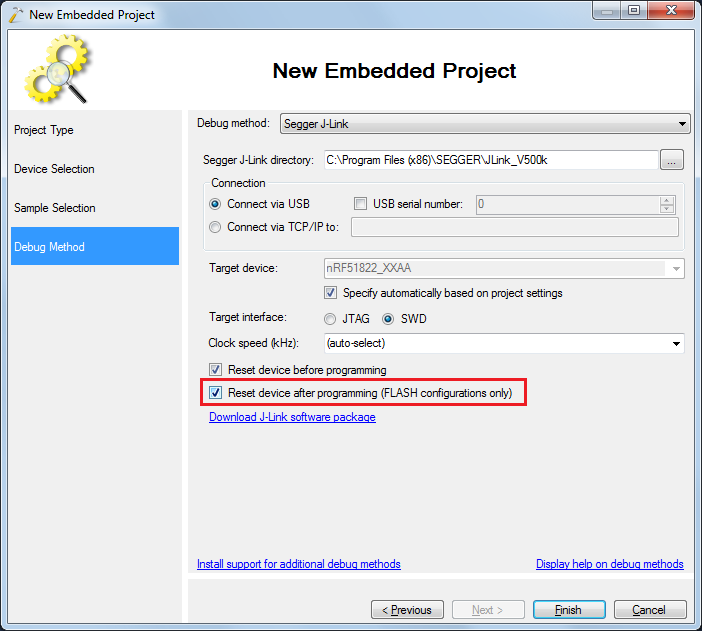
- Select Segger J-Link as the debug method and check the “Reset device after programming” checkbox:
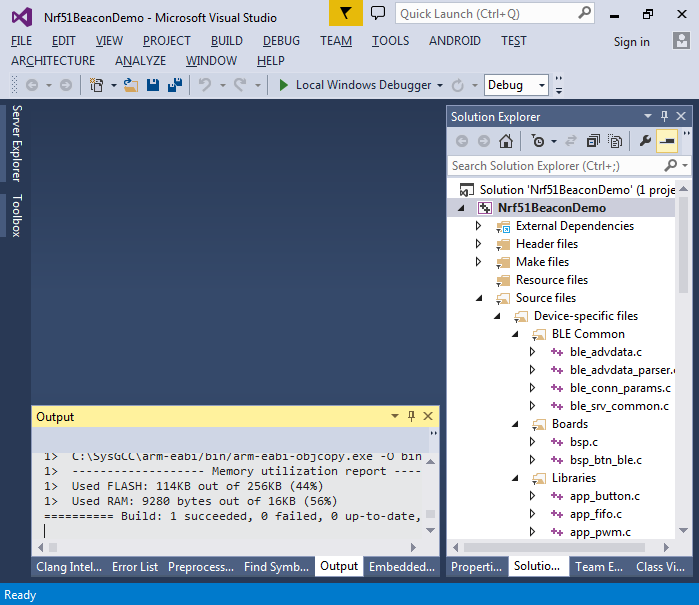
- Once the project is created, build it with Ctrl-Shift-B:
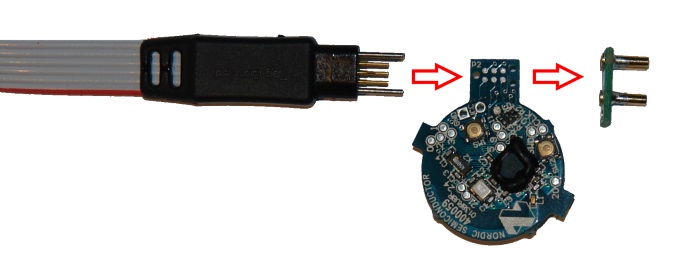
- Connect the Tag Connect TC2030-IDC-NL cable to the beacon kit as shown below:
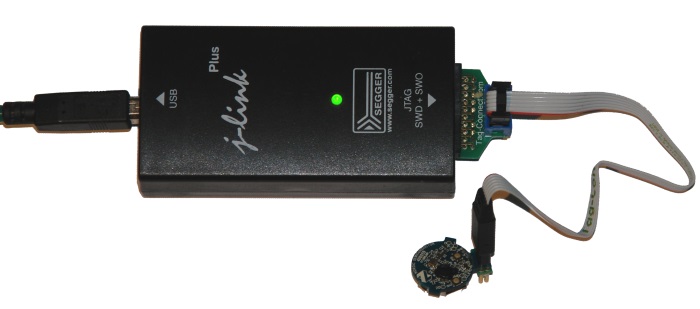
- Connect the other end of the cable to your Segger J-Link probe using the ARM20-CTX adapter:
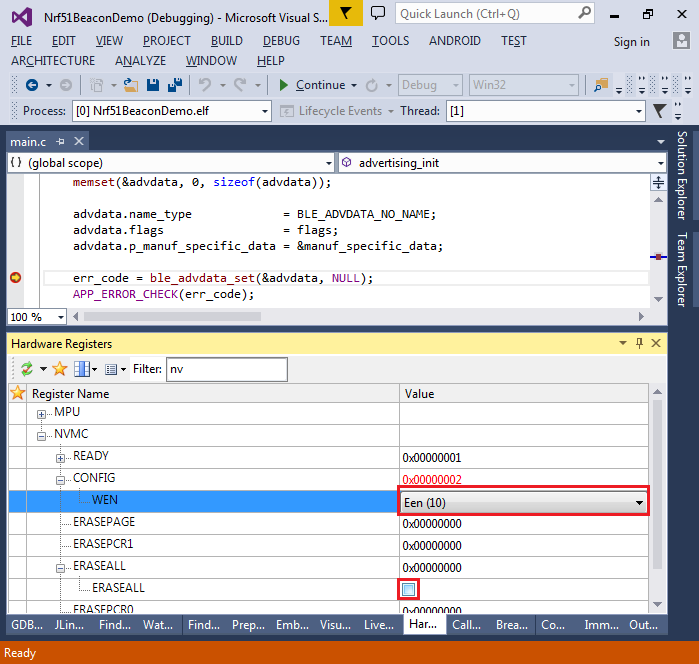
- Now you can press F5 to start debugging. If the program does not start, you may need to manually erase the chip to override the FLASH lock bits. This can be done by setting NVMC->WEN to 10 and then setting the ERASEALL bit in the Hardware Registers window:
 If you erase the FLASH, hit Shift-F5 and then F5 again to actually program the new firmware.
 - Once the program is running, open the Beacons tab of Nordic nRF51 toolbox on your Android device:
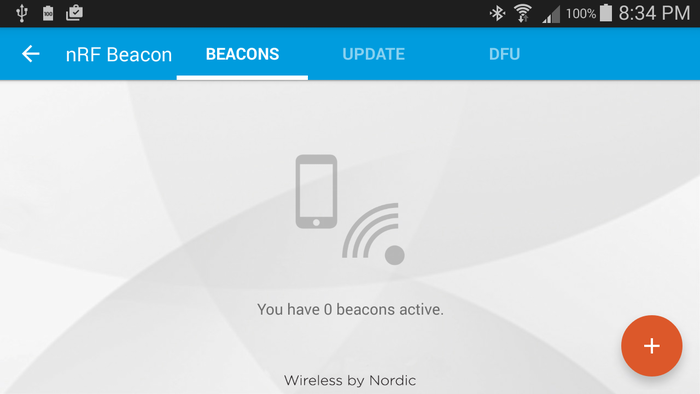
- Click “Add” and wait until your phone discovers the beacon:
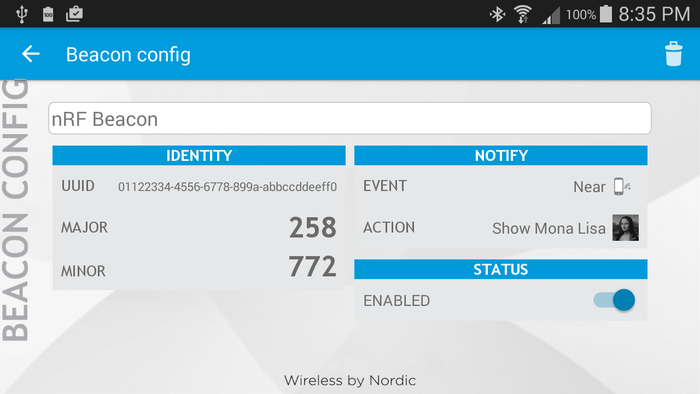 Now you can modify the beacon firmware and quickly test it out by pressing F5 in Visual Studio. See this tutorial for an example of modifying the major and minor IDs.


