Developing a UART-over-Bluetooth LE adapter using Nordic nRF51
This tutorial shows how to create a UART-over-Bluetooth LE adapter using the nRF51-DK evaluation board from Nordic and VisualGDB. We will show how to use the Nordic Android app to send and receive data to the UART port on the board.
Before you begin, install VisualGDB 5.0, get a Bluetooth LE-enabled Android phone and follow our Basic nRF51 tutorial to get started with nRF51 devices.
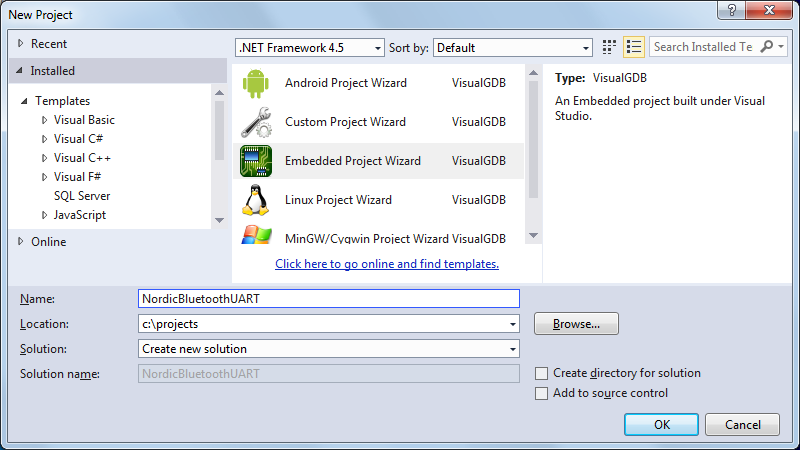
- Start creating a new Visual Studio project using the VisualGDB Embedded Project Wizard:
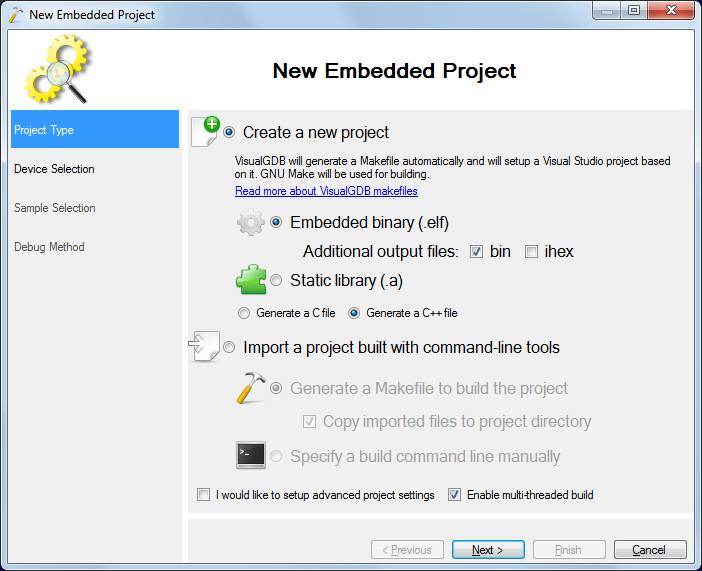
- Proceed with the default settings on the first page of the wizard:
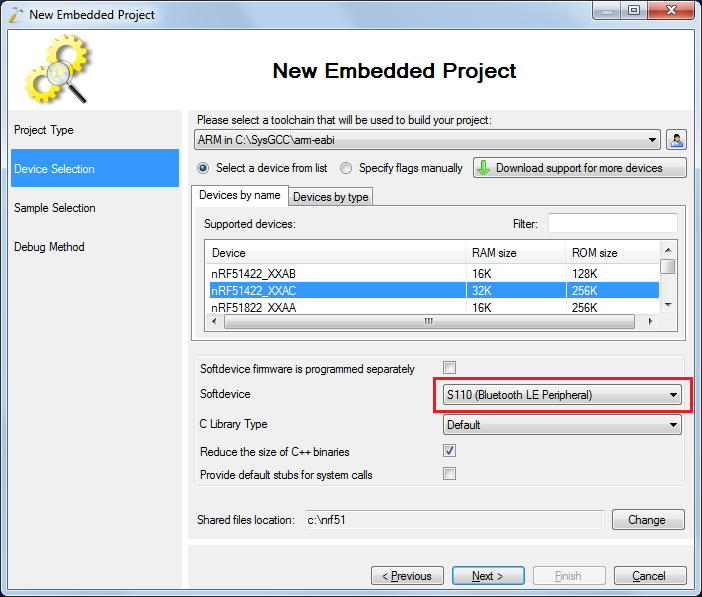
- Specify your Nordic device. Set the softdevice to S110 that supports Bluetooth LE Peripheral mode:
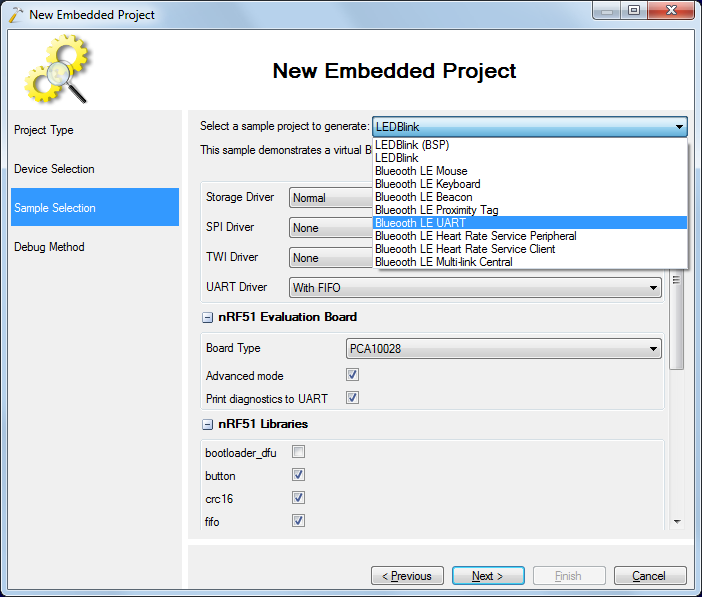
- On the next page select the Bluetooth LE UART sample and specify your board type that is printed on a sticker on the board below:
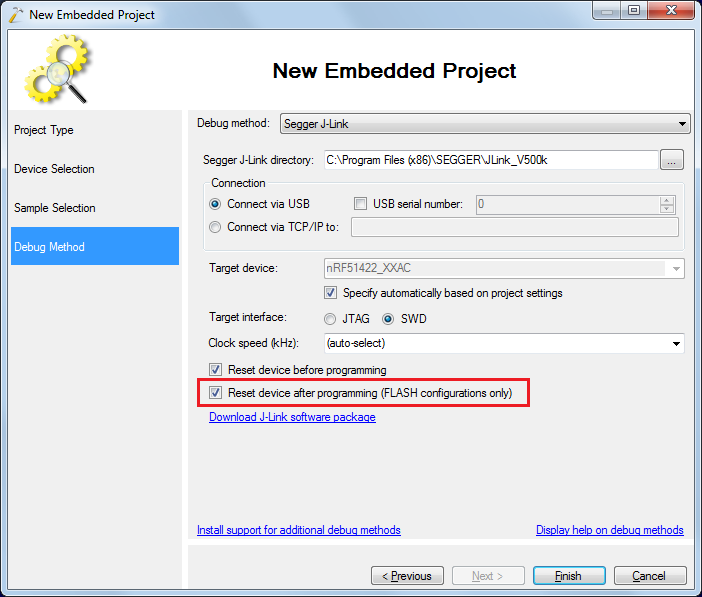
- On the Debug Settings page specify a debug method that works with your board. In this example we will use the on-board Segger J-Link that works with the Segger software. Check the “Reset device after programming” checkbox as otherwise GDB will try to run your program entry point bypassing the softdevice entry point:
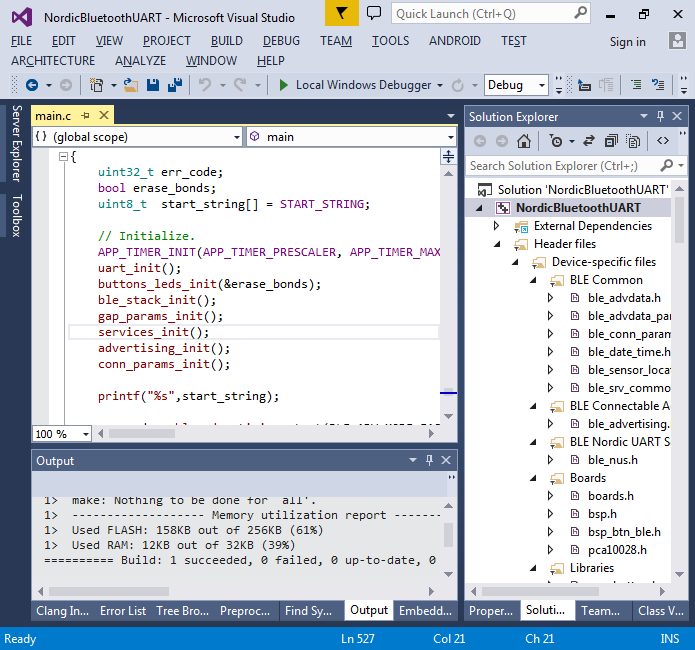
- Press Finish to create your project. Build it via Build->Build Solution. Ensure that the build succeeds:
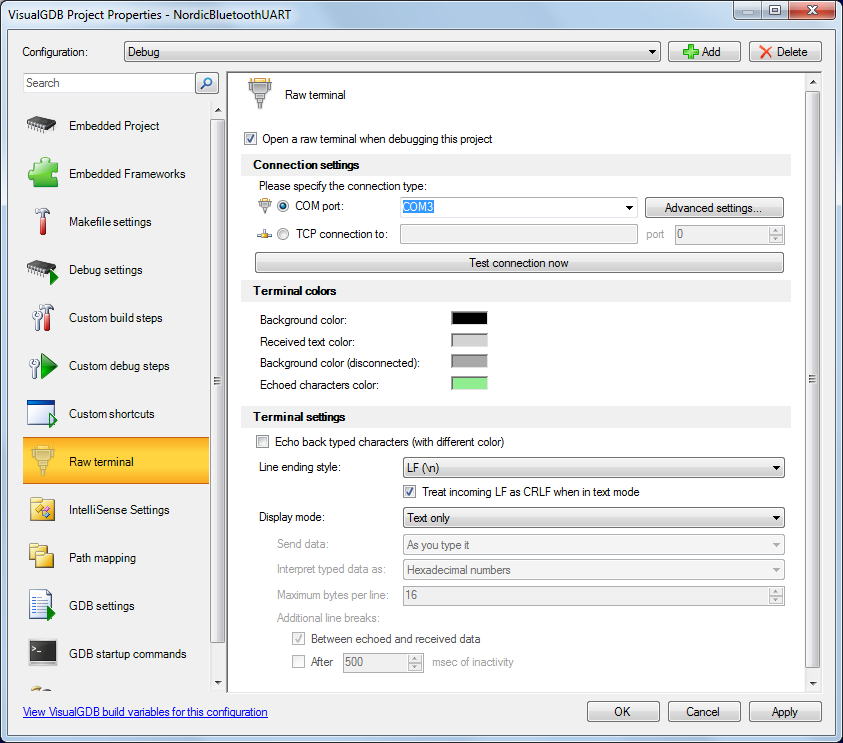
- Open VisualGDB Project Properties and go to the Raw Terminal page. Specify the COM port number of the on-board J-Link (see this tutorial for details) and the advanced connection settings by clicking “advanced settings”. By default, the Bluetooth LE UART sample uses 38400 bits per second and hardware flow control:
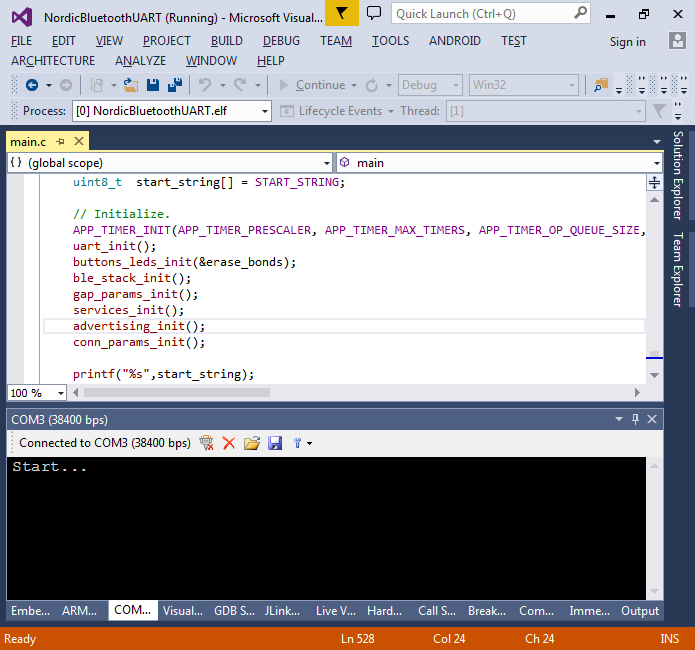
- Start debugging your program and ensure that the COMx window displays the “Start…” message. Note that if you have not overridden the _isatty() function as described in the UART tutorial, VisualGDB will also show the ARM Semihosting console that will be empty:
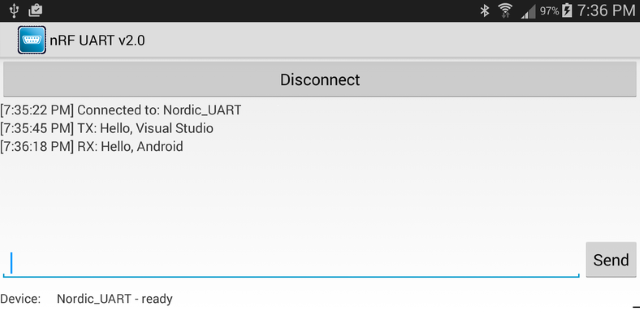
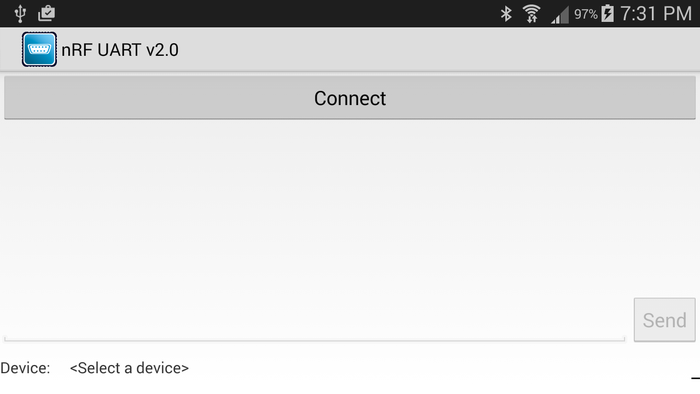
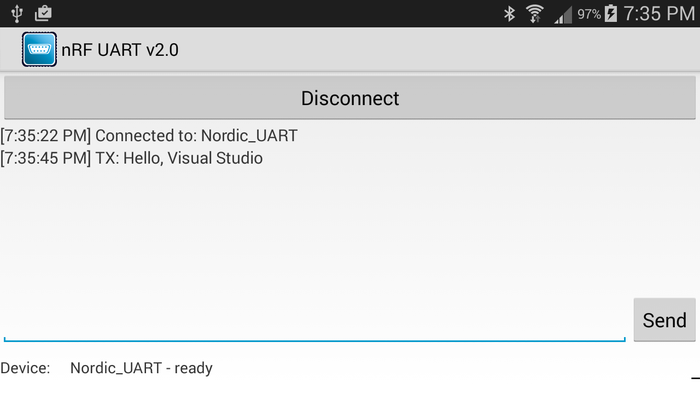
- Install the nRF UART App on your Android device. Launch it and click “Connect”:
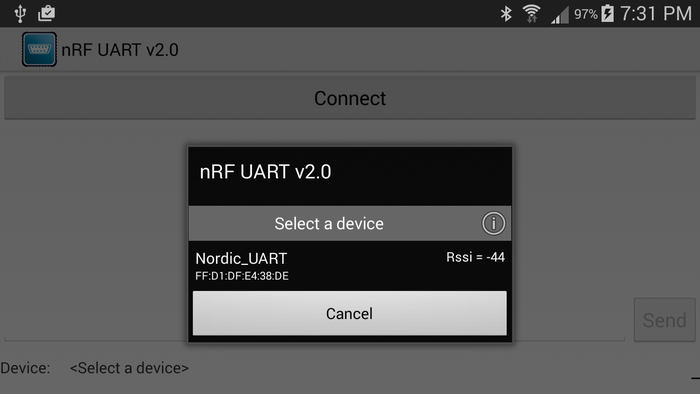
- Ensure you see the Nordic_UART device in the list. Note that the Nordic UART service does not require bonding, so you do not need to pair with the device using the Android Bluetooth manager (in fact, it will not work as the UART sample does not handle bonding requests):
- Click on the device name to connect to it. Once the connection is established, type some text in the app and press the “Send” button:
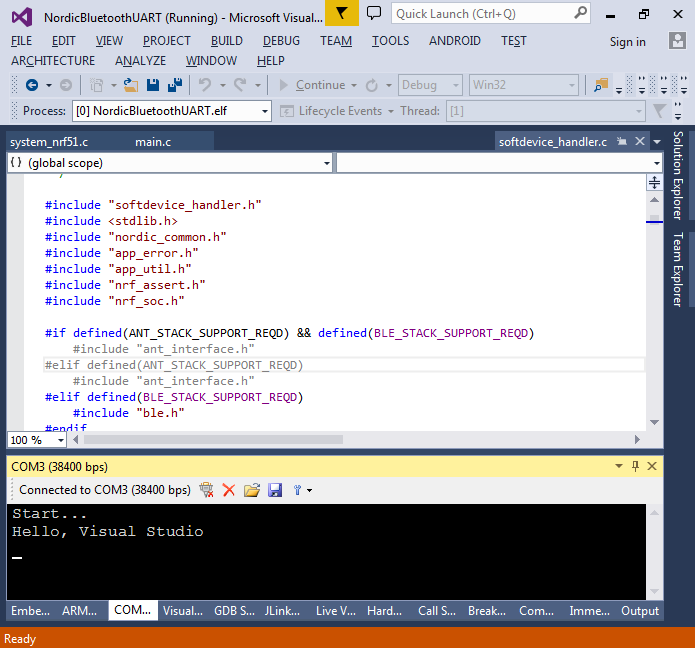
- See how the text appears in the Visual Studio COMx window:
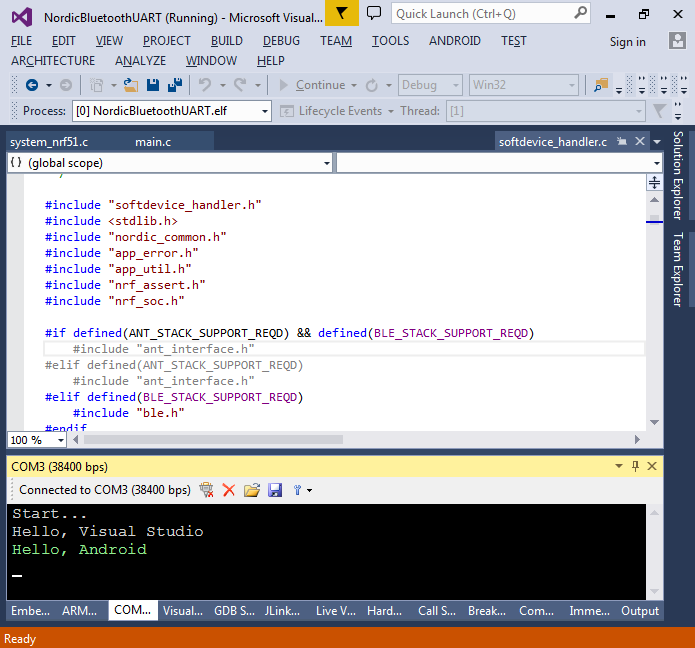
- Type some text back in Visual Studio and press “Enter” (you can turn on character echoing via the “settings” button in the COMx window):
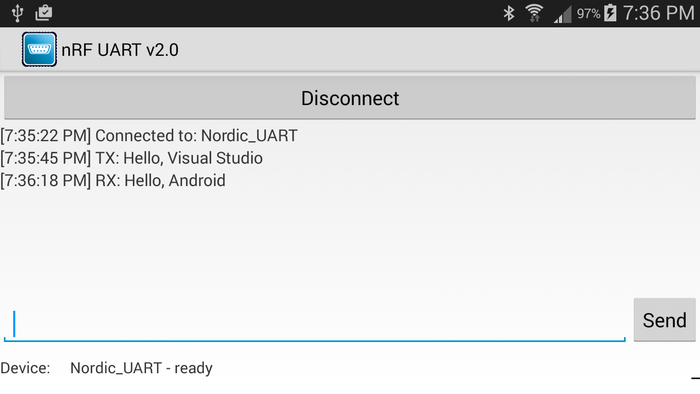
- Check that the reply is shown in the nRF UART app:
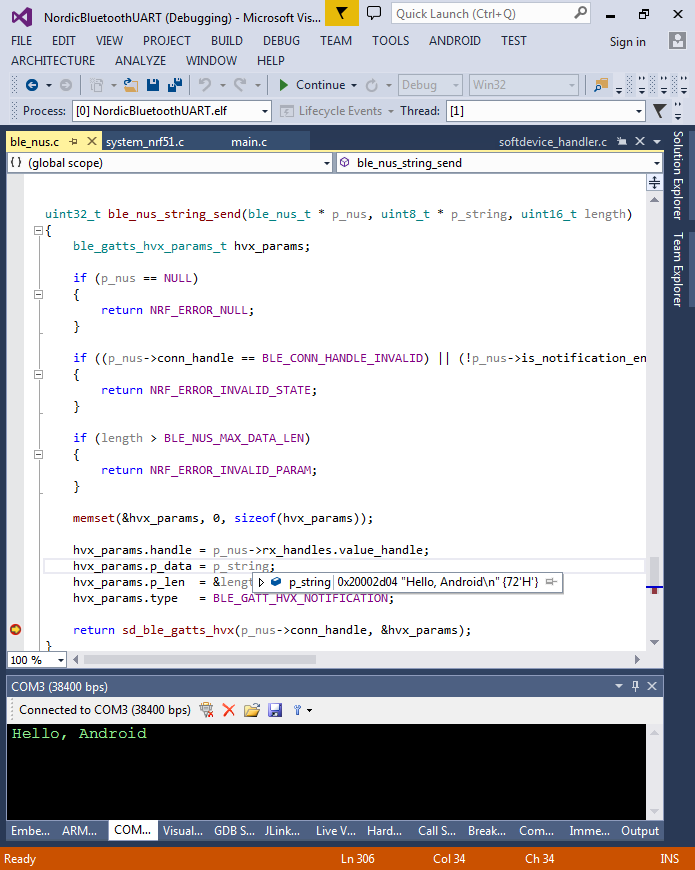
- Now we will see how the communication is performed. Set a breakpoint in the ble_nus_string_send() function and send a line of text from the COMx window:
 Note that once you have stopped at a breakpoint in a Bluetooth-enabled application, resuming will most likely result in a reset, as the softdevice will detect inconsistencies due to missed interrupts. This is a known limitation of the Nordic nRF51 devices and can be partially worked around by setting PRIMASK register to 1 using the Watch window as described in the nRF51 Bluetooth LE Mouse tutorial.
 - Right-click at the rx_handles field and select “Show on Code Map”. Then display the functions using the field and the functions calling them:
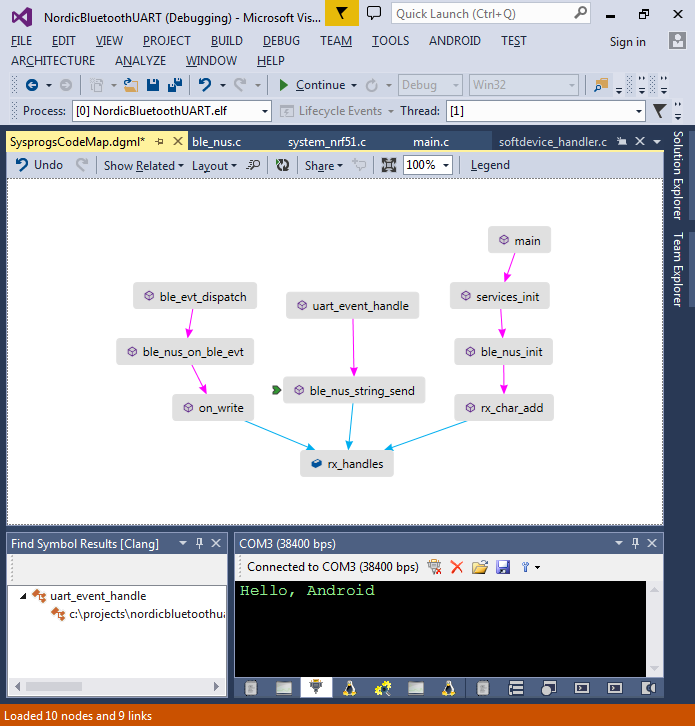
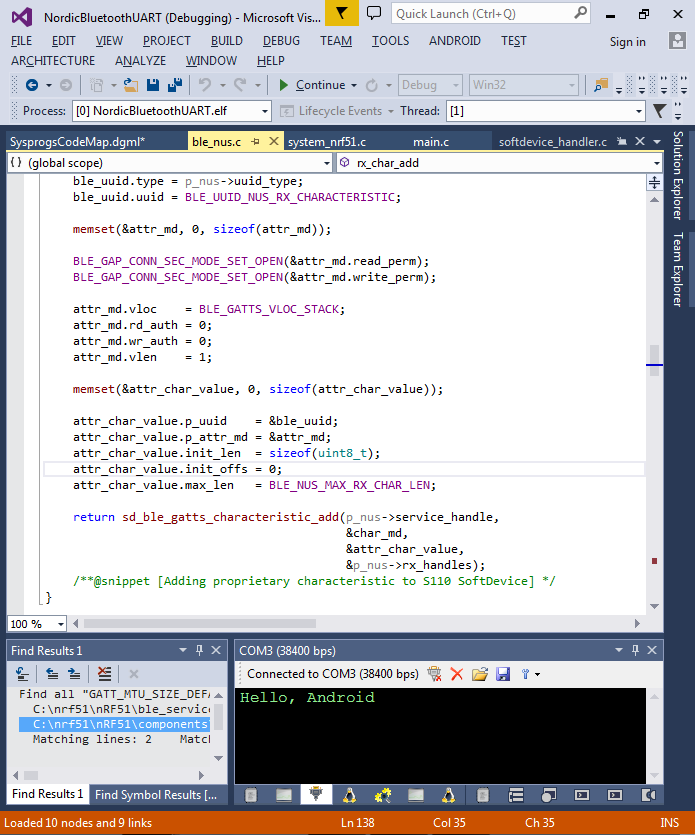
- This reveals the rx_char_add() function that adds a proprietary characteristic (BLE_UUID_NUS_RX_CHARACTERISTIC) used by the Nordic UART App. When the firmware wants to send a string to the UART, it generates an update event for this characteristic and the App receives it and displays the text:
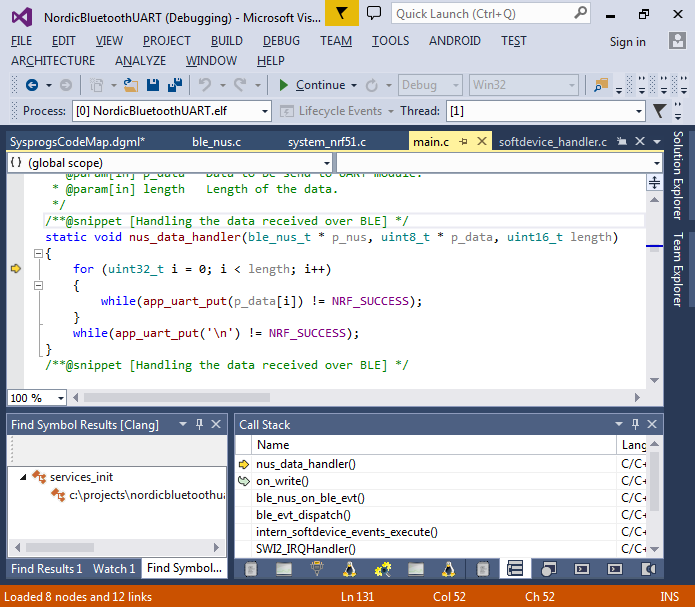
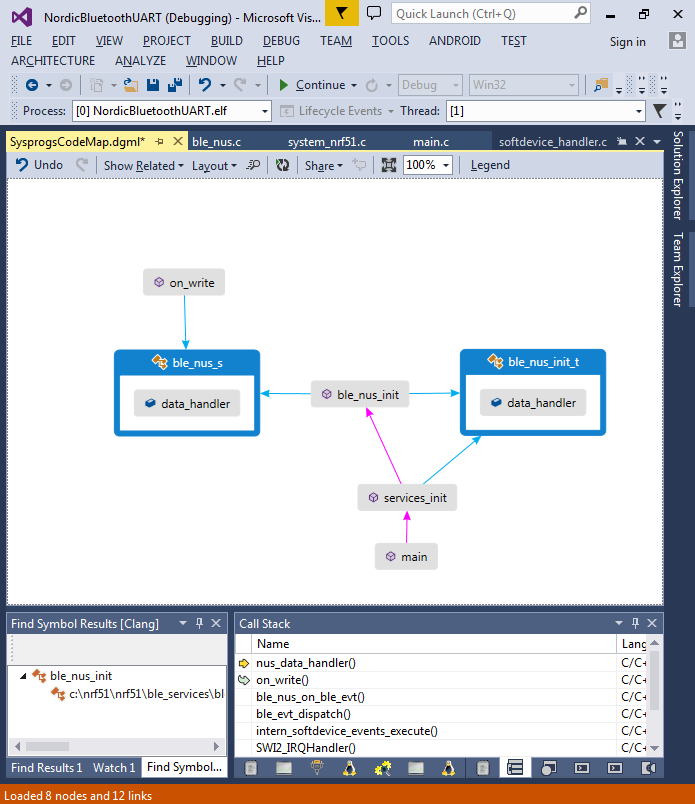
- The Code Map has also revealed the on_write() function that is called when the UART App sets the BLE_UUID_NUS_TX_CHARACTERISTIC characteristic:
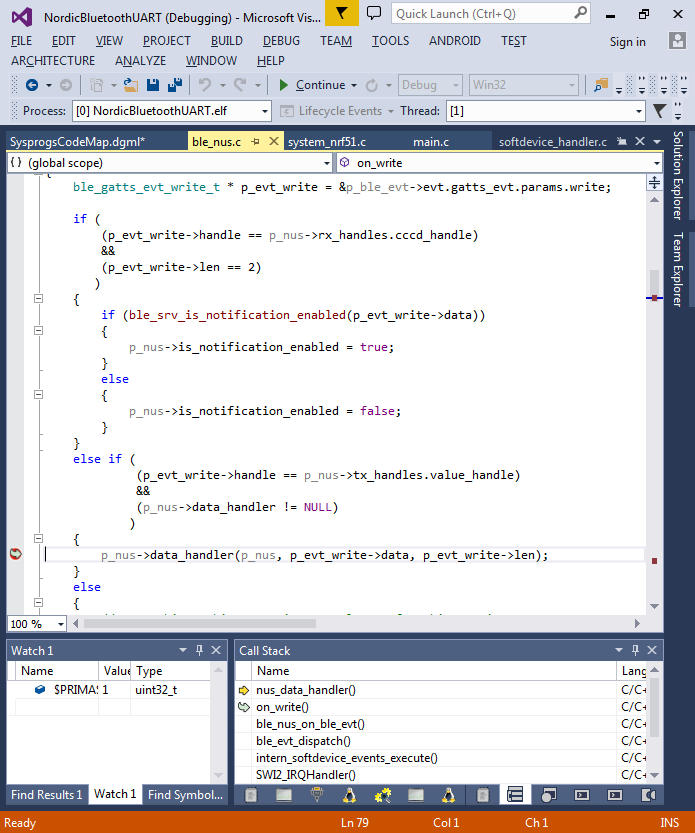
- Using the Code Map you can see that the data_handler field of ble_nus_s used by on_write() is initialized from the ble_nus_init_t::data_handler field that is in turn set in services_init() in the main.c file.
- The handler in the UART example simply prints the received string using the app_uart_put() function: