Developing code for ARM-based Arduino boards with Visual Studio
This tutorial shows how to use the VisualGDB Advanced Arduino Project Subsystem to develop projects for ARM-based Arduino-compatible boards. In this tutorial we will create a basic “Blinking LED” project for the Arduino Due board and will show how to FLASH it using the built-in bootloader and debug it using Segger J-Link.
Before you begin, install VisualGDB 5.4 Preview 4 or later.
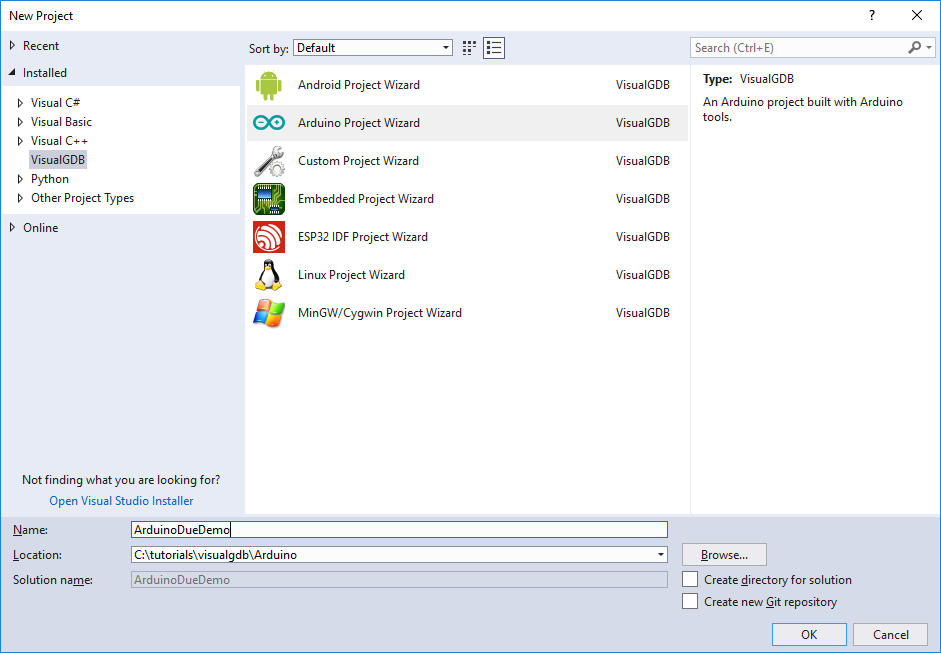
- Start Visual Studio and open the VisualGDB Arduino Project Wizard:
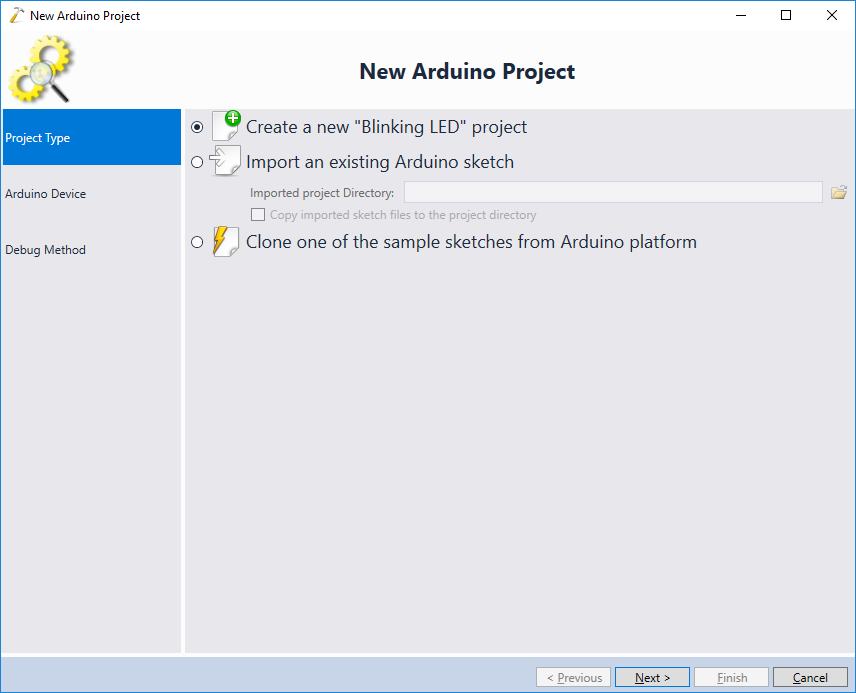
- On the first page of the wizard, proceed with the default “Blinking LED” choice:
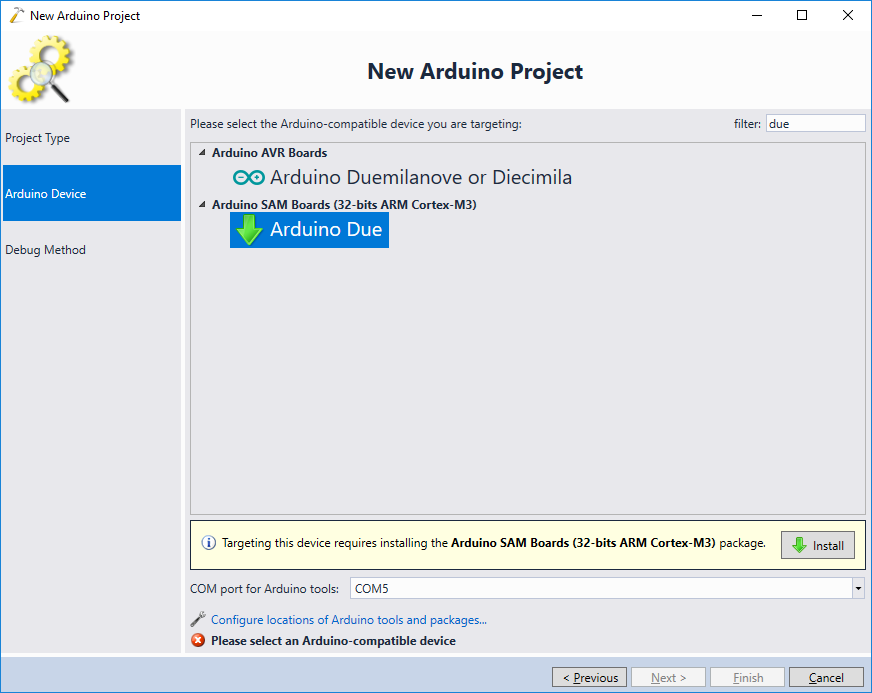
- On the next page select your board. In this tutorial we will use the Arduino Due board. If this is the first time you are creating a project for this platform, VisualGDB will suggest automatically downloading and installing the related Arduino packages. Click “Install” to proceed with the installation:
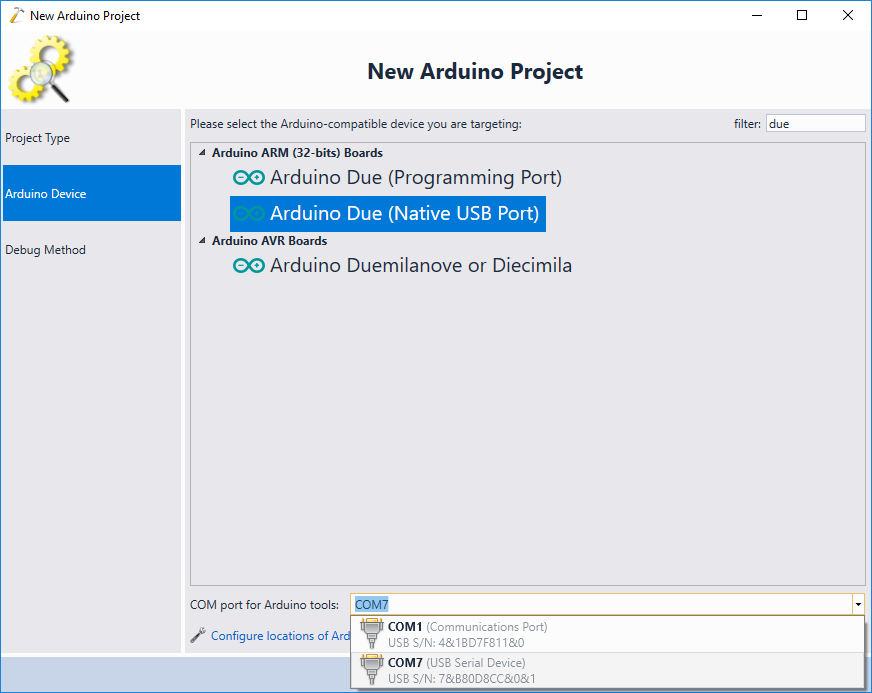
- Once the package is installed, VisualGDB will display a more detailed list of boards reported by the installed package. The Arduino Due board could be programmed either via the programming port (P), or the native USB port (N):

- In this tutorial we will use the native USB port. Connect the board to it and select “Arduino Due (Native USB Port)” on the Arduino Device page, then select the COM port corresponding to your board:
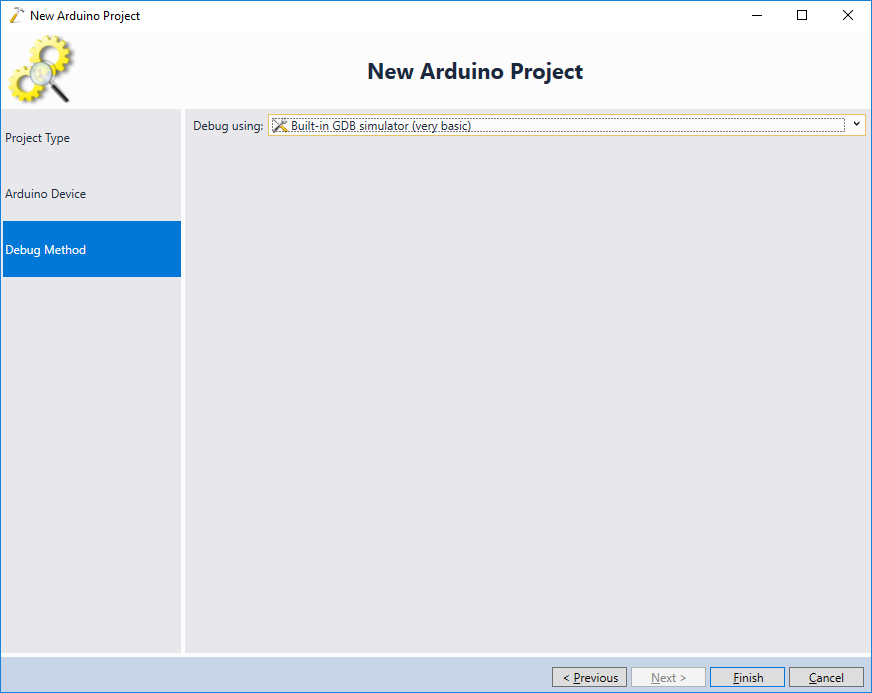
- Before we proceed with the JTAG debugging setup, we will show how to FLASH the firmware using the Arduino bootloader and use the built-in USB port, so select “Built-in GDB simulator” as the debug method:
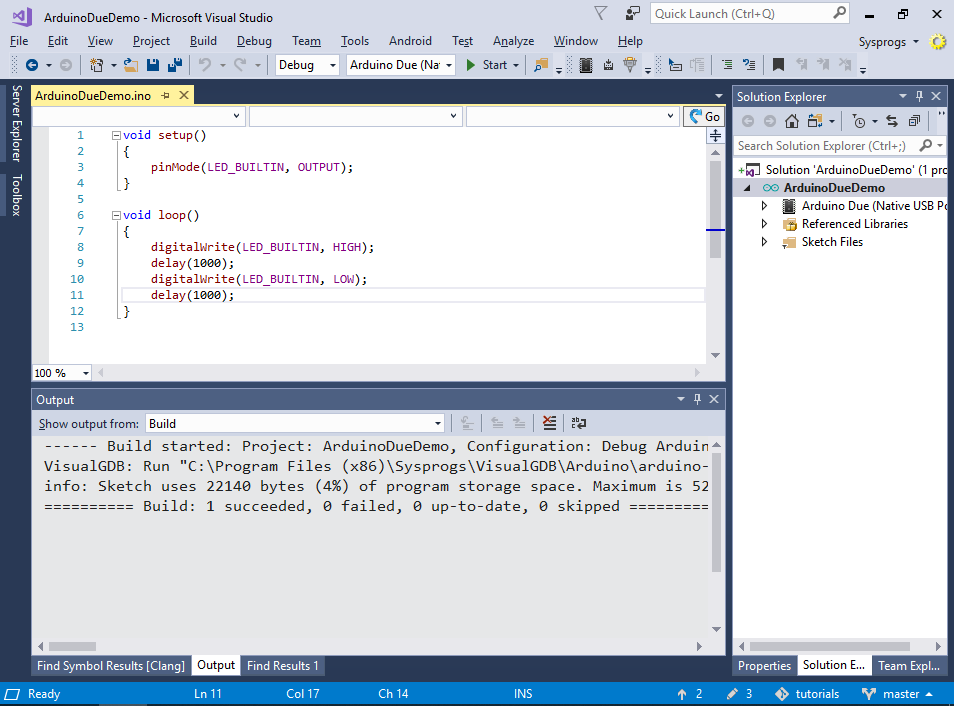
- Press “Finish” to generate the project. The created project will be using the Advanced Arduino Project Subsystem that will recognize both the sketch files and the core/libraries. The Advanced Arduino projects query the detailed project structure directly from the Arduino build tools, so they show the accurate information in the Solution Explorer and configure IntelliSense to work precisely the same way as the Arduino compiler does. Build the project by pressing Ctrl-Shift-B:
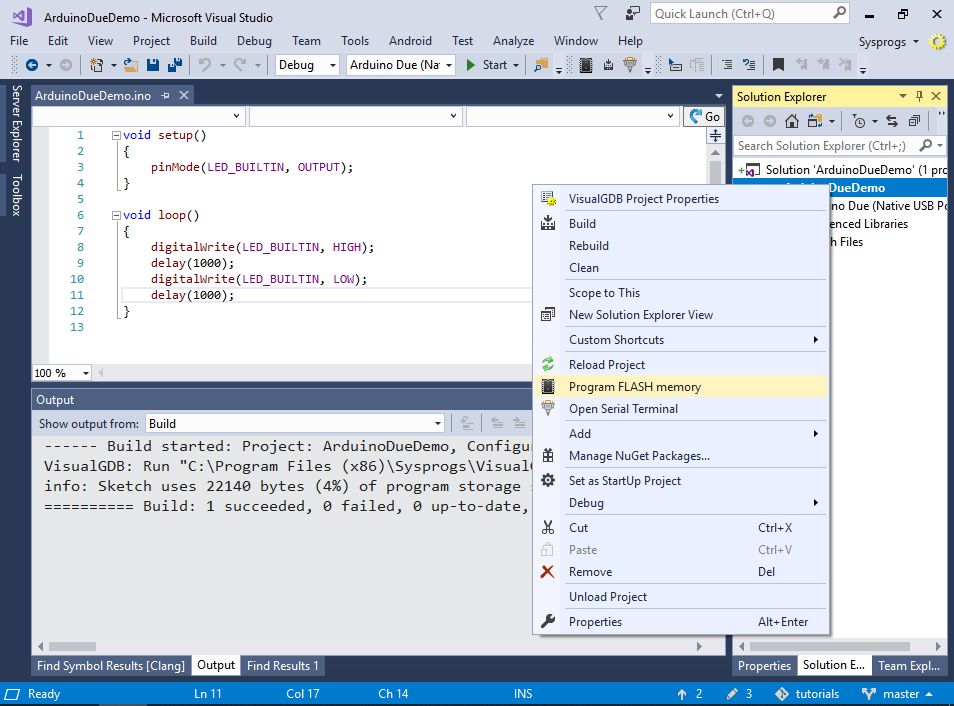
- Right-click on the project node in the Solution Explorer and select “Program FLASH memory”:
 VisualGDB will invoke the Arduino programming tools to automatically program the FLASH memory. Once the memory is programmed, the on-board LED will begin to blink.
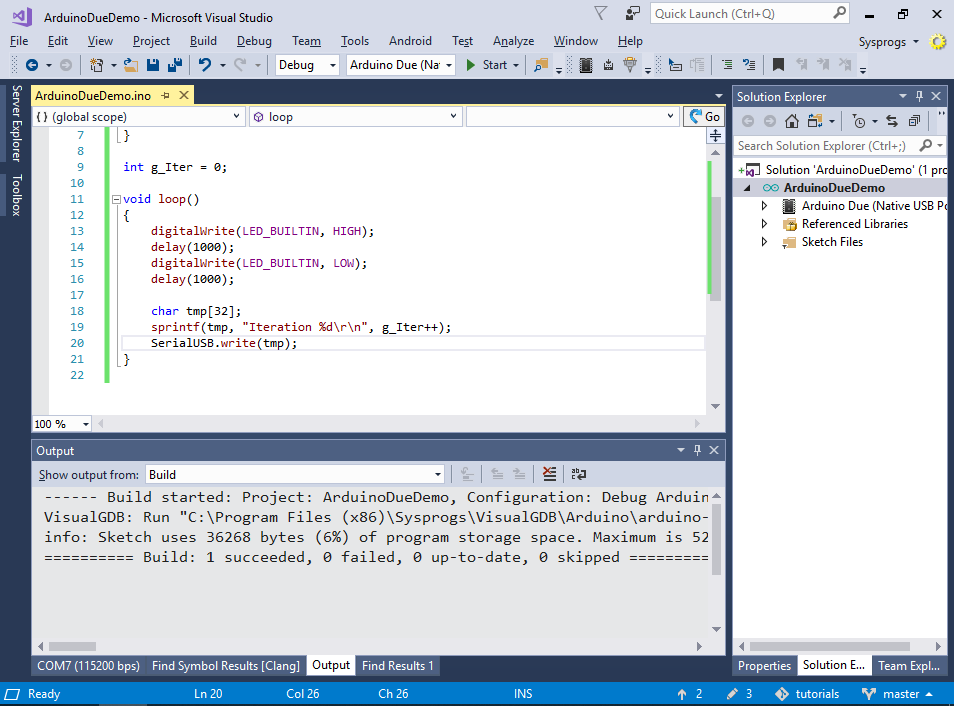
 - Now we will show how to use the built-in serial port. Replace your sketch contents with the following code:
#include <HardwareSerial.h>

void setup()
{
    pinMode(LED_BUILTIN, OUTPUT);
    SerialUSB.begin(115200);
}

int g_Iter = 0;

void loop()
{
    digitalWrite(LED_BUILTIN, HIGH);
    delay(1000);
    digitalWrite(LED_BUILTIN, LOW);
    delay(1000);

    char tmp[32];
    sprintf(tmp, "Iteration %d\r\n", g_Iter++);
    SerialUSB.write(tmp);
}
Then build it via Ctrl-Shift-B:
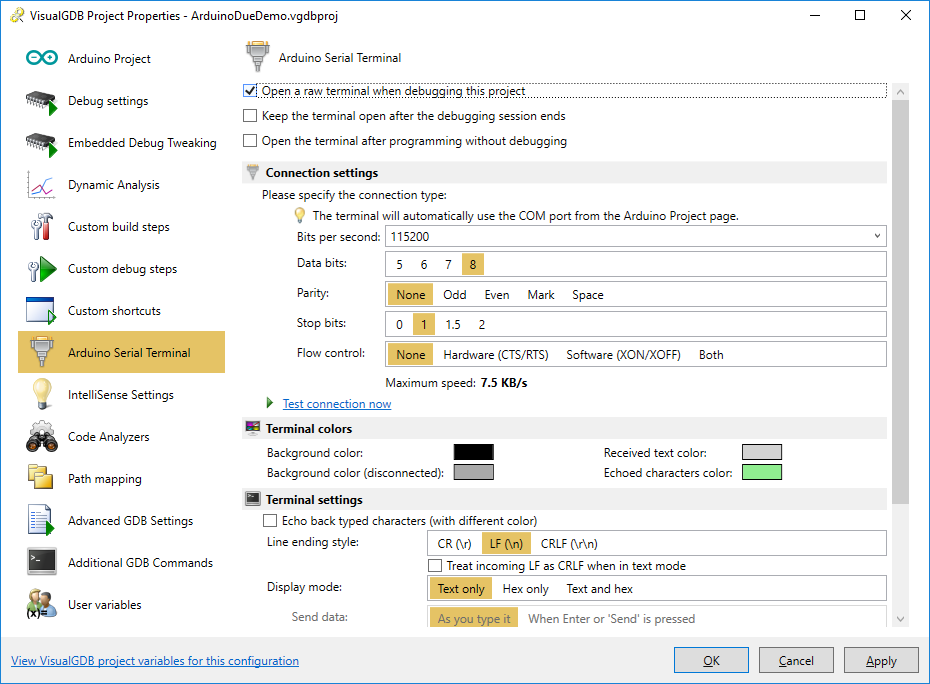
- Open VisualGDB Project Properties and enable the Arduino Serial Terminal (ensure that the baud rate in VisualGDB Project Properties matches the baud rate in the sketch):
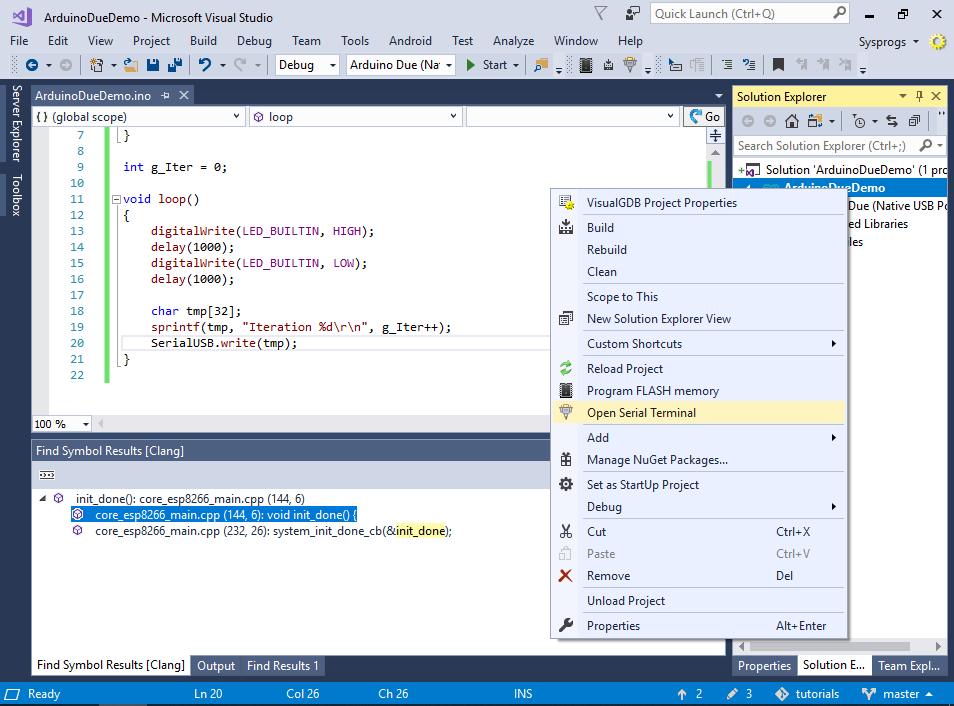
- Program the FLASH memory again, then right-click in Solution Explorer and select “Open Serial Terminal”:
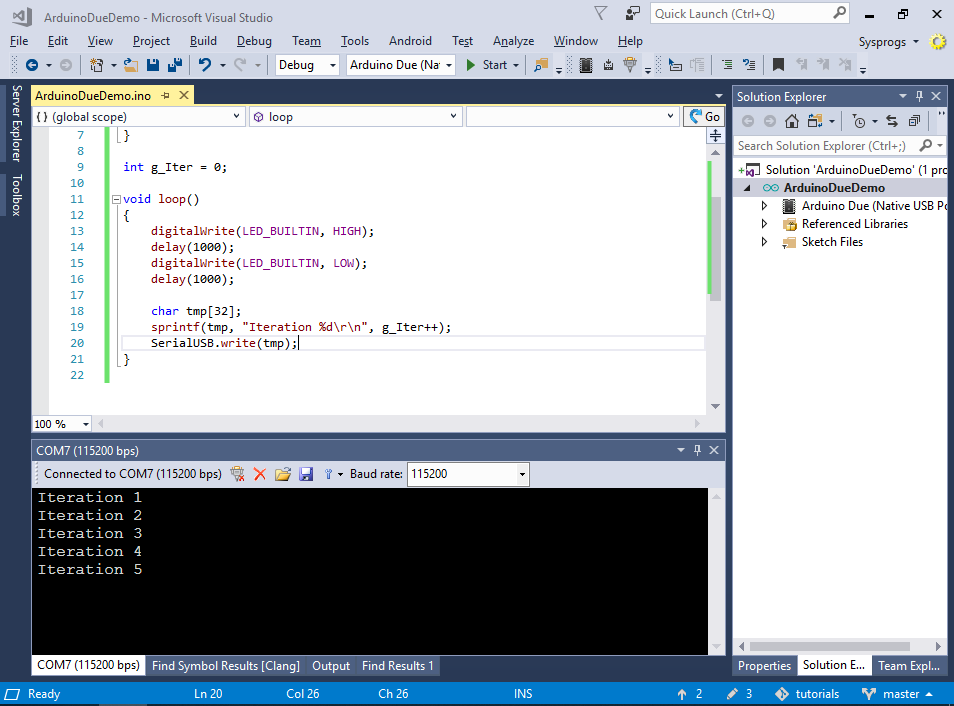
- VisualGDB will open a terminal pane in Visual Studio window, showing the output from your Arduino sketch:
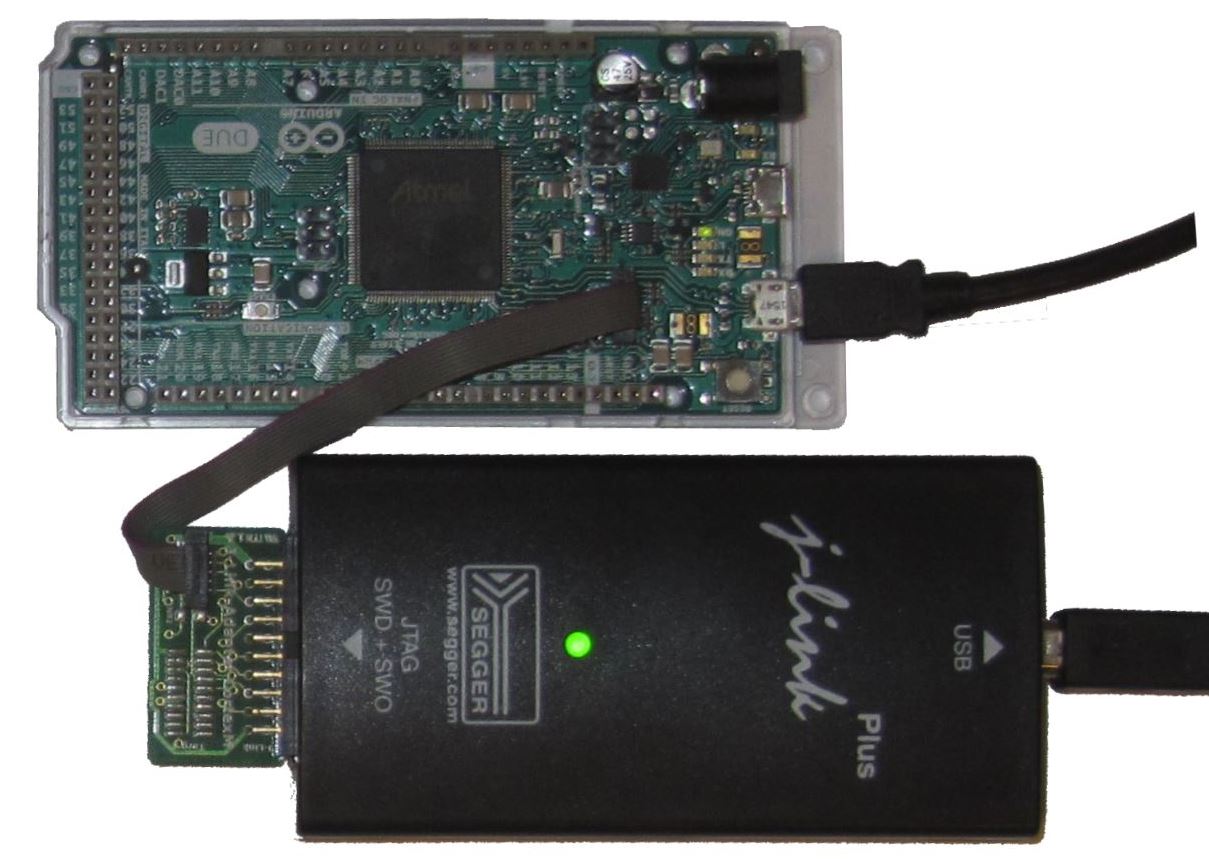
- Now we will show how to debug the board. Connect your ARM debugger (e.g. Segger J-Link or Olimex ARM-USB-OCD-H) to the board and plug it into a USB port:
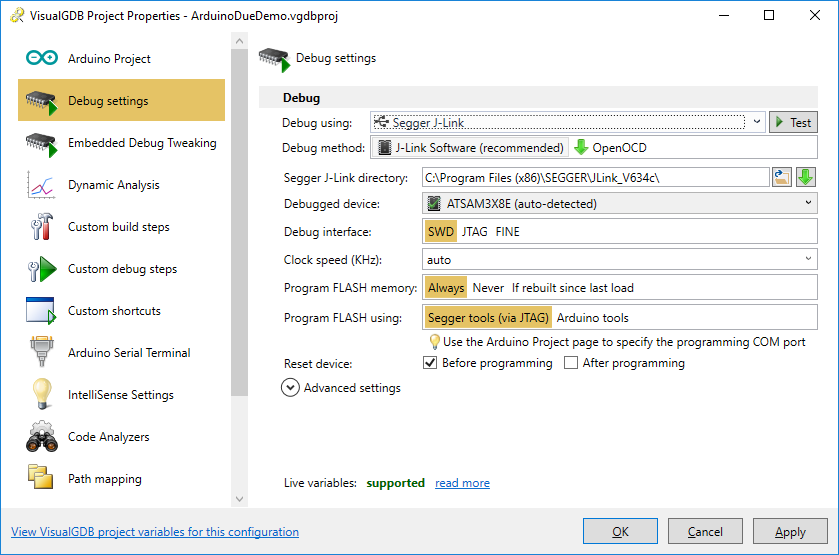
- Open VisualGDB Project Properties and select the debug probe in the “Debug using” field:
- Press “OK” to save the new settings and hit F5 to begin debugging. The Advanced Arduino projects will offer the same debugging experience as the regular C/C++ projects: you will be able to set breakpoints, evaluate variables and step through your code:

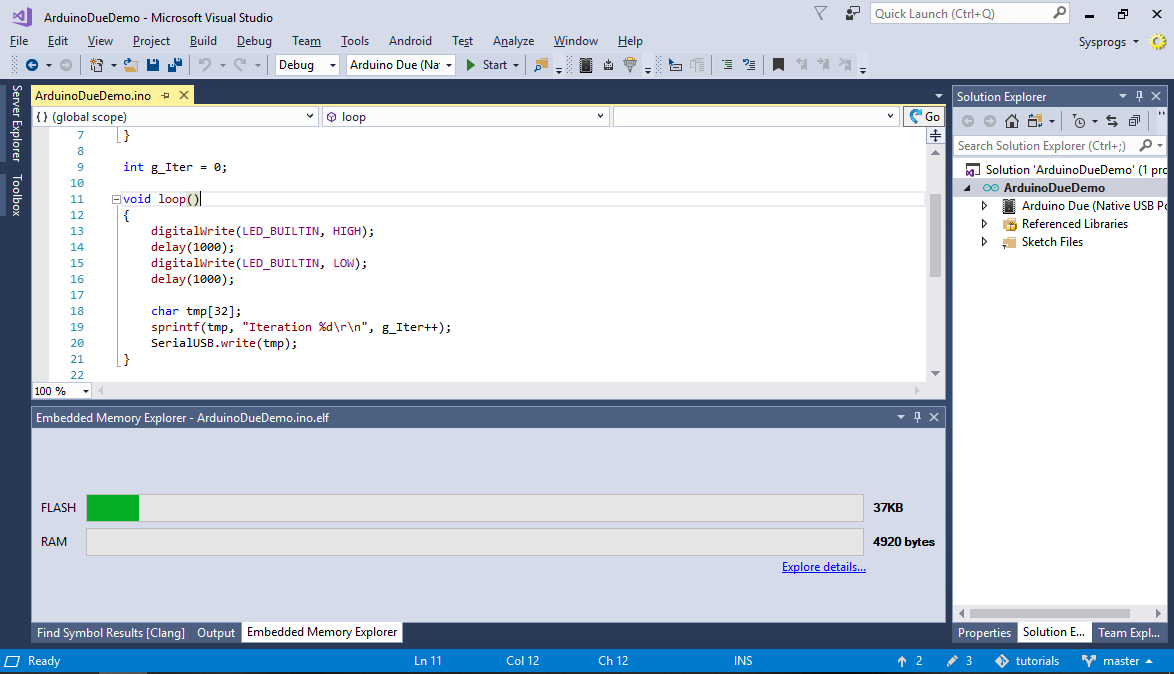
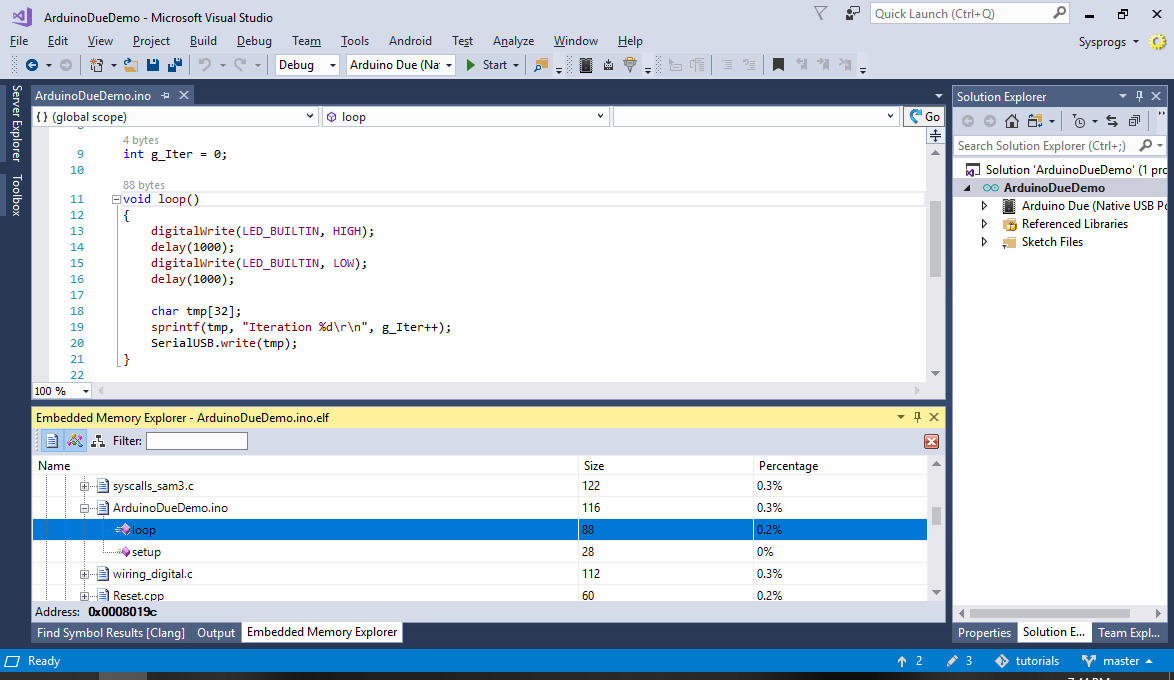
- You can analyze the memory footprint of your project using the View->Embedded Memory Explorer command. The default view will show an overview of the RAM and FLASH usage:
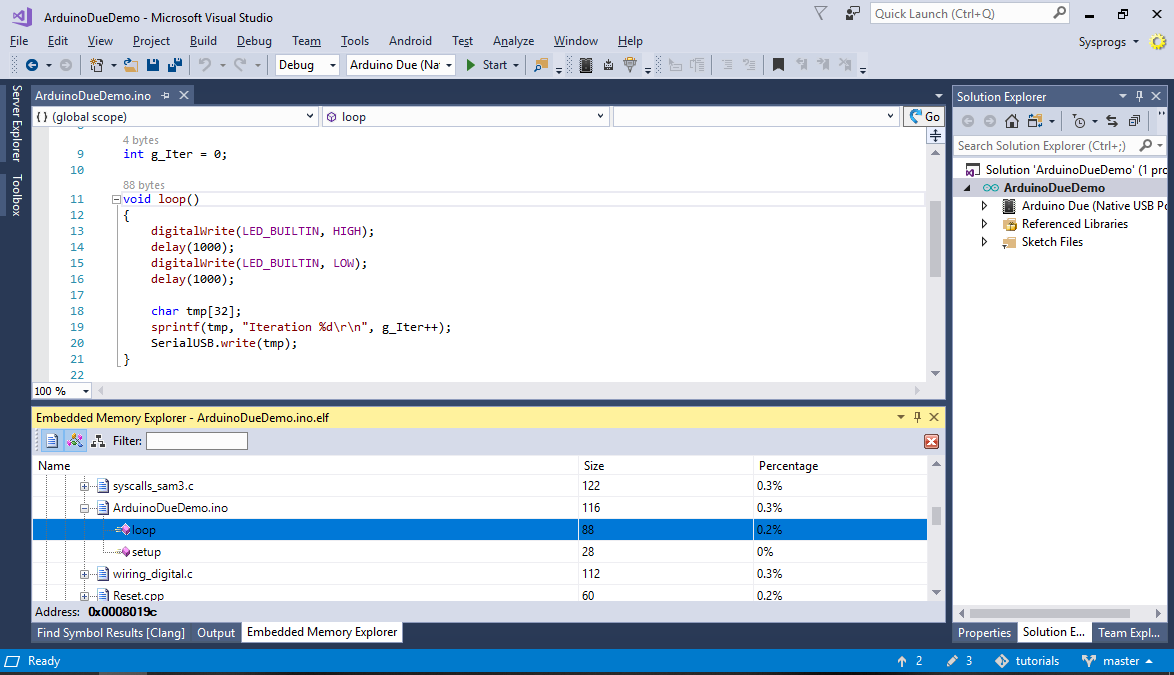
- Click on “Explore details” to see a detailed list of functions and global variables together with their sizes and to also display them as annotations in your code:
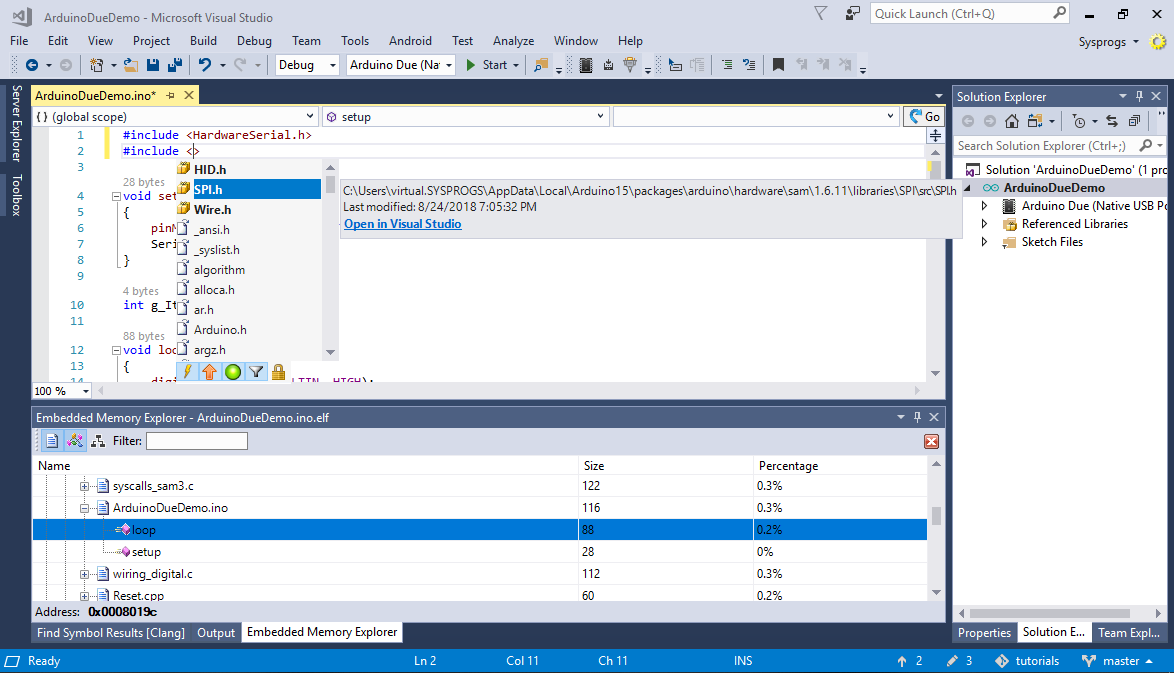
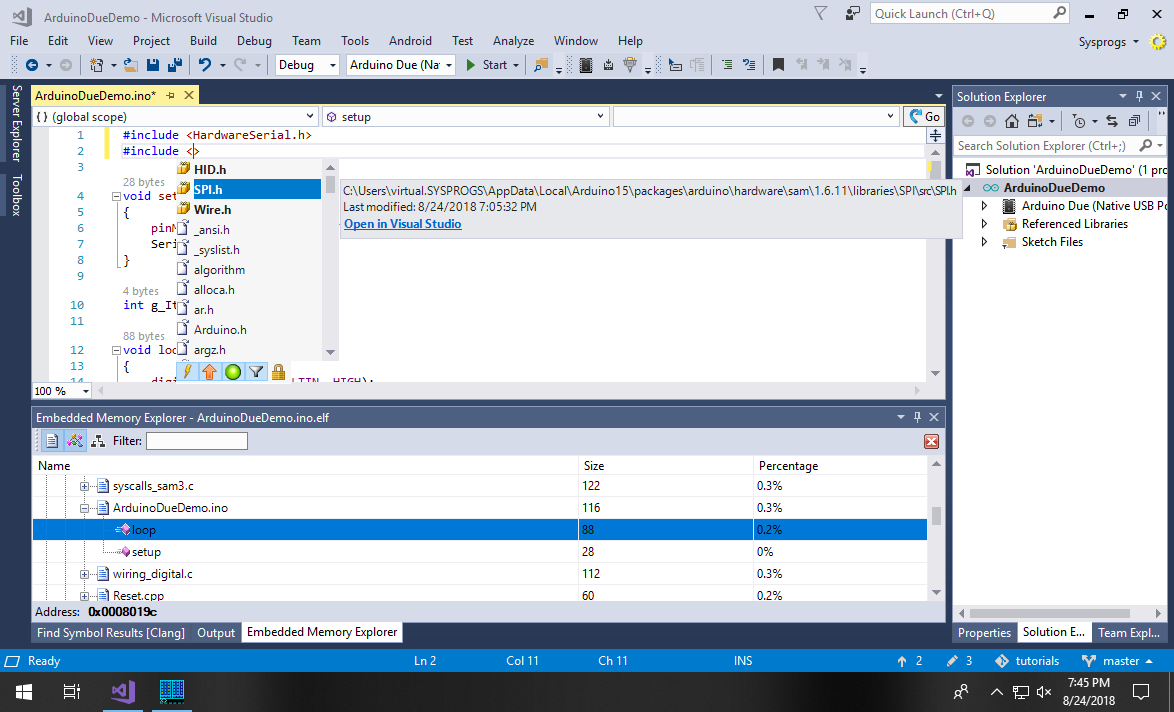
- The Advanced Arduino Project Subsystem automatically recognizes the libraries available on the selected platform. Simply include one of the corresponding header files and VisualGDB will automatically display them in the Solution Explorer and will index their contents to support commands like Go to Definition, Find All References and Code Map: