Developing Unit Tests for Raspberry Pi with CppUTest
This tutorial shows how to use the CppUTest framework to create C++ unit tests with VisualGDB. We will show how to create a basic test project verifying the behavior of the std::atomic types and how to use the CppUTest framework to automatically check your code for memory leaks.
Before you begin, install VisualGDB 5.2 or later and ensure that you are using a Custom edition or higher.
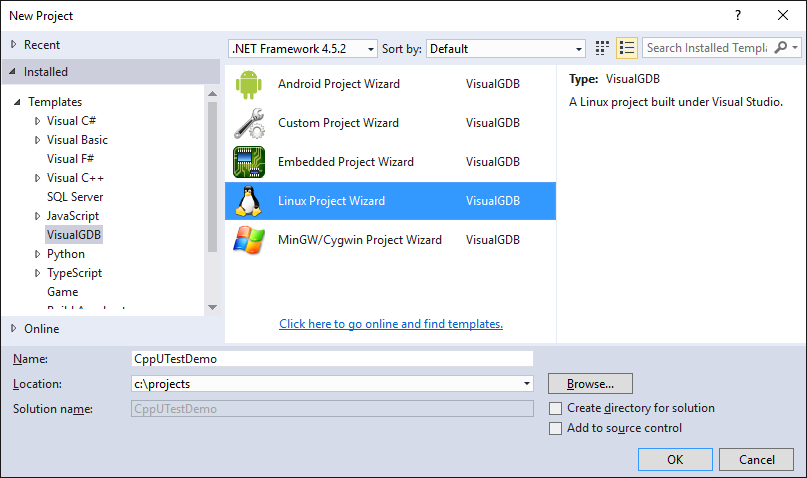
- Start Visual Studio, open the New Project window and select VisualGDB Linux Project Wizard:
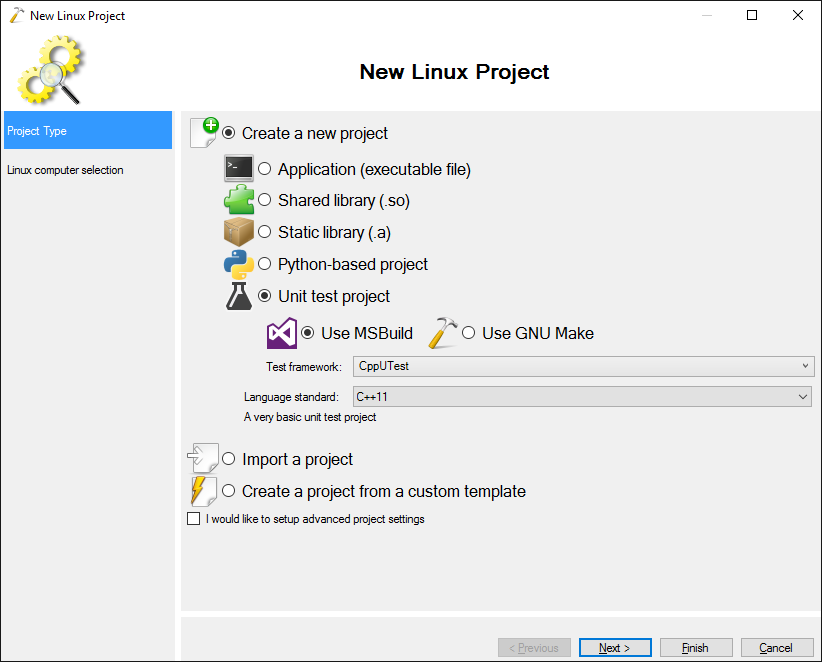
- Select Create a new project -> Unit test project -> Use MSBuild and select the CppUTest framework. As this tutorial will demonstrate the std::atomic types present only in C++11, select C++11 as the language standard:
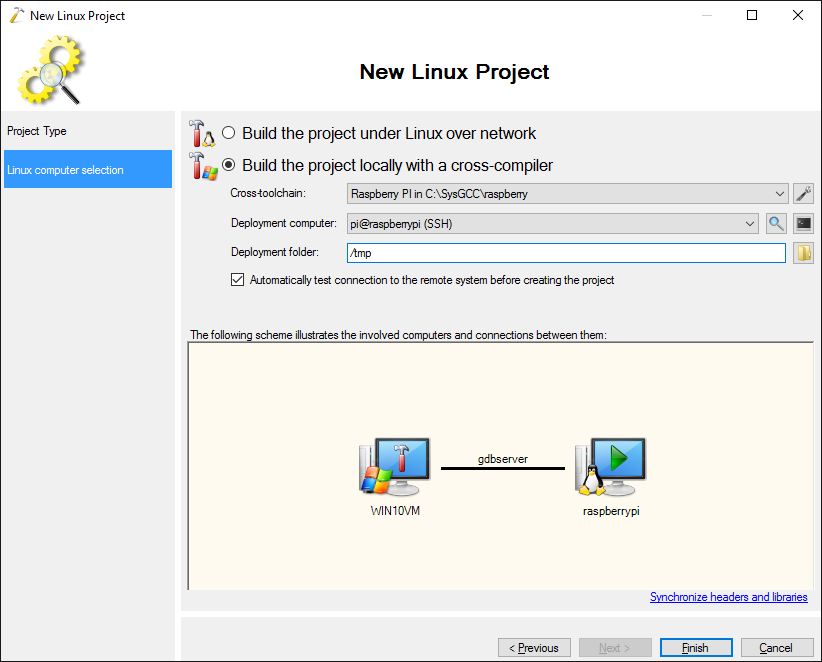
- On the next page select the machines to build and run your project. For Raspberry Pi we recommend building the code on Windows using a cross-toolchain provided by VisualGDB:
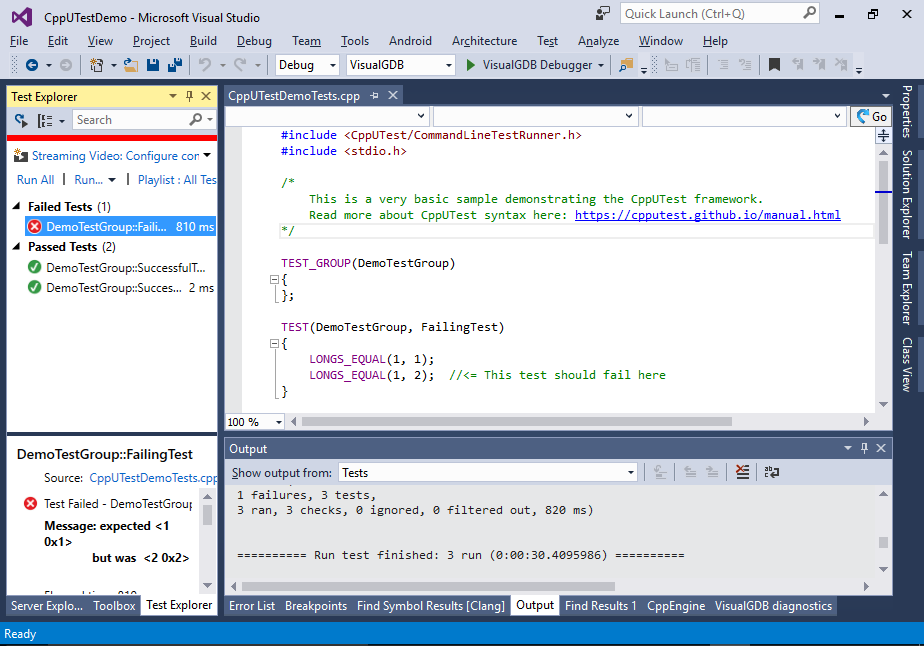
- Press “Finish” to generate a project and build it with Ctrl-Shift-B. VisualGDB will generate a few sample tests that will appear in the Test Explorer window:
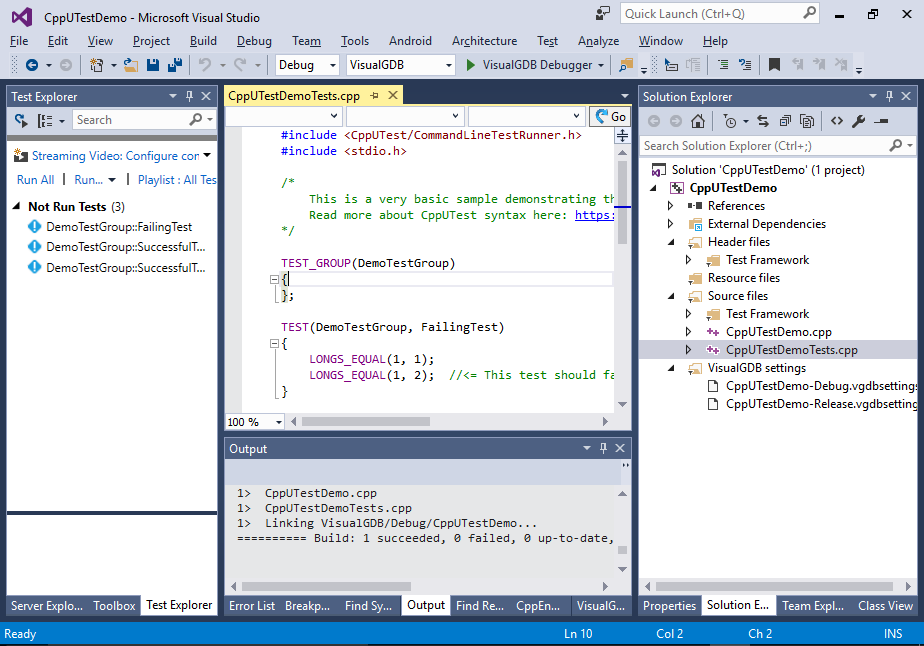
- Select Test->Run All to ensure that the FailingTest fails as suggested by the name and the rest of the tests pass:
- Now we will show how to make some real-world tests using the CppUTest framework. First of all, we will make a very basic test that checks the atomicity of the “++” operator. It will do the following:
- Define a variable shared between several threads
- Run several threads, each one independently incrementing the variable
- Wait for all the threads to exit
- Report the final value of the variable
#include <CppUTest/CommandLineTestRunner.h>
#include <stdio.h>

#include <unistd.h>
#include <atomic>
#include <vector>
#include <pthread.h>

template <typename _Type> class AtomicTest
{
private:
    struct Context
    {
        int Iterations;
        volatile _Type Counter;
    };

    static void *AtomicTestThread(void *pContext)
    {
        Context *pCtx = (Context*)pContext;
        for (int i = 0; i < pCtx->Iterations; i++)
            pCtx->Counter++;
        return nullptr;
    }

public:
    static int Run(int threadCount, int iterationCount)
    {
        std::vector<pthread_t> threads;
        Context ctx;
        ctx.Counter = 0;
        ctx.Iterations = iterationCount;
        for (int i = 0; i < threadCount; i++)
        {
            pthread_t id;
            pthread_create(&id, nullptr, AtomicTestThread, &ctx);
            threads.push_back(id);
        }

        for (auto id : threads)
            pthread_join(id, nullptr);

        return ctx.Counter;
    }
};
- Now we will define two tests that will use the AtomicTest class: one will check the regular ‘int’ variable and will expect it to fail, the other one will use the C++11 std::atomic_int type that is a drop-in replacement for the regular int type that guarantees thread-safety:
TEST_GROUP(AtomicTests)
{
};

TEST(AtomicTests, TestAtomicInteger)
{
    const int IterationCount = 1000000;
    LONGS_EQUAL(IterationCount  * 4, AtomicTest<std::atomic_int>::Run(4, IterationCount));
}

TEST(AtomicTests, TestRegularInteger)
{
    const int IterationCount = 1000000;
    int finalCount = AtomicTest<int>::Run(4, IterationCount);
    if (finalCount == IterationCount * 4)
        FAIL("The final counter unexpectedly matches for non-atomic type.");
}
Both tests will run 4 threads. The TestAtomicInteger test expects the counter value to match the expected one and the TestRegularInteger expects it to mismatch.
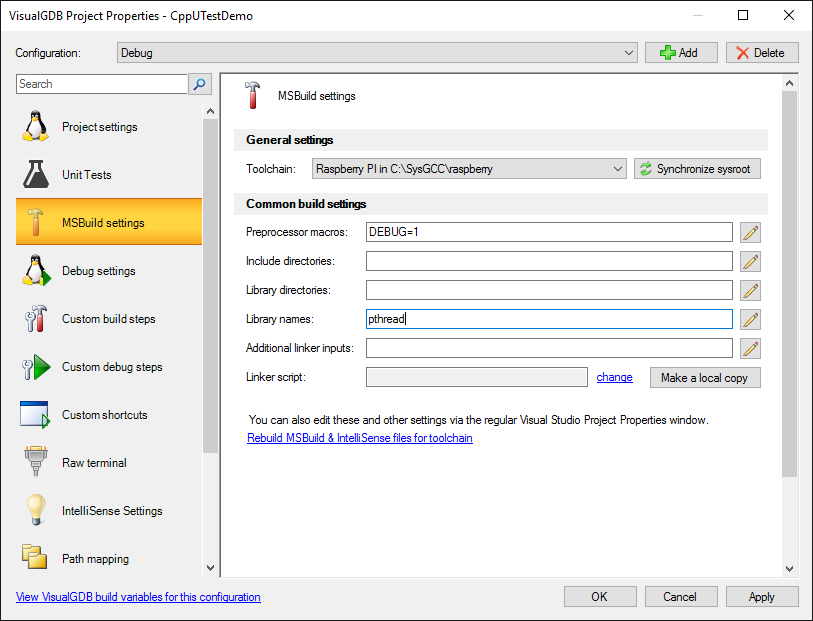
- Before you can build the code, open VisualGDB Project Properties and add ‘pthread’ to the “Library names” field:
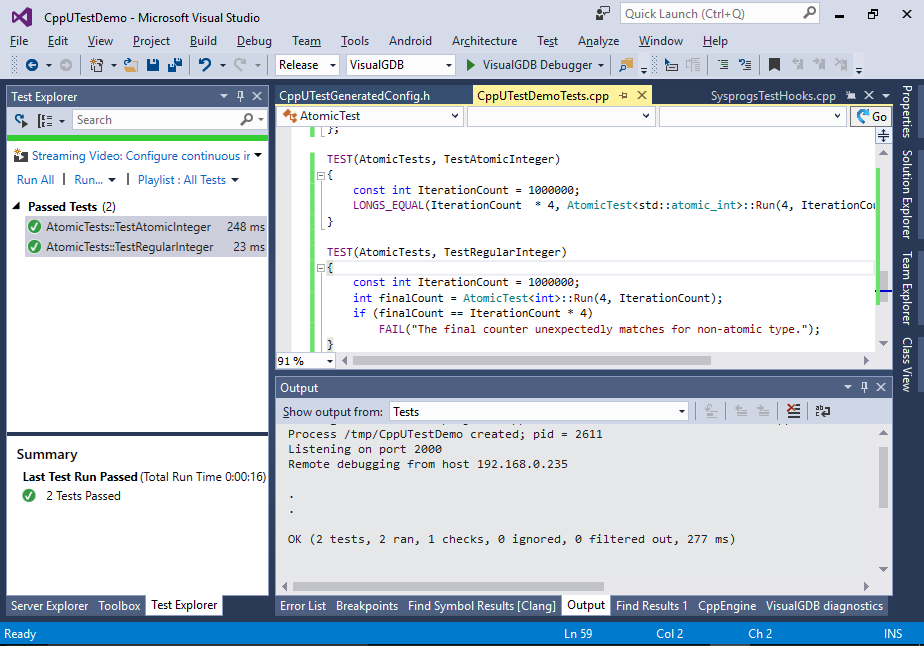
- Now you can build your project and run both tests:
 If the TestRegularInteger fails because it does not reproduce the race condition, try running it on an optimized release build and increasing the number of iterations.
 - CppUTest allows tests in the same group to share common constants and variables. You can declare those variables inside the TEST_GROUP() statement. To do some initialization before each tests in a group runs, define a setup() method inside the the group. In this example we will define an IterationCount constant and set the number of threads to the number of CPU cores active on the target machine:
TEST_GROUP(AtomicTests)
{
    int NumberOfCores;
    const int IterationCount = 1000000;

    void setup()
    {
        NumberOfCores = sysconf(_SC_NPROCESSORS_ONLN);
    }

    void teardown()
    {
    }
};
Note that setup() will be called before each test in the group and each test will have its own instance of NumberOfCores.
- You can rewrite the TestAtomicInteger and TestRegularInteger tests to use the shared information instead of hardcoding it in each of the tests:
TEST(AtomicTests, TestAtomicInteger)
{
    LONGS_EQUAL(IterationCount  * NumberOfCores, AtomicTest<std::atomic_int>::Run(4, IterationCount));
}

TEST(AtomicTests, TestRegularInteger)
{
    int finalCount = AtomicTest<int>::Run(NumberOfCores, IterationCount);
    if (finalCount == IterationCount * NumberOfCores)
    {
        FAIL("The final counter unexpectedly matches for non-atomic type.");
    }
    else
    {
        printf("Regular integer confirmed to be non-atomic: final counter is %d instead of %d\n", finalCount, NumberOfCores * IterationCount);
    }
}
- Finally we will add another test that will fail if we are not running on a 4-core Raspberry Pi 3:
TEST(AtomicTests, CheckCoreCount)
{
    if (NumberOfCores < 4)
        FAIL("Number of online cores too low. Please check your device.");
}
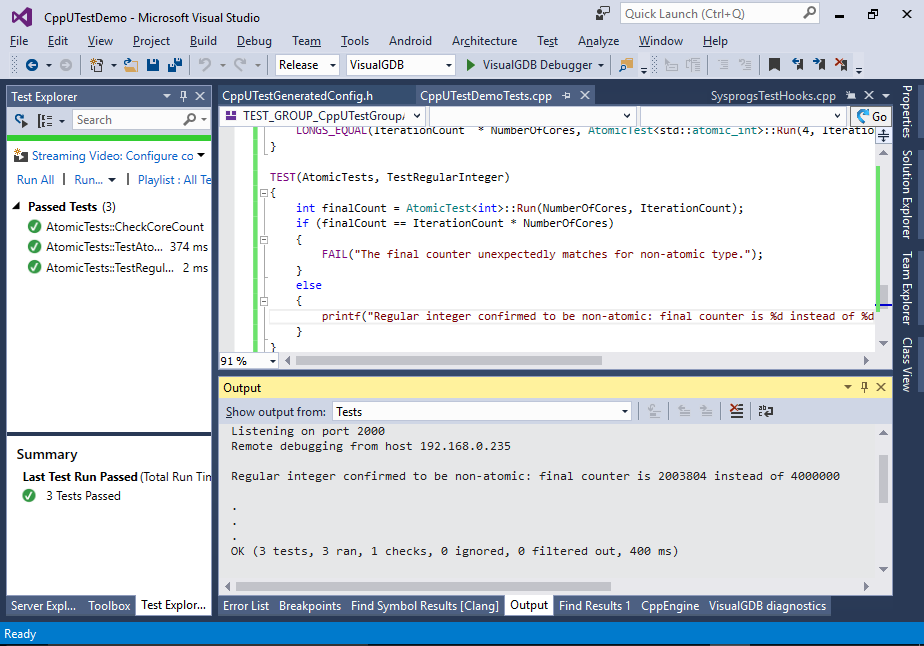
- Now we can build the project and run all the 3 tests:
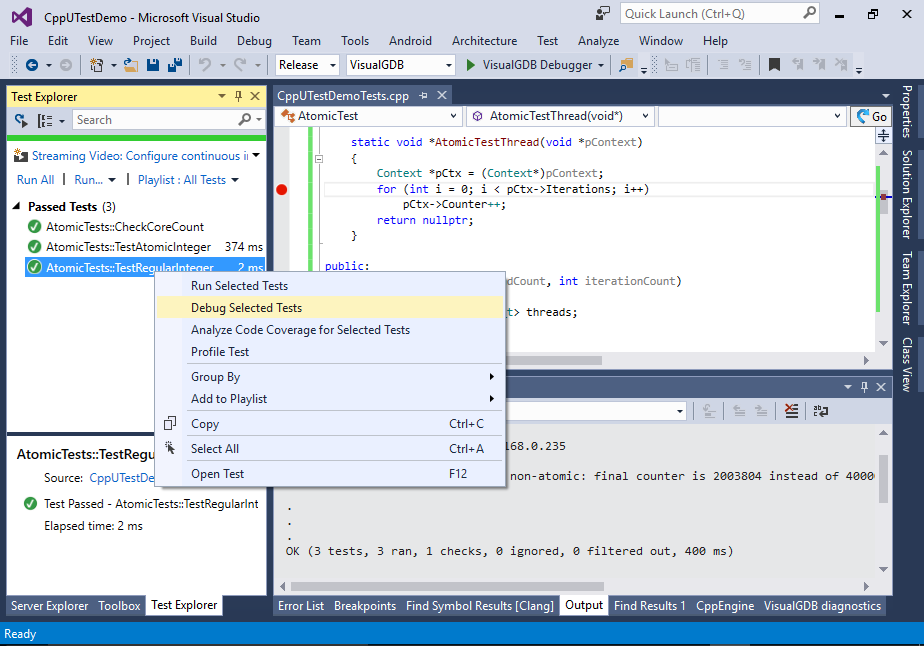
- Now that both atomic and non-atomic version behaves as expected, let’s use the debugger to see the differences between them. Switch to the release mode, set a breakpoint in AtomicTestThread(), right-click on the TestRegularInteger test and select “Debug Selected Tests”:
- Once the breakpoint hits, switch to the Disassembly view. You will see that the ‘++’ operator got expanded into 3 operations:
- Reading memory contents to register
- Incrementing the register value
- Writing it back
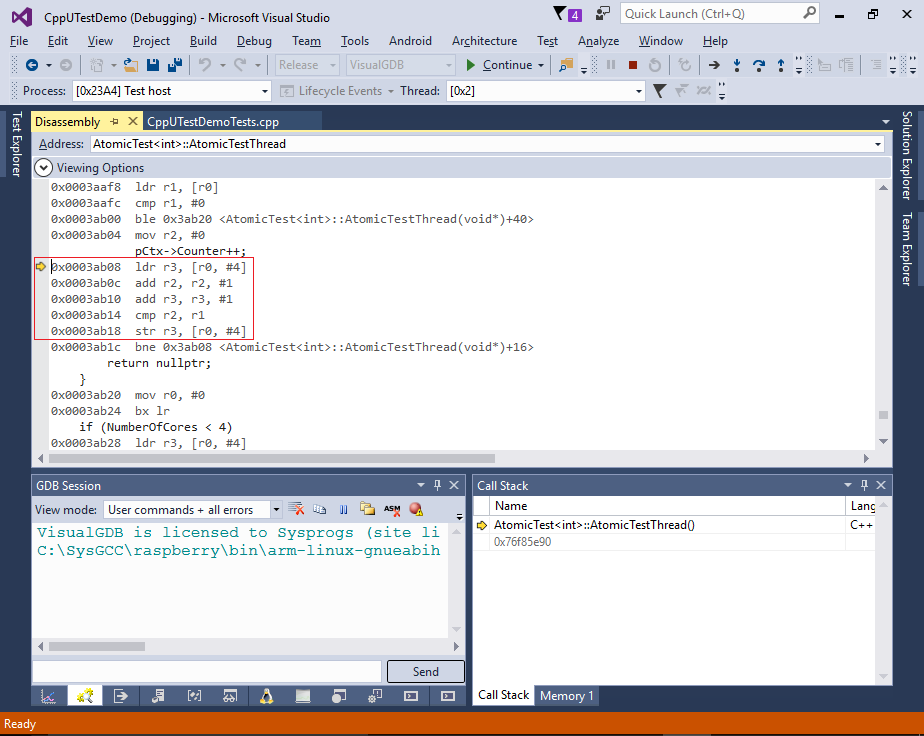 This can easily cause a race condition and result in an invalid value, e.g.
- Thread A reads value = 0
- Thread B reads value = 0
- Thread A increments the value (0 => 1)
- Thread A writes the new value (1)
- Thread B increments the value (0 => 1)
- Thread B writes the new value (1)
Instead of 2 (expected after 2 increments) the counter will have a value of 1.
- Repeat the same steps for the TestAtomicInteger test:
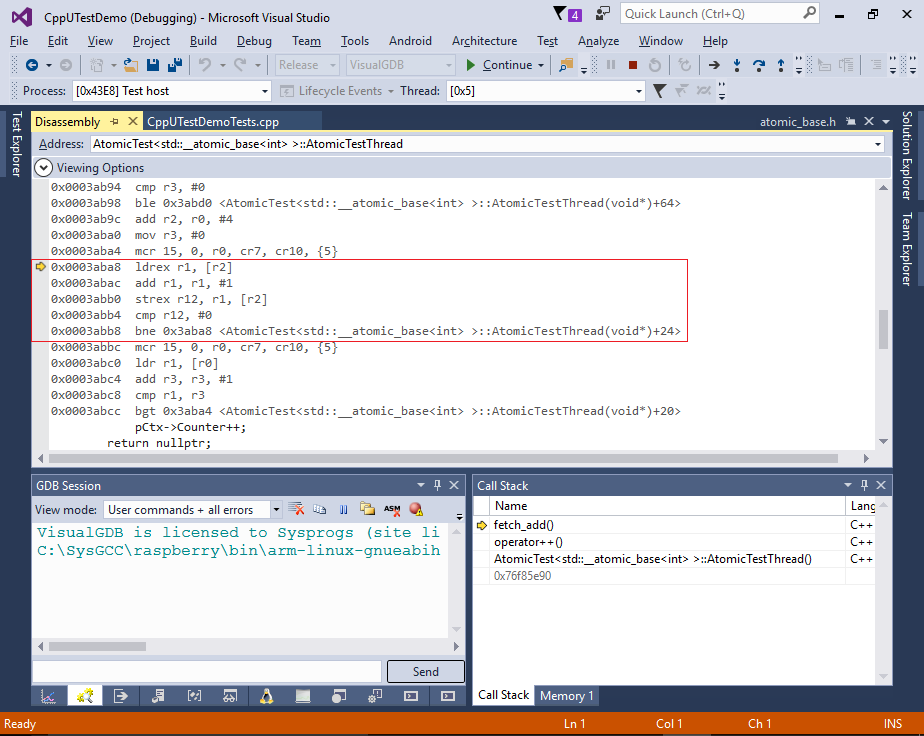 The disassembly window shows that the “++” operator was expanded to a load-link/store-conditional instructions. These instructions check if any other core has modified the same value between the load and store operations. If a modification is detected, the store is aborted and the entire increment operation is repeated until it runs without any other core interfering.
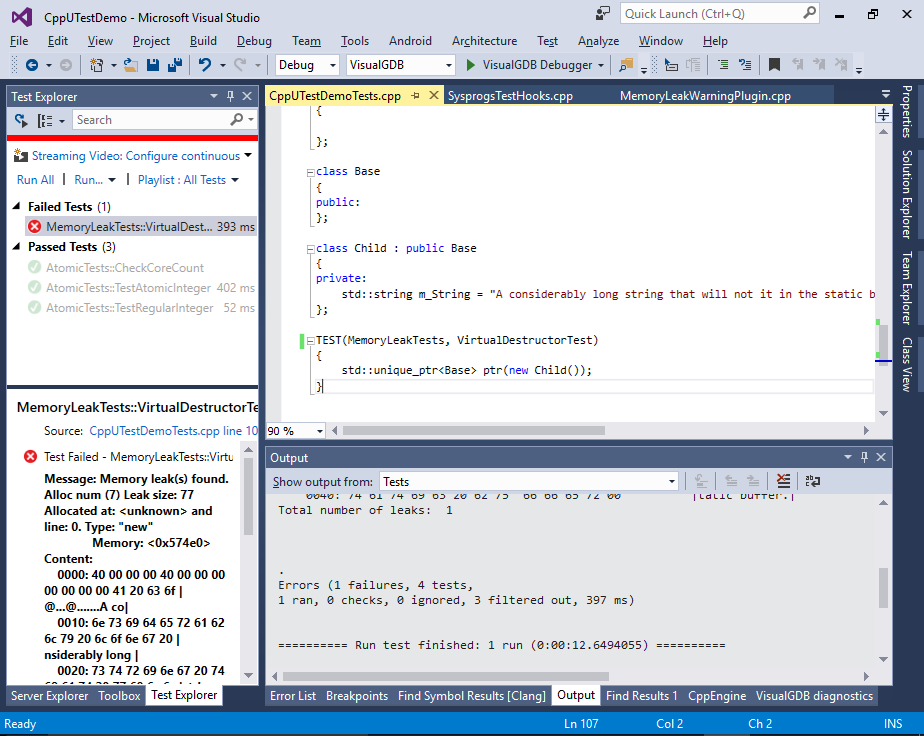
 - Now we will show how to use CppUTest to detect memory leaks. Add the following test to your source file:
#include <memory>

TEST_GROUP(TestGroup2)
{

};

class Base
{
public:
};

class Child : public Base
{
private:
    std::string m_String = "A considerably long string that will not it in the static buffer";
};

TEST(TestGroup2, BasicTest)
{
    std::unique_ptr<Base> ptr(new Child());
}
This test creates an instance of the Child class and deletes it using the pointer to the Base class. As the Base class does not declare a virtual destructor, the code deleting it has no way of detecting that it’s actually deleting an instance of Child and that it should call the destructor of m_String.
- Run the new test. CppUTest will report a memory leak:
- Add a virtual destructor to the Base class, build the project and ensure that the test no longer fails:

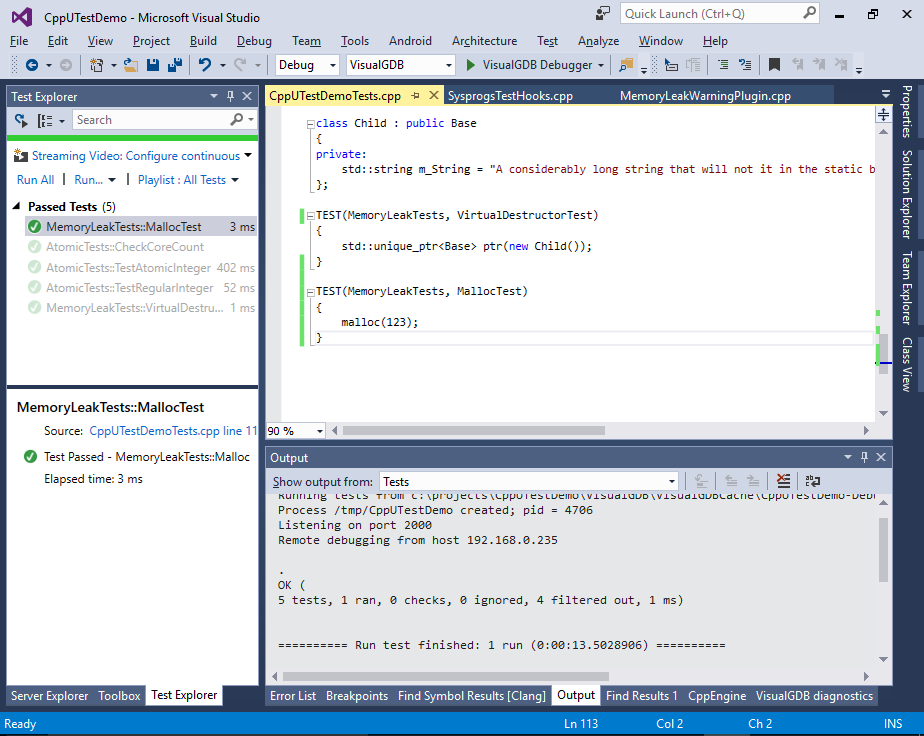
- Finally we will show how to use CppUTest to detect leaks related to the malloc() and free() functions. Normally it won’t catch those leaks, so the following basic test will succeed despite causing a memory leak:
TEST(MemoryLeakTests, MallocTest)
{
    malloc(123);
}
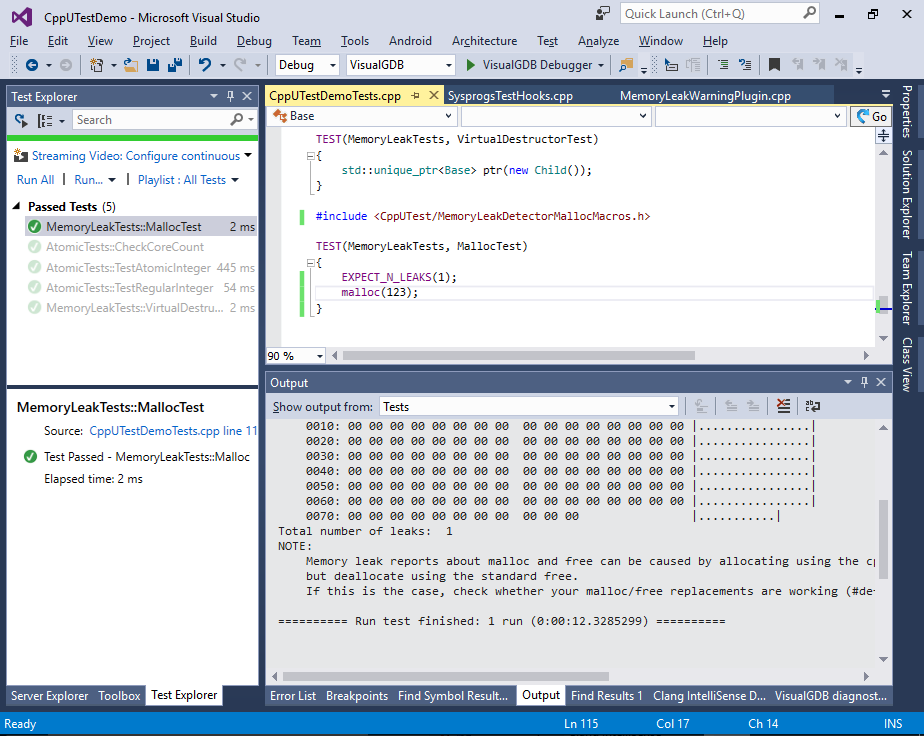
 To fix that, insert the following line before any calls to malloc() and free():
 -
#include <CppUTest/MemoryLeakDetectorMallocMacros.h>Now the leak will be detected properly:

- You can tell CppUTest to ignore the leak in this test by inserting the following line:
EXPECT_N_LEAKS(1);
The leak will be still reported, but it will not cause the test to fail:
 You can use VisualGDB to create unit tests for Linux, Android and Embedded projects. It supports CppUTest and GoogleTest frameworks out-of-the-box and provides a separate TinyEmbeddedTest framework optimized for small embedded devices.


