Using WiringPi library with Raspberry PI cross-compiler
This tutorial shows how to develop a blinking LED project for Raspberry Pi in Visual Studio using the WiringPi library and our cross-toolchain.
Before we begin, ensure that VisualGDB is installed.
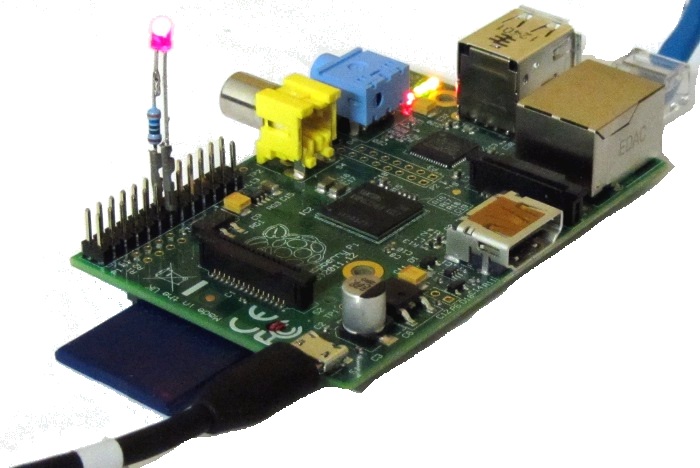
- If you do not have a LED prepared to connect to the expansion connector on the Raspberry Pi, please follow the steps 1-8 of our other blinking LED tutorial to prepare and connect a LED.
- Now create a basic Raspberry Pi cross-compilation project with VisualGDB by following this tutorial. If you are familiar with the classic Visual Studio C++ projects, we recommend using MSBuild (shown in this tutorial). Otherwise, try using Advanced CMake.
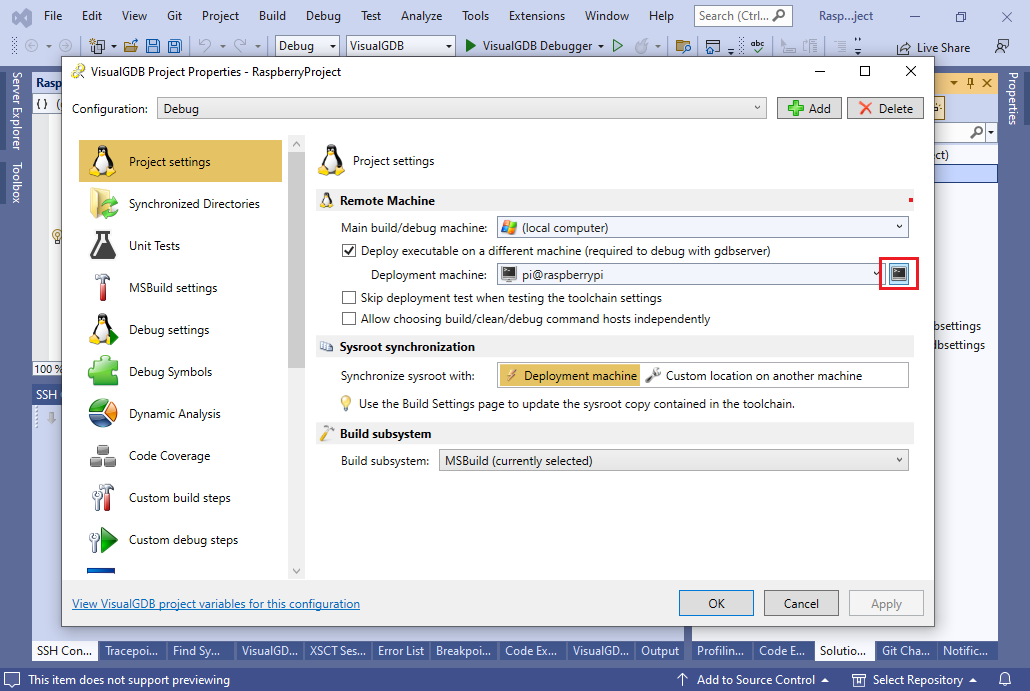
- Next we install the wiringPi library on the Raspberry. Open VisualGDB Project Properties -> Proejct Settings, locate the Deployment Machine setting and click the console button next to it:
- We follow the official installation steps.
sudo apt-get install git-core
git clone https://github.com/WiringPi/WiringPi
cd WiringPi
./build
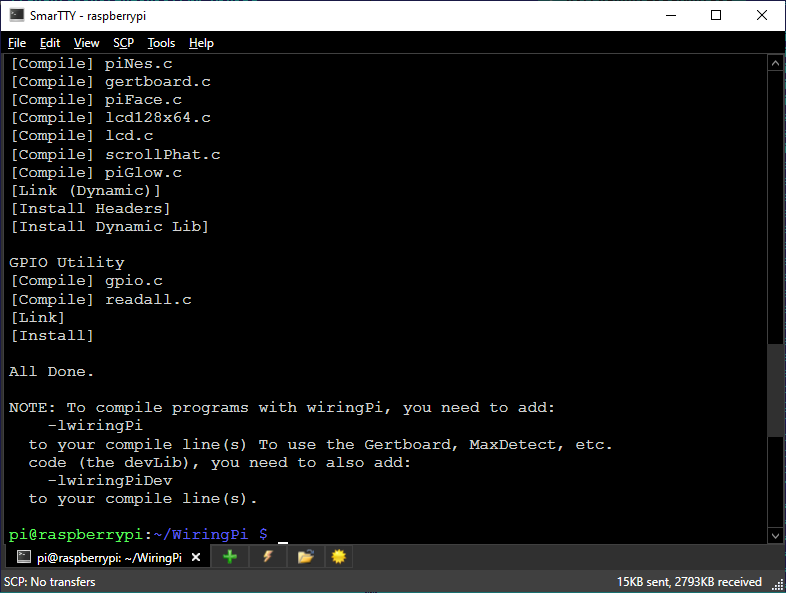 This will build all the necessary files and install the libraries and include files into the corresponding directories on your Raspberry PI. The next step would be to import them to the cross-compiler.
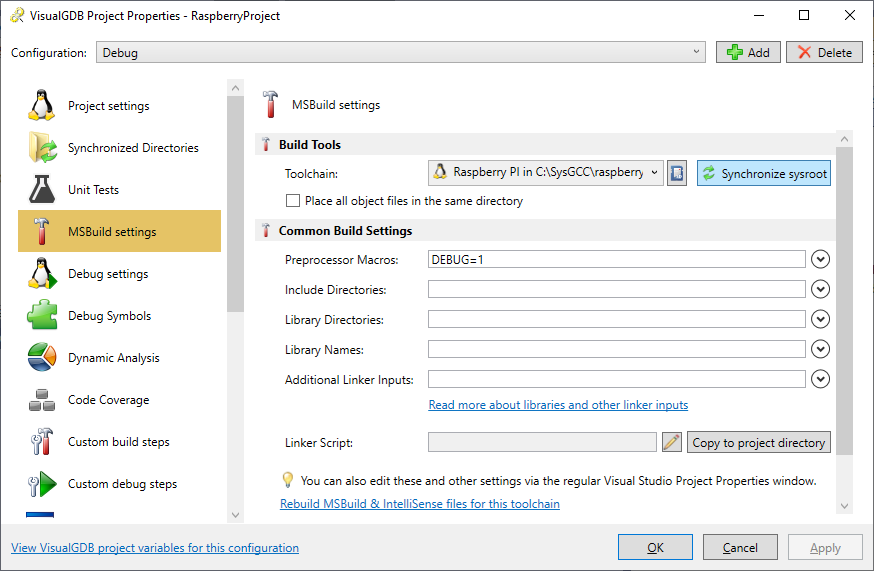
 - Go back to Visual Studio. Right-click on the project in Solution Explorer and choose VisualGDB Project Properties. Go to the MSBuild Settings (or CMake Build Settings page if you are using CMake) and click “Synchronize Sysroot”:
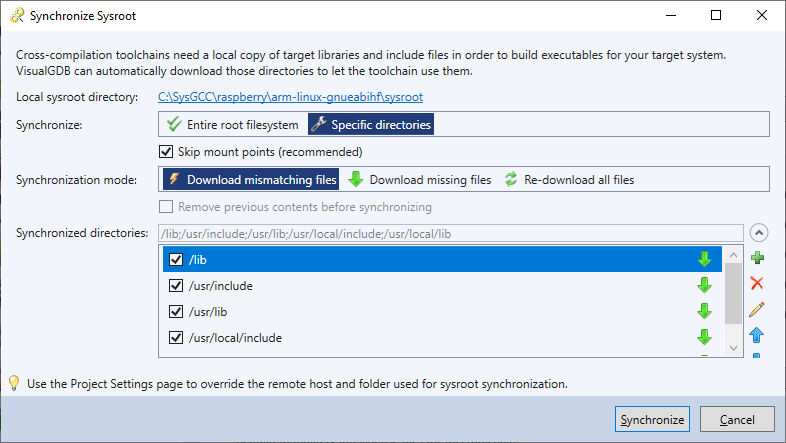
- This will download the include and library directories from your Raspberry PI to the corresponding directories in the cross-compiler toolchain so that the cross-compiler can use your newly installed wiringPi library:
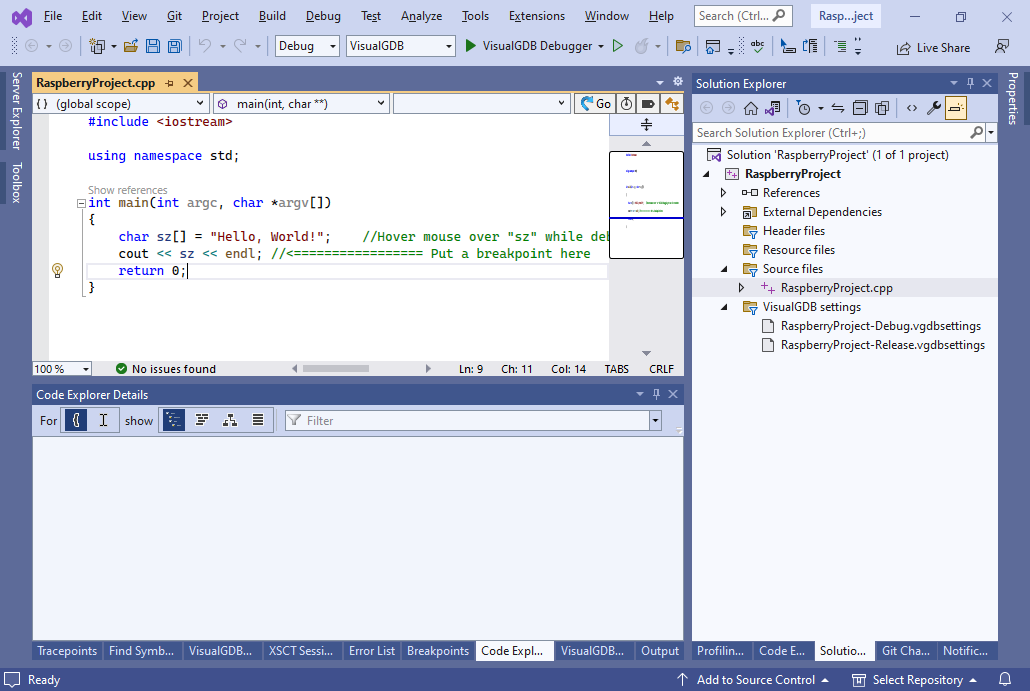
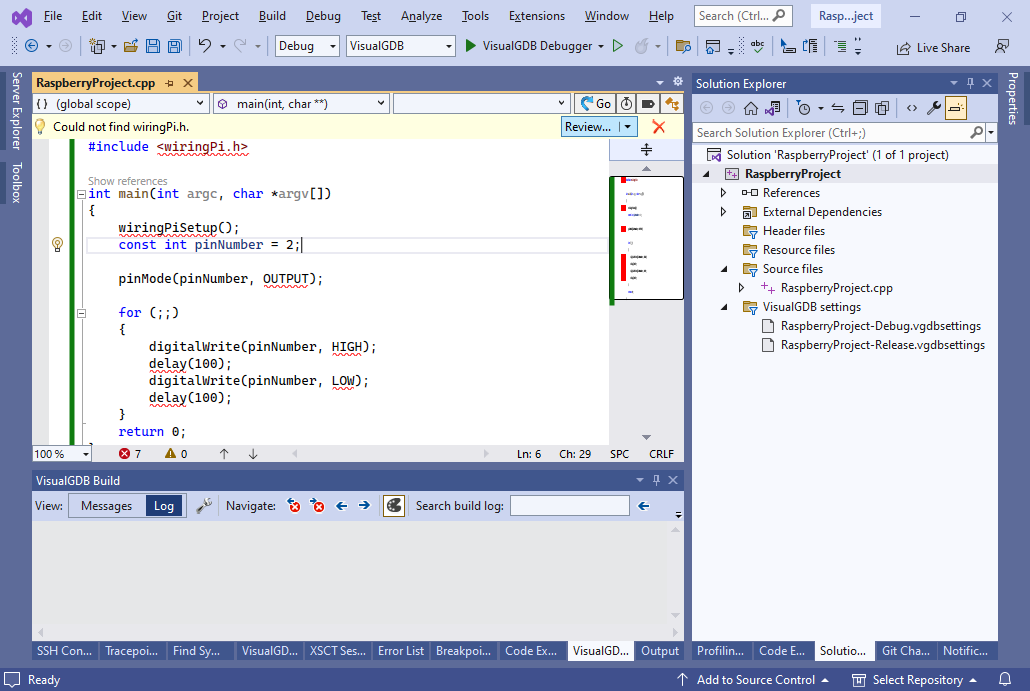
- In order to use wiringPi in your application, you would need to reference the =/usr/local/include header directory (‘=’ refers to the toolchain’s sysroot) and the wiringPi library. Although you can do it directly via VisualGDB Project Properties or MSBuild/CMake Properties, in this tutorial we will show how to let VisualGDB discover the missing dependencies automatically. Replace the source with the following.
#include <wiringPi.h>

int main(int argc, char *argv[])
{
    wiringPiSetup();
    const int pinNumber = 2;

    pinMode(pinNumber, OUTPUT);

    for (;;)
    {
        digitalWrite(pinNumber, HIGH);
        delay(100);
        digitalWrite(pinNumber, LOW);
        delay(100);
    }
    return 0;
}
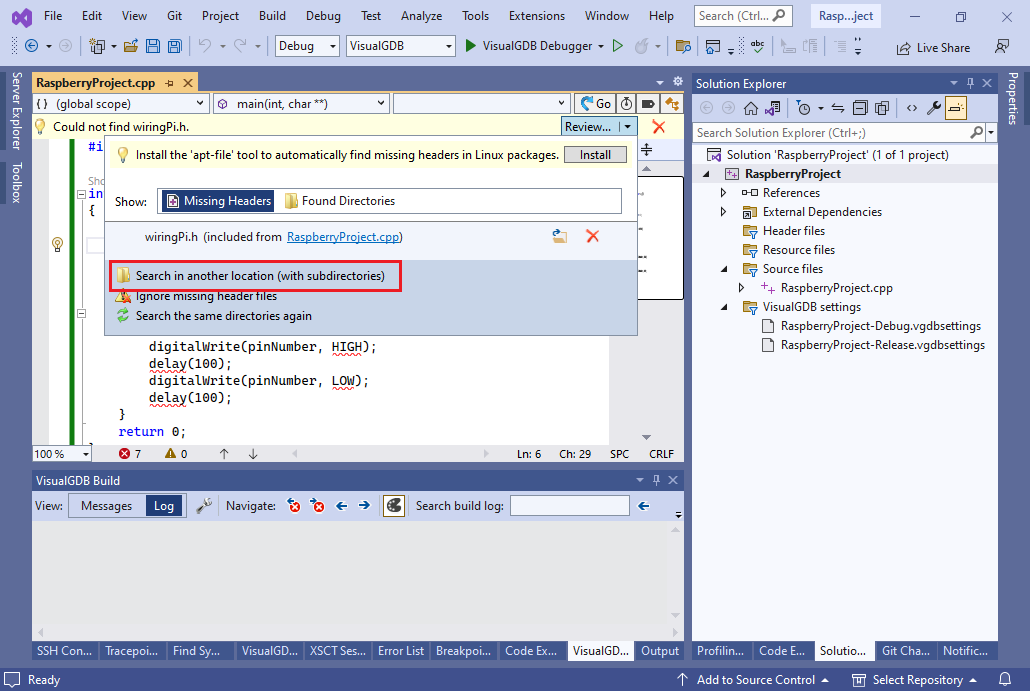
- VisualGDB will immediately report that wiringPi.h is missing. Click the Review button:
- In the header discovery popup, click “Search in another location” and point VisualGDB to the toolchain directory (e.g. c:\SysGCC\raspberry):
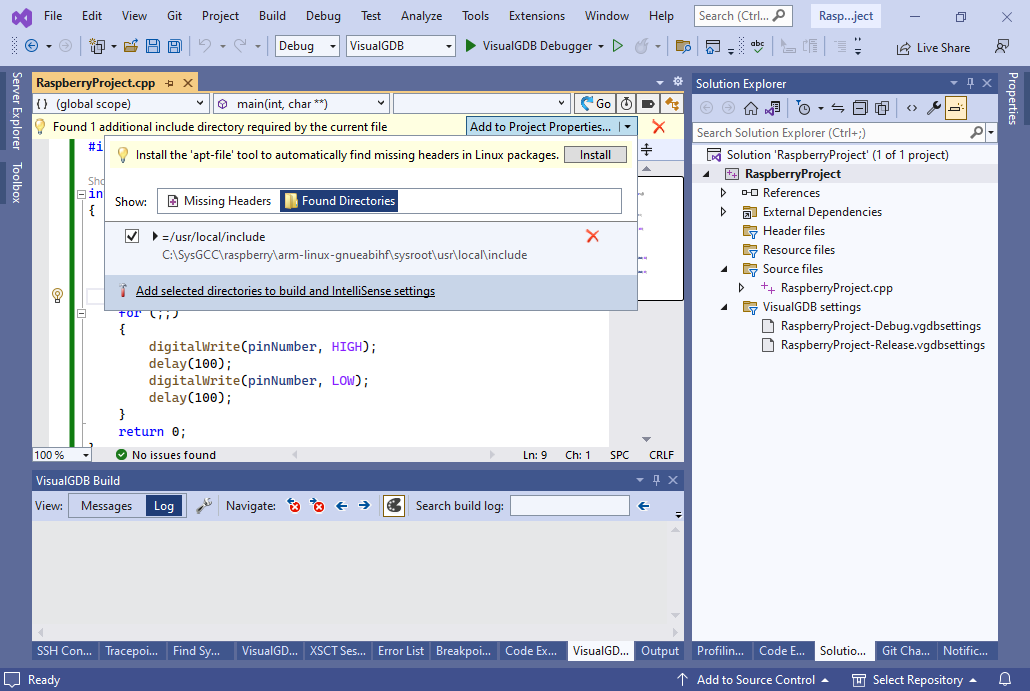
- VisualGDB will discover the missing file in <sysroot>/usr/local/include and will suggest referencing it. Click “Add selected directories” to automatically fix the project:
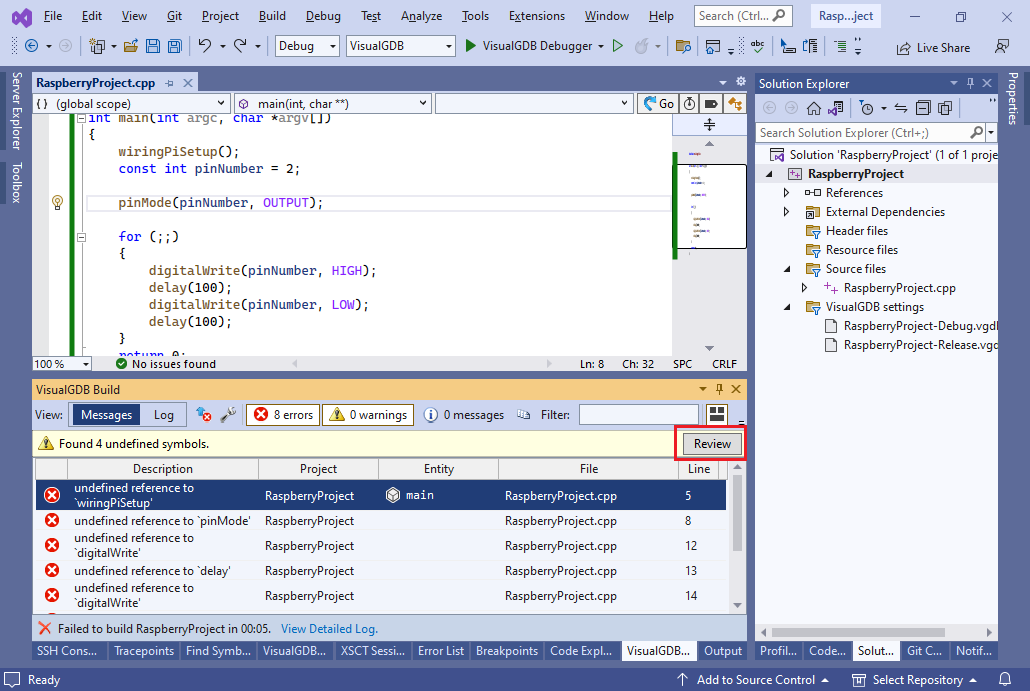
- Try building the project. It will complain about missing wiringPiSetup() and a few other functions. Click “Review”:
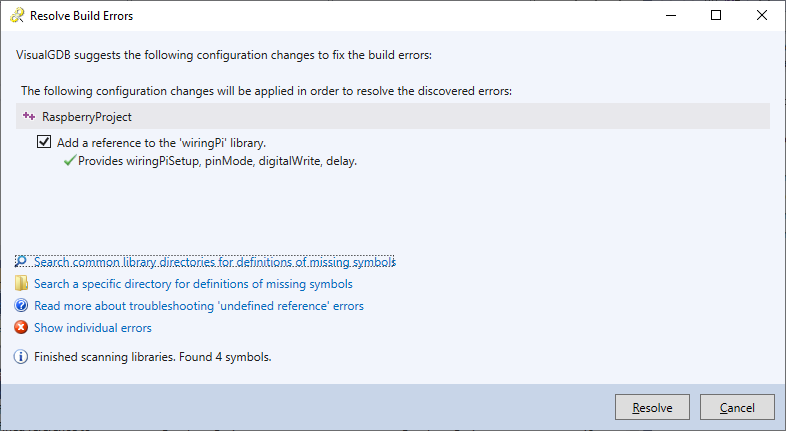
- VisualGDB will show a list of missing symbols and will offer several troubleshooting options. Click “Search common library directories“:
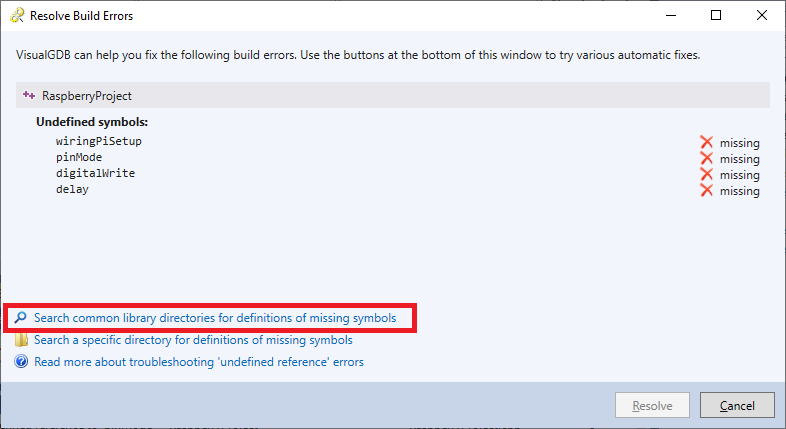
- VisualGDB will successfully locate the wiringPi library that provides the missing symbols. You can reference it automatically by clicking “Resolve”:
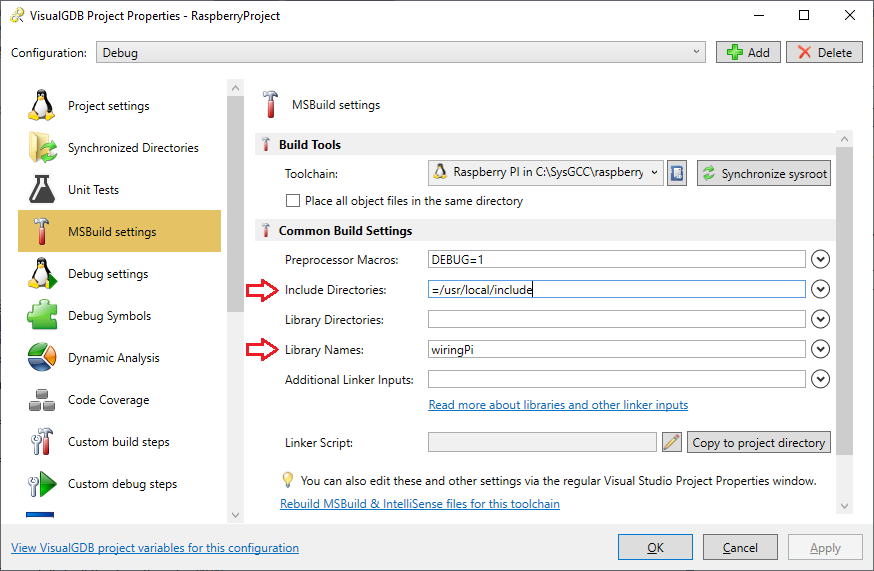
- You can review or modify the settings that were just discovered via VisualGDB Project Properties (MSBuild and GNU Make projects):
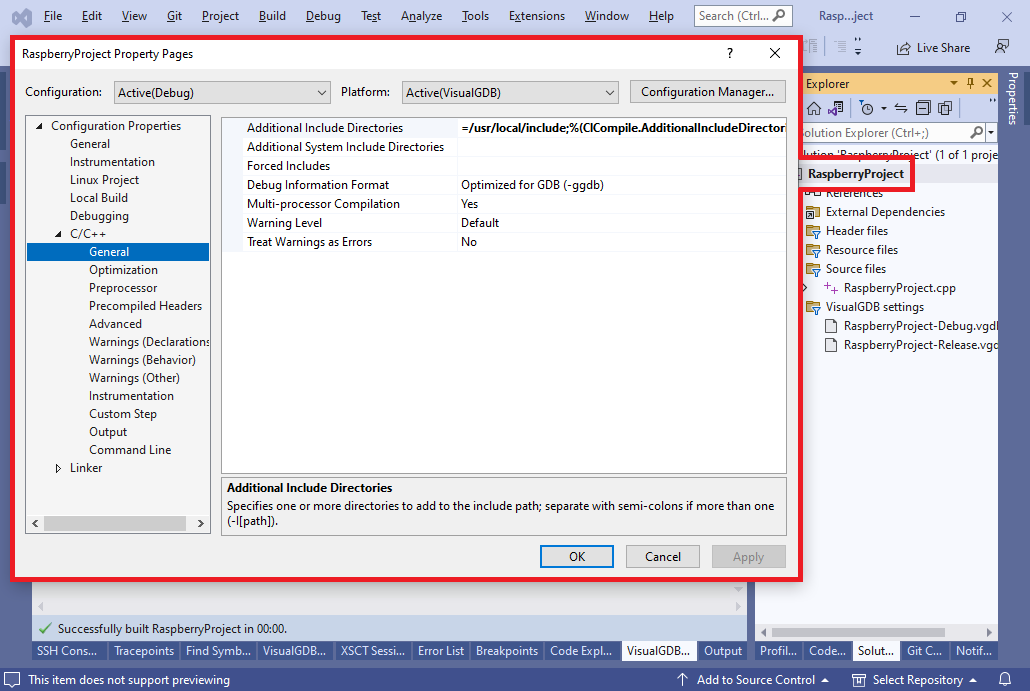
- Another option would be to use VS project properties (MSBuild and CMake projects):
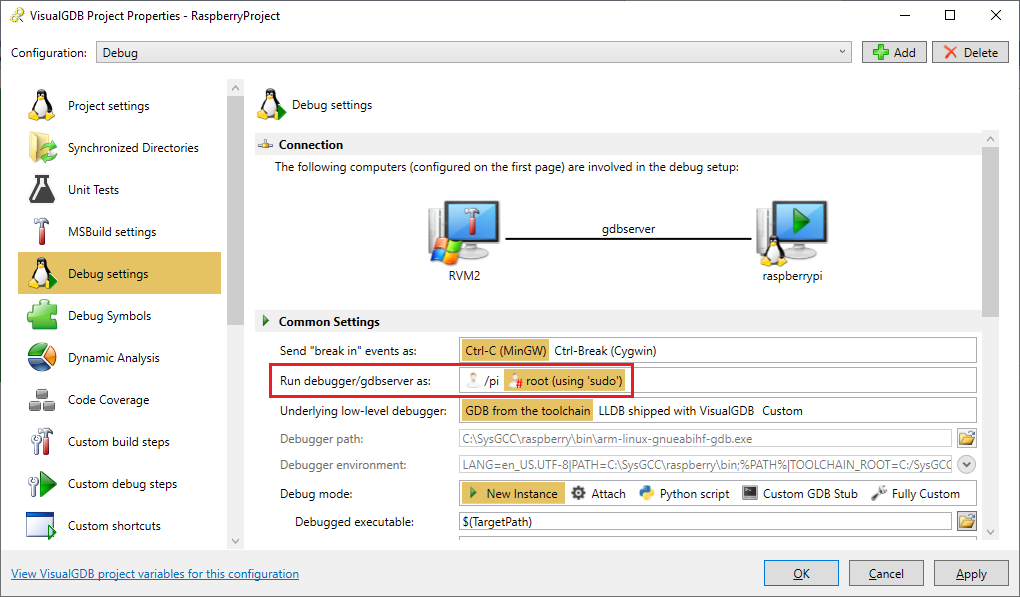
- If your Raspberry Pi does not allow accessing hardware from the regular user account, you can configure VisualGDB to run the program as root via VisualGDB Project Properties -> Debug Settings:
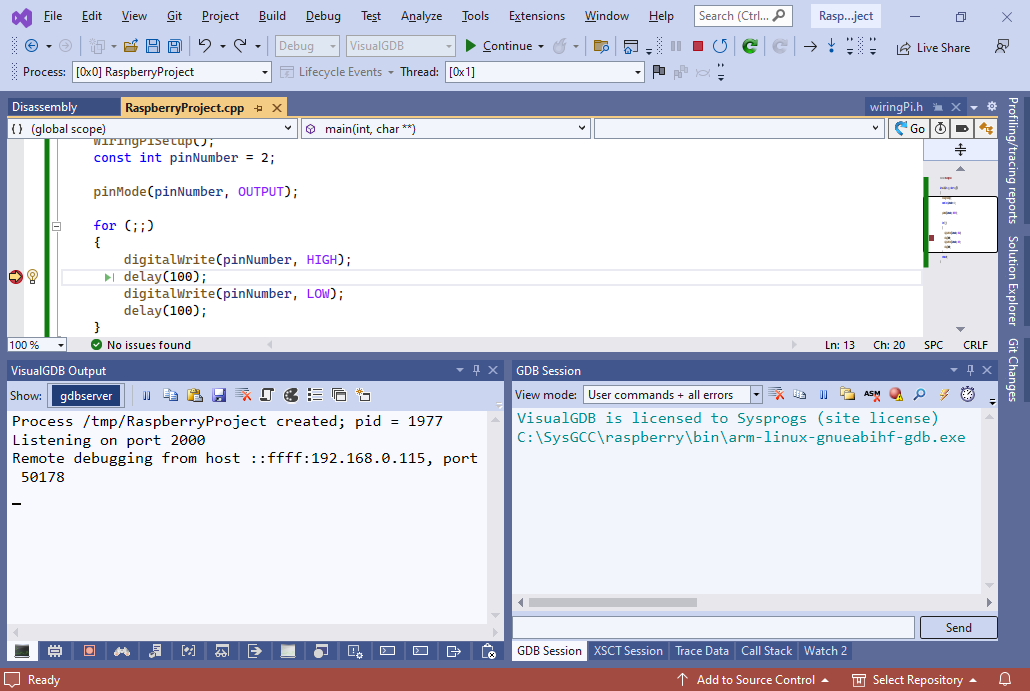
- Set a breakpoint as shown and start debugging. Step through the code and watch how the LED turns on and off: