Simplifying Library Development with Exported Settings
This tutorial shows how to use the new Exported Settings feature of VisualGDB MSBuild projects to simplify the use of library projects. We will show how to avoid manually adding include directories and extra libraries to all projects referencing your library project to save time and avoid mistakes.
Before you begin, install VisualGDB 5.2 or later.
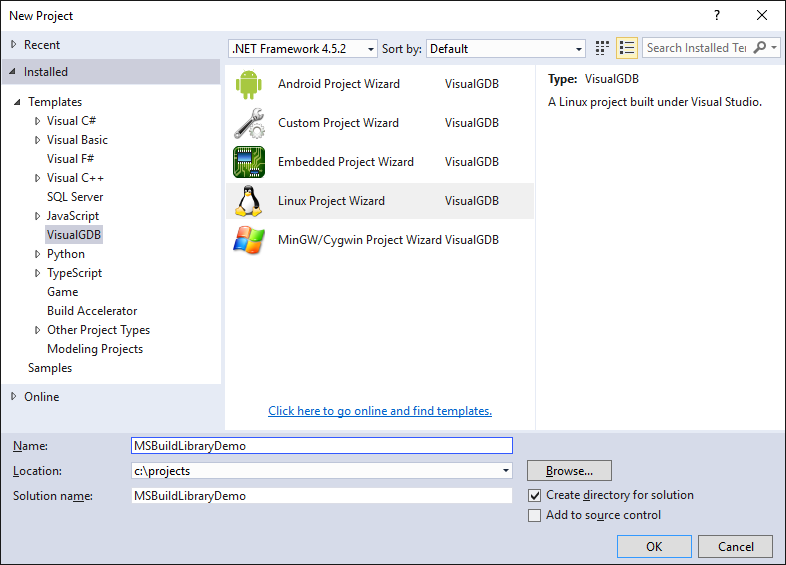
- Start Visual Studio and open the VisualGDB Linux Project Wizard. The steps below will also work for Embedded projects as long as you are using MSBuild:
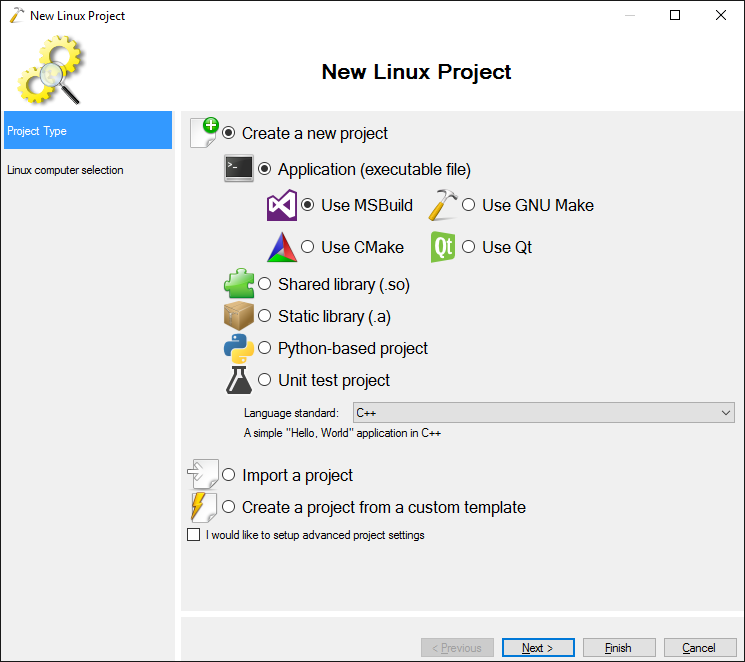
- First we will create a normal application project that will use our library, so select “New project -> Application -> MSBuild”:
- On the next page select your target computer. The steps described below will work for both remotely built projects and projects built with cross-toolchains:
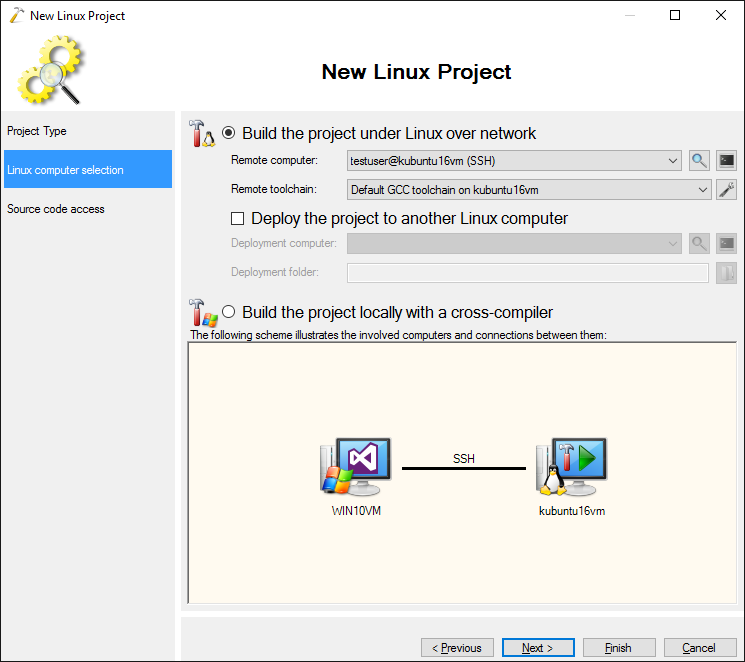
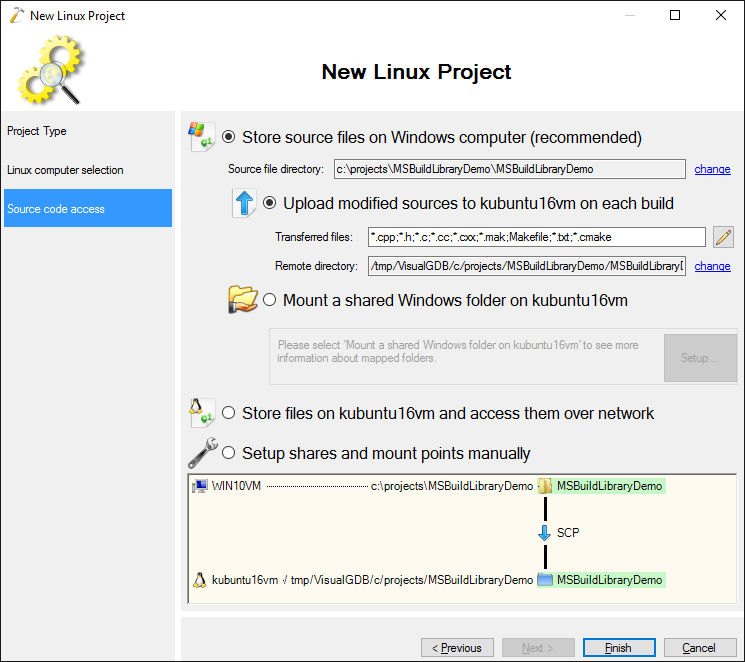
- If you are building the project remotely, specify where to store the source files on the remote machine:
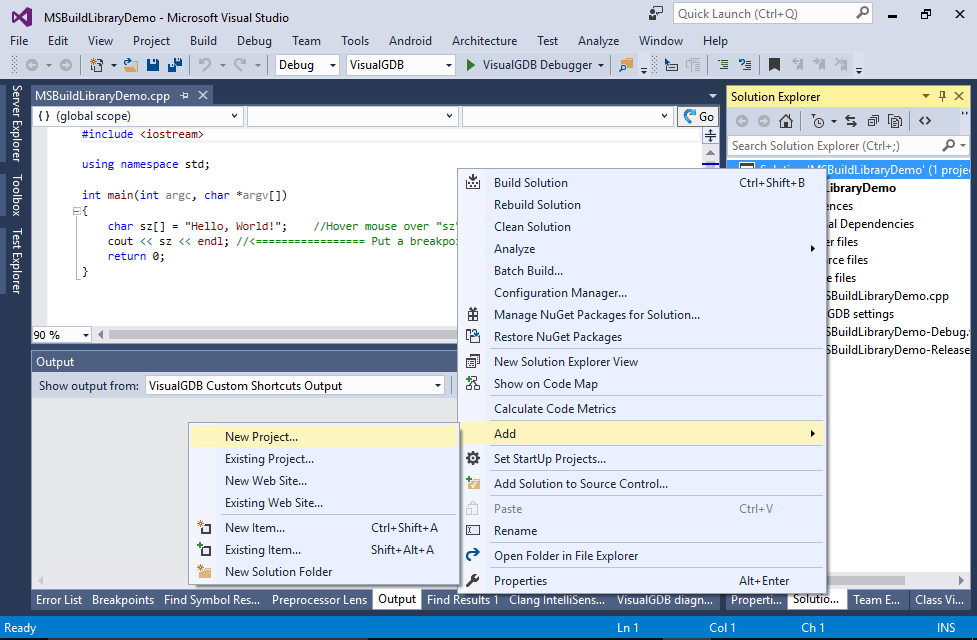
- Press “Finish” to create the project. Now we will add the library project. Right-click in Solution Explorer and select Add->New Project:
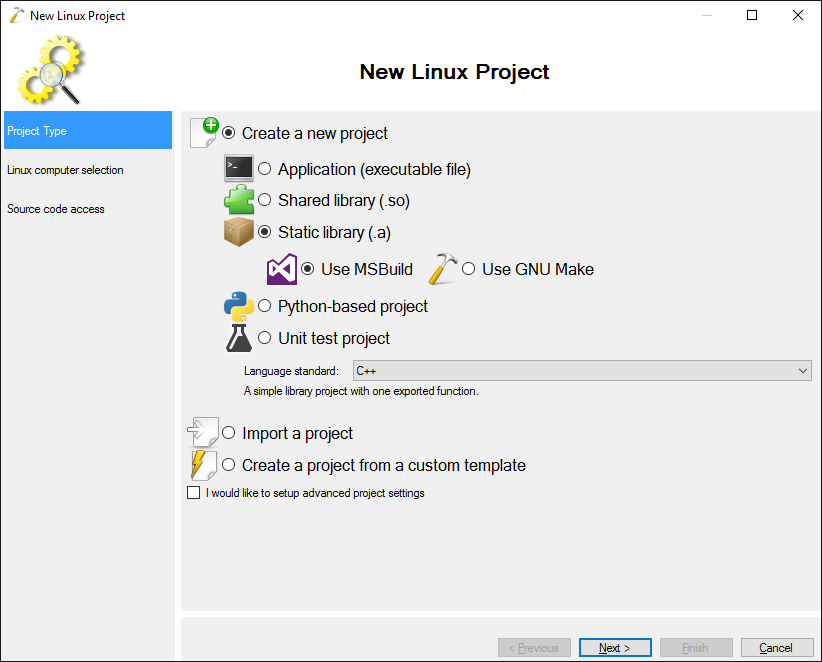
- Select “New Project -> Static Library” and repeat the rest of the wizard steps you did when creating the main project:
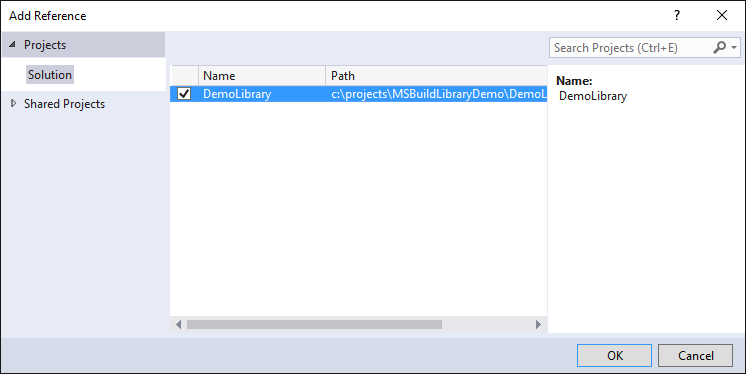
- Add a reference from the main application project to the library project:
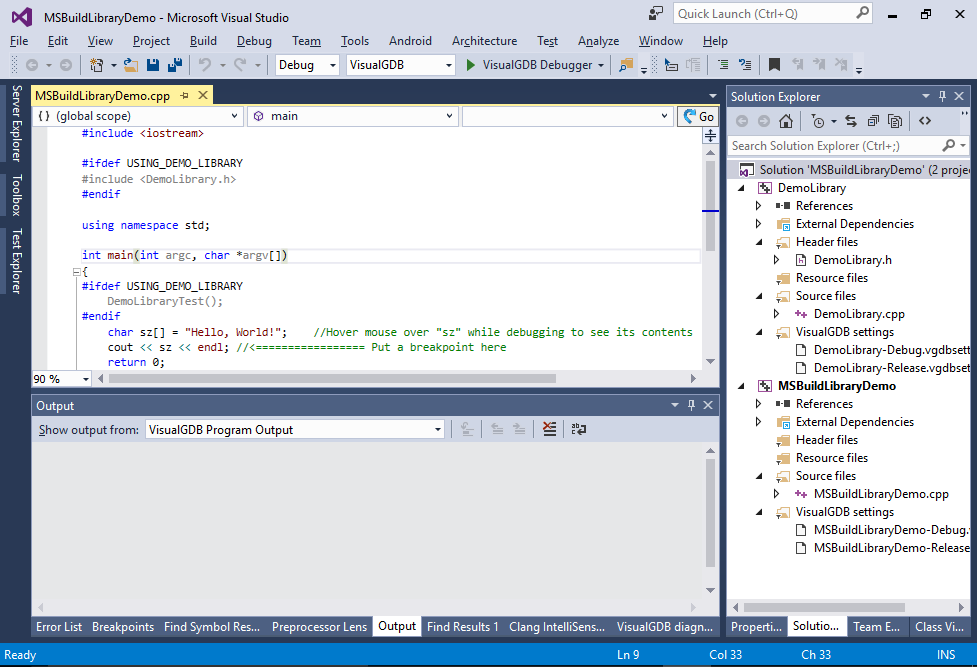
- The library project defines a demo function called DemoLibraryTest() in DemoLibrary.h. Try including DemoLibrary.h from your main project to use this function:
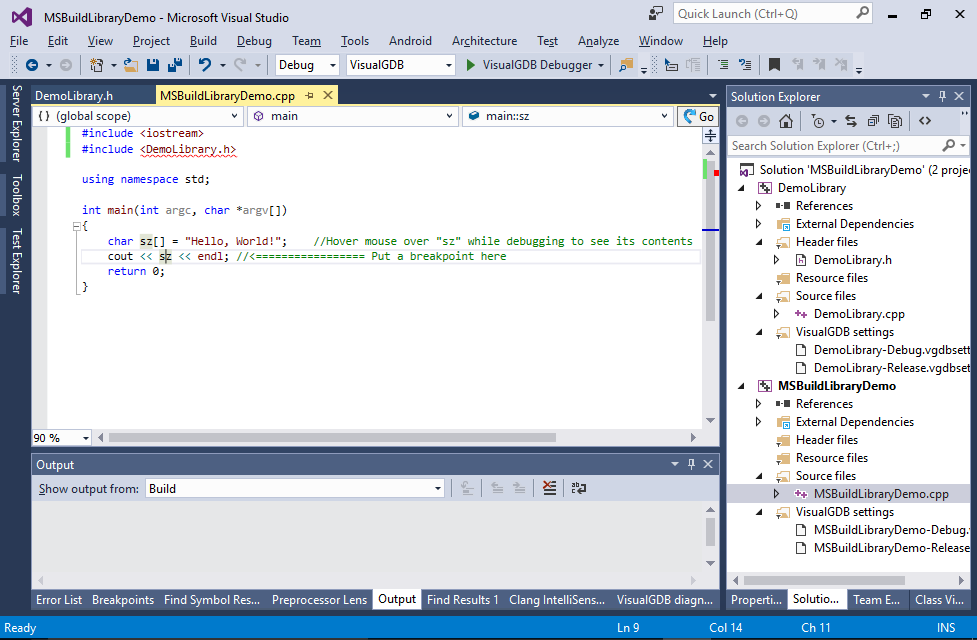 Despite referencing the project, this will result in an error, as project references normally only affect linking, but not compilation.
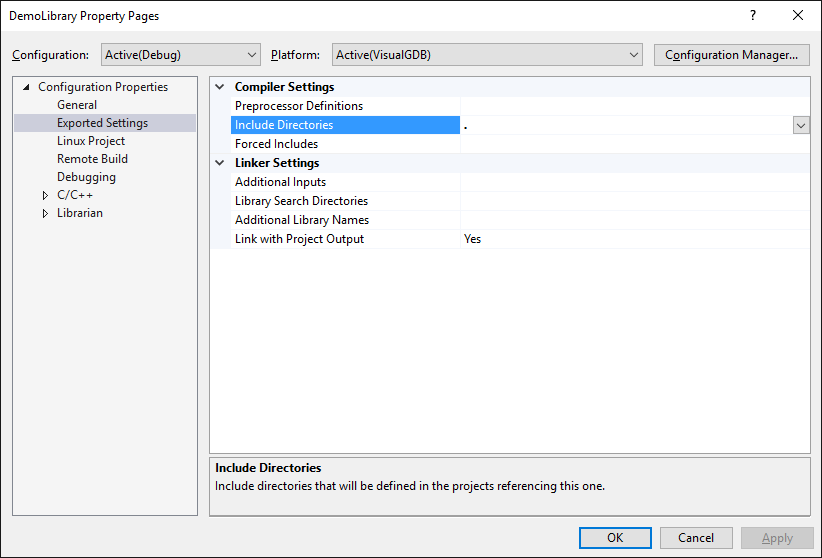
 - On regular Visual Studio projects, the solution would be to manually add the directory of the library project to the application project’s include directories. You would need to repeat that for each project referencing your library. VisualGDB offers a simpler solution: open the Visual Studio project properties for the library project and go to the Exported Settings page. Then add “.” to the Include Directories field:
- If you build the project now, it will succeed:
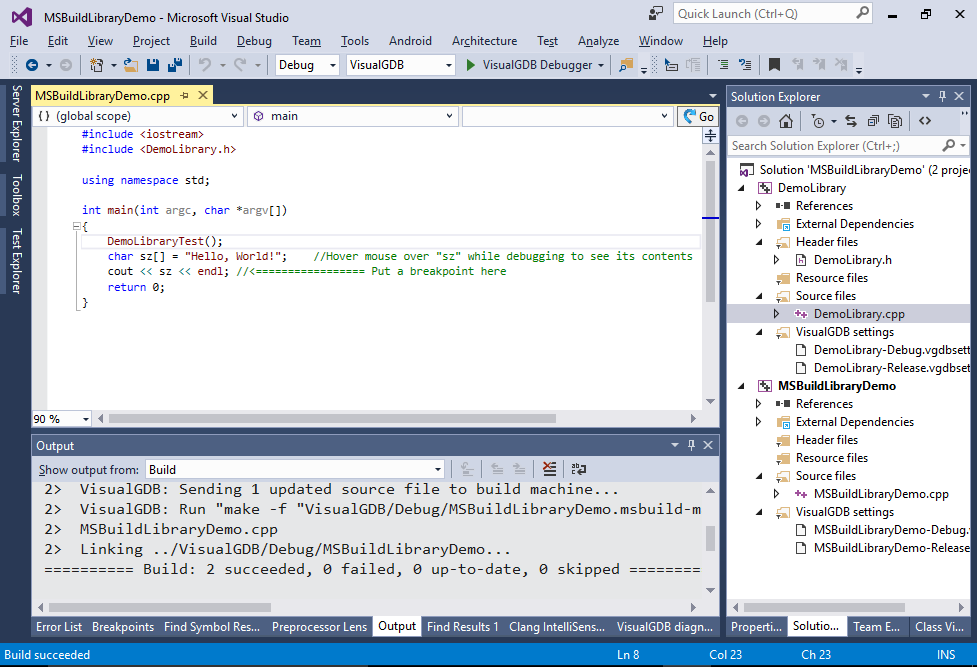 Note that we did not need to change anything in the application project except for adding a reference. If you have several projects referencing your library and want to change the include directories it exports, you only need to do this once for the library project itself.
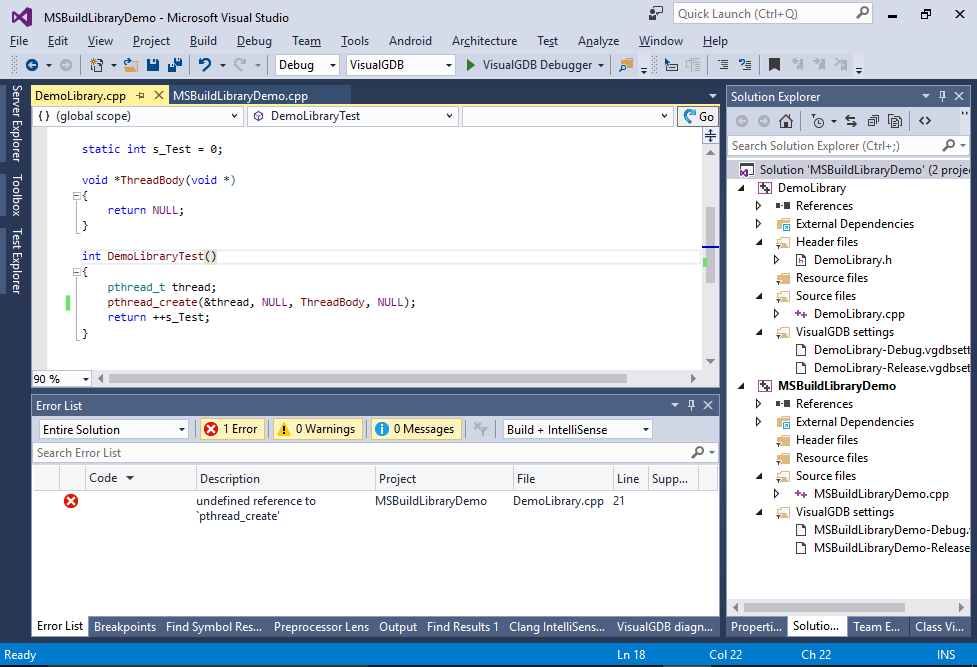
 - Modify DemoLibraryTest() to call the pthread_create() function:
#include <pthread.h>

void *ThreadBody(void *)
{
    return NULL;
}

int DemoLibraryTest()
{
    pthread_t thread;
    pthread_create(&thread, NULL, ThreadBody, NULL);
    return ++s_Test;
}
Note how this results in a link error because of a missing reference to libpthread:
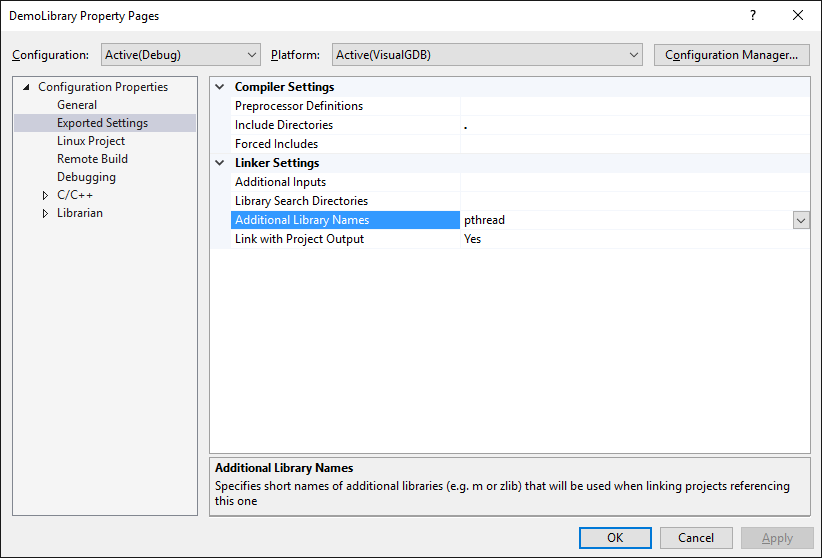
- A normal solution would be to add “pthread” to library list of each application that uses your library. With the new exported settings feature you can add it just once on the Exported Settings page and all referencing projects will automatically pick it up:
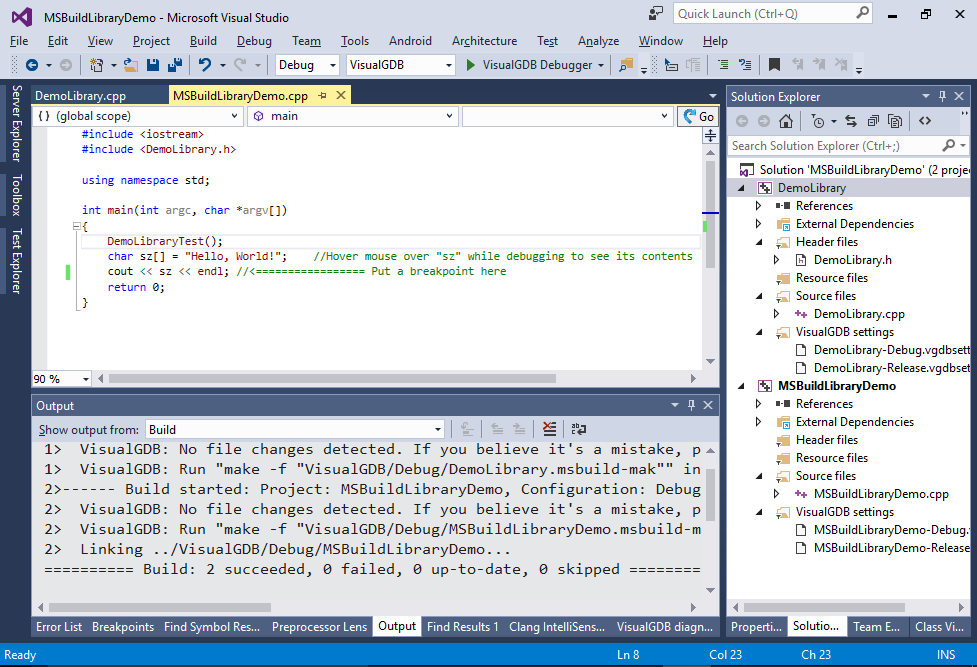
- The build will now succeed without having to modify the application again:
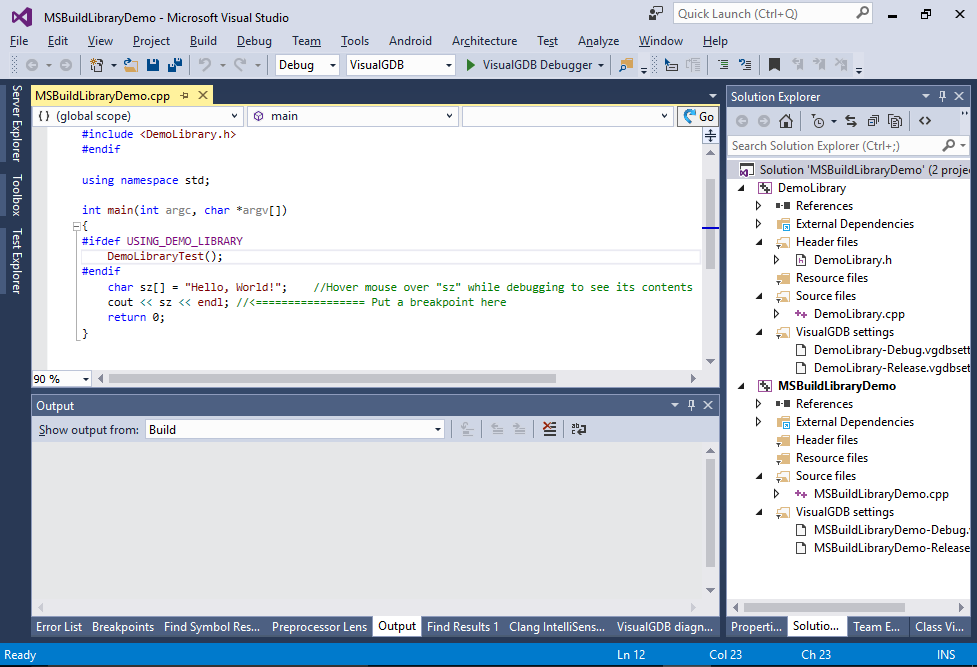
- You can also use this mechanism to export preprocessor macros. E.g. you can add USING_DEMO_LIBRARY macro to each of the projects referencing your library:

- You can use the macro to make the library-dependent code conditional:
- Removing the reference to the library will automatically remove the USING_DEMO_LIBRARY macro and stop the main application from using the functionality from the library: