Building and Debugging the hello-neon Project with VisualGDB
This tutorial shows how to build and debug the hello-neon sample project provided by Android NDK.
Before we begin, ensure that VisualGDB 2.0 or later is installed with the Android Edition.
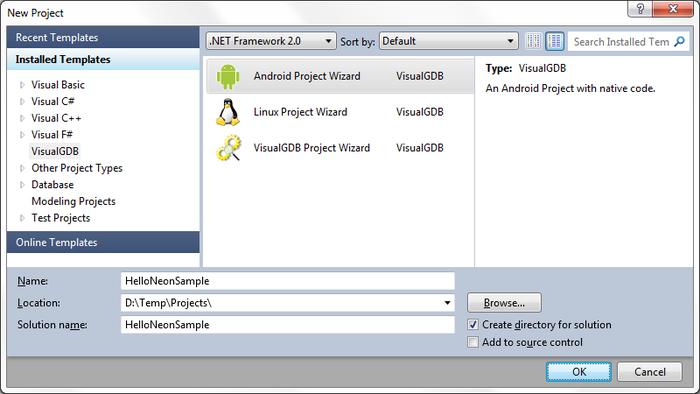
- Start Visual Studio. Go to File->New->Project. Choose VisualGDB->Android Project Wizard. Choose the name and location for the project as you wish.
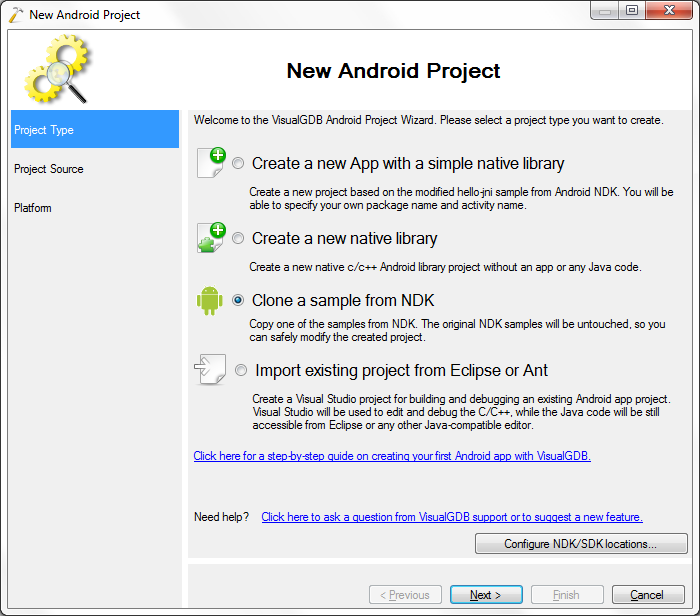
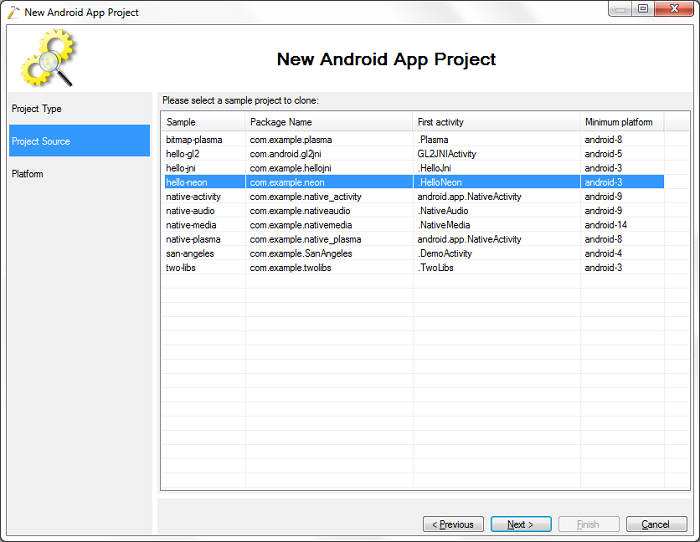
- For this tutorial we are going to copy a sample from the NDK.
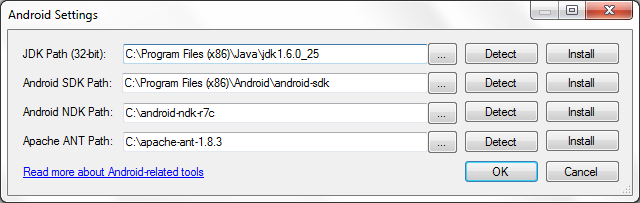
- If you have not made any Android projects with VisualGDB before, press on ‘Configure NDK/SDK locations’. There either browse to the needed tools or development kits or start installing them.
- Press ‘Next’ in the wizard. Choose the hello-neon sample project.
- Press ‘Next’. Choose an Android platform 3 or higher. Choose the option of multiple libraries. Press ‘Finish’.
The option ‘The JNI Folder folder contains multiple libraries’ needs to be selected as the Android.mk file for this project includes the source files separately.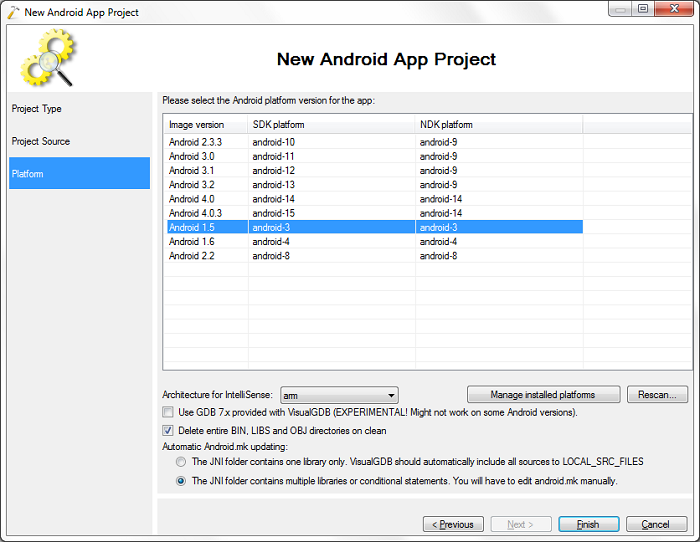
- Connect a device with armeabi-v7a or start a virtual device with ABI armeabi-v7a (Android 4.0 or later).
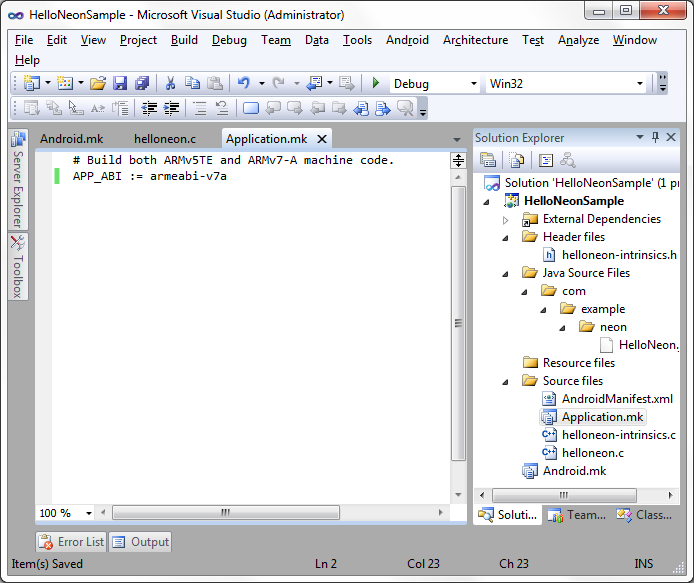
- If the app reports that it has no ARMv7 support although the device supports it, modify the Application.mk file to have only the armeabi-v7a target. Note that if you have already built the app, please delete the bin, obj and libs subfolders after you have modified Application.mk.
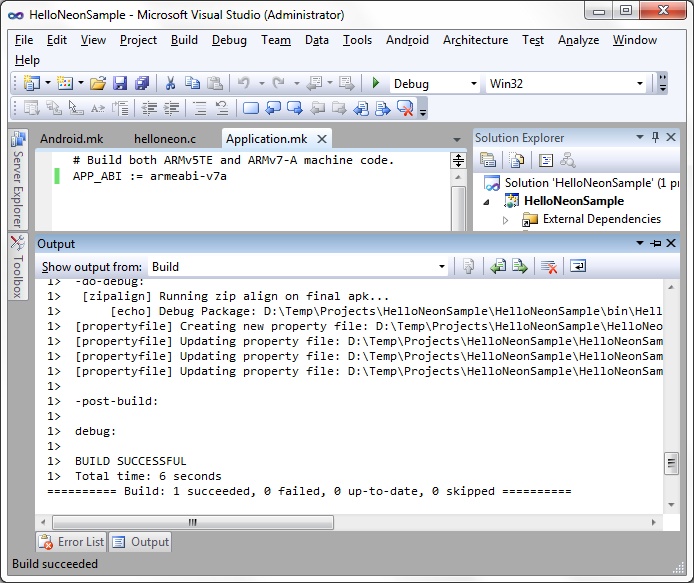
- Build the project by going to Build->Build Solution.
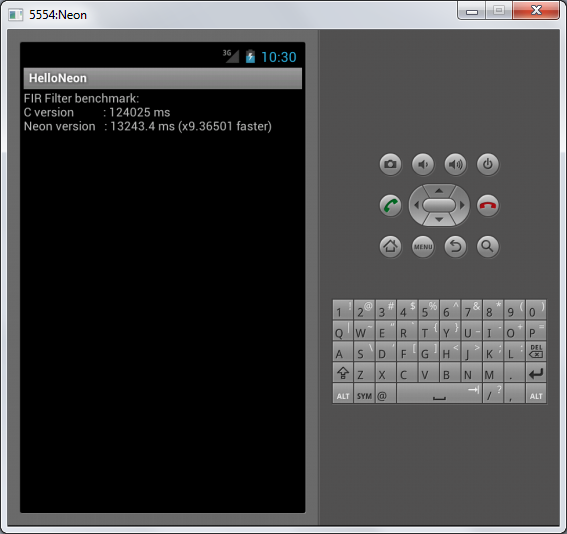
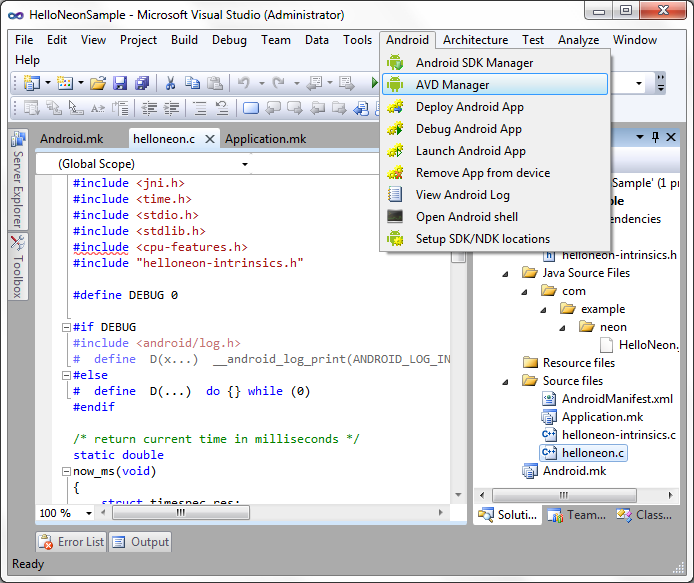
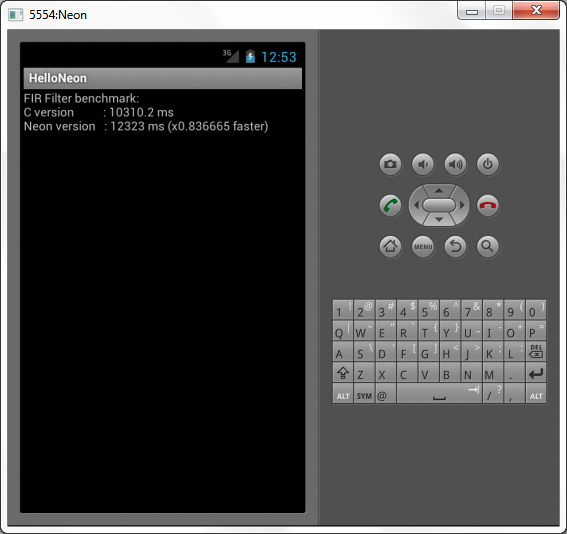
- Launch the project by going to Android->Launch Android App. A successful launch looks as follows i.e. there must be a value for the Neon version. Note that Neon instructions are slower on the emulator.
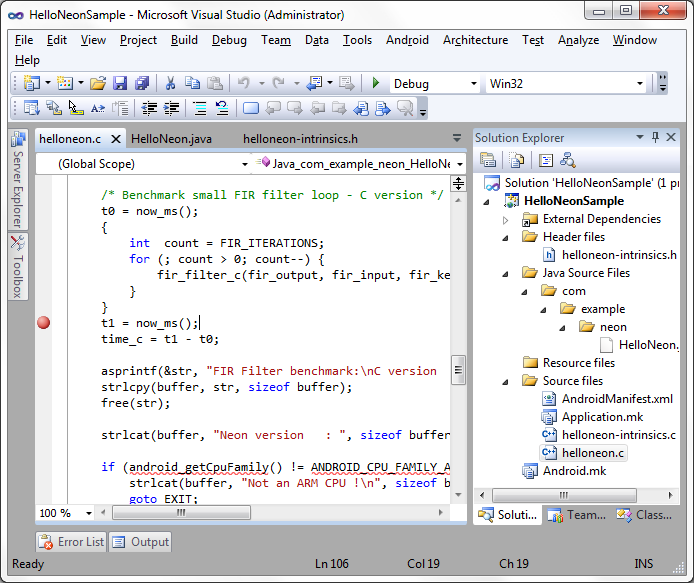
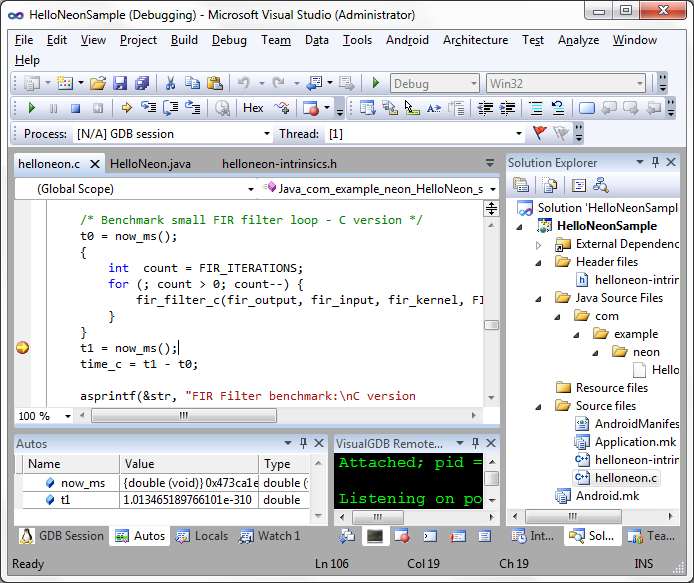
- Add a breakpoint to line 106 of helloneon.c.
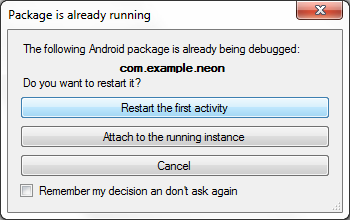
- Start debugging. When prompted choose ‘Restart the first activity’.
- When the breakpoint is hit take your time looking at the autos etc. Continue debugging when ready.
- Look at the time difference between the Neon and C versions. Now the C version is much slower as stopping at our breakpoint affected the time calculations for it.