Tutorial: Building and Debugging the two-libs Project with VisualGDB
In this tutorial we build and debug the two-libs Android ndk sample project. The main idea of the tutorial is to demonstrate how to debug ndk code that is only called at the startup of the app (i.e. OnCreate function).
For this, ensure that VisualGDB 2.4 or later is installed with the Android Edition.
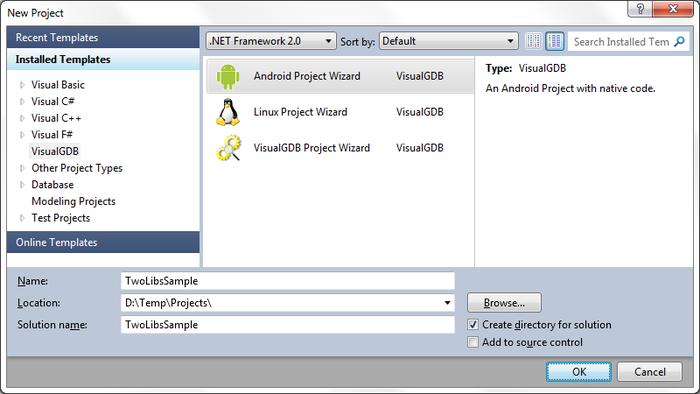
- Start Visual Studio. Go to File->New->Project. Choose VisualGDB->Android Project Wizard. Choose the name and location for the project as you wish.
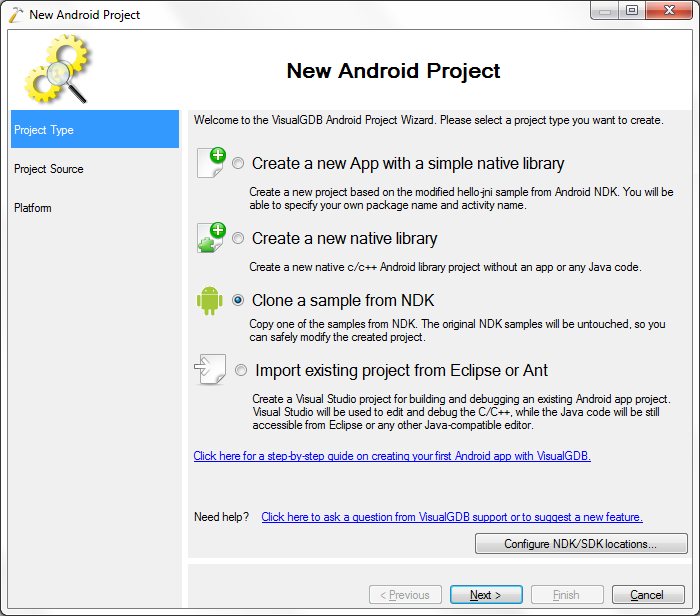
- Press ‘OK’ and choose the ‘clone a sample from NDK’ in the wizard. Note that if this is your first VisualGDB Android project, then you may need to configure the NDK/SDK locations first. Press ‘Next’ when done.
- For the purpose of this tutorial choose the two-libs sample from the list. Press ‘Next’ when done.

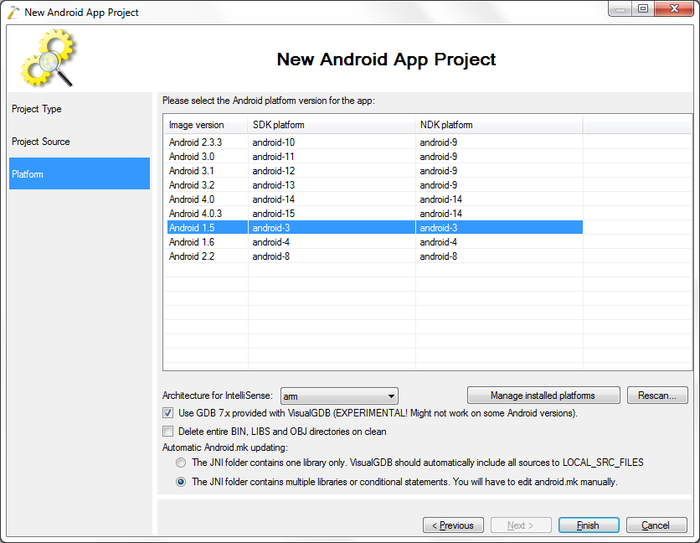
- Now choose the aimed platform for the project. This sample just needs a min Android version of 1.5. Furthermore make sure the option ‘The JNI folder contains multiple libraries’ is selected. Press ‘Finish’ to exit from the wizard.
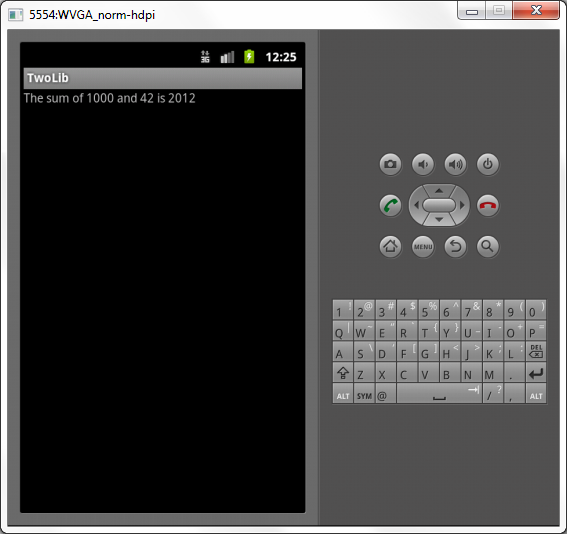
- This sample project just has two libs, one calling the other. The function ‘first’ just returns a sum of two values. Open the file ‘second.c’ and set a breakpoint on the line calling ‘first’ by pressing ‘f9’ or clicking in front of the line.
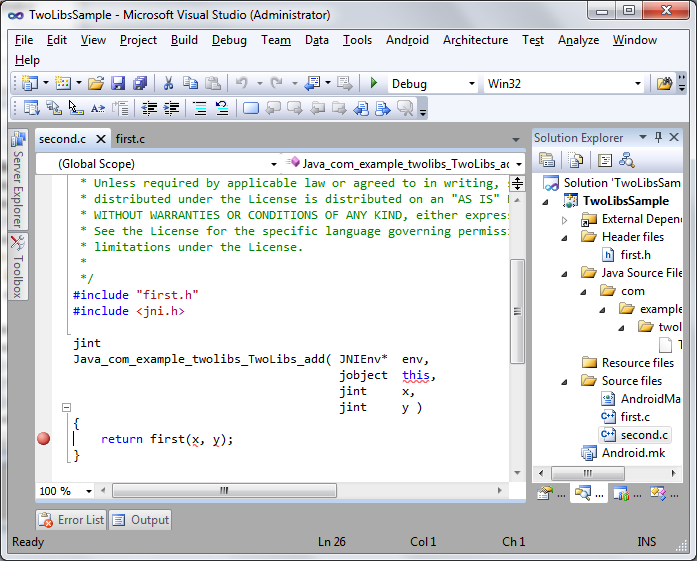
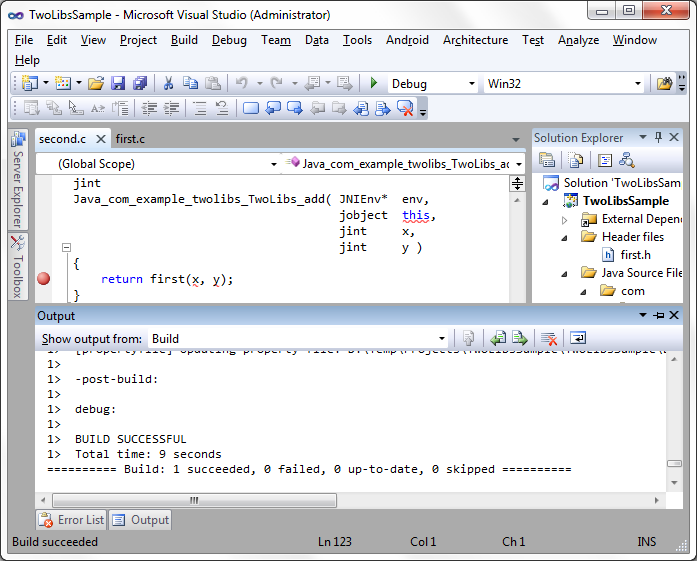
- Now we build the project by going to Build->Build Solution.
- Next connect an android device or emulator. Once it is started and connected go to Android->Debug App Startup.

- Next wait for the breakpoint to be hit.
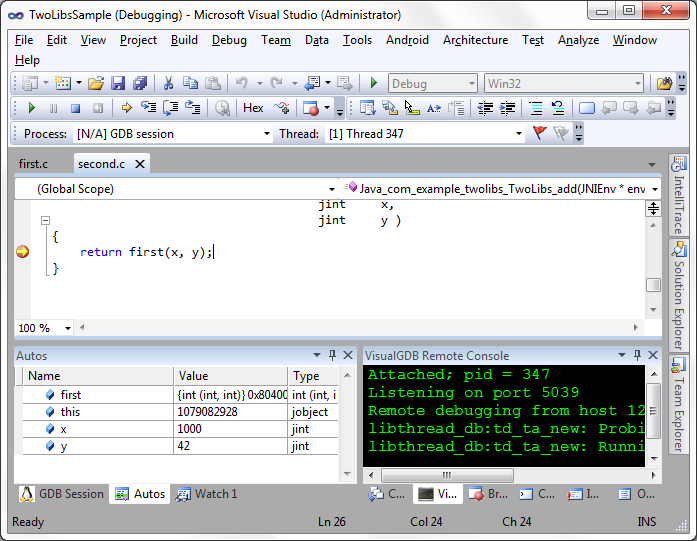
- Go to the view Autos and change the values of x and y. For this just double-click on the value and write the new value, press ‘Enter’ when done.
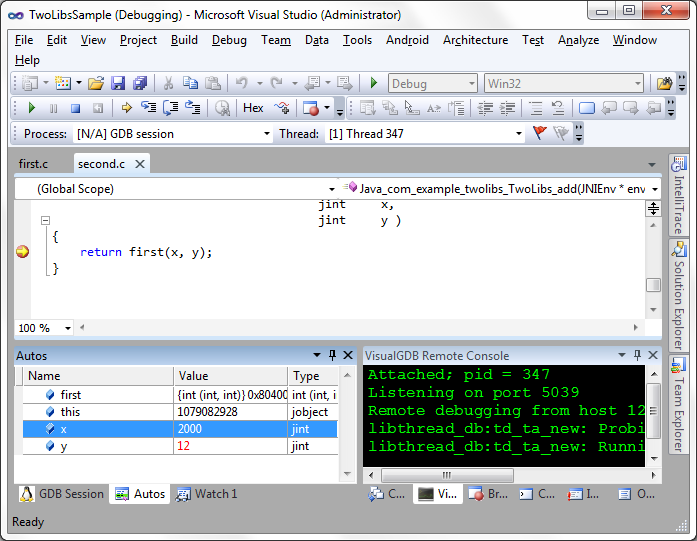
- Press ‘f5’ to continue running and observe the device screen. The value of the sum is now changed to the values we chose.