Developing for Ubuntu with Visual Studio and Hyper-V
This tutorial shows how to configure a Hyper-V virtual machine to run Ubuntu 15 and use Visual Studio with VisualGDB to develop applications for it from Visual Studio. In this tutorial we will use Visual Studio 2015 Preview, Windows 10 Preview and Ubuntu 15.
Before you begin, install Visual Studio and VisualGDB on your machine.
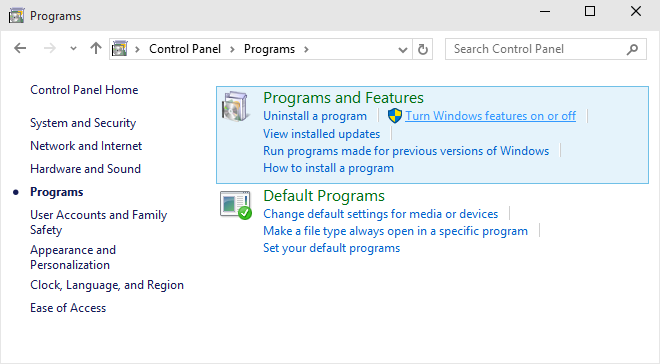
- Enable Hyper-V. To do this, open Control Panel, go to Programs and select “Turn Windows features on and off”:
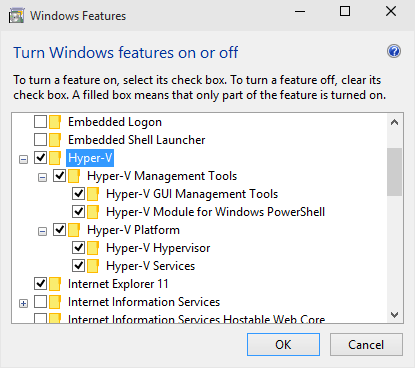
- Enable “Hyper-V”. Ensure that you install both the platform and the management tools:
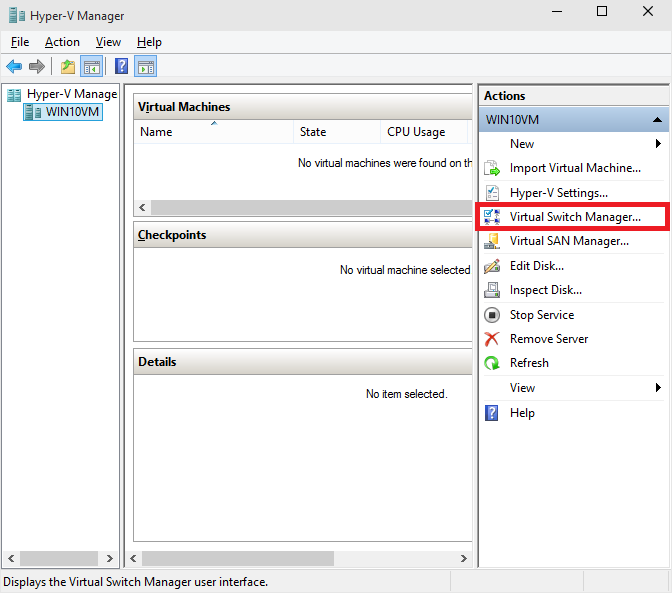
- Find Hyper-V in start menu and start the Hyper-v Manager:

- Before you can create any VMs, you need to configure network settings so that you can communicate to your VM. Click on “Virtual Switch Manager”:
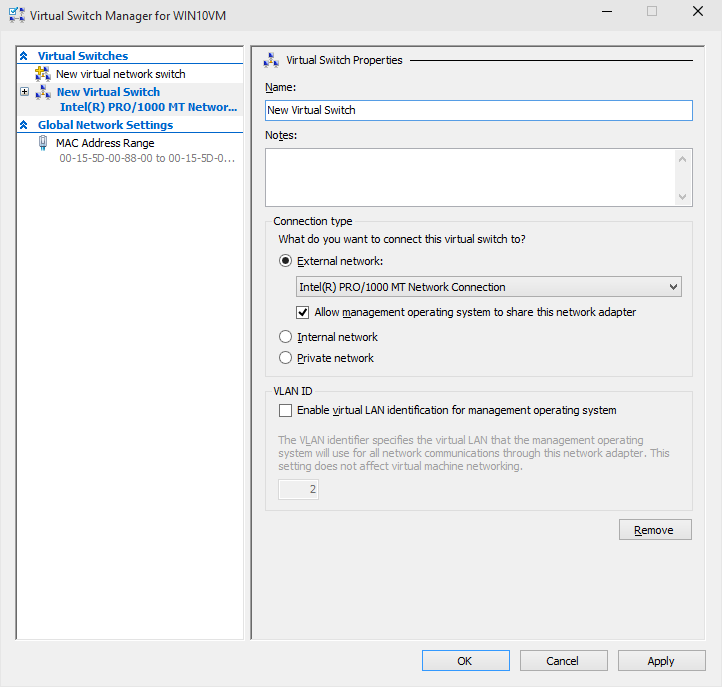
- Create a new virtual switch:
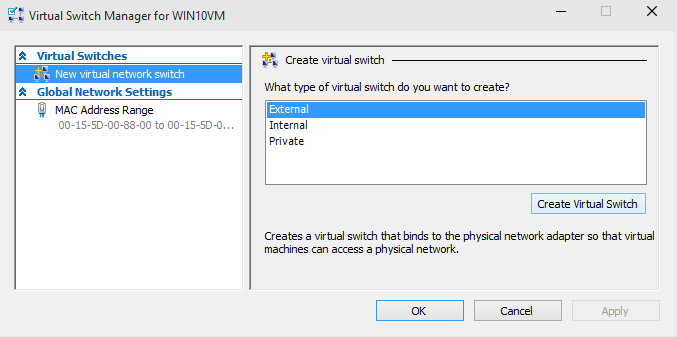 There are 2 options of creating a switch:
- If your computer is connected to a network with a DHCP server that can assign address to your VM, select an external switch. This will virtually place your VM into the same network as if it was just another physical computer.
- If you do not have a DHCP server, or do not have enough IP addresses available, select an internal switch. We will configure network sharing with an internal switch later.
- Press “Create Virtual Switch” to complete the operation:
 Warning: Hyper-V may report that your network adapter is already bound to the virtual switch protocol:
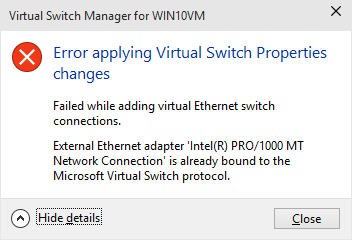
If that happens, go to Network Connections in Control Panel and uncheck the corresponding checkbox for your network adapter: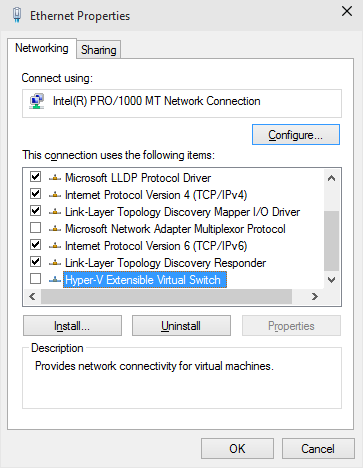 Once you uncheck it and apply the changes, you can try creating the switch again.
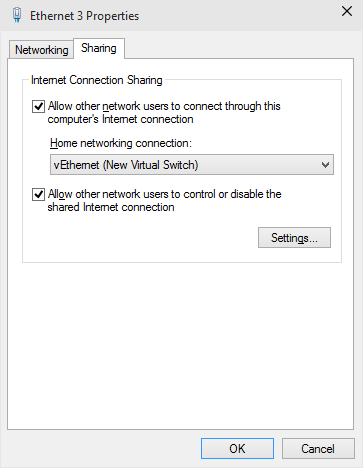
 - Only if you have created an internal switch, go to Network Connections in Control Panel, open the properties of your Internet connection and share it with the newly created switch:
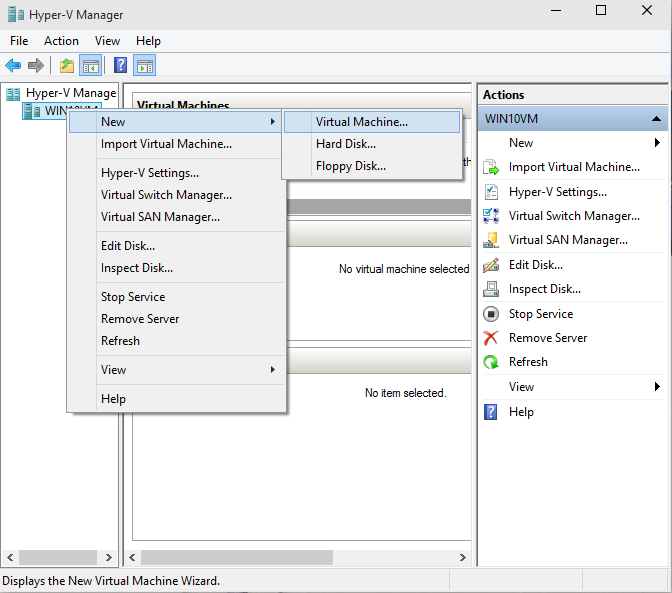
- Now we can create a VM. Right-click on your computer name in Hyper-V manager and select “New->Virtual Machine”:
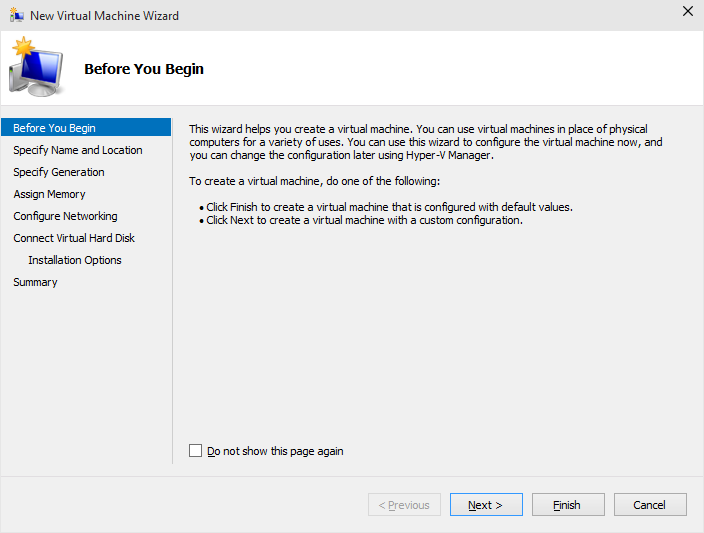
- Press “Next” to skip the introduction page:
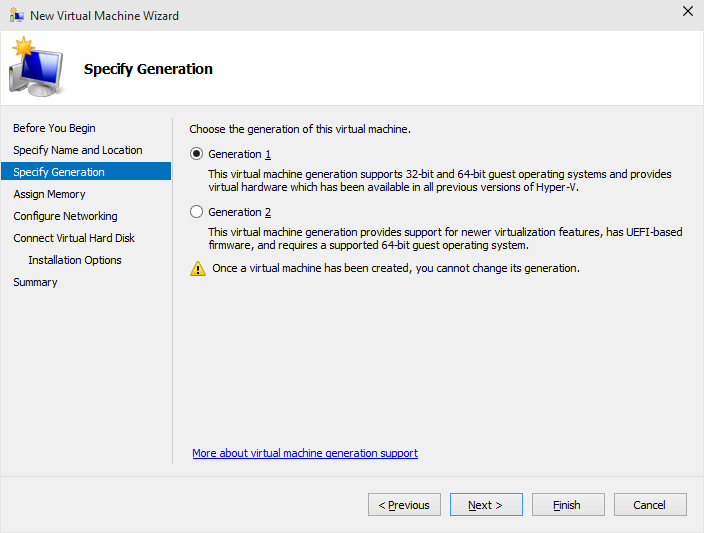
- Select the first generation of the VM:
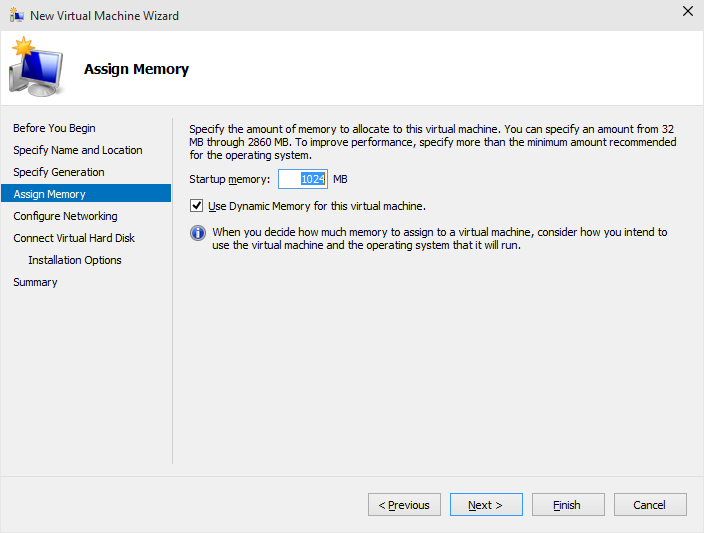
- Specify the memory amount you would like to allocate to your VM:
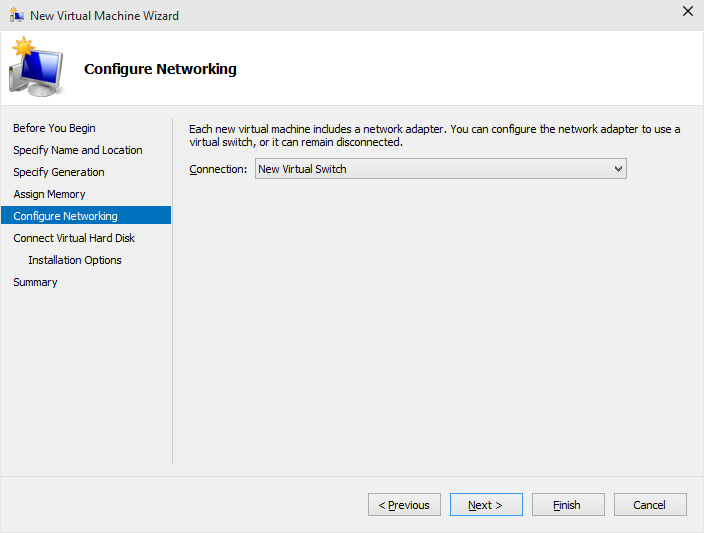
- Select the network switch created before:
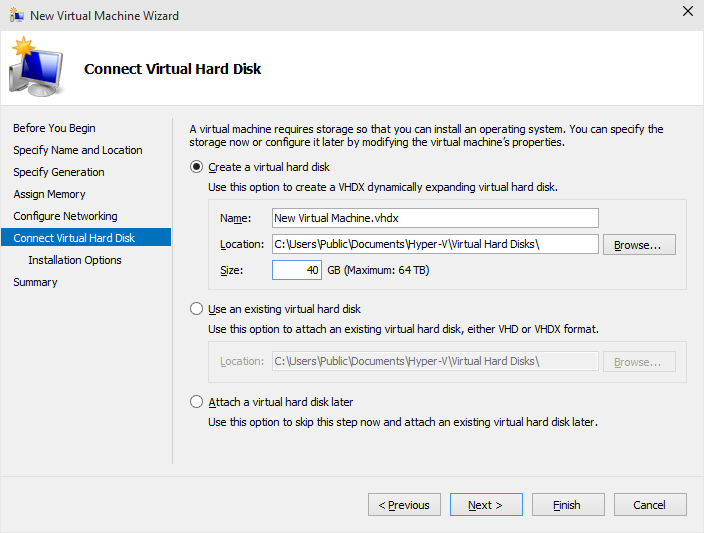
- Select “Create a virtual hard disk” and specify the size you want to use:
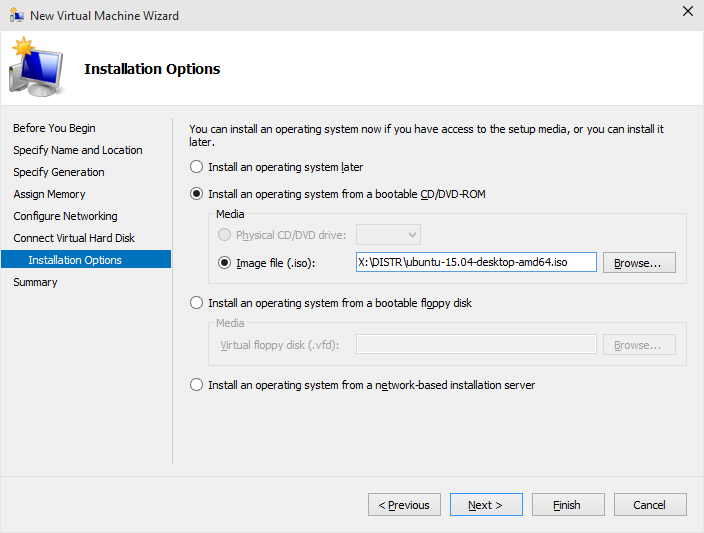
- Specify the path to the Ubuntu installation disk image. You can download one here.
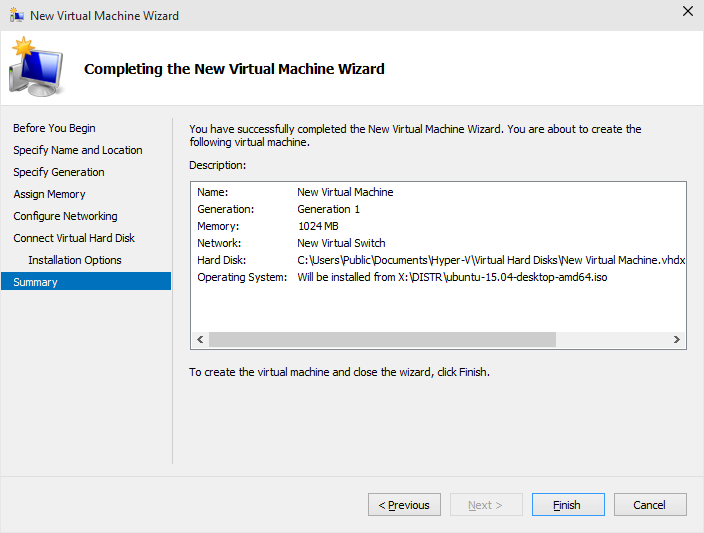
- Verify the VM settings on the last page and click “Finish”:
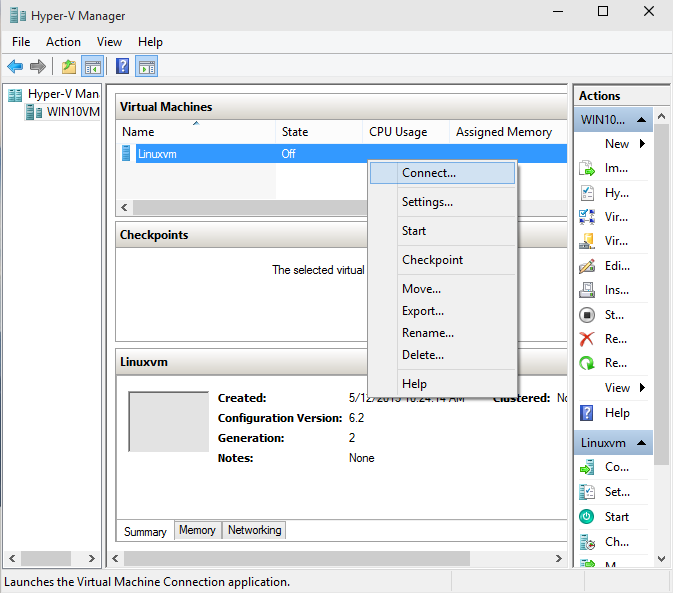
- Right-click on the newly created VM and select “Connect”:
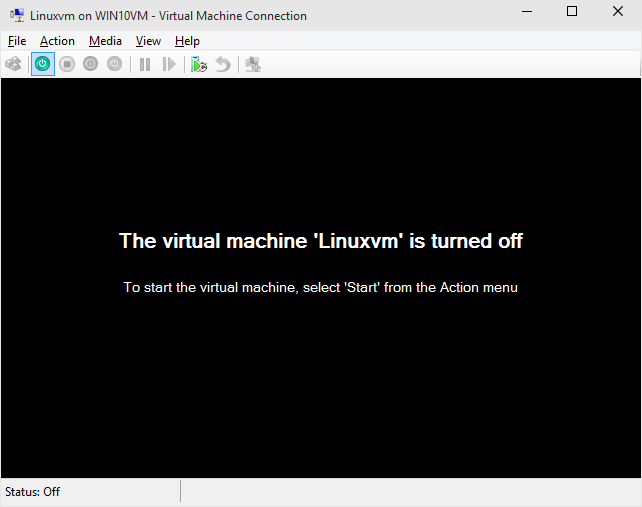
- Click “start” to start the virtual machine:
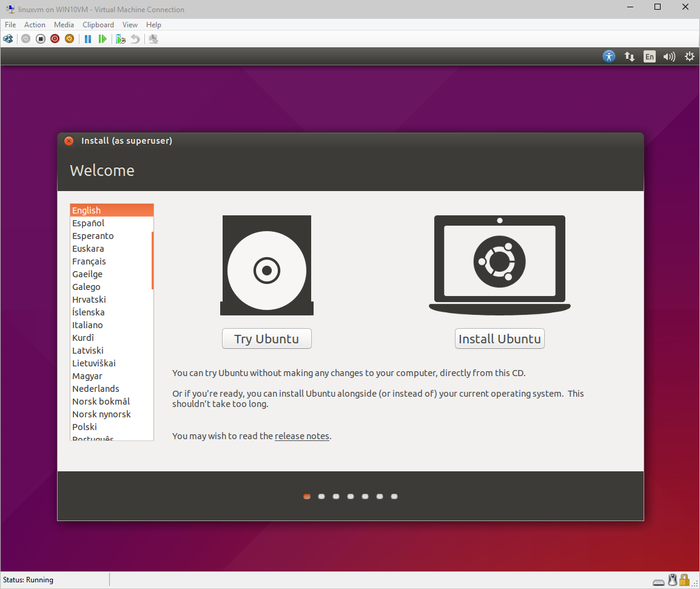
- Once the Ubuntu installer loads, select “Install Ubuntu”:
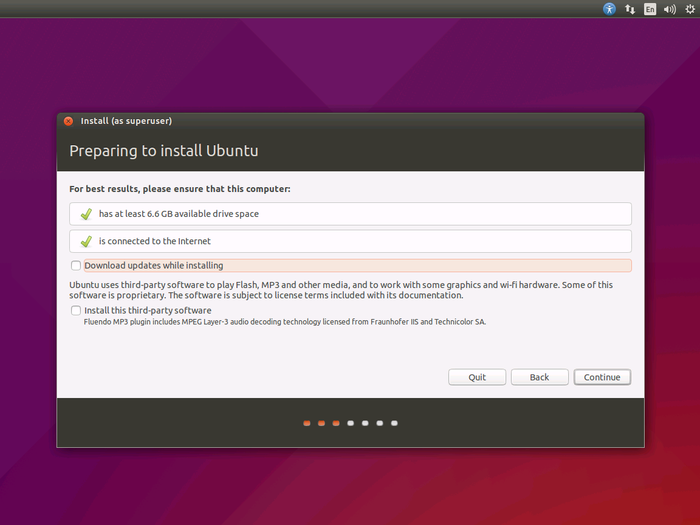
- Verify that you have internet connection. If not, recheck the virtual switch settings:
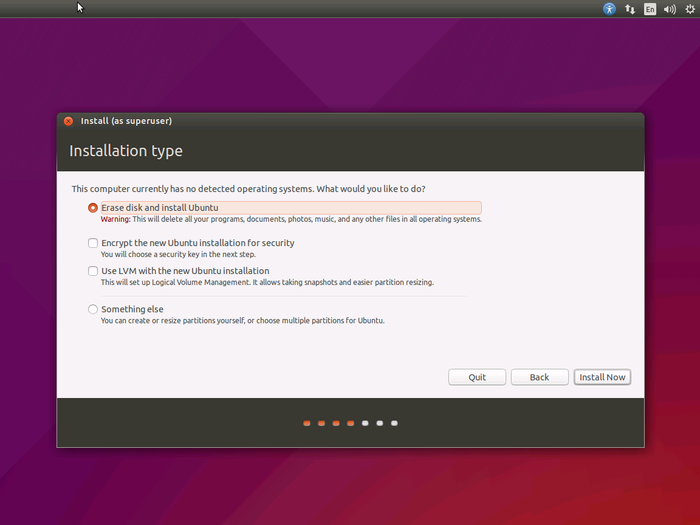
- Select “erase disk and install”:
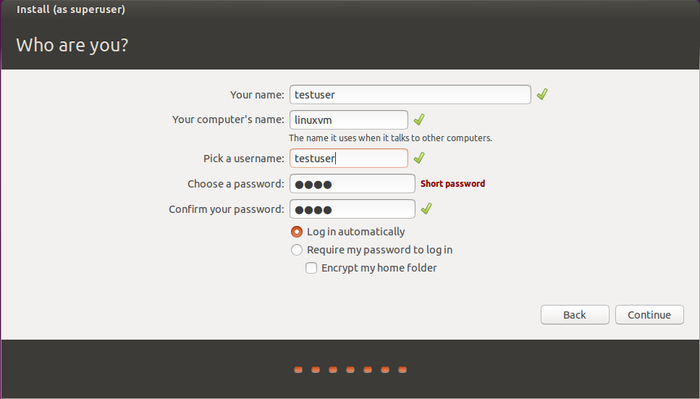
- Specify the user name, computer name and a password you would like to use:
- Once the Ubuntu installation is done, open a terminal window on it and run “ifconfig”. This will display the current IP address of the virtual machine:
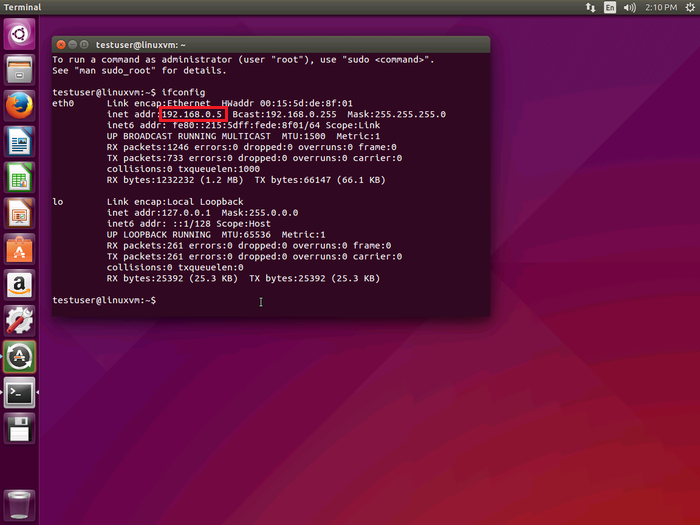 Unless you have a DCHP server configured to publish updates to the DNS server, you will need to use the IP address to
access the machine. Verify that you can access it by pinging
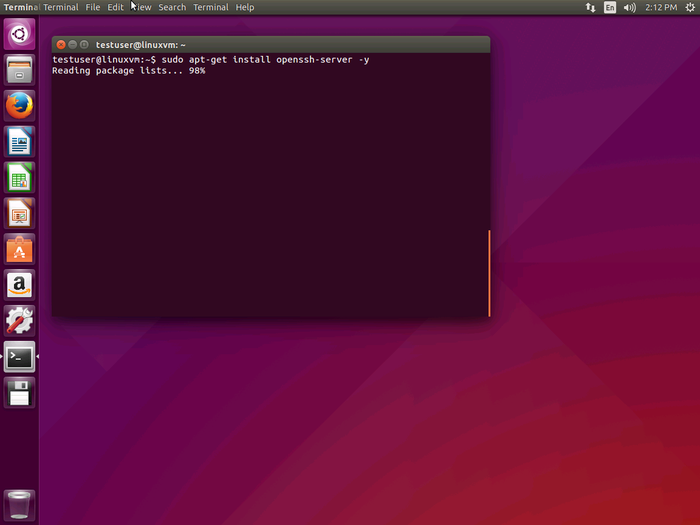
it from Windows. - Install the OpenSSH package on the VMto enable access via SSH:
sudo apt-get install openssh-server
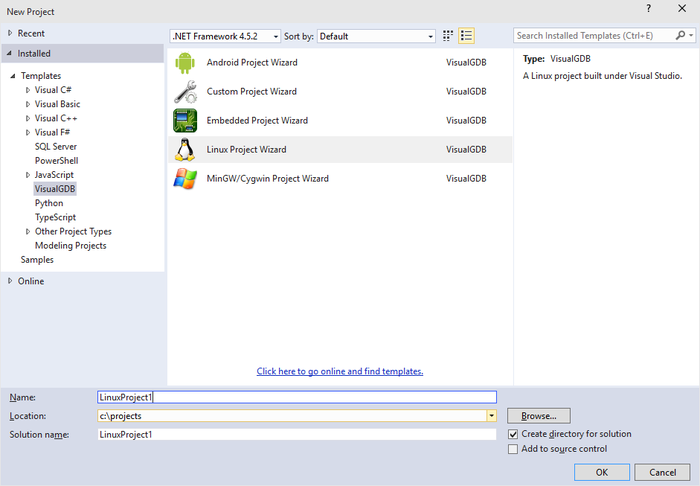
- Now we will create a VisualGDB project for your Linux app. Select File->New project and choose the VisualGDB Linux Project Wizard:
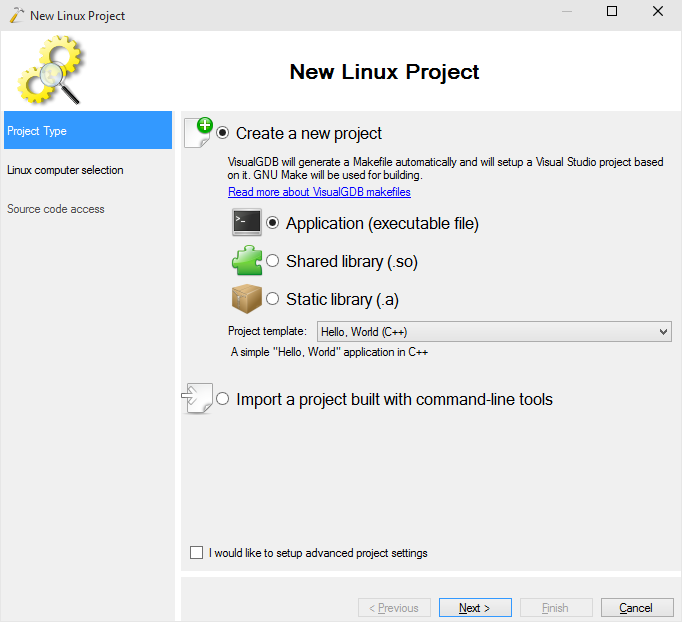
- Proceed with the default “Application” setting:
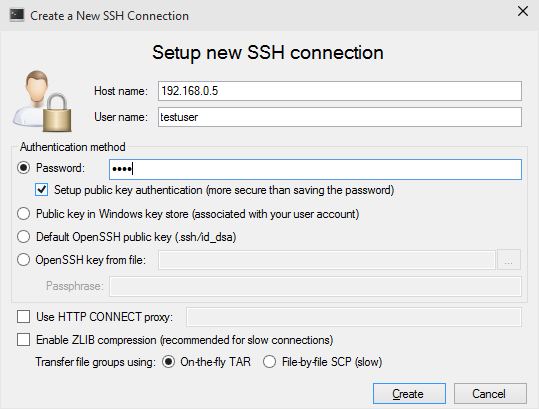
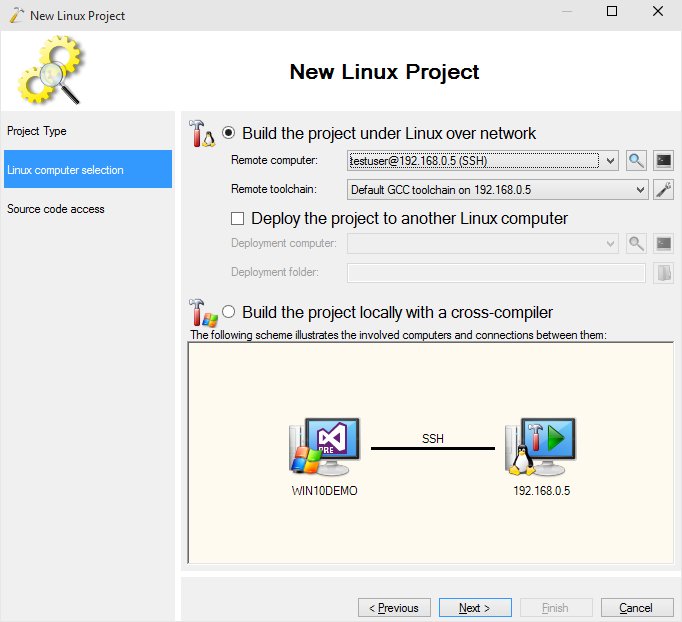
- On the next page select “New SSH connection” in the Remote Computer field and enter the IP address, user name and password you specified when installing Ubuntu:
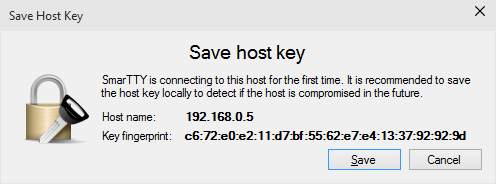
- Confirm the host key:
- VisualGDB will remember the connection settings, so next time you create a project, it will be displayed in the connection list:
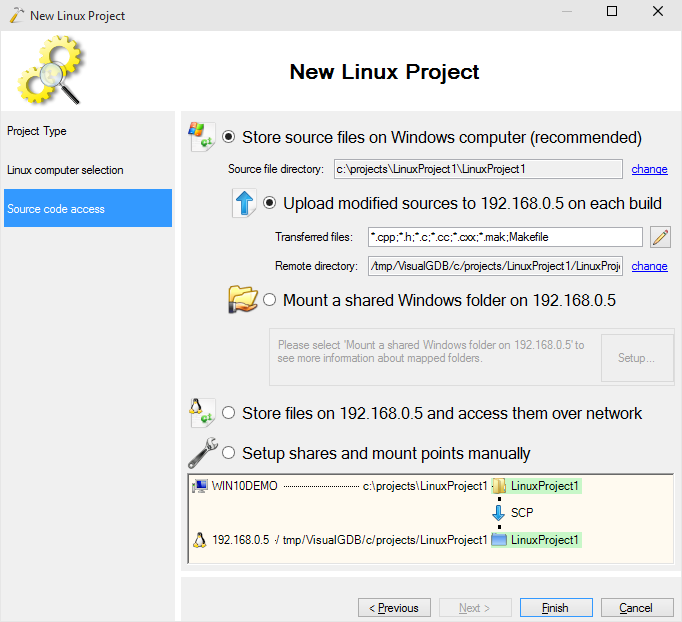
- Proceed with the default file transfer settings:
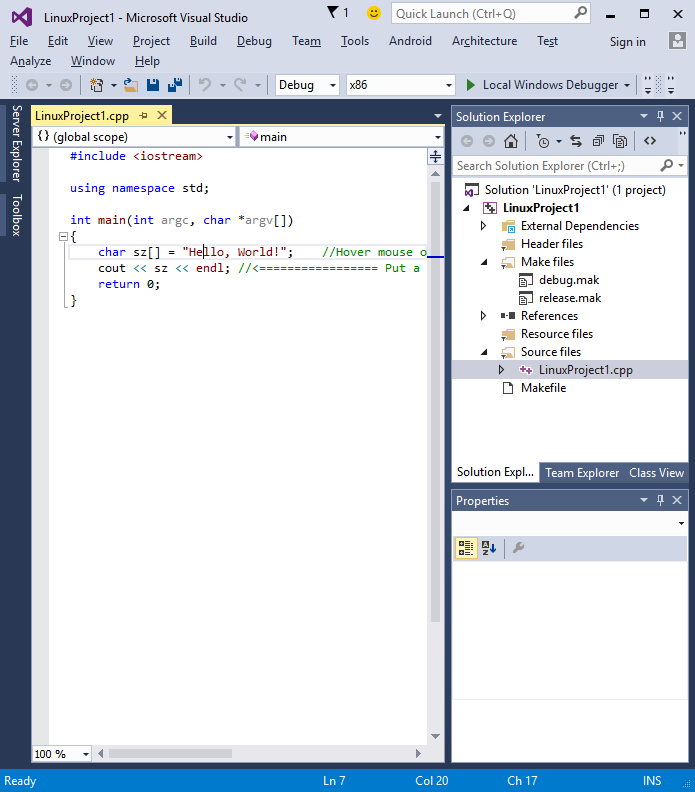
- Press “Finish” complete creating the project:
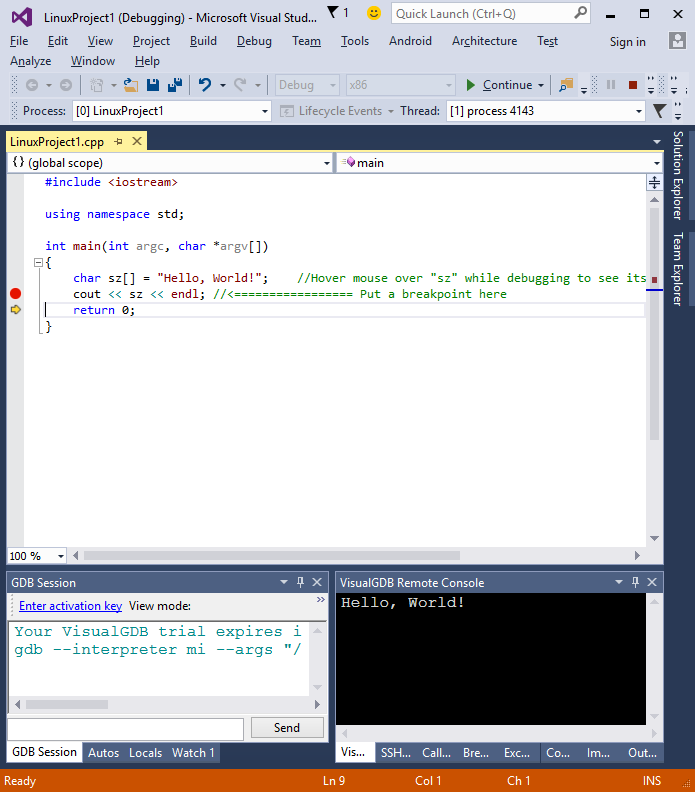
- Set a breakpoint somewhere in the code and press F5 to build your project and start debugging it:
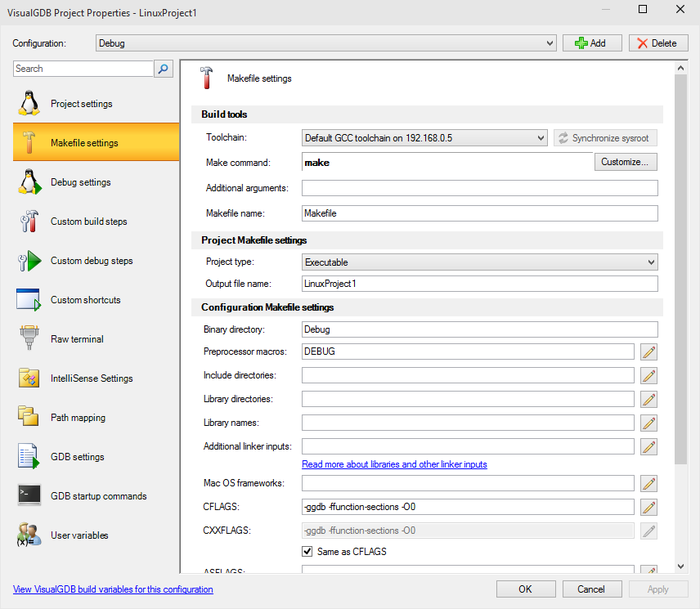
- You can edit various VisualGDB-related settings by right-clicking on your project in Solution Explorer and selecting “VisualGDB Project Properties”:
 If you are using VisualGDB 5.0, it will automatically enable the new Clang-based IntelliSense engine, so you will be able to refactor your code and explore it via Code Map.


