Using AI Edits to Add New Functionality to Projects
This tutorial continues the series where we are using AI to turn a third-party open-source HTTP server for Raspberry Pi Pico into a smart thermostat. In the previous tutorial we refactored the ADC and LED-related logic from the existing project into a separate Thermostat module. In this tutorial we will extend the thermostat module to actually control the output based on the temperature.
Before you begin this tutorial, follow the previous one, or check out the 02-adding-logic tag from the tutorial repository. Once the ADC and LED code has been moved to the Thermostat module, proceed with the steps below to start adding the actual thermostat functionality.
- First of all, we will create a new FreeRTOS task for the thermostat. You can search for xTaskCreate to find that the other tasks are created in main():
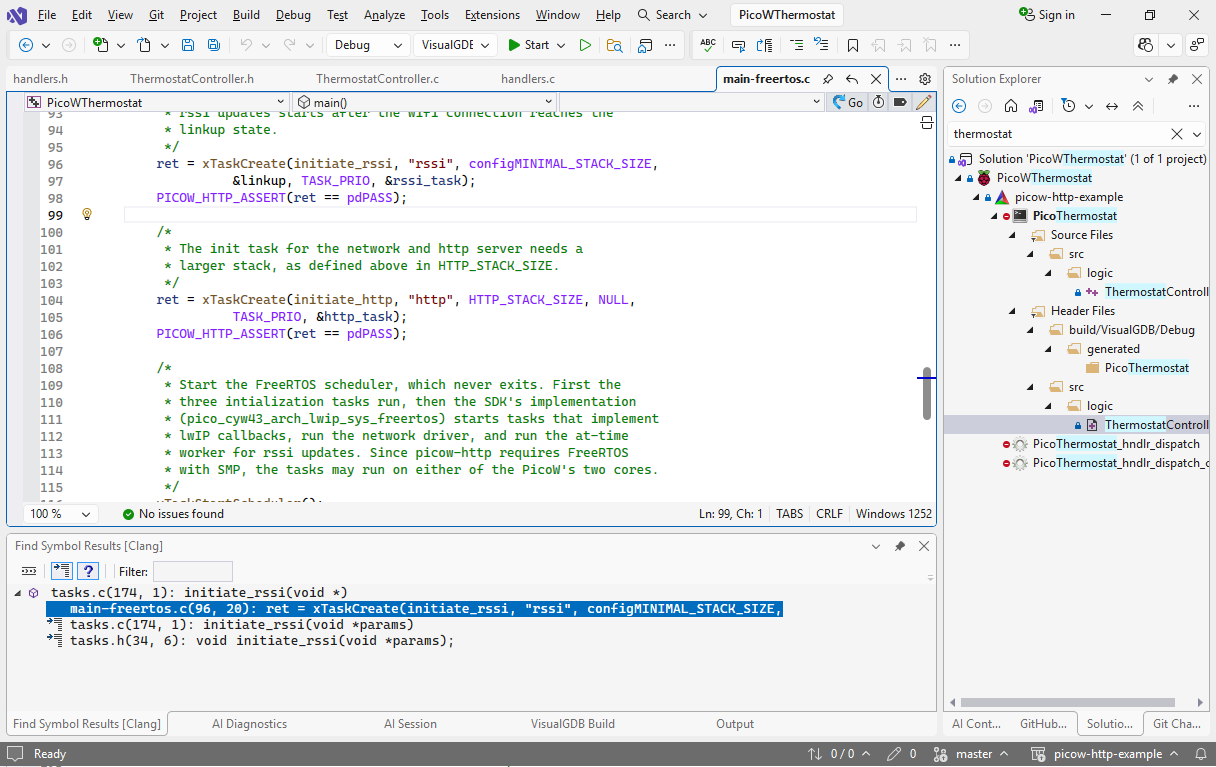
- If we wanted to add another task manually, we would need to copy one of the xTaskCreate() calls, create a separate variable for the new task, and create declaration + implementation for the task body. With AI, you can do it by clicking on the edit button and using this prompt:x
+ThermostatTask in @ThermostatController.c (empty for now)
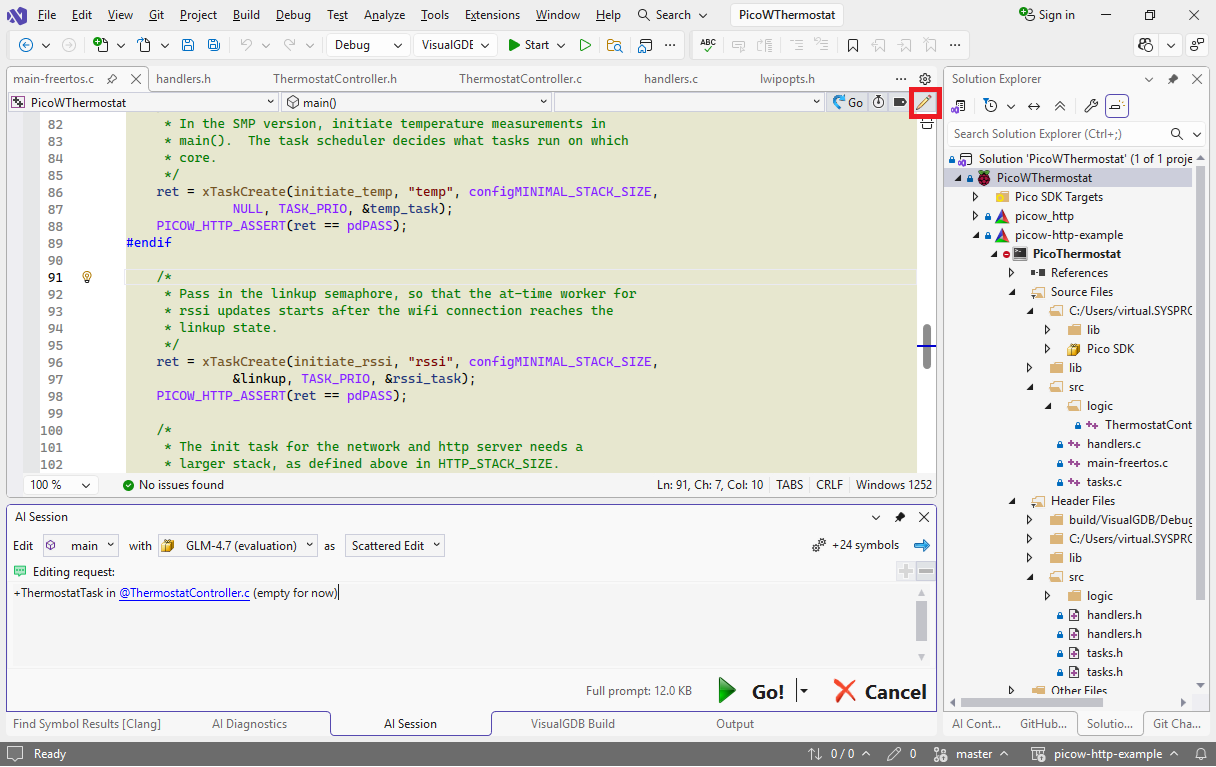 Note how typing @ in the prompt box opens the suggestion popup showing all symbols and files visible from the current file.
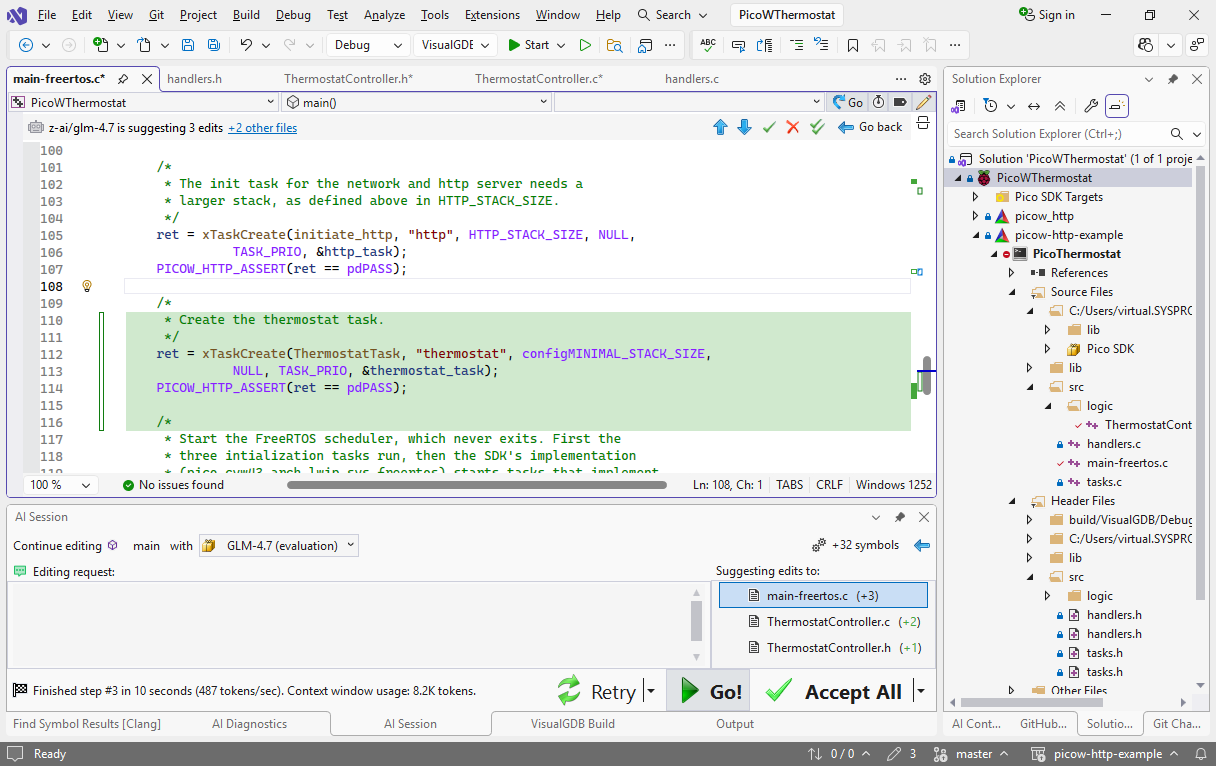
 - Most models will handle it just fine:
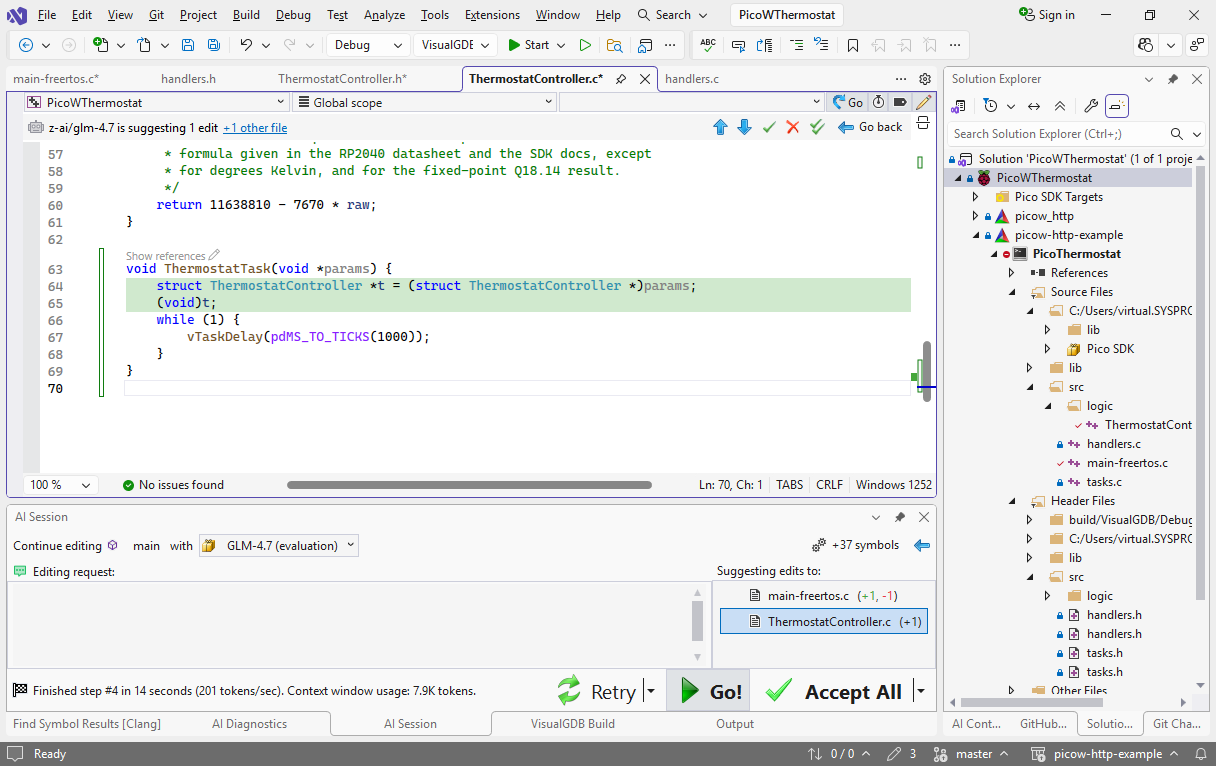
- We can ask the model to pass &g_Thermostat as the parameter to the task body by using this prompt:
&g_Thermostat as arg
VisualGDB automatically passes the definition of xTaskCreate() to the language model, so it will know which function argument gets passed to the body, and will also add casting code inside the body:
- Now we will implement the actual thermostat control loop. It’s a very straight-forward algorithm: the heater should be turned on if the temperature drops below the low threshold, and it should stay on until the temperature is above the high threshold. Doing it manually would involve adding fields for temperature & tolerance, setter functions if we wanted to keep things modular, and implementing the actual loop. AI can do it with a prompt like this:
Implement thermostat loop with @Thermostat_GetTemperatureK and @Thermostat_SetOutputValue . Add TargetTemperature/Tolerance fields & setter funcs.
 Smaller models can do it just fine in a couple of seconds, which is way faster than doing it by hand.
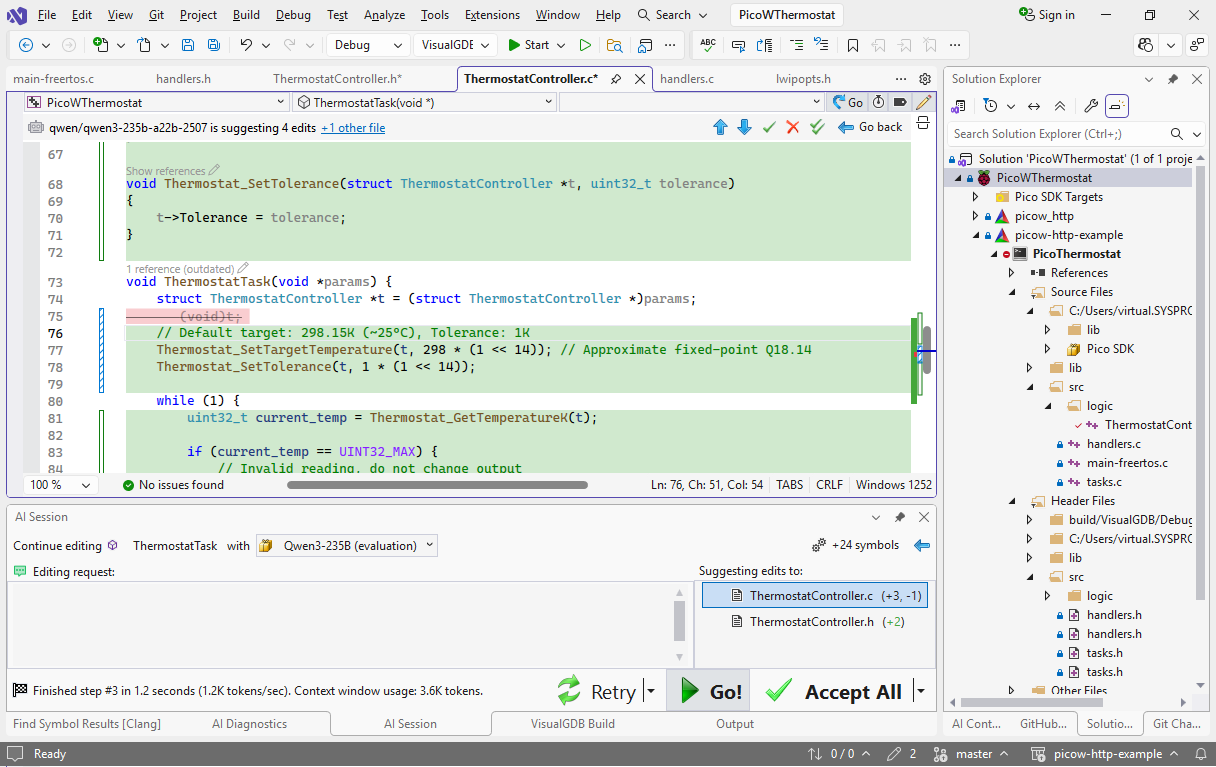
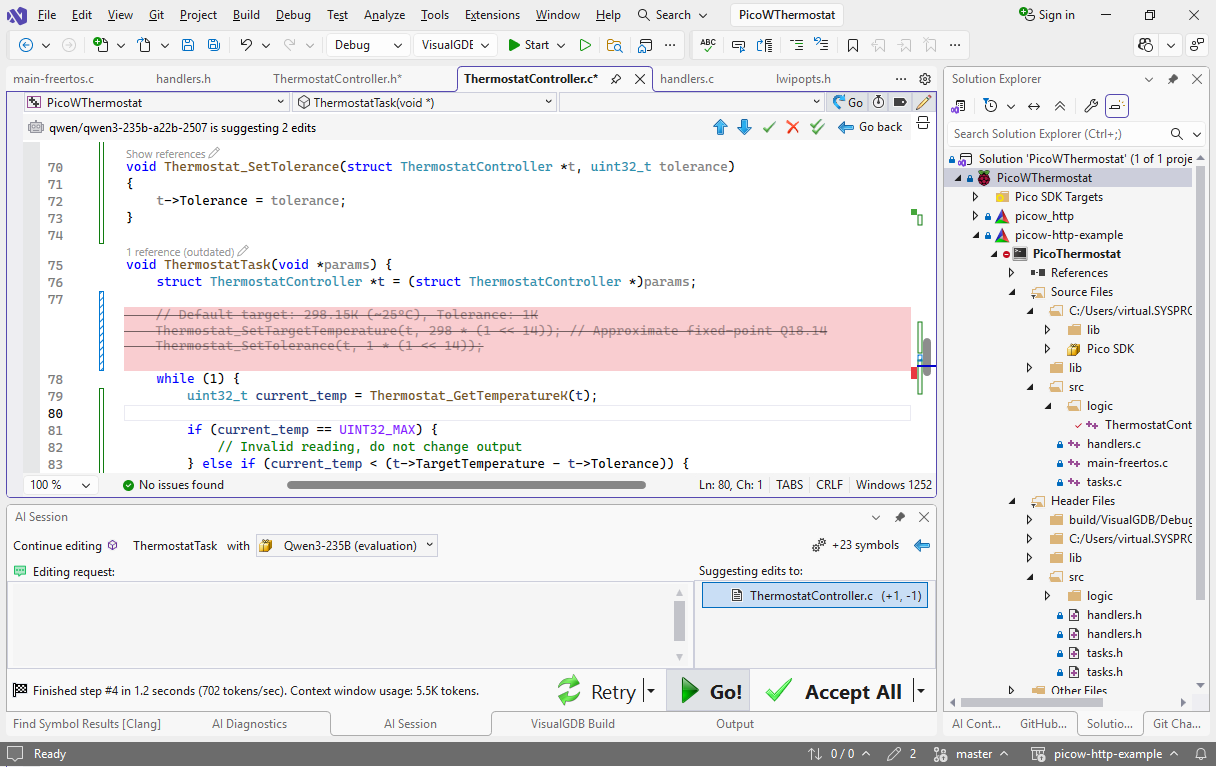
 - Note that the model decided to set the default values right in the task, that could cause a race condition if some other code sets them earlier. You can move initialization to the init function with this prompt:
set defaults in @Thermostat_Init
- To maximize the editing performance, VisualGDB heavily trims the code going into the language model. If you are editing ThermostatTask(), it will normally only see the function itself, the ThermostatController struct that is used inside it, and the GetTemperature()/SetOutput() functions that were explicitly mentioned in the prompt (along with their dependencies). This allows doing most edits in a few seconds, but limits the AI’s capability of automatically finding relevant code. You can tweak this behavior by using the scope controls:
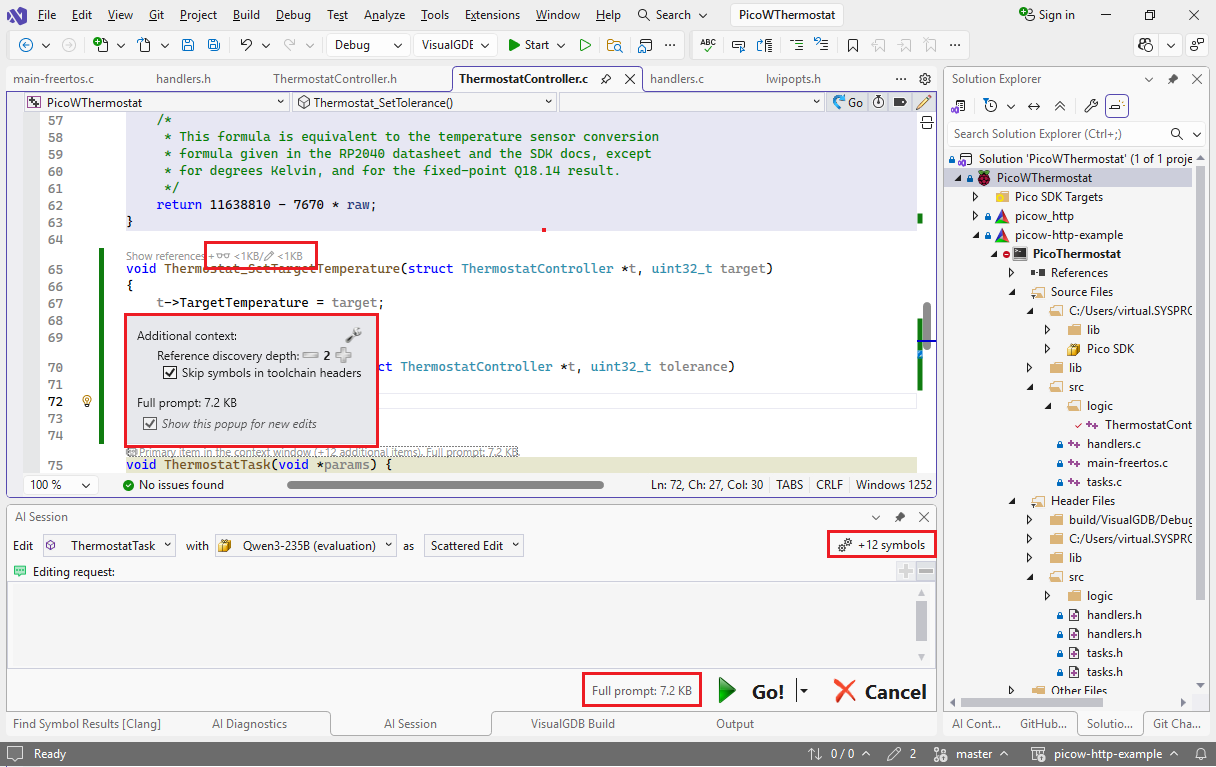 Any symbol in any source file can be added to the context window as read-only (declaration only) or editable (declaration + body), and you can control the depth of reference discovery. E.g. if ThermostatTask() refers to struct Thermostat, and struct Thermostat refers to critical_section_t, this is considered 2 levels of depth. You can change the reference depth in the primary scope popup, and preview the prompt size in the prompt window.
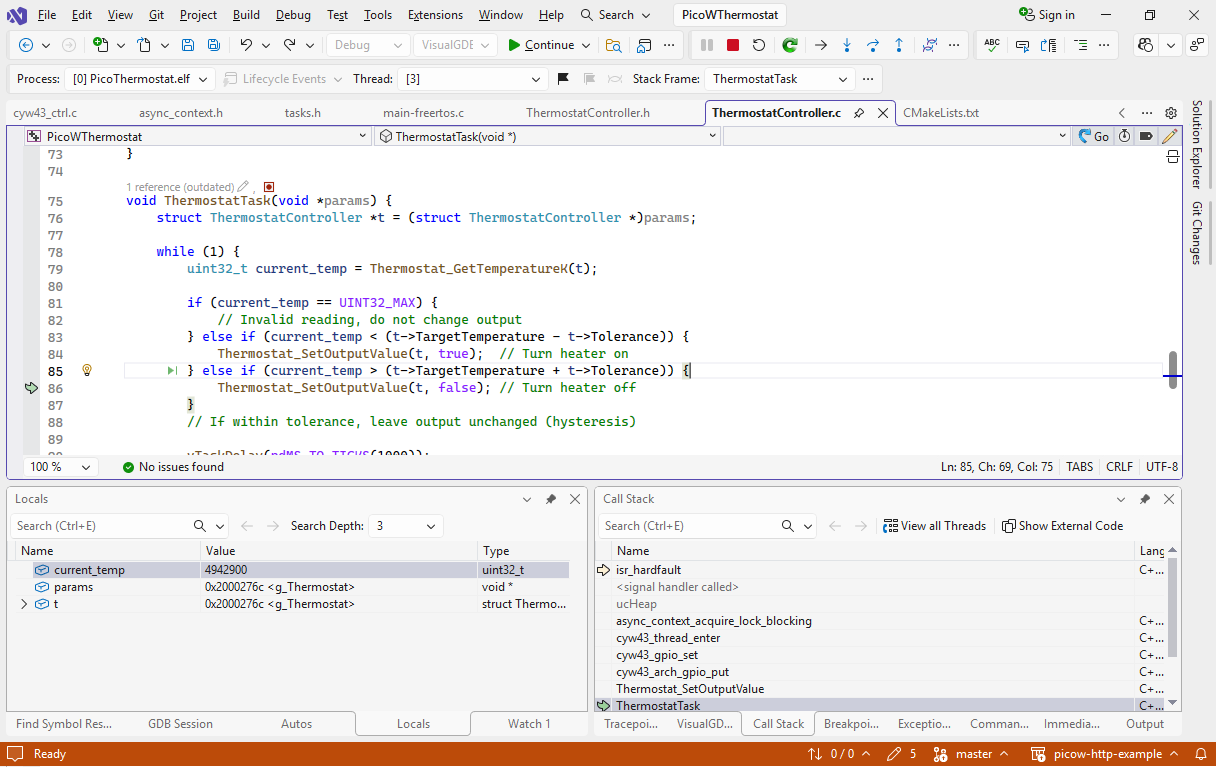
 - If you try building and running the project now, it will crash as soon as ThermostatTask() tries setting the output. This happens because the cyw43 driver has not been initialized yet:
- To fix it, let’s update the thermostat task to wait until someone sets the IsRunning field to true:
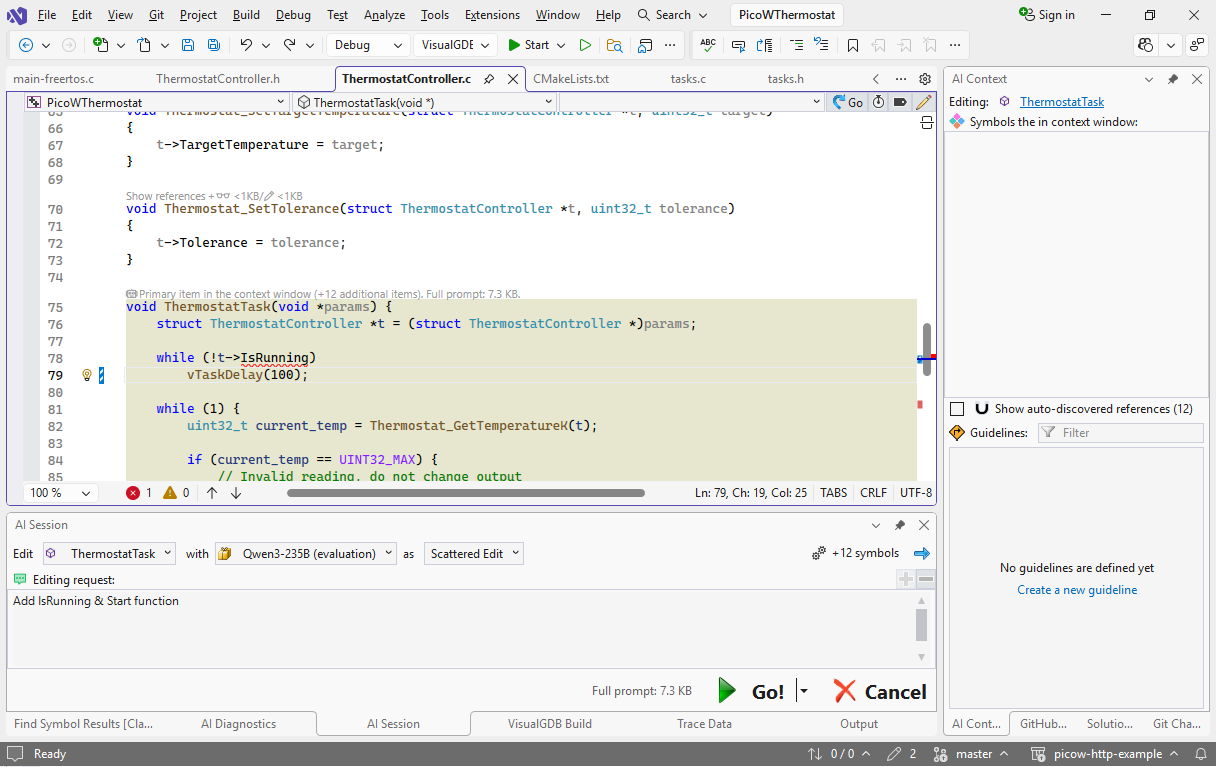
- We could create the new field and the function setting it by hand, but AI can do it faster. Use the “Add IsRunning & Start function” prompt:
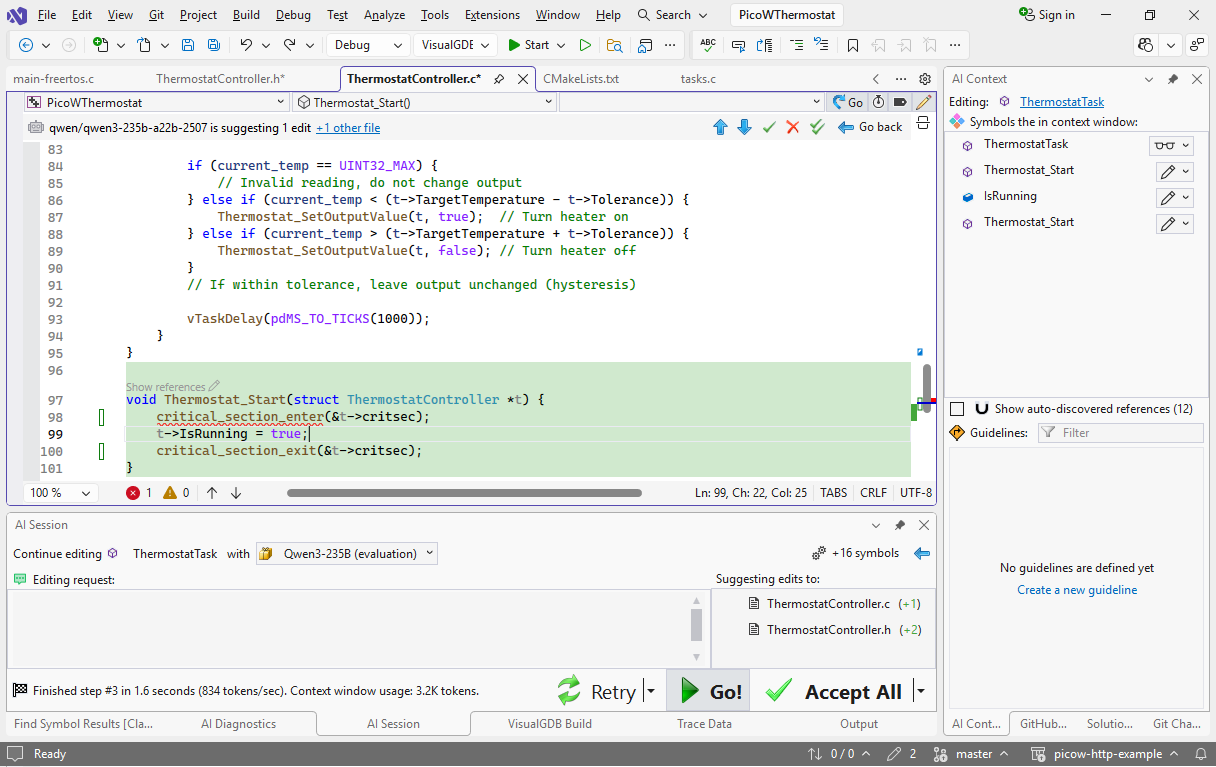 Note how AI decided to take the critical section in Thermostat_Start(), although it’s not required in this case. In this case it is easier to fix this by hand, but you could also refine it with a short prompt (e.g. “no critsec”).
 - Finally, call Thermostat_Start() from initiate_http() after the call to cygw43_arch_init() to actually start the thermostat:
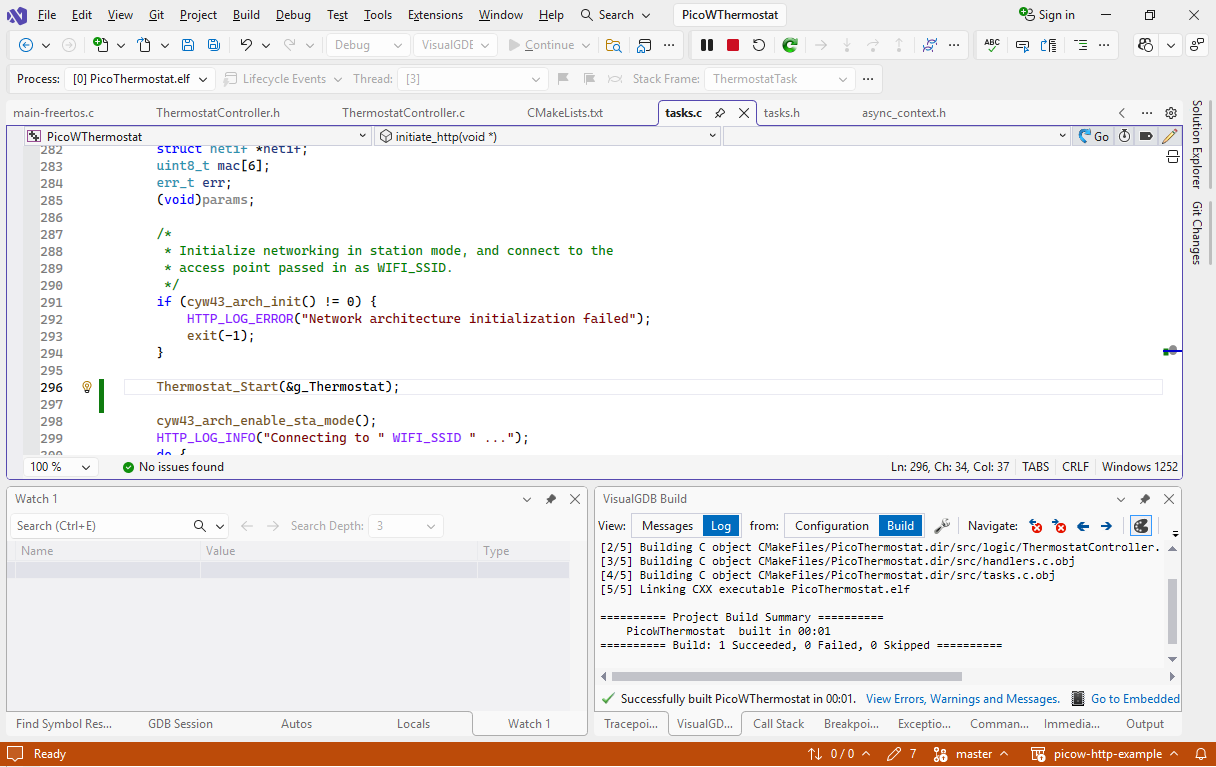
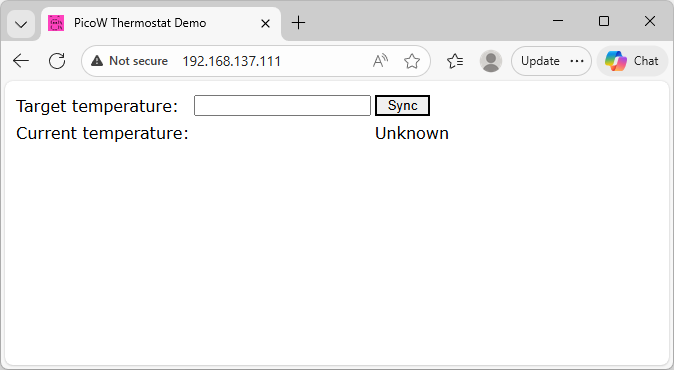
- Update the www/index.html and www/sample_app.js files to match this commit and press F5 to start debugging the project. The Raspberry Pi Pico board should connect to the Wi-Fi, and opening it in the browser should show this page:
 If you have difficulties running or debugging the project, you can force the single-core mode by adding configNUMBER_OF_CORES=1 to target_compile_definitions(PicoThermostat).
Note that the target and current temperature fields won’t work yet because we have not added handlers for the /api/getconfig and /api/settemp calls used by the JavaScript file. Follow the next tutorial for detailed instructions on adding them.