Managing Libraries in Arduino Projects
This tutorial shows how to reference libraries from your Arduino projects. We will create a basic project, reference several existing libraries and create a new one from scratch. We will also explain how the Arduino build tools automatically locate the referenced libraries and go over the project settings that affect library discovery.
Before you begin, install VisualGDB 5.5 Preview 2 or later.
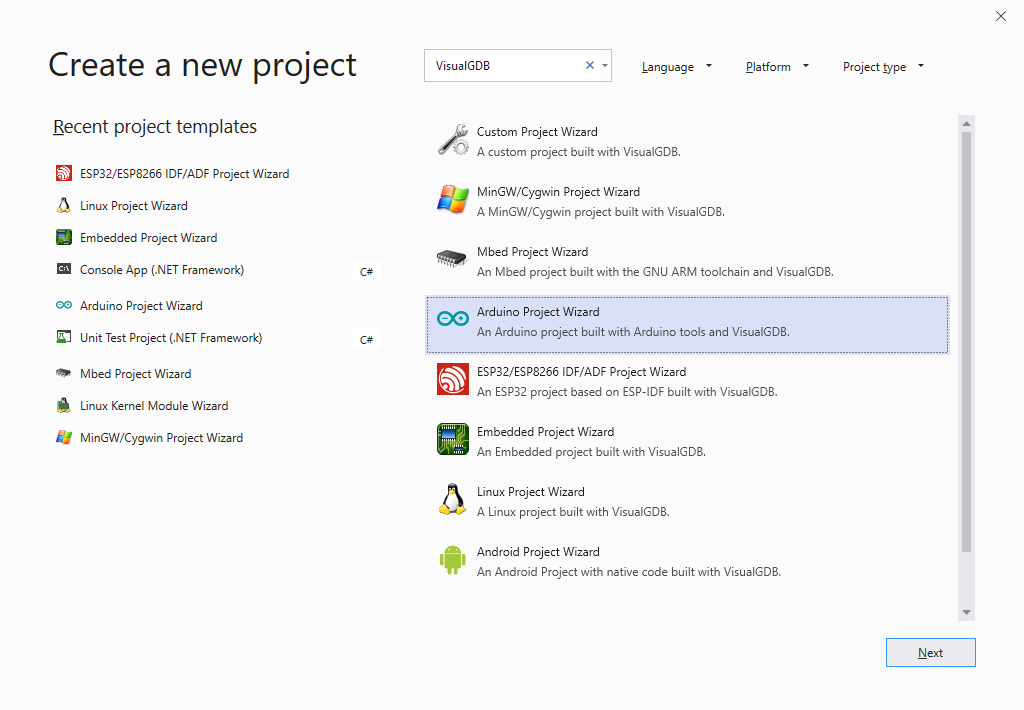
- Start Visual Studio and open the VisualGDB Arduino Project Wizard:
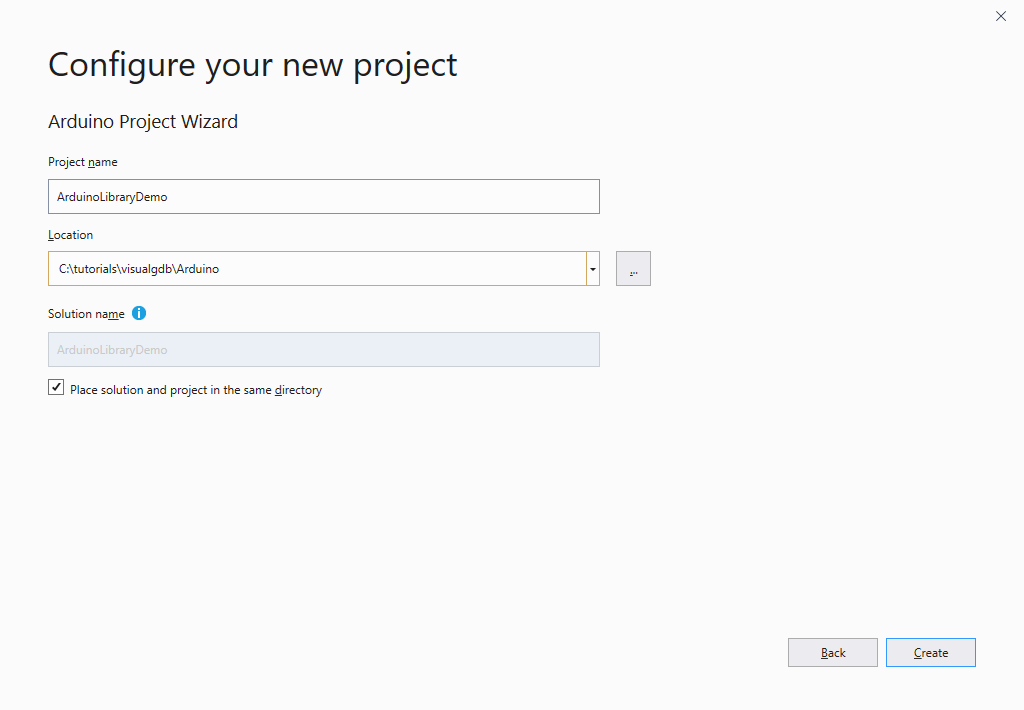
- Enter the name and location for your project and press “Create” to launch VisualGDB-specific portion of the wizard:
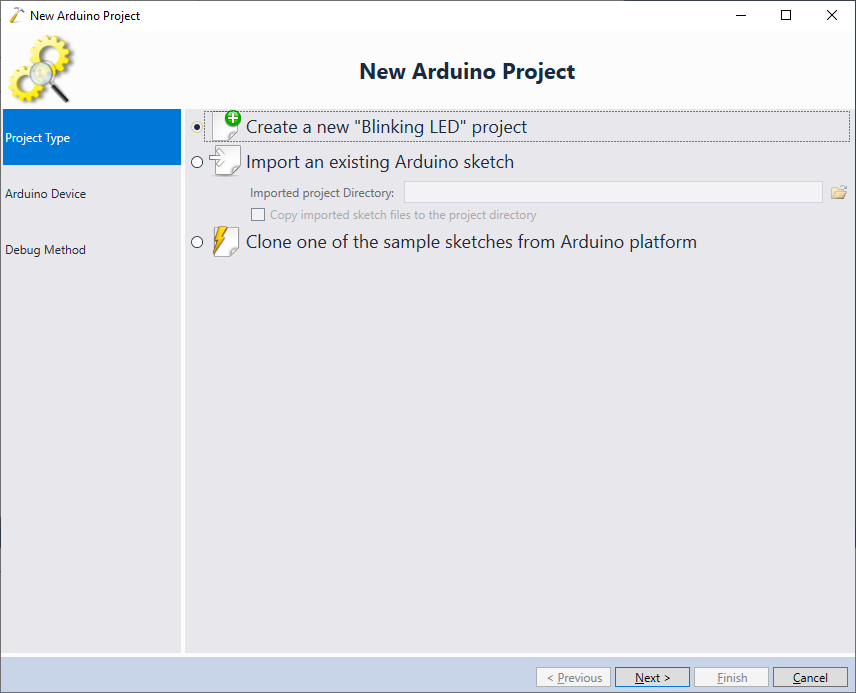
- On the first page of the VisualGDB’s wizard select “Create a new ‘Blinking LED’ project” and click “Next”:
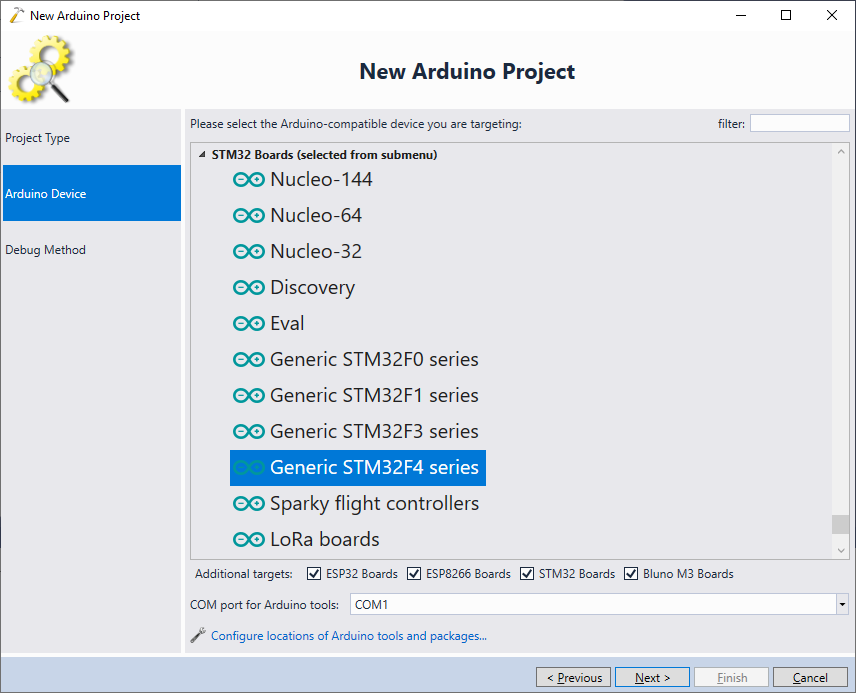
- On the next page select your target. In this tutorial we will use the STM32Duino platform, however most of the library-related steps shown here will also work with other Arduino targets:
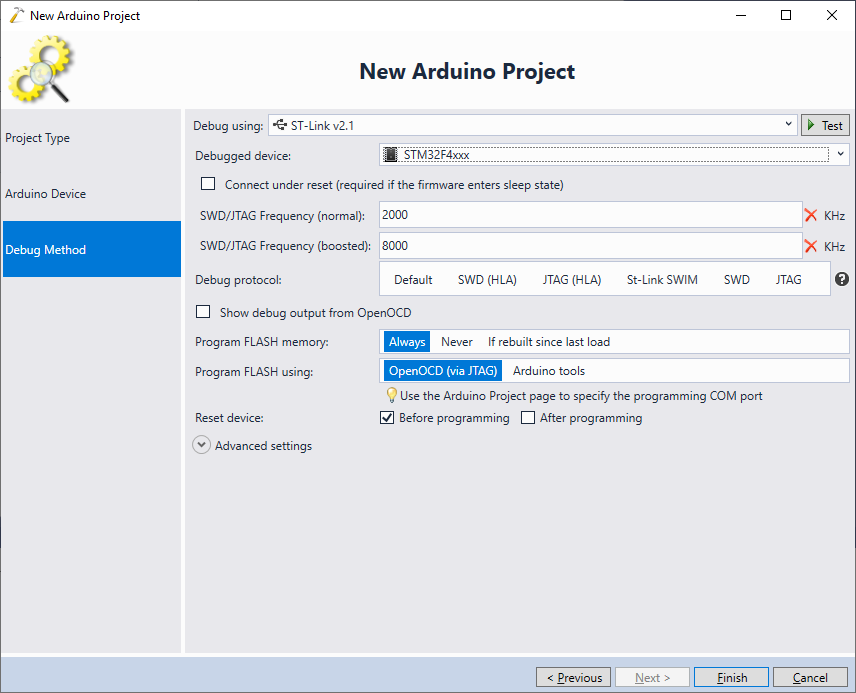
- On the “Debug Method” page select your debug method and press “Finish” to generate the project. Most STM32 boards are debugged using the on-board ST-Link programmer, so simply connecting it to the USB port and letting VisualGDB detect it should be the easiest way to get everything working:
- Normally, the STM32Duino platform will build the projects without debug information, preventing you from setting breakpoints and stepping through them. VisualGDB can automatically detect and fix this. Click “Fix Build Settings” to enable the generation of debugging symbols for your project, then building by pressing Ctrl-Shift-B:
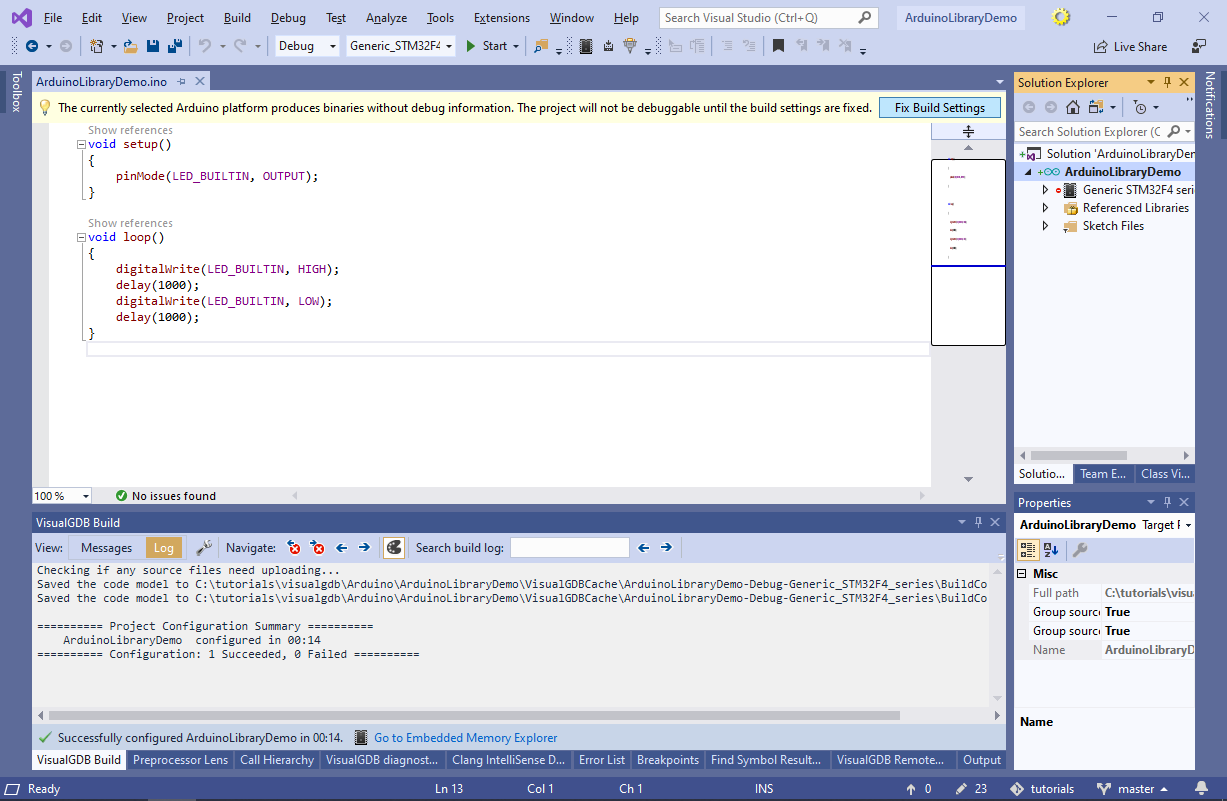
- Now we will show how to reference a basic library. Try including the <SPI.h> file from your main sketch (.ino file) and save the sketch:

- The Arduino build tools will automatically search the standard library directories for the SPI.h file. Once it is located, the Arduino tools will automatically update the include search path used by the compiler to find it. If the library contains source files (SPI.cpp in this example), they will be automatically added to the project as well:
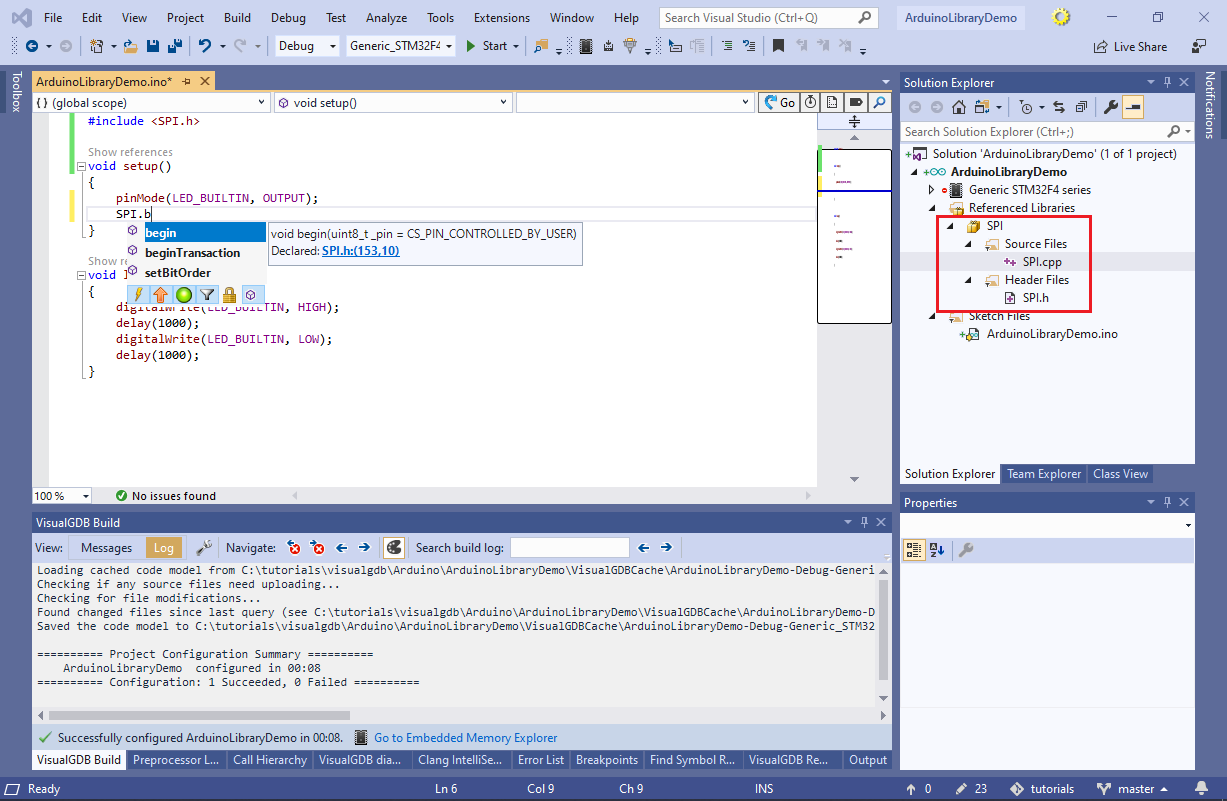 You can reference the libraries from the project by simply including the corresponding .h files from your .ino files. As long as the libraries are installed in the standard library directories, the Arduino tools will find them automatically.
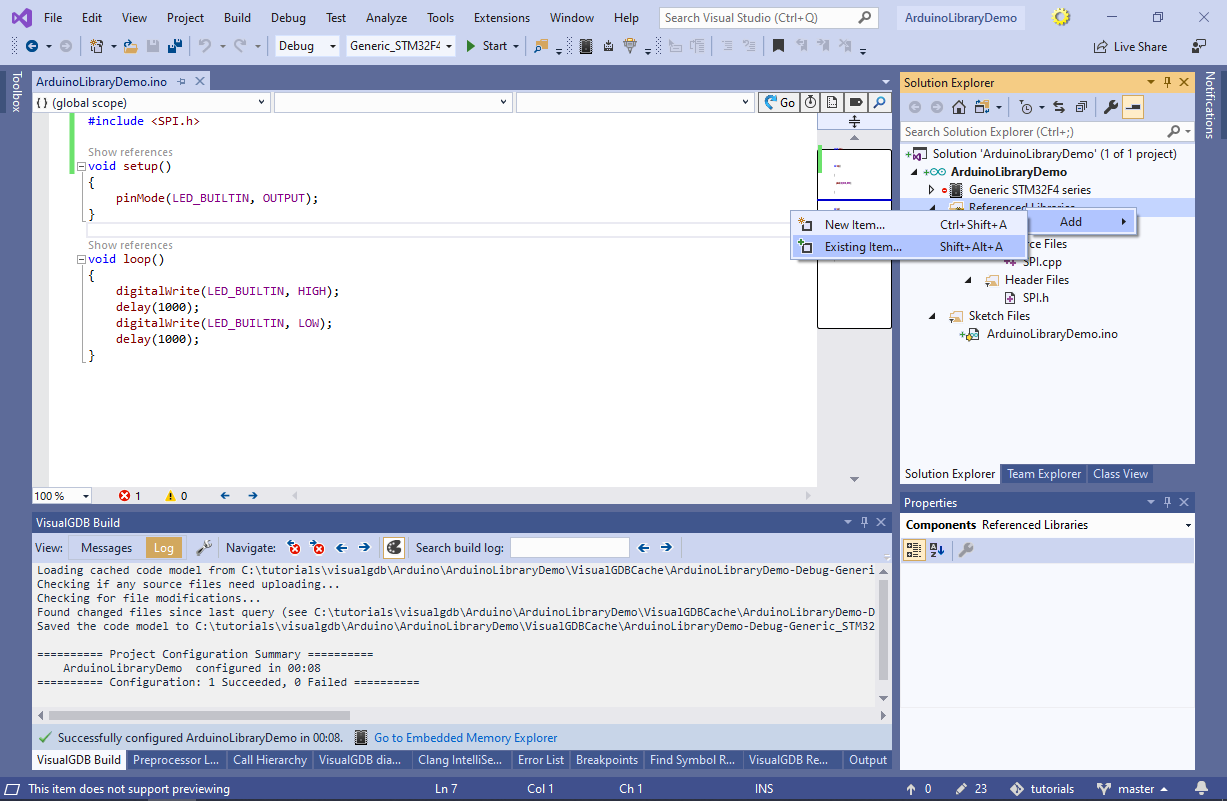
 - Now we will show how to reference a library explicitly. Right-click on the “Referenced Libraries” node in Solution Explorer and select “Add->Existing Item”:
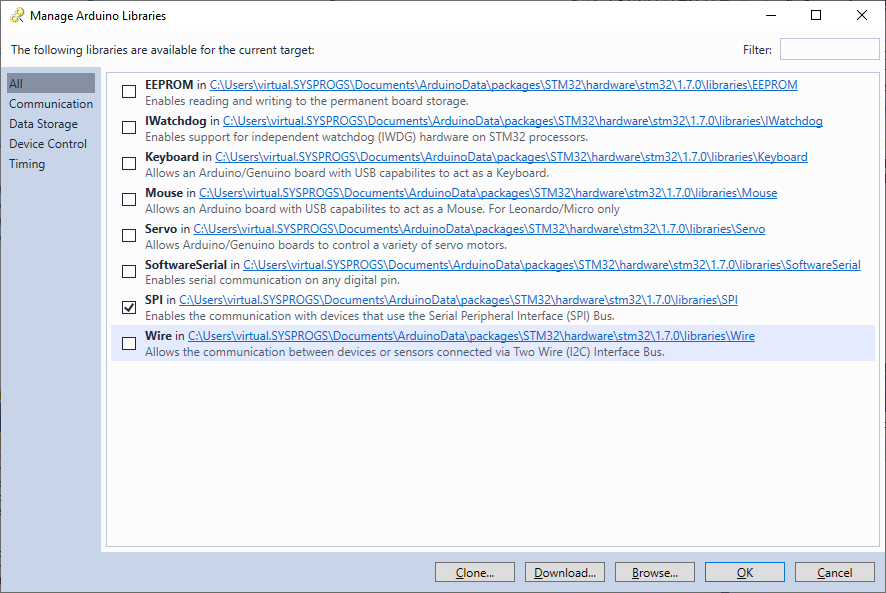
 VisualGDB will show the list of libraries reported by the Arduino build tools. You can use the checkboxes in this window to add or remove references to Arduino libraries. Note that this will simply add or remove the #include<> directives for the libraries’ header files in your main sketch file. I.e. the result will be exactly the same as if you added/removed those directives manually:
- Click on the “Download” button at the bottom of the Libraries window. VisualGDB will display the list of libraries available for download. Try locating and installing the CRC32 library:
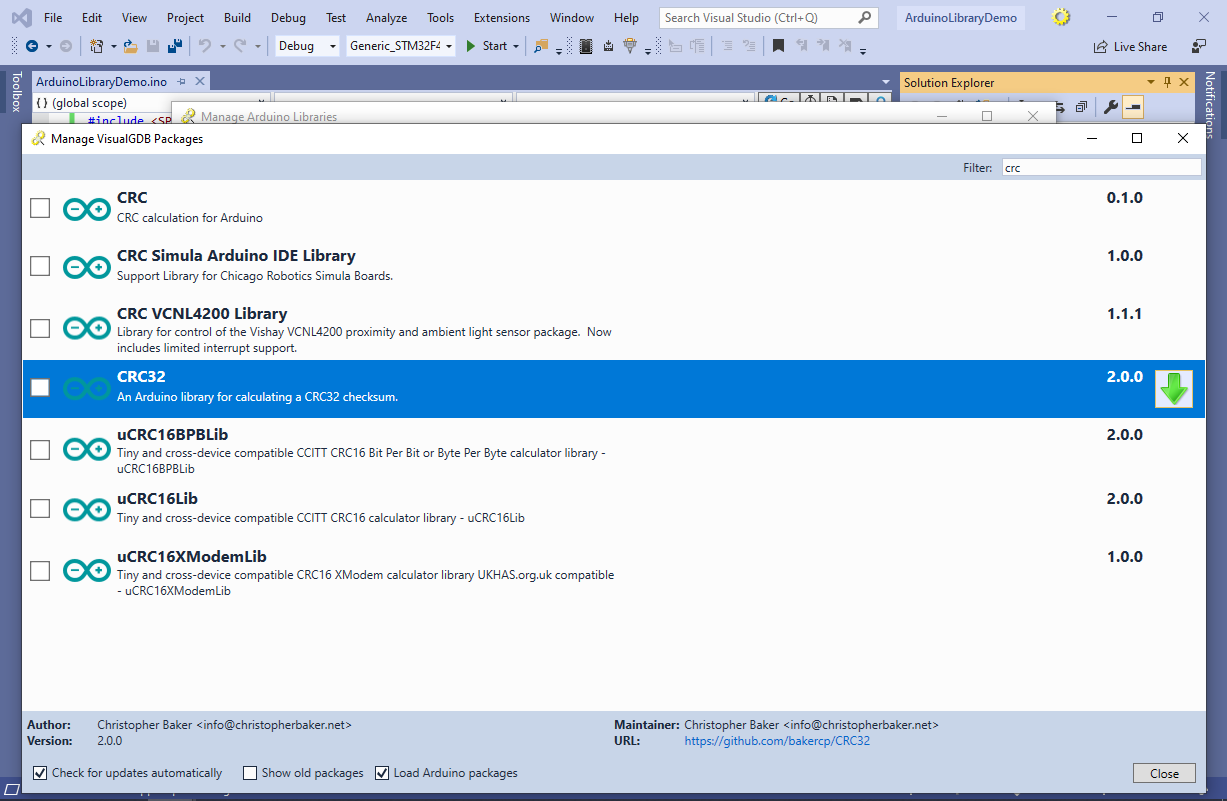
- Once the library is installed, you can reference it via the “Manage Arduino Libraries” window:
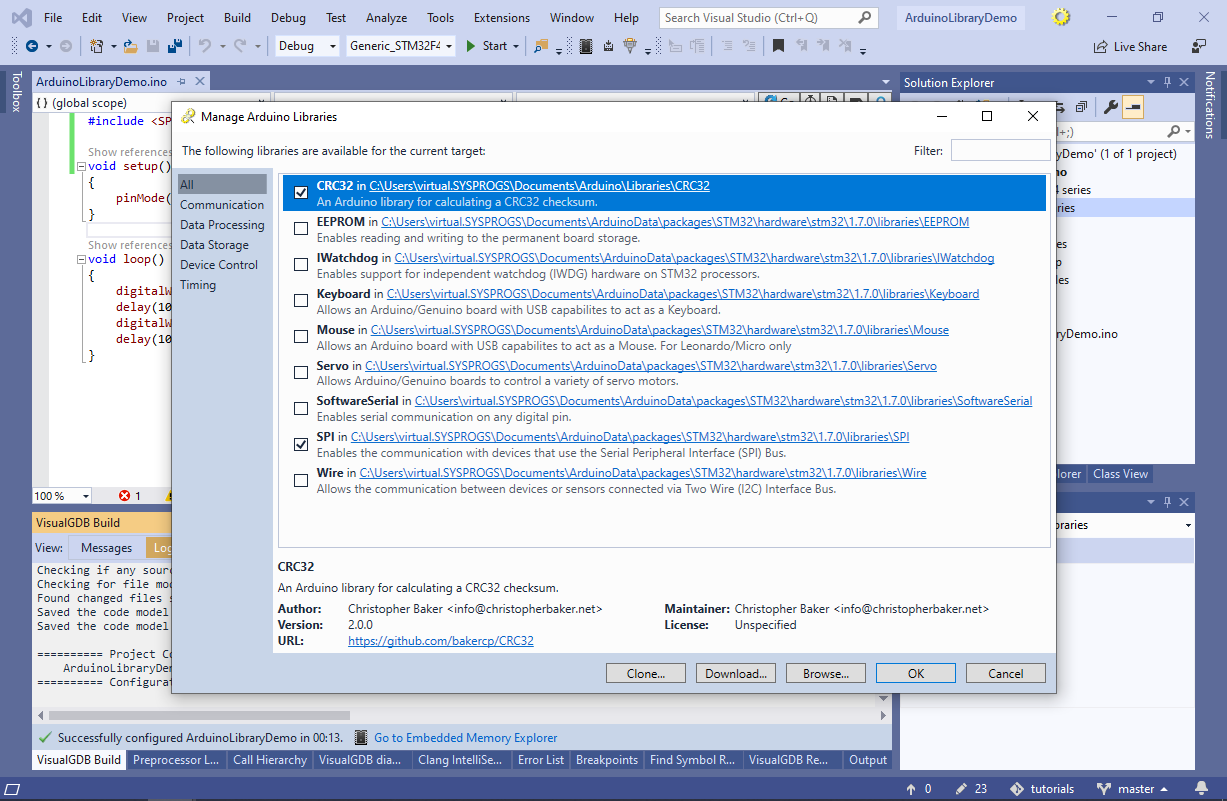
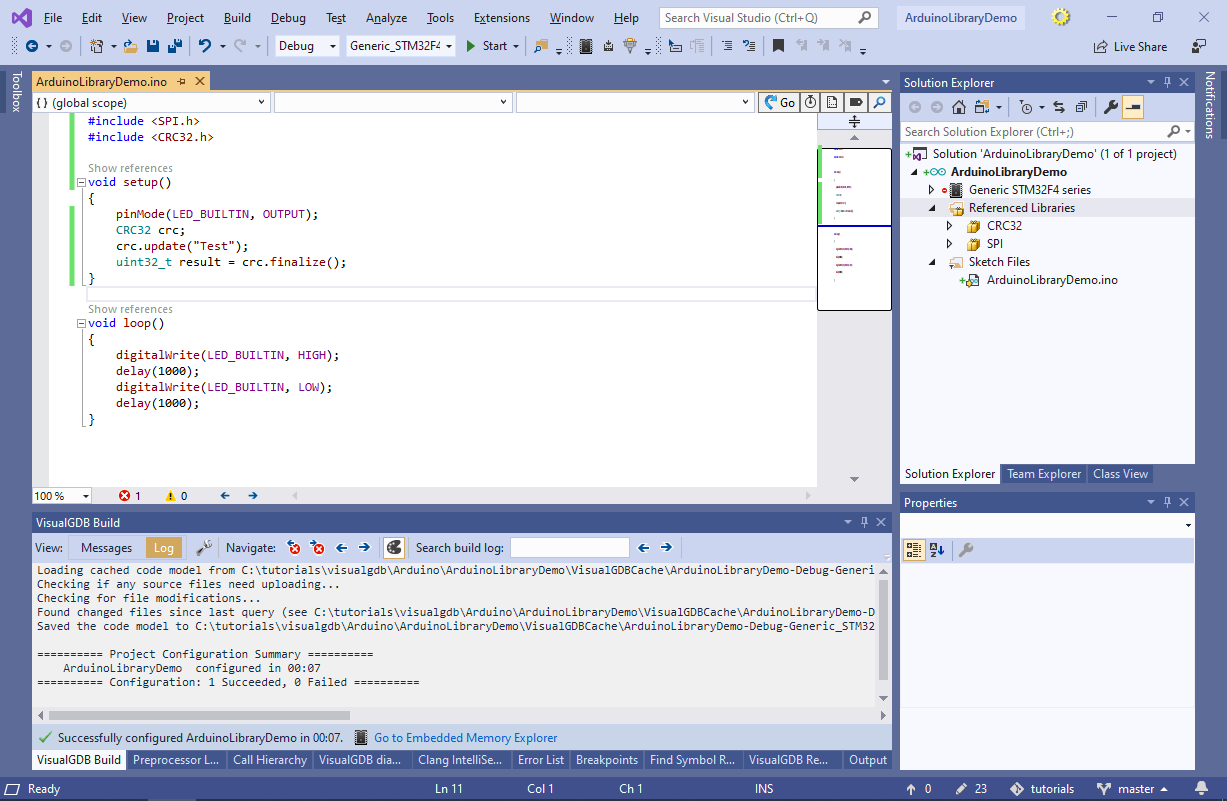
- You can try using the CRC library by adding the following code to the setup() function:
    CRC32 crc;
    crc.update("Test");
    uint32_t result = crc.finalize();
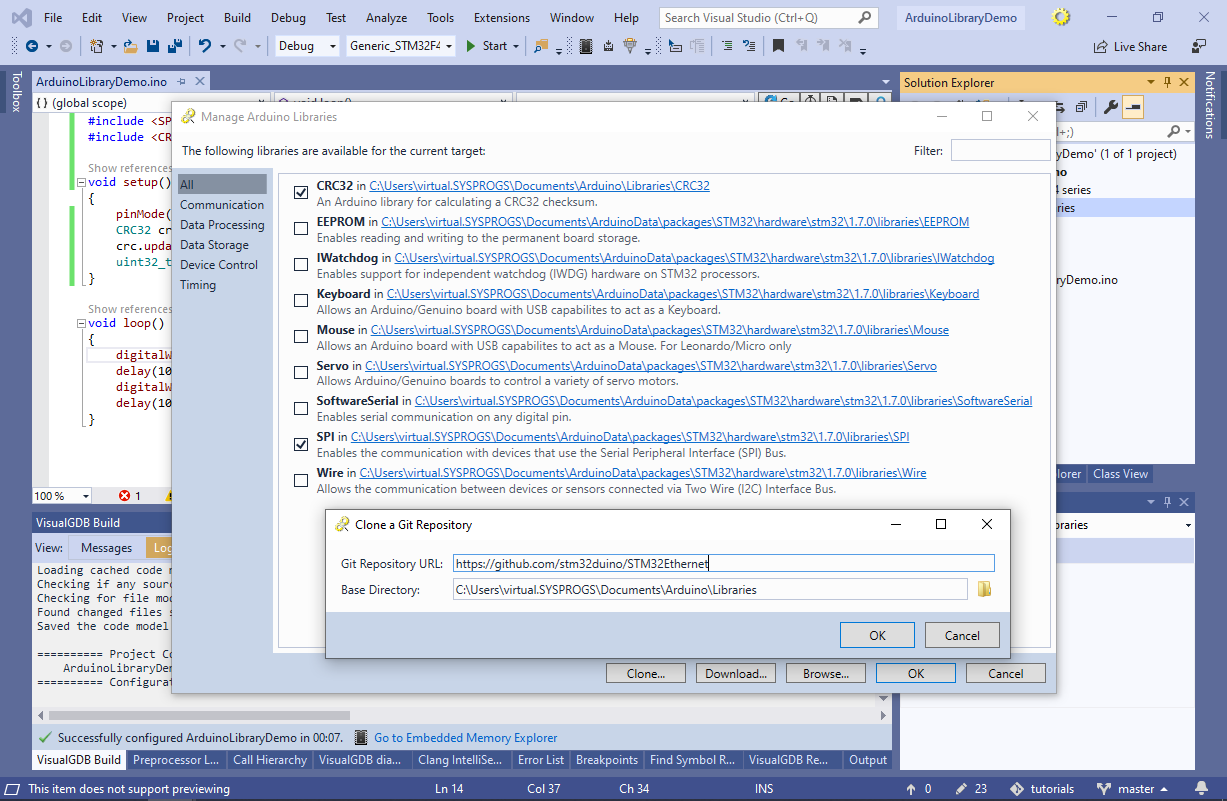
- You can also clone libraries from Git repositories using the “Clone” button in the “Manage Arduino Libraries” window. Try cloning the following library:
https://github.com/stm32duino/STM32Ethernet
- VisualGDB will clone it, however referencing it will not work due to the missing STM32duino LwIP library:
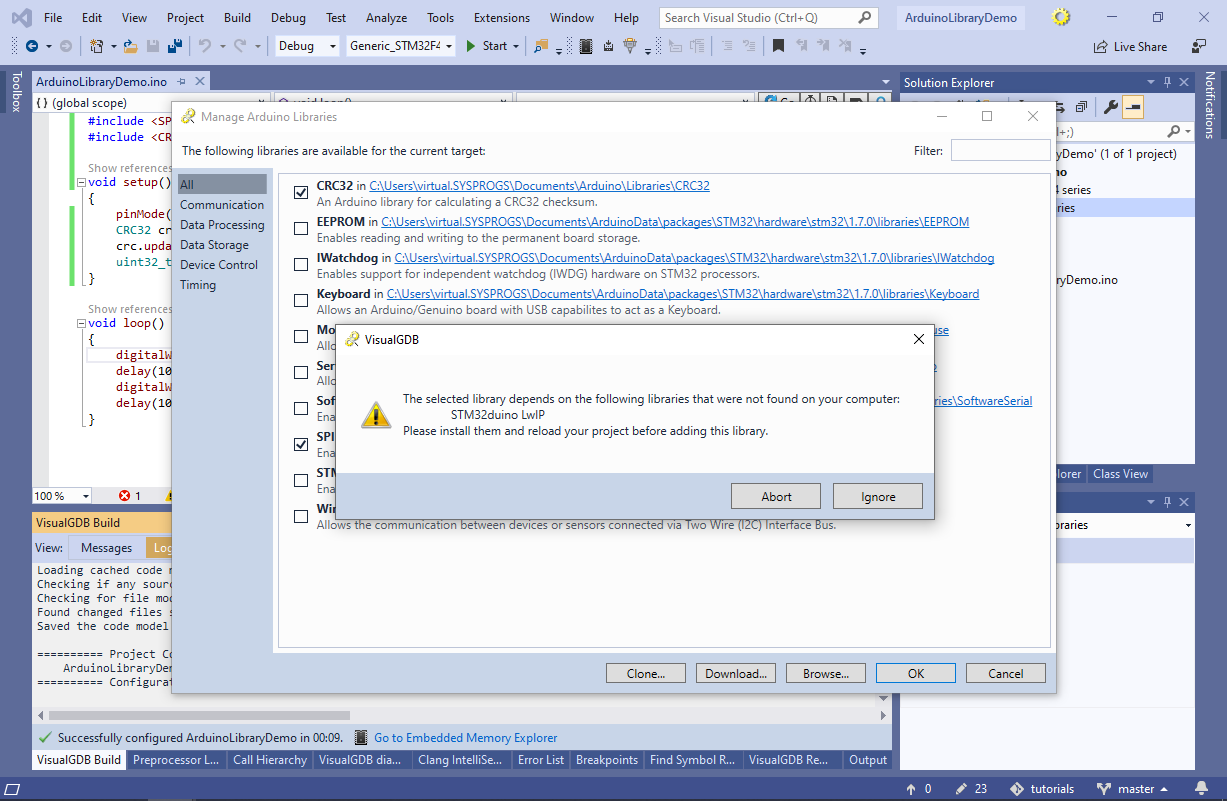
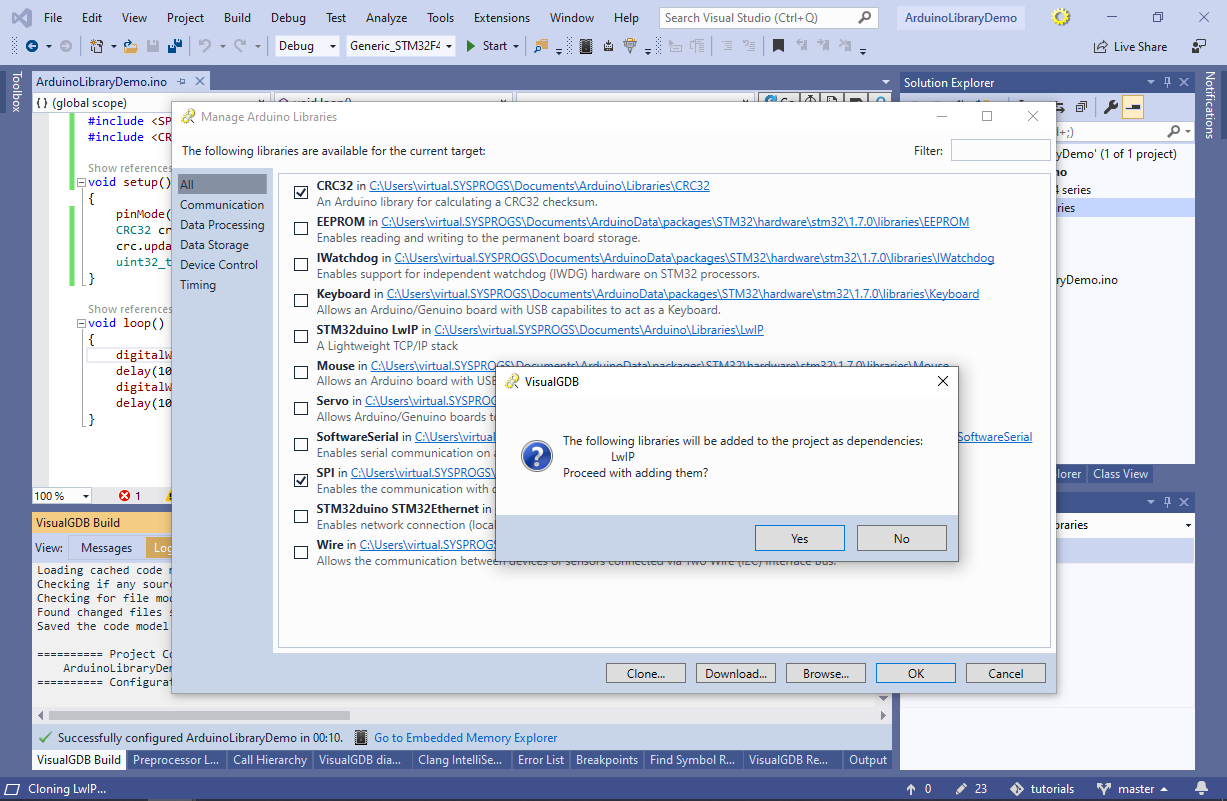
- Clone the https://github.com/stm32duino/LwIP library as well and try referencing the STM32duino STM32Ethernet library. VisualGDB will suggest automatically referencing the the LwIP library as well:
- You can use the Tools->VisualGDB->Arduino Settings command to manage the directories used by VisualGDB to discover installed and available libraries:
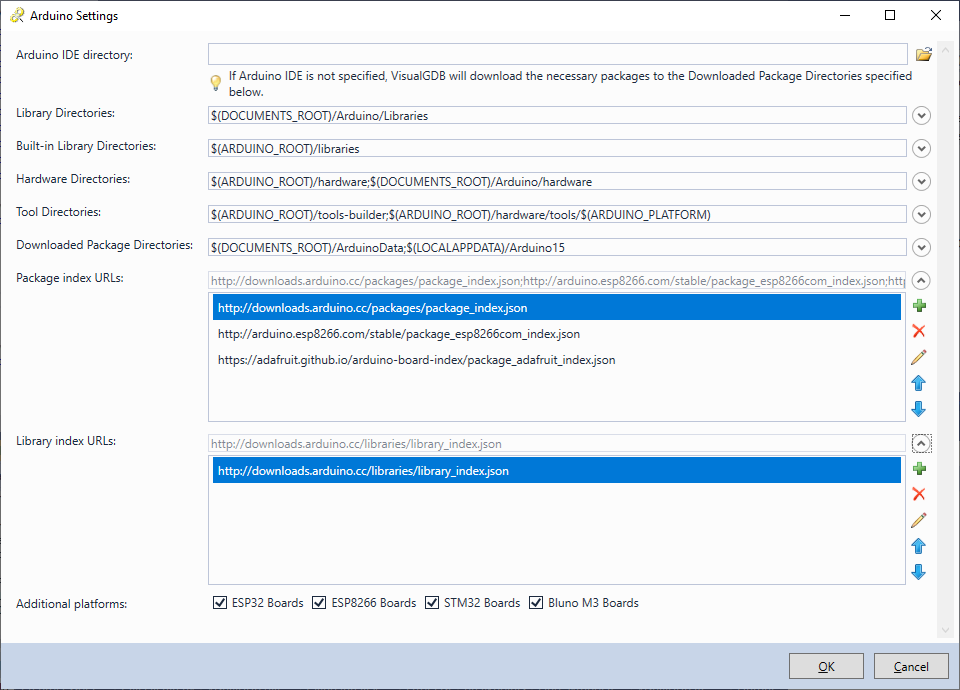 E.g., if the library directories are set to $(DOCUMENTS_ROOT)/Arduino/Libraries,the Arduino tools will expect the libraries to be installed in <Documents>\Arduino\Libraries\<Library Name> folders. Once a header file is found anywhere inside the library’s folder, the entire library will get added to the project.
 - Now we will show how to add a library from scratch. Right-click on the “Referenced Libraries” item and select “Add->New Item”:
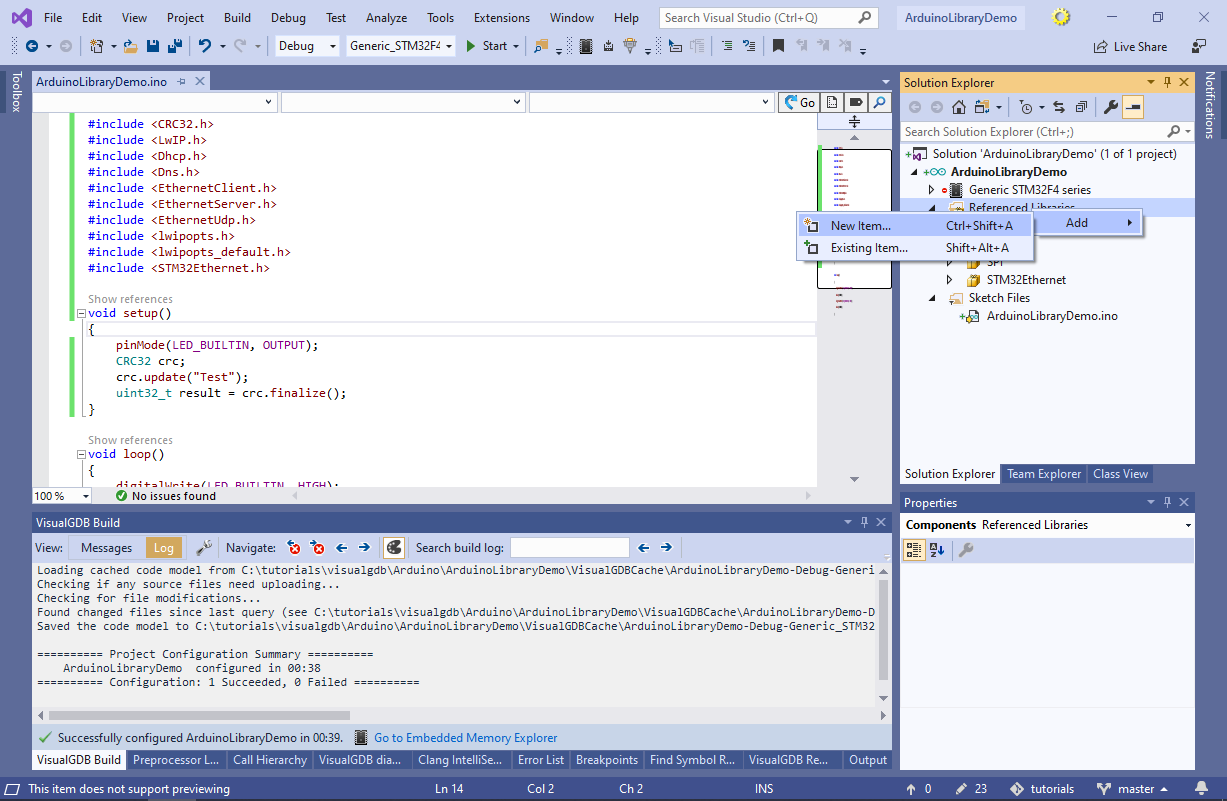
- Enter the name and location of the new library. In this tutorial we will place it outside the regular library directory so that we could check it into source control:
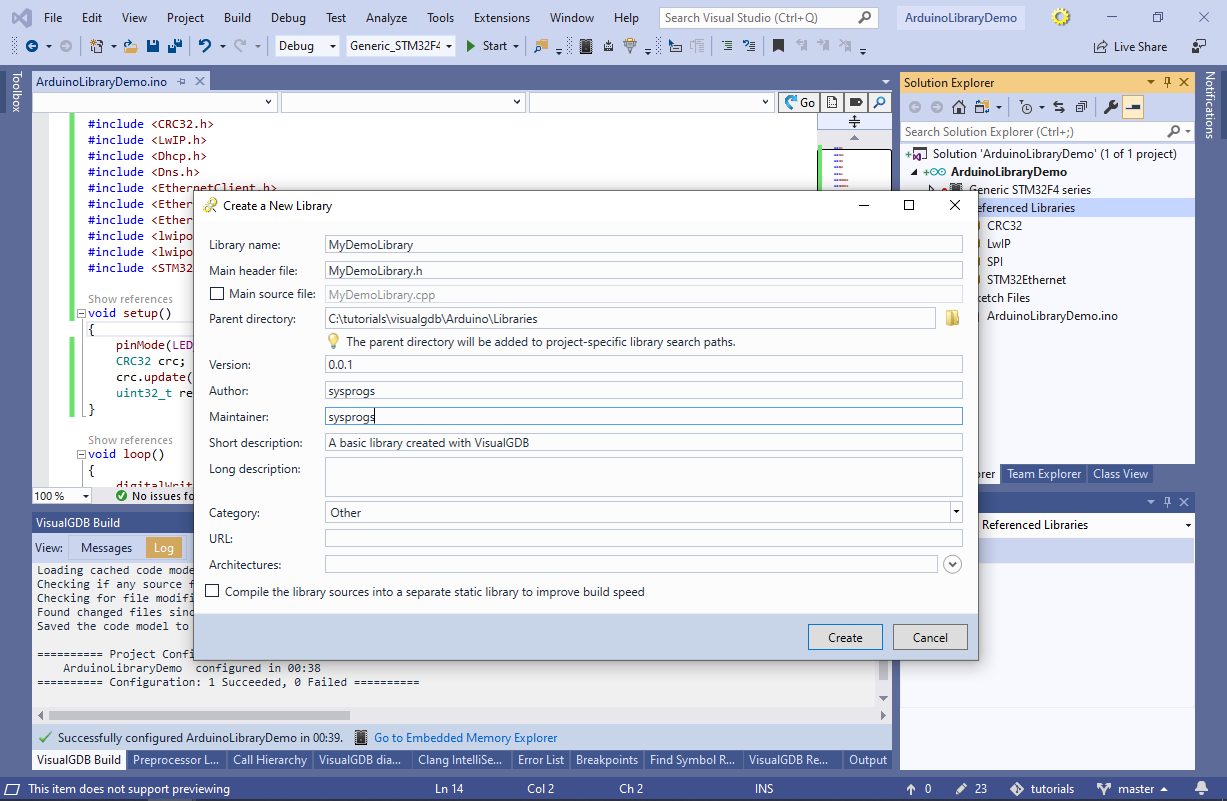
- This will automatically add the parent directory of the new library to the project-specific library search path:
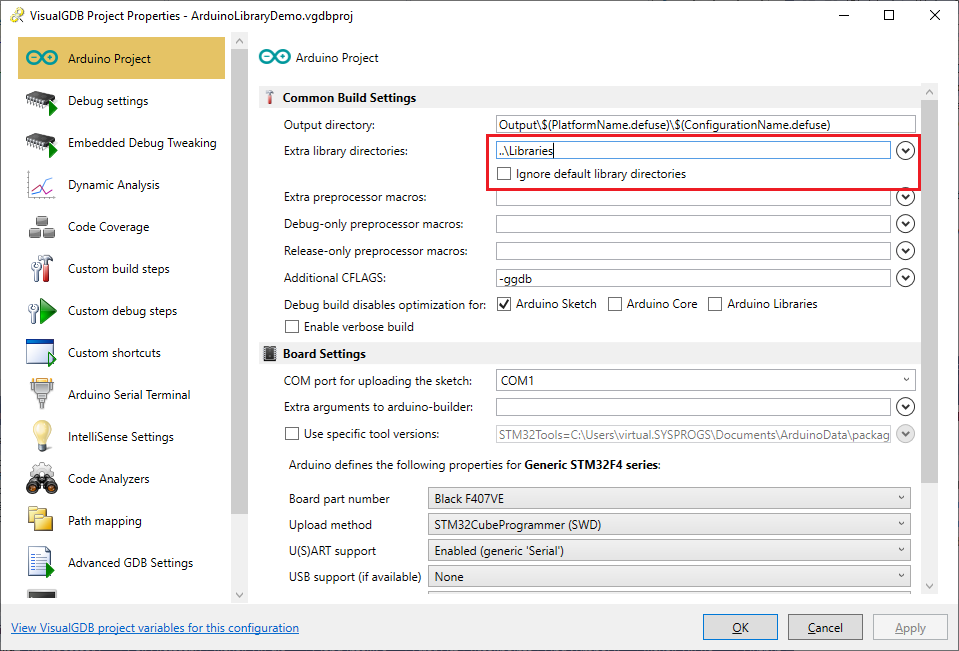 Directories listed in the “Extra library directories” field will get searched for libraries same way as the system-wide directories, such as <Documents>\Arduino\Libraries. If the Arduino tools keep finding incorrect types/versions of the libraries, try checking the “Ignore default library directories” checkbox and specifying the library directories explicitly.
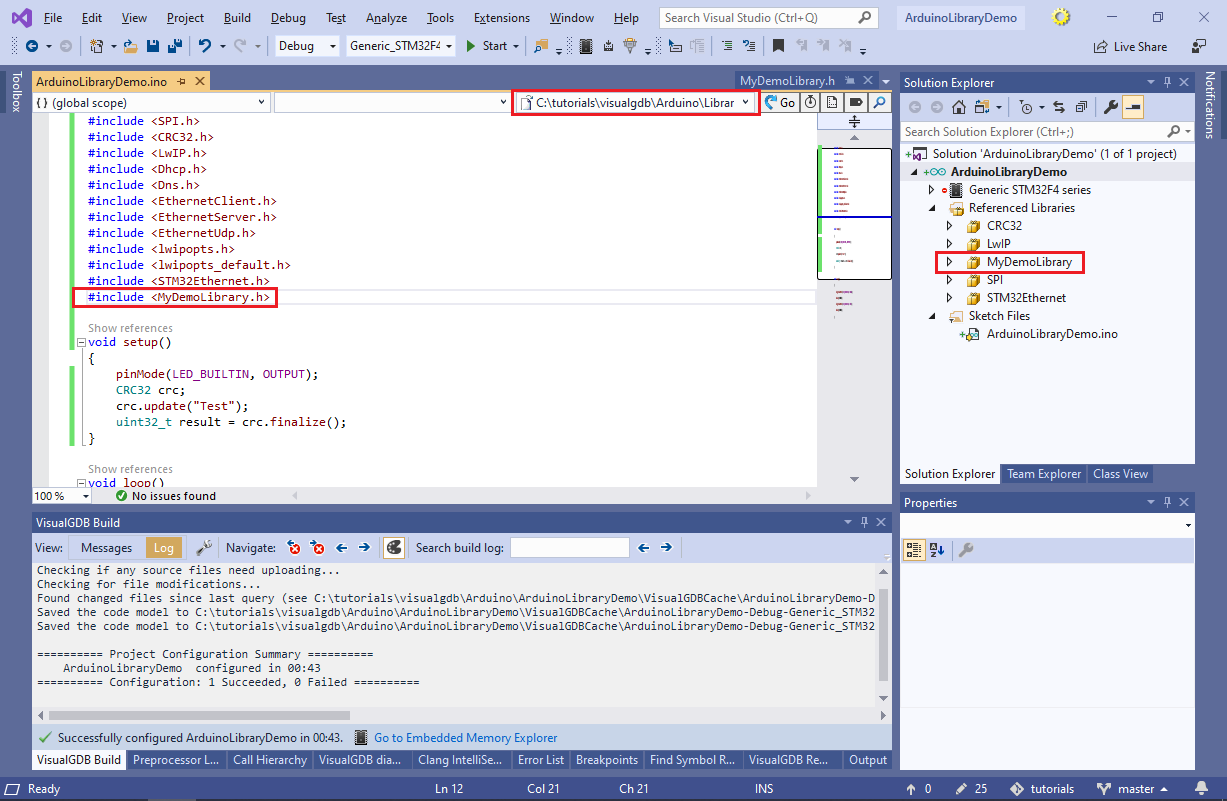
 - See how including the <MyDemoLibrary.h> file automatically referenced MyDemoLibrary:
- Close the solution and locate the <Project name>.adeps file in the project directory. Each time the project is loaded, VisualGDB will save the exact libraries (and platform) discovered by the Arduino tools. The file itself does not participate in build, however if you check it into source control and open the project on another machine, VisualGDB will suggest automatically downloading and installing the missing libraries:
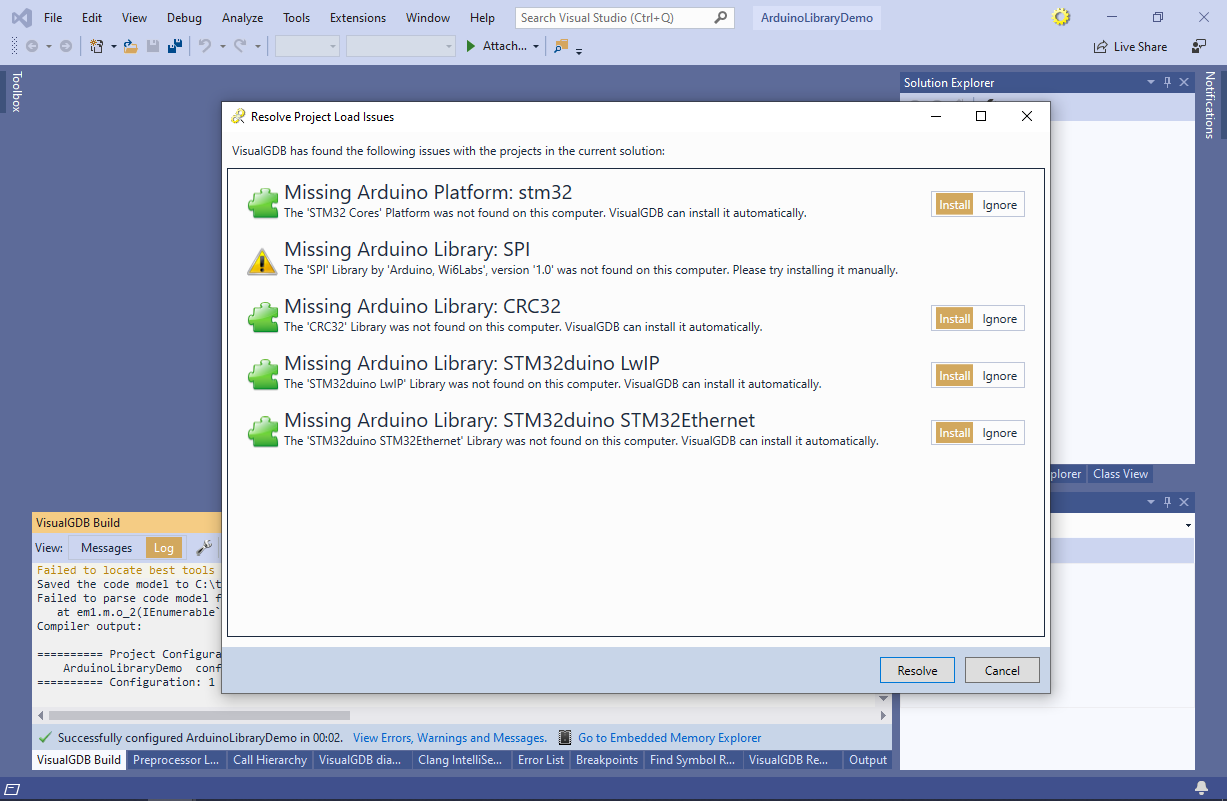 Note that the SPI library is a part of the STM32 Arduino core and will be displayed as missing until you install the STM32 core itself.
 - Note that as of November 2019, if you try building the STM32Ethernet library with the default configuration, you will likely get multiple errors in ethernetif.cpp:
C:\Program Files (x86)\Sysprogs\VisualGDB\Arduino\arduino-builder.exe -prefs=com.sysprogs.extraflags="-ggdb" -compile -logger=machine -fqbn=STM32:stm32:GenF4:pnum=DIYMORE_F407VGT,upload_method=swdMethod,xserial=generic,usb=none,xusb=FS,opt=osstd,rtlib=nano -build-path C:\tutorials\visualgdb\Arduino\ArduinoLibraryDemo\Output\Generic_STM32F4_series\Debug -unoptimize=sketch -hardware "C:\Program Files (x86)\Sysprogs\VisualGDB\Arduino/hardware" -hardware C:\Users\virtual.SYSPROGS\Documents/ArduinoData/packages -tools "C:\Program Files (x86)\Sysprogs\VisualGDB\Arduino/tools-builder" -tools C:\Users\virtual.SYSPROGS\Documents/ArduinoData/packages -libraries C:\Users\virtual.SYSPROGS\Documents/Arduino/Libraries -libraries C:\tutorials\visualgdb\Arduino\ArduinoLibraryDemo\..\Libraries -prefs=runtime.tools.STM32Tools.path=C:\Users\virtual.SYSPROGS\Documents\ArduinoData\packages\STM32\tools\STM32Tools\1.3.1 -prefs=runtime.tools.arm-none-eabi-gcc.path=C:\Users\virtual.SYSPROGS\Documents\ArduinoData\packages\STM32\tools\arm-none-eabi-gcc\8.2.1-1.7 sketches/ArduinoLibraryDemo.ino
A subdirectory or file C:\tutorials\visualgdb\Arduino\ArduinoLibraryDemo\Output\Generic_STM32F4_series\Debug\sketch already exists.
C:\Users\virtual.SYSPROGS\Documents\Arduino\Libraries\STM32duino_STM32Ethernet\src\utility\ethernetif.cpp:75:15: error: 'ETH_DMADescTypeDef' does not name a type; did you mean 'RTC_DateTypeDef'?
 __ALIGN_BEGIN ETH_DMADescTypeDef  DMARxDscrTab[ETH_RXBUFNB] __ALIGN_END;/* Ethernet Rx MA Descriptor */
               ^~~~~~~~~~~~~~~~~~
               RTC_DateTypeDef
C:\Users\virtual.SYSPROGS\Documents\Arduino\Libraries\STM32duino_STM32Ethernet\src\utility\ethernetif.cpp:80:15: error: 'ETH_DMADescTypeDef' does not name a type; did you mean 'RTC_DateTypeDef'?
 __ALIGN_BEGIN ETH_DMADescTypeDef  DMATxDscrTab[ETH_TXBUFNB] __ALIGN_END;/* Ethernet Tx DMA Descriptor */
               ^~~~~~~~~~~~~~~~~~
               RTC_DateTypeDef
In file included from C:\Users\virtual.SYSPROGS\Documents\ArduinoData\packages\STM32\hardware\stm32\1.7.0\system/STM32F4xx/stm32f4xx_hal_conf.h:13,
                 from C:\Users\virtual.SYSPROGS\Documents\ArduinoData\packages\STM32\hardware\stm32\1.7.0\system/Drivers/STM32F4xx_HAL_Driver/Inc/stm32f4xx_hal.h:30,
                 from C:\Users\virtual.SYSPROGS\Documents\ArduinoData\packages\STM32\hardware\stm32\1.7.0\system/Drivers/CMSIS/Device/ST/STM32F4xx/Include/stm32f4xx.h:250,
                 from C:\Users\virtual.SYSPROGS\Documents\ArduinoData\packages\STM32\hardware\stm32\1.7.0\cores\arduino/stm32/stm32_def.h:34,
                 from C:\Users\virtual.SYSPROGS\Documents\Arduino\Libraries\STM32duino_STM32Ethernet\src\utility\ethernetif.cpp:48:
C:\Users\virtual.SYSPROGS\Documents\ArduinoData\packages\STM32\hardware\stm32\1.7.0\system/STM32F4xx/stm32f4xx_hal_conf_default.h:227:40: error: 'ETH_MAX_PACKET_SIZE' was not declared in this scope
 #define ETH_RX_BUF_SIZE                ETH_MAX_PACKET_SIZE /* buffer size for receive               */
                                        ^~~~~~~~~~~~~~~~~~~
C:\Users\virtual.SYSPROGS\Documents\Arduino\Libraries\STM32duino_STM32Ethernet\src\utility\ethernetif.cpp:85:44: note: in expansion of macro 'ETH_RX_BUF_SIZE'
 __ALIGN_BEGIN uint8_t Rx_Buff[ETH_RXBUFNB][ETH_RX_BUF_SIZE] __ALIGN_END; /* Ethernet Receive Buffer */
                                            ^~~~~~~~~~~~~~~
C:\Users\virtual.SYSPROGS\Documents\ArduinoData\packages\STM32\hardware\stm32\1.7.0\system/STM32F4xx/stm32f4xx_hal_conf_default.h:227:40: note: suggested alternative: 'ETH_TX_BUF_SIZE'
 #define ETH_RX_BUF_SIZE                ETH_MAX_PACKET_SIZE /* buffer size for receive               */
                                        ^~~~~~~~~~~~~~~~~~~
C:\Users\virtual.SYSPROGS\Documents\Arduino\Libraries\STM32duino_STM32Ethernet\src\utility\ethernetif.cpp:85:44: note: in expansion of macro 'ETH_RX_BUF_SIZE'
 __ALIGN_BEGIN uint8_t Rx_Buff[ETH_RXBUFNB][ETH_RX_BUF_SIZE] __ALIGN_END; /* Ethernet Receive Buffer */
                                            ^~~~~~~~~~~~~~~
C:\Users\virtual.SYSPROGS\Documents\ArduinoData\packages\STM32\hardware\stm32\1.7.0\system/STM32F4xx/stm32f4xx_hal_conf_default.h:228:40: error: 'ETH_MAX_PACKET_SIZE' was not declared in this scope
 #define ETH_TX_BUF_SIZE                ETH_MAX_PACKET_SIZE /* buffer size for transmit              */
                                        ^~~~~~~~~~~~~~~~~~~
C:\Users\virtual.SYSPROGS\Documents\Arduino\Libraries\STM32duino_STM32Ethernet\src\utility\ethernetif.cpp:90:44: note: in expansion of macro 'ETH_TX_BUF_SIZE'
 __ALIGN_BEGIN uint8_t Tx_Buff[ETH_TXBUFNB][ETH_TX_BUF_SIZE] __ALIGN_END; /* Ethernet Transmit Buffer */
                                        ^~~~~~~~~~~~~~~
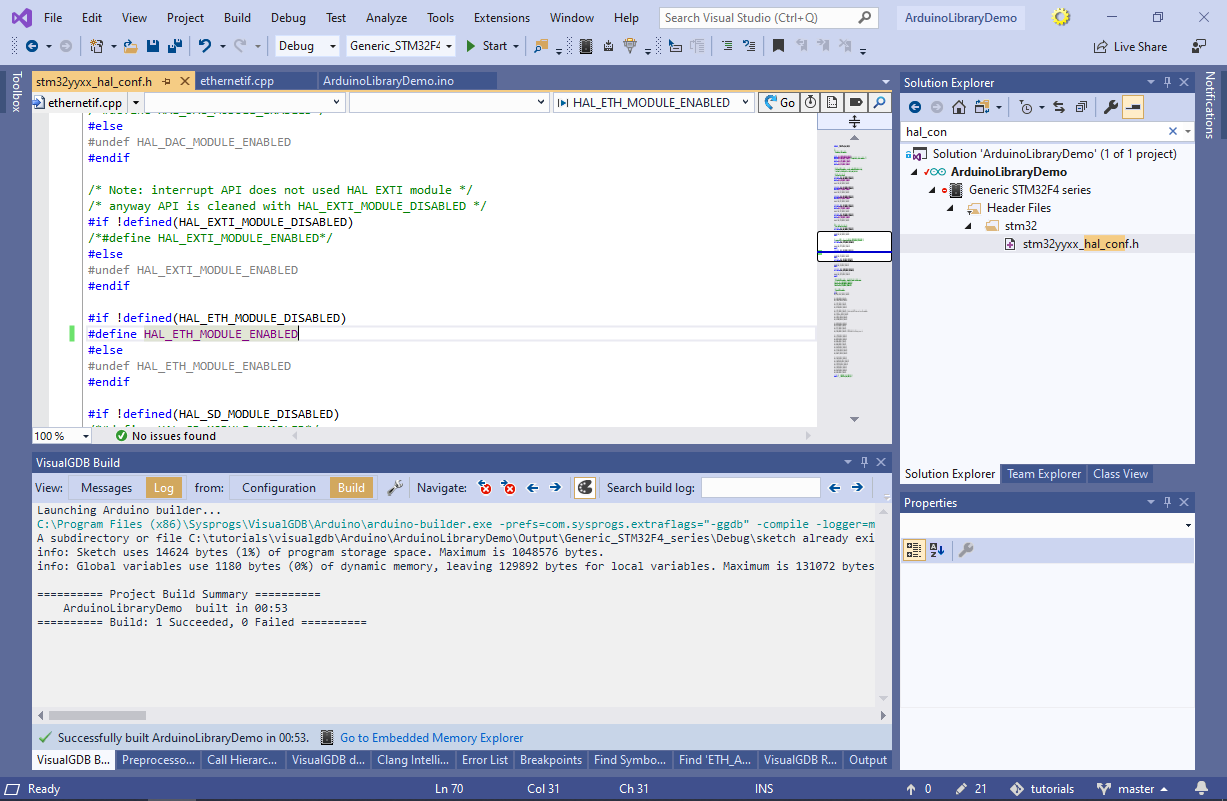
- This happens because the stm32yxx_hal_conf.h file is missing the HAL_ETH_MODULE_ENABLED macro. Uncomment the macro as shown below and you will be able to build the project successfully:
