Using Project Templates for Embedded Projects
This tutorial shows how to convert a VisualGDB project into a template that can be used to create a similar project on the same or a different machine. Before you begin, install VisualGDB 5.1 or later. Note that project templates are available in the Custom edition and higher.
We will first create a basic project, modify it by adding some source files and changing settings, and then show how to create a template based on it.
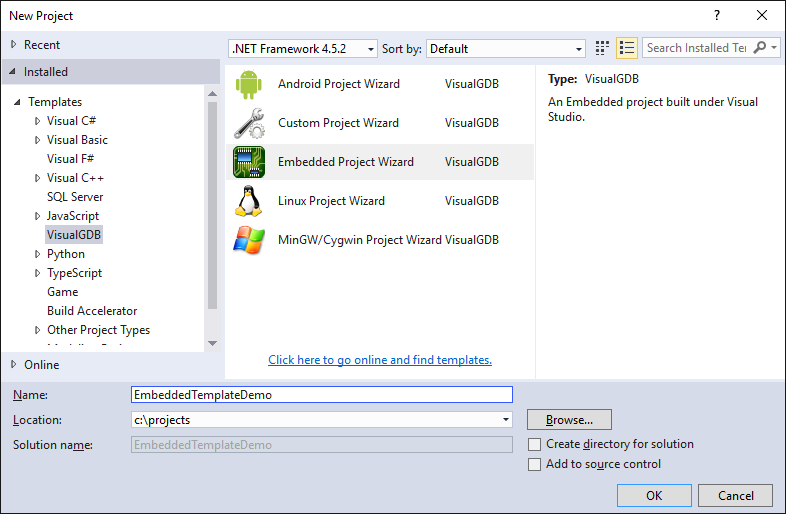
- Start Visual Studio and launch the VisualGDB Embedded Project Wizard:
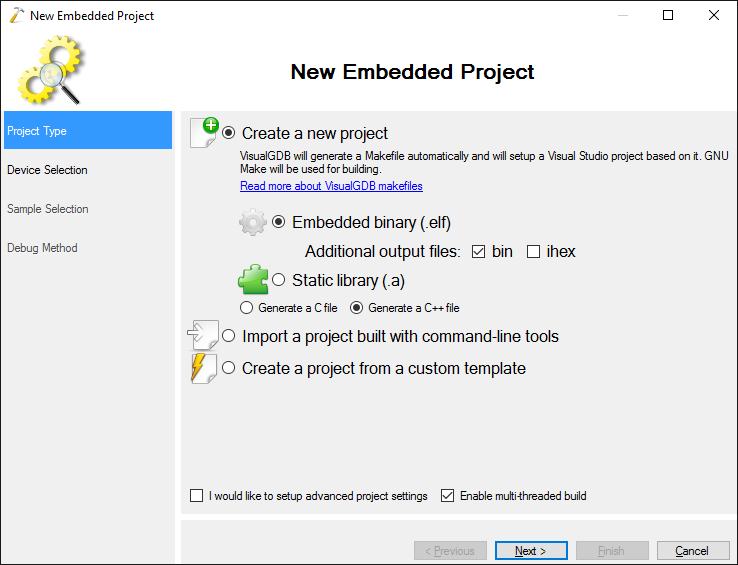
- Proceed with the default settings on the first page (New Project->Embedded Binary):
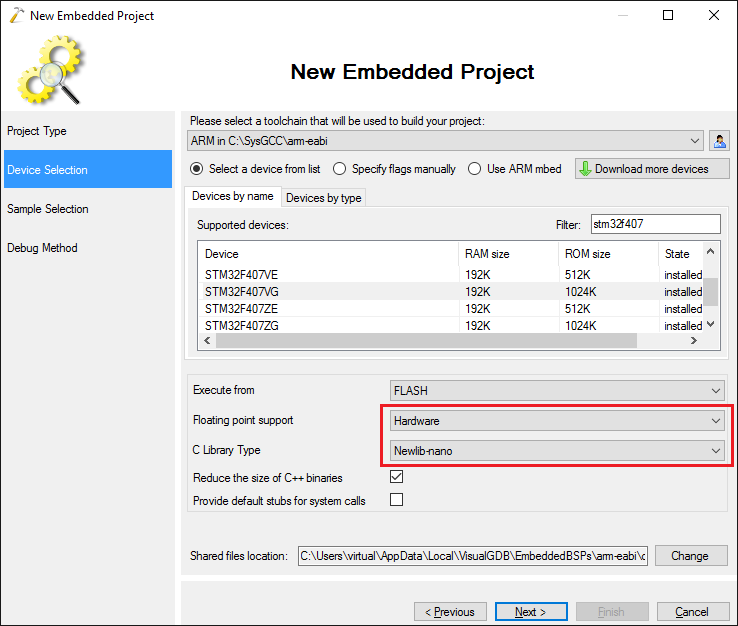
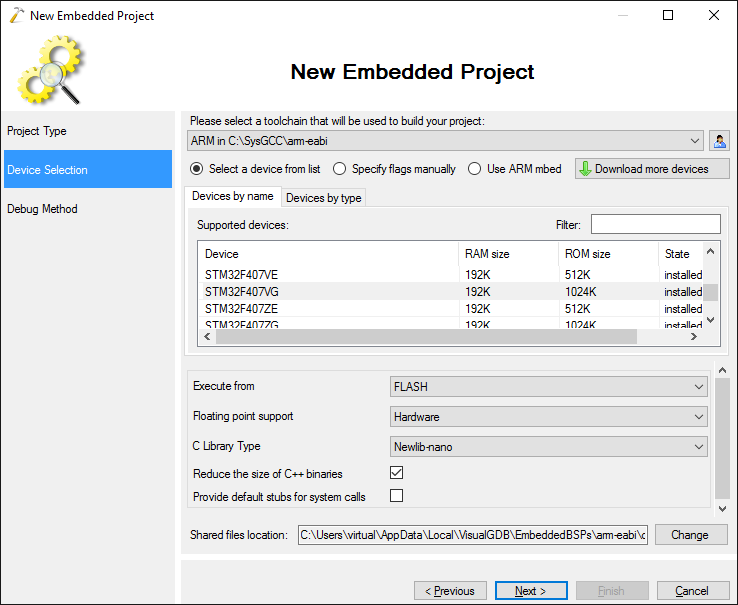
- On the second page select your toolchain and device. In this tutorial we will target the STM32F4Discovery board, so we select the STM32F407VG device. Change the floating point support mode to Hardware and the libc library type to newlib-nano. We will show later how these settings will be saved in the template:
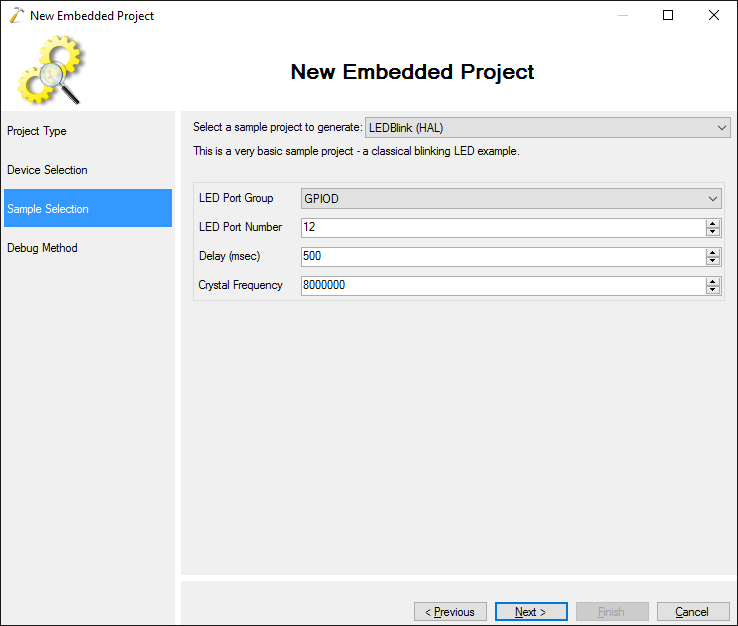
- On the Sample Selection page select “LEDBlink (HAL)” and proceed with the default settings:
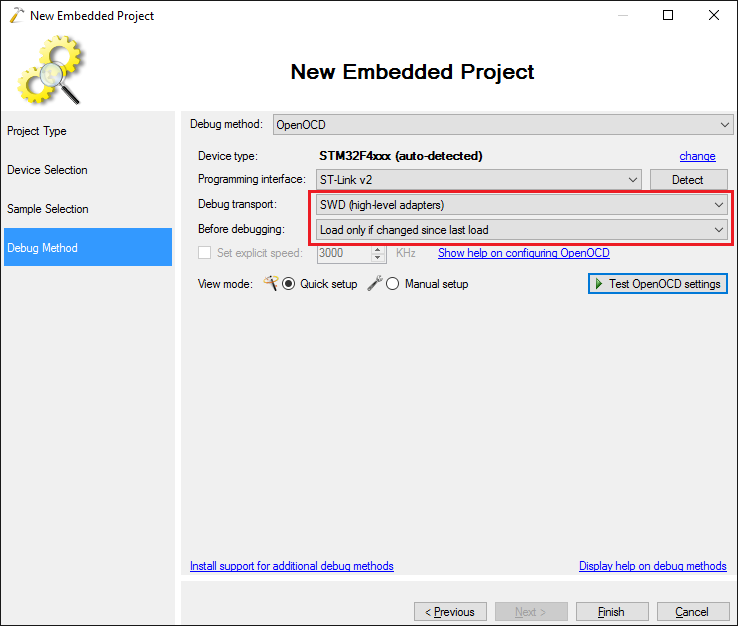
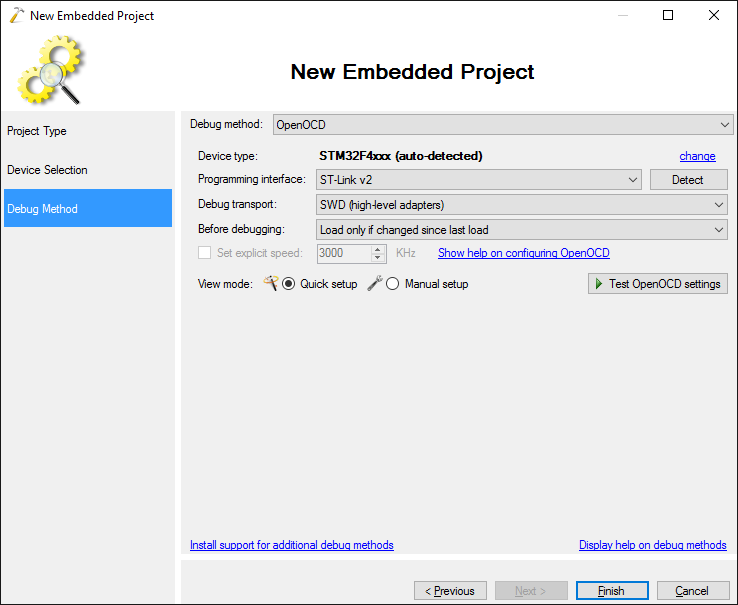
- On the Debug transport page select your debug method and configure it to use your JTAG or SWD programmer. In this example we will explicitly select the SWD mode and change the load mode to “Load only if changed” to show how these settings are saved in the template:
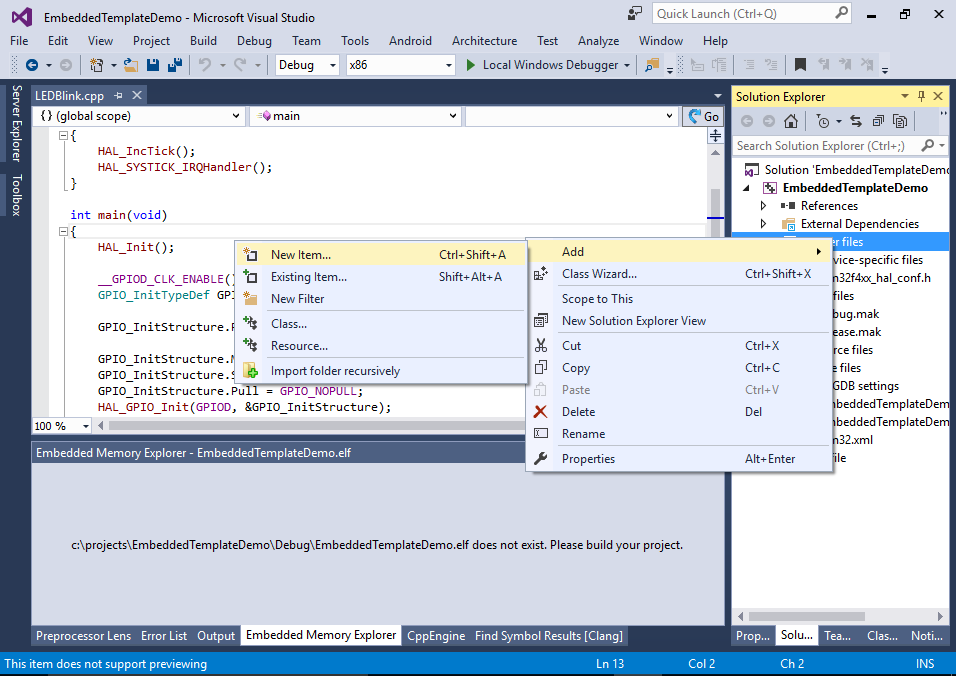
- Press “Finish” to generate the project. We will now modify it by adding a class called “PWMGenerator” that will generate the PWM output to make the LED go brighter and dimmer softly. Right-click in Solution Explorer and select “Add->New Item”:
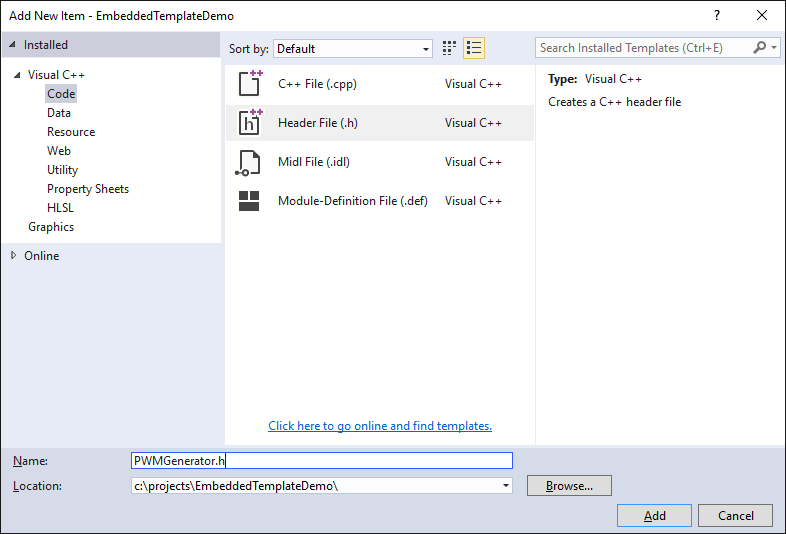
- Add an empty PWMGenerator.h file to the project:
- Similarly add PWMGenerator.cpp:

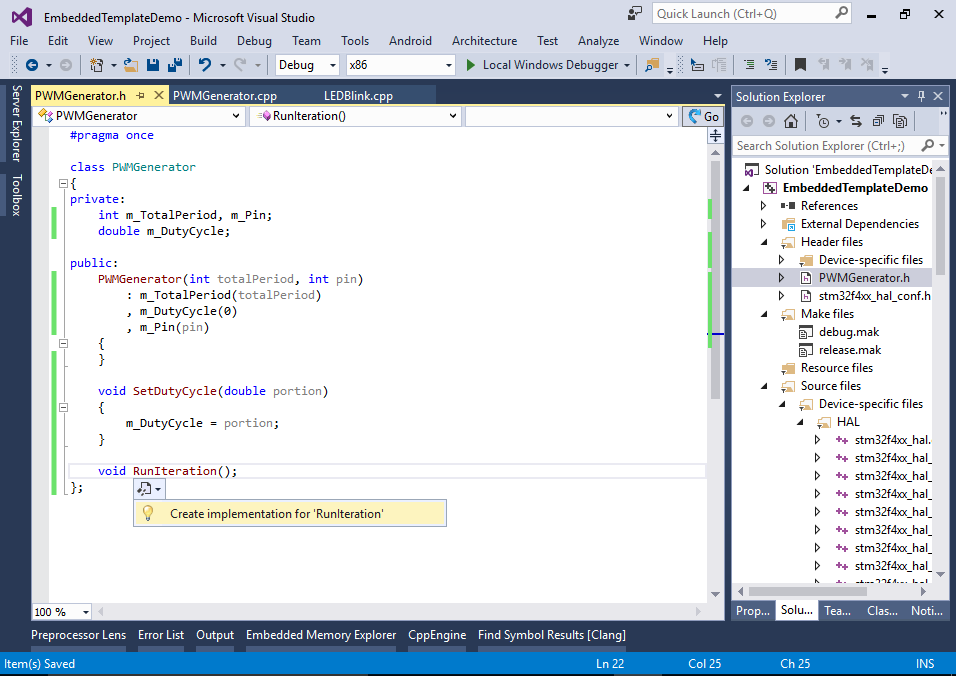
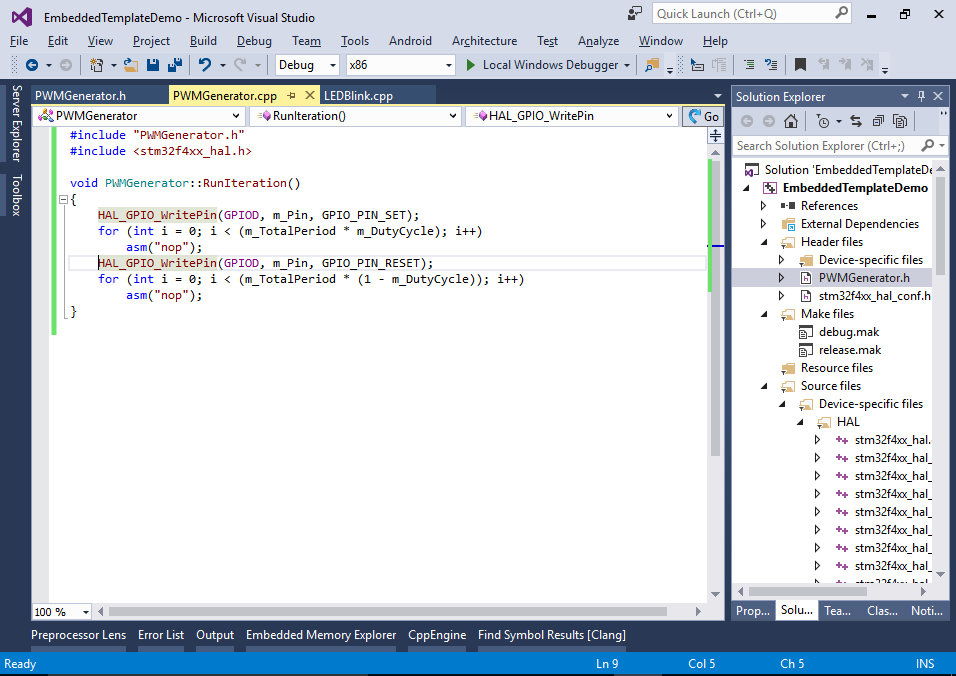
- Copy the following text into PWMGenerator.h:
#pragma once

class PWMGenerator
{
private:
    int m_TotalPeriod, m_Pin;
    double m_DutyCycle;

public:
    PWMGenerator(int totalPeriod, int pin)
        : m_TotalPeriod(totalPeriod)
        , m_DutyCycle(0)
        , m_Pin(pin)
    {
    }

    void SetDutyCycle(double portion)
    {
        m_DutyCycle = portion;
    }

    void RunIteration();
};
Then click on the Smart Tag near the “RunIteration” function and select “Create implementation”:
- Enter the following implementation for the function (don’t forget to include PWMGenerator.h and the HAL header file):
void PWMGenerator::RunIteration()
{
    HAL_GPIO_WritePin(GPIOD, m_Pin, GPIO_PIN_SET);
    for (int i = 0; i < (m_TotalPeriod * m_DutyCycle); i++)
        asm("nop");
    HAL_GPIO_WritePin(GPIOD, m_Pin, GPIO_PIN_RESET);
    for (int i = 0; i < (m_TotalPeriod * (1 - m_DutyCycle)); i++)
        asm("nop");
}
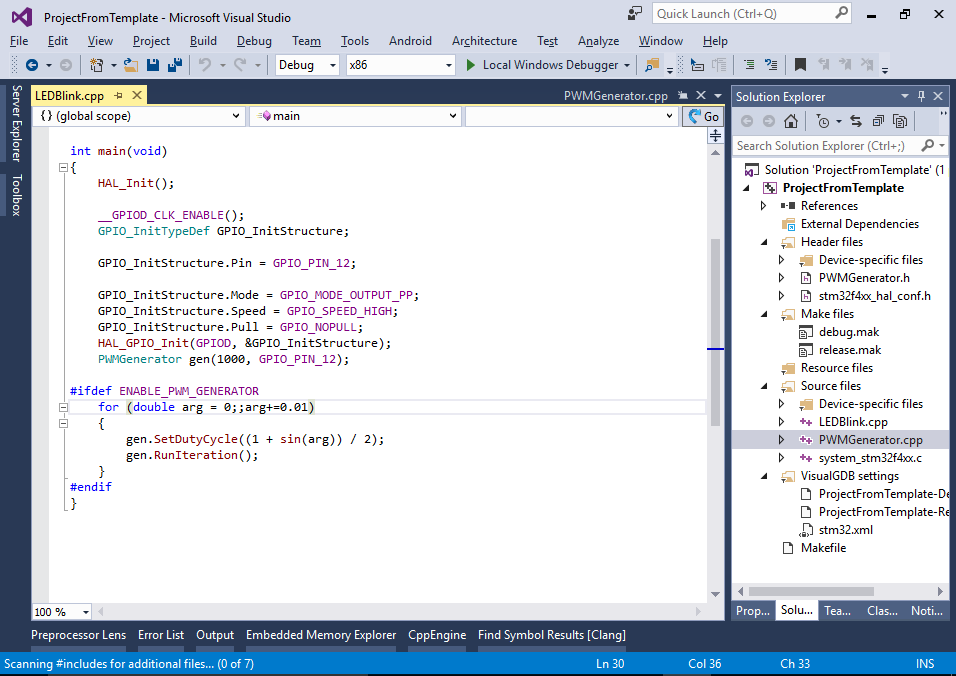
- Finally add the following lines to your main() function:
#ifdef ENABLE_PWM_GENERATOR
    for (double arg = 0;;arg+=0.01)
    {
        gen.SetDutyCycle((1 + sin(arg)) / 2);
        gen.RunIteration();
    }
#endif
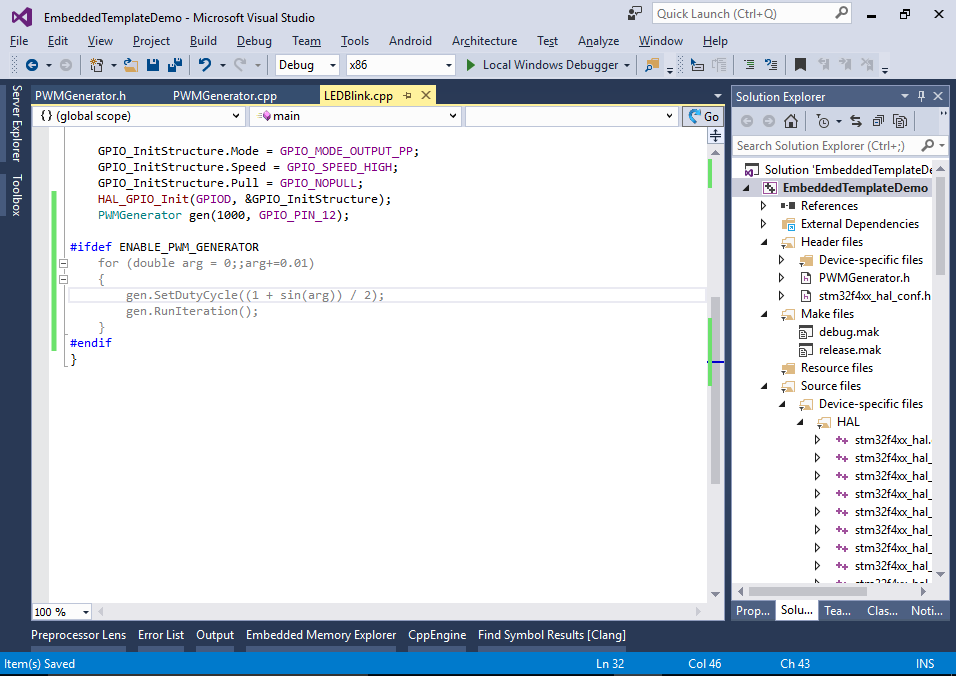
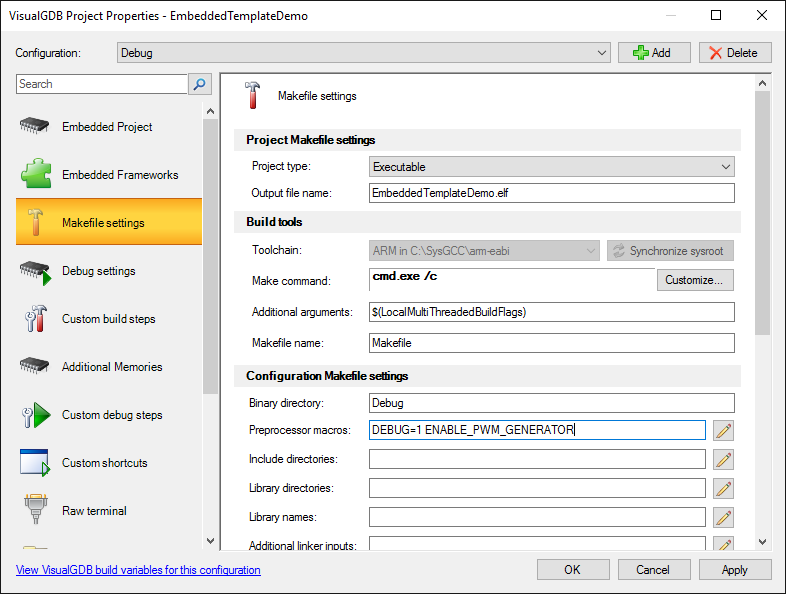
- Note how the code block inside the #ifdef statement is inactive. This happens because we have never defined the ENABLE_PWM_GENERATOR macro. Open VisualGDB Project Properties and define it on the Makefile Settings page:
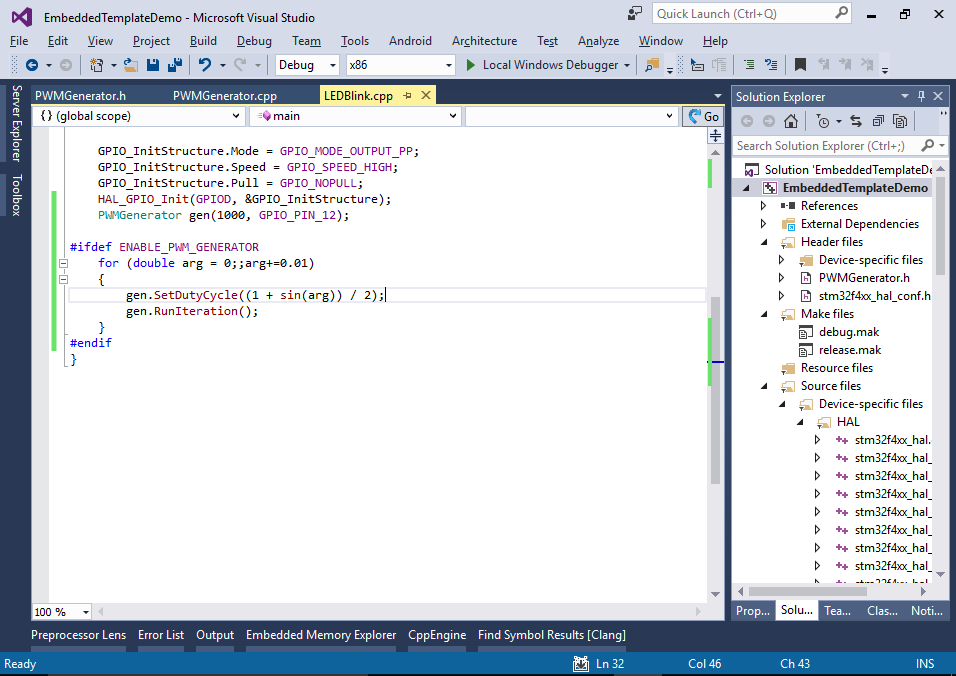
- Now the code block is active. You can press F5 to build and start debugging your project so that you can verify that the LED is slowly turning brighter and dimmer:
- We will now convert the project into a template that will contain:
- The new PWMGenerator class
- The modifications to the main .cpp file
- The selected device and its properties like the newlib-nano library
- The build settings like the added ENABLE_PWM_GENERATOR macro
- The debug settings like the explicitly selected SWD method
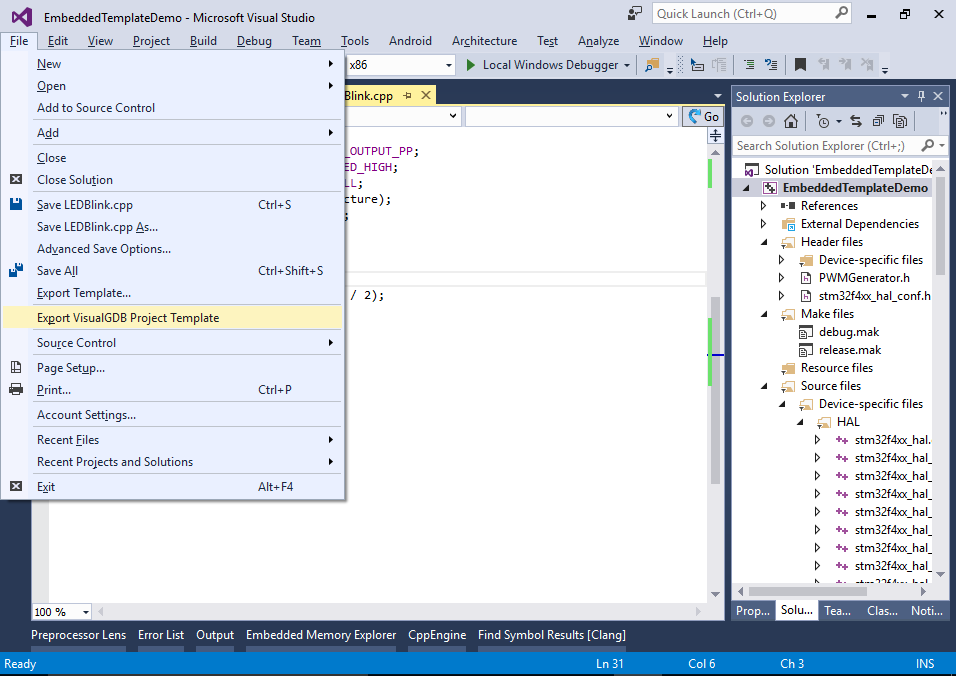
Select File->Export Project Template in Visual Studio:
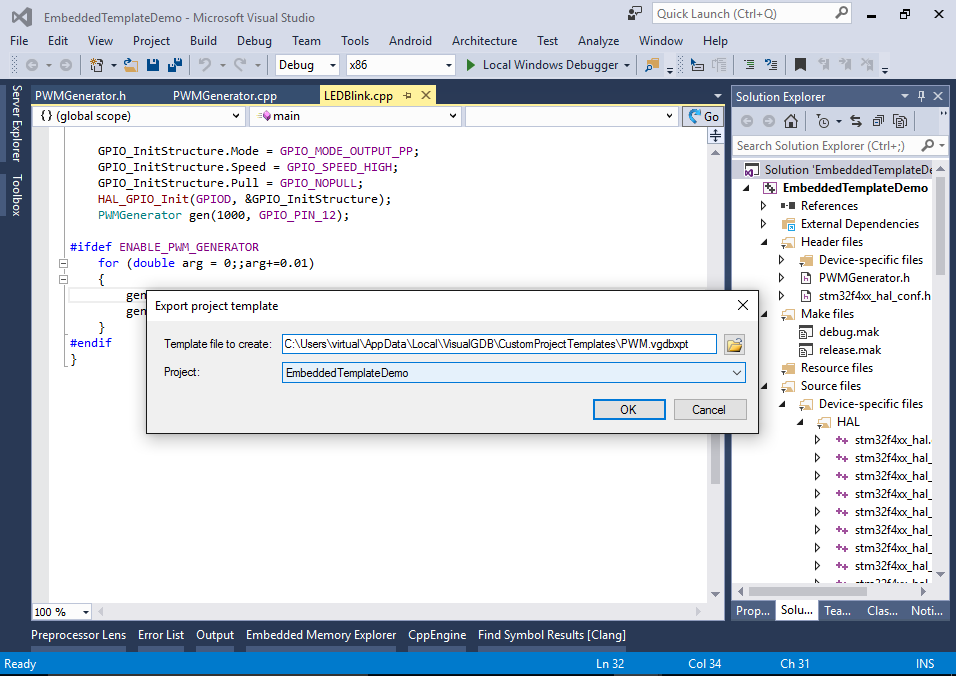
- Enter the file name for the template. If you press the “Browse” button, VisualGDB will offer saving it to %LOCALAPPDATA%\VisualGDB\CustomProjectTemplates, however you can pick any other location:
- Now we will create a project based on the template. You can do that on the same machine, or any other machine that has VisualGDB installed and can access the template file. Open VisualGDB Embedded Project Wizard:
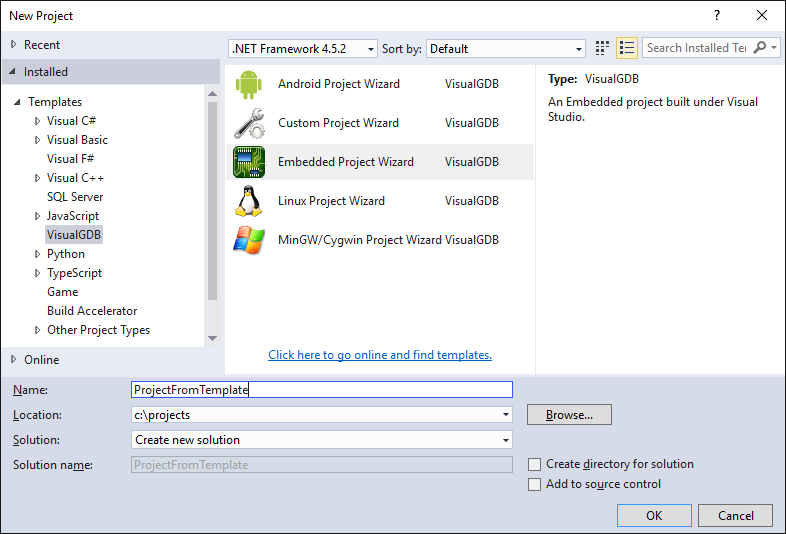
- Select “Create a project from a custom template”:
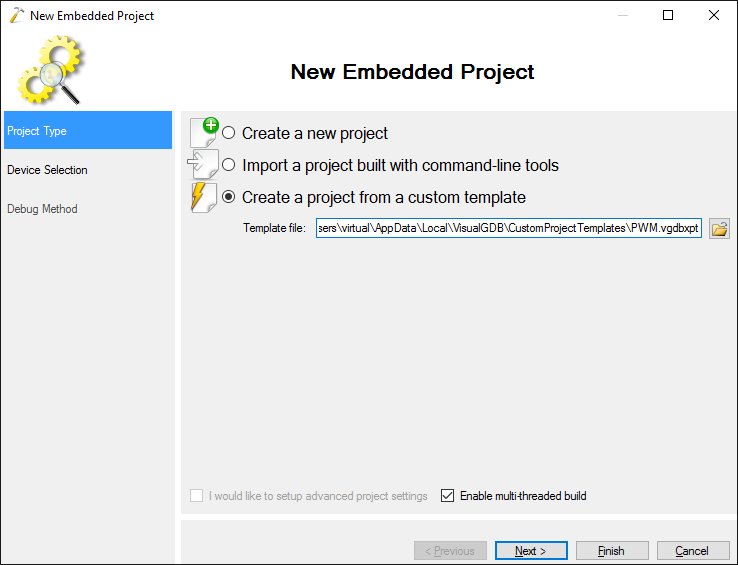
Note how the “Finish” button becomes available immediately after you select the template file. If you press it now, VisualGDB will immediately create a project based on the template, however if you click “Next”, you can go through the settings loaded from the template and change them if you wish.
- The Device Selection page will have the device pre-selected and the settings like the Newlib-nano library will be automatically loaded:
- The Debug Method page will similarly have the correct debug method selected and configured exactly in the way your original project was:
- Once you press Finish, VisualGDB will generate a new project that will have all files and build settings from the original project. Note how the ENABLE_PWM_GENERATOR macro is automatically defined.
Common files outside the project directory won’t be included in the project and will be referenced instead.
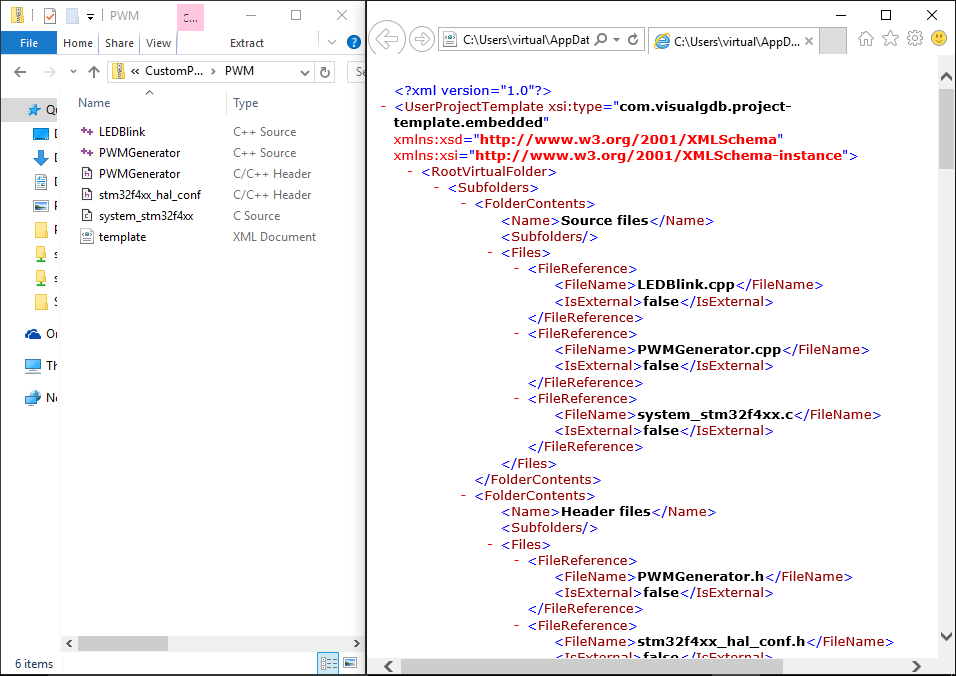
- The VisualGDB project template format is straight-forward: it’s simply a .zip file containing your project files and the template.xml file containing a snapshot of the project properties. You can rename the file to .zip and simply open it in Explorer:
 Because VisualGDB saves all project settings in the template file independently, the templates will work across all supported Visual Studio versions. E.g. you can create a template in Visual Studio 2015 and use it to create a project in Visual Studio 2008.


