Developing ESP8266 Arduino Projects with Visual Studio
This tutorial shows how to develop Arduino projects for ESP8266-based boards. We will create a basic “Blinking LED” project for the NodeMCU board and will show how to debug it with the built-in GDB stub.
Warning: the ESP8266 Arduino core uses settings that are incompatible with reliable JTAG debugging and the GDB stub debugging is not fully supported unless you are using the ESP8266 Arduino Core v2.5.0 or later. Please ensure you are using the latest Arduino Core.
Before you begin, install VisualGDB 5.4 or later.
- Start Visual Studio and open the VisualGDB Arduino Project Wizard:
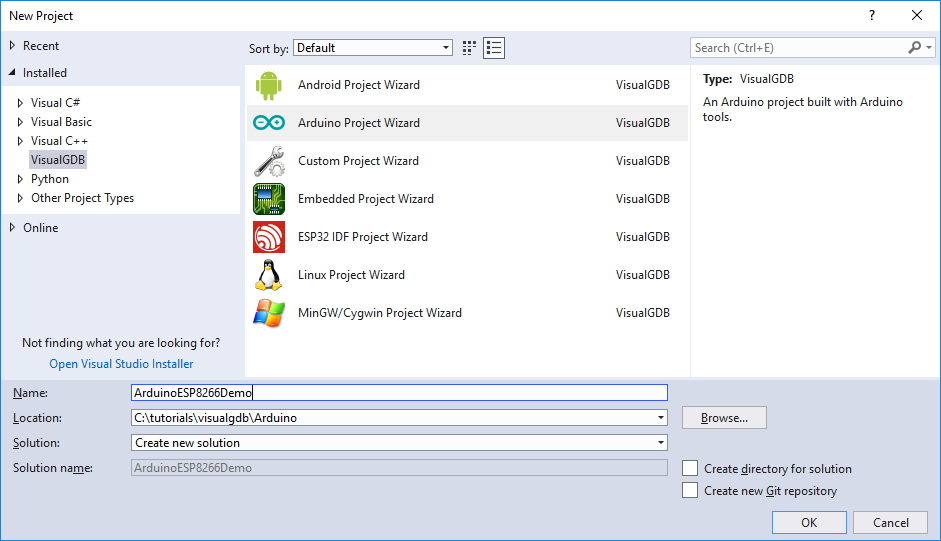
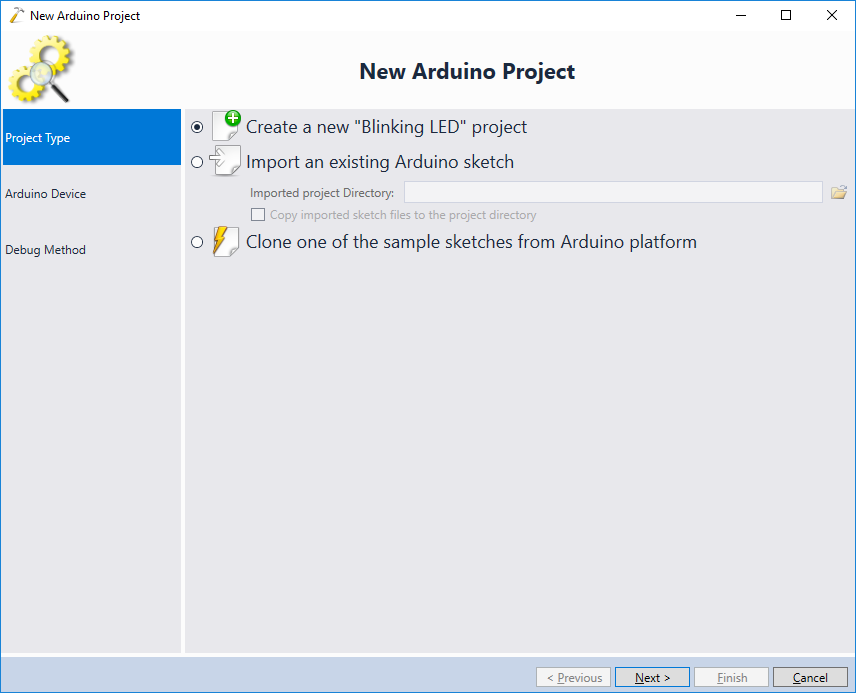
- Select “Create a new ‘Blinking LED'” project:
 Warning: if you are importing an existing Arduino project, it will not automatically insert the ESP8266 gdb stub code into it. Please test the debugging functionality with a new project as shown in this tutorial before proceeding to import existing projects.
 - On the next page select your ESP8266-based board. If the ESP8266 core is not installed, VisualGDB will suggest installing it automatically:
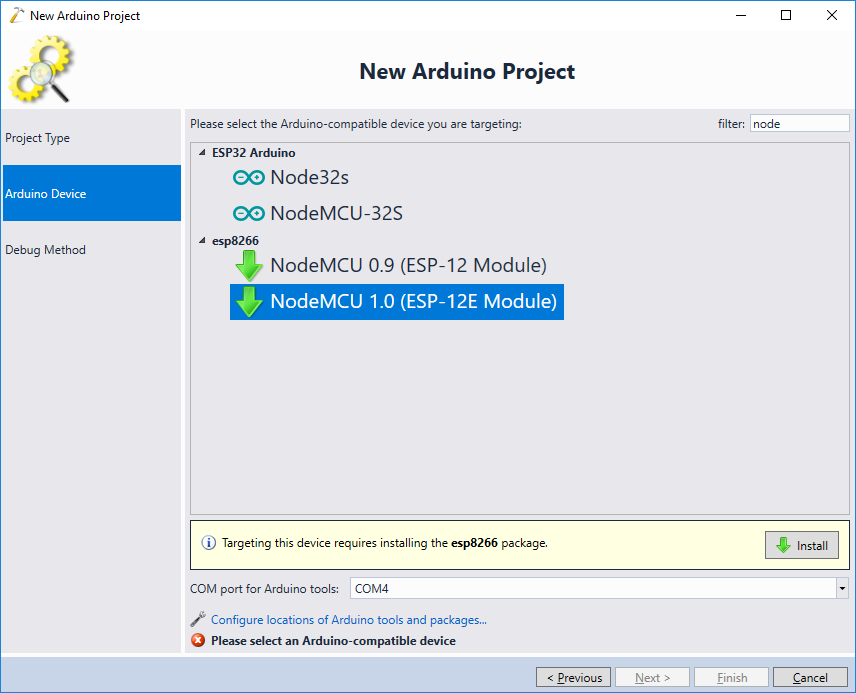
- Once the board is selected, ensure it is plugged into the USB port and select its COM port at the bottom of the page:

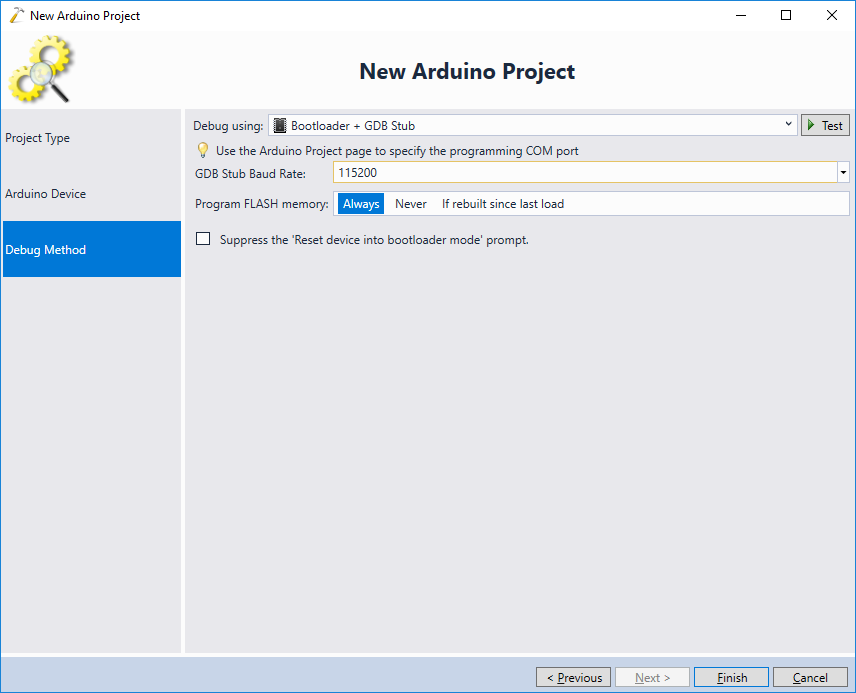
- Finally select the debug method. As the ESP8266 Arduino core configures the chip in a way that prevents JTAG debugging from working, the only supported debug method is the ESP8266 GDB stub. Select it in the “Debug using” field and press “Finish” to generate the project:
- VisualGDB will generate a project based on the Advanced Arduino Project Subsystem. As you have selected an ESP8266-based board, the project will contain the code necessary to debug it with the ESP8266 gdb stub:

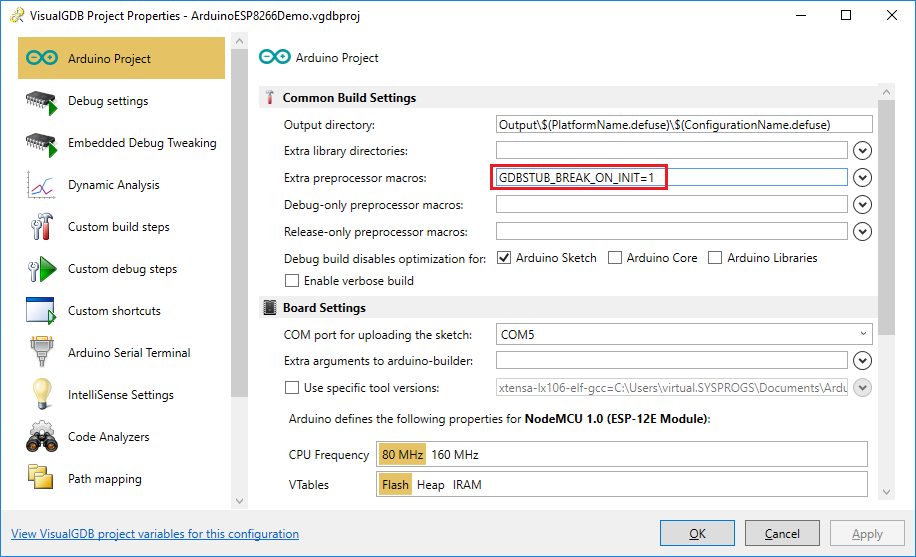
- If you get an error message about the missing GDBSTUB_BREAK_ON_INIT macro, set it as shown below:
- Set a breakpoint in the loop() function and press F5 to start debugging:

- Once the breakpoint hits, you will be able to step through your code as usual:
 If you are not able to set breakpoints in the code while it is running, ensure that you are using the latest ESP8266 Arduino core (2.5.0 or later).
 - If gdb refuses to connect to the gdb stub, double-check the baud rate setting on the Debug Settings page of VisualGDB Project Properties. If you are not sure what baud rate is used by the stub, try connecting to your board’s COM port with different baud rates (e.g. using SmarTTY) and resetting it. If the baud rate is correct, you should see the “$T05#b9” text indicating that the stub is waiting for gdb to connect:
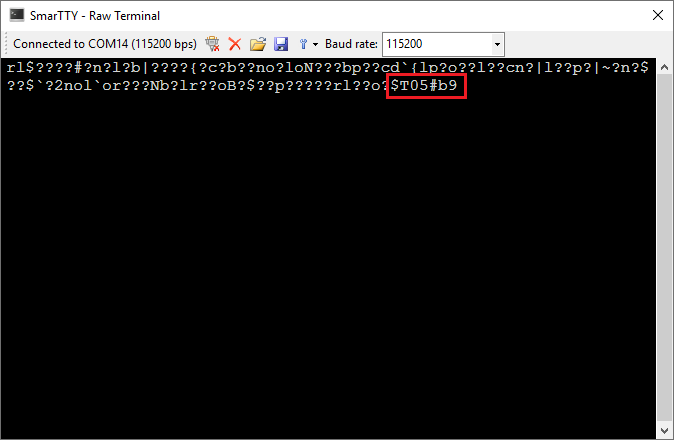 If you don’t see this text, try choosing a different baud rate and restarting the board.