Cross-compiling Linux C/C++ Projects for STM32MP1 Devices
This tutorial shows how to use a Windows-based cross-toolchain to build and debug Linux projects on the STM32MP1 devices. We will create a basic “Hello, World” application using the GTK+ toolkit and will show how to build it on Windows, debug it and view the source code of the GTK functions on the call stack.
Before you begin, install VisualGDB 5.4R11 or later and ensure you have an STM32MP1 board ready.
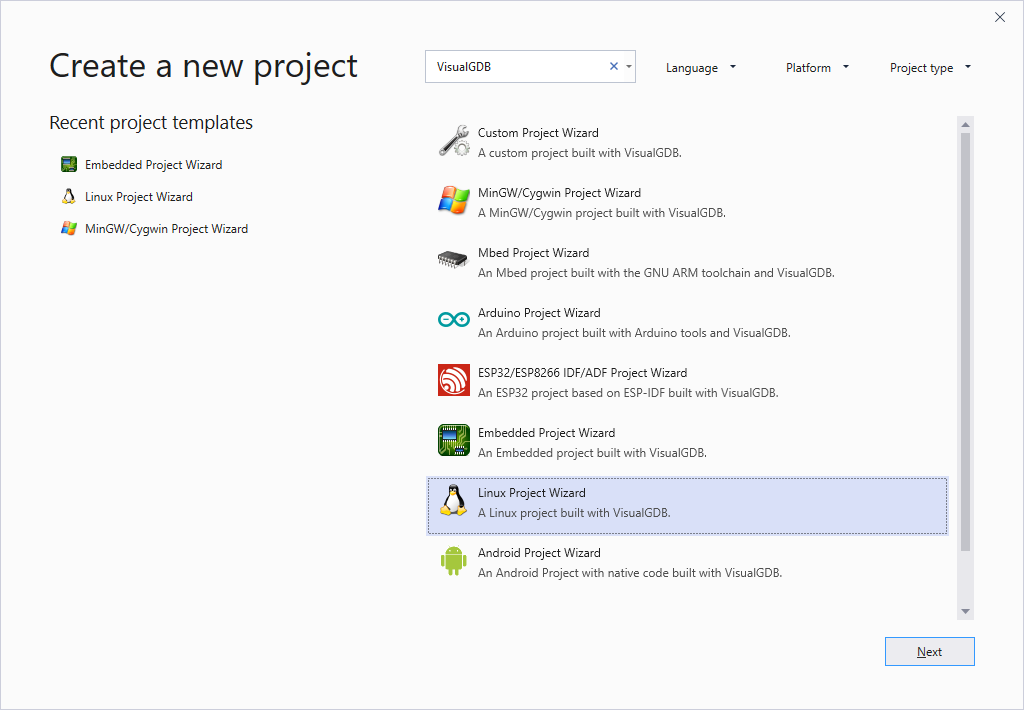
- Start Visual Studio and open the VisualGDB Linux Project Wizard:
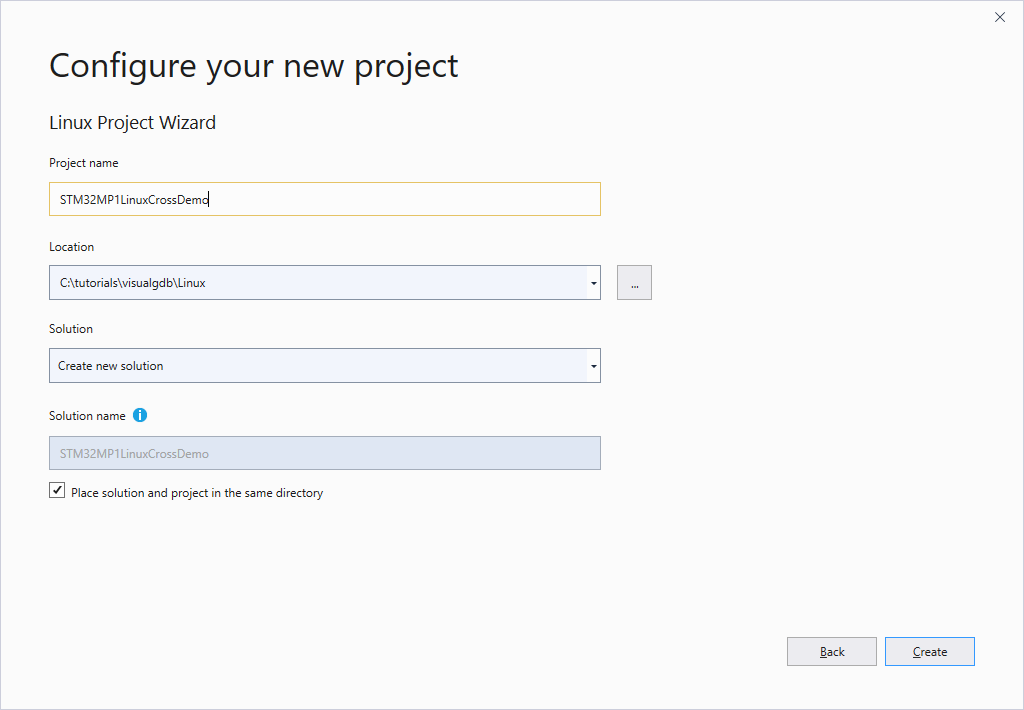
- Specify the name and location for your project and click “Create” to start the VisualGDB’s part of the wizard:
- On the first page of the wizard select “Create a new project -> Application -> MSBuild”:

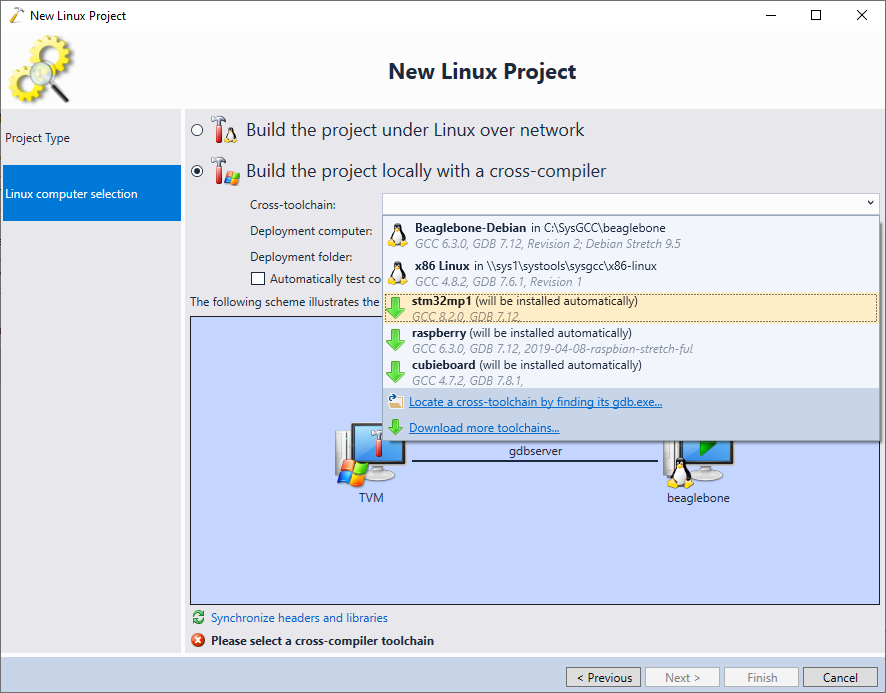
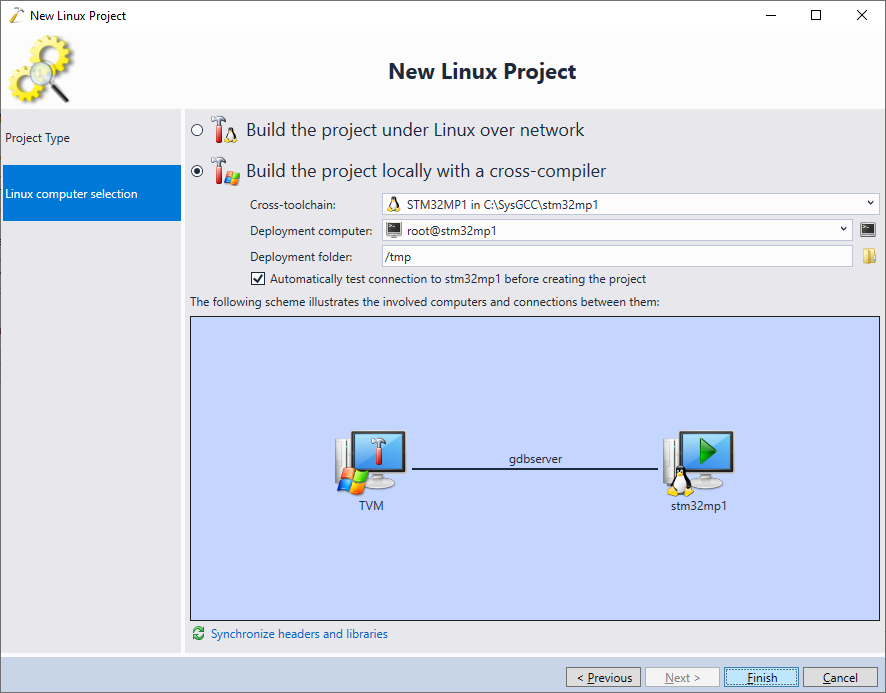
- On the next page select “Build the project locally with a cross-compiler” and pick the STM32MP1 cross-toolchain. If you haven’t installed it yet, VisualGDB will automatically download and install one for you:
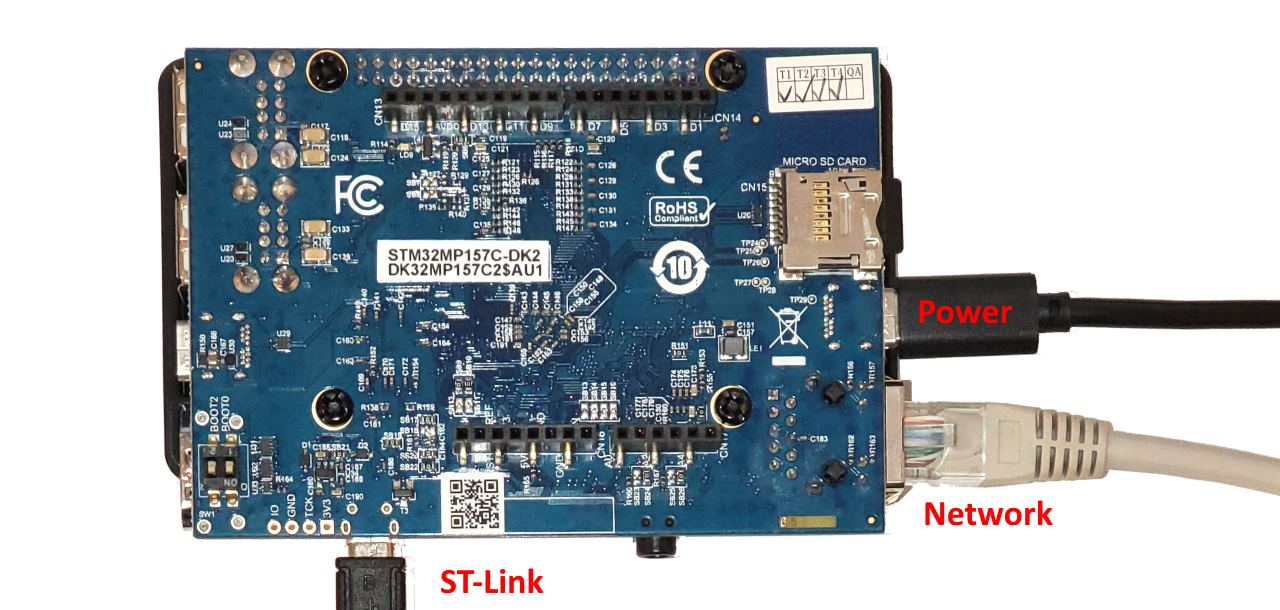
- Ensure you have uploaded a compatible SD card image to your STM32MP1 board. You can download pre-built images compatible with our toolchains from our Github page. Then plug in both power and Ethernet connectors on the board (optionally use the ST-Link’s virtual COM port to find out the board’s IP address and double-check its network status):
- Select the board’s connection in the “Deployment computer” field. By default, the STM32MP1 board will have a host name of stm32mp1 and have a root user with an empty password:
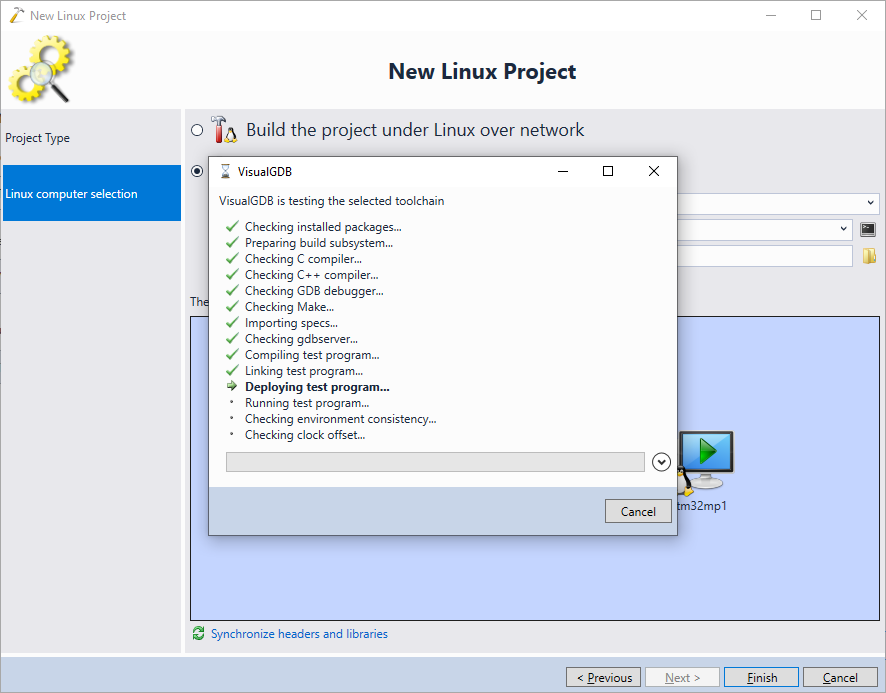
- Press “Finish” to create the project. VisualGDB will automatically test the toolchain and ensure it produces binaries compatible with the board:
- Once the project has been created, set a breakpoint at the end of main() and press F5 to build it and start debugging:

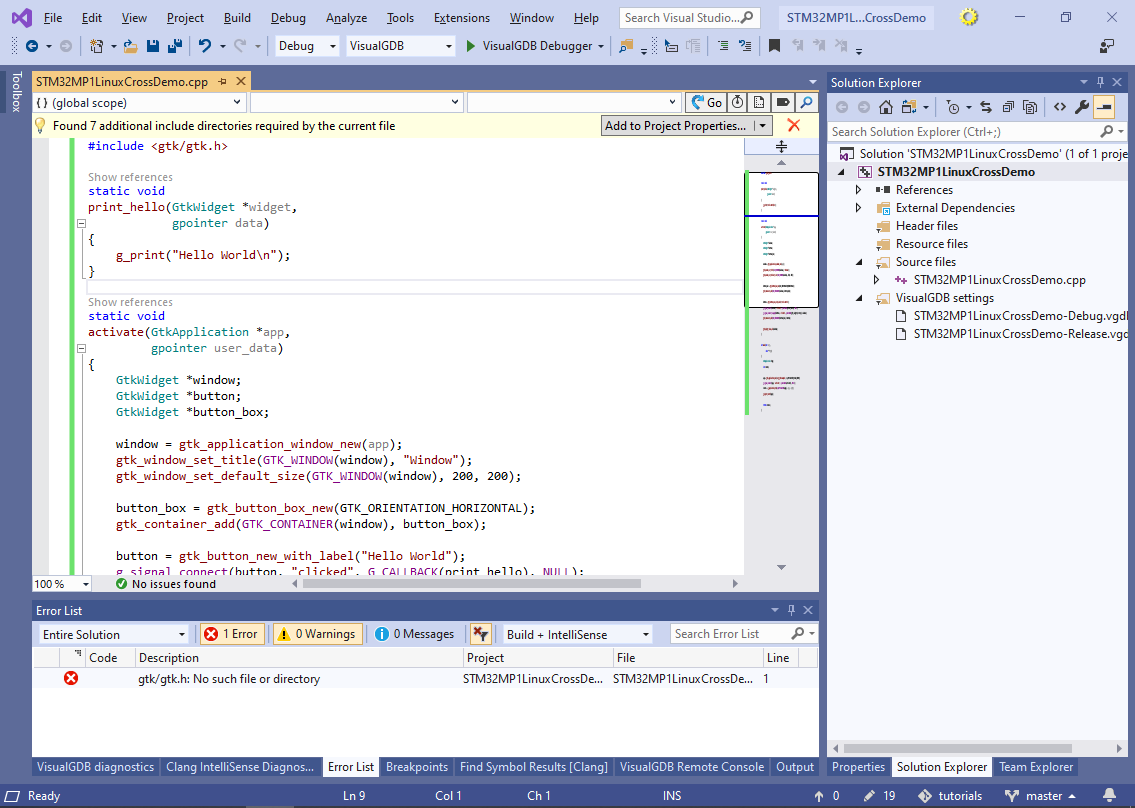
- Now we will show how to use GTK+ library with VisualGDB. Replace the contents of the main source file with the basic GTK example:
#include <gtk/gtk.h>

static void
print_hello (GtkWidget *widget,
             gpointer   data)
{
  g_print ("Hello World\n");
}

static void
activate (GtkApplication *app,
          gpointer        user_data)
{
  GtkWidget *window;
  GtkWidget *button;
  GtkWidget *button_box;

  window = gtk_application_window_new (app);
  gtk_window_set_title (GTK_WINDOW (window), "Window");
  gtk_window_set_default_size (GTK_WINDOW (window), 200, 200);

  button_box = gtk_button_box_new (GTK_ORIENTATION_HORIZONTAL);
  gtk_container_add (GTK_CONTAINER (window), button_box);

  button = gtk_button_new_with_label ("Hello World");
  g_signal_connect (button, "clicked", G_CALLBACK (print_hello), NULL);
  g_signal_connect_swapped (button, "clicked", G_CALLBACK (gtk_widget_destroy), window);
  gtk_container_add (GTK_CONTAINER (button_box), button);

  gtk_widget_show_all (window);
}

int
main (int    argc,
      char **argv)
{
  GtkApplication *app;
  int status;

  app = gtk_application_new ("org.gtk.example", G_APPLICATION_FLAGS_NONE);
  g_signal_connect (app, "activate", G_CALLBACK (activate), NULL);
  status = g_application_run (G_APPLICATION (app), argc, argv);
  g_object_unref (app);

  return status;
}
Note that initially VisualGDB will will have to guess the include directories containing GTK+ files:
- You could proceed with using the guessed directories (although you would then need to specify library names), however in this tutorial we will use the pkg-config tool to find the include directories and libraries declared by the gtk+-3.0 package. Open the <toolchain>\usr\bin folder in a Command Prompt and run the following commands:
pkg-config.bat --cflags gtk+-3.0 > cflags.txt
pkg-config.bat --libs gtk+-3.0 > libs.txt
 Normally, you should get the following cflags file:
-pthread
-IC:/SysGCC/stm32mp1/usr/bin/../../cortexa7t2hf-neon-vfpv4-openstlinux_weston-linux-gnueabi/sysroot/usr/include/gtk-3.0
-IC:/SysGCC/stm32mp1/usr/bin/../../cortexa7t2hf-neon-vfpv4-openstlinux_weston-linux-gnueabi/sysroot/usr/include/atk-1.0
-IC:/SysGCC/stm32mp1/usr/bin/../../cortexa7t2hf-neon-vfpv4-openstlinux_weston-linux-gnueabi/sysroot/usr/include/at-spi2-atk/2.0
-IC:/SysGCC/stm32mp1/usr/bin/../../cortexa7t2hf-neon-vfpv4-openstlinux_weston-linux-gnueabi/sysroot/usr/include
-IC:/SysGCC/stm32mp1/usr/bin/../../cortexa7t2hf-neon-vfpv4-openstlinux_weston-linux-gnueabi/sysroot/usr/include/pango-1.0
-IC:/SysGCC/stm32mp1/usr/bin/../../cortexa7t2hf-neon-vfpv4-openstlinux_weston-linux-gnueabi/sysroot/usr/include/gio-unix-2.0/
-IC:/SysGCC/stm32mp1/usr/bin/../../cortexa7t2hf-neon-vfpv4-openstlinux_weston-linux-gnueabi/sysroot/usr/include/cairo
-IC:/SysGCC/stm32mp1/usr/bin/../../cortexa7t2hf-neon-vfpv4-openstlinux_weston-linux-gnueabi/sysroot/usr/include/gdk-pixbuf-2.0
-IC:/SysGCC/stm32mp1/usr/bin/../../cortexa7t2hf-neon-vfpv4-openstlinux_weston-linux-gnueabi/sysroot/usr/include/glib-2.0
-IC:/SysGCC/stm32mp1/usr/bin/../../cortexa7t2hf-neon-vfpv4-openstlinux_weston-linux-gnueabi/sysroot/usr/lib/glib-2.0/include
-IC:/SysGCC/stm32mp1/usr/bin/../../cortexa7t2hf-neon-vfpv4-openstlinux_weston-linux-gnueabi/sysroot/usr/include/at-spi-2.0
-I/usr/include/dbus-1.0
-I/usr/lib/dbus-1.0/include
-IC:/SysGCC/stm32mp1/usr/bin/../../cortexa7t2hf-neon-vfpv4-openstlinux_weston-linux-gnueabi/sysroot/usr/include/libdrm
-IC:/SysGCC/stm32mp1/usr/bin/../../cortexa7t2hf-neon-vfpv4-openstlinux_weston-linux-gnueabi/sysroot/usr/include/harfbuzz
-IC:/SysGCC/stm32mp1/usr/bin/../../cortexa7t2hf-neon-vfpv4-openstlinux_weston-linux-gnueabi/sysroot/usr/include/freetype2
-IC:/SysGCC/stm32mp1/usr/bin/../../cortexa7t2hf-neon-vfpv4-openstlinux_weston-linux-gnueabi/sysroot/usr/include/fribidi
-IC:/SysGCC/stm32mp1/usr/bin/../../cortexa7t2hf-neon-vfpv4-openstlinux_weston-linux-gnueabi/sysroot/usr/include/pixman-1
-IC:/SysGCC/stm32mp1/usr/bin/../../cortexa7t2hf-neon-vfpv4-openstlinux_weston-linux-gnueabi/sysroot/usr/include/libpng16
-IC:/SysGCC/stm32mp1/usr/bin//../../cortexa7t2hf-neon-vfpv4-openstlinux_weston-linux-gnueabi/sysroot/usr/include
The libs.txt should contain the following:
-LC:/SysGCC/stm32mp1/usr/bin/../../cortexa7t2hf-neon-vfpv4-openstlinux_weston-linux-gnueabi/sysroot/usr/lib
-lgtk-3 -lgdk-3 -latk-1.0 -lgio-2.0 -lpangocairo-1.0 -lgdk_pixbuf-2.0
-lcairo-gobject -lpango-1.0 -lcairo -lgobject-2.0 -lglib-2.0
- As the cflags.txt mostly contains the include directories (the -pthread flag can be ignored), we recommend replacing the -I<path to sysroot> part with just ‘=’:
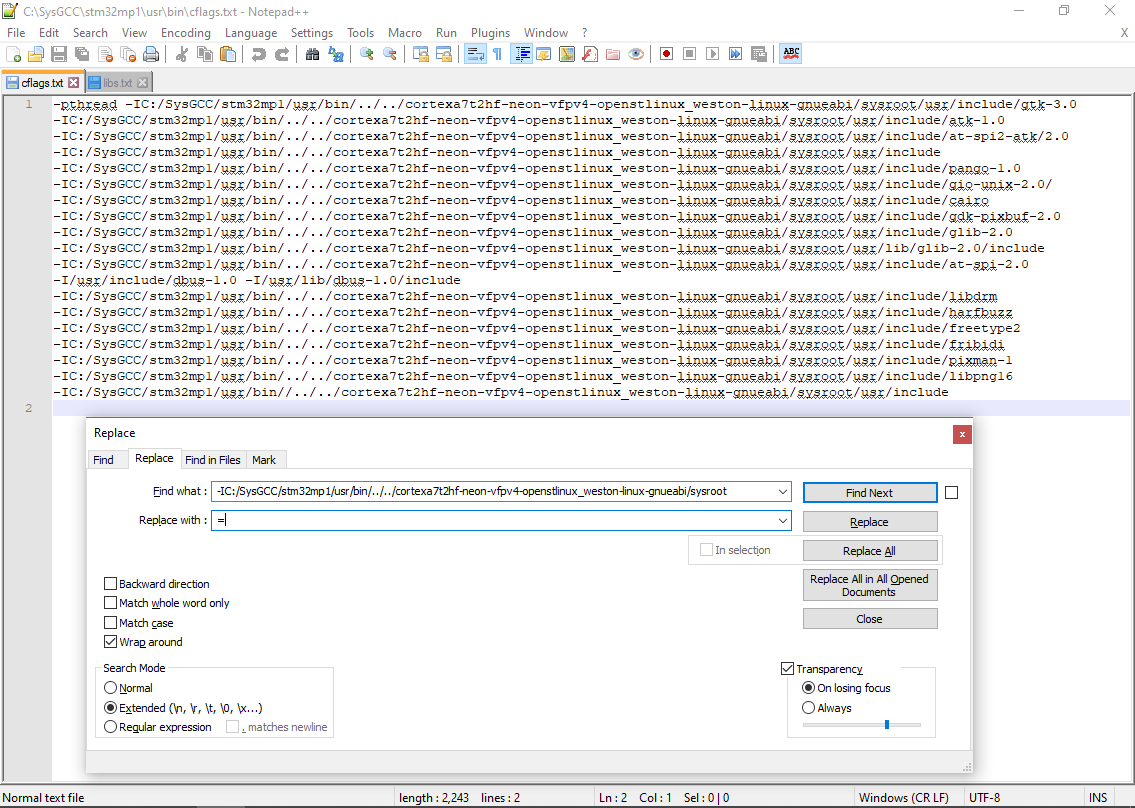 Also replace spaces with semicolons:
=/usr/include/gtk-3.0;
=/usr/include/atk-1.0;
=/usr/include/at-spi2-atk/2.0;
=/usr/include;
=/usr/include/pango-1.0;
=/usr/include/gio-unix-2.0/;
=/usr/include/cairo;
=/usr/include/gdk-pixbuf-2.0;
=/usr/include/glib-2.0;
=/usr/lib/glib-2.0/include;
=/usr/include/at-spi-2.0;
=/usr/include/dbus-1.0;
=/usr/lib/dbus-1.0/include;
=/usr/include/libdrm;
=/usr/include/harfbuzz;
=/usr/include/freetype2;
=/usr/include/fribidi;
=/usr/include/pixman-1;
=/usr/include/libpng16;
=/usr/include;
In the libs.txt file remove the “-l” prefix, the library search path (with the -L option) and also replaces spaces with semicolons:
gtk-3;gdk-3;atk-1.0;gio-2.0;pangocairo-1.0;gdk_pixbuf-2.0;cairo-gobject;pango-1.0;cairo;gobject-2.0;glib-2.0
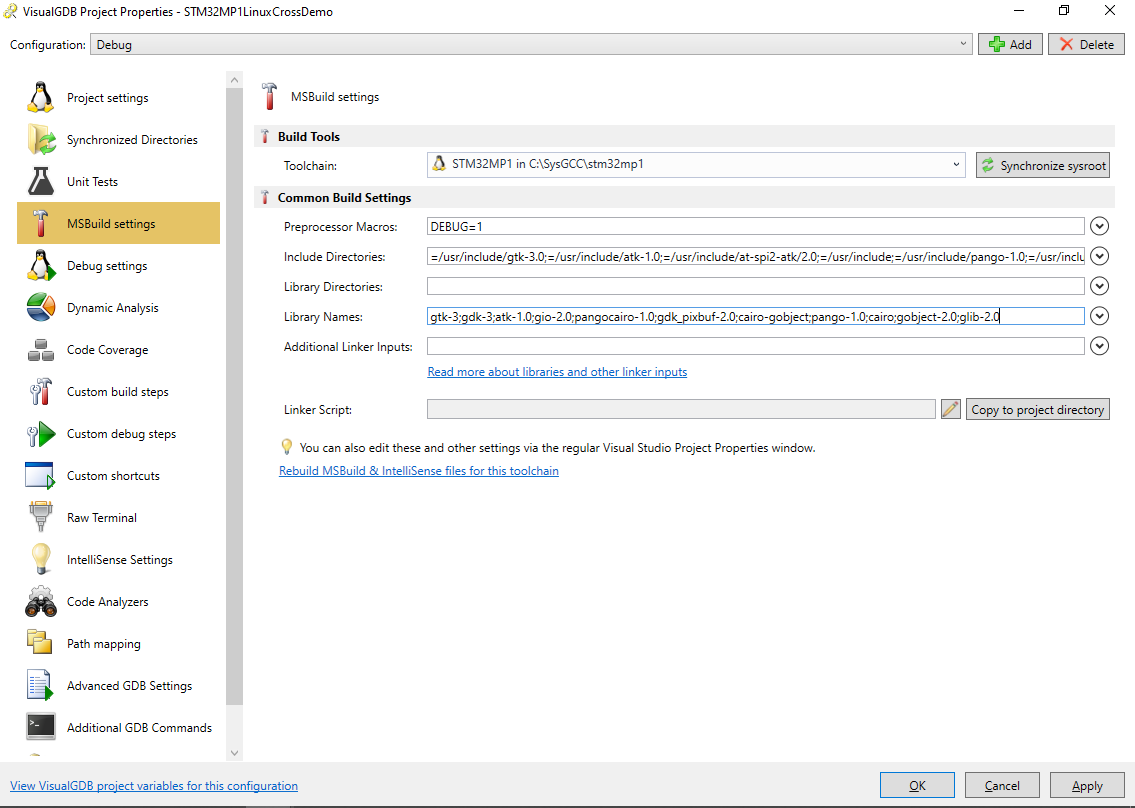
- Now copy the include directories and library names to VisualGDB Project Properties as shown below:
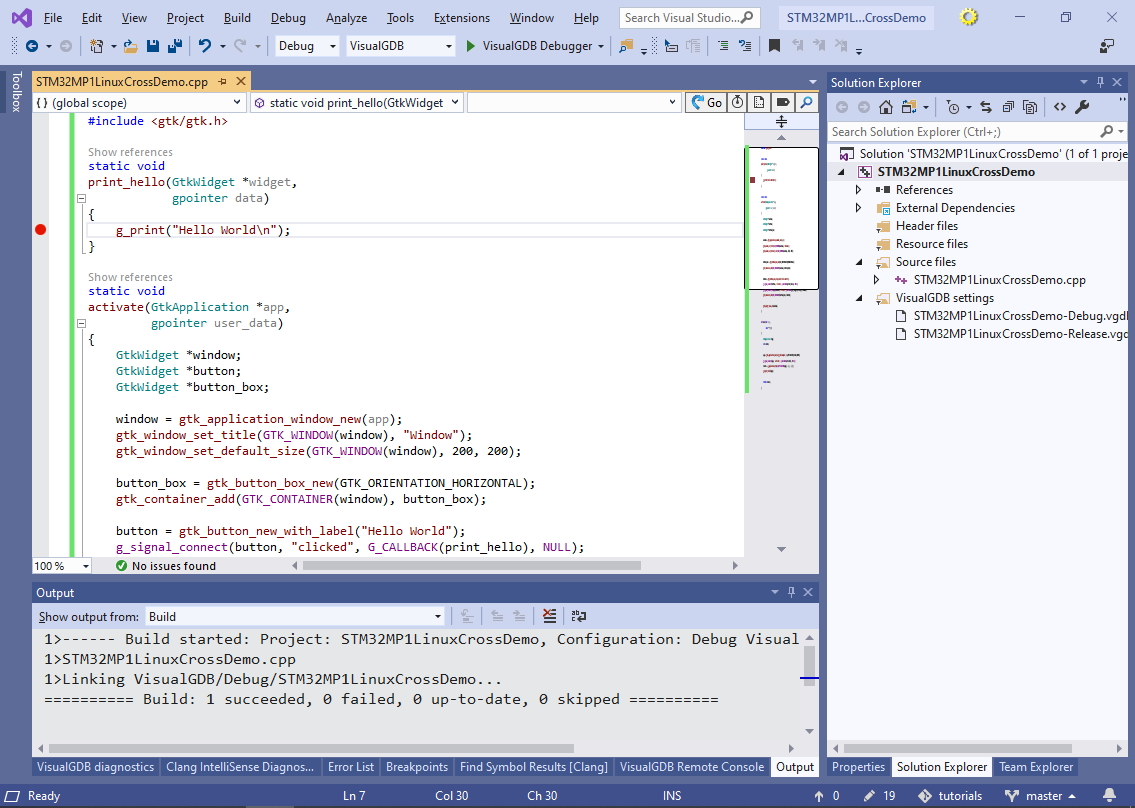
- Once you apply the new properties, you will be able to build the project:
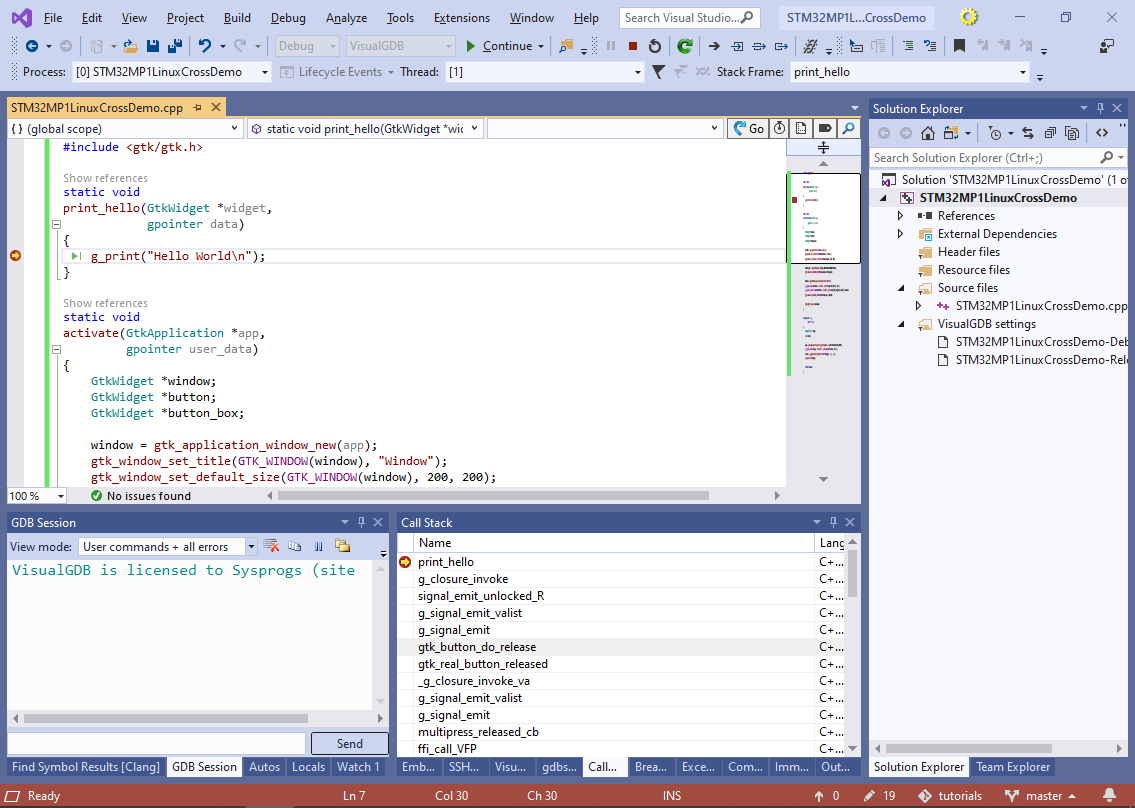
- Set a breakpoint inside print_hello() and press F5 to start debugging. Observe the Hello, World window on the board’s LCD screen:
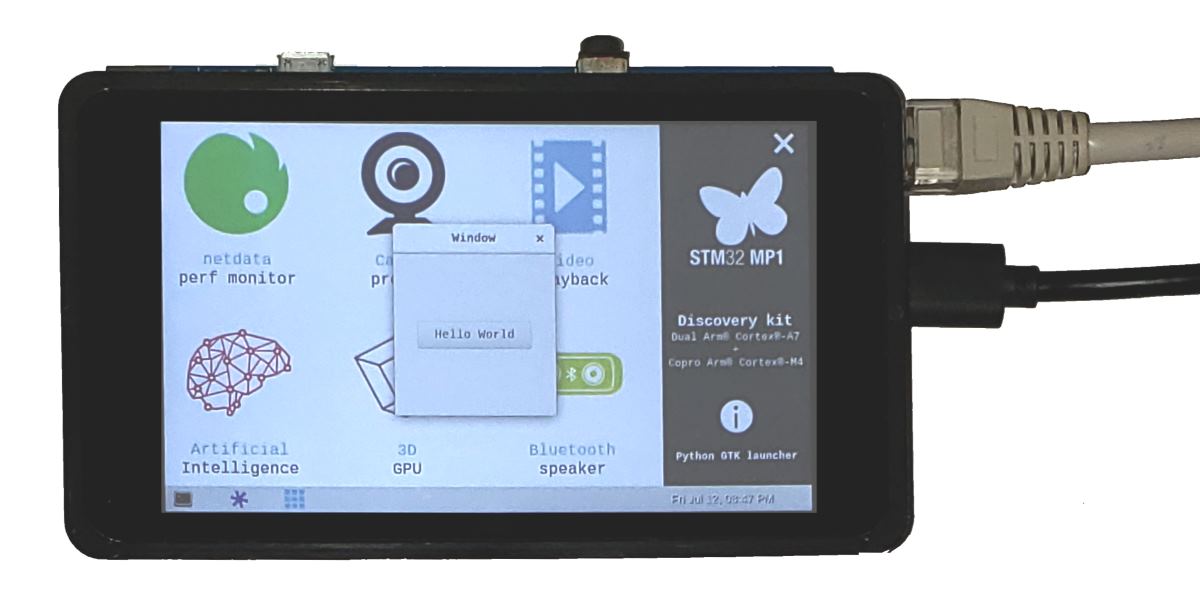
- Tap the “Hello World” button and observe the breakpoint being triggered:
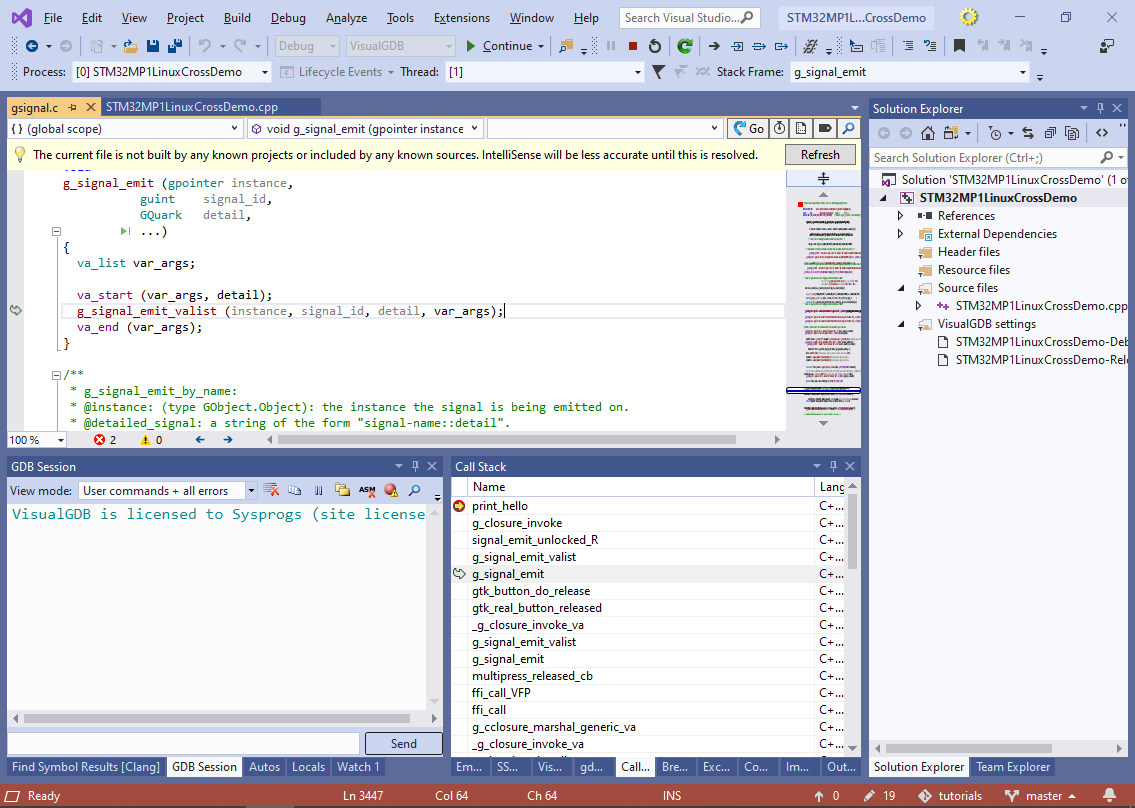
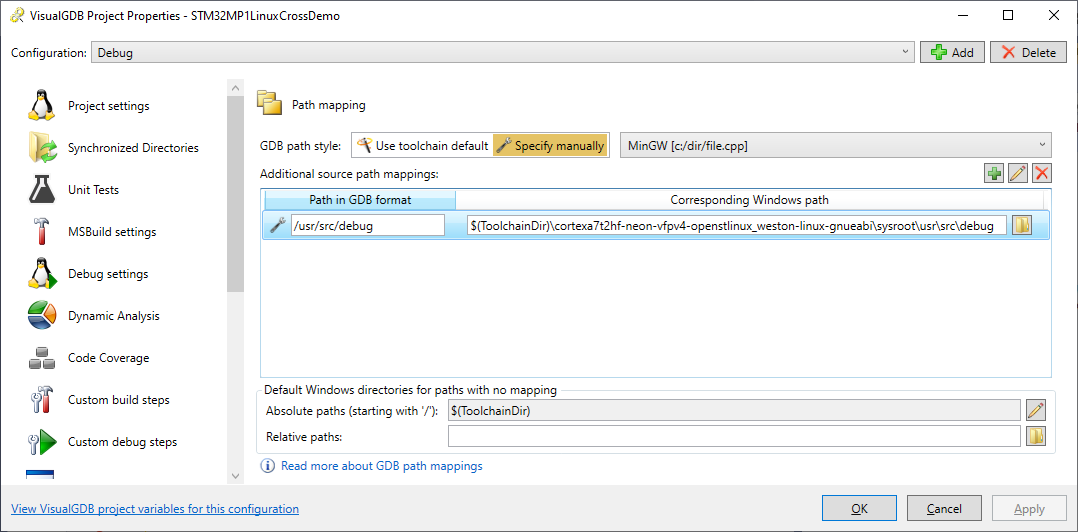
- You can now debug your application using the regular Visual Studio functionality, however you will only see the source code of your own application. In order to display the sources of the Linux components shipped with the STM32MP1 toolchain, add a path mapping between /usr/src/debug and $(ToolchainDir)\cortexa7t2hf-neon-vfpv4-openstlinux_weston-linux-gnueabi\sysroot\usr\src\debug to the Path Mapping page of VisualGDB Project Properties:
- Now you will be able to see the GTK+ sources and step through them in the debugger, although due to optimization, the detail level will be lower, compared to debugging unoptimized code: