Customizing Embedded Projects with Stand-Alone Frameworks
This tutorial shows how to customize Advanced CMake-based Embedded Projects by creating stand-alone embedded frameworks. Stand-alone frameworks are forked versions of the vendor-supplied frameworks (such as the STM32 USB library) that can be used in place of the original frameworks. This allows keeping one or more patched versions of the commonly used libraries under source control, while otherwise relying on the original BSP packages installed by VisualGDB.
We will start by creating a basic USB device project for the STM32F4Discovery board. It will follow the default project layout referencing the shared STM32-specific files installed under the %LOCALAPPDATA% folder: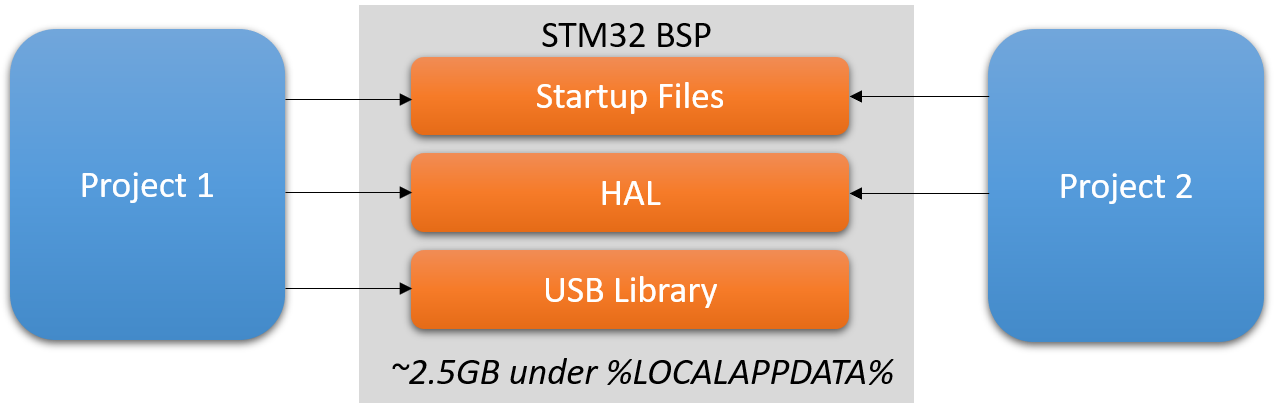 Then we will convert the USB library to a stand-alone framework, while keeping the references to the rest of the shared STM32 components:
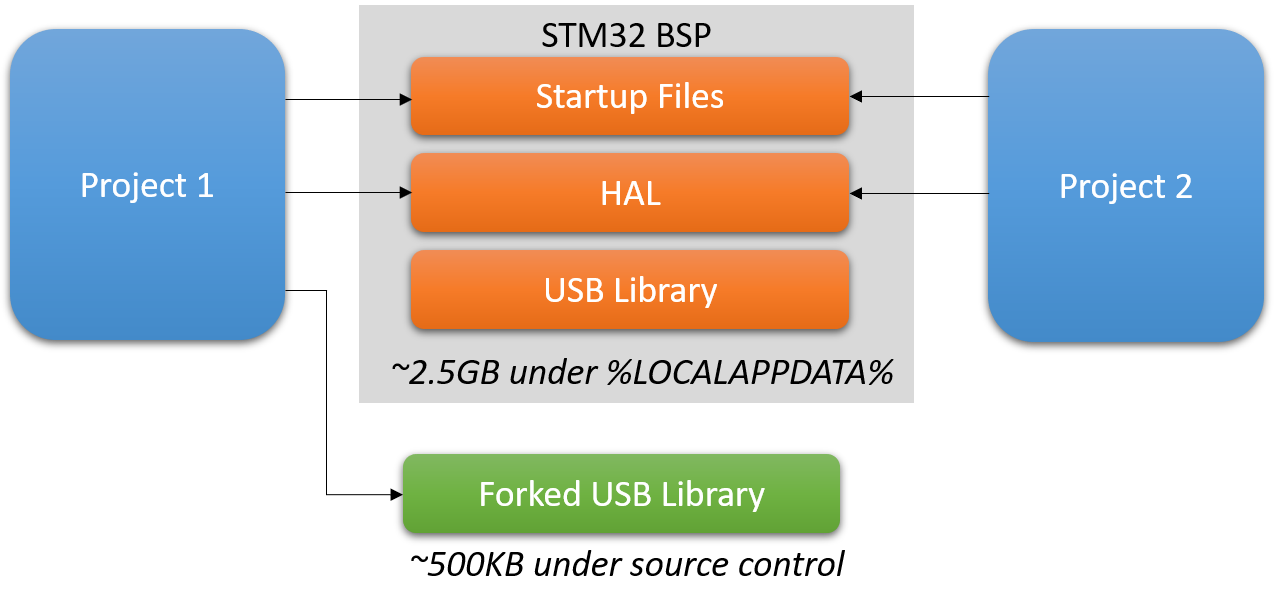 Before you begin, install VisualGDB 5.5 or later.
- Start Visual Studio and locate the VisualGDB Embedded Project Wizard:

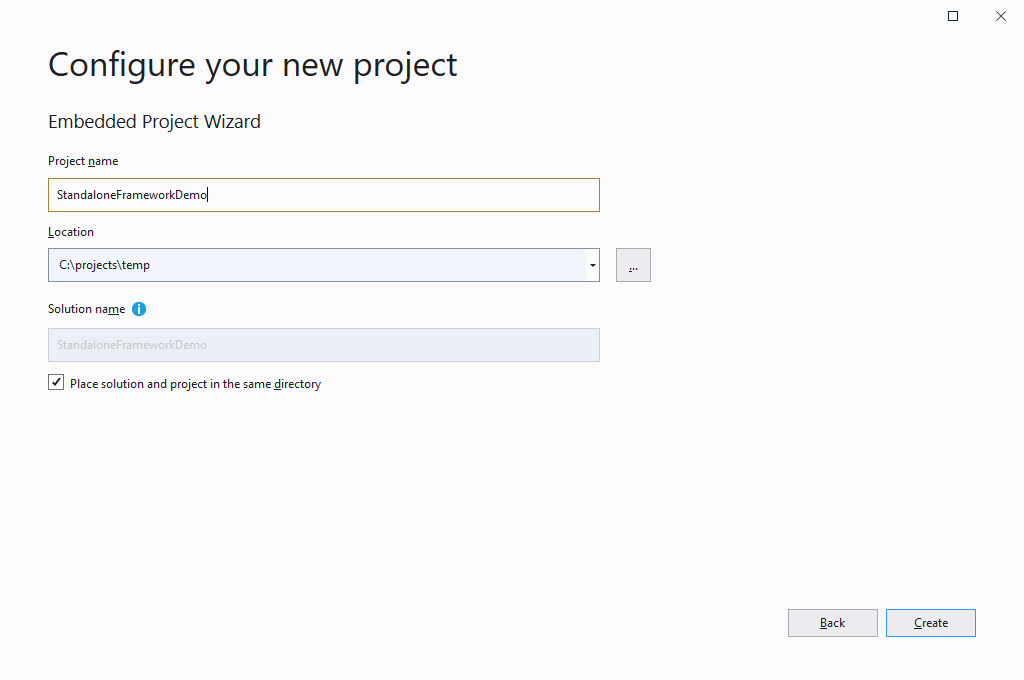
- Enter the name and location of the first project:
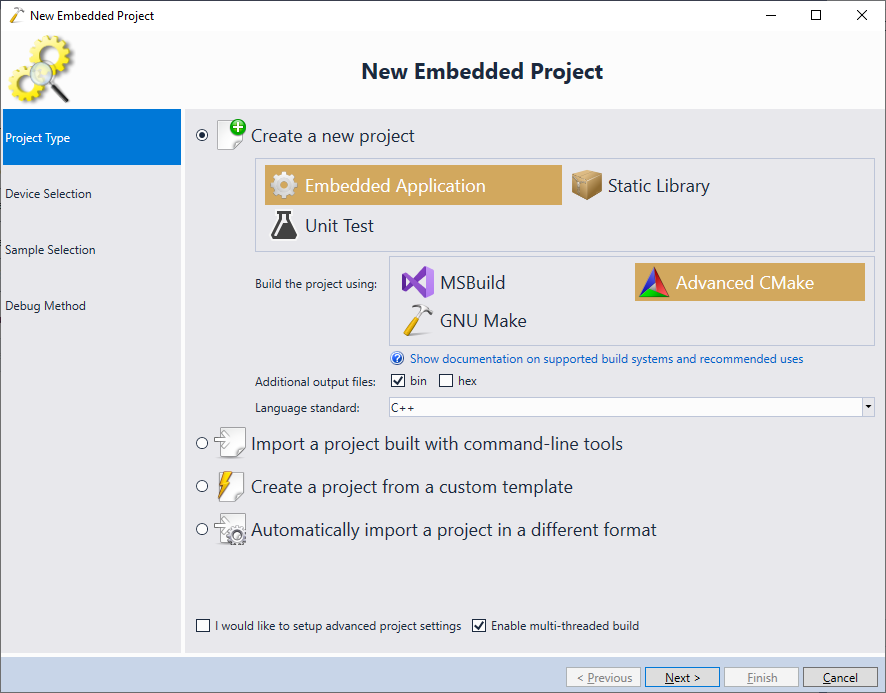
- Make sure you have the Advanced CMake project subsystem selected on the Project Type page of the VisualGDB Project Wizard:
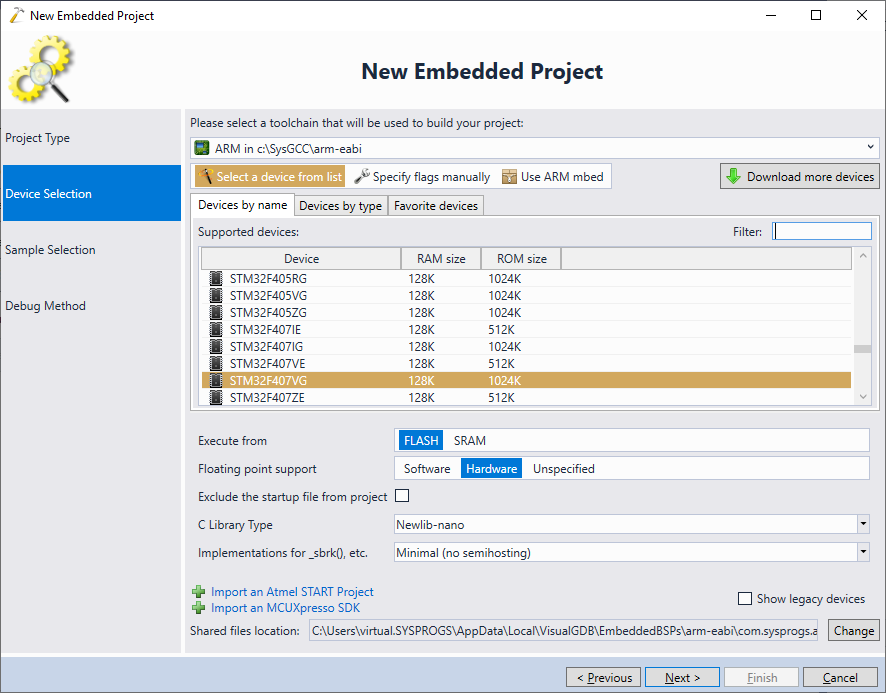
- Select your toolchain and the target device. In this tutorial we will target the STM32F4Discovery board that uses the STM32F407VG chip:
- On the next page select the sample project you would like to clone. In this tutorial we will demonstrate the stand-alone frameworks based on the STM32 USB Framework, so we will use the USB Communication Device sample:

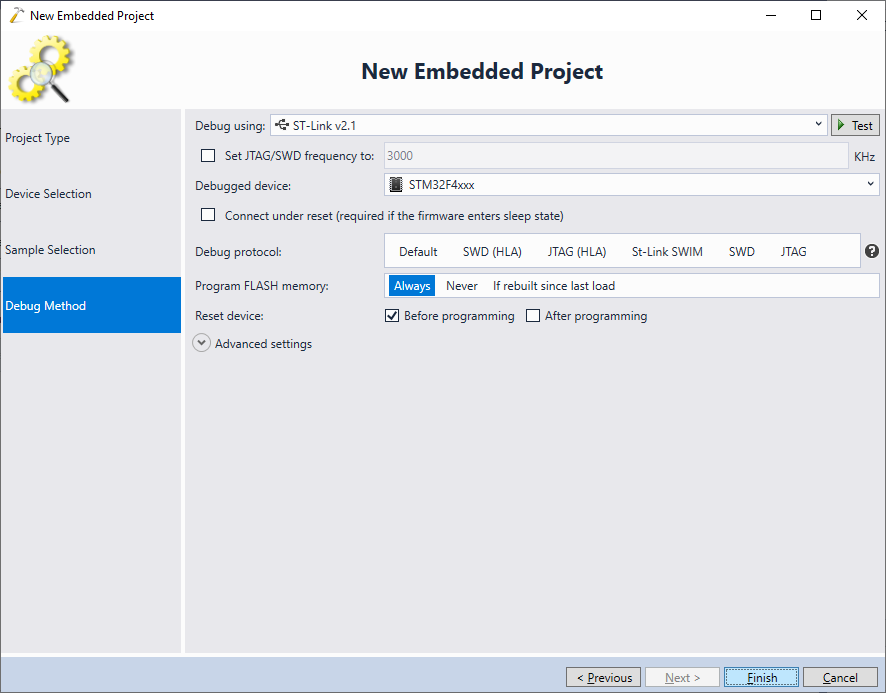
- Finally, select the debug settings that work with your board and click “Finish” to create the project:
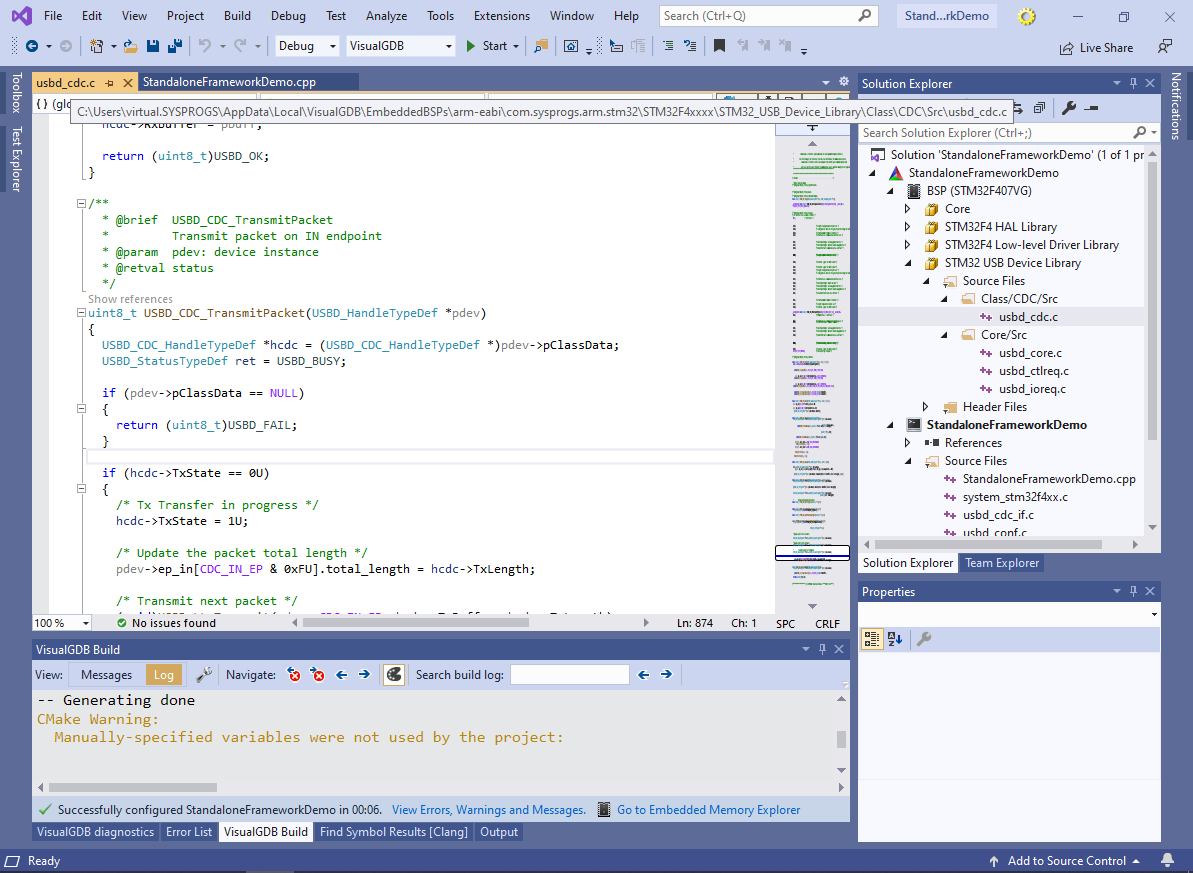
- VisualGDB will generate a simple embedded application based on the USB Device sample. Note how aside from the application itself (3), the Solution Explorer shows the shared STM32 BSP (1) that includes the STM32 USB Device Library (2):

- Right-click on the project node (with CMake icon) in Solution Explorer and select “VisualGDB Project Properties”. Note how the project explicitly references the STM32 USB Device Library:
 This reference makes sure that VisualGDB will automatically locate the USB device library inside the STM32 BSP, and will link it together with the project.
 - Open the usbd_cdc.c file from the STM32 USB Device Library framework. See how it is located under %LOCALAPPDATA%\VisualGDB\EmbeddedBSPs:
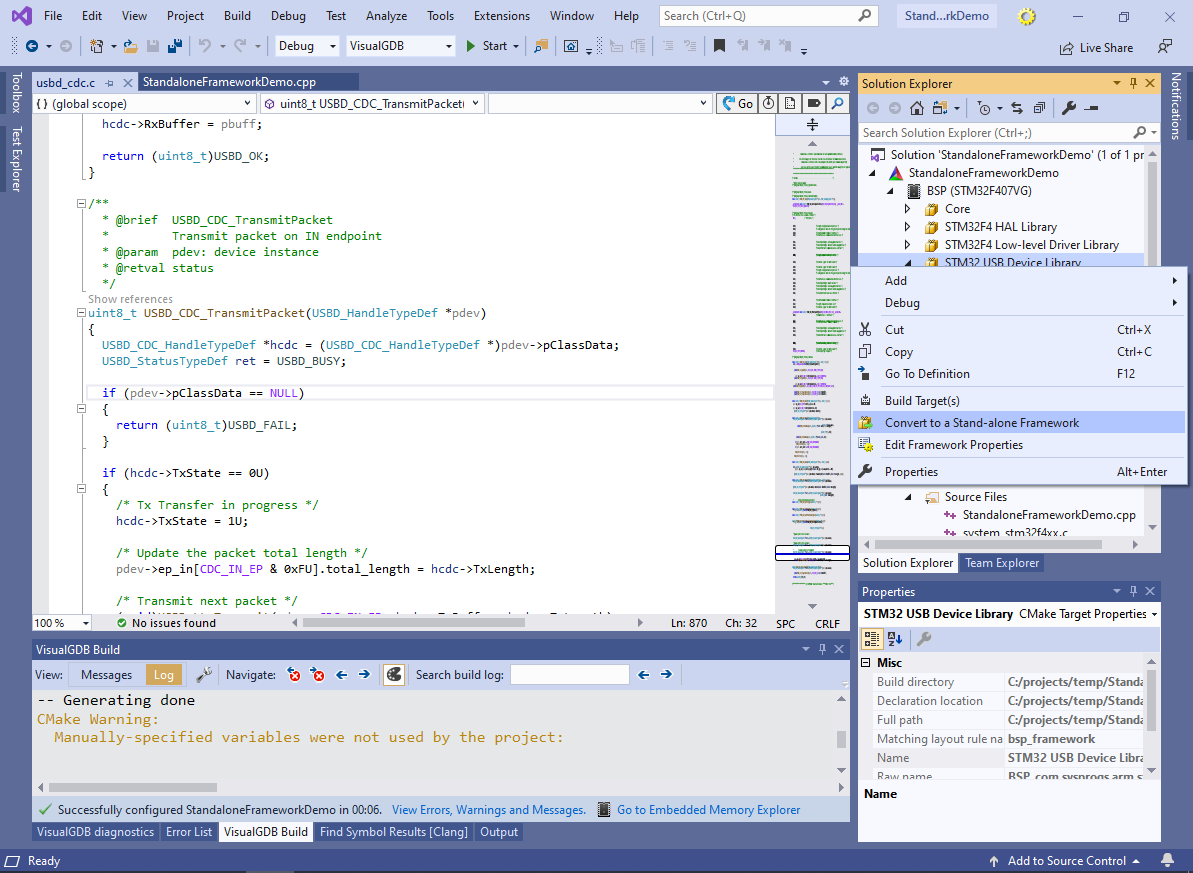
- Although we could technically patch this file to modify its functionality, the changes would never make it into our source control, and would be overwritten next time the STM32 BSP is reinstalled. Instead, we will now convert the STM32 USB Device Library into a stand-alone framework, so that we could easily make changes to it. Click the “Convert to a Stand-alone Framework” command from the framework context menu:
- VisualGDB will ask for the name, location, and a few other parameters of the new framework. Make sure you enter the following values:
Parameter Meaning Value Framework ID Used to distinguish the framework from other frameworks. Ignored for stand-alone frameworks until you include it into an exported BSP. Otherwise, must be unique within the exported BSP, but can collide with frameworks from other BSPs. Leave default Framework Name User-friendly framework name shown in Solution Explorer. Leave default Short Library Name Name of the underlying CMake library. Used in CMake statements. Shorter names recomended. USBFramework Framework Location Directory where the framework will be placed. Choose a location under source control. 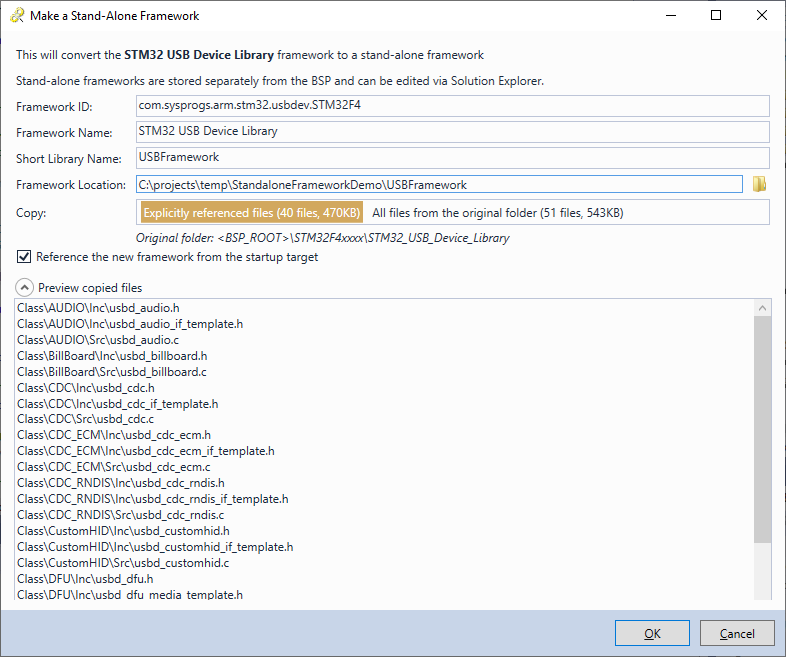 Cloning a framework will preserve its configurable options (e.g. ability to choose between CDC, HID and other USB device classes). Normally, VisualGDB will try to leave out the files that are not directly involved in building (e.g. configuration file templates). This works with the STM32 USB Device Library, but may break frameworks the use implicit dependencies. If the cloned framework fails to build, select “Copy: All files from the original folder” instead.
 - VisualGDB will copy the framework contents into the new directory and will update the CMakeLists.txt file:
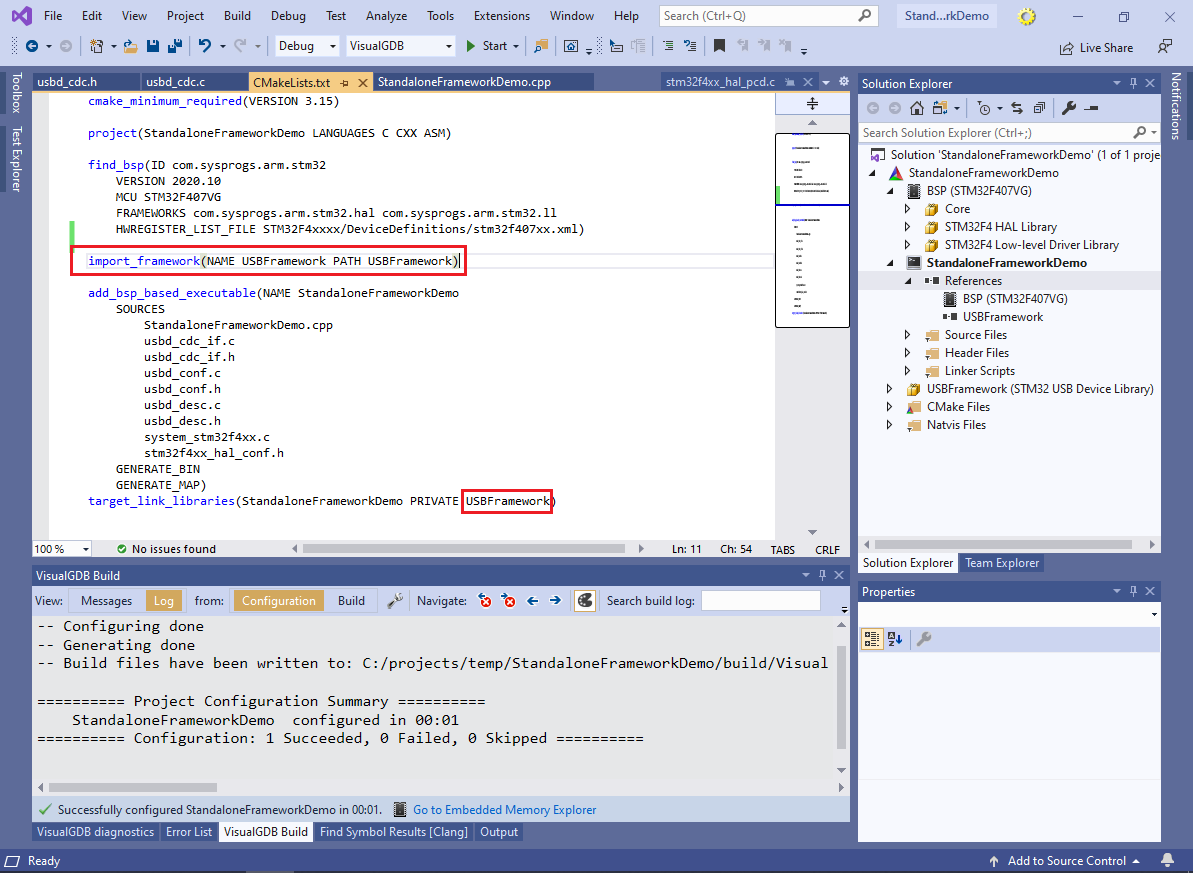 Note how the framework reference explicitly specifies the short name and the relative path to the framework directory. If you want to move the framework to a new location, simply update the import_framework() statement accordingly. If you do any changes manually, make sure that the name in target_link_libraries() matches the NAME in import_framework().
 - Go to the definition of VCP_write() and use CodeJumps to quickly locate USBD_CDC_TransmitPacket():
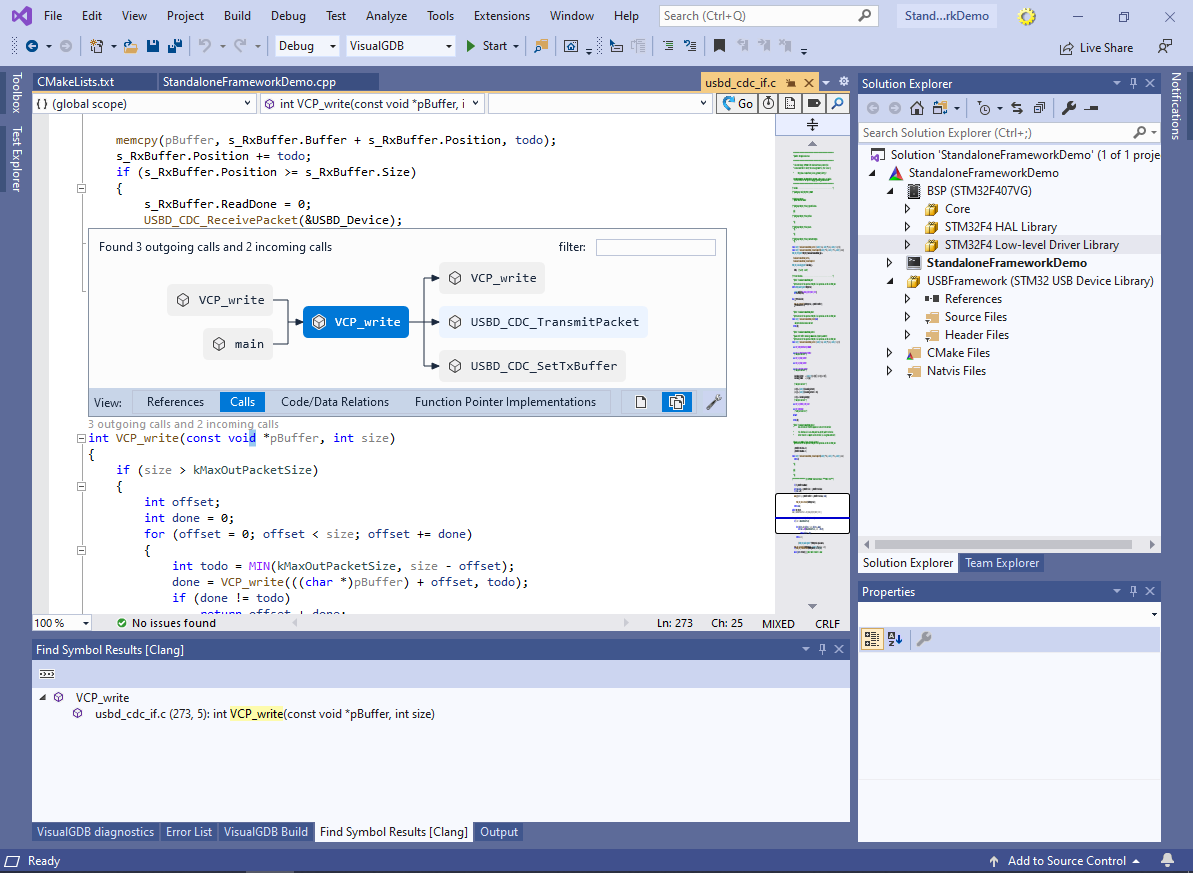
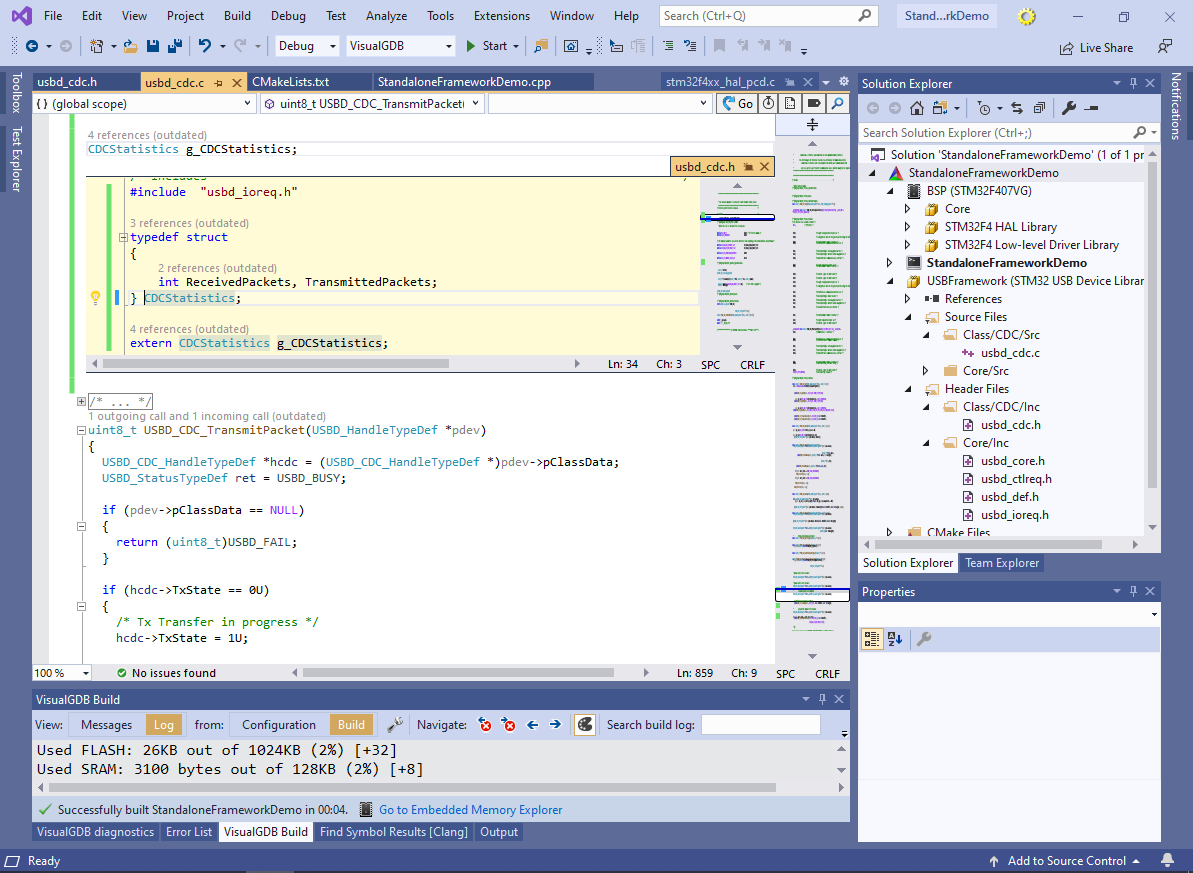
- See how it is now located in usb_cdc.c file under the source control:

- We will now edit the framework to support simple statistics counting. Add the following code to usbd_cdc.h:
typedef struct
{
    int ReceivedPackets, TransmittedPackets;
} CDCStatistics;

extern CDCStatistics g_CDCStatistics;
Then, instantiate g_CDCStatistics in usbd_cdc.c:
CDCStatistics g_CDCStatistics;Finally, update USD_CDC_TransmitPacket() and USBD_CDC_ReceivePacket() to increase the counters in the statistics structure:
- Update the loop in the main source file to print the statistics:
for (;;)
{
	if (VCP_read(&byte, 1) != 1)
		continue;

        char buffer[128];
        sprintf(buffer, "\r\nYou typed '%c'. Received %d packets, sent %d packets\r\n",
                byte, g_CDCStatistics.ReceivedPackets, g_CDCStatistics.TransmittedPackets);

        VCP_write(buffer, strlen(buffer));
}
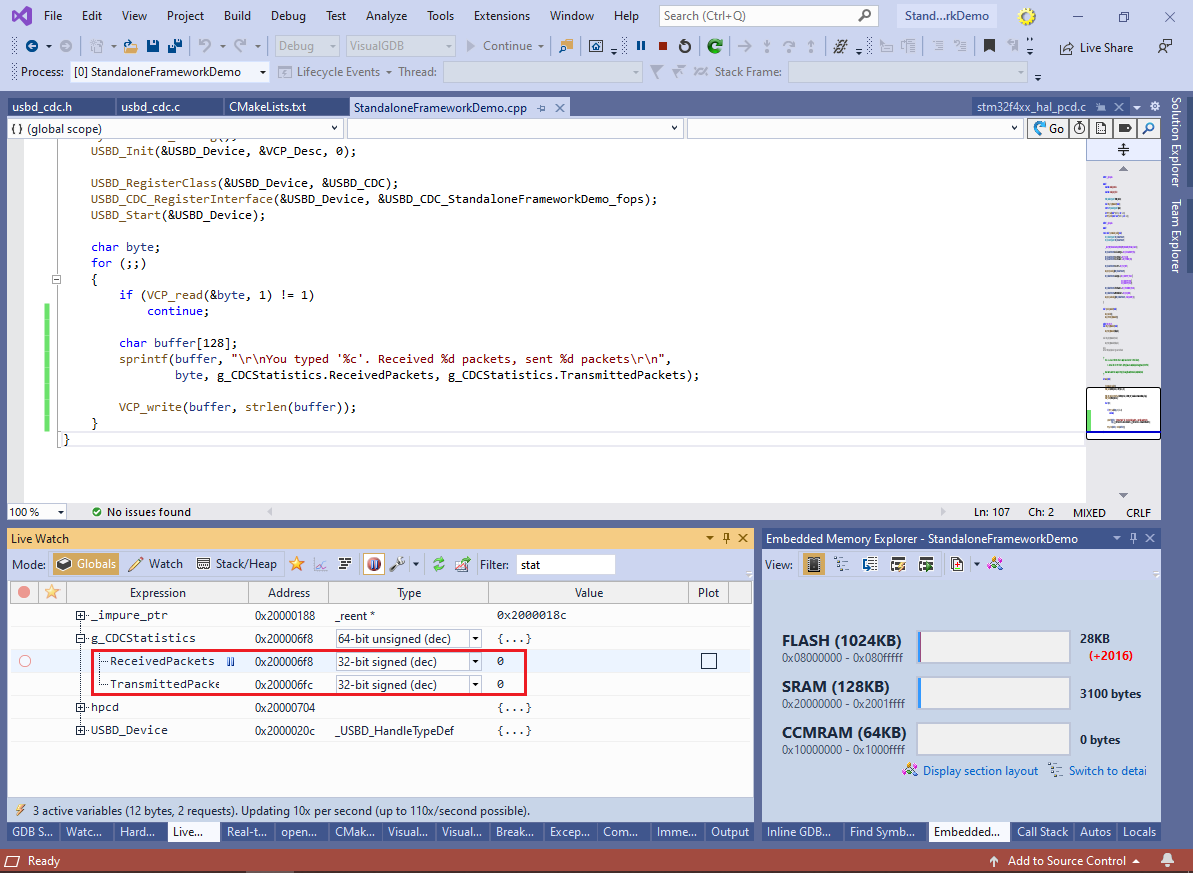
Then, press F5 to run the program. You can observe the real-time packet counts via Debug->Windows->Live Watch:
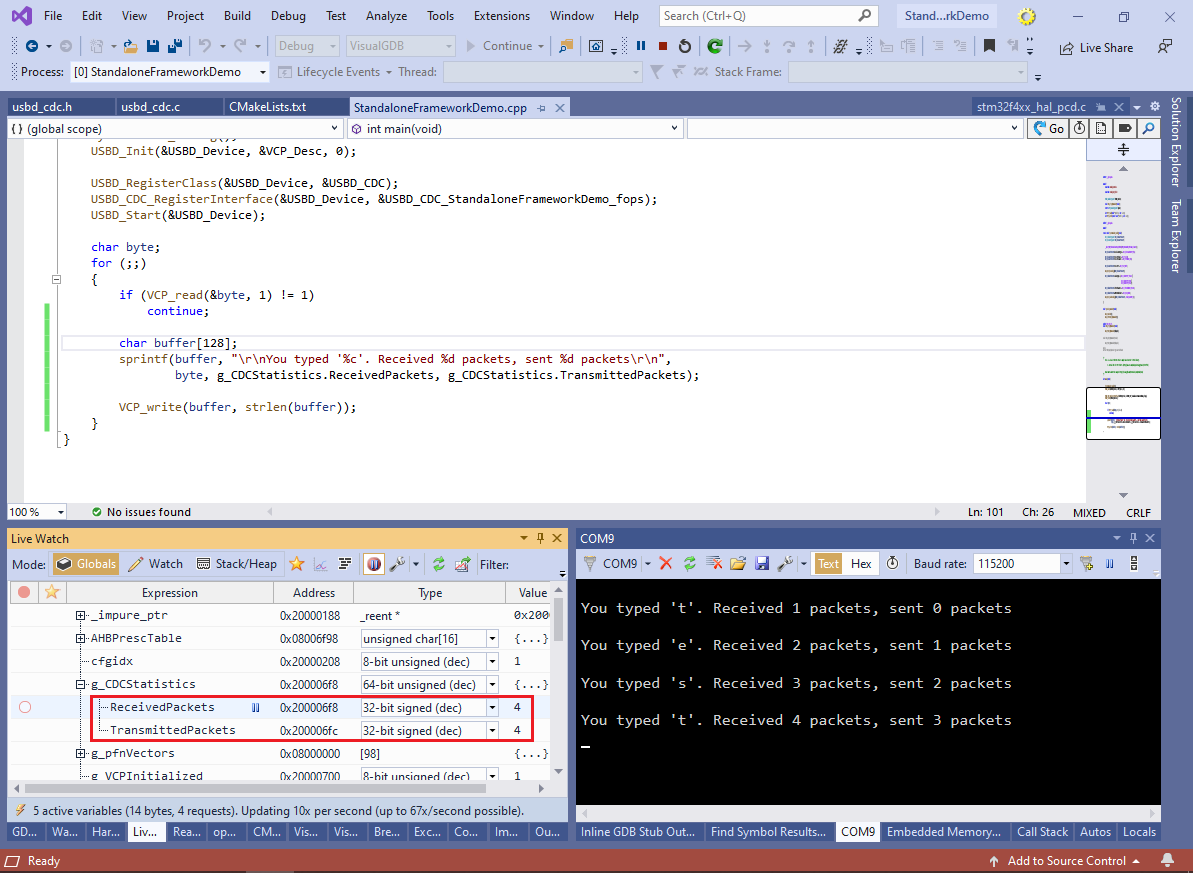
- Right-click on the project node and open the Serial Terminal (VisualGDB Custom Edition) or use SmarTTY to connect to the virtual serial port provided by the application. Try typing some characters in it and observe how the packet counts change in Live Watch and are shown in the output:
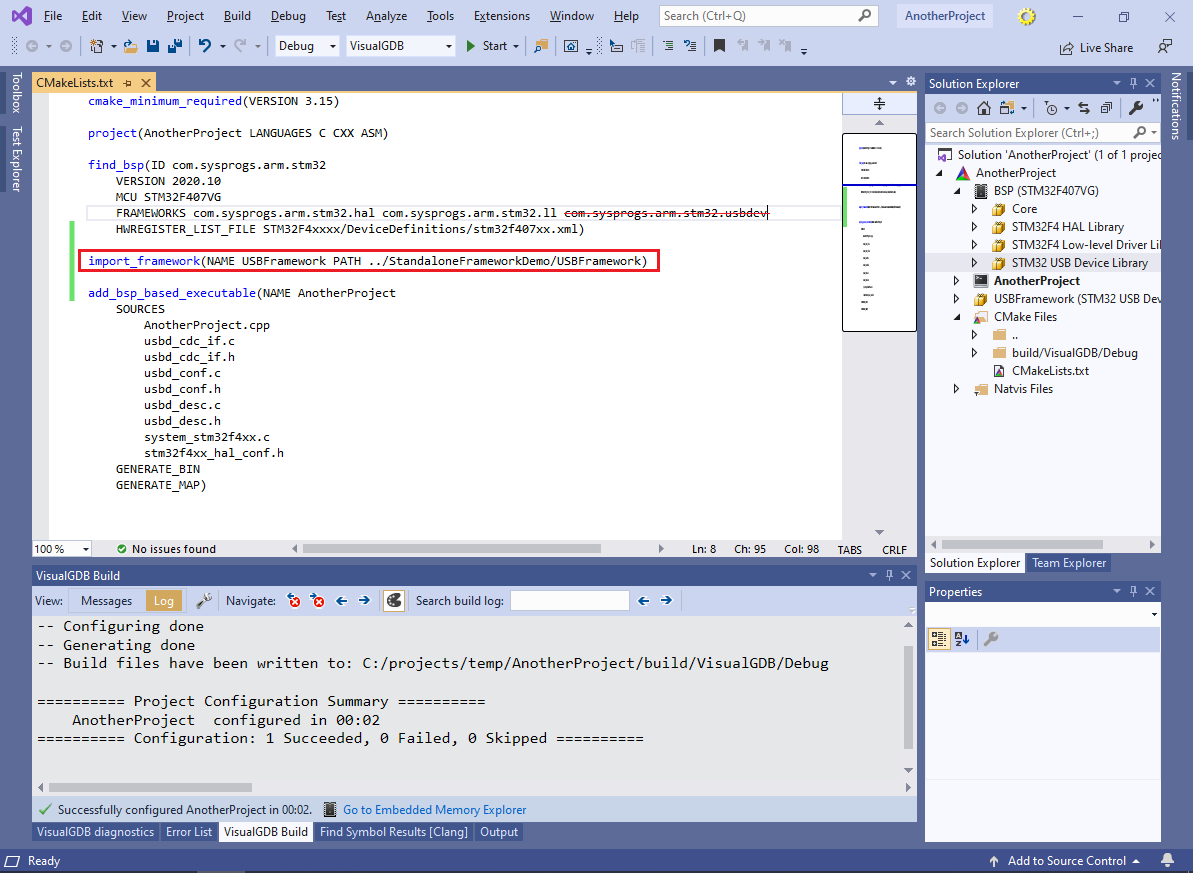
- You can reference the stand-alone framework from another project by removing the original USB framework reference from the find_bsp() statement and manually adding the import_framework() statement to CMakeLists.txt:
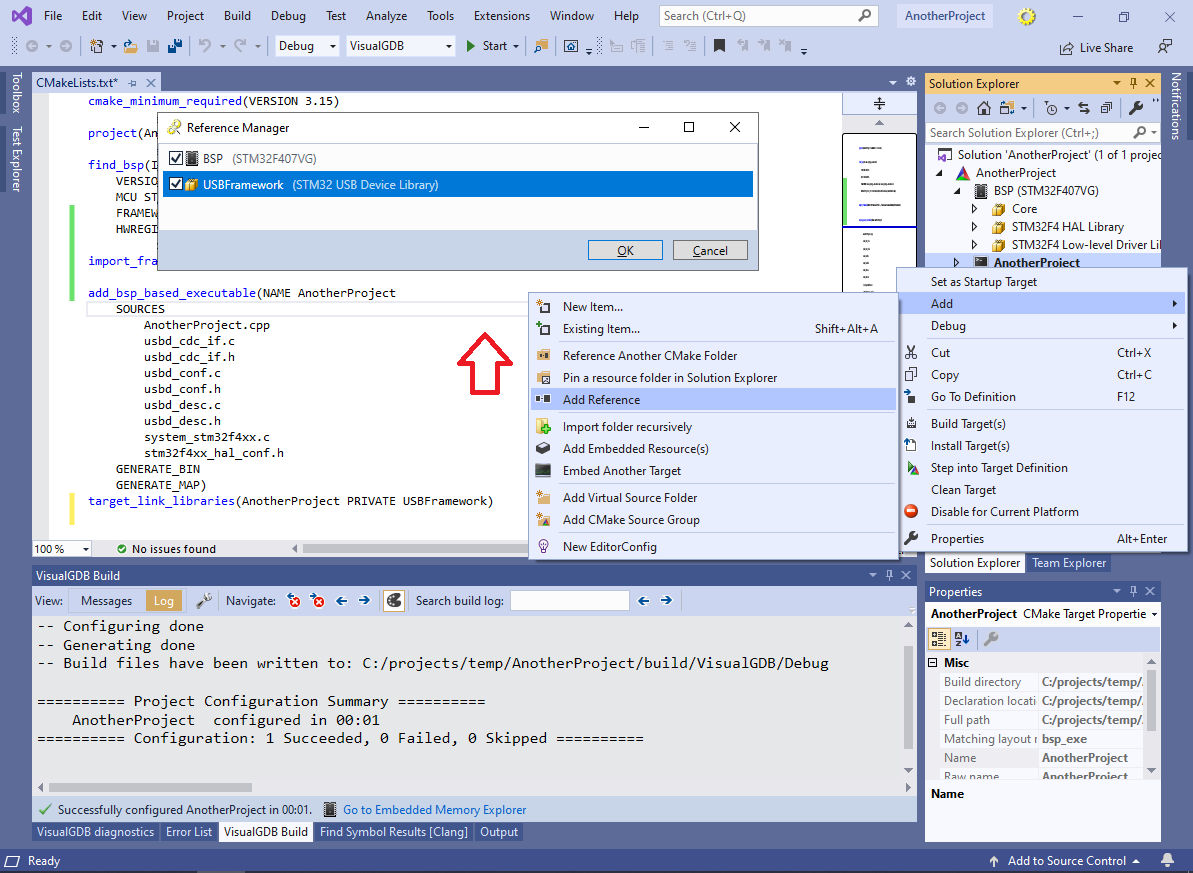
- Then, use the Add->Add Reference command in Solution Explorer to reference the framework from specific application targets:
You can find the source code for the project shown in this tutorial in our Github repository.