Using ESP32 Application Trace with VisualGDB
This tutorial shows how to use the ESP-IDF Application Trace feature (apptrace) to route the debug output from your program into Visual Studio. In this tutorial we will create a basic “Blinking LED” project, extend it to produce debug output and show how to view this output with VisualGDB. Before you begin, install VisualGDB 5.4 Preview 3 or later.
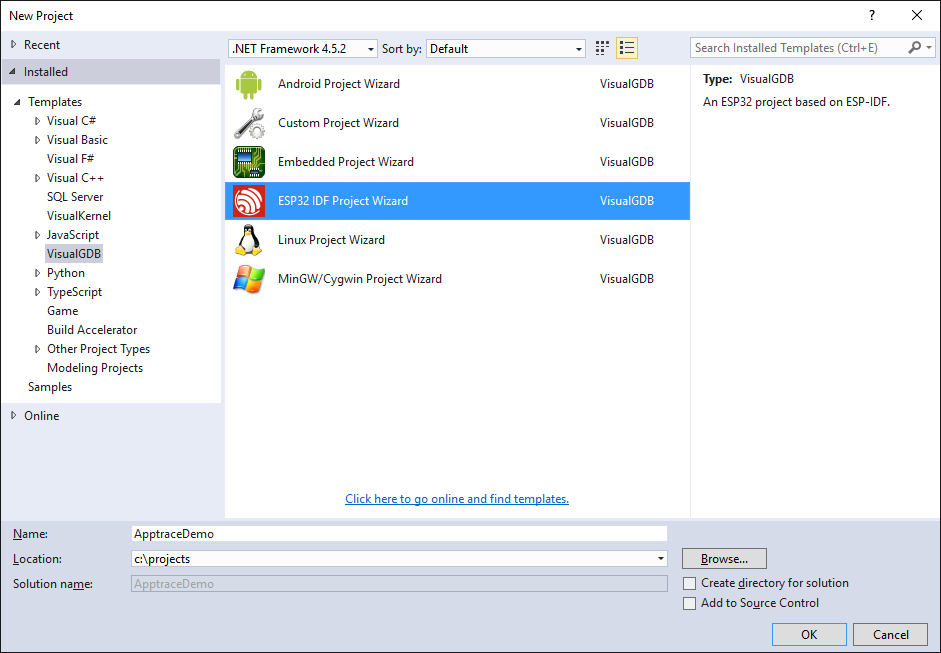
- Start Visual Studio and open the VisualGDB ESP-IDF Project Wizard:
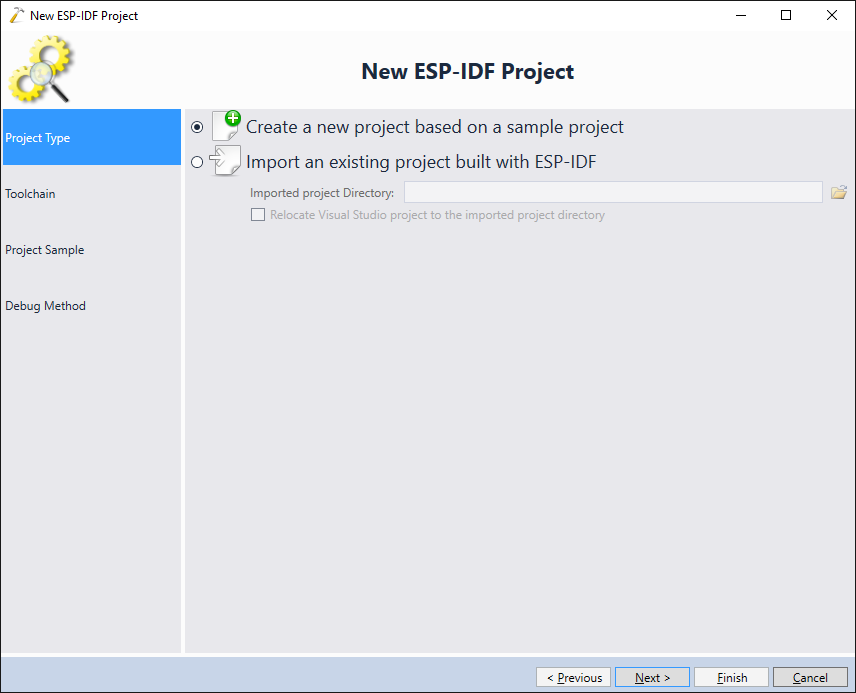
- Proceed with the default “Create a new project based on a sample project” setting:
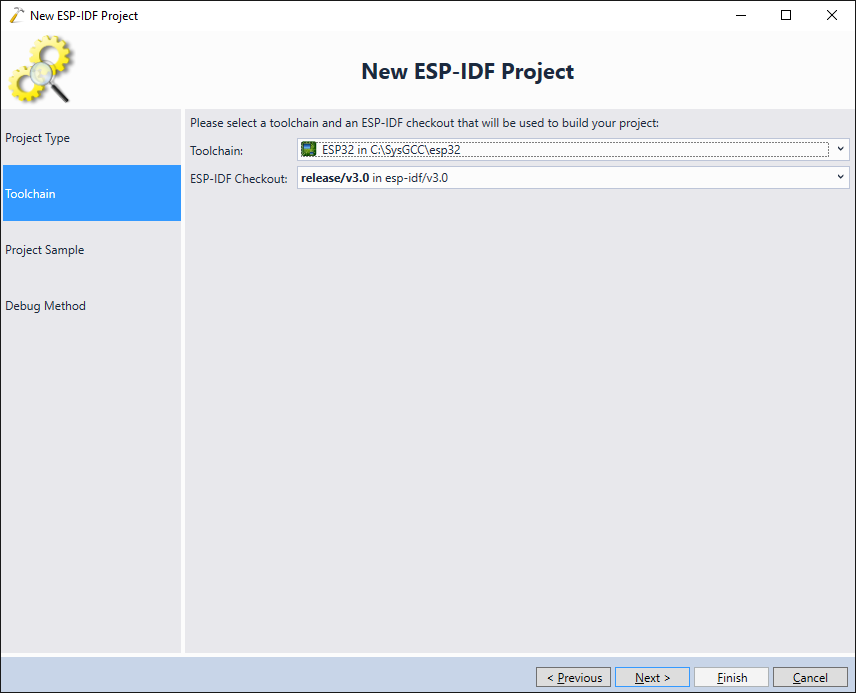
- On the next page select your ESP32 toolchain and the ESP-IDF checkout:
- Then select a sample you would like to use to create your project. In this tutorial we will use the simplest “blink” sample:

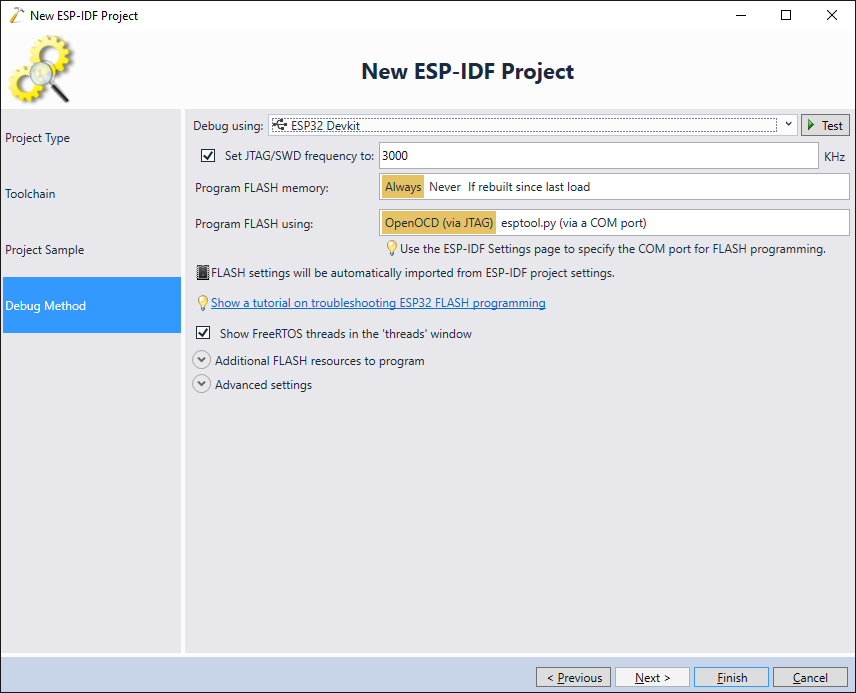
- Connect your debug adapter to the board and plug it into the USB port. VisualGDB will automatically detect it and pick the correct OpenOCD settings. Click “Test” to verify the connection:
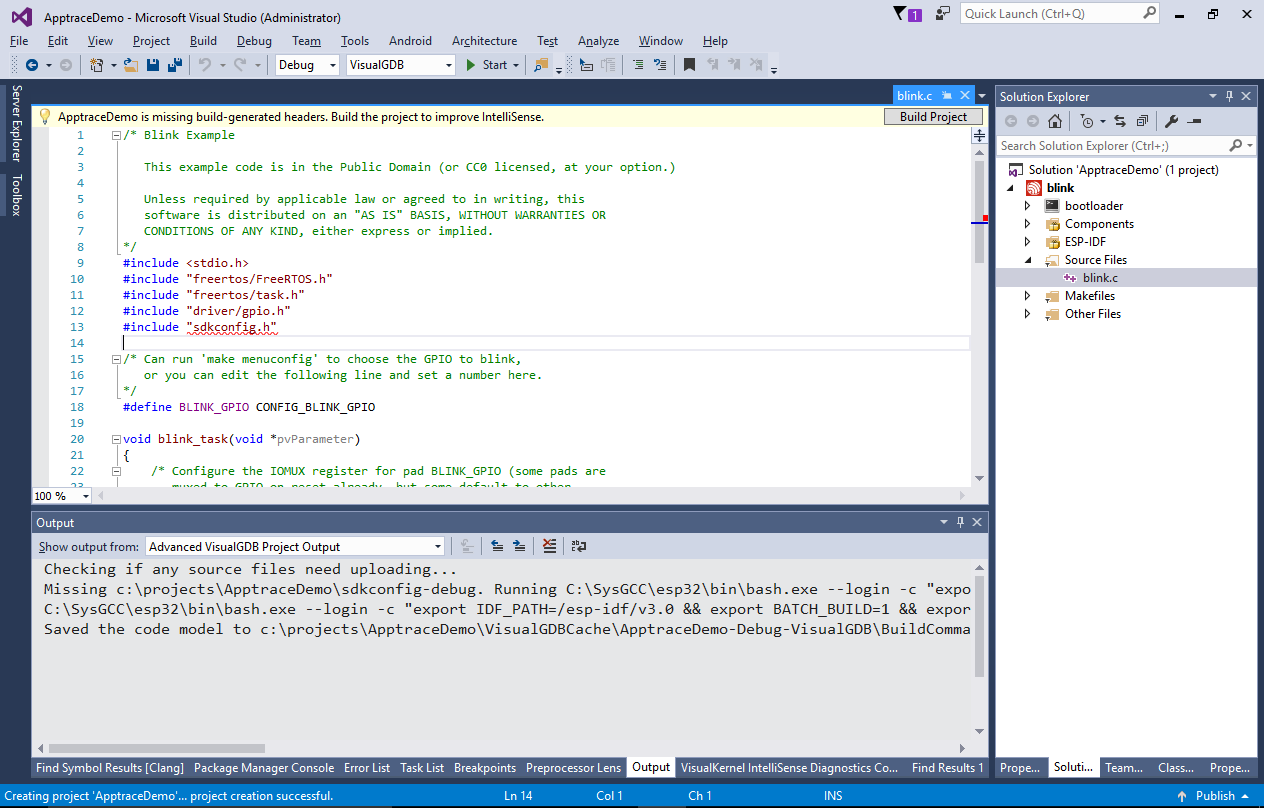
- Press “Finish” to create the project. Initially the IntelliSense will show several errors due to missing sdkconfig and other files. Build the project to generate all necessary files and resolve IntelliSense errors:
- Now we will demonstrate how to modify the project to produce debug output. First, include the <esp_app_trace.h> and <string.h> files. Then modify the main program loop to have a counter and add the following code inside it:
 char buffer[128];
 sprintf(buffer, "Iteration %d\n", i);
 esp_apptrace_write(ESP_APPTRACE_DEST_TRAX, buffer, strlen(buffer), ESP_APPTRACE_TMO_INFINITE);
 esp_apptrace_flush(ESP_APPTRACE_DEST_TRAX, ESP_APPTRACE_TMO_INFINITE);
Note that unless you explicitly call esp_apptrace_flush() after writing the debug output, it won’t be immediately sent to VisualGDB.
- If you try building the project now, it will fail due to missing implementations of the esp_apptrace_write() function:

- In order to fix this, open VisualGDB Project Properties and set the “Data Destination” under “ESP-IDF Project -> ESP-IDF Configuration -> Component Config -> Application Level Tracing” to “Trace memory” (ESP-IDF 4.x) or “Data Destination 1” to “JTAG” (ESP-IDF 5.x) :
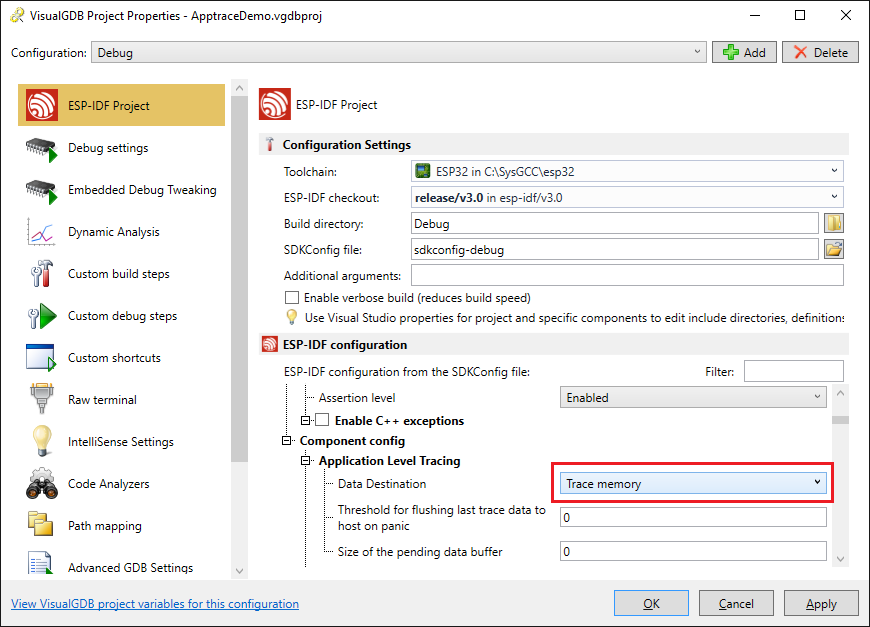
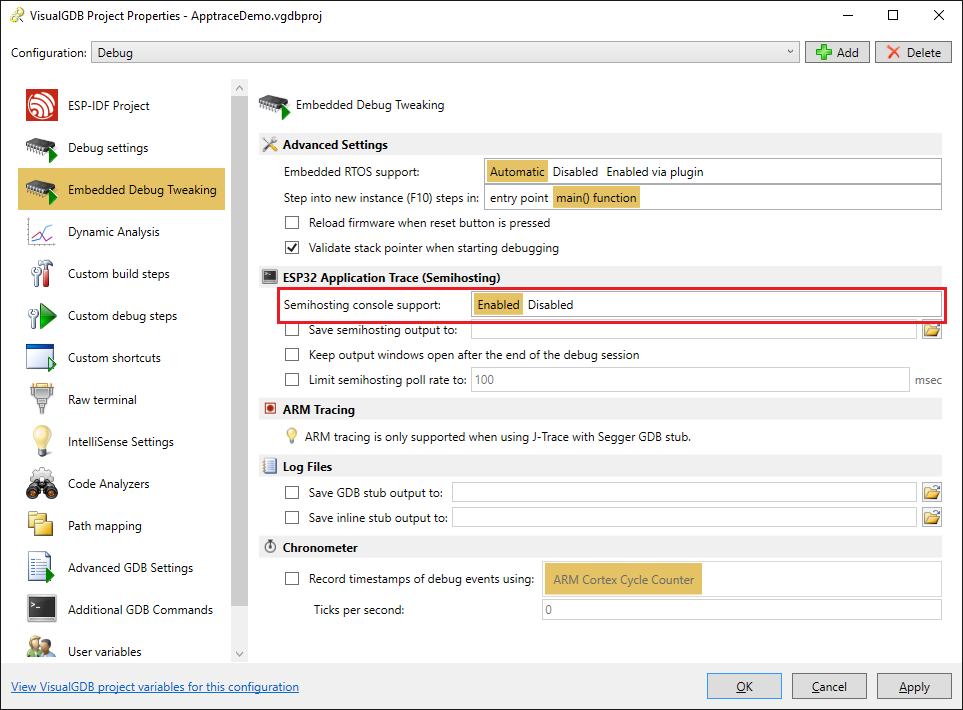
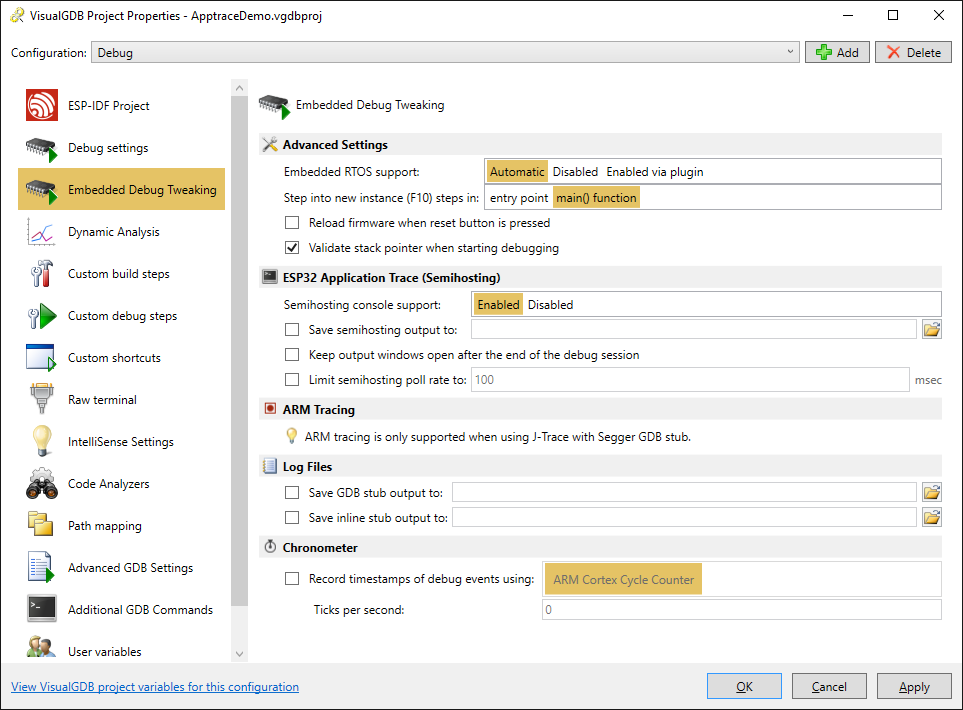
This will enable the apptrace mechanism – any data stored via esp_apptrace_write() function will be placed into a special trace buffer that could be read by VisualGDB without stopping your program. - In order to view the debug output in VisualGDB, enable it via Embedded Debug Tweaking -> ESP32 Application Trace -> Semihosting Console Support:
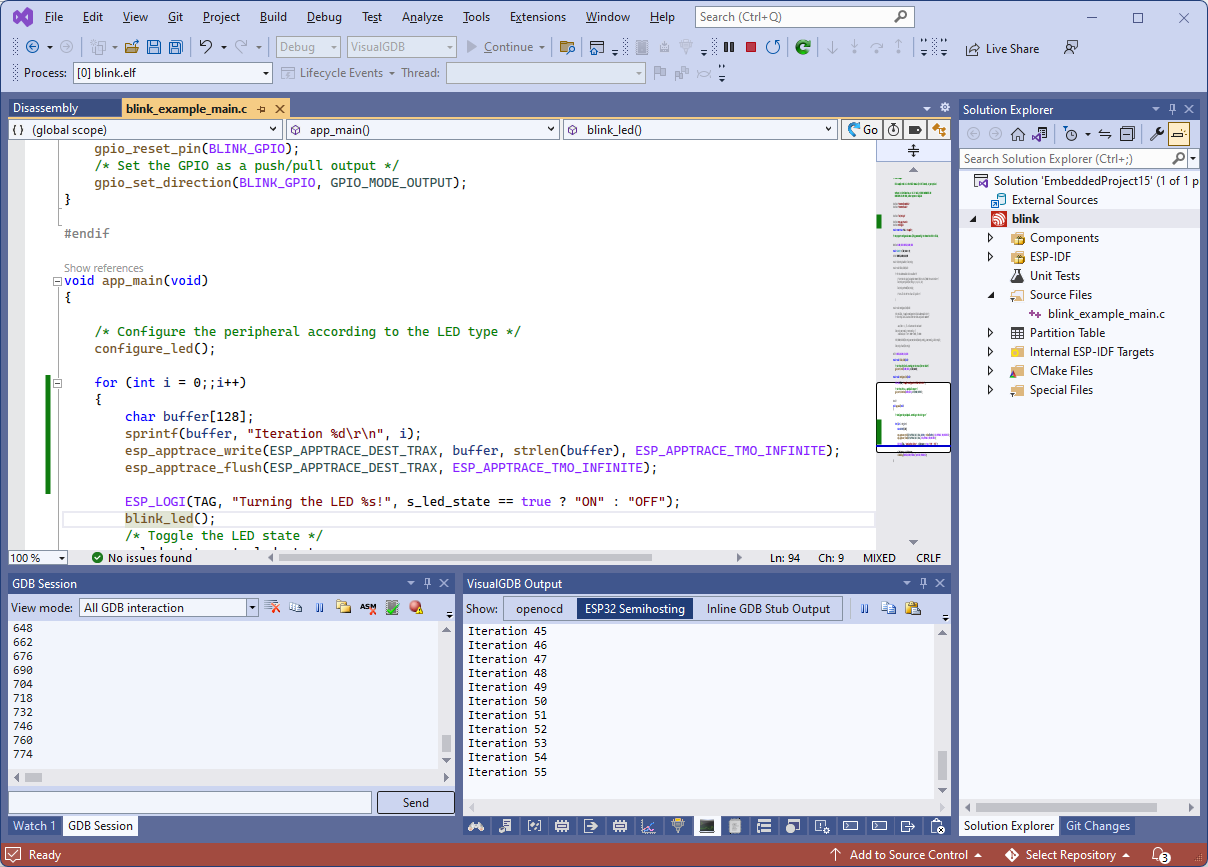
- Now you can build and start debugging your project. The output sent via the esp_apptrace_write() function will appear in the Debug->Windows->VisualGDB Output->ESP32 Semihosting window inside Visual Studio: