Developing Projects for the Infineon EtherCAT module with Visual Studio:
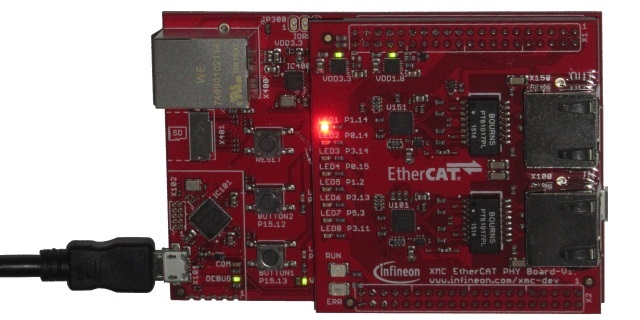
This tutorial shows how to create projects for the Infineon EtherCAT module featuring the XMC4800 microcontroller using Visual Studio and VisualGDB.
Before you begin, install VisualGDB.
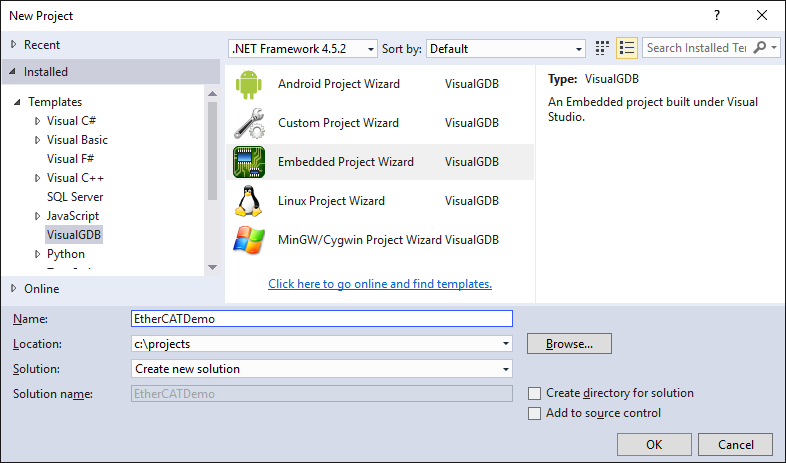
- Start Visual Studio. Select File->New->Project and pick the VisualGDB Embedded Project Wizard from the list:
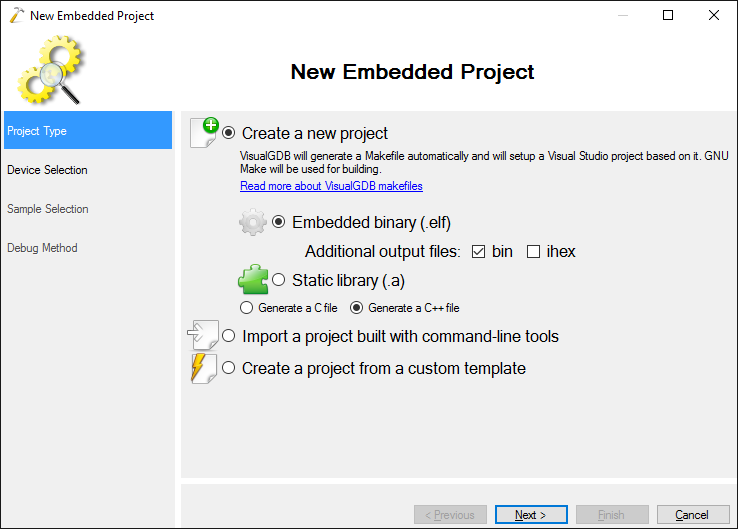
- As we are creating a very basic project, the default setting of “Embedded Binary” will work, so simply click “Next” on the first page:
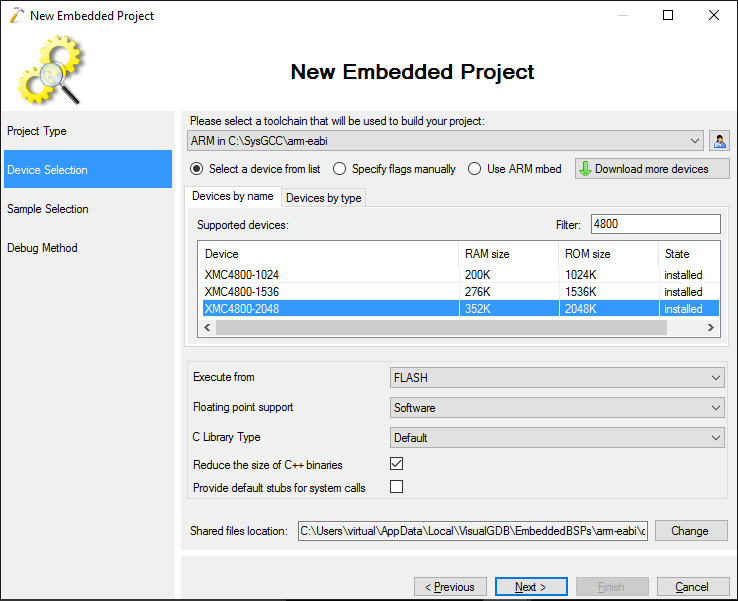
- Select the ARM toolchain and the Infineon device you are targeting. The EtherCAT module has the XMC4800-2048 device installed, so we simply select it:
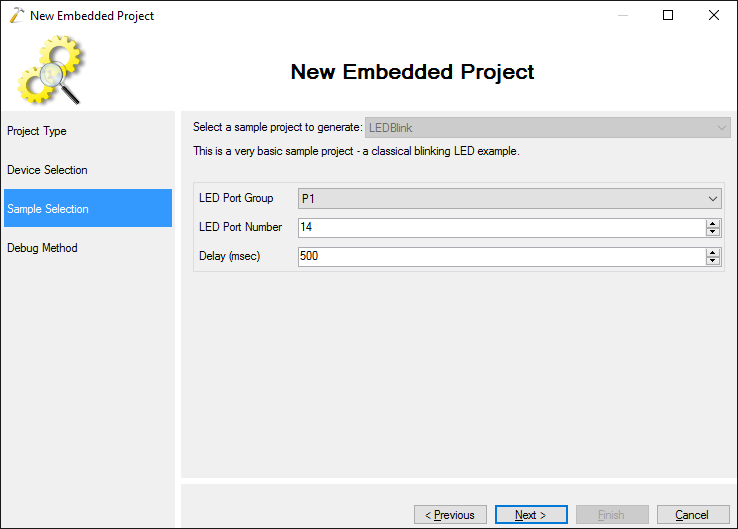
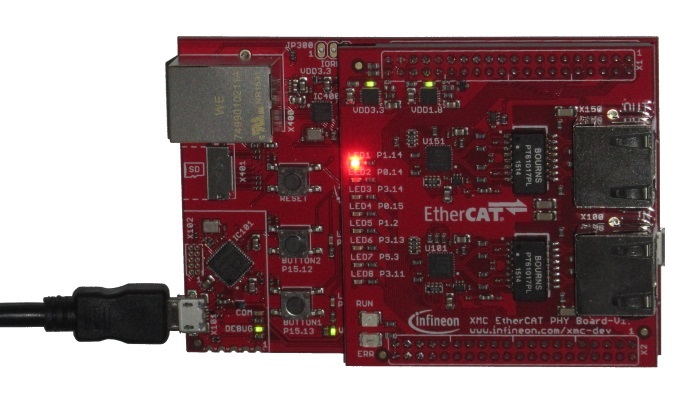
- Proceed with the default LEDBlink sample. The module has several on-board LEDs with the port numbers printed next to them. We will use the first one that is connected to P1.14, so select P1-14 as the LED port:
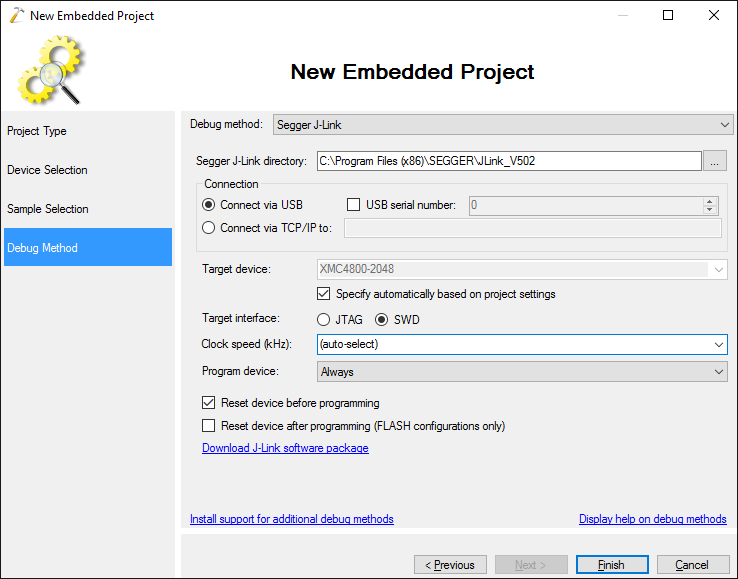
- The module comes with an on-board Segger J-Link, so simply select it in the Debug Method field and VisualGDB will configure everything automatically:
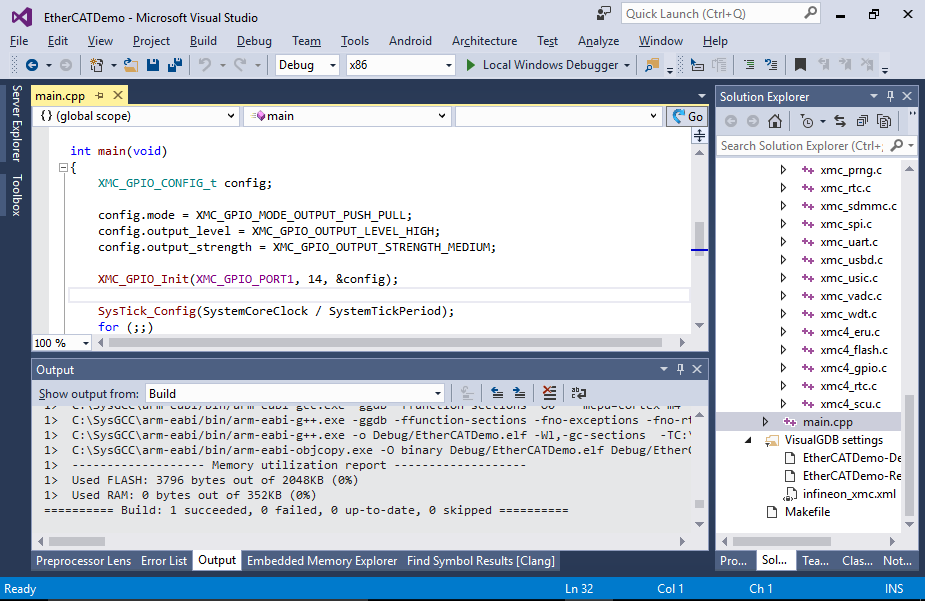
- Press “Finish” to create your project. Build it by pressing Ctrl-Shift-B:
- Press F5 to start debugging. Note how the LED that we selected in the wizard starts blinking:
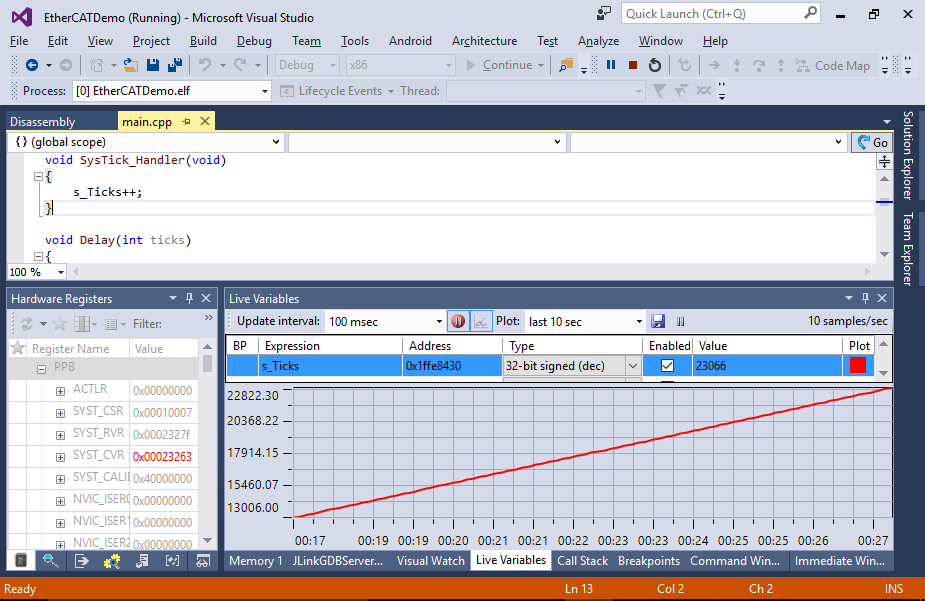
- Set a breakpoint at the SysTick_Handler() function and wait for it to trigger. See how the interrupt handler is incrementing the s_Ticks variable each time an interrupt happens:

- You can configure VisualGDB to display the s_Ticks variable value while your program is running. Simply add it to the Live Variables window as if you were adding a watch, enable plotting and press F5 to continue debugging:
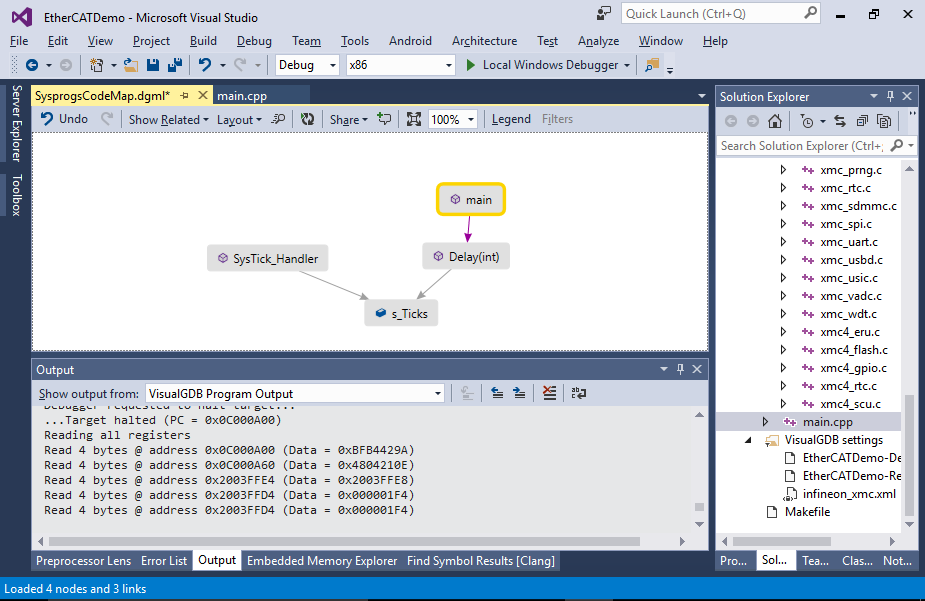
- You can also use the Code Map feature provided by the VisualGDB’s Clang-based IntelliSense engine to quickly explore the relations between code and data. E.g. you can see how main() is calling the Delay() function that in turns reads the s_Ticks variable also accessed by SysTick_Handler():