Porting a Windows App to Linux with Visual Studio
This tutorial shows how to port a simple Windows application to Linux by creating a Linux configuration in a Visual Studio project with VisualGDB.
Before we begin, ensure that VisualGDB 4.0 or later is installed.
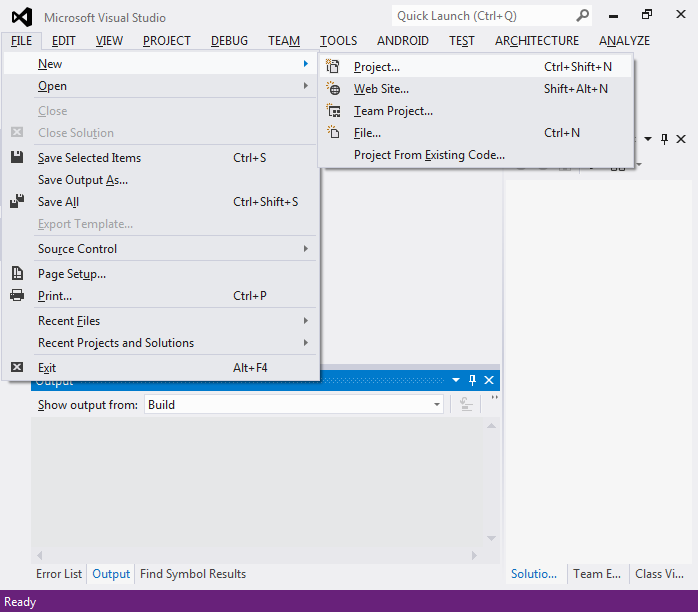
- Our first step will be to create a simple console application for Windows. Start Visual Studio and select File->New->Project.
- Select “Win32 Console Application”:
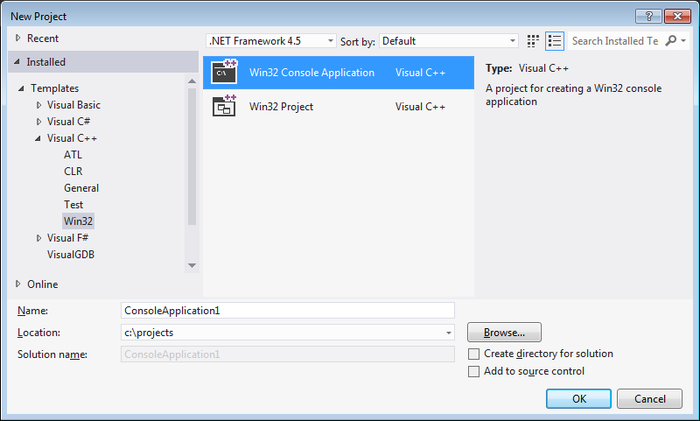
- Proceed with the default settings and press “Finish”. Visual Studio will create a basic console application. Add the following code to the main file:
#include "stdafx.h"
#include <stdio.h>
#include <stdlib.h>

int _tmain(int argc, _TCHAR* argv[])
{
    printf("HOMEPATH=%s\n", getenv("HOMEPATH"));
    printf("HOME=%s\n", getenv("HOME"));
    return 0;
}
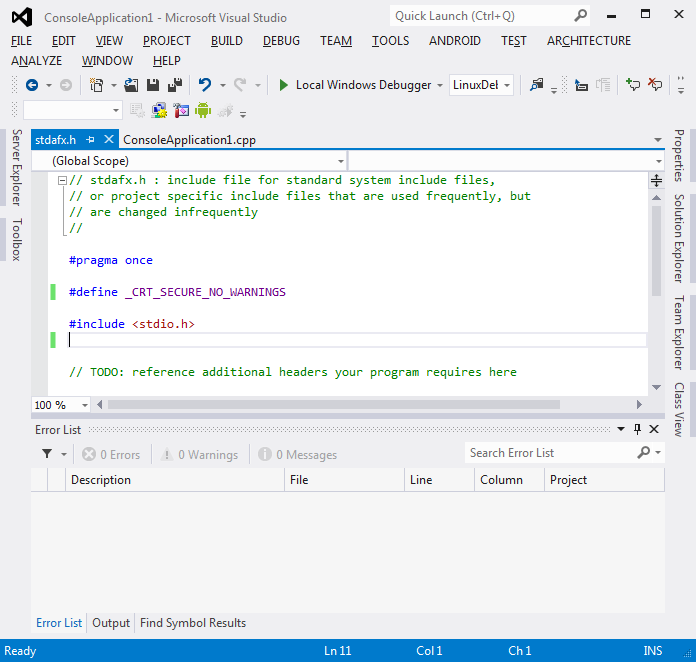
- Build the project. If the build complains about the getenv() function, add the following line to the beginning of stdafx.h:
#define _CRT_SECURE_NO_WARNINGS
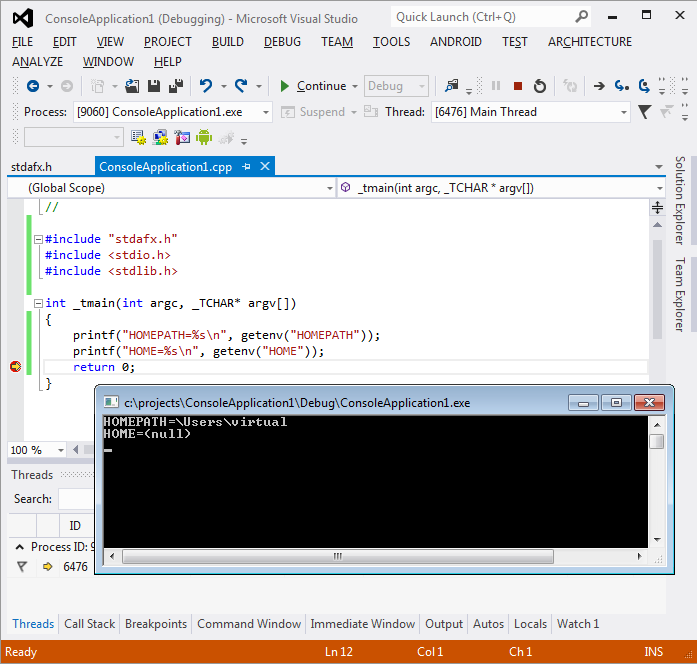
Run the project and observe its output. Note that on Windows the HOME variable is undefined:
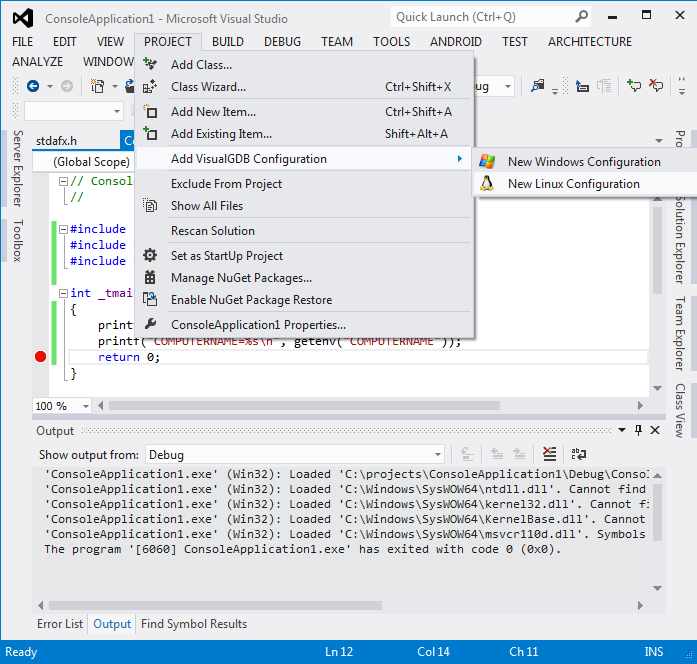
- Now we will create a new Linux configuration for the project. Select Project->Add VisualGDB Configuration->New Linux Configuration:
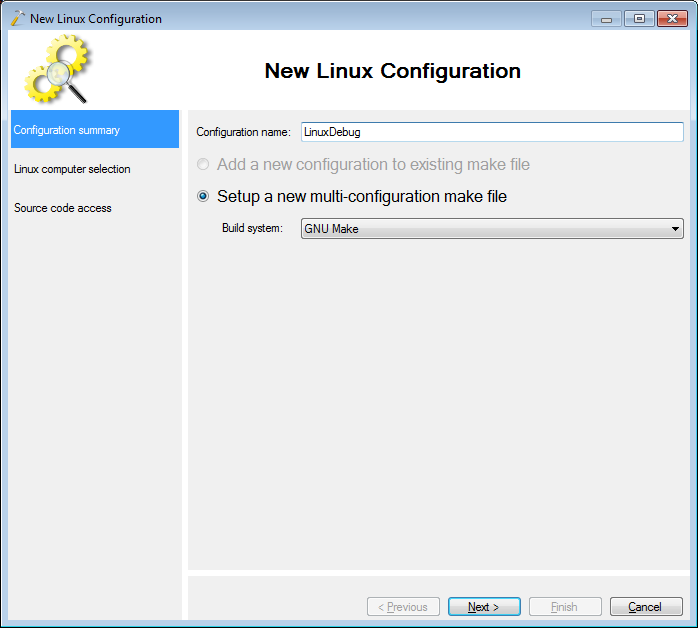
- VisualGDB will start the Linux Configuration Wizard. Enter “LinuxDebug” as the configuration name:
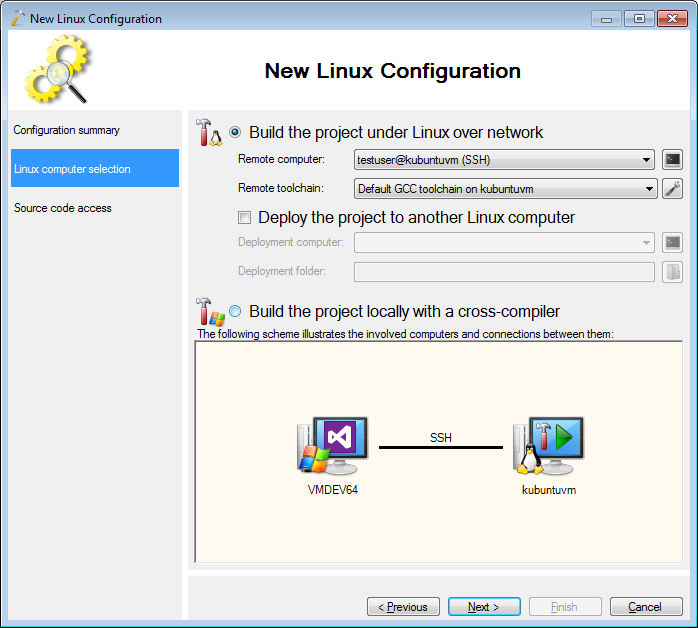
- On the next page select the Linux computer you want to use. You can also select a different toolchain:
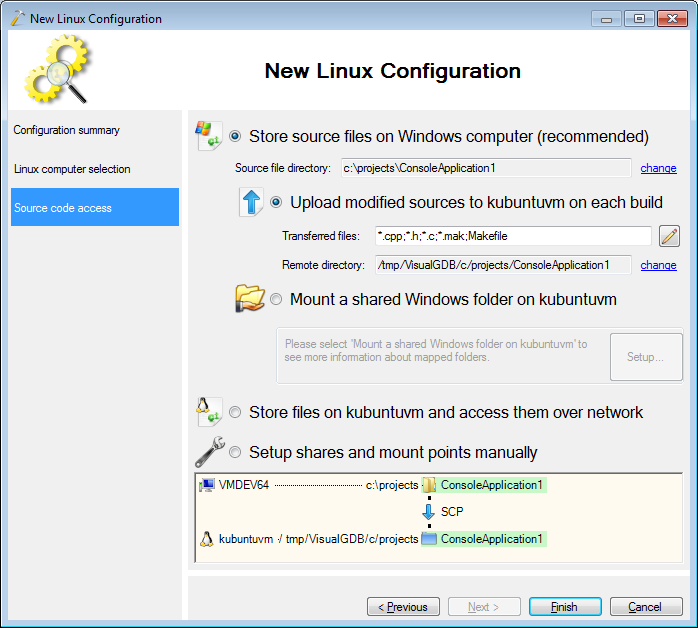
- The last page allows specifying the location of the source files on the Linux machine. You can proceed with the default settings:
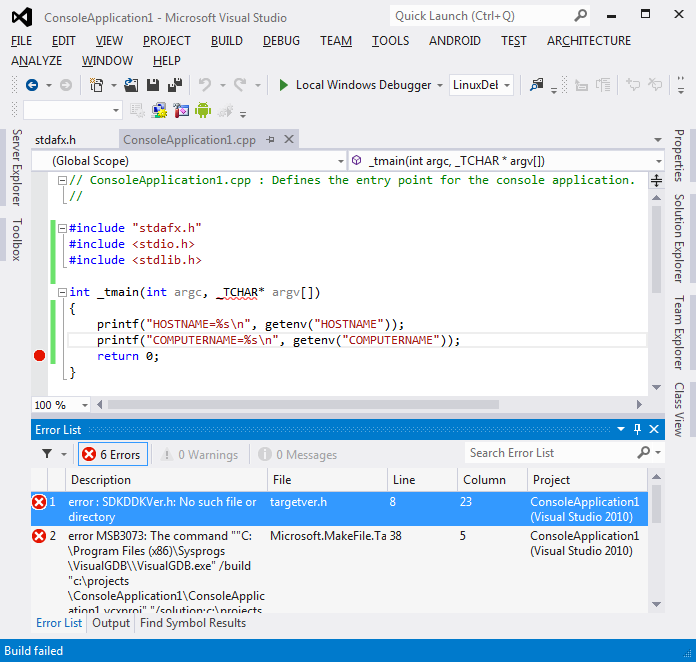
- When you press Finish, VisualGDB will create a new project configuration and a corresponding solution configuration. As certain Windows-specific files are missing on the Linux machine, the compilation will fail with several errors. We will fix them in the next steps:
- Open the stdafx.h file and remove references to SDKDDKVer.h and tchar.h:
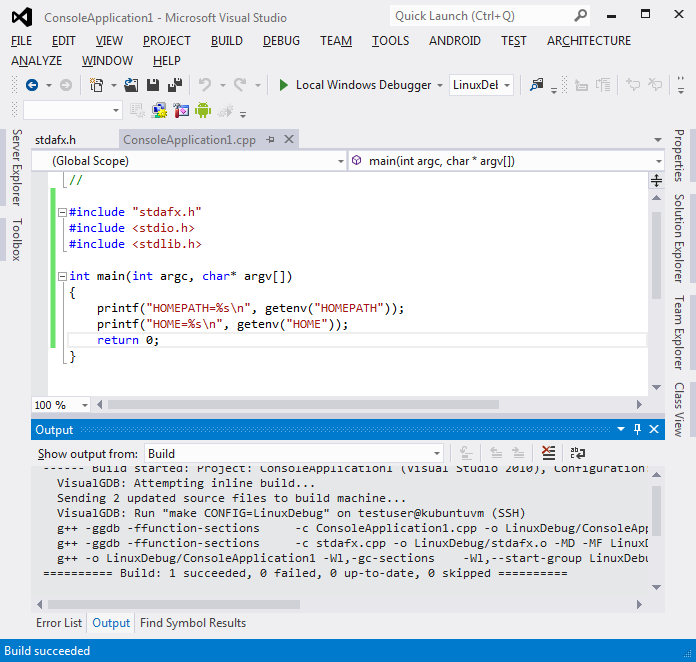
- Rename _tmain() to main() and replace _TCHAR with char. Build the project. You will notice that the modified source files will be transferred to the Linux machine and built there using GCC, the standard compiler on Linux systems:
- Set a breakpoint on the return statement and run the program. Observe the output:

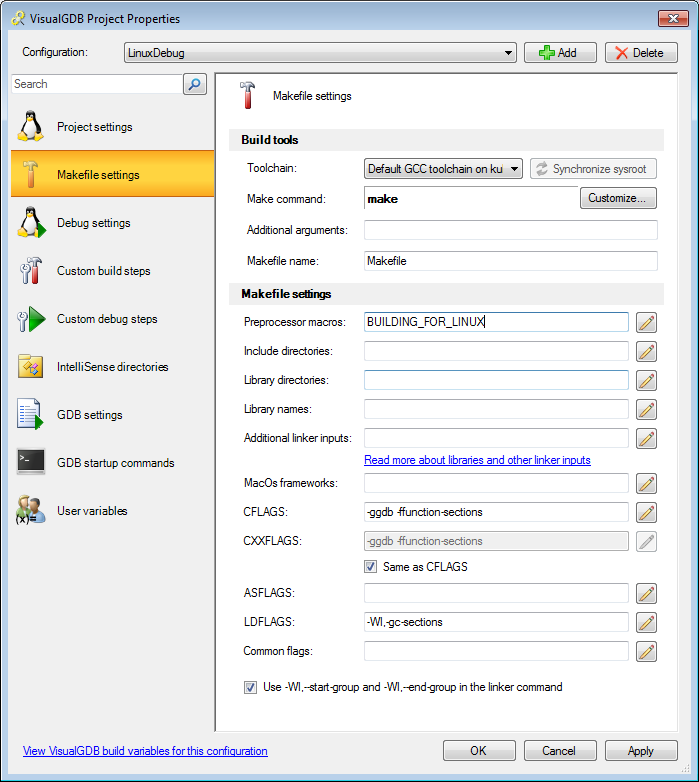
- As Windows and Linux use different variable names (HOMEPATH vs HOME), we had to write two separate getenv() lines. Now we will add conditional compilation statements to ensure that only one line is used on each OS. We could test for the _MSC_VER macro on Windows (that is set by the Visual C++ compiler) or the LINUX macro that is defined by Linux headers, however in this tutorial we will show how to add your own macro. Right-click on the project, select VisualGDB Project Properties and go to the Makefile Settings page. Add BUILDING_FOR_LINUX to Preprocessor Macros:
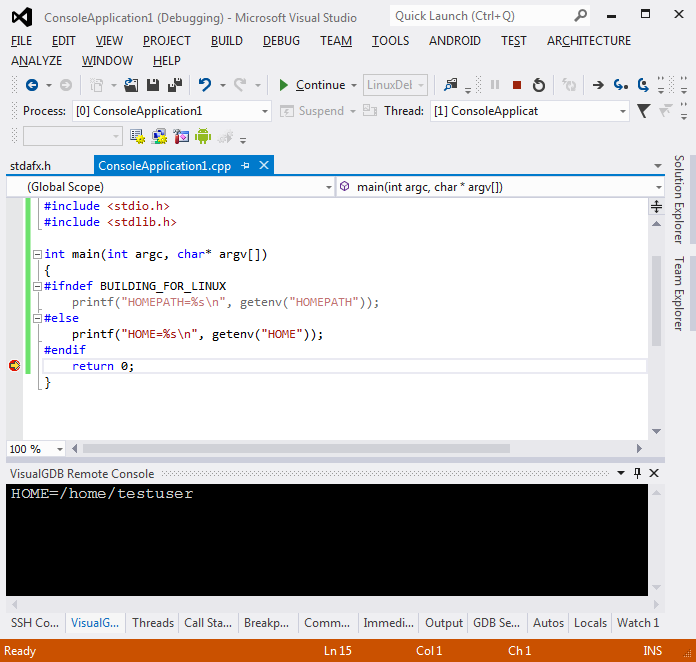
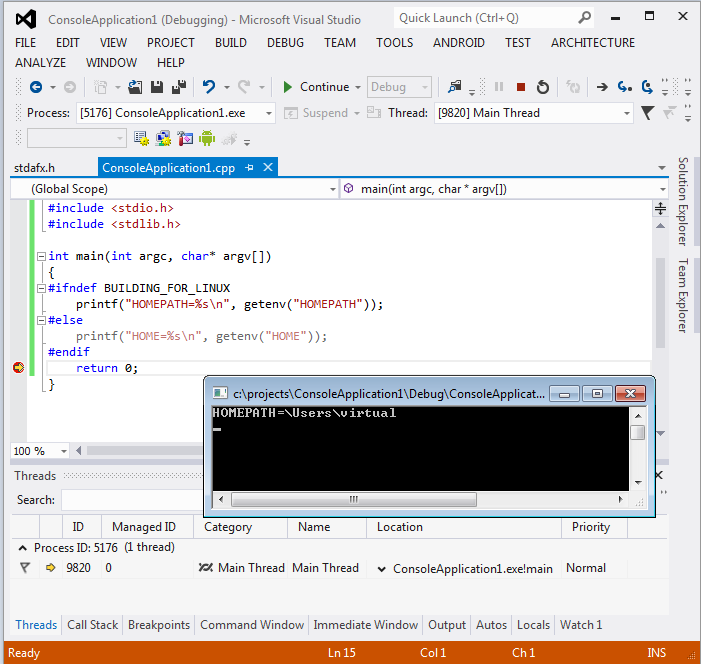
- Now press OK and add the #ifndef BUILDING_FOR_LINUX statement to your code. Build and run the program. Observe that the output only contains one line now:
- Now switch the current configuration back to Debug and hit F5 to run the Windows version of your program:
- As most of the API (except for the basic standard functions) is different between Linux and Windows, you may want avoid having too many #ifdef statements and simplify your porting. You can accomplish this in one of the following ways:
- Use a multi-platform framework like QT that abstracts out the differences between platforms
- Install Cygwin and create a Cygwin configuration via Project->Add VisualGDB Configuration->Windows. Cygwin provides equivalents to most Linux APIs on Windows so once you have ported your app to Linux you can build the Windows version of it without too many changes.


If you are using Windows 10, you can also use the Windows Subsystem for Linux to build, debug and test your Linux code. See this tutorial for a detailed description.