Porting Windows projects to Linux with Windows 10 Linux Subsystem
This tutorial shows how to port native Win32 projects to Linux using VisualGDB and the Windows 10 Linux Subsystem. Before you begin, install Windows 10, Visual Studio and VisualGDB 5.3 or later.
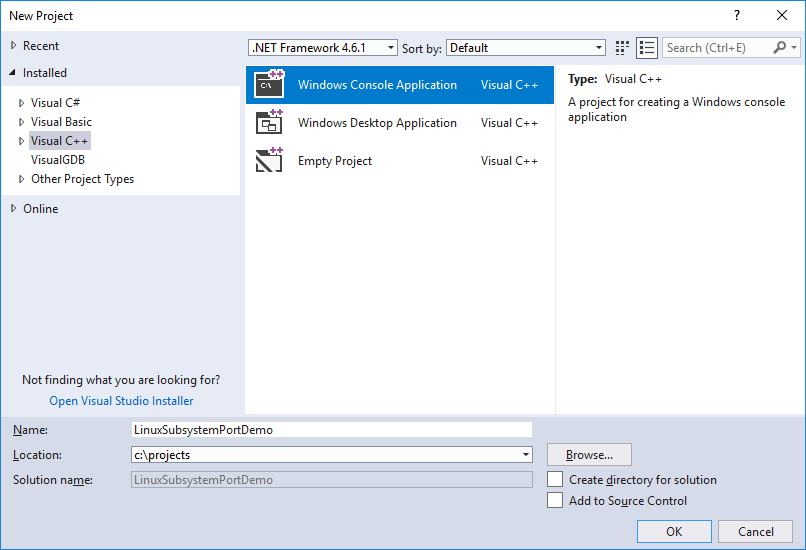
- Open Visual Studio and create a regular Win32 Console application:
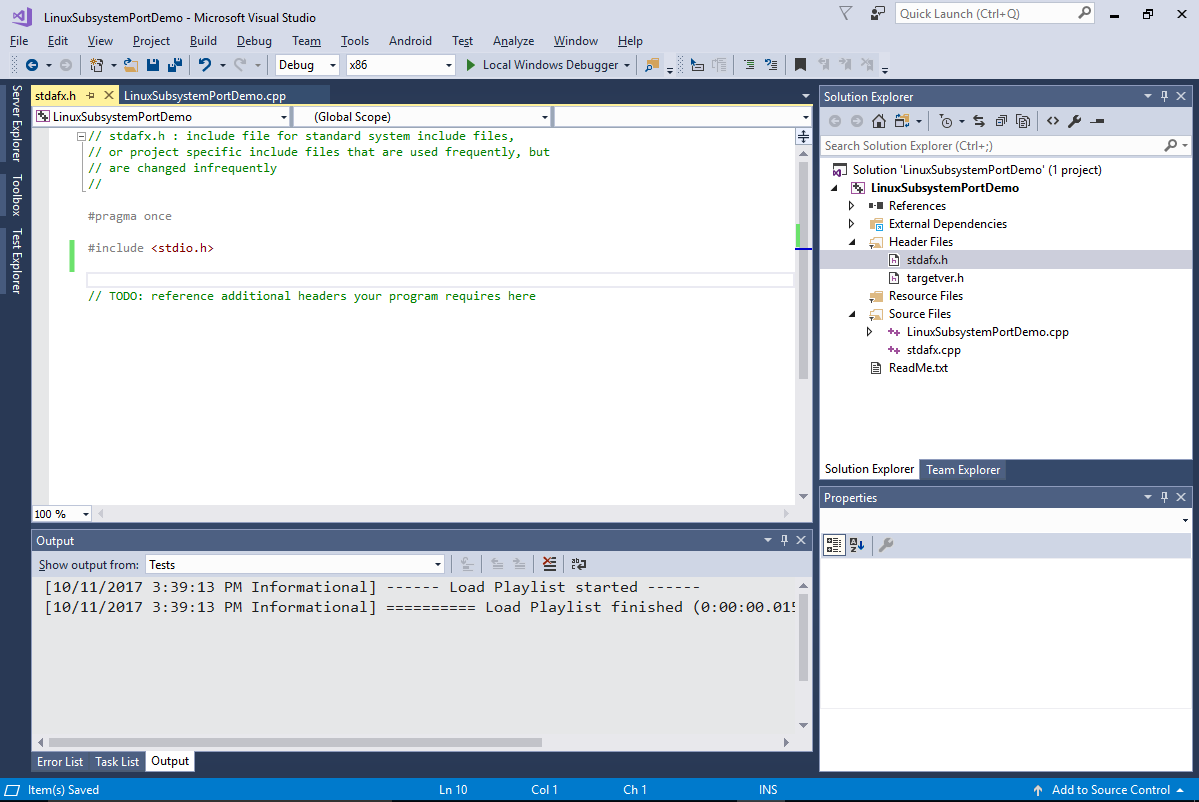
- Open the stdafx.h file and remove references to tchar.h and targetver.h that are not available on Linux:
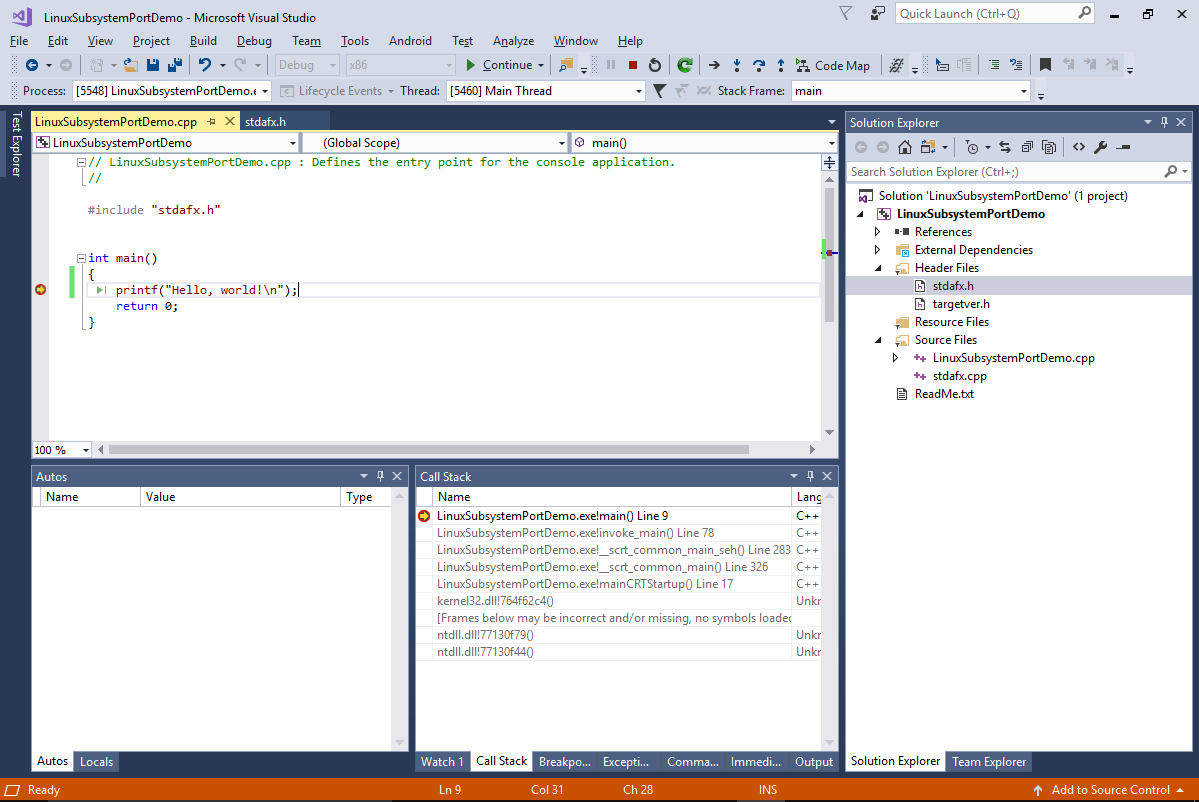
- Modify the main() function to print a basic “Hello, world” message and build the project:
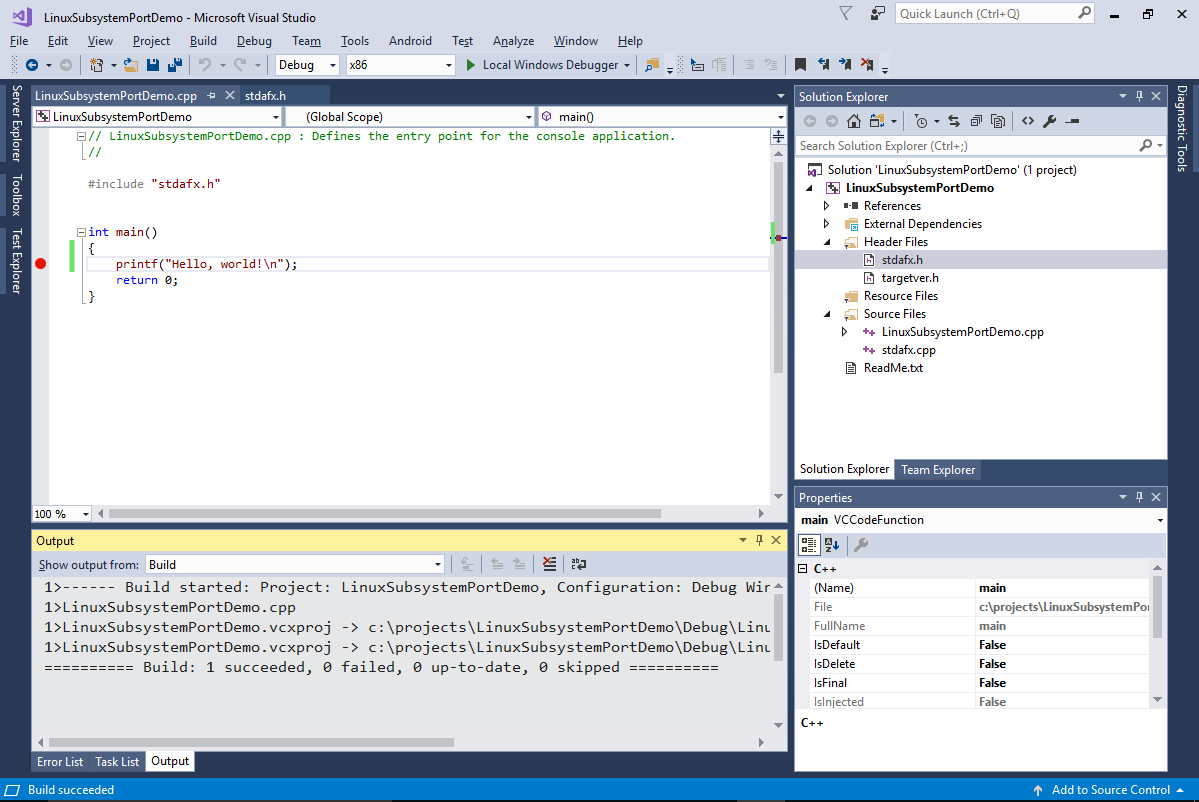
- Set a breakpoint on the printf() line and begin debugging with F5 to ensure that the native Windows build runs:
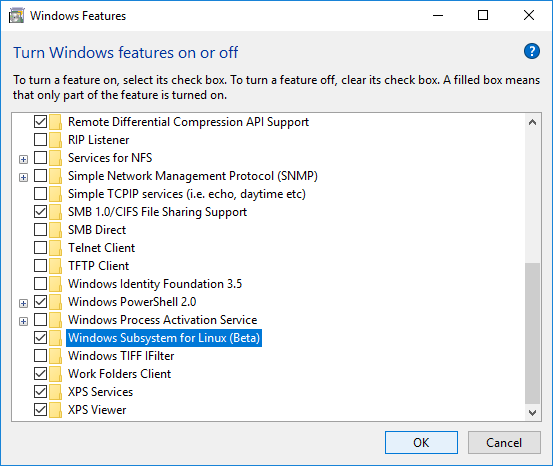
- Now we will show how to target the Windows 10 Linux subsystem. Unlike a separate virtual machine running Linux that would require synchronizing files over network, the Windows 10 Linux Subsystem can access the Windows filesystem directly, making the setup much easier. Before you begin, ensure that the Linux Subsystem is installed via Add/Remove Programs -> Turn Windows features on or off:
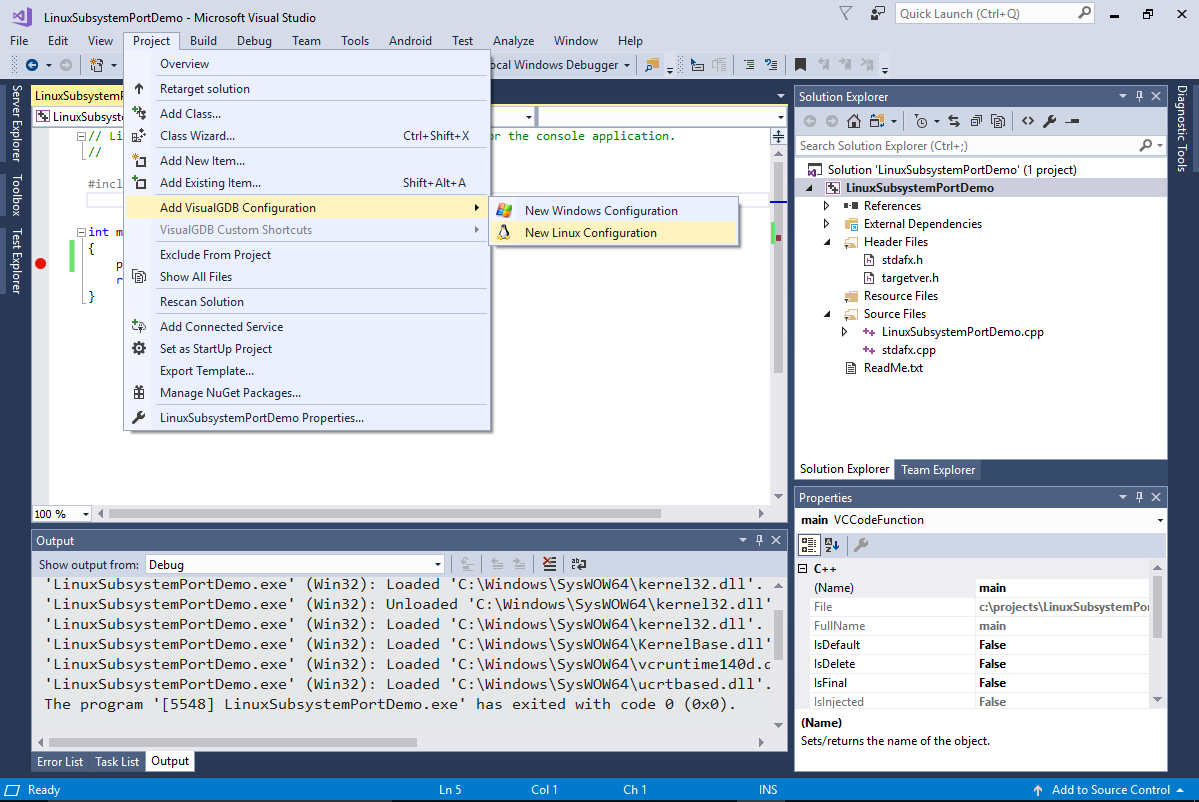
- Go back to Visual Studio and select Project->Add VisualGDB Configuration->New Linux Configuration:
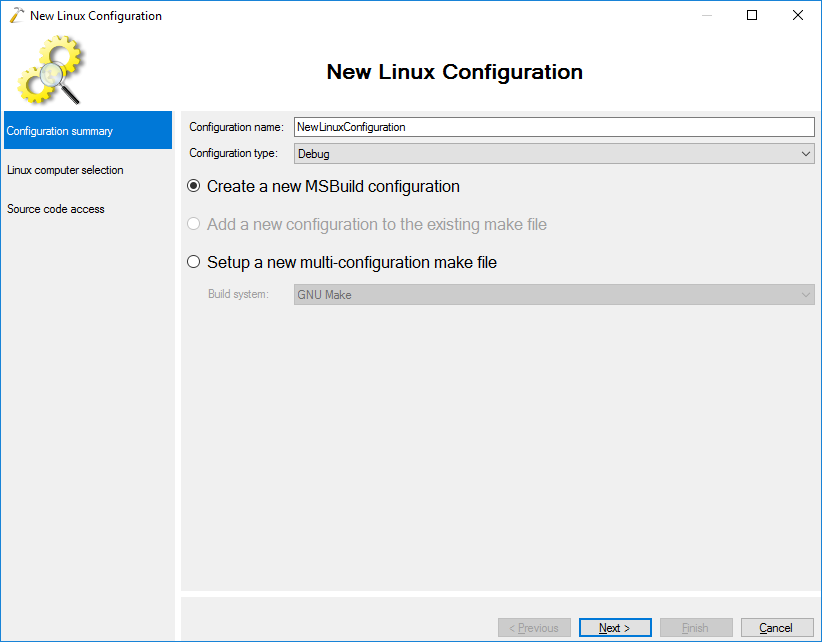
- VisualGDB will show the New Linux Configuration wizard. In this tutorial we will use MSBuild to build the project, so proceed with the default settings:
- On the next page select “Use the Windows 10 Linux Subsystem” and proceed with the default toolchain:
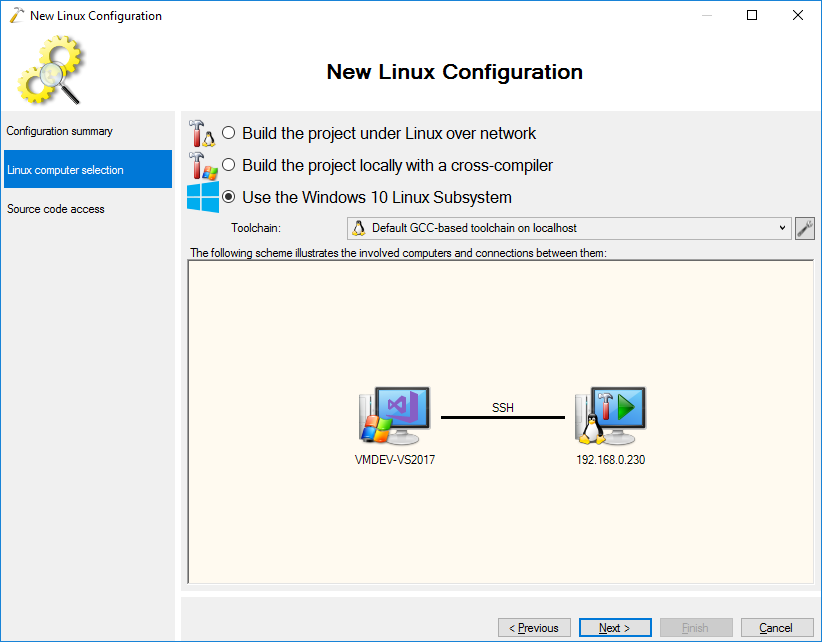
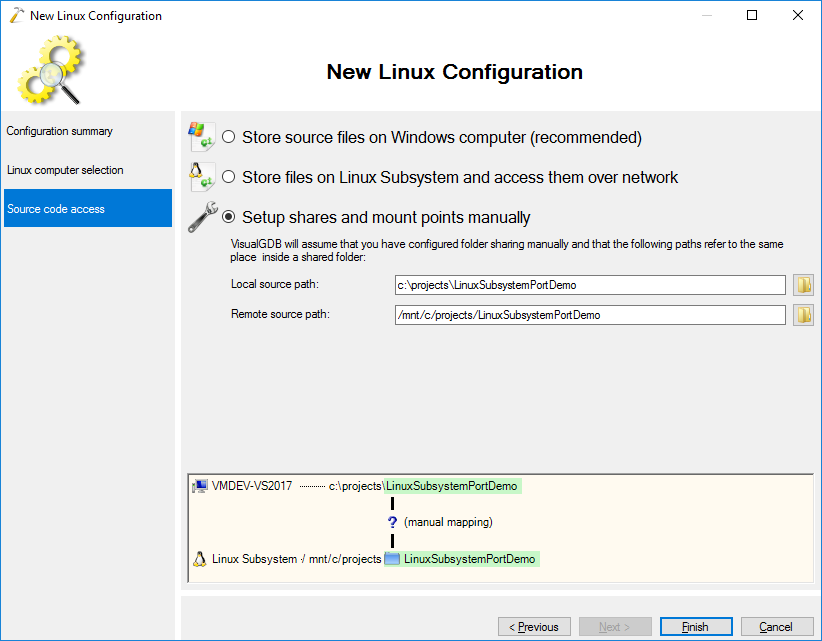
- VisualGDB will automatically detect the path mappings between the Windows and Linux subsystems, so simply click “Finish” on the last page:
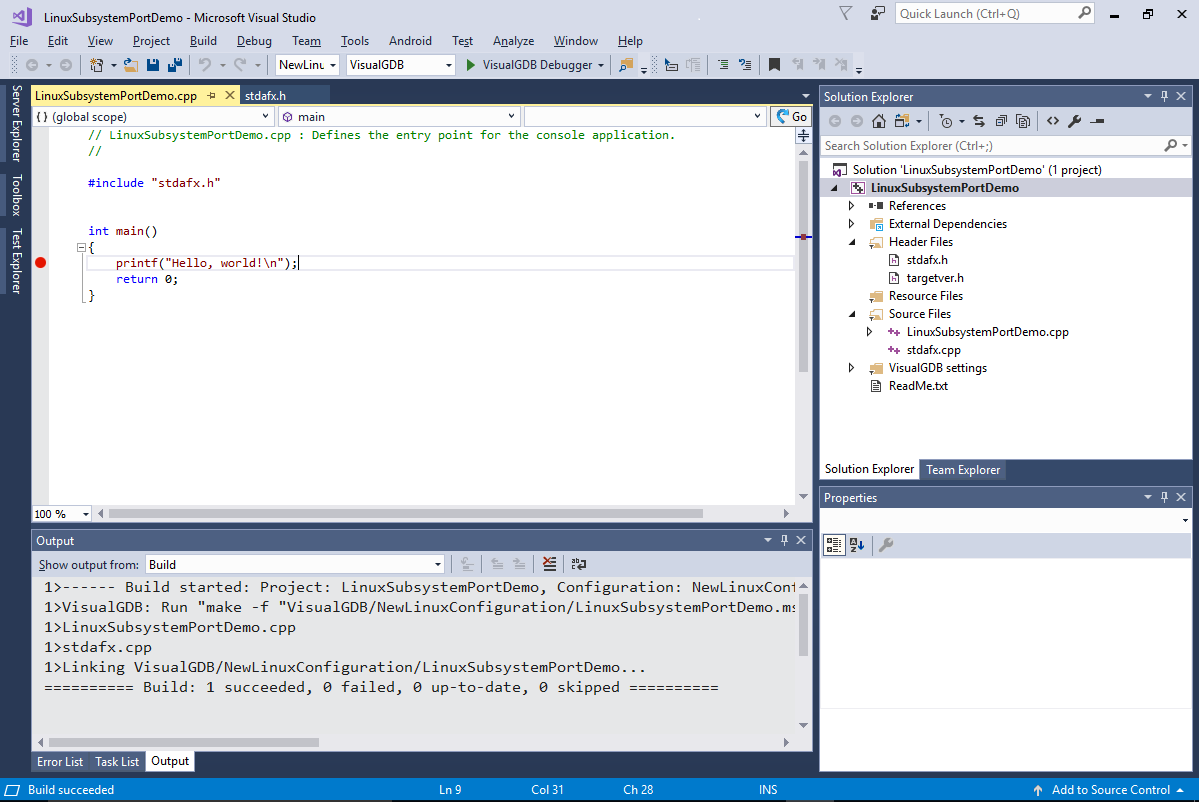
- VisualGDB will create a new solution platform called ‘VisualGDB’ and will insert the new configuration there. Ensure that you can build the project by pressing Ctrl-Shift-B:
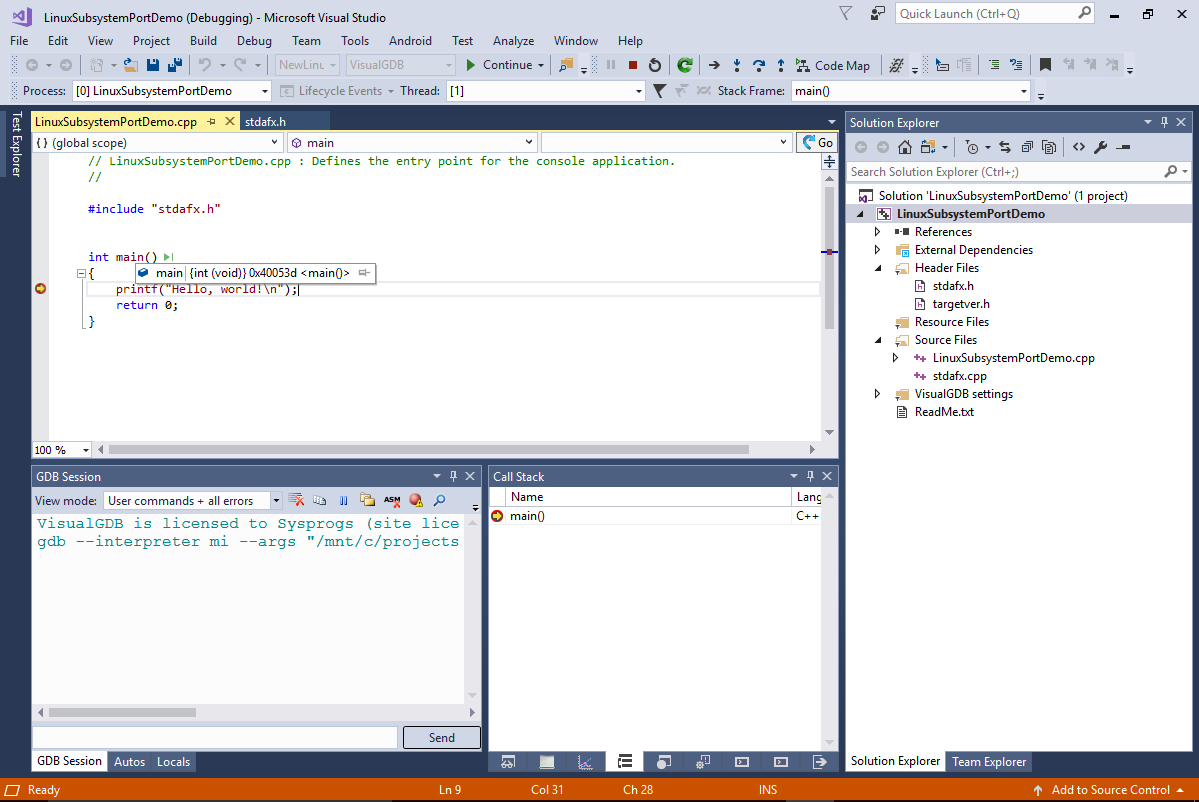
- Set a breakpoint in main() and start debugging by pressing F5:
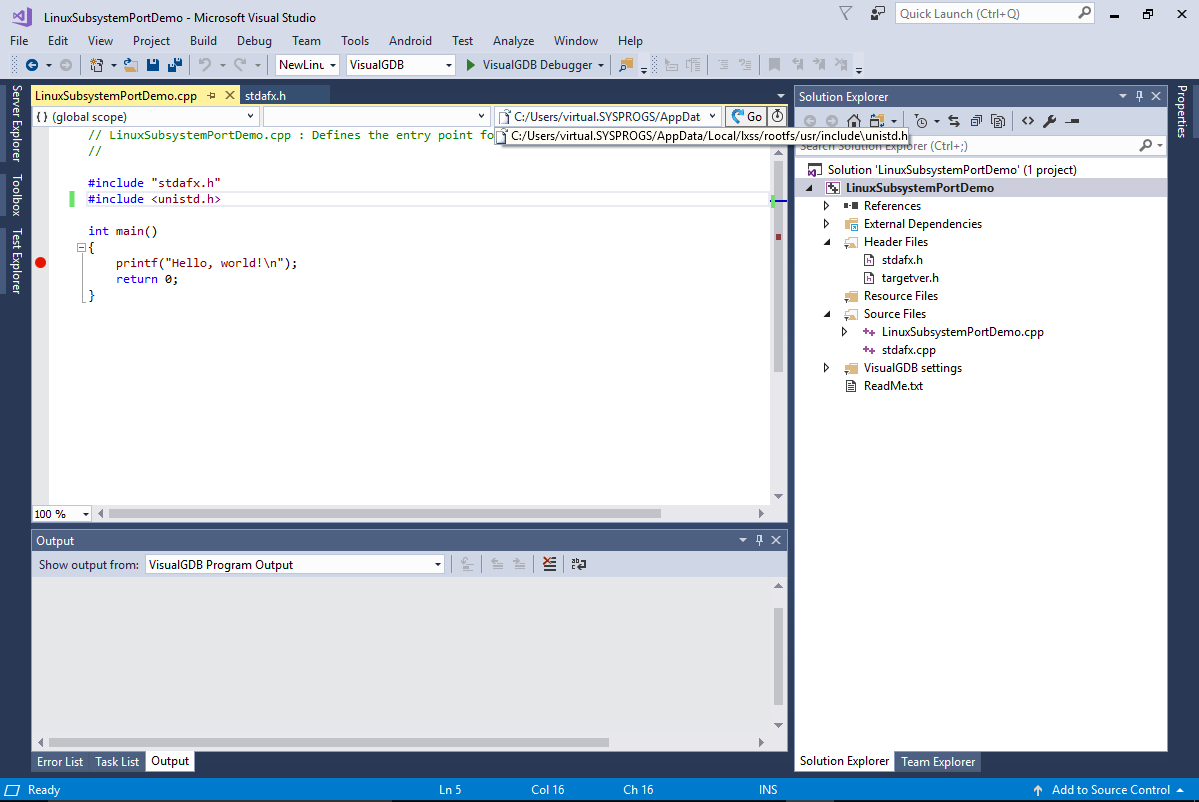
- Include the <unistd.h> file from the main source file and select the corresponding line. See how VisualGDB automatically discovered the file under the lxss root file system. You can press the “Go” button to open the file, or simply begin using any functions declared in it and IntelliSense will automatically recognize them:
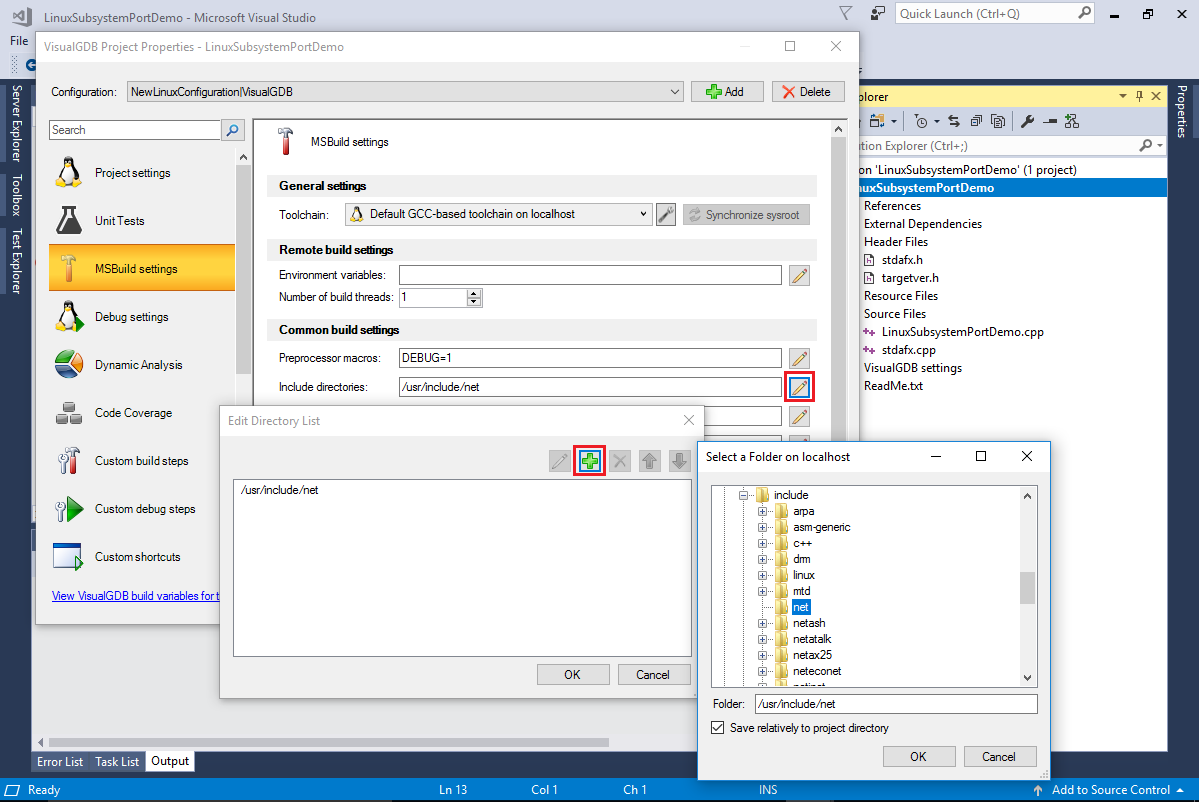
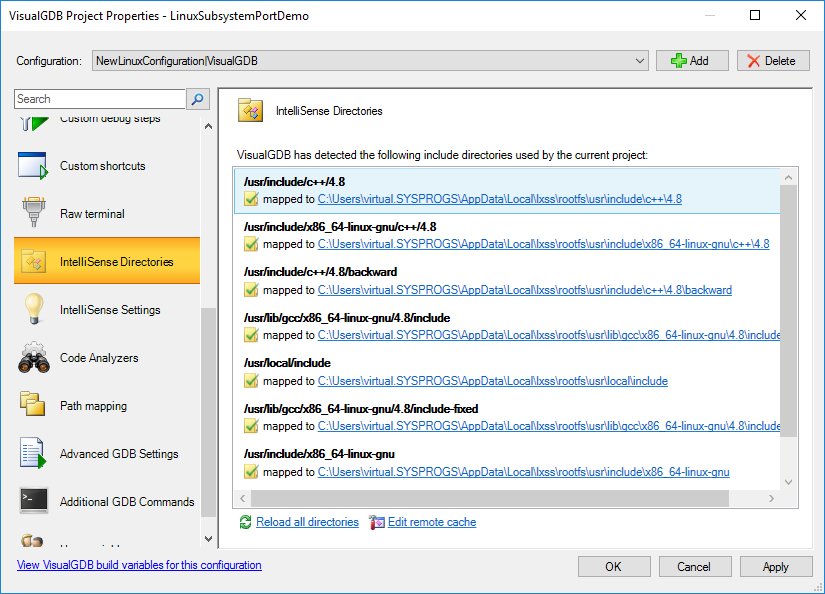
- If you add new libraries to your Linux Subsystem via apt-get, VisualGDB will automatically locate the header files installed by them (as long as the corresponding include directories are set in the project properties), so you won’t need to re-synchronize them. You can get a quick overview of the directories seen by VisualGDB via VisualGDB Project Properties -> IntelliSense Directories:
- As long as you are using MSBuild, you can use the regular Visual Studio project properties to set various build-related settings:
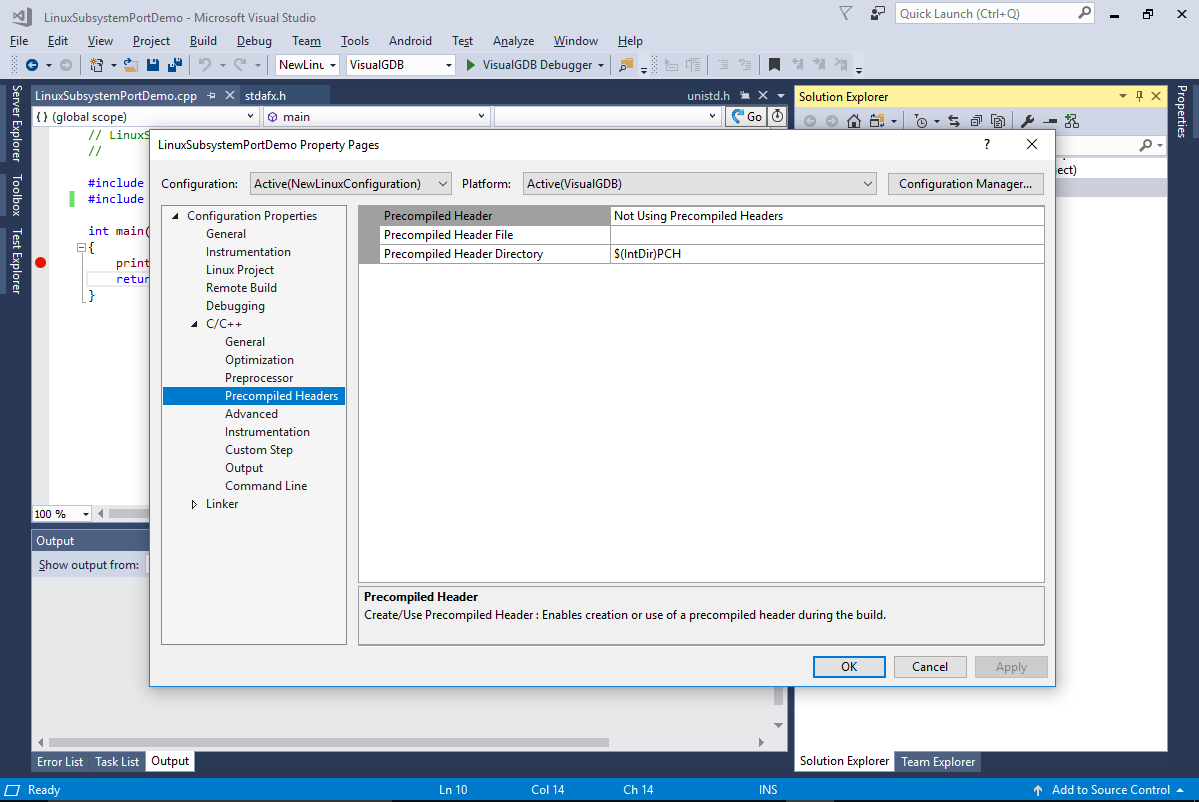
- For common settings like Include Paths we recommend using VisualGDB Project Properties instead. This will refer to the same settings, but will provide more convenient GUI for editing them: