Targeting Multiple Platforms in One Project
This tutorial shows how to create multi-platform Visual Studio projects with VisualGDB. We will start with a basic Win32 console project and show how to add platforms for Linux, Android and a barebone ARM device (STM32).
Combining multiple platforms in one project is an advanced task that requires editing several configuration files, so we will give a detailed explanation of the involved settings and will show all the necessary edits. Before you begin, install VisualGDB 5.3 or later.
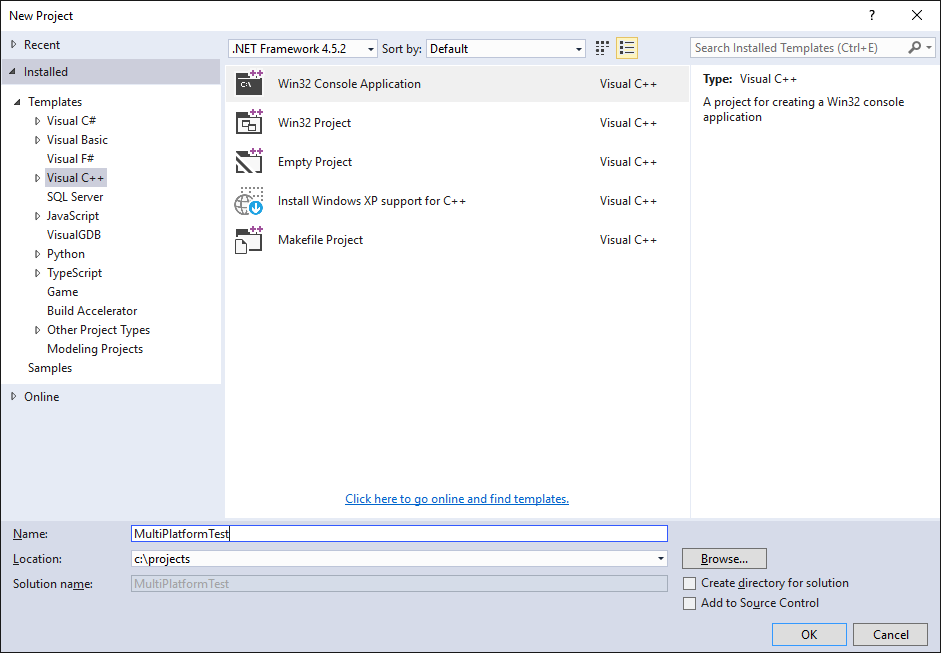
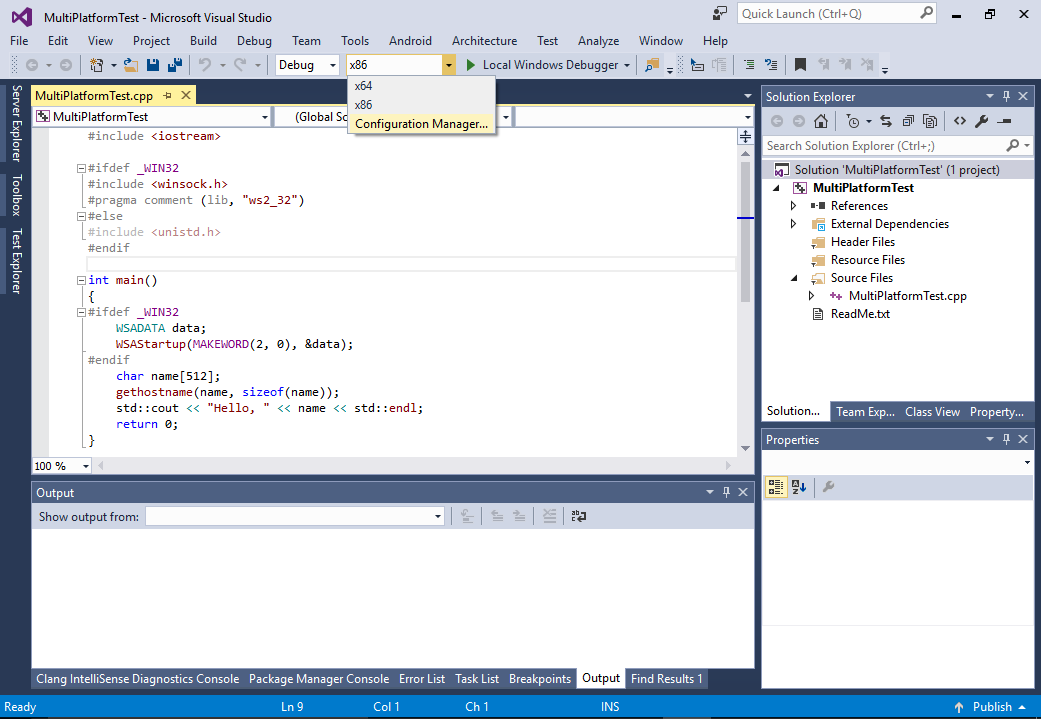
- Start with creating a regular Windows project:
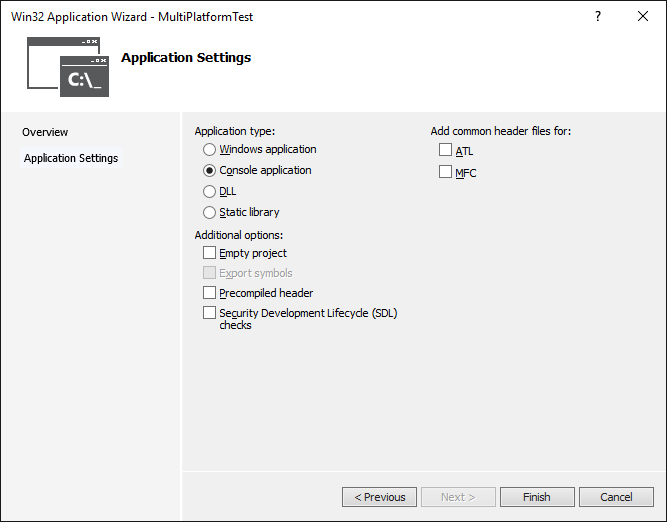
- Select “Console Application” and uncheck the “precompiled header” and “SDL checks” checkboxes:
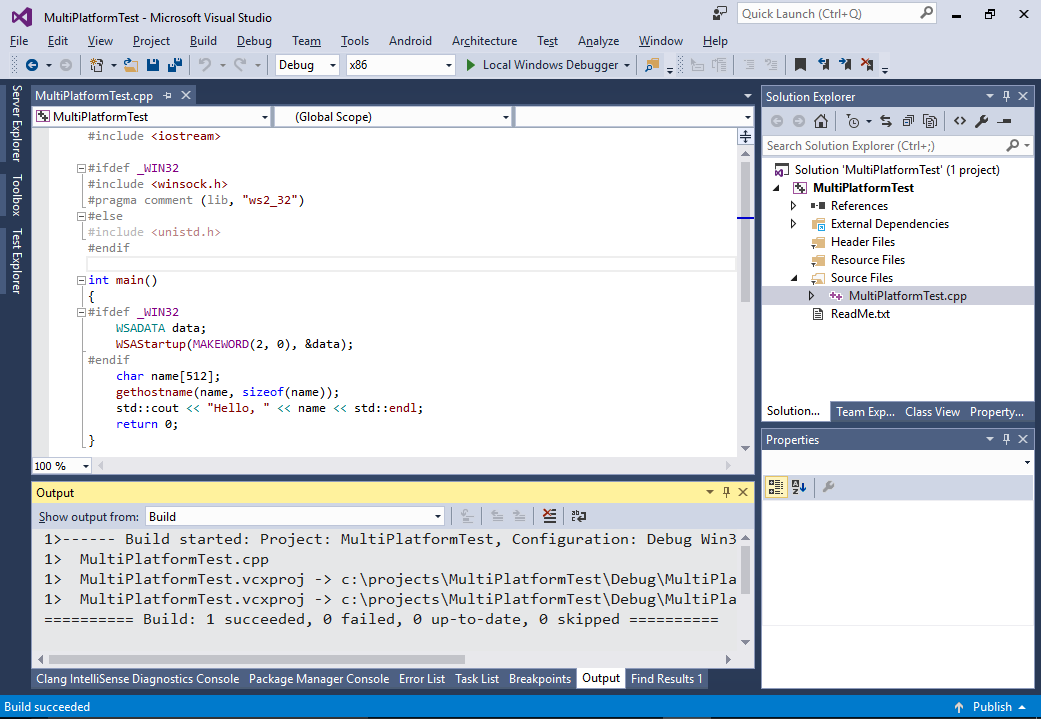
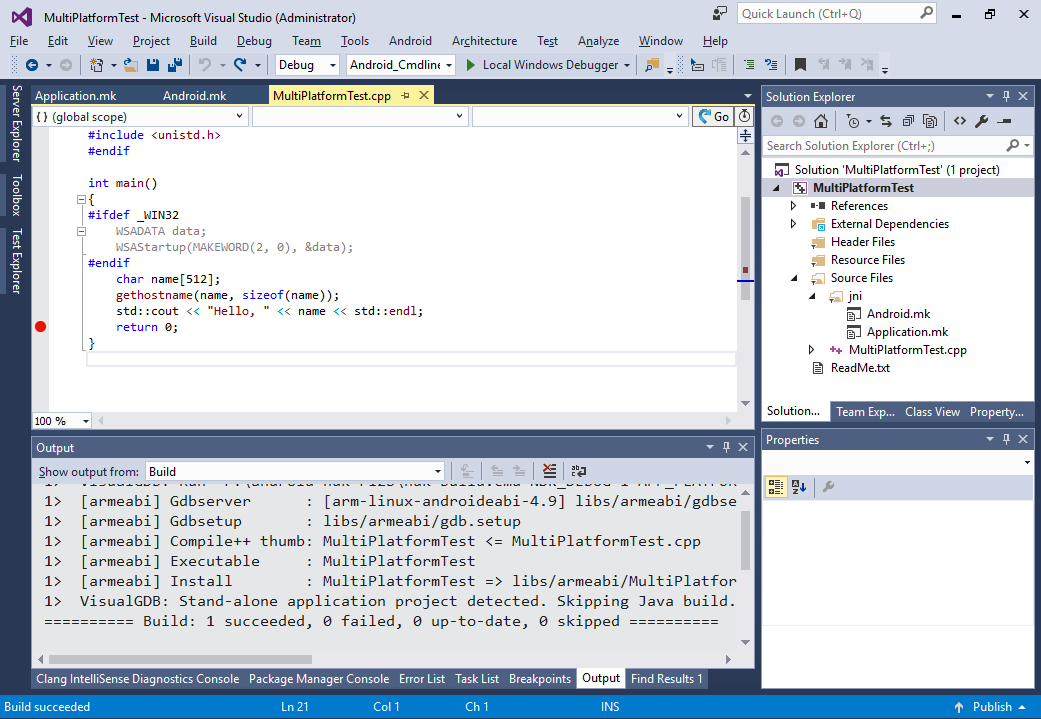
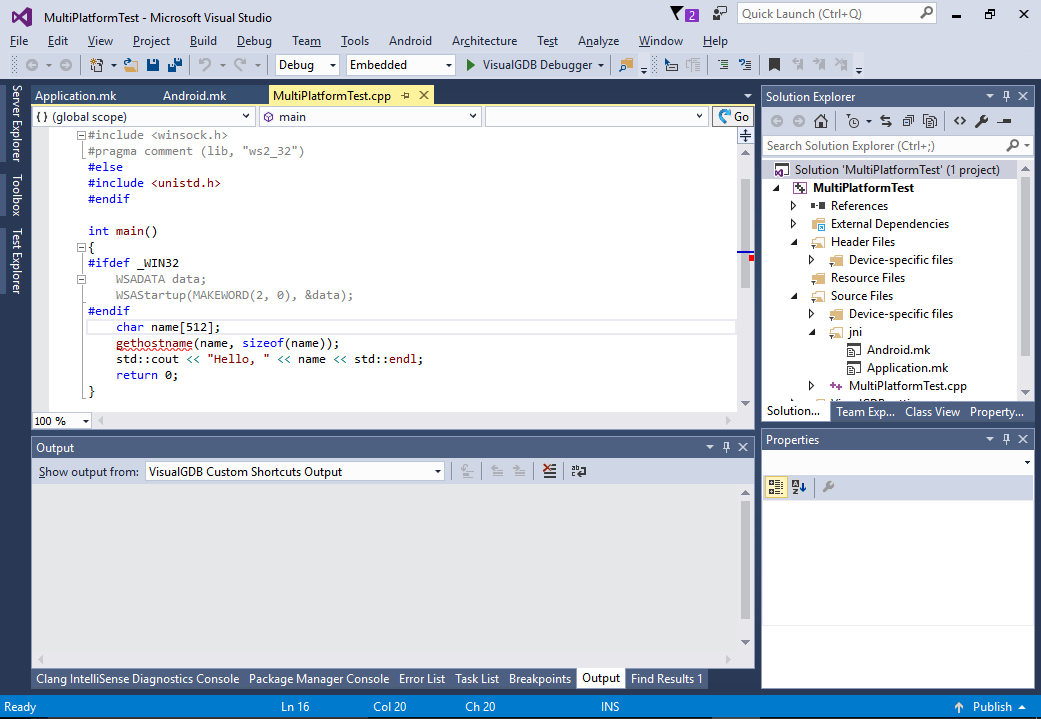
- Press “Finish” to build the project and replace the code in the main source file with this:
include <iostream>

#ifdef _WIN32
#include <winsock.h>
#pragma comment (lib, "ws2_32")
#else
#include <unistd.h>
#endif

int main()
{
#ifdef _WIN32
    WSADATA data;
    WSAStartup(MAKEWORD(2, 0), &data);
#endif
    char name[512];
    gethostname(name, sizeof(name));
    std::cout << "Hello, " << name << std::endl;
    return 0;
}
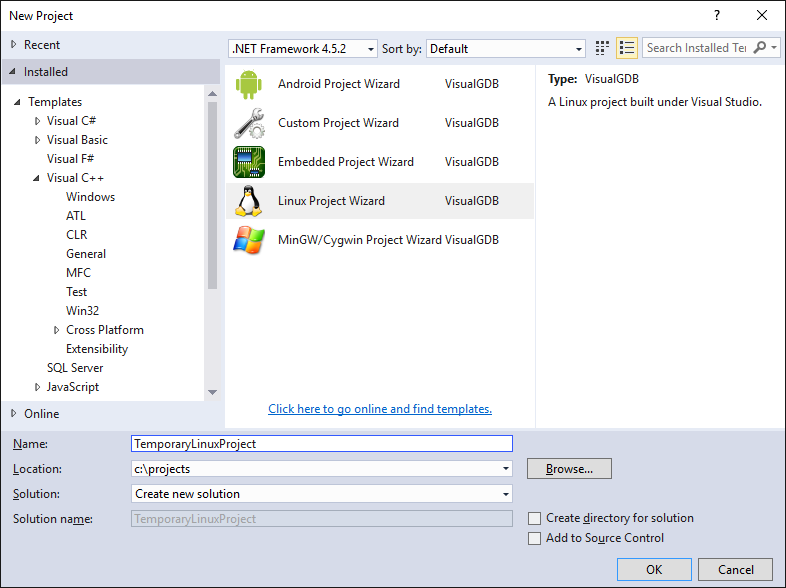
- You could normally use the VisualGDB Configuration Wizard to add a new Linux configuration to the existing project, however it would not allow combining VisualGDB MSBuild configurations with other configuration types (such as normal Win32 or Android), so we will show how to add a new platform manually instead. Begin with creating a new temporary Linux project:
- Select “MSBuild” on the first page:
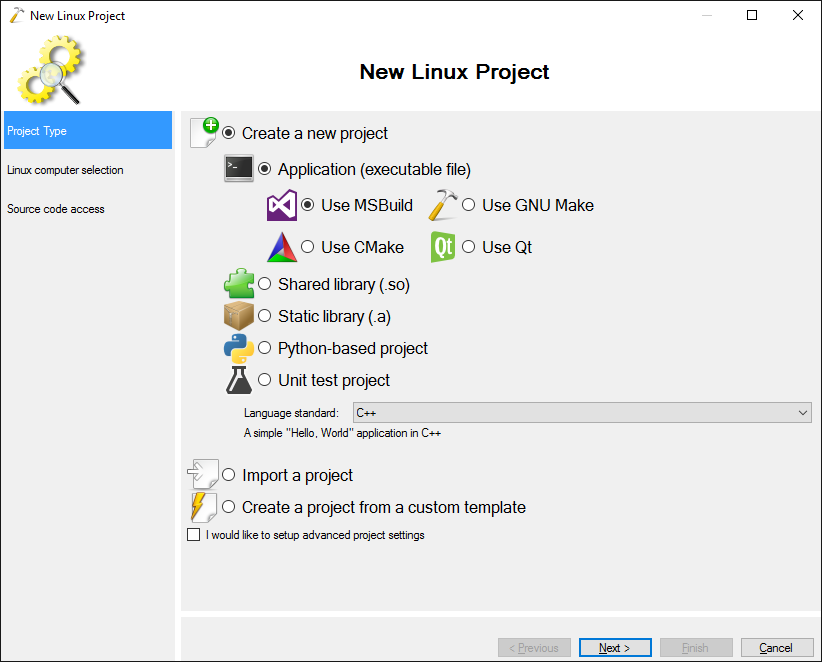
- Then select the machine you would like to use for building:

- Finally select where to store the source files:

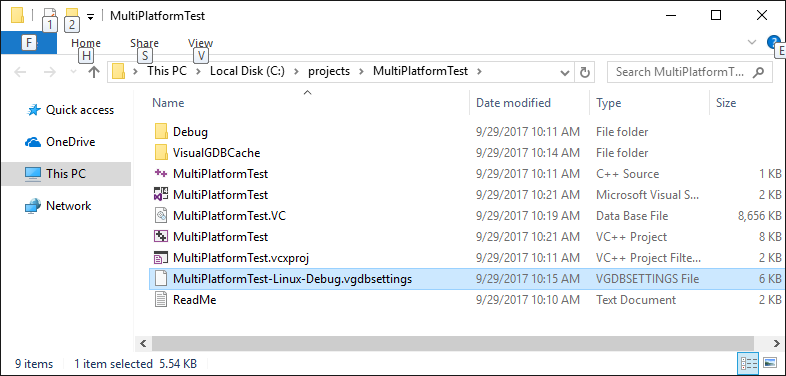
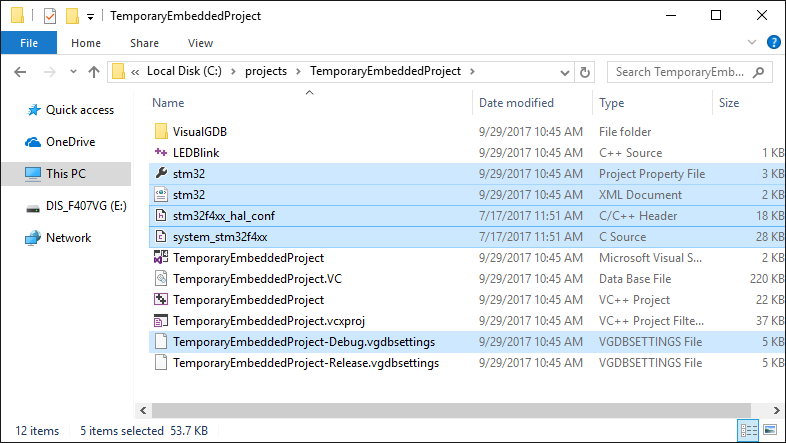
- Press “Finish” to create the project and open its directory in Explorer. The project directory will include 2 important types of files:
- .vcxproj files containing the project itself and MSBuild-specific settings
- .vgdbsettings files containing VisualGDB-specific project properties
The table below summarizes the location where common settings are stored:
Setting .vgdbsettings file .vcxproj file Remote build machine name yes yes Toolchain ID yes yes Remote directories yes no Debug/deployment settings yes no Source upload settings yes no Build flags (e.g. optimization) no yes 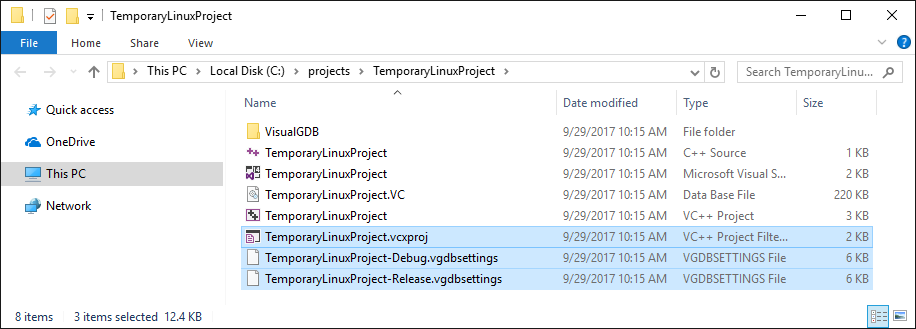
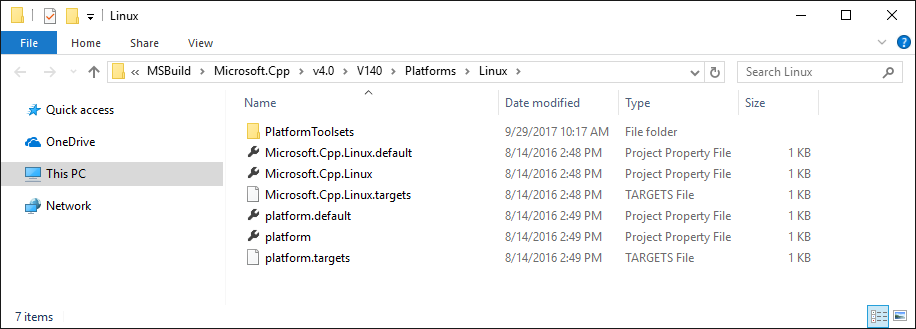
- We will move the common settings (e.g. the remote build machine) from the temporary project to the combined project by copying the .vgdbsettings file, however before we do that, we would need to add another platform to MSBuild platform list so that MSBuild can recognize it. Locate the platforms directory for your Visual Studio version and open the VisualGDB platform directory inside it:
Visual Studio version Default platform directory 2010 C:\Program Files (x86)\MSBuild\Microsoft.Cpp\v4.0\Platforms 2012 C:\Program Files (x86)\MSBuild\Microsoft.Cpp\v4.0\V110\Platforms 2013 C:\Program Files (x86)\MSBuild\Microsoft.Cpp\v4.0\V120\Platforms 2015 C:\Program Files (x86)\MSBuild\Microsoft.Cpp\v4.0\V140\Platforms 2017 C:\Program Files (x86)\Microsoft Visual Studio\2017\Enterprise\Common7\IDE\VC\VCTargets\Platforms 2019 C:\Program Files (x86)\Microsoft Visual Studio\2019\<Edition>\MSBuild\Microsoft\VC\v160\Platforms 
- Copy the ‘VisualGDB’ directory to a new ‘Linux’ directory and rename the files containing ‘VisualGDB’ in the name accordingly:
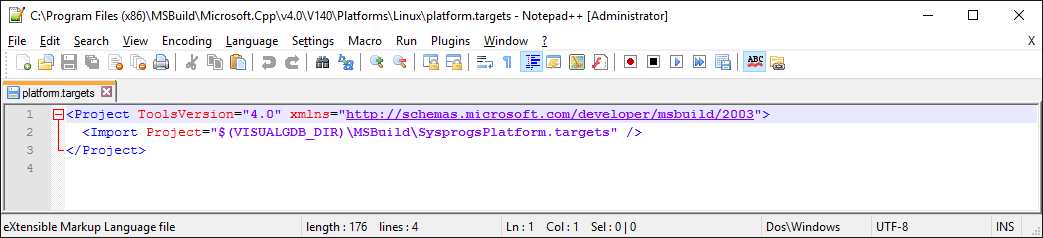
- Note that the files in the Platforms\VisualGDB directory are simply references to similar named files in $(VISUALGDB_DIR)\MSBuild:
- Restart Visual Studio and open Configuration Manager:
- Select Platform->New:
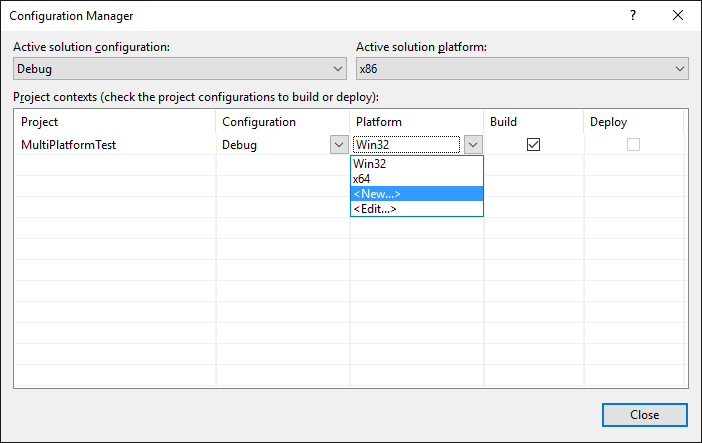
- Then locate the new ‘Linux’ platform, select “Copy from: <Empty>” and press OK:
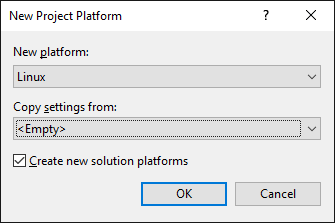
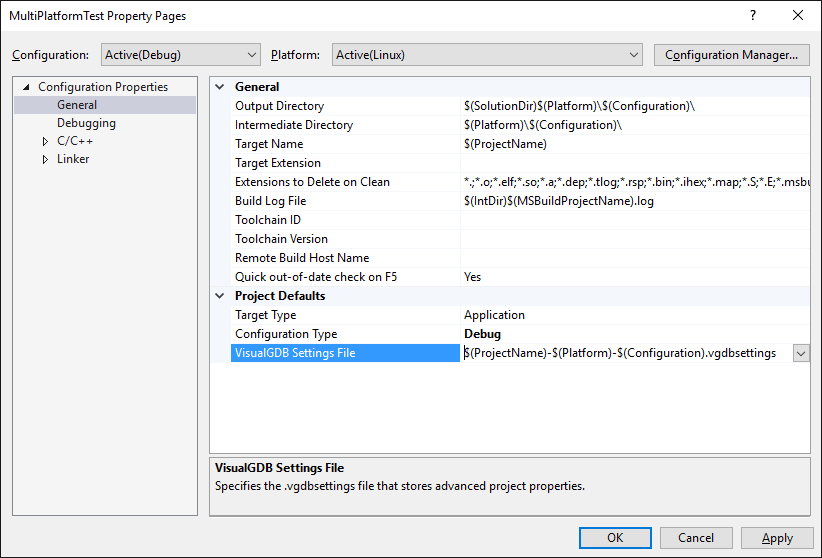
- Visual Studio will create a new solution platform called ‘Linux’. As it is linked to the VisualGDB MSBuild files, it will be controlled by the VisualGDB MSBuild backend similar to the normal ‘VisualGDB’ platform. Open VS project properties for the new platform and take a note of the ‘VisualGDB Settings File’ setting:
- Copy the .vgdbsettings file from the temporary project and rename it so that it matches the name in the VS project properties:
- Now you can right-click on the project in Solution Explorer and select “VisualGDB Project Properties” (ensure you have the new ‘Linux’ platform selected). Then got to the MSBuild Setting page and click the ‘repair’ link below:
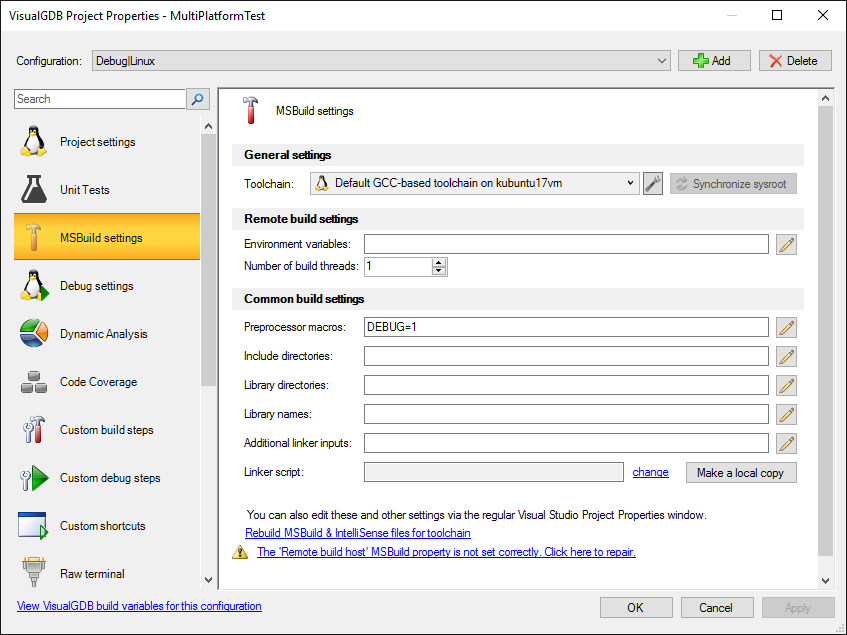 Note that if you have not opened VisualGDB-based projects since starting Visual Studio yet, many VisualGDB menu items won’t appear. If this is the case, open the Help->About VisualGDB window to force the full initialization of VisualGDB, after which all menu commands will become available.
 - VisualGDB will propagate the common settings like toolchain ID and build machine to the .vcxproj file so that MSBuild will be able to build the project:
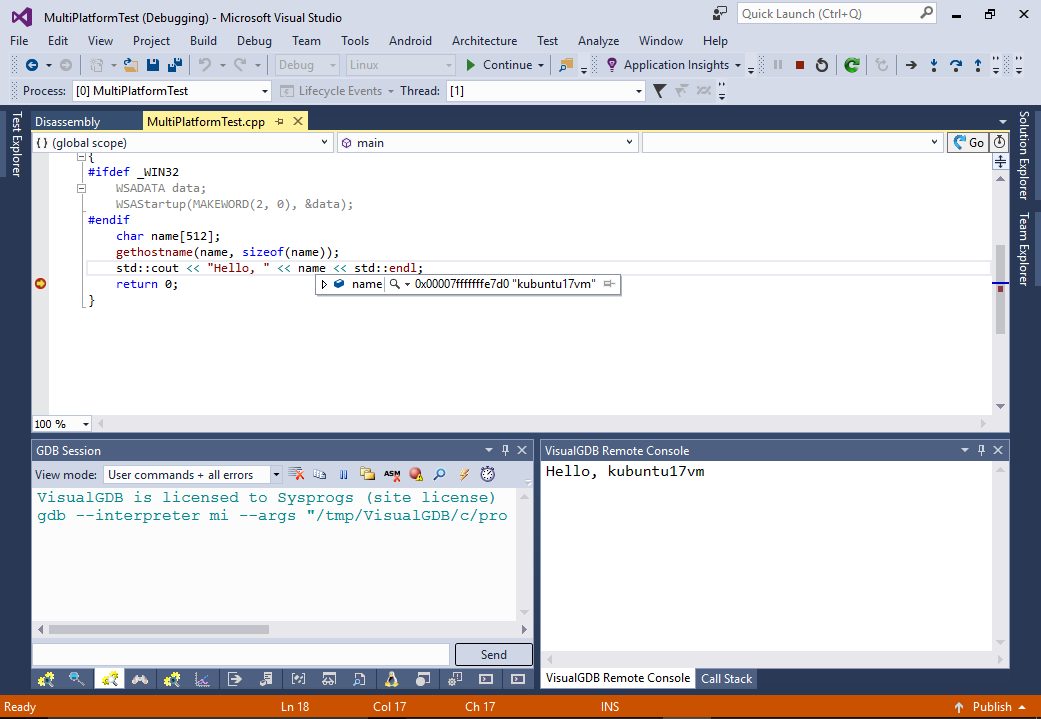
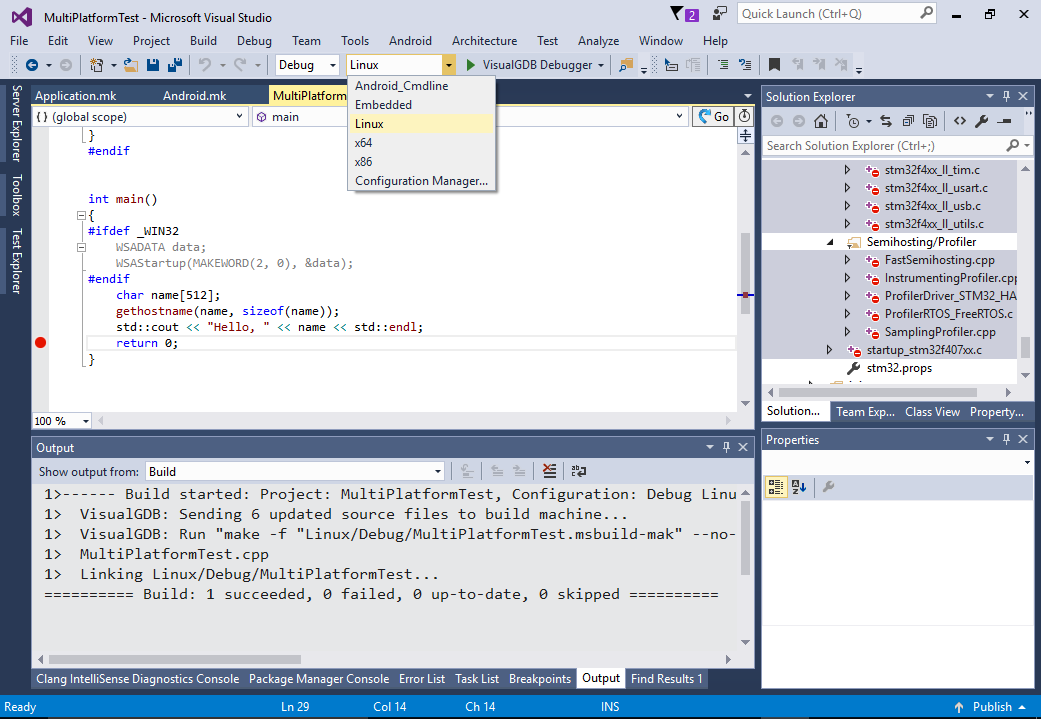
- Build the project via Build->Build Solution:

- Start debugging it and see how the gethostname() returned the name of your Linux machine:
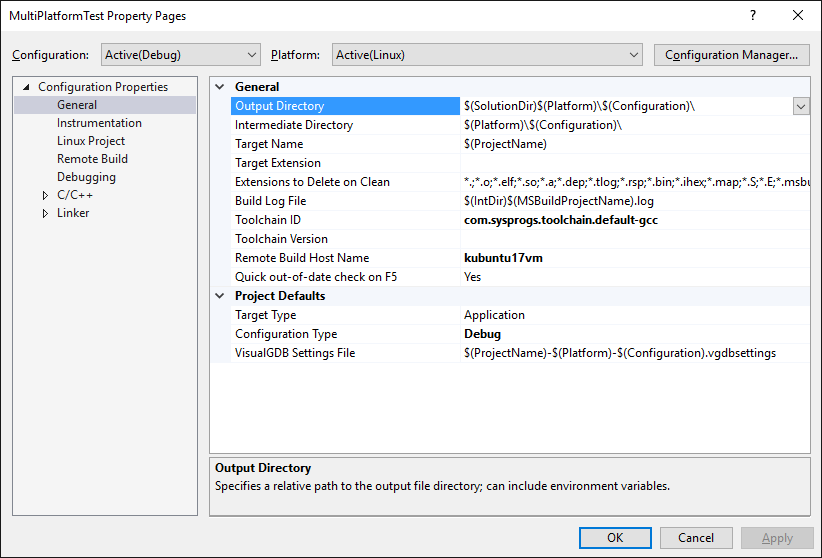
- The VS project properties for the Linux platform are controlled by the VisualGDB MSBuild backend, so they will reflect GCC-specific settings:

- Now we will show how to add another platform for a command-line Android tool. Create a new temporary Android project:
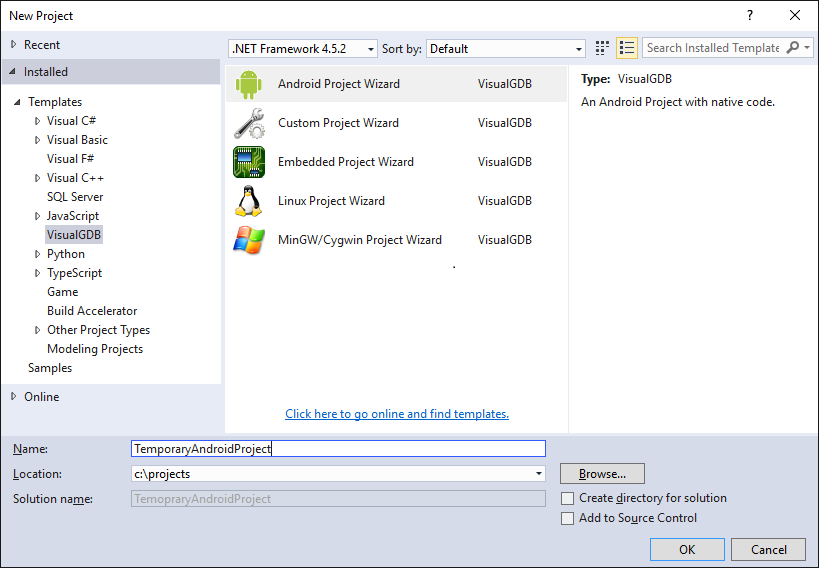
- Select “Create a command-line Android executable”:

- Select your Android platform and click “Finish”:

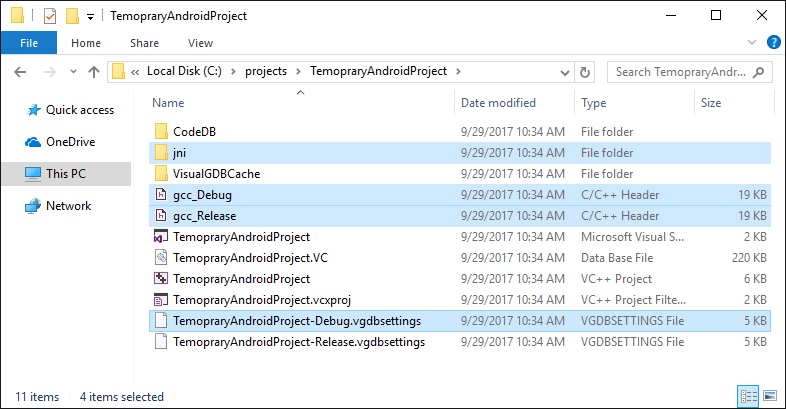
- The VisualGDB Android projects are built with the ndk-build scripts, not MSBuild, so the file structure is slightly different. The ‘jni’ folder contains the files with build settings (e.g. Android.mk), the gcc_Debug.h and gcc_Release.h files contain snapshots of GCC preprocessor macros used for IntelliSense and the .vgdbsettings file contains all project settings:
- Copy the files mentioned above to the multi-platform project and rename the .vgdbsettings file accordingly:

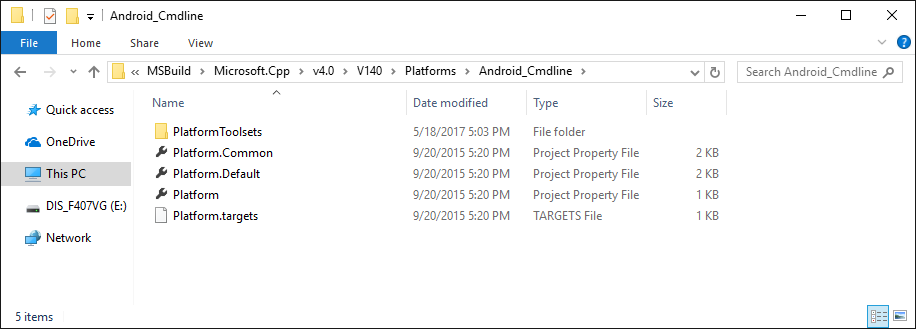
- Then copy the ‘Win32’ MSBuild platform (not ‘VisualGDB’ platform) under the ‘Android_Cmdline’ name:
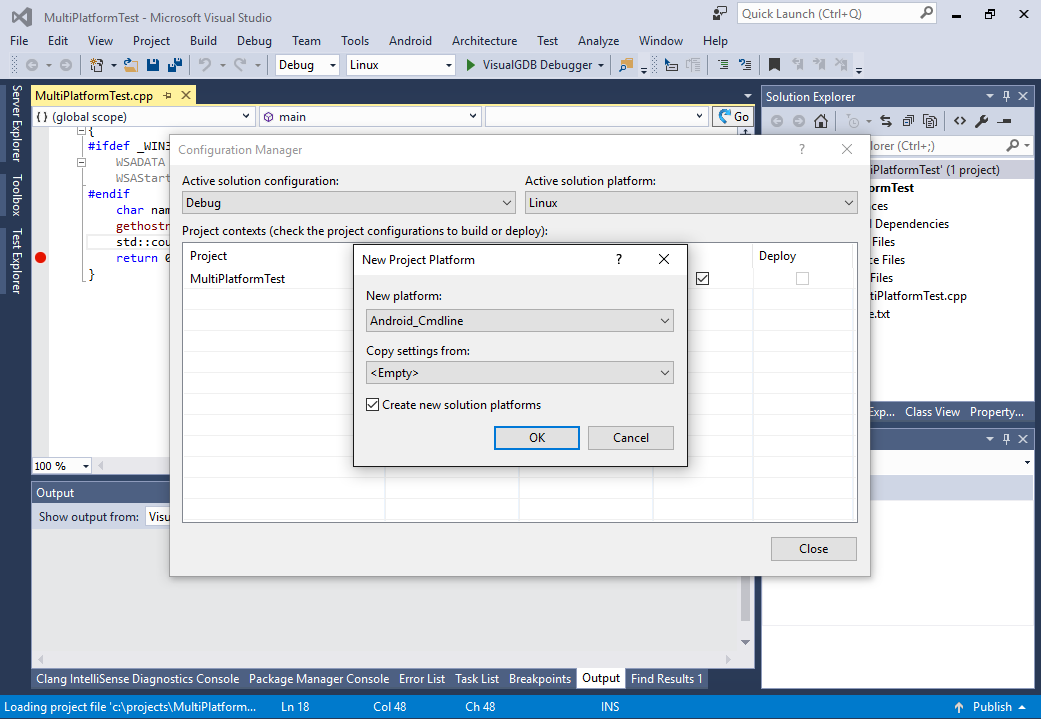
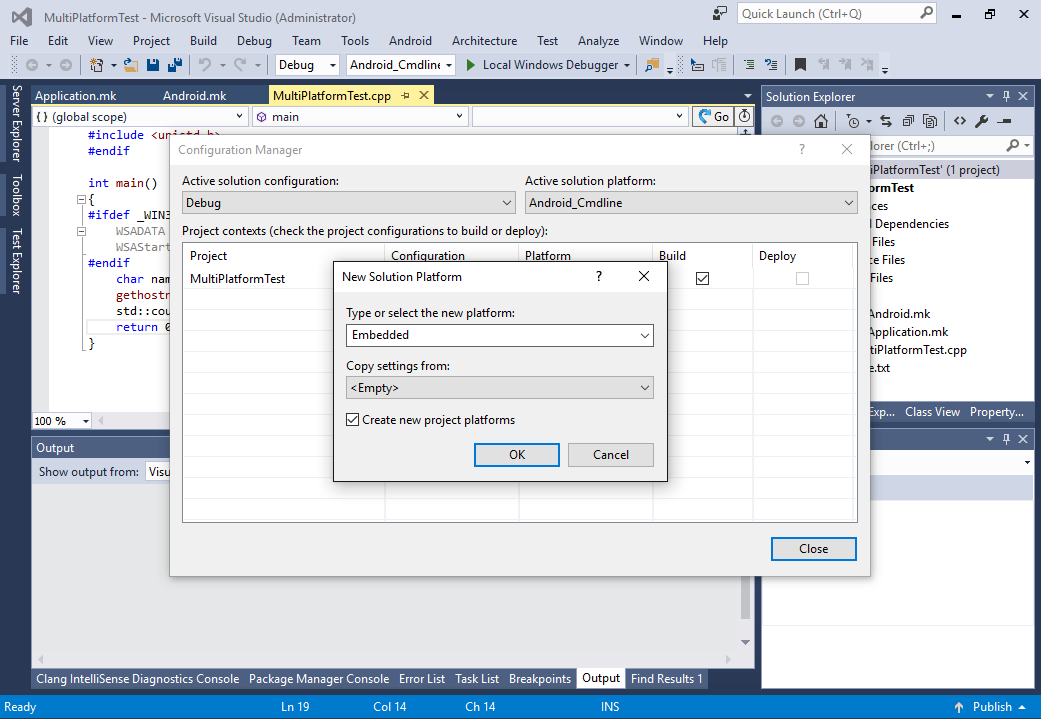
- Restart Visual Studio and create a new project/solution platform:
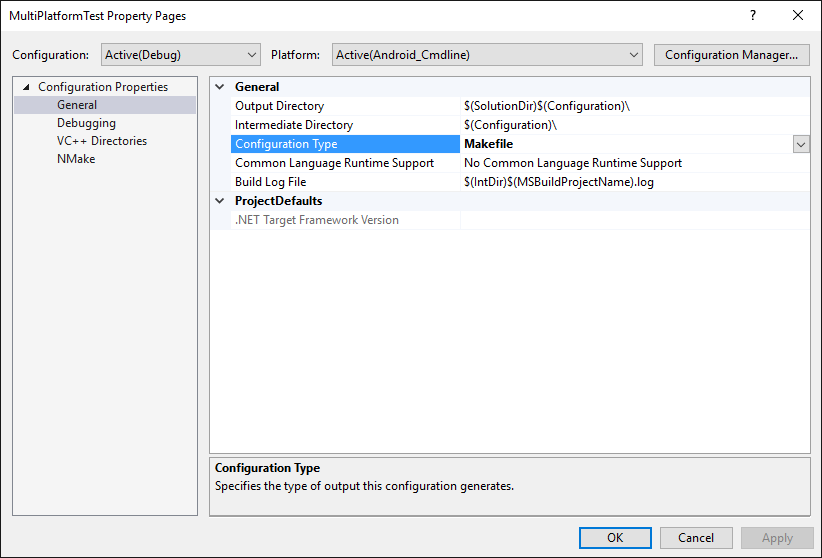
- As Android build process is not controlled by the VisualGDB MSBuild backend, the settings for it will look different. First of all, change the Configuration Type to Makefile and click “Apply”:
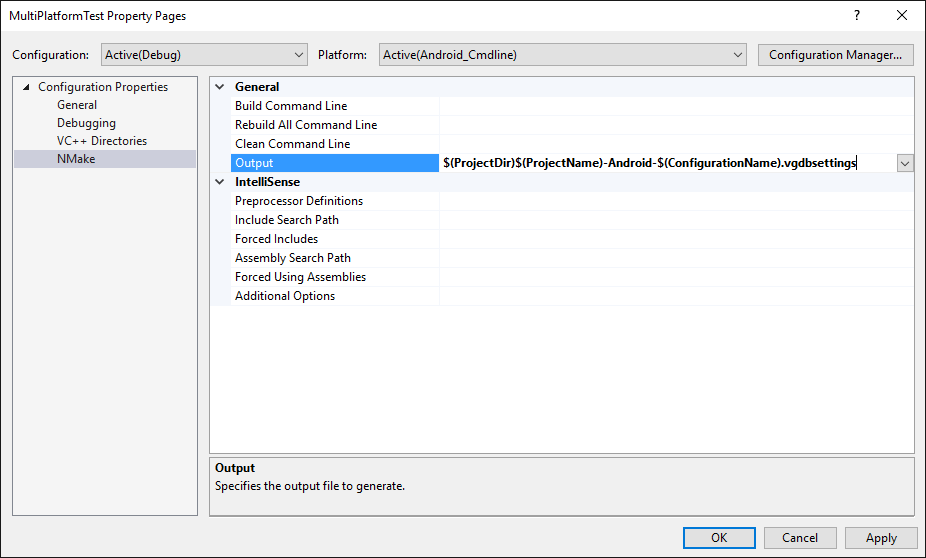
- Then go to the NMake page and set Output to match the .vgdbsettings file name. This will let VisualGDB recognize this configuration and let you debug it:
- Open VisualGDB Project Properties and click the “Repair” link:
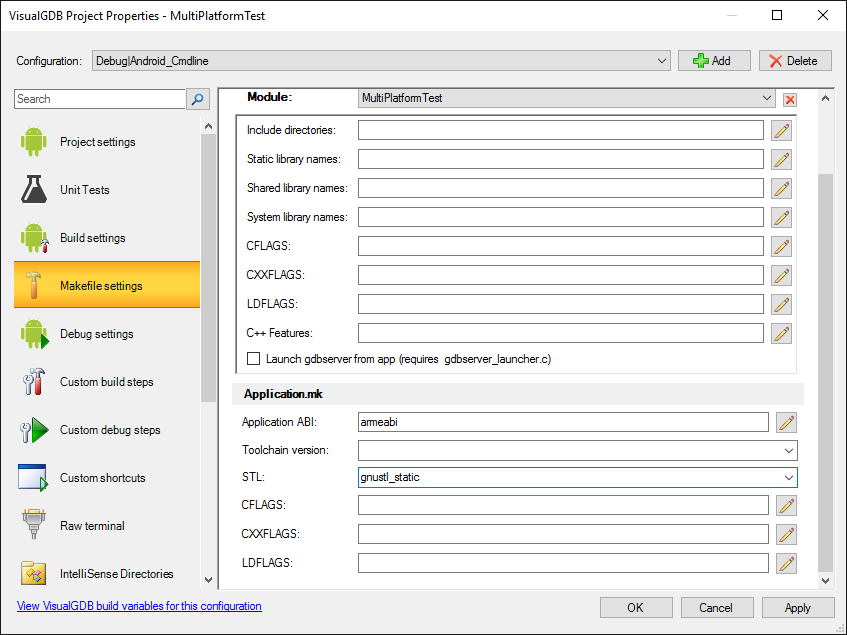
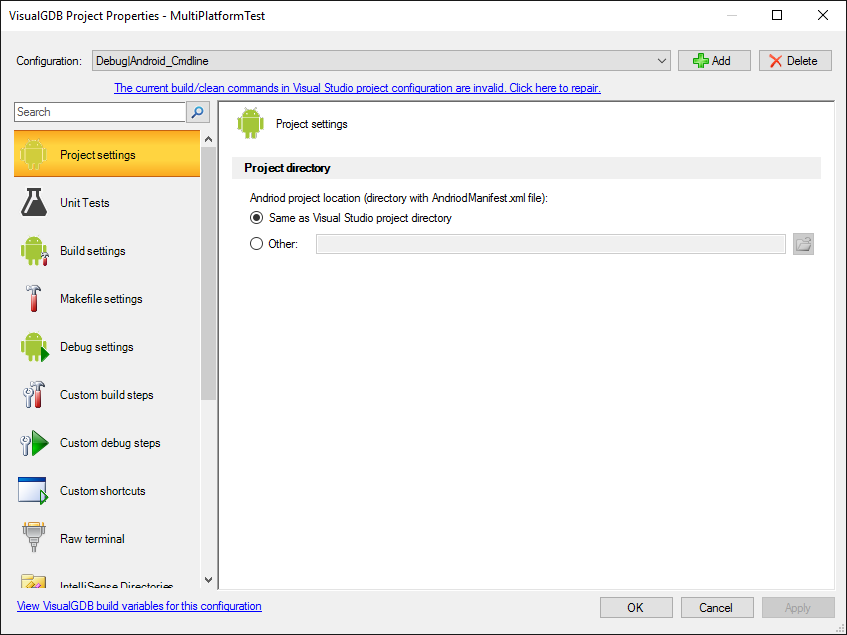 VisualGDB will automatically fill the build/clean command lines in the Visual Studio project properties so that Visual Studio will run VisualGDB to do the actual build.
 - Go to the “Makefile Settings” page and switch STL to gnustl_static:
- Finally press “OK” and build the project:
 See how the same project is now build using the Android build toolset.
 - Connect your Android device and press F5 to start debugging. See how the executable gets launched on the device:

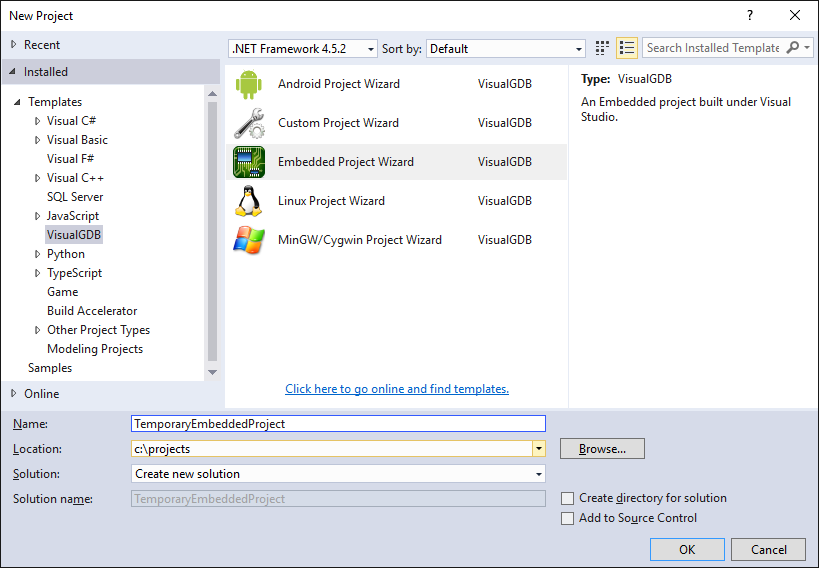
- Now will will add another platform for a barebone ARM device (STM32). Create a temporary Embedded project:
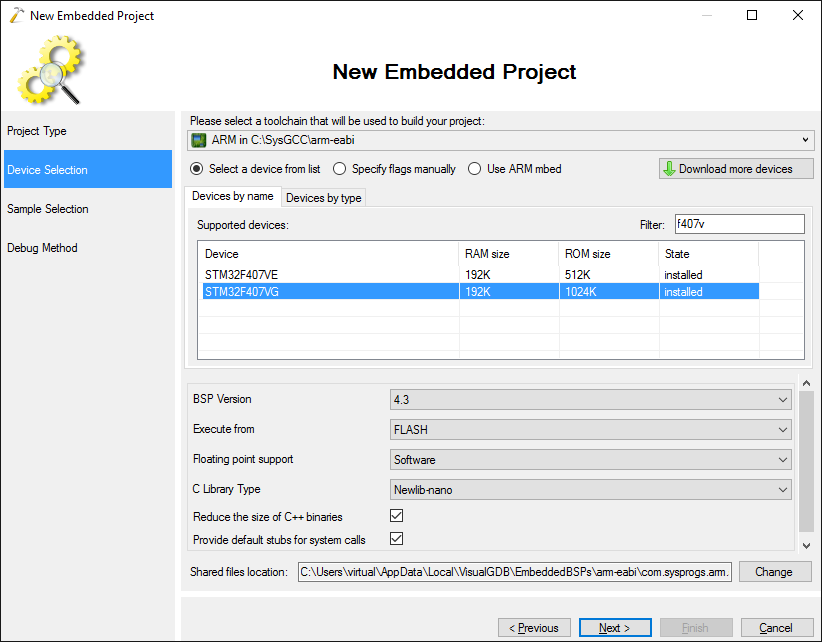
- Select the toolchain and the device:
- Proceed with the default sample:

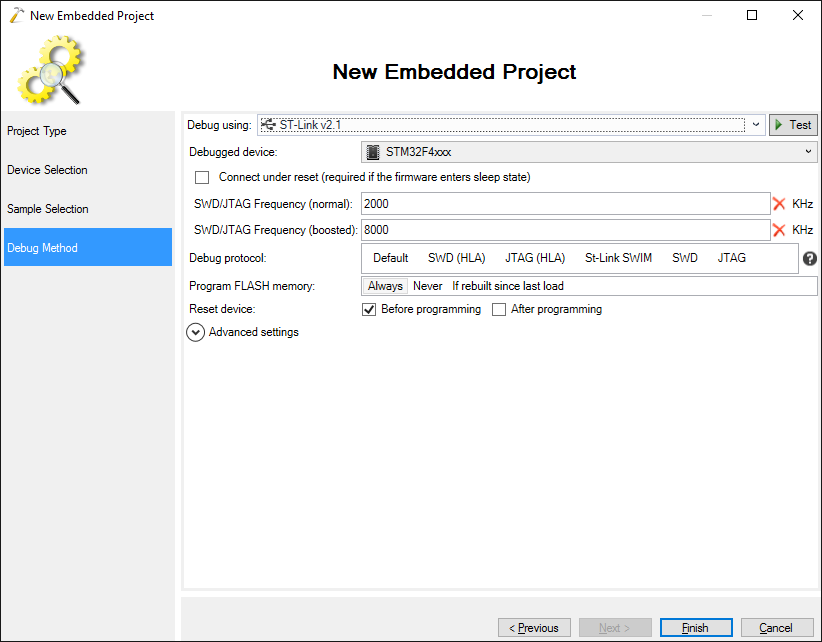
- Select your debug method:
- Press “Finish” to generate the project. The structure of the embedded project is similar to the structure of an MSBuild-based Linux project with 2 important differences:
- The embedded project stores global device-specific flags (like the SDK include directories) in a separate file called stm32.props and a set of common embedded settings in stm32.xml
- The project must include some MCU-specific files (e.g. system_stm32f4xx.c).
- Copy the ‘VisualGDB’ MSBuild platform to ‘Embedded’, restart Visual Studio and create a new project/solution configuration:
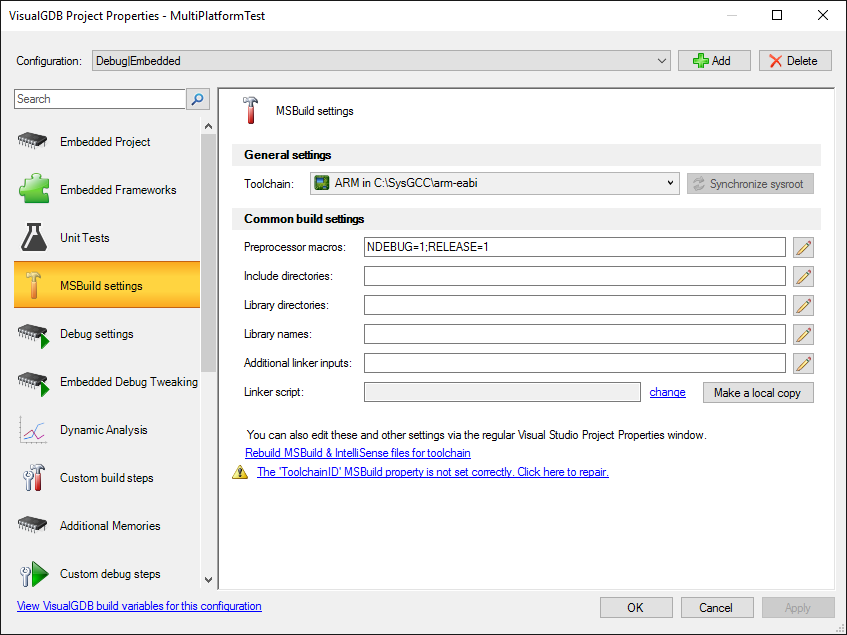
- Copy and rename the .vgdbsettings file and also copy the mcu-specific .props/.xml files together with the system file and the HAL configuration file. Then open VisualGDB Project Properties on the MSBuild Settings page and click the “Repair” link:
- Then go to the Embedded Project page of VisualGDB Project Properties and click “Regenerate MCU files” (or change the MCU back and forth):
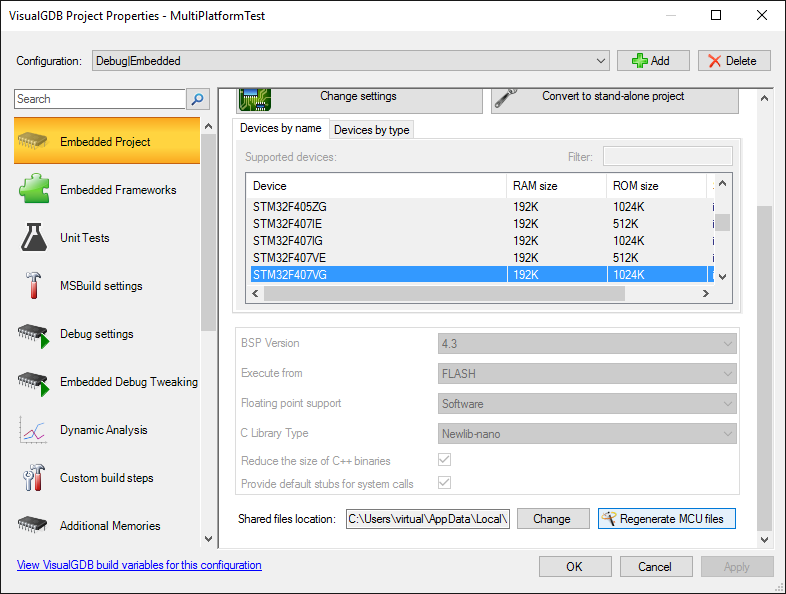
- VisualGDB will update the configuration settings and add the STM32-specific files to the project:
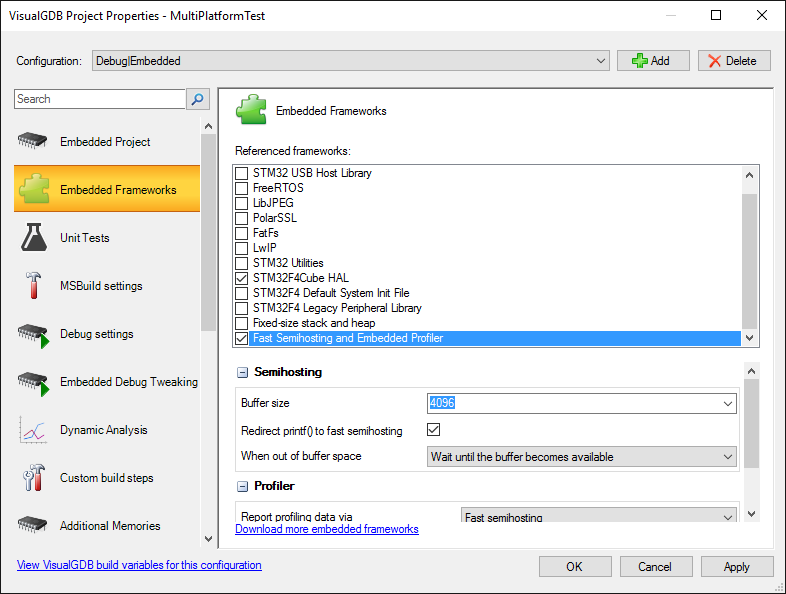
- Go to the Embedded Frameworks page and enable Fast Semihosting and Embedded Profiler:
- Finally add an implementation of the gethostname() function so that it can compile without an underlying OS:
#if defined(__arm__) && !defined(__linux__)
#include <string.h>

static void gethostname(char *pBuffer, int size)
{
    strncpy(pBuffer, "(embedded)", size);
}
#endif
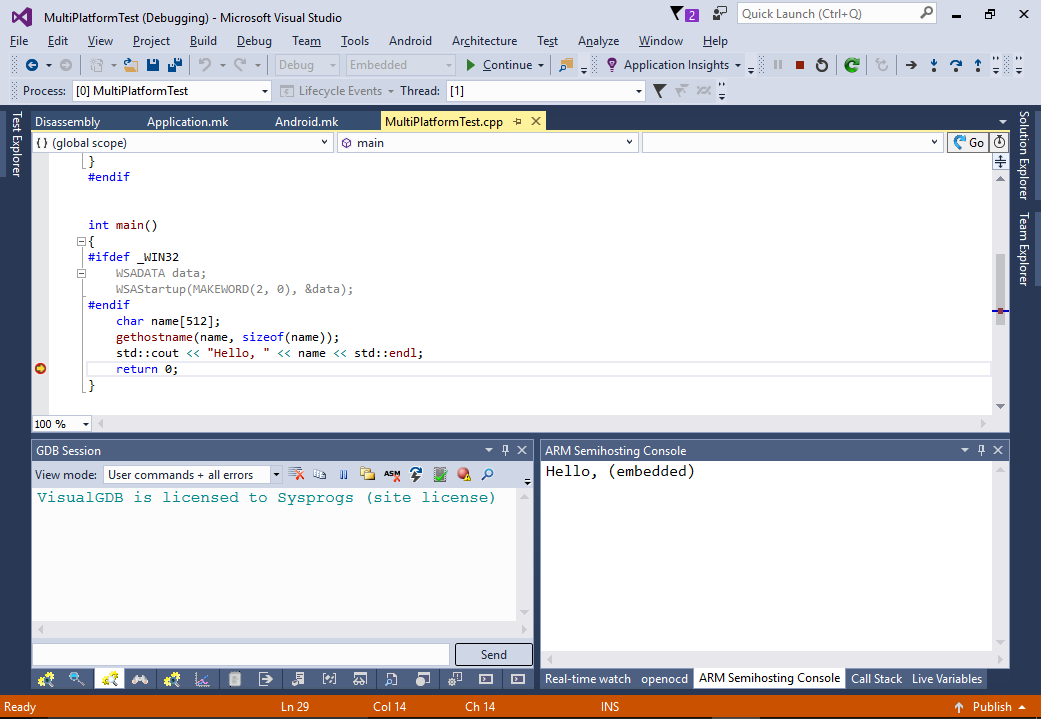
- Connect your embedded device, build the project and start debugging it. Ensure it runs correctly and displays the output:
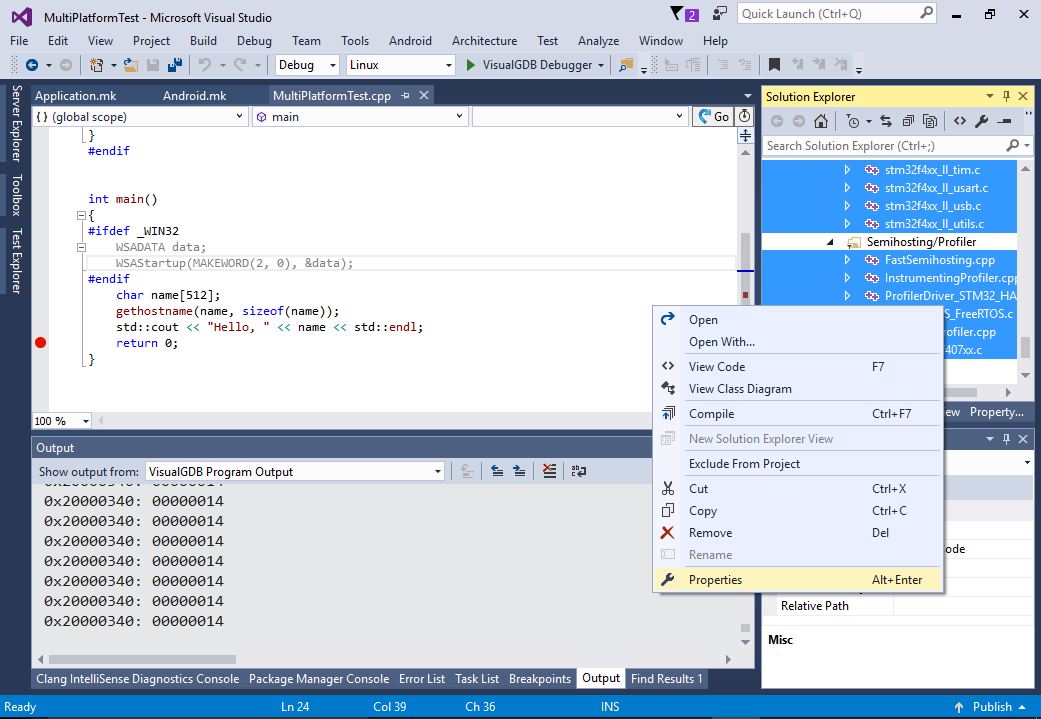
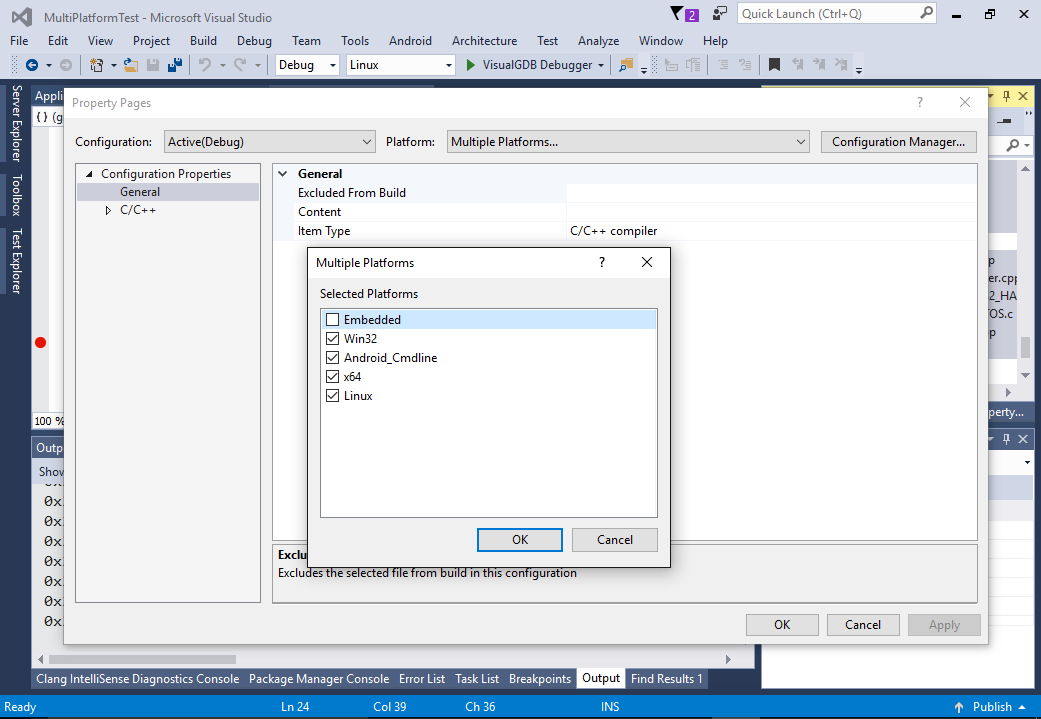
- If you try building the Linux or Windows configuration now, they will fail because the embedded project has added multiple STM32-specific files. You can fix this by excluding them from build for those configurations. First select all of the STM32-specific files, right-click and select “Properties”:
- Select “Multiple Platforms” and check every platform except the Embedded one:
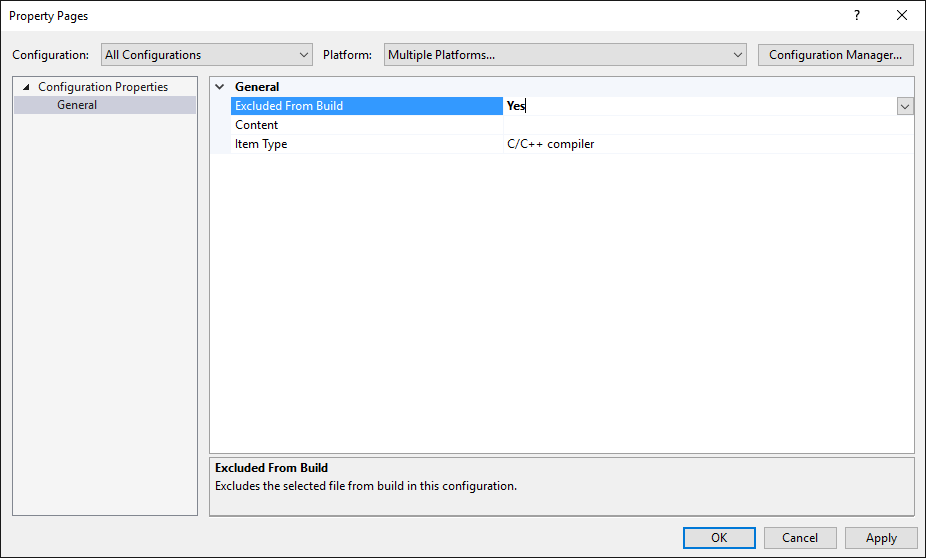
- Set “Excluded from Build -> yes”:
- Now you should be able to build the Windows and Linux platforms as well as Embedded:
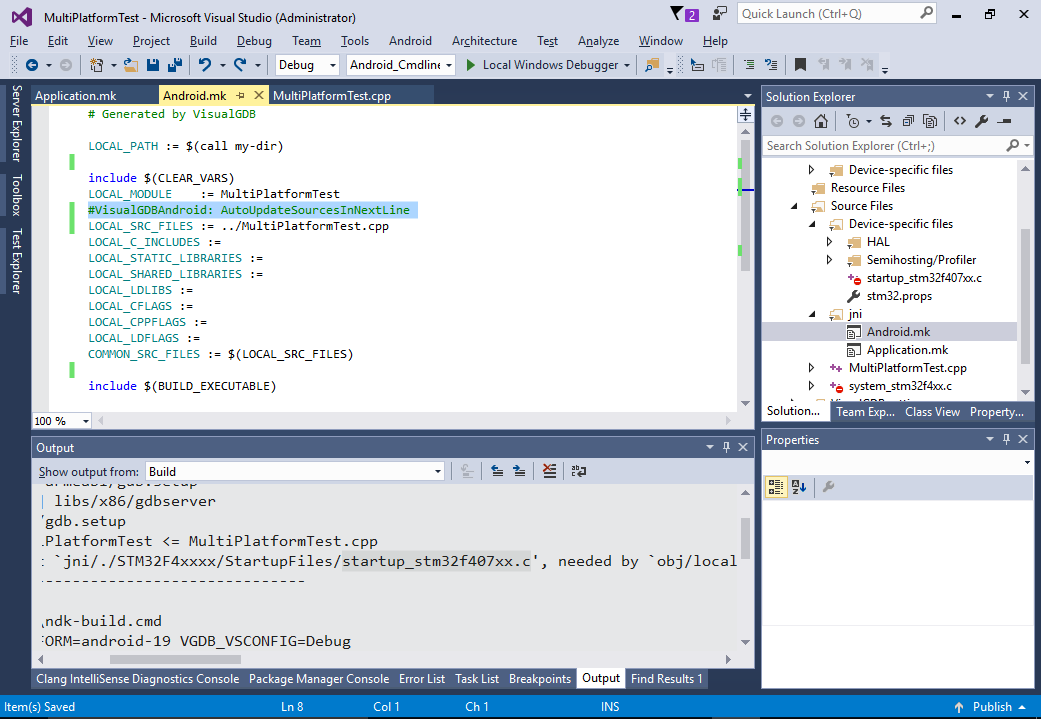
- Android build system won’t be able to handle the BSP-specific paths of STM32 source files, so simply delete the “AutoUpdateSourcesInNextLine” line and list the Android-compatible files in the LOCAL_SRC_FILES line:
 Congratulations! Now you can build the same project on 4 different platforms.
 - If you don’t want to create extra MSBuild platforms (like ‘Embedded’ or ‘Linux’), you can add new project configurations instead, e.g. Debug (Linux) and Release (Linux) and repeat the steps above to link them with VisualGDB. The only constraint is that:
- Configurations using VisualGDB MSBuild backend should be created within the ‘VisualGDB’ platform (or platforms copied from it).
- Configurations using other build systems (e.g. Android, Make, CMake or QMake) should be created within the ‘Win32’ or ‘x64’ platform and switched to ‘NMake’.
As Visual Studio treats platforms/configurations as a 2-dimensional matrix, combining MSBuild and non-MSBuild configurations in one project would create some unusable configurations, e.g.:
Debug (Win32) Debug (Linux) Debug (Embedded) Debug(Android) Win32 platform Usable Unusable Unusable Usable VisualGDB platform Unusable Usable Usable Unusable Creating additional MSBuild platforms as shown in this tutorial makes the platform/configuration matrix more compact:
Debug Win32 platform Usable Linux platform (copied from VisualGDB) Usable Embedded platform (copied from VisualGDB) Usable Android platform (copied from Win32) Usable - Note that starting from version 5.4, VisualGDB will only load itself into Visual Studio if you explicitly use one of its menu commands, or if the opened project contains one of the following strings:
- <Platform>VisualGDB</Platform>
- $(VISUALGDB_DIR)
- .vgdbsettings
This is done to eliminate any startup delays when opening non-VisualGDB projects. If the changes you’ve done to the project file resulted in removal of all the strings shown above, you would need to manually enable VisualGDB (e.g. by using the Help->About VisualGDB) after loading the project. Alternatively, edit the .vcxproj file so that it will contain one of the strings shown above (e.g. change the default name of the .vgdbsettings file via VS Project Properties).
You can find the source code shown in this tutorial in our Github repository.