Creating Embedded Bootloader Projects with Advanced CMake
This tutorial shows how to use the Advanced CMake Project Subsystem to create a multi-target project consisting of a main application and a separate bootloader stored at the beginning of the FLASH memory: This is a simplified version of the GNU Make-based bootloader tutorial. We will focus on CMake-specific aspects of bootloader projects, and will leave out details about interrupt handling and system calls that are described in the GNU Make-based tutorial.
- Start Visual Studio and locate the VisualGDB Embedded Project Wizard:

- Enter the name and location of the project:
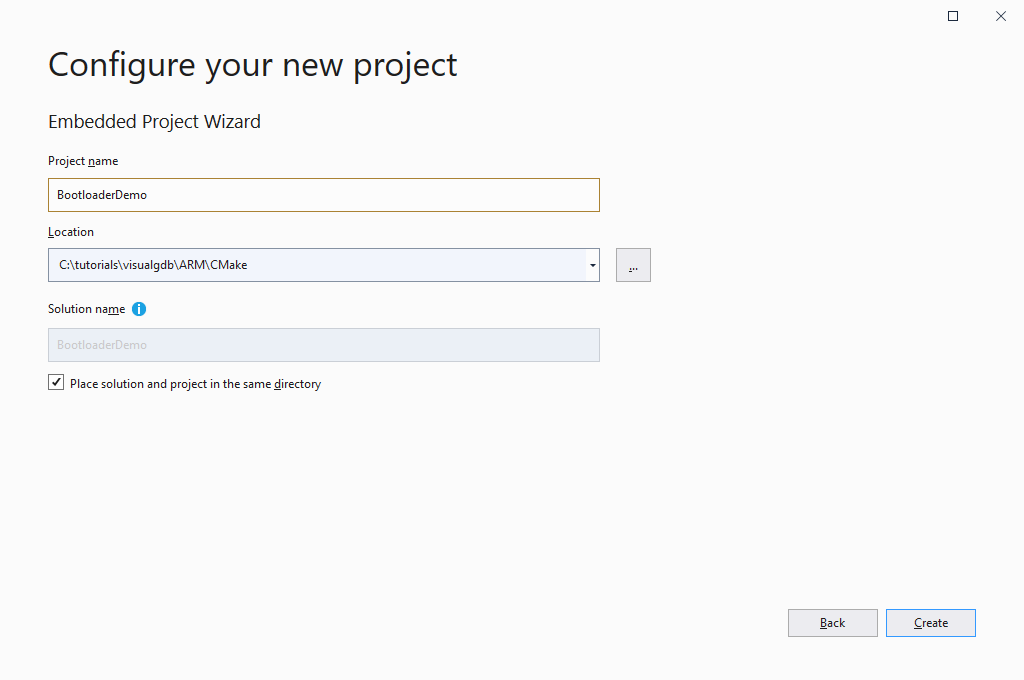 Note that Advanced CMake projects can contain multiple targets, so the BootloaderDemo project shown here will contain both the main application and the bootloader.
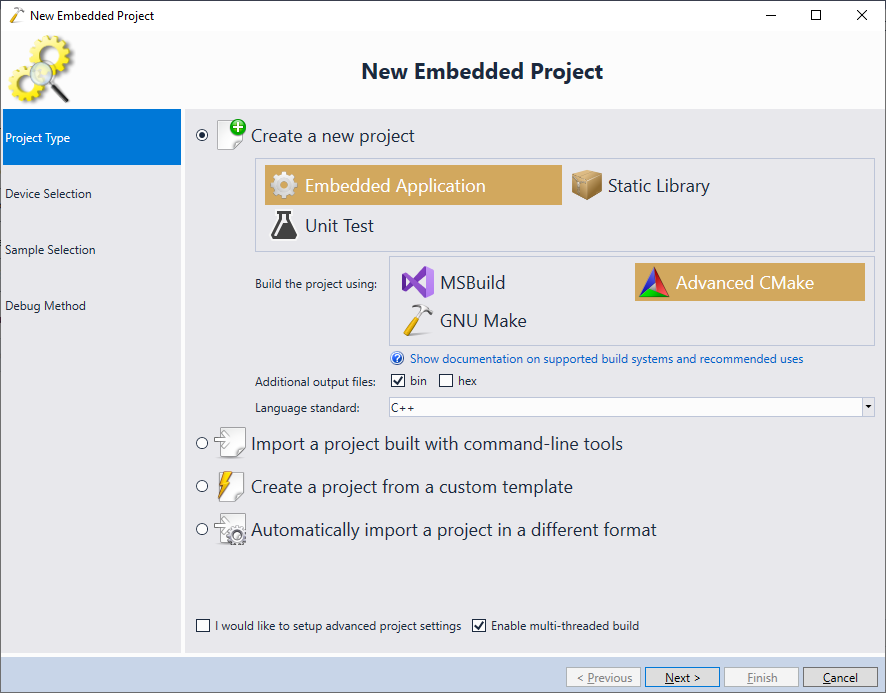
 - Select “Create a new project -> Embedded Application -> Advanced CMake” and make sure the generation of .bin files is enabled:
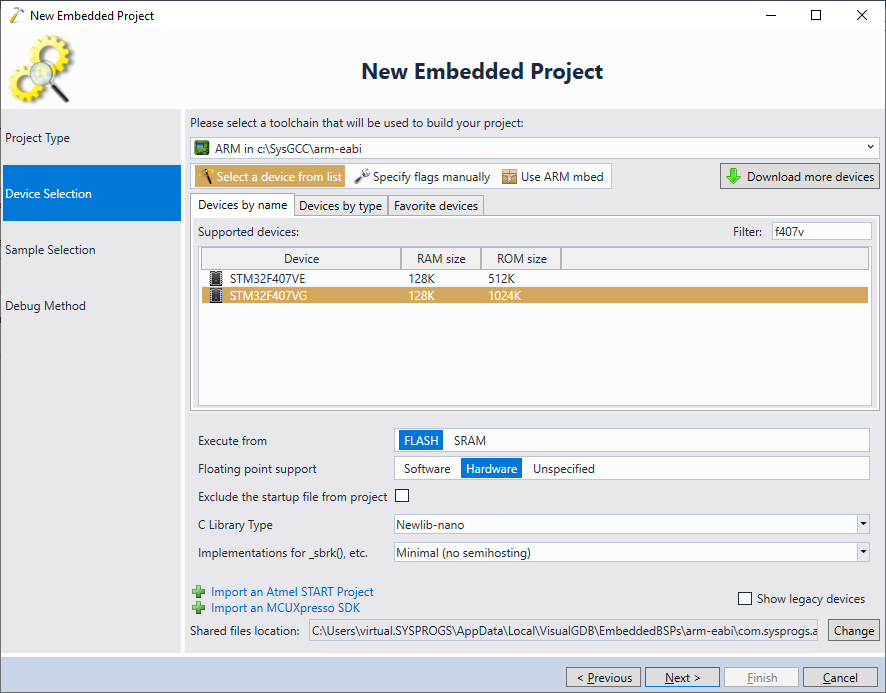
- On the next page of the wizard select the toolchain and the device you would like to target:
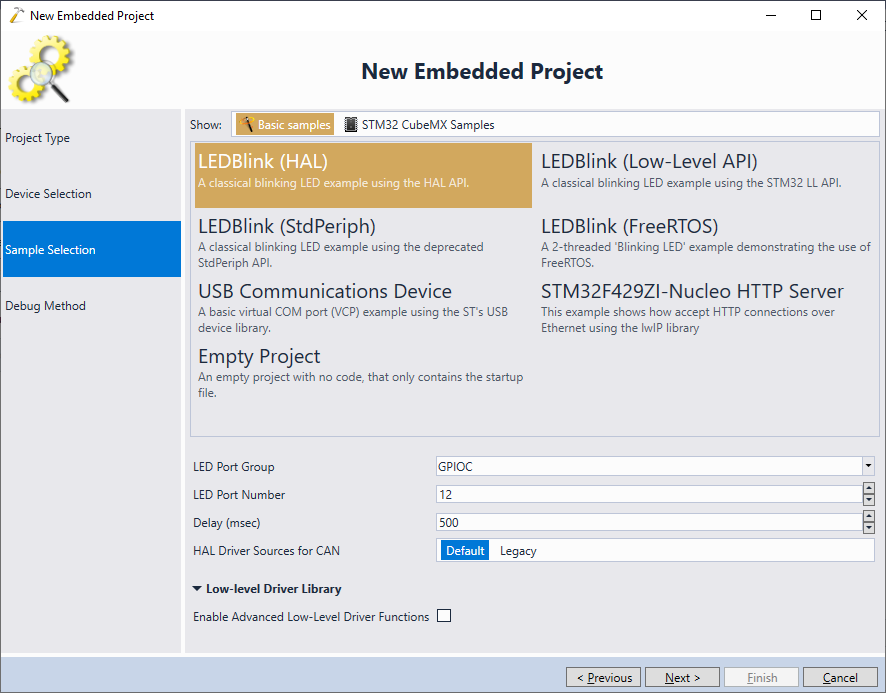
- Proceed with the simplest LEDBlink sample:
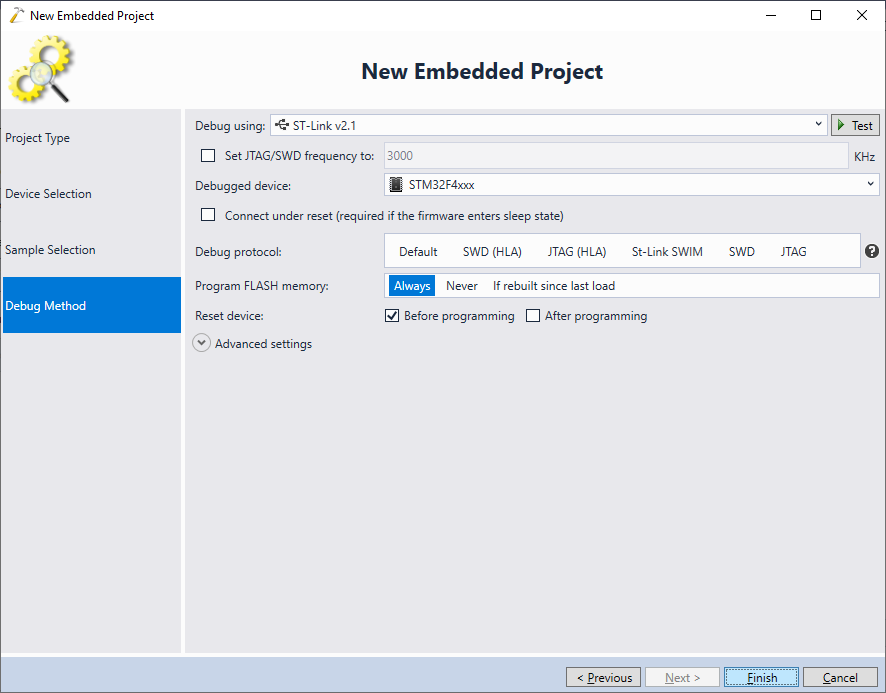
- Configure the debug settings that work with your board and click “Finish” to generate the project:
- We will now replace the generated LEDBlink project with a very simple bootloader that will blink the LEDs twice and pass control to the main application. Locate the linker script in Solution Explorer, right-click on it and select “Copy to Project Directory“:
 Once the linker script is copied, we can modify it to reflect the memory layout used by the bootloader and the application. The only modification required on the bootloader side is to define the _app_start symbol to point to the start of the actual application (see the entire linker script here):
_app_start = 0x08000000 + 0x4000;
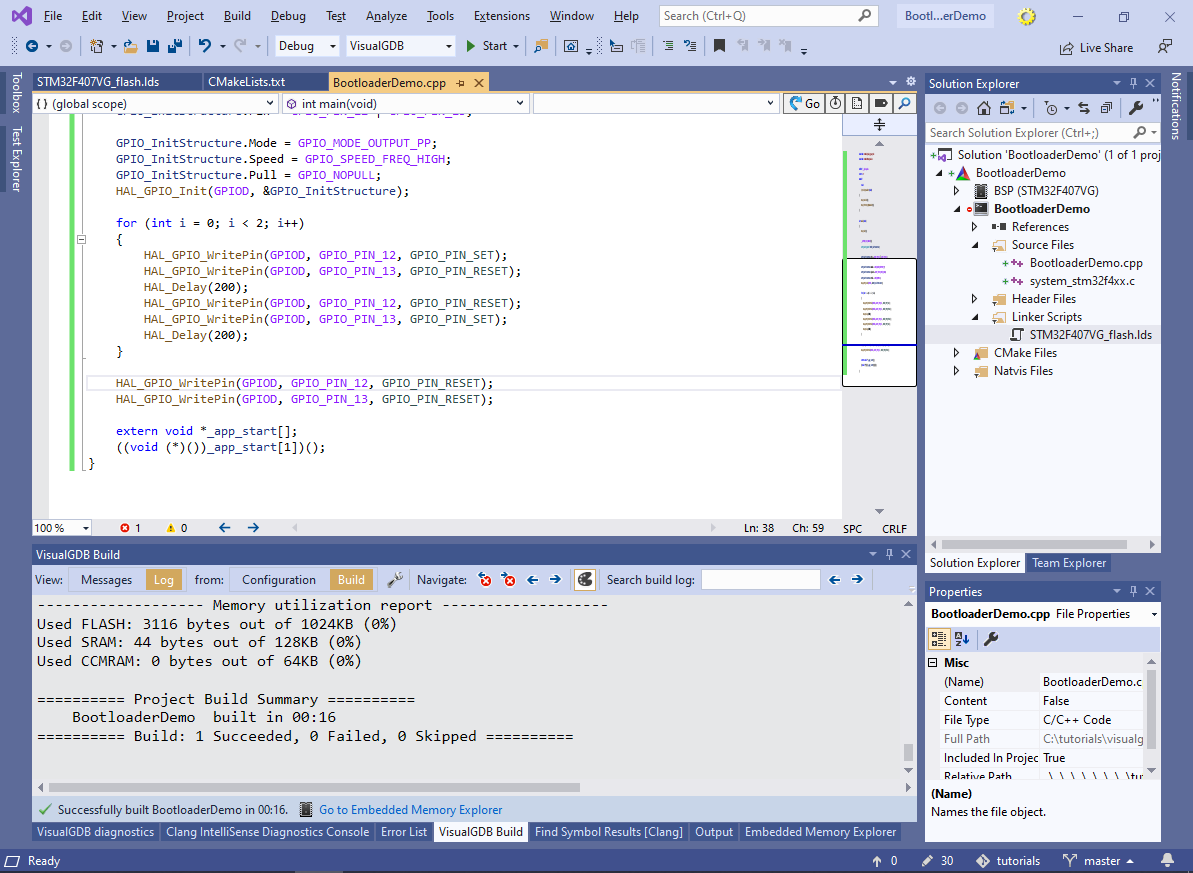
- Replace the contents of the main file with this code. It will blink the on-board LEDs twice and then pass control to the main application by calling the function stored at the second slot after the _app_start address (we will later place the main application’s reset handler there):
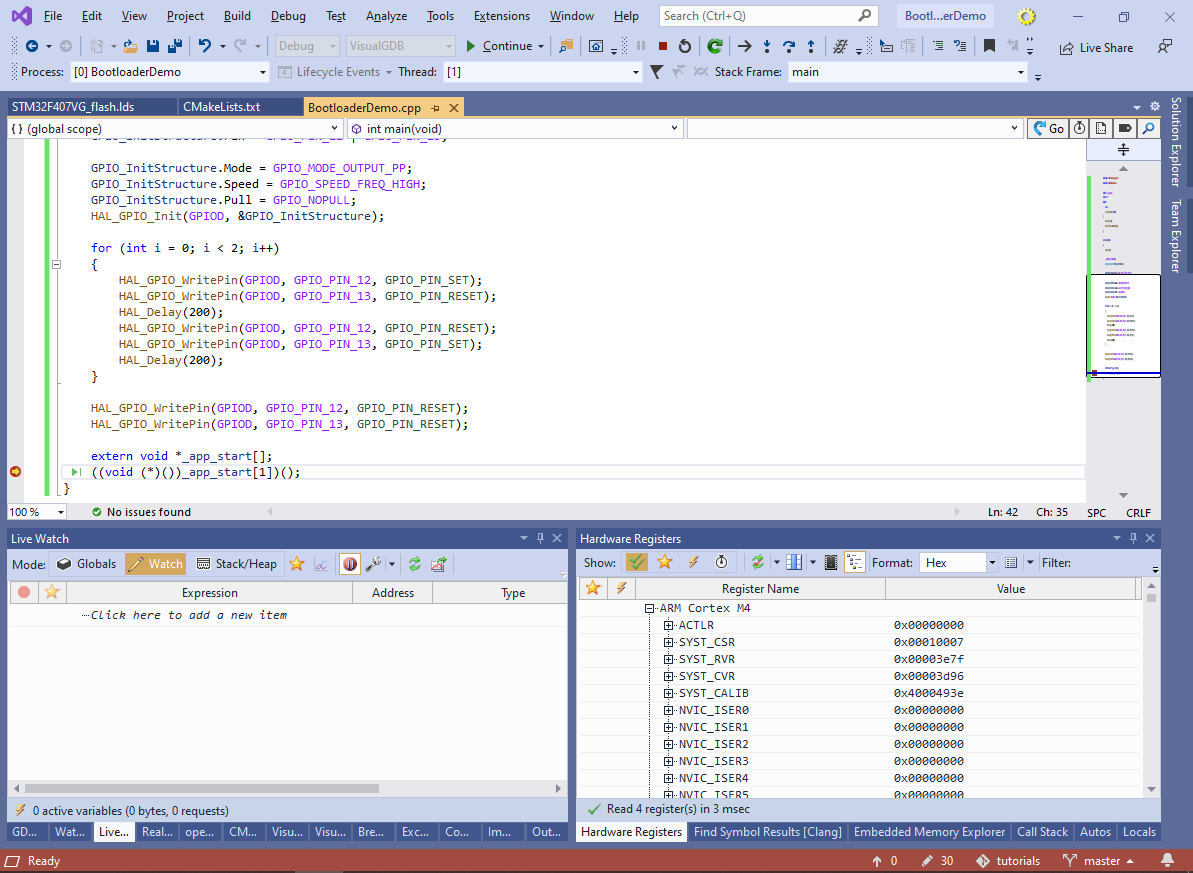
- You can quickly test out the project by setting a breakpoint on the call to _app_start() and pressing F5 to begin debugging. Do not step into _app_start yet, as it doesn’t contain anything meaningful:
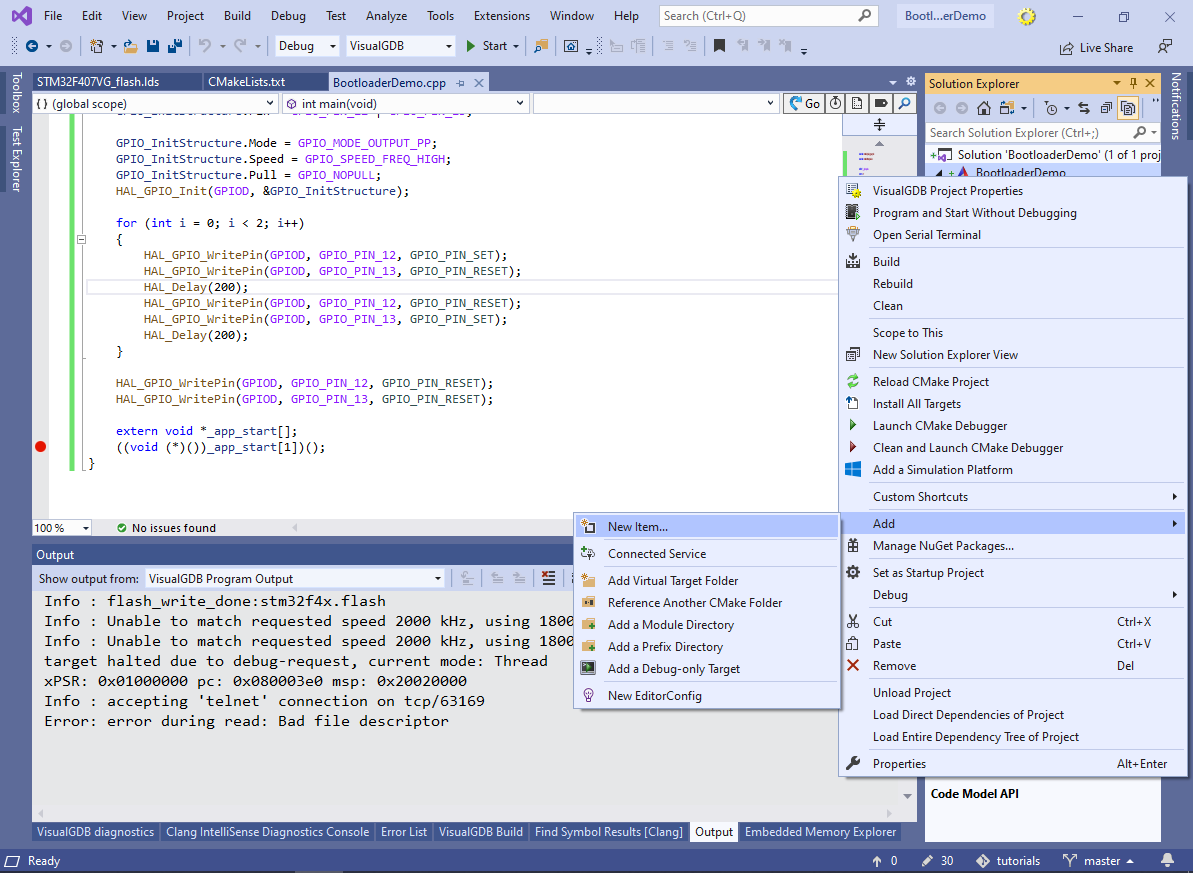
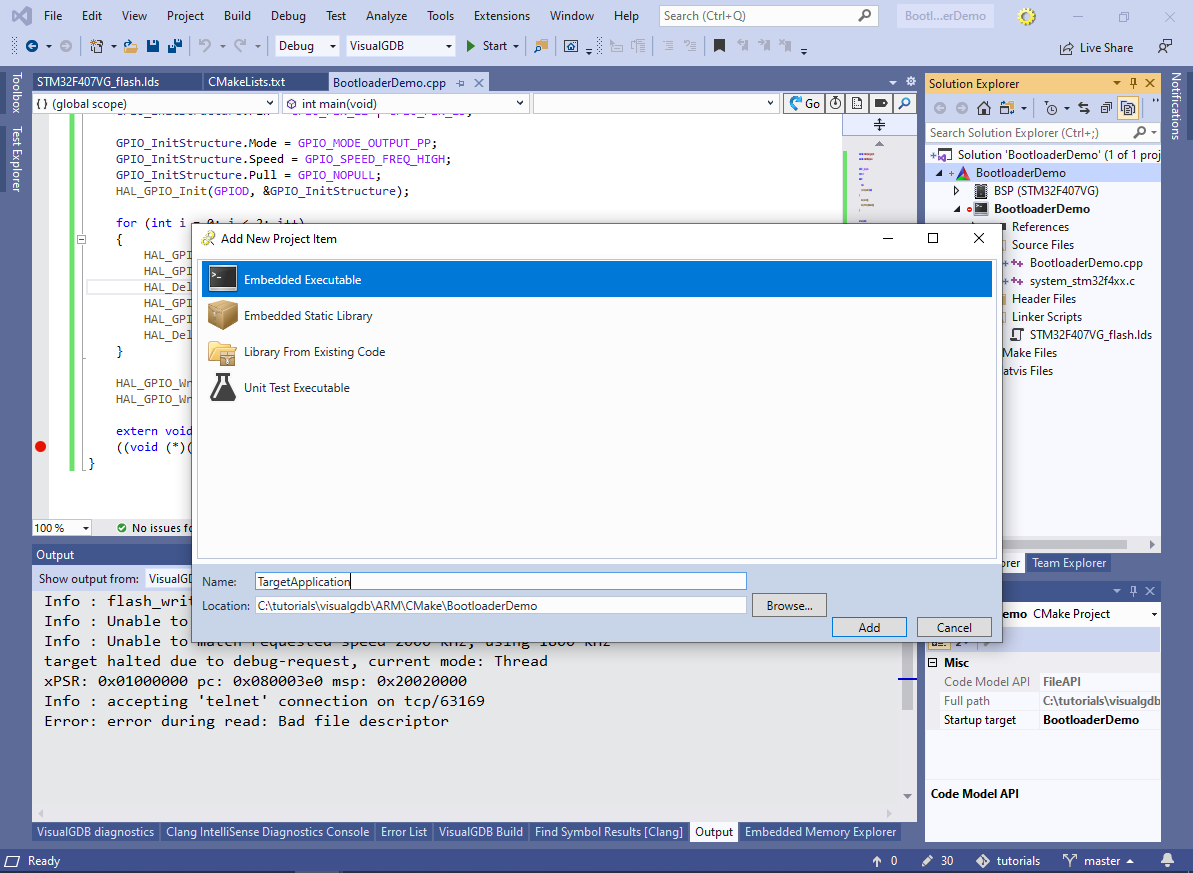
- Now we will create a separate target for the main embedded application. Right-click on the project node in Solution Explorer and select Add->New Item:
- Proceed with adding a new embedded executable:
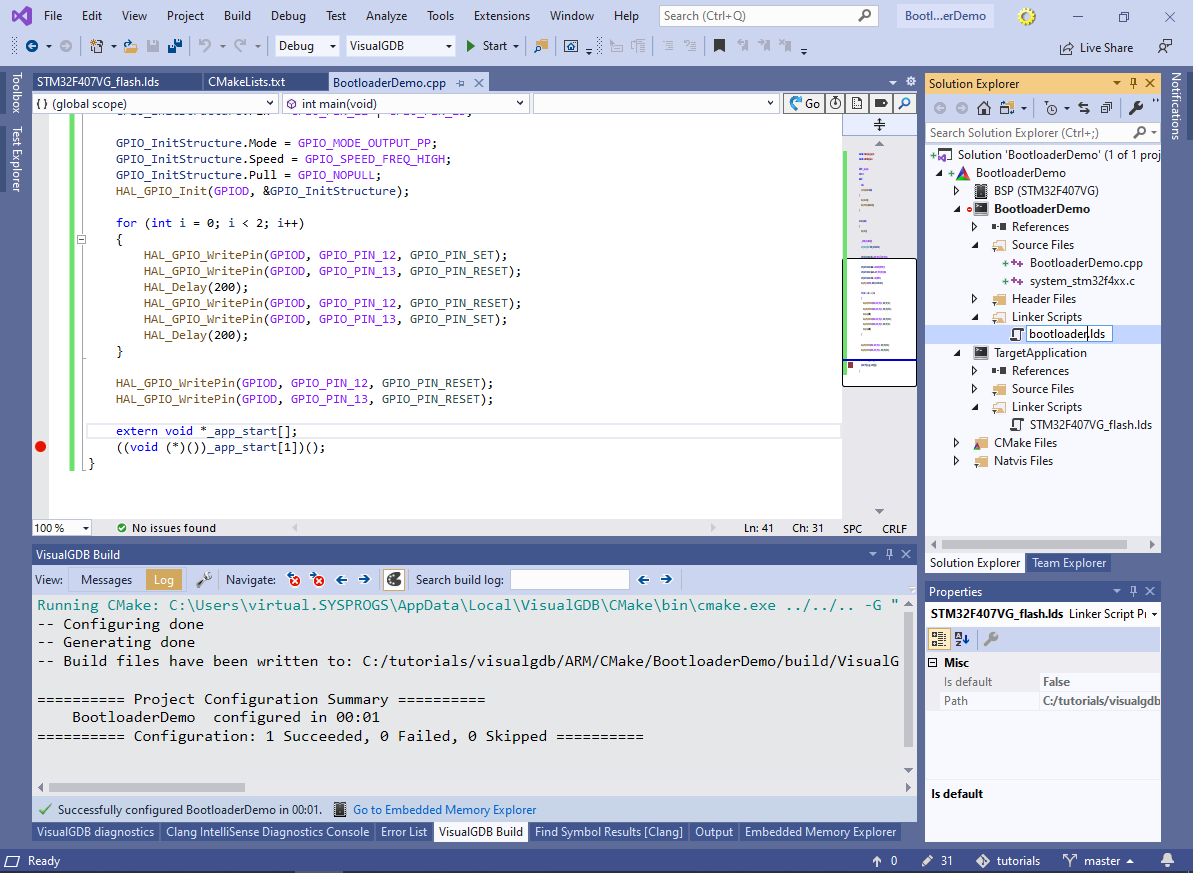
- In order to avoid confusion between the bootloader’s and application’s linker scripts, rename the one in the BootloaderDemo target to bootloader.lds:
- Then copy the main application’s linker script file to the project directory and insert the .bootldr section in it:
.bootldr :
{
    . = ALIGN(4);
    KEEP(*(.bootldr))
    FILL(0xFFFFFF)
    . = 0x4000;
} > FLASH
You can find the entire linker script here.
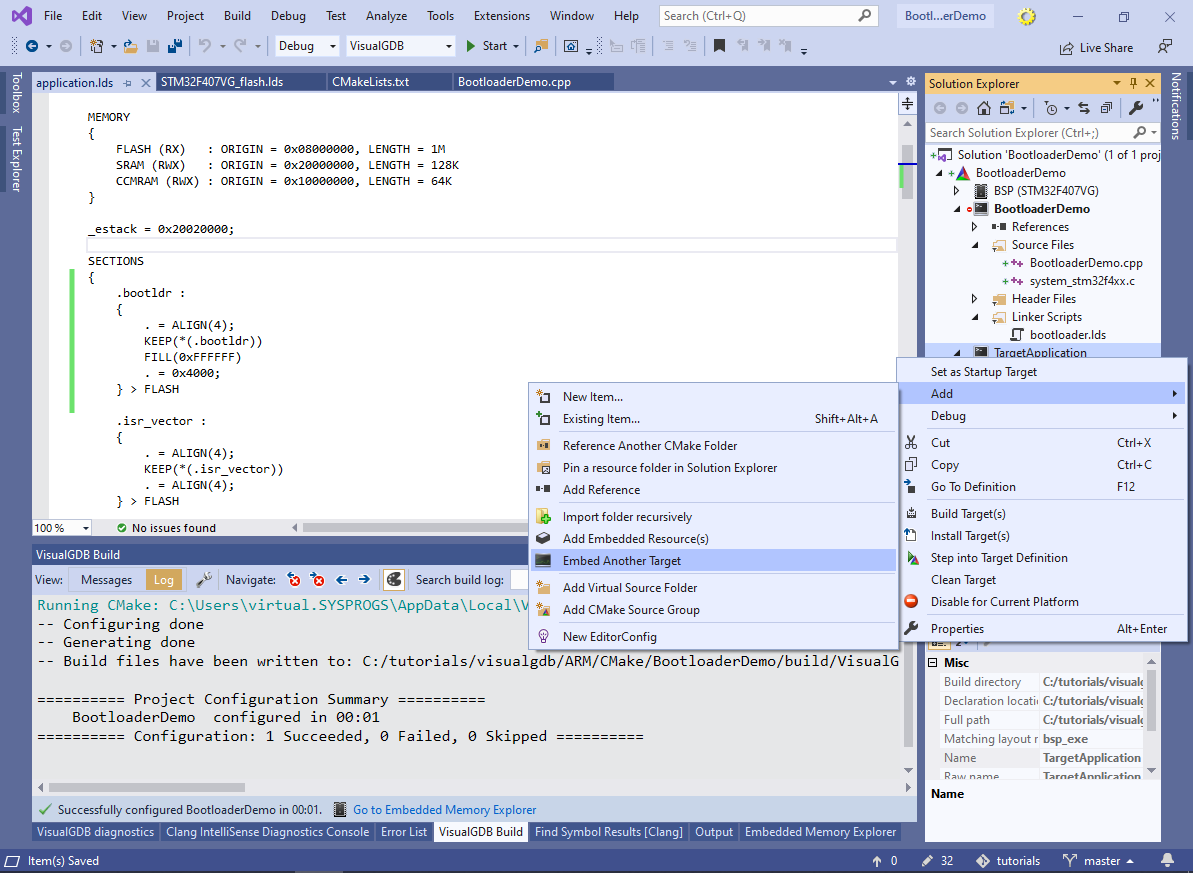
- The last modification made to the linker script will place the .bootldr section at the beginning of the FLASH, however we still need make sure the contents of the BootloaderDemo target ends up in that section. Right-click on the TargetApplication node in Solution Explorer and select “Add->Embed Another Target“:
- VisualGDB will ask for the target you would like to embed and will allow specifying the exact section name. Make sure the target gets placed in the .bootldr section:
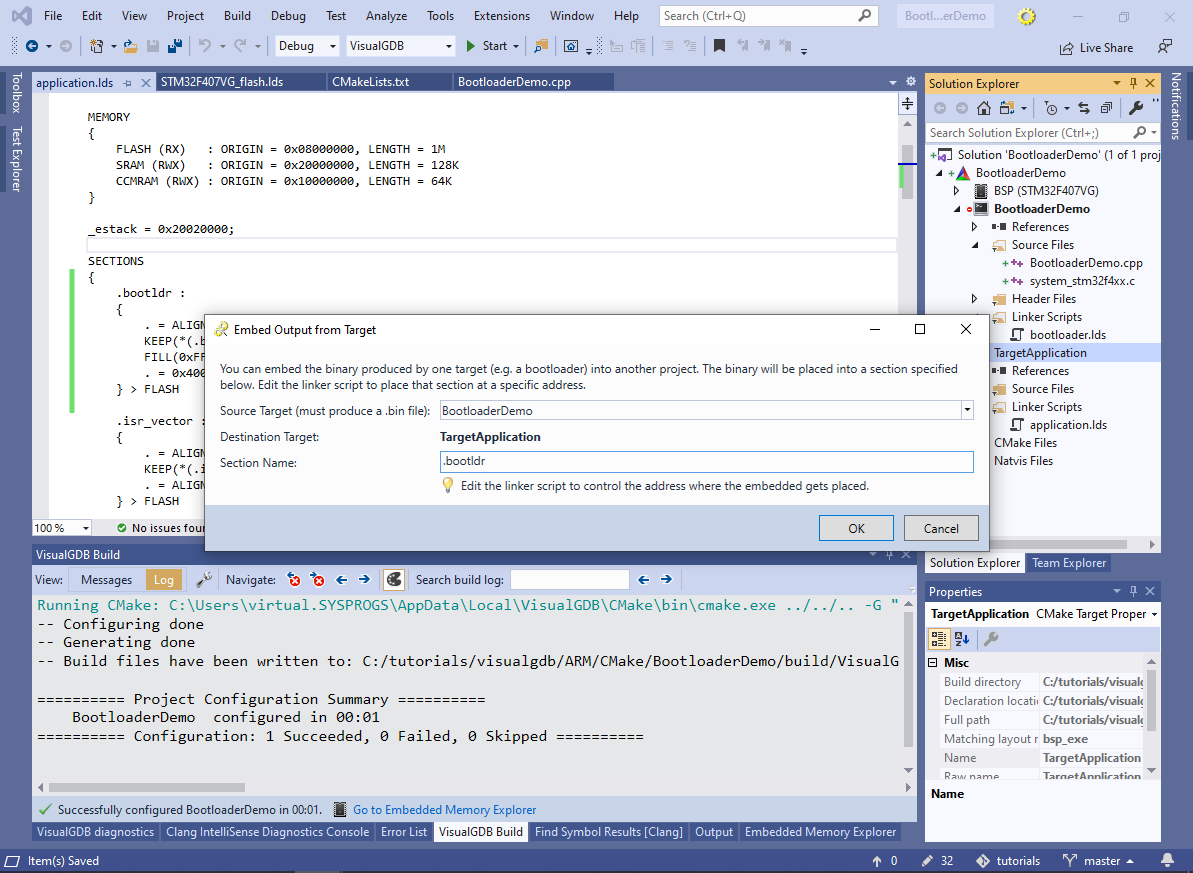 Once you click OK, VisualGDB will automatically create an embed_target_output statement, instructing the build system to embed the BootloaderDemo target into TargetApplication. You can always edit the statement in CMakeLists.txt to change this behavior, or use the properties in Solution Explorer to have VisualGDB edit it for you.
 - Right-click on the TargetApplication node in Solution Explorer and select “Set as Startup Target“:

- Open VisualGDB Project Properties and enable the “Reset after programming” option on the Debug Settings page:
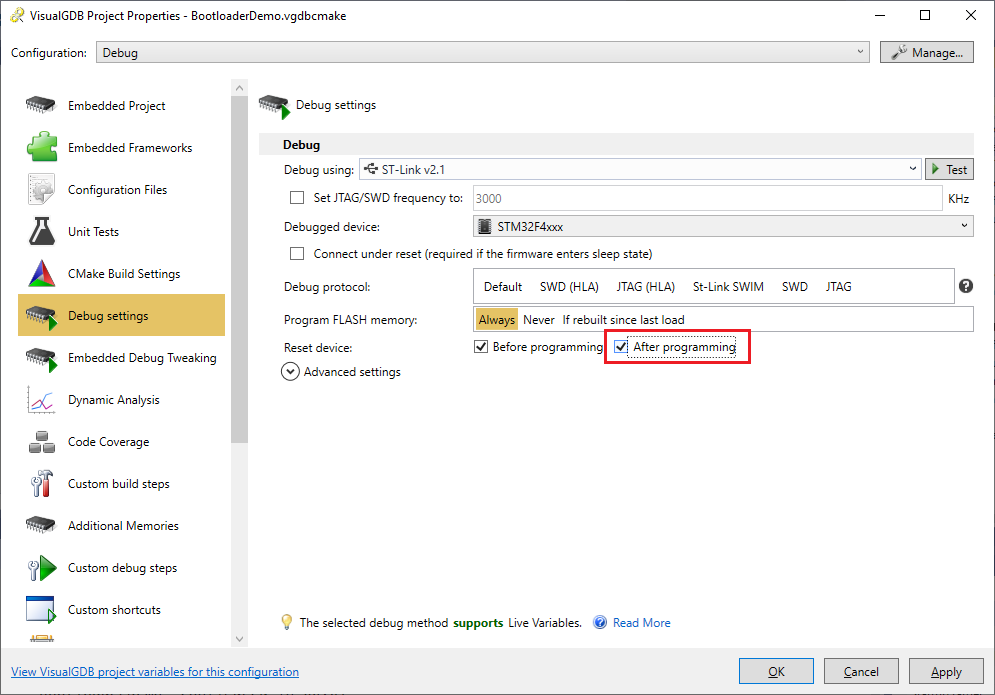 Note that for Advanced CMake projects the debug settings are shared between all targets of the same project. When you press F5, VisualGDB will use the startup target selected in Solution Explorer. You can also debug a specific target by selecting the “Debug” command in its context menu.
 - Replace the contents of TargetApplication.cpp with this code and try building the project. The build will fail due to the missing SystemInit() call:

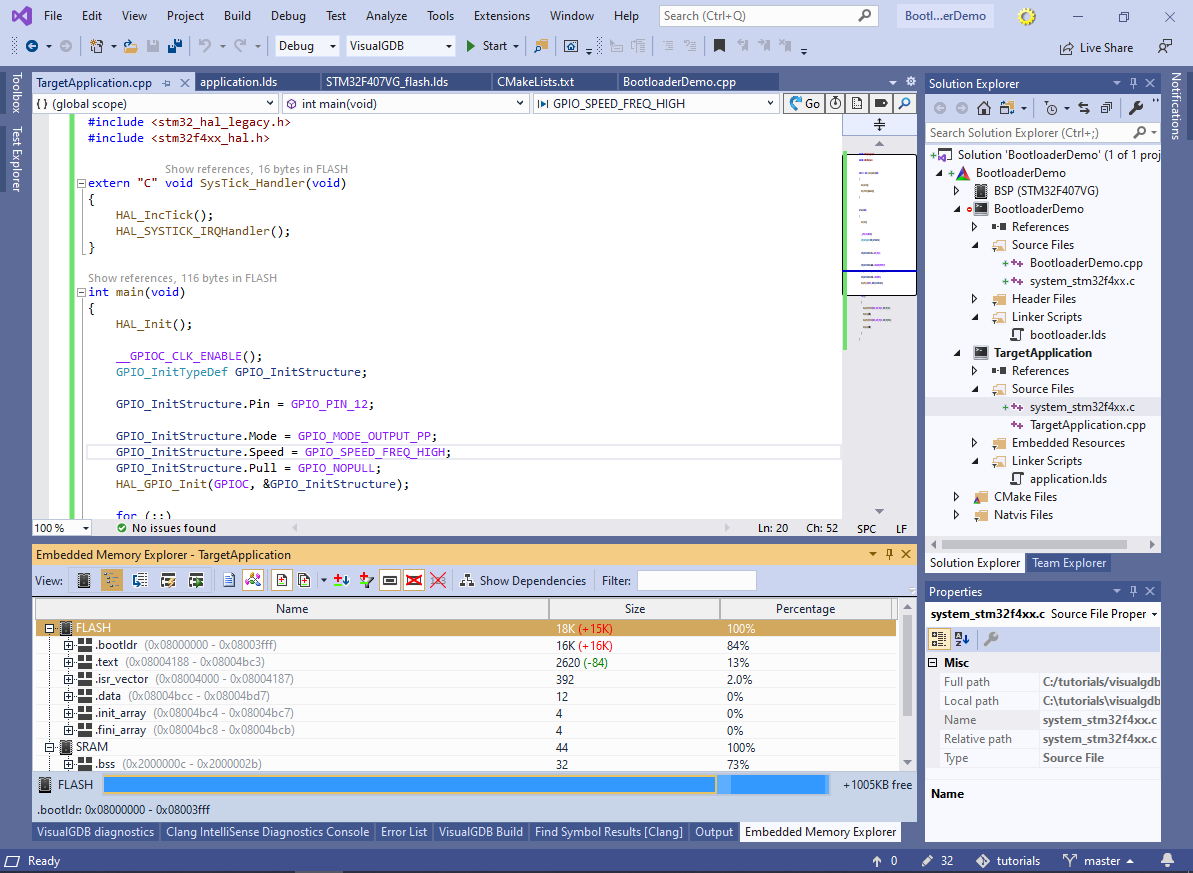
- You can reuse the system_stm32f4xx.c file from the bootloader by right-clicking on the application and selecting “Add->Existing Item“. Once it is added to the target, the project will build successfully. Note how most of the FLASH memory is occupied by the fixed-size bootloader block:
- Press F5 to begin debugging. The LEDs will briefly blink a couple of times, indicating that the bootloader has finished running, and the main program loop will then begin:

You can find the project shown in this tutorial in our Github repository.
To learn about handling interrupts in bootloader-based setups and using syscalls from the application to the bootloader, follow the second part of the GNU Make-based bootloader tutorial.