Creating TWR-K60 module projects with Visual Studio
This tutorial shows how to create a basic project for the TWR-K60D100M module based on the MK60DN512VMD10 microcontroller using Visual Studio and VisualGDB.
Before you begin ensure that you have VisualGDB 4.1 or later installed.
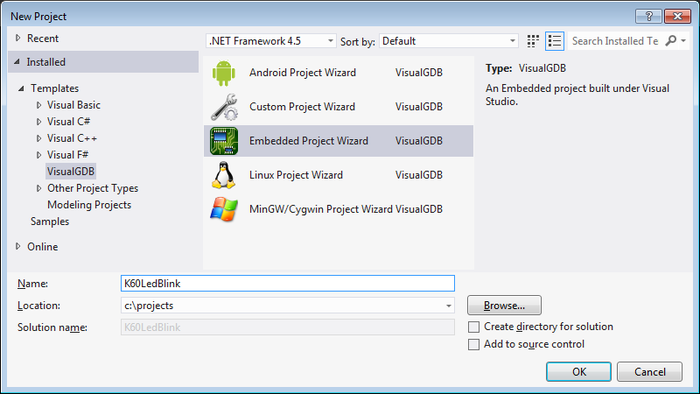
- Launch Visual Studio. Open the New Project window and select VisualGDB Embedded Project Wizard:
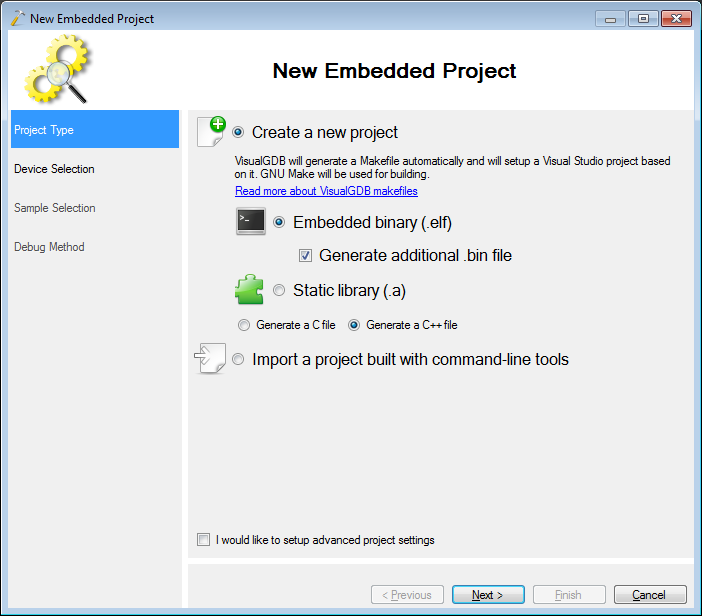
- In this tutorial we will create a simple stand-alone project. Select “embedded binary” and continue to the next page.
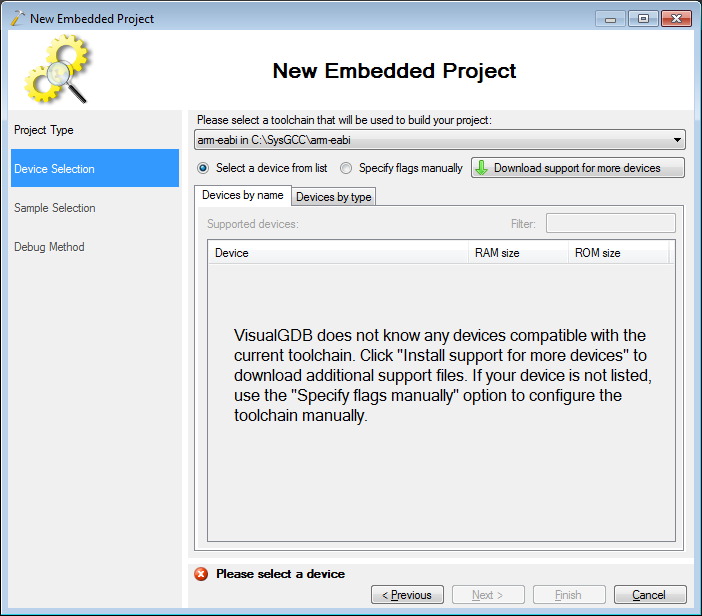
- On the next page select the arm-eabi toolchain. If you don’t have it installed, VisualGDB will download it for you automatically:
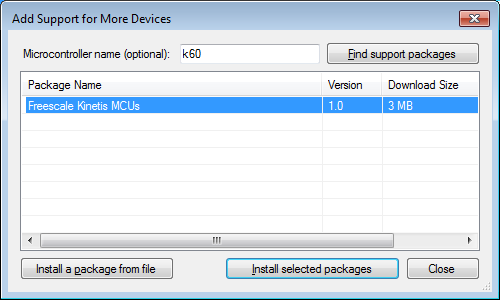
- Click “download support for more devices” and select Freescale Kinetis in the list. VisualGDB will download headers and libraries for Kinetis devices:
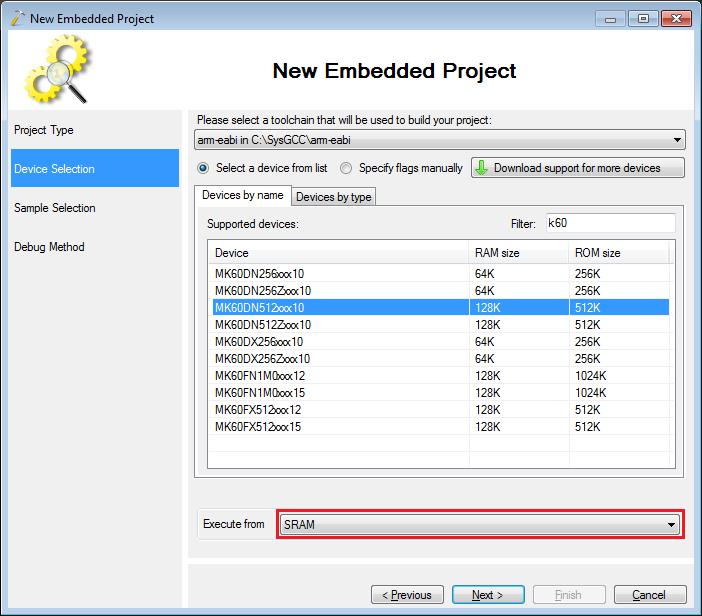
- Select MK60DN512xxx10 from the device list. In this tutorial we will create a project that will be placed in the SRAM memory, keeping the FLASH contents unchanged. Select “SRAM” in the list below:
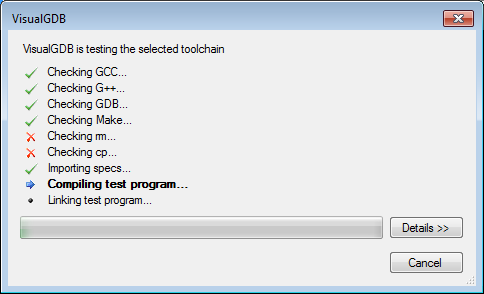
- Click “Next”. VisualGDB will test the toolchain and ensure that it can compile and link binaries for your device:
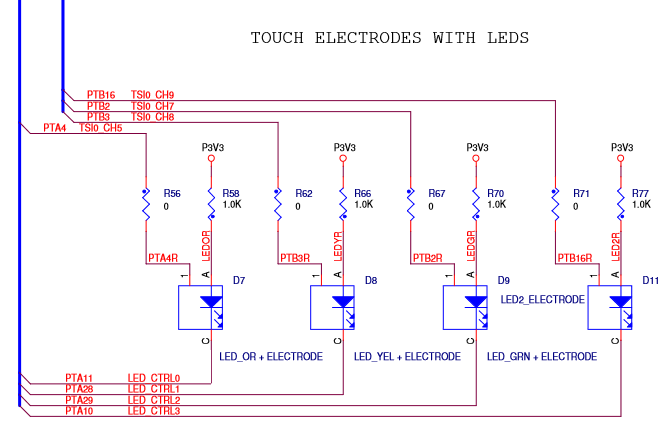
- The next page allows customizing the ‘Blinking LED ‘sample generated by VisualGDB. According to TWR-K60100M schematics, a green LED is connected to PA29:
 Select “PTA” and “29” as “LED Port group” and “LED Port Number” respectively:
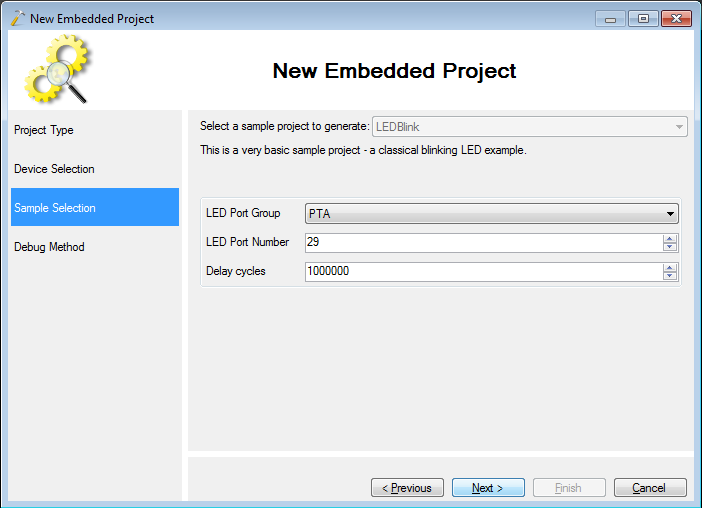
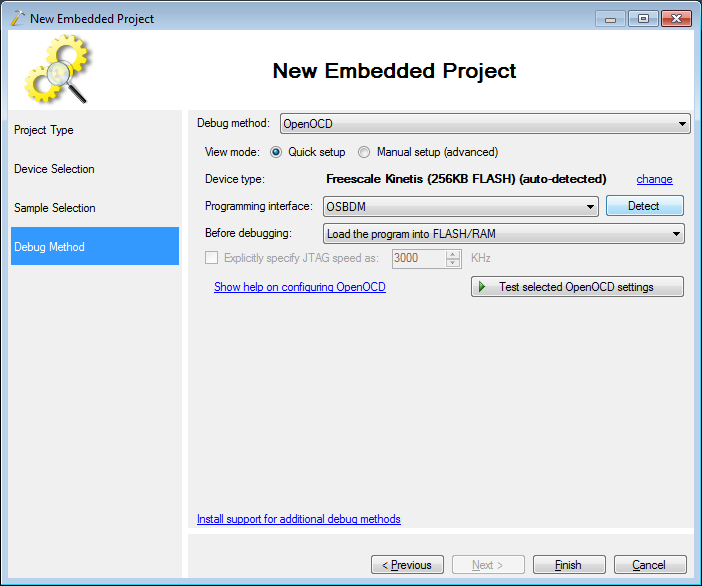
- The module contains the OSBDM/OSJTAG interface that allows debugging the microcontroller without any external hardware. We will use the OpenOCD tool to connect to it. Select OpenOCD as the debug method on the next page. If it’s not available, click “Download support for more debug methods”. Select “OSBDM” as the interface:
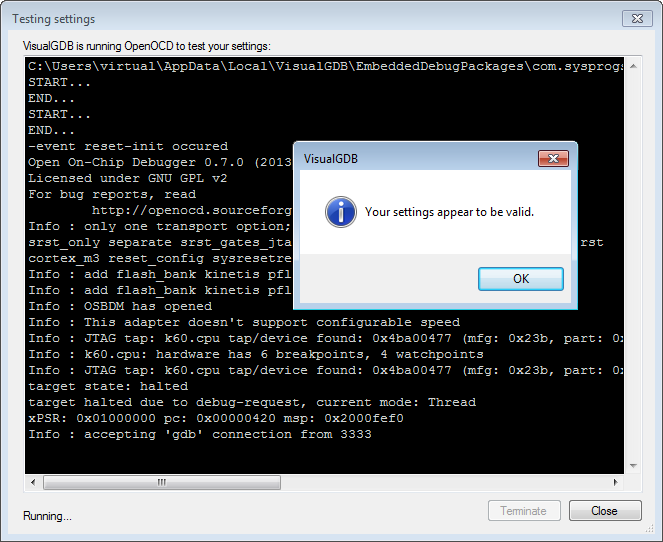
- Click “Test selected OpenOCD settings” to test their validity. VisualGDB will launch OpenOCD and ensure that it can connect to your board:
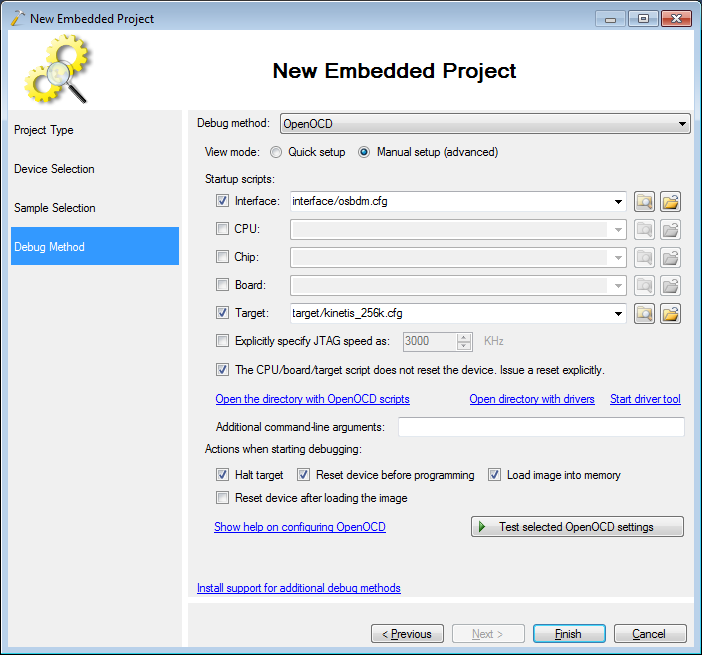
- You can always switch to the manual mode to customize various OpenOCD settings:
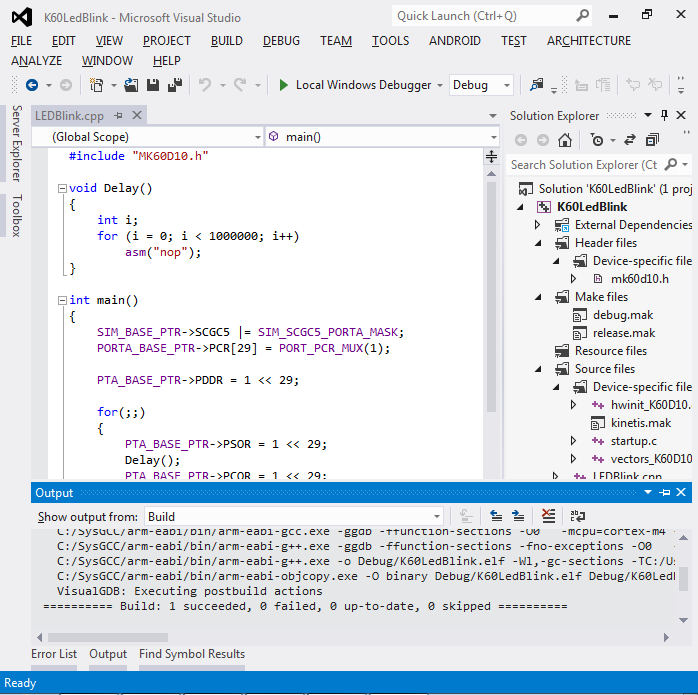
- Press “Finish” to have your project created. Build it by pressing Ctrl-Shift-B:
- Press F5 to start debugging your project. Once you see the LED blinking, put a breakpoint on the line that turns on the LED:
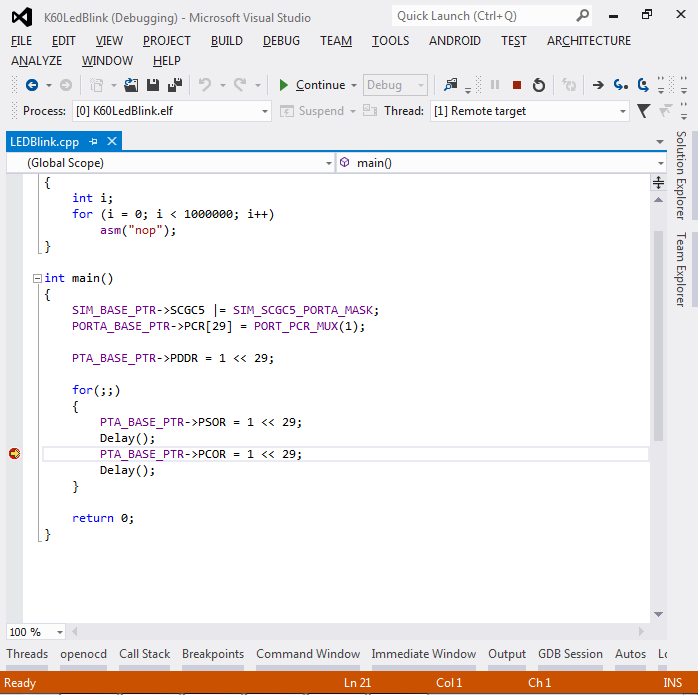
- Press F10 to step over the line. See how the LED turns on:
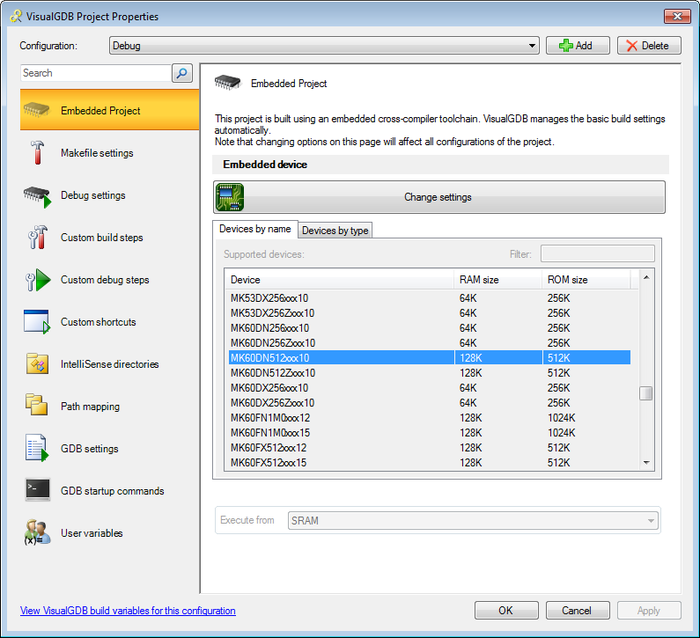
- You can change between SRAM and FLASH modes and customize many other settings in the VisualGDB Project Properties dialog that can be opened by right-clicking on your project in Solution Explorer and selecting “VisualGDB Project Properties”: