Developing mbed applications with RTX and Visual Studio
This tutorial shows how to use the Keil RTX real-time operating system to create multi-threaded embedded applications with mbed and VisualGDB. Before you begin, install VisualGDB 5.1 or later and update your embedded tools via Embedded Tool Manager.
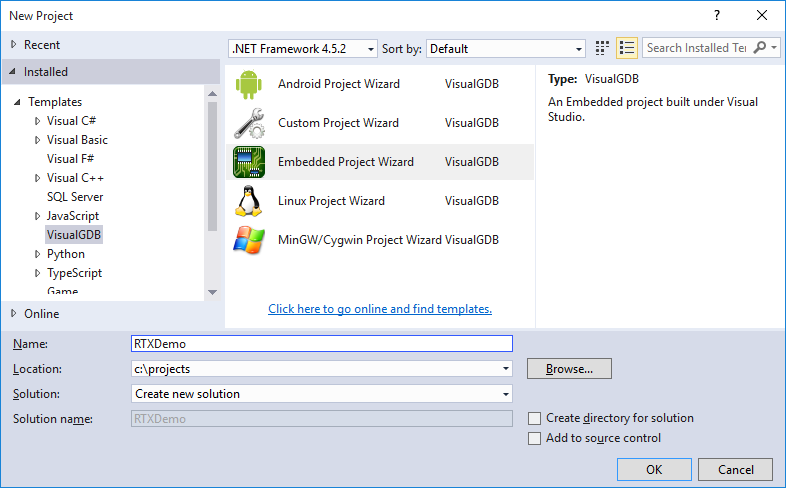
- Start Visual Studio and begin creating a new project with the VisualGDB Embedded Project Wizard:
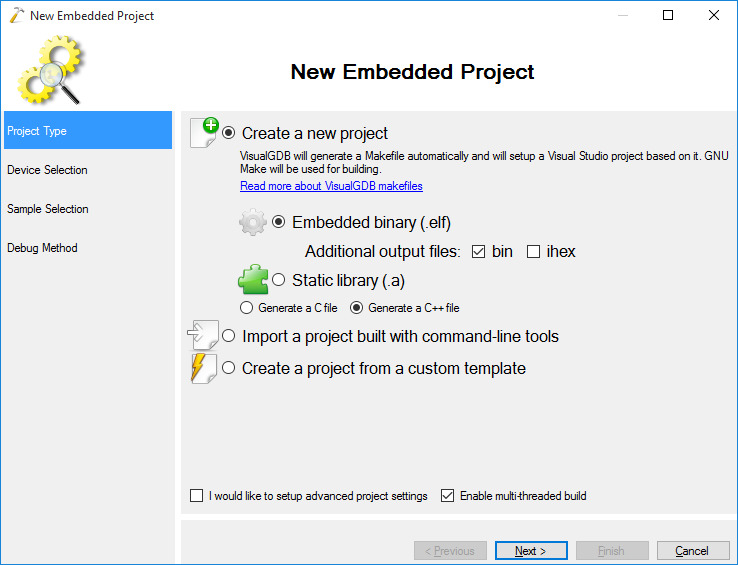
- On the first page select “Create a new project” and ensure that the “Enable multi-threaded build” checkbox is checked:
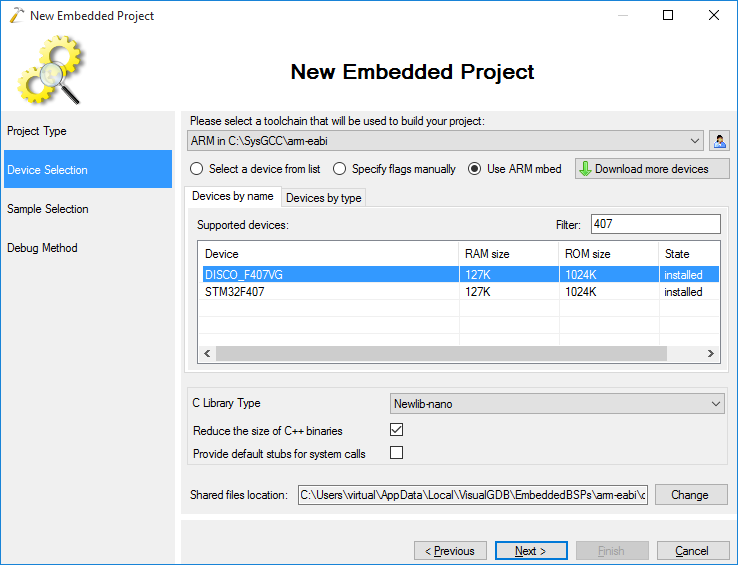
- Click “Use ARM mbed” and select your mbed board in the device list. In this tutorial we will use the STM32F4Discovery board (DISCO_F407VG). Ensure you have newlib-nano selected as the C library:
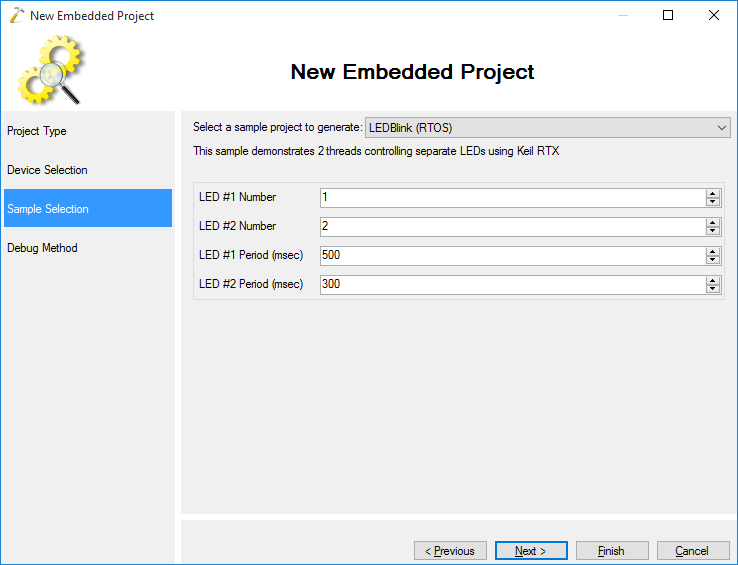
- On the sample selection page select “LEDBlink (RTOS)” to create a project with RTOS support:
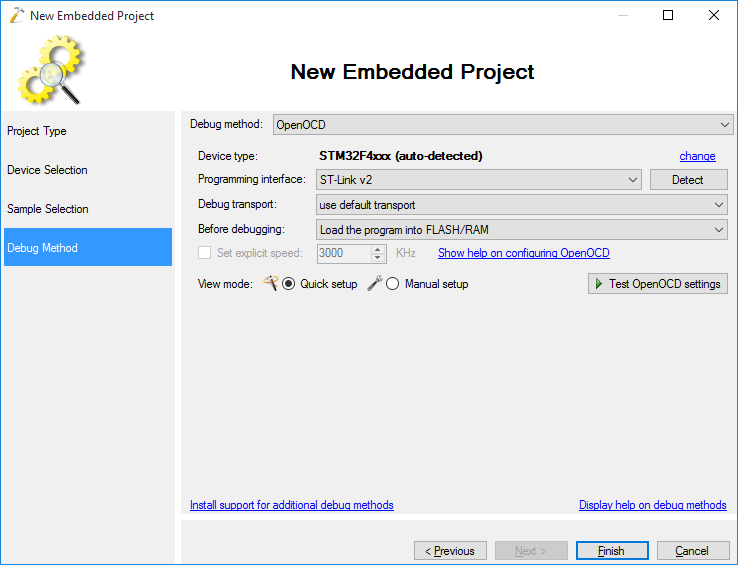
- On the Debug Settings page select your debug method. If you are using Segger J-Link or a device that can be programmed with firmware from segger, use the J-Link debug method, otherwise use OpenOCD:
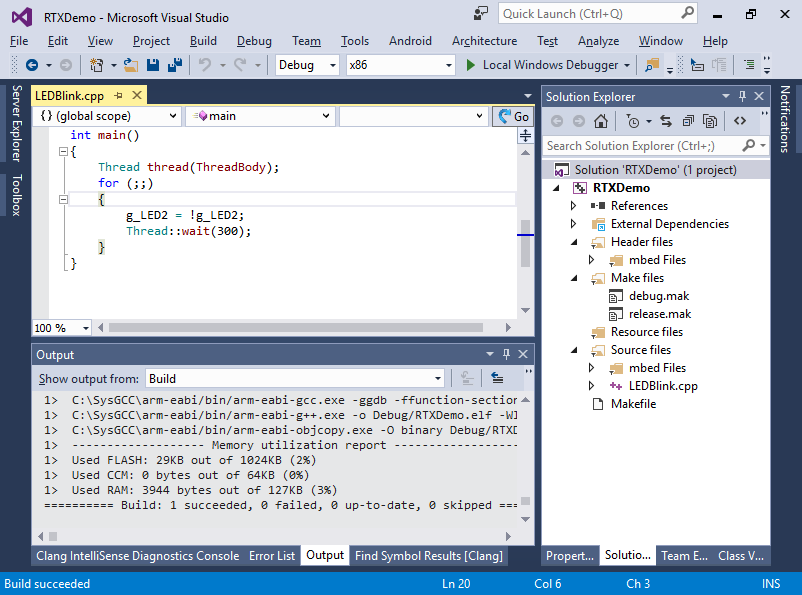
- Press “Finish” to generate your project. Build it via Build->Build Solution:
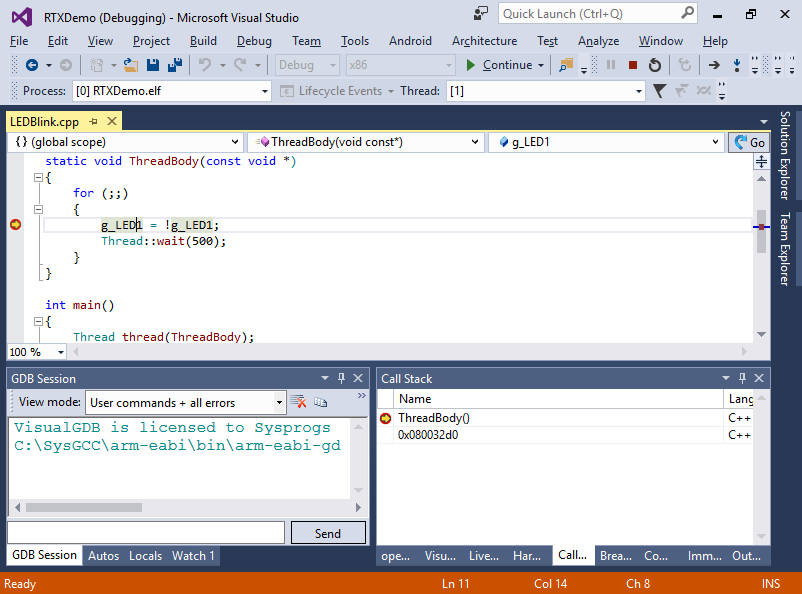
- Start debugging by pressing F5. See how the 2 LEDs blink with different periods as 2 independent threads are controlling them. Set a breakpoint on the line modifying the value of g_LED1 and wait for it to trigger:
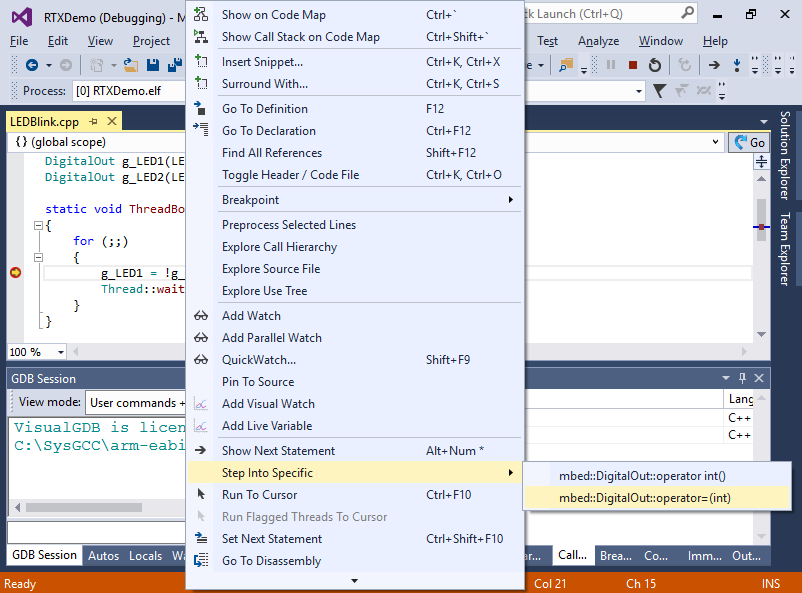
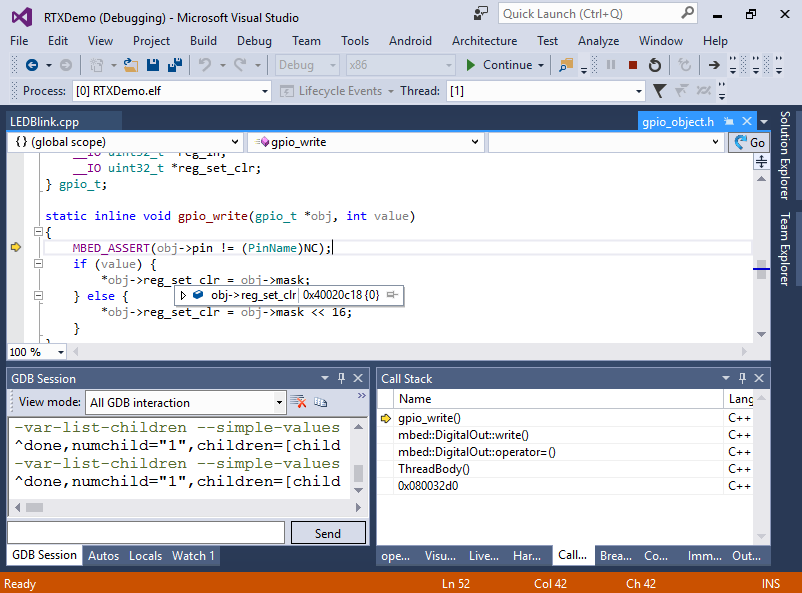
- The line gets the current state of the LED, inverts it and sets the new state. Step into the operator that sets the new state by selecting Step Into Specific -> operator=(int):
- Step into the write() method function and into the gpio_write() function again to see what exactly happens when the new value is assigned to g_LED1:
- Now we will modify our source code to demonstrate communication between the 2 threads. Replace the contents of your main file with this:
#include <mbed.h>
#include <rtos.h>

DigitalOut g_LED1(LED1);
DigitalOut g_LED2(LED2);
Semaphore g_Semaphore(0);

static void ThreadBody(const void *)
{
    for (;;)
    {
        g_LED1 = 0;
        g_Semaphore.wait();
        g_LED1 = 1;
        Thread::wait(100);
    }
}

int main()
{
    Thread thread(ThreadBody);
    for (;;)
    {
        g_LED2 = !g_LED2;
        g_Semaphore.release();
        Thread::wait(300);
    }
}
This will create a global semaphore that will be signaled each time the main thread inverts the second LED. The background thread will wait for the signal and do a short pulse on the first LED when it receives it.
- Build and run your program:
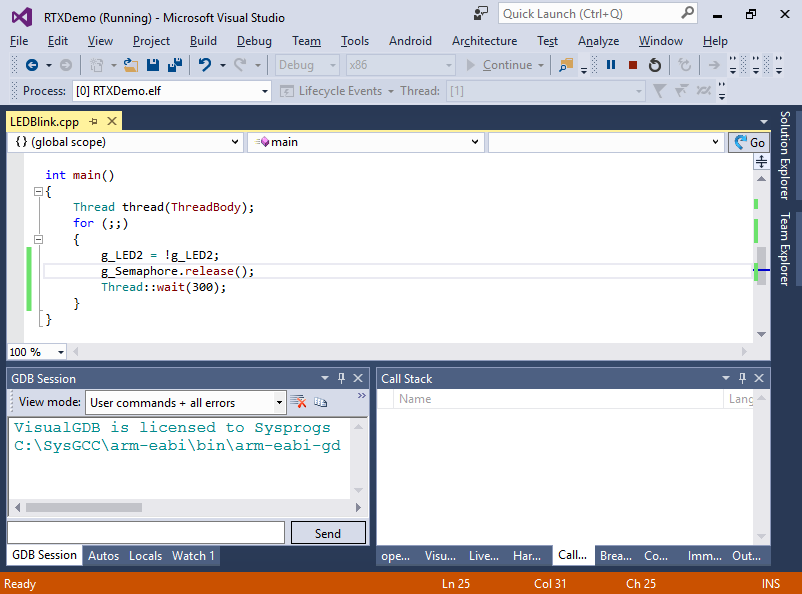 Observe how the first LED pulses quickly each time the second one changes state.
 - You can step into the RTOS methods (e.g. Semaphore::wait()) by pressing F11. As your project includes all necessary mbed code, you can easily step through it and even modify it:


