Creating Advanced STM32CubeMX-based Projects with VisualGDB
This tutorial shows how to create Advanced STM32CubeMX-based projects with VisualGDB. The Advanced STM32CubeMX projects offer seamless integration with STM32CubeMX, can automatically launch it to edit the project layout, and do not require downloading the STM32 BSP supplied by VisualGDB.
Before you begin, install VisualGDB 5.5 or later.
- Start Visual Studio and open the VisualGDB STM32CubeMX Project Wizard:

- Enter the name and location for your project:

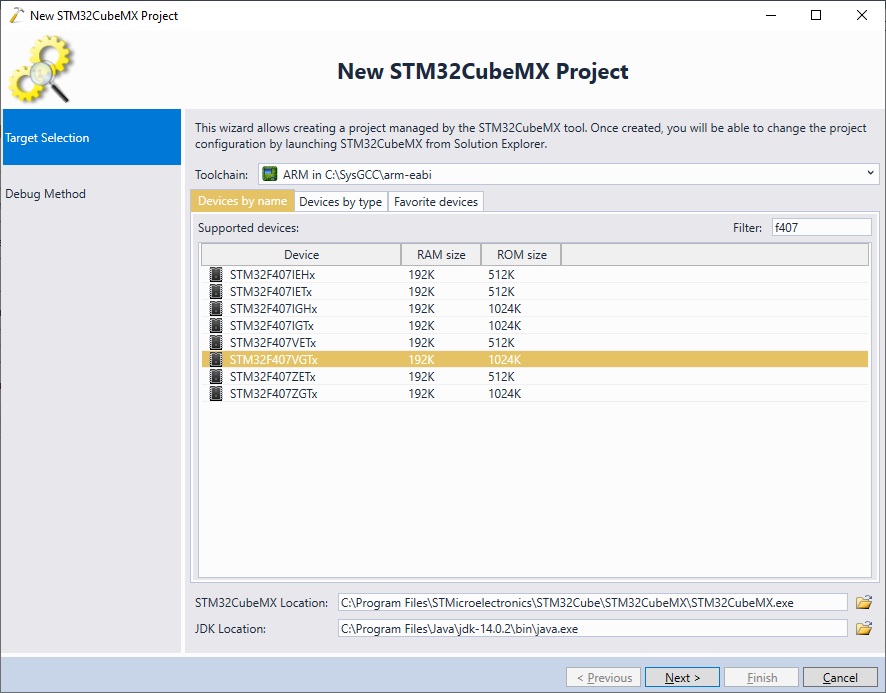
- If you are running the STM32CubeMX wizard for the first time, VisualGDB may ask for the location of the STM32CubeMX tool and the Java environment required for running it. Once they are located, VisualGDB will scan the STM32CubeMX directory for the list of supported devices and will display them on the first VisualGDB-specific page of the wizard. Select an ARM toolchain, pick your device and click “Next”:
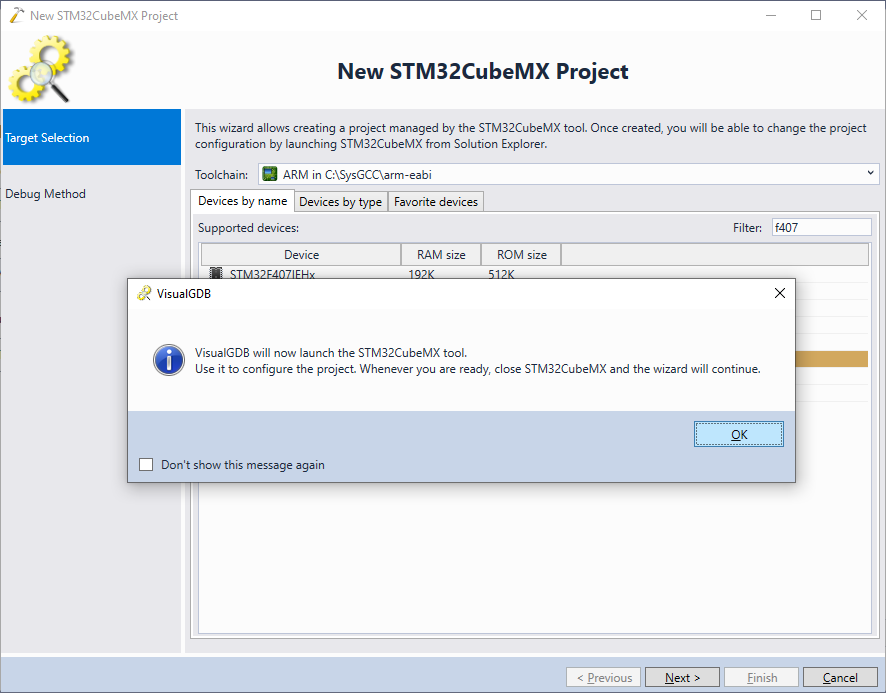
- VisualGDB will now automatically launch the STM32CubeMX tool with the device selected in the wizard:
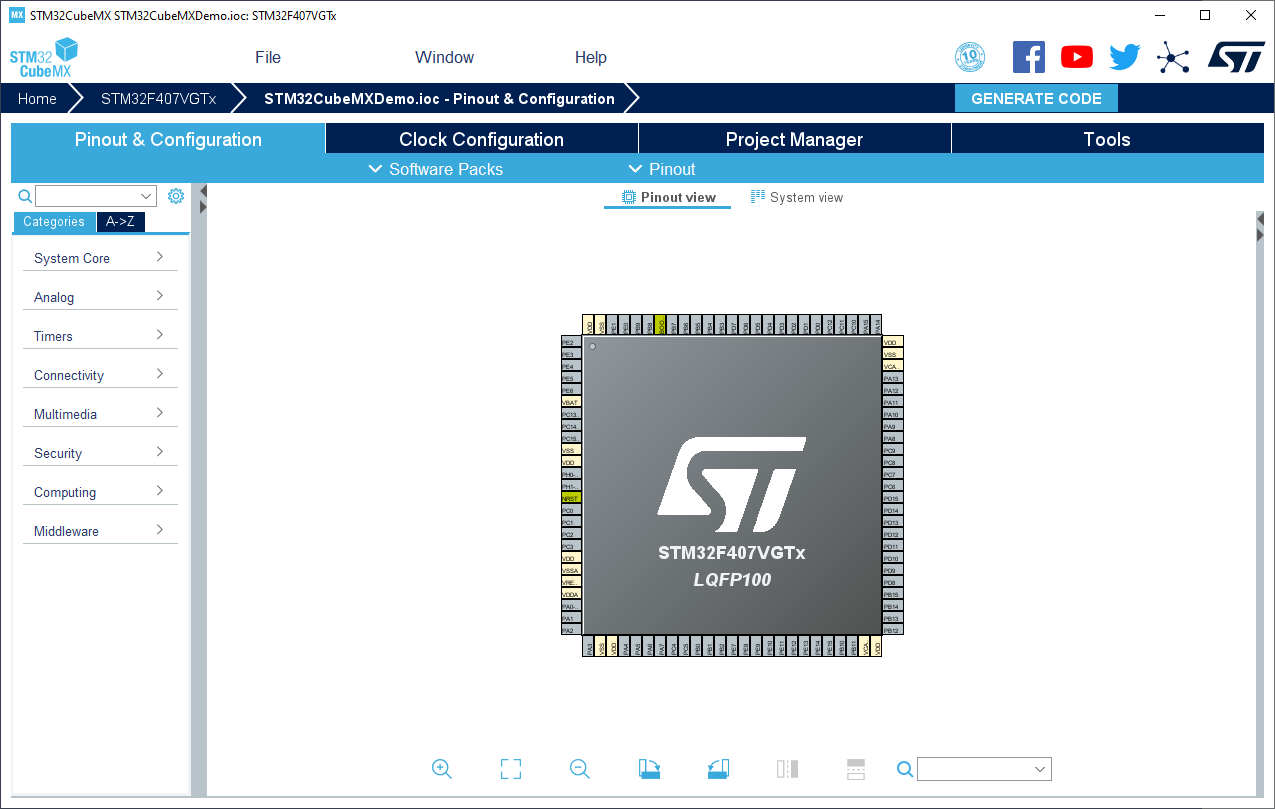
- You can use the STM32CubeMX GUI to customize the device (e.g. change the functions of various peripherals or reference various frameworks). In this tutorial we will accept the default configuration and close STM32CubeMX. There is no need to press the “Generate Code” button, as VisualGDB will handle it automatically:
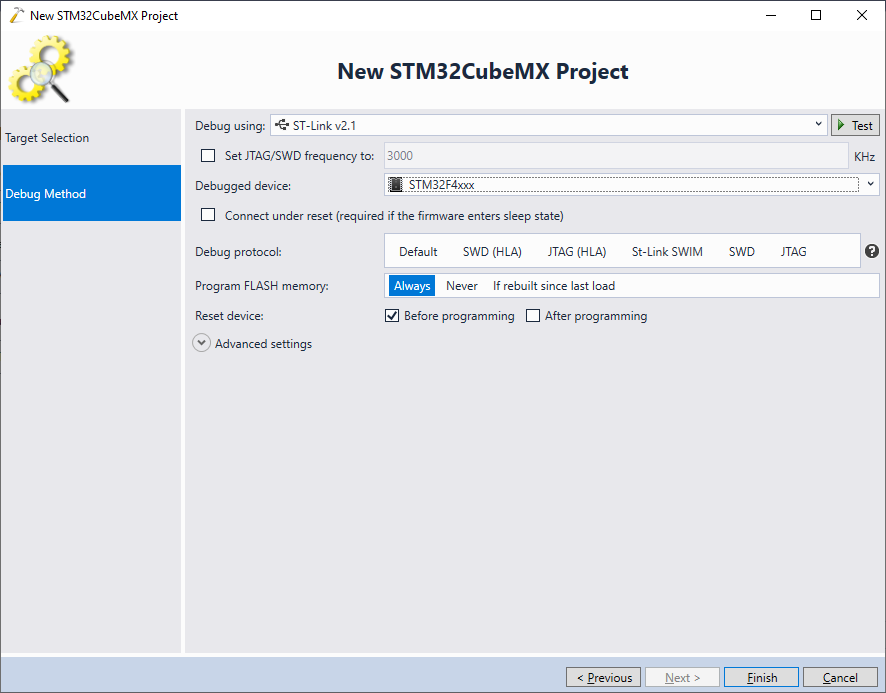
- Connect your development board via USB and select the debug settings on the second page of the wizard:
- Once you click “Finish”, VisualGDB will generate a project based on the template created by STM32CubeMX. Note how the source files are shown under the “STM32CubeMX Files” node:
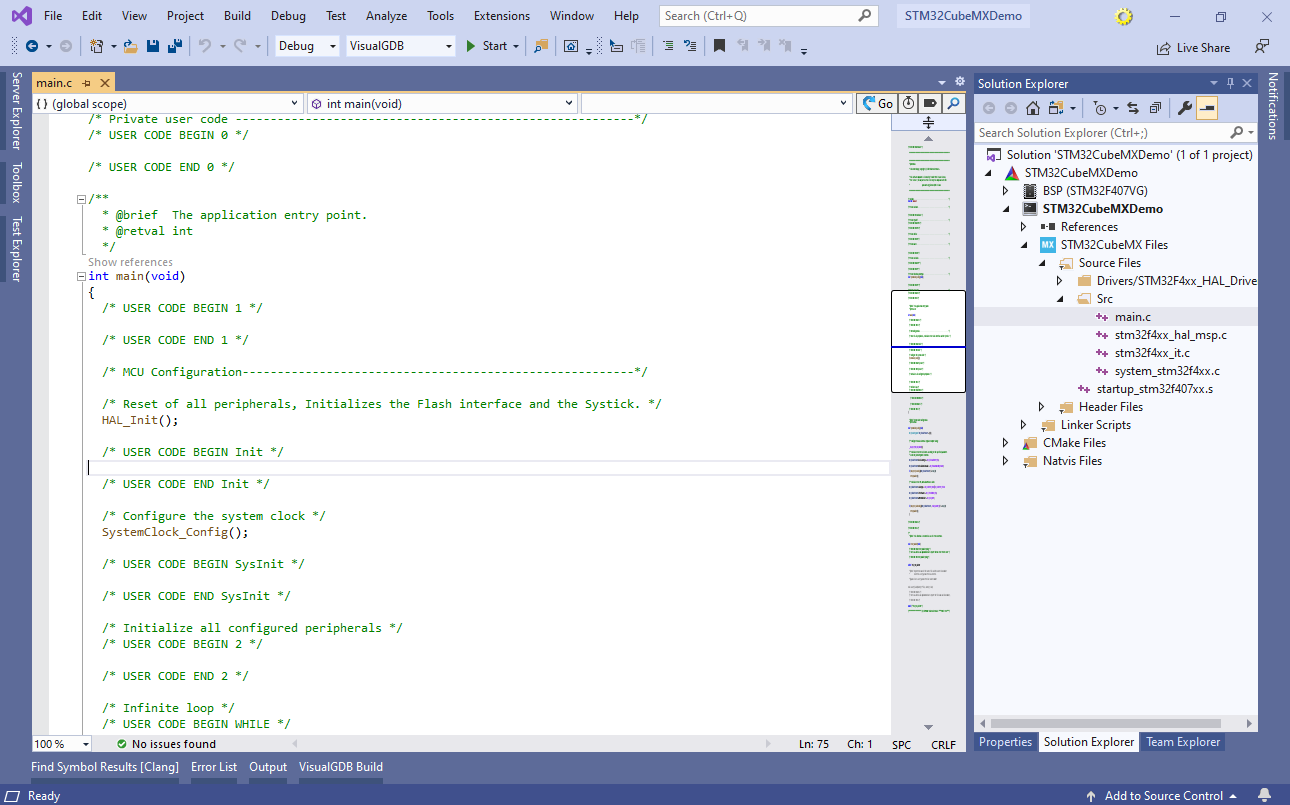 These files are automatically managed by STM32CubeMX. Note the “USER CODE BEGIN” and “USER CODE END” markers. Make sure to add any extra code between these markers. This way, you can change various device parameters via STM32CubeMX GUI and it will preserve your changes to the files, while automatically editing device-specific code, like SystemClock_Config().
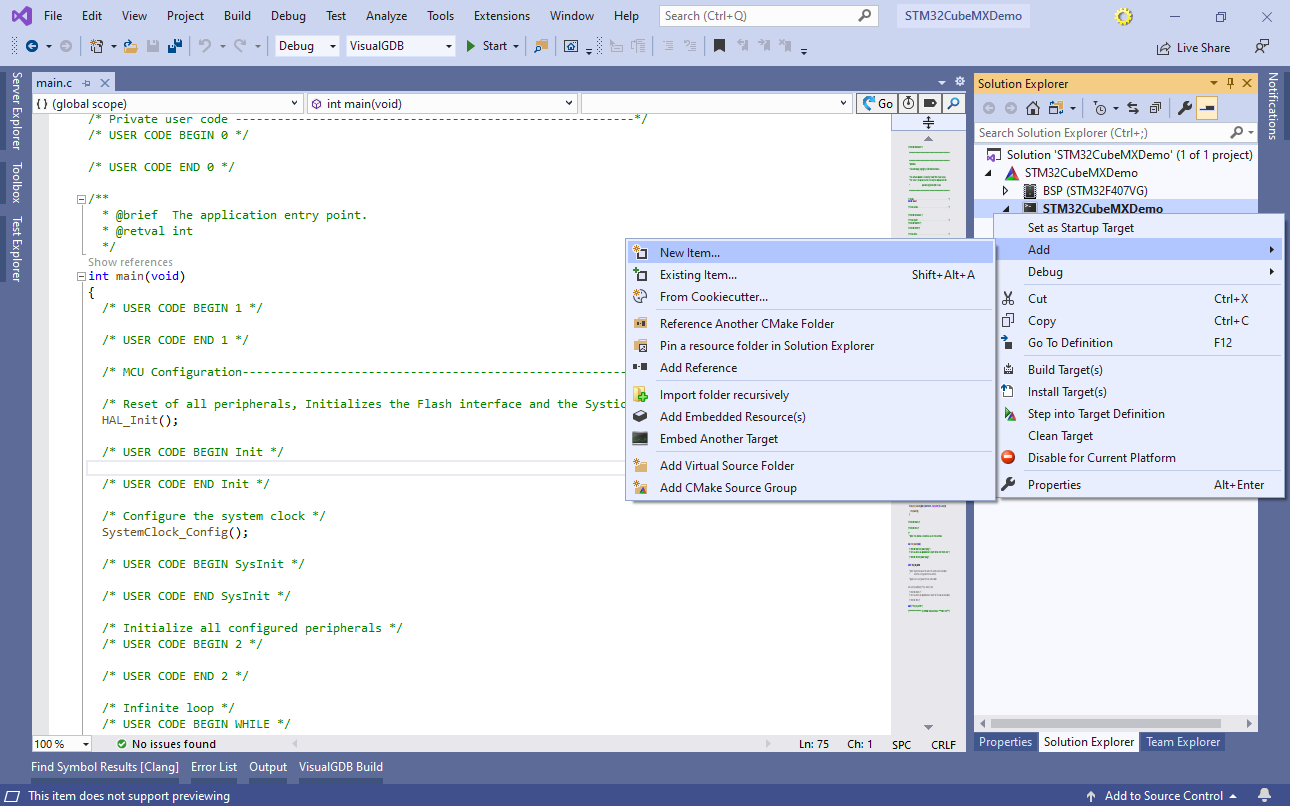
 - Now we will show how to add a new source file to the project. Right-click on the STM32CubeMXDemo node in Solution Explorer and select Add->New Item:
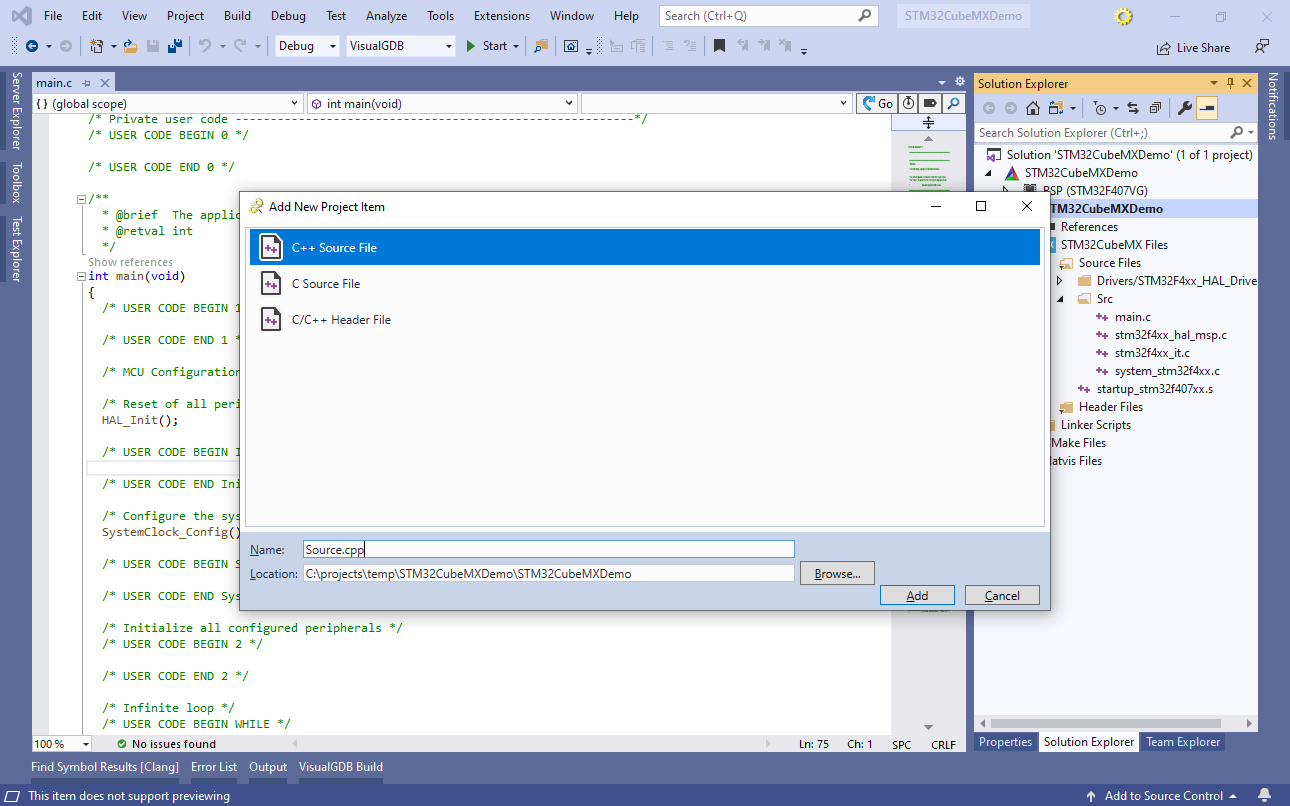
- Select “C++ Source File” and click “Add”:
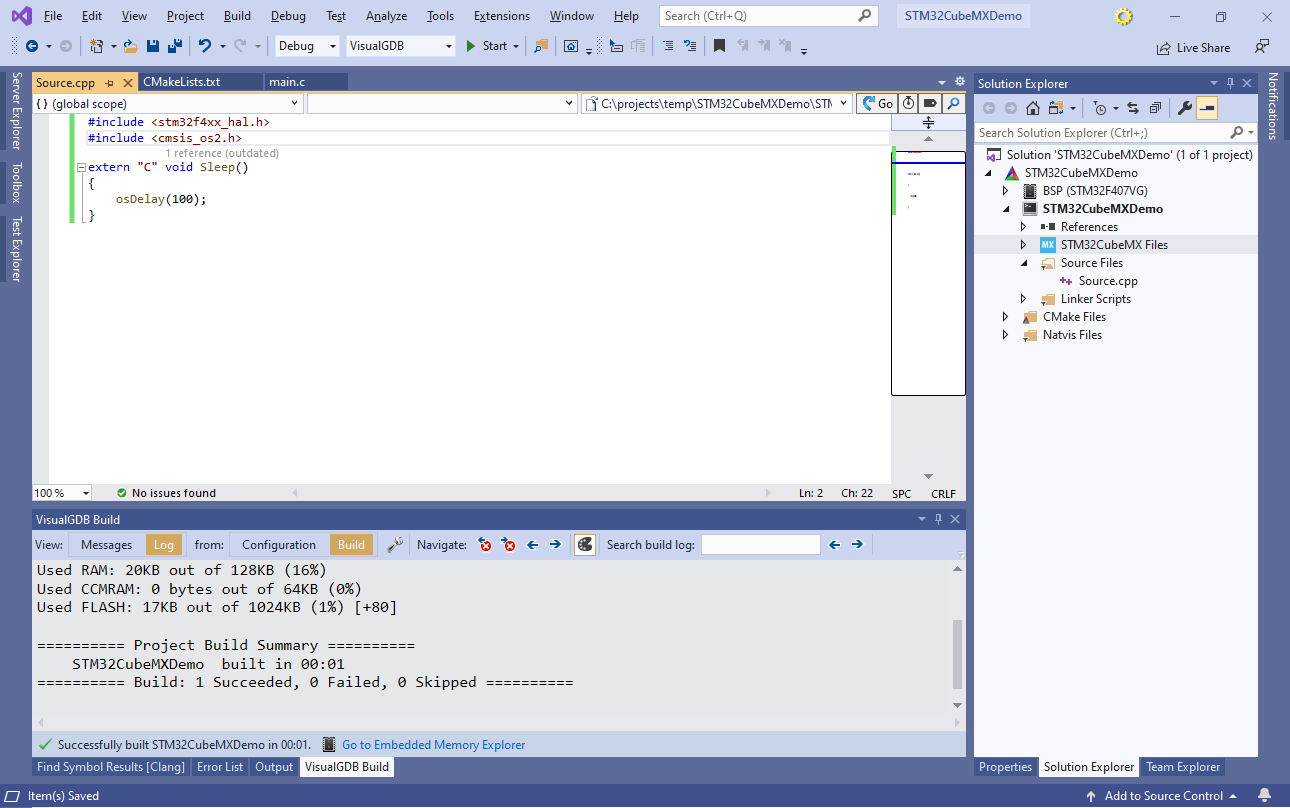
- Add the following code to the newly added file:
#include <stm32f4xx_hal.h>

extern "C" void Sleep()
{
    HAL_Delay(100);
}
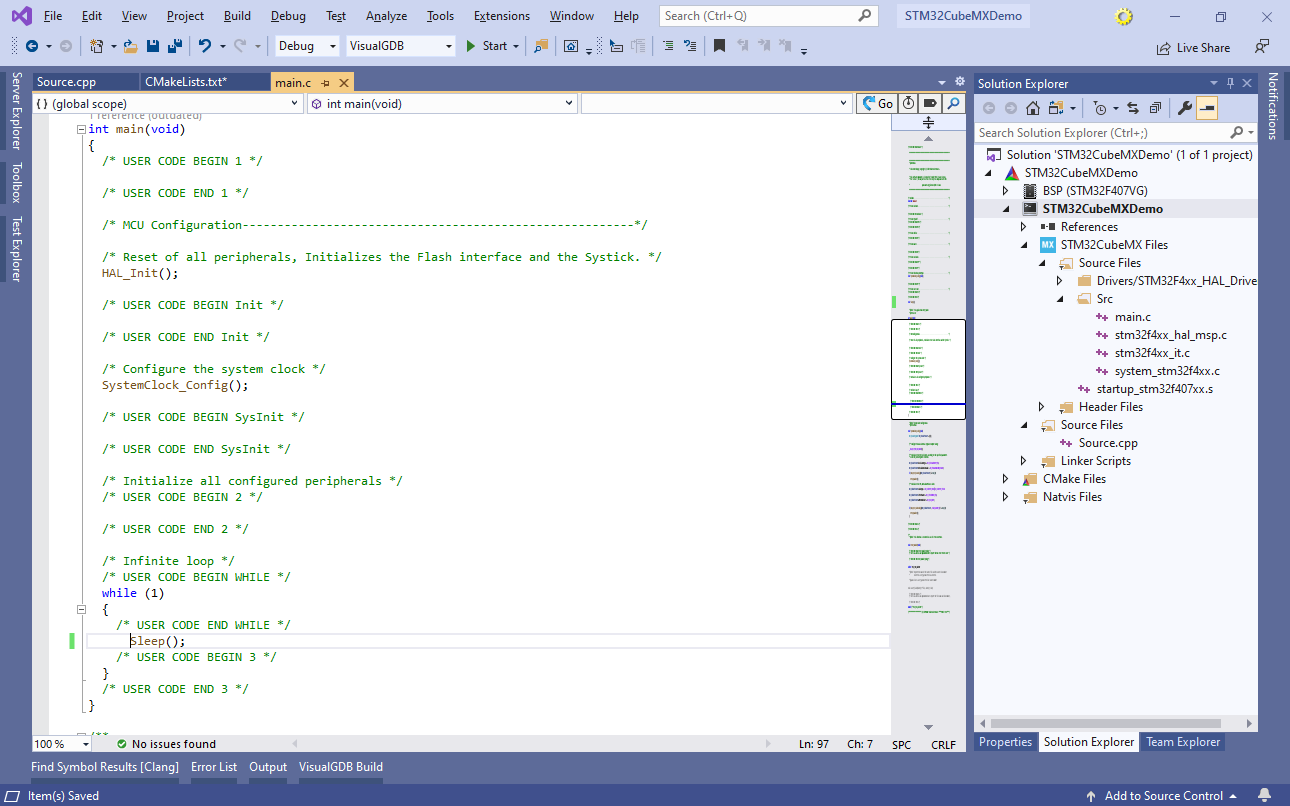
 Note how Source.cpp appears outside of STM32CubeMX Files in Solution Explorer because this file was added explicitly.
 - Update main() to call Sleep() from the while(1) loop:
 You can now try building/debugging the project. The STM32CubeMX-generated main() function will successfully call Sleep().
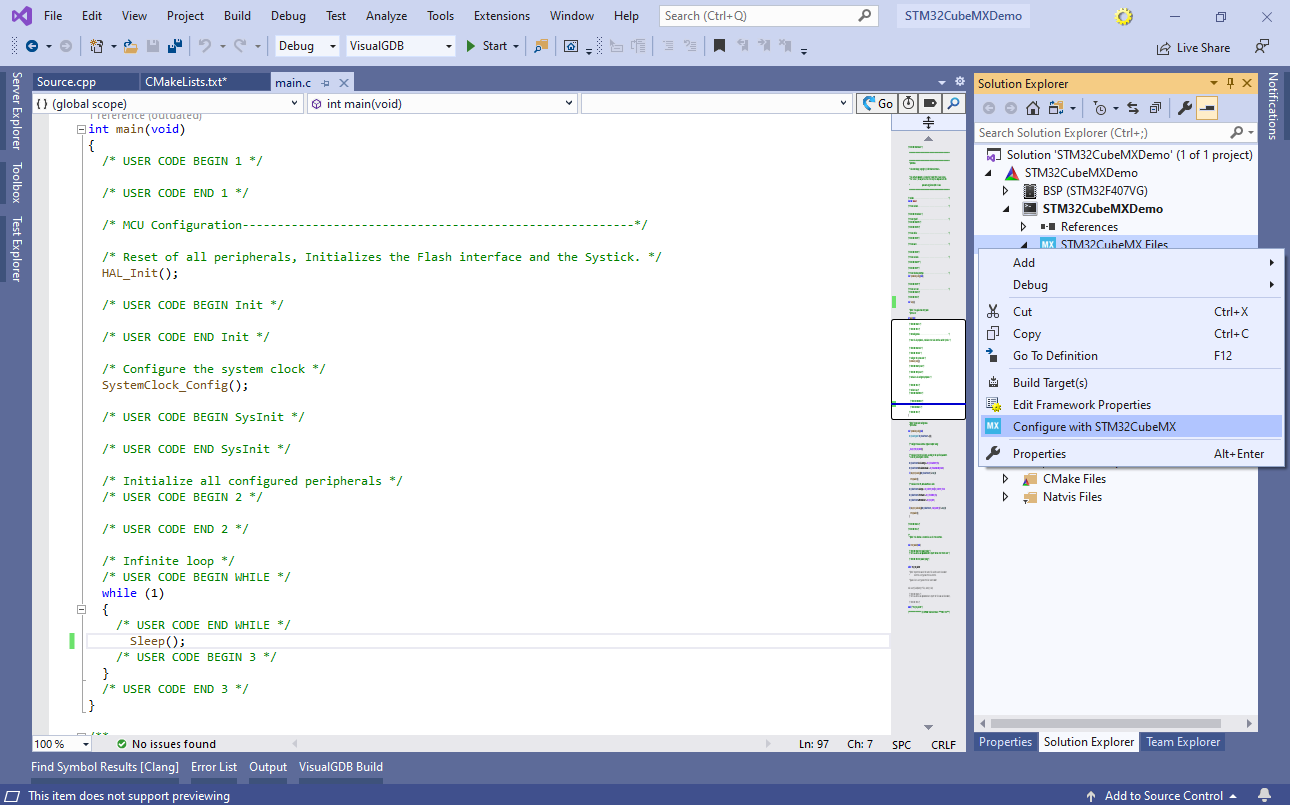
 - Now we will show how to edit the project structure via the STM32CubeMX GUI. Right-click on the STM32CubeMX Files node in Solution Explorer and select “Configure with STM32CubeMX“:
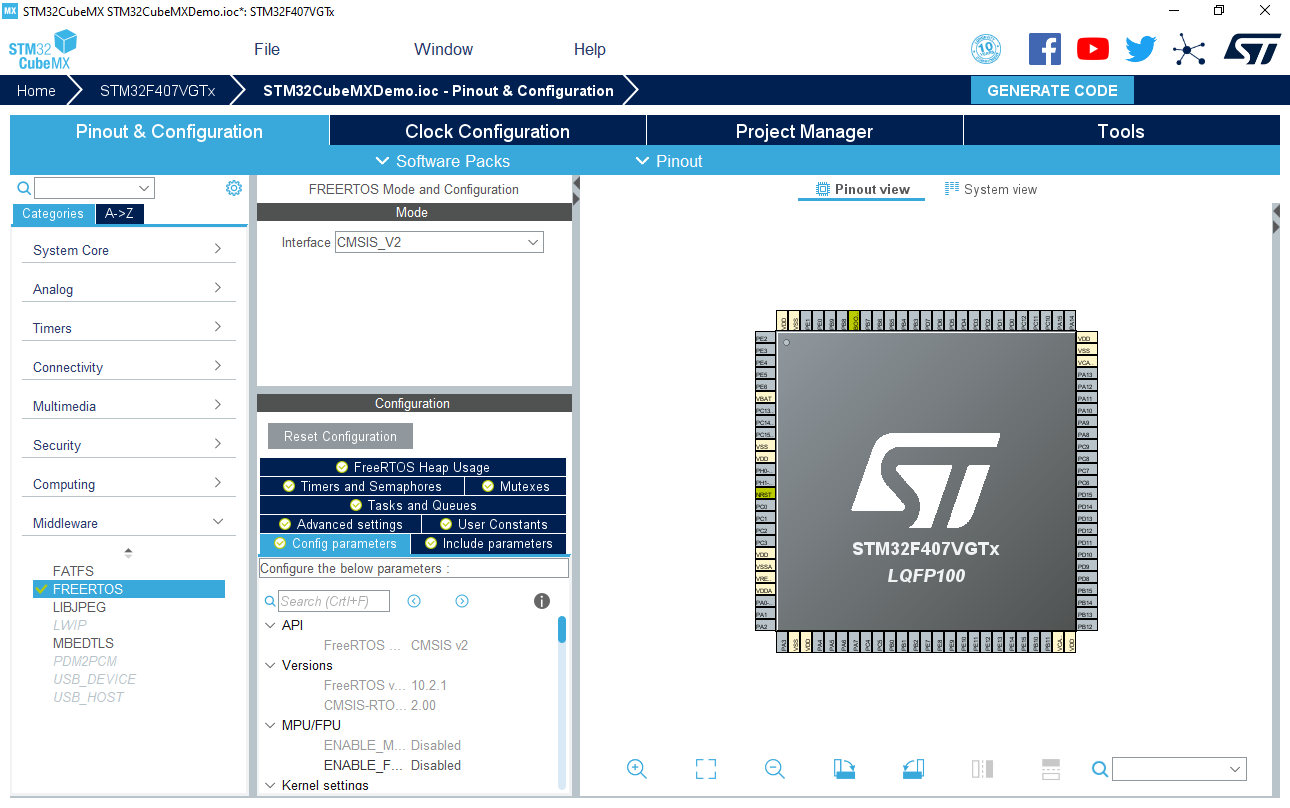
- VisualGDB will launch STM32CubeMX for your project. Go to the Pinout & Configuration view and enable System Core->RCC and SYS. Configure HSE to use a resonator (as long as your board supports it):

- Switch to the Clock Configuration view, enter the resonator speed and set the AHB bus clock to the maximum value supported by your device. STM32CubeMX will automatically compute the PLL parameters required to achieve this speed:

- Close STM32CubeMX while saving changes. There is no need to press “Geenrate Code” as VisualGDB will do it automatically once you exit STM32CubeMX:
 The STM32CubeMX-generated part (e.g. configuring the clock) will be updated, while the user-specific part between the USER CODE labels will be preserved.
 - Now we will show how to switch the project to use FreeRTOS. Launch STM32CubeMX from the context menu again. Reference Middleware->FreeRTOS:
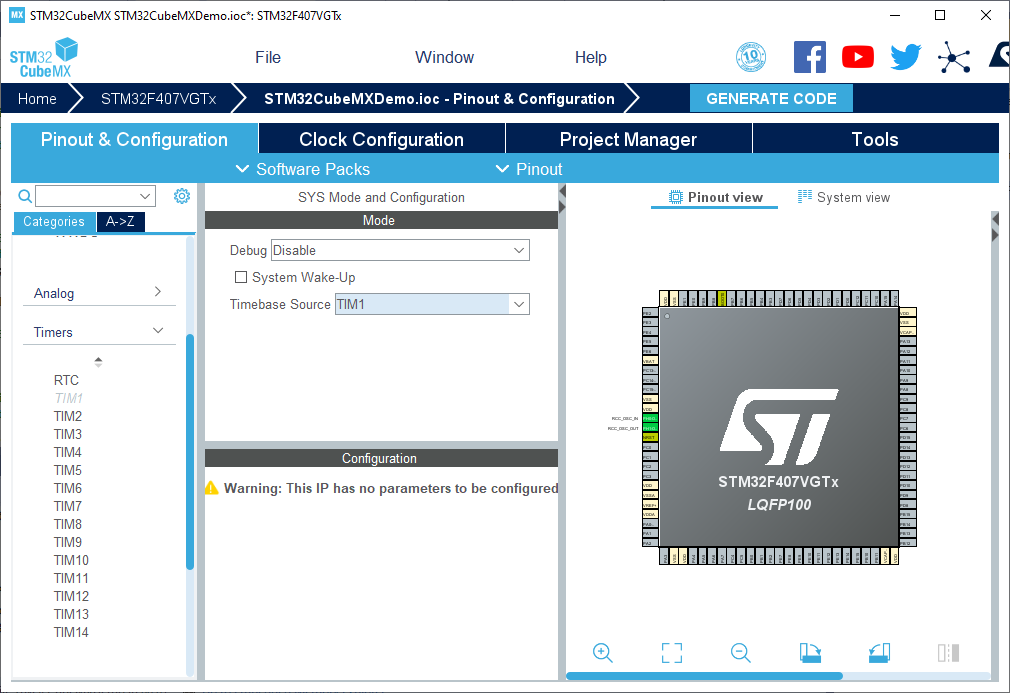
- If STM32CubeMX displays warnings about changing the timebase source, you can configure it as shown below:
- Once you close STM32CubeMX, the project will be automatically updated to reference FreeRTOS. Note that as the main.c file now follows a completely different structure, the changes you made to it will not be preserved. This only happens when switching between incompatible file layouts (e.g. FreeRTOS vs barebone):

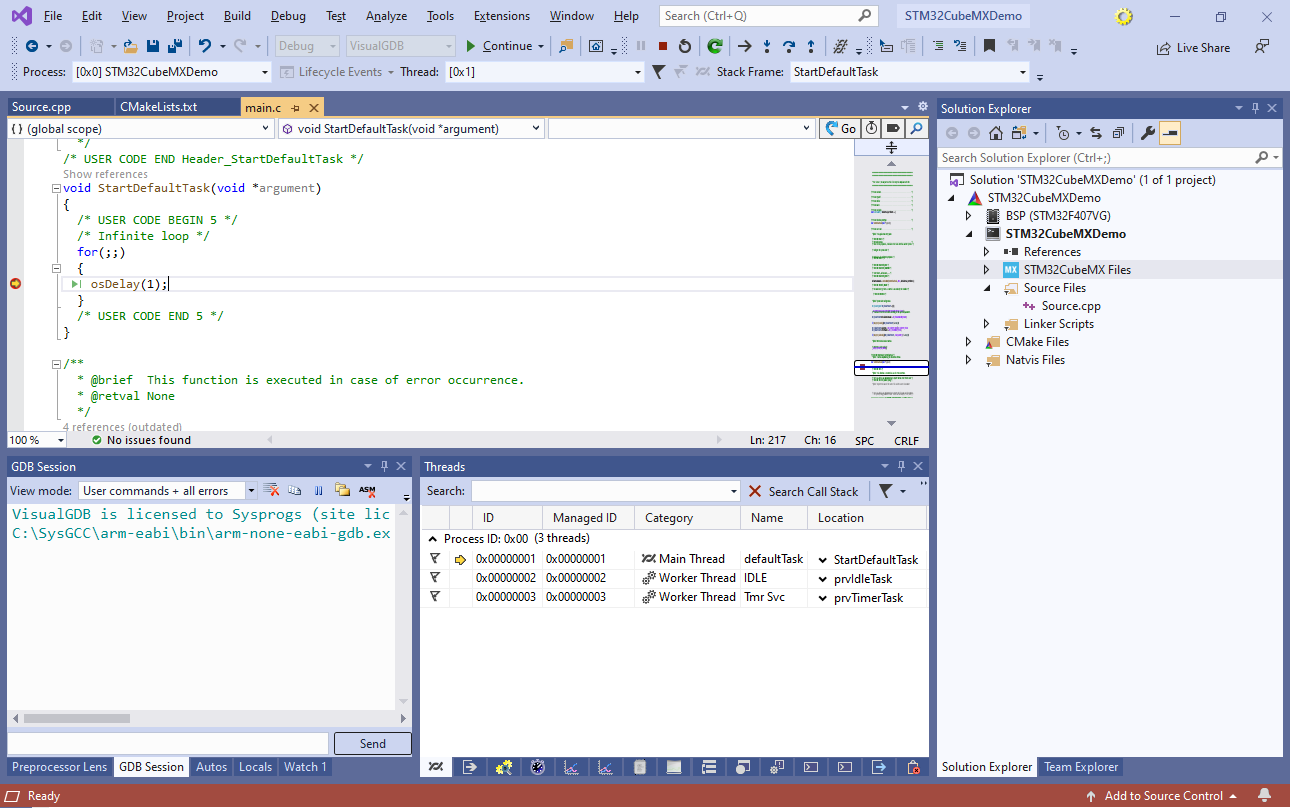
- Locate the StartDefaultTask() function and set a breakpoint in it. See how it calls the osDelay() function from CMSIS:
- Update the Sleep() function we created to also call osDelay():
- Switch StartDefaultTask() to call Sleep() as well:
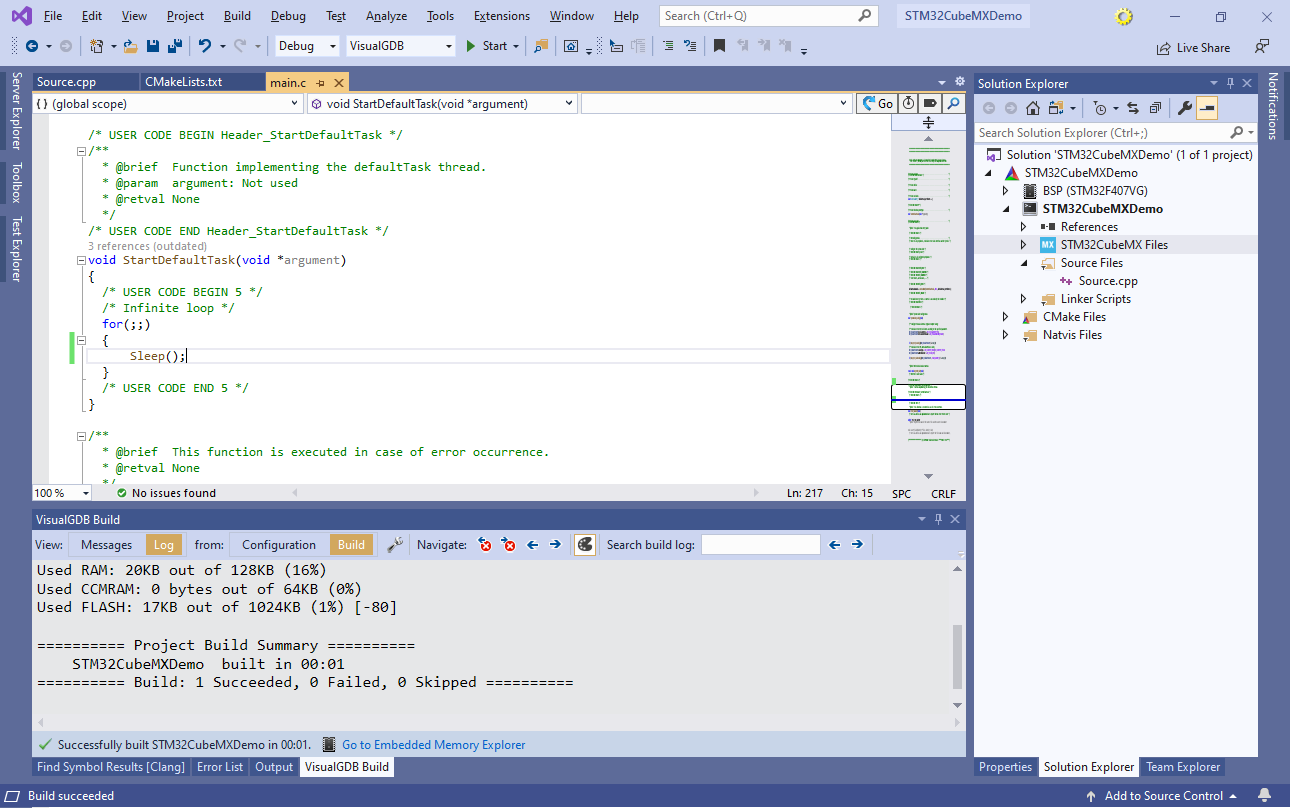
- Now you can build the project and confirm that STM32CubeMX-generated StartDefaultTask() function calls our Sleep() implementation. You can use Embedded Memory Explorer to observe the FLASH and RAM utilization by various parts of the project:
