Debugging Initialization Code of Multi-Core STM32H7 Devices
This tutorial explains the initialization process of the multi-core STM32H7 devices and shows how to reliably debug both cores using VisualGDB.
In this tutorial we will clone the OpenAMP demonstration project for the STM32H7-Discovery board, will show how both cores are initialized and how to reliably debug them.
Before you begin, install VisualGDB 5.5 Preview 3 or later.
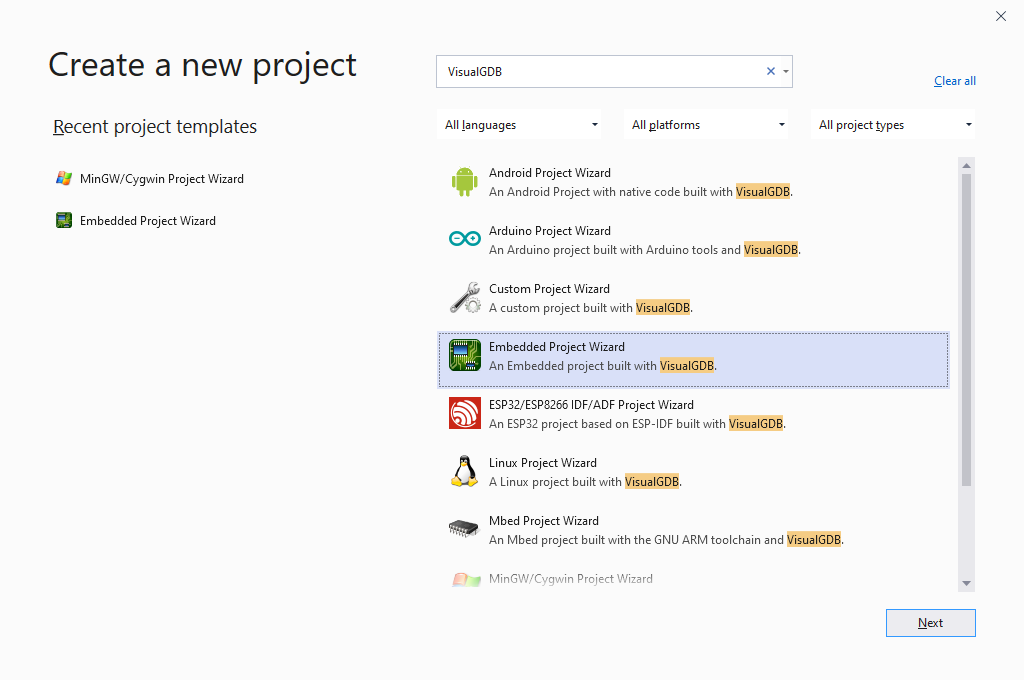
- Start Visual Studio and open the VisualGDB Embedded Project Wizard:
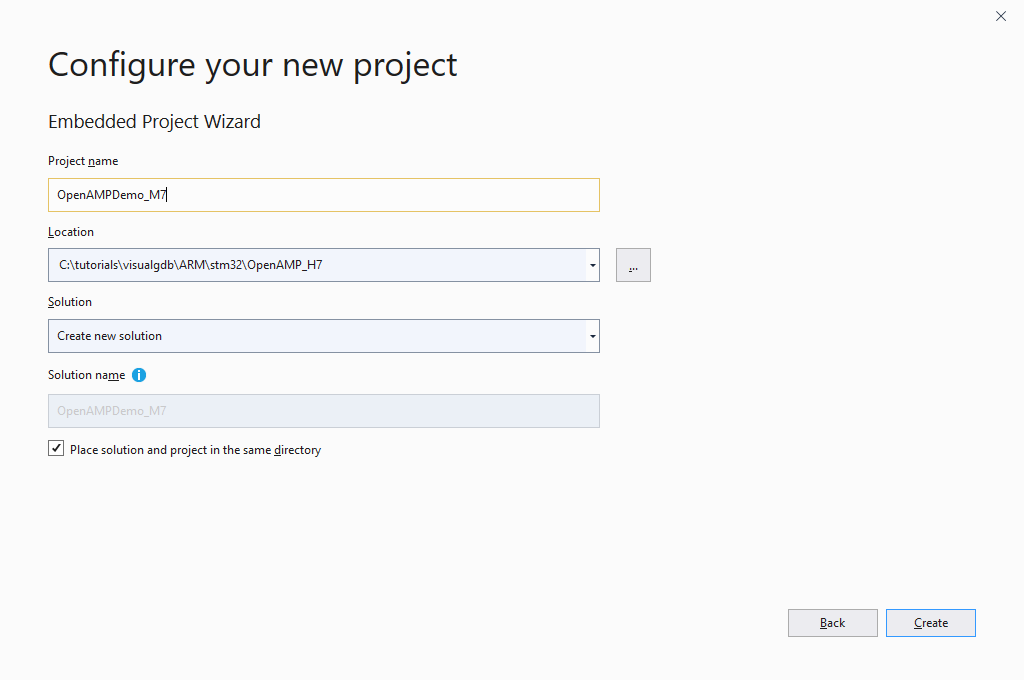
- Specify the name and the location for the project targeting the Cortex-M7 core. Note that we will create another project targeting the Cortex-M4 core later:
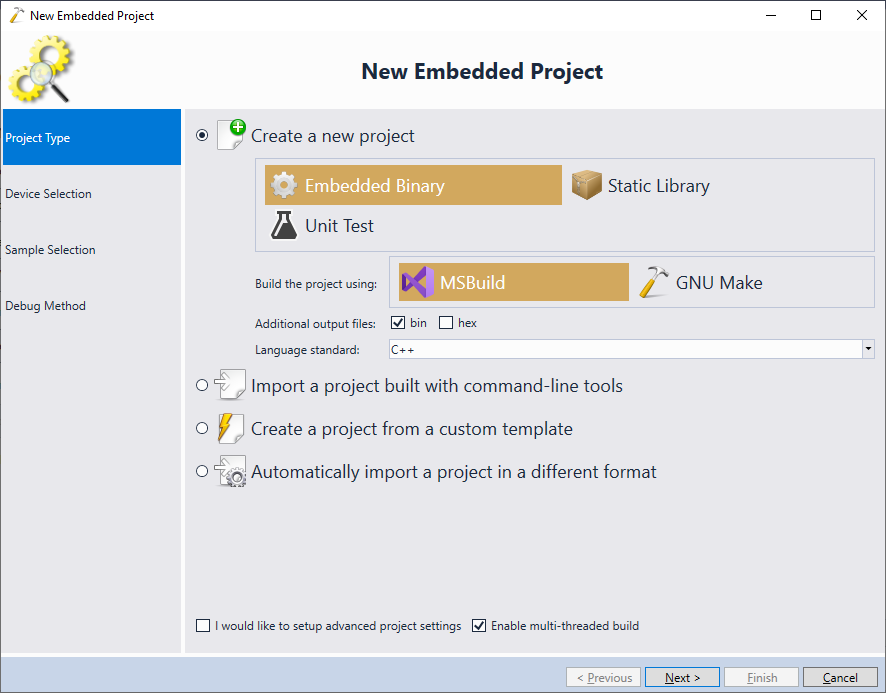
- Proceed with creating the project based on MSBuild:
- On the Device Selection page pick the Cortex-M7 core of your STM32H7 device (the one that does not have the _M4 suffix):

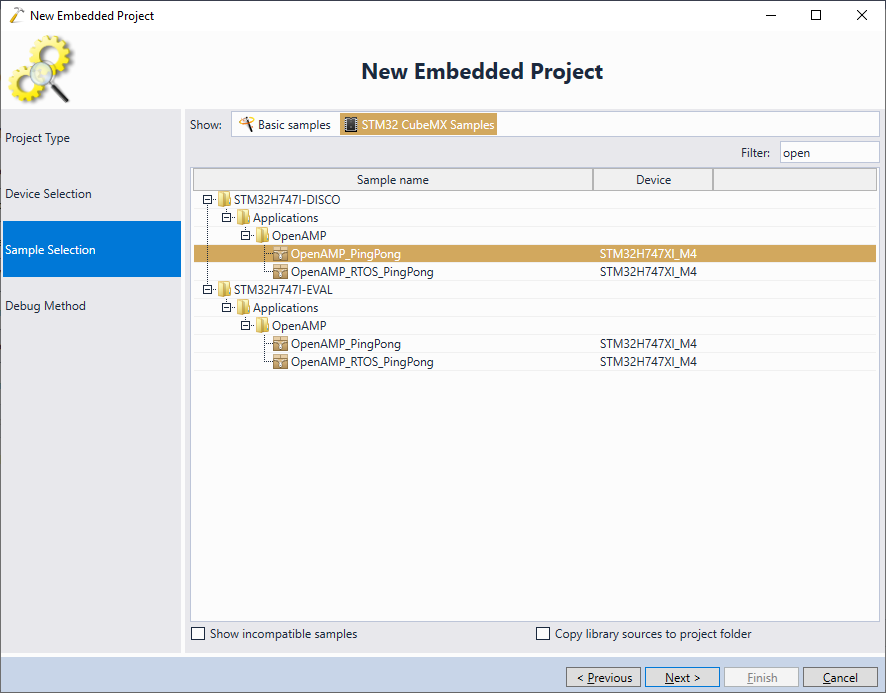
- On the Sample Selection page switch to the “STM32CubeMX Samples” view and pick the OpenAMP_PingPong example:
 Double-check that the “Device” column does not have the _M4 suffix.
 - Connect your board to the USB port and let VisualGDB recognize it. Ensure that the “Debugged Core” option has “Cortex-M7” selected:
 For optimal debugging experience, we recommend selecting the ST fork of OpenOCD.
 - Press “Finish” to create the project. Once it is generated, open another Visual Studio instance and create a project for the Cortex-M4 core of the same chip (STM32H7xxxx_M4 variant on the Device Selection page) and make sure you select the same sample on the Sample Selection page:
 Note that the “Device” column should now show the _M4 variant.
 - Select the Cortex-M4 core on the Debug Method page and click “Finish” to generate the second project:
 Also make sure the “reset device before/after programming” checkboxes are not set for the Cortex-M4 core.
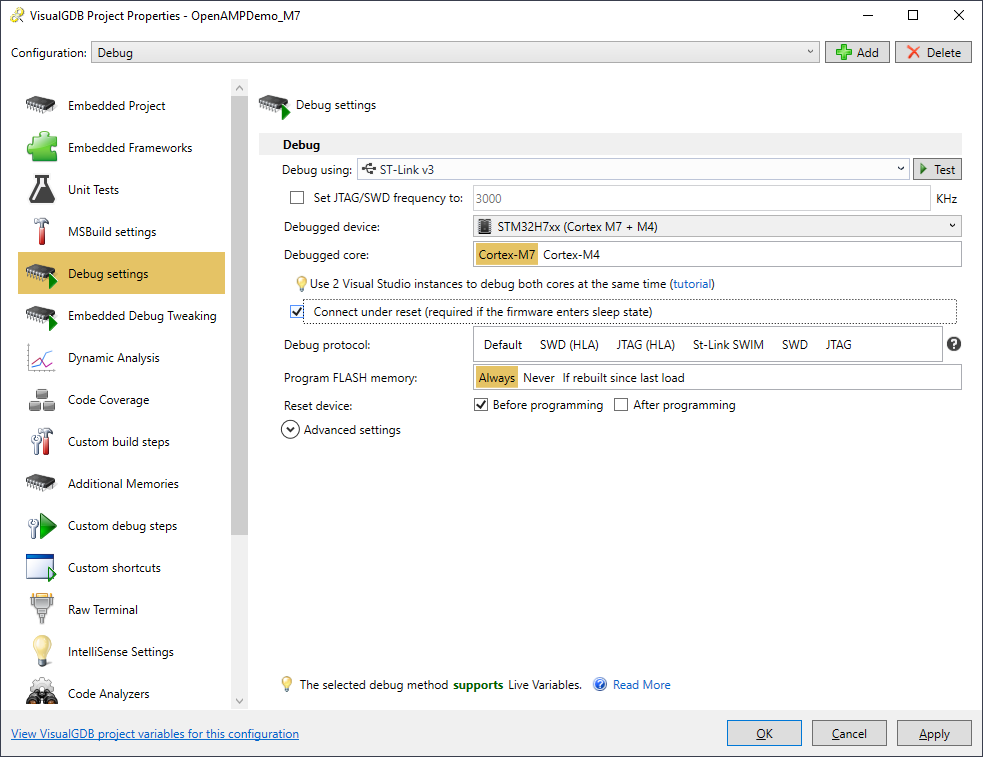
 - Now we will try debugging both projects. First launch the one corresponding to the Cortex-M7 core. If it doesn’t start correctly, try setting the “Connect under reset” checkbox in the VisualGDB Project Properties:
- Once the Cortex-M7 core starts, begin debugging the Cortex-M4 project by pressing F5 in the second Visual Studio instance. Most likely, the project will immediately stop, reporting a breakpoint at the address 0xa05f0000:

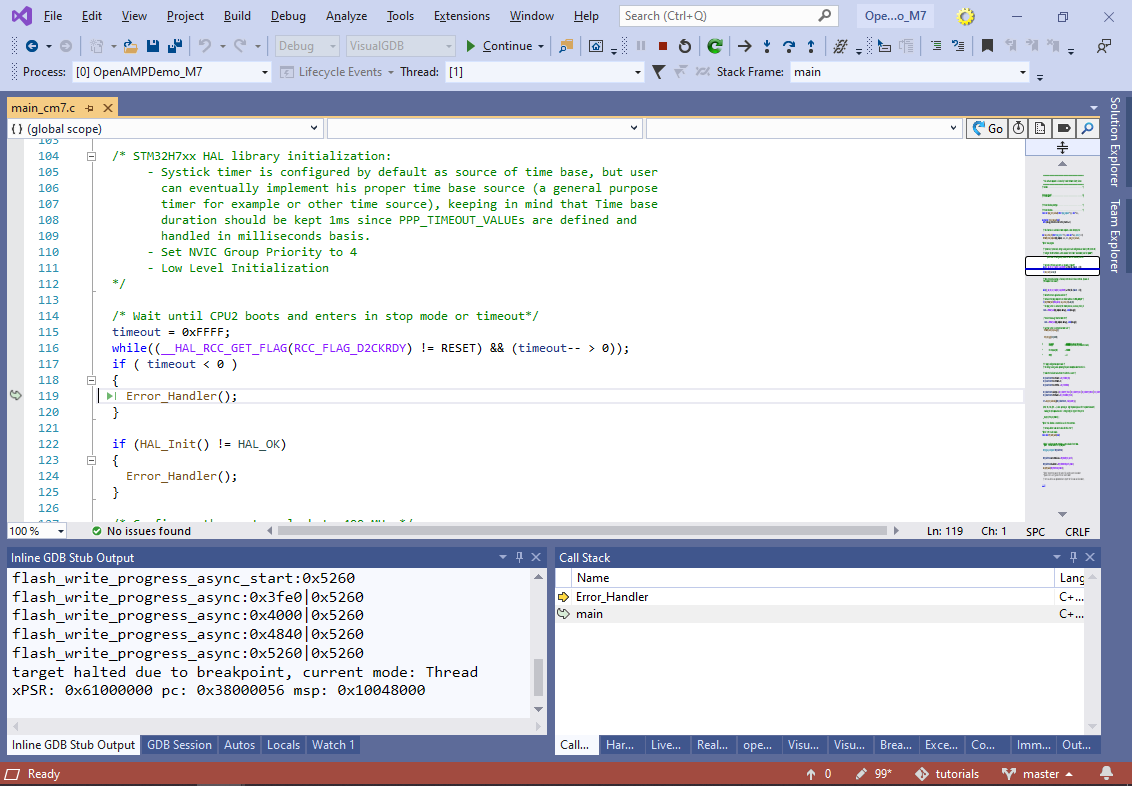
- If you stop the Cortex-M7 core via the Debug->Break All command in the first Visual Studio instance, you will see that it has encountered an error at the beginning of the initialization:
- In order to understand what is going on, take a note of the initialization code in the beginning of the Cortex-M4’s main() function:
  /*HW semaphore Clock enable*/
  __HAL_RCC_HSEM_CLK_ENABLE();
  /*HW semaphore Notification enable*/
  HAL_HSEM_ActivateNotification(__HAL_HSEM_SEMID_TO_MASK(HSEM_ID_0));

  /* When system initialization is finished, Cortex-M7 will release Cortex-M4  by means of
  HSEM notification */
  HAL_PWREx_ClearPendingEvent();
  HAL_PWREx_EnterSTOPMode(PWR_MAINREGULATOR_ON, PWR_STOPENTRY_WFE, PWR_D2_DOMAIN);
The Cortex-M4 core enables the inter-core notification mechanism and then stops itself, waiting for the Cortex-M7 core to wake it up. This is done to avoid accessing any peripherals before they have been fully initialized by the Cortex-M7 core. The OpenOCD tool reports the “Core powered down” event as a stop at address 0xa05f0000.
- The initialization code for he Cortex-M7 core expects the Cortex-M4 core to enter the sleep mode, however that check is designed to time out after 64K iterations:
  timeout = 0xFFFF;
  while((__HAL_RCC_GET_FLAG(RCC_FLAG_D2CKRDY) != RESET) && (timeout-- > 0));
  if ( timeout < 0 )
  {
    Error_Handler();
  }
When both cores are started without a debugger, the default initialization logic will work as expected: the Cortex-M4 core will power itself down, then the Cortex-M7 core will initialize the peripherals and finally wake up the Cortex-M4 core. However, if the Cortex-M4 core is not started immediately after the Cortex-M7 core (which is the case when using the debugger), the Cortex-M7 initialization will fail with an error.
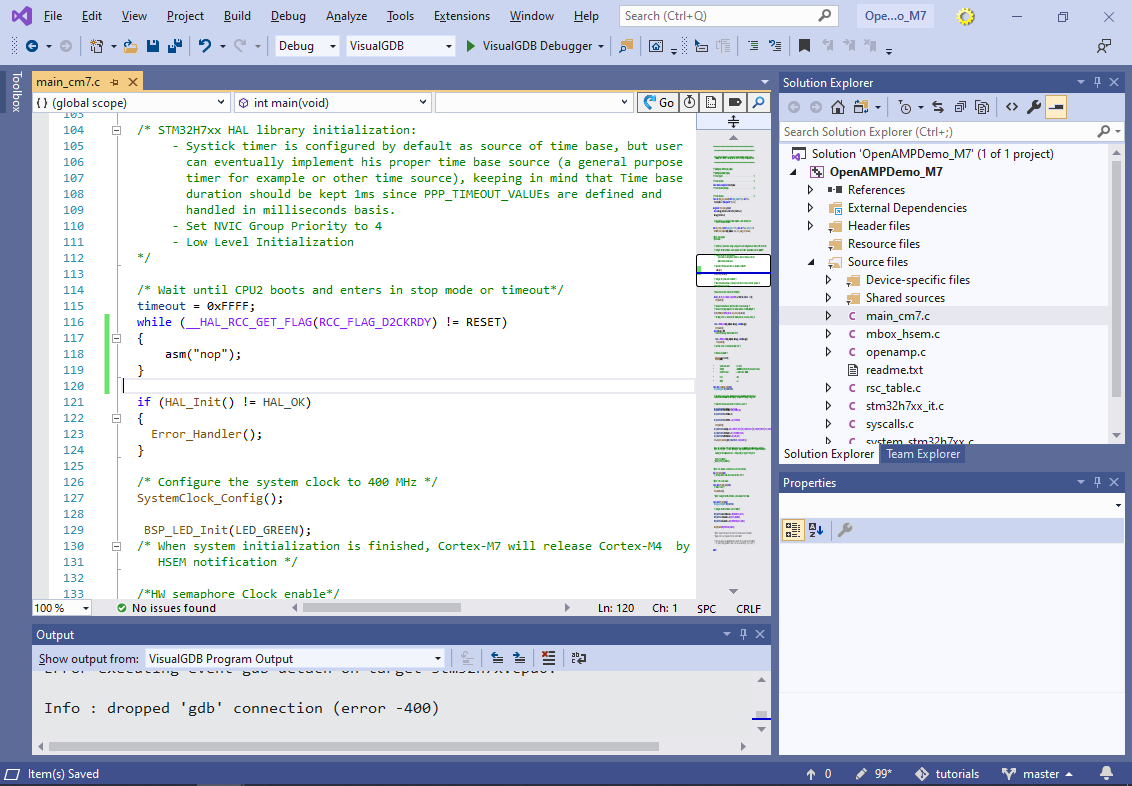
- In order to work around this, modify the Cortex-M7 initialization code to wait for the Cortex-M4 powerdown indefinitely:
  while (__HAL_RCC_GET_FLAG(RCC_FLAG_D2CKRDY) != RESET)
  {
      asm("nop");
  }
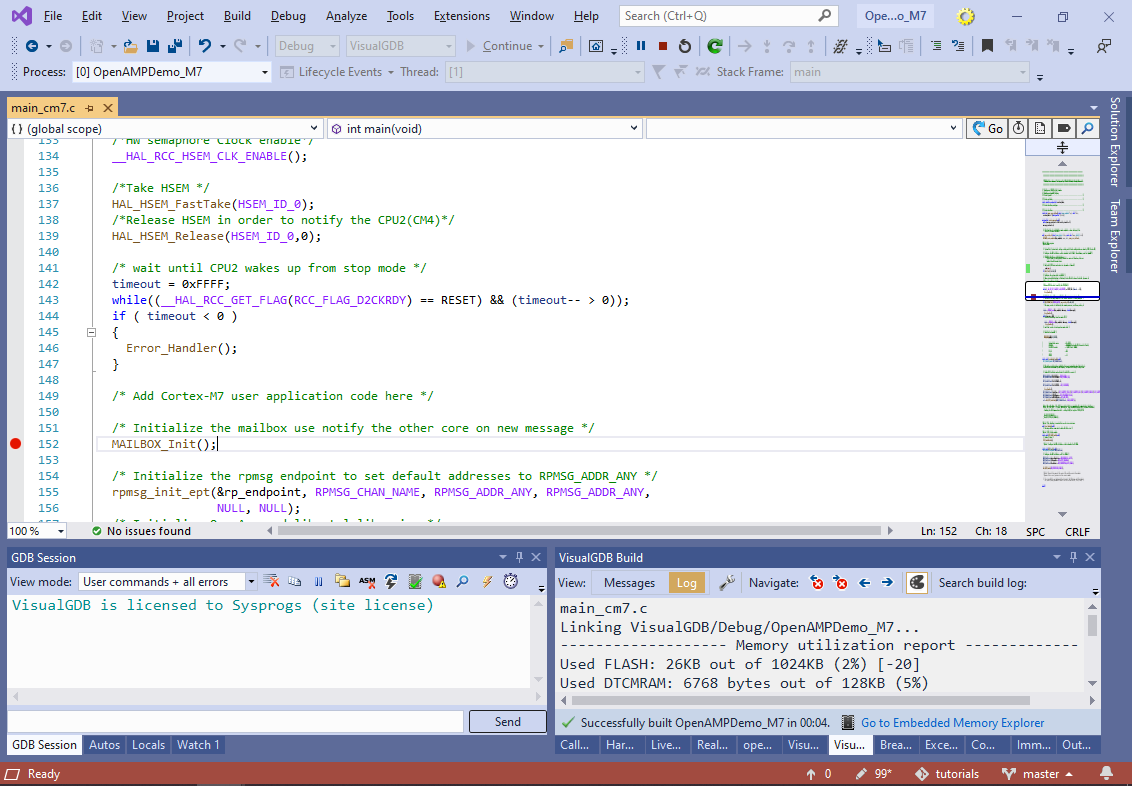
- Now you will be able to debug both cores at the same time. Set a breakpoint in the Cortex-M7 project at the MAILBOX_Init() call (after the Cortex-M7 core resumes the Cortex-M4 one) and start the M7 project:
- Set a breakpoint at the MAILBOX_Init() call in the Cortex-M4 project and launch it as well. Now both breakpoints will hit:
 WARNING! If the Cortex-M7 core stops in debugger while the Cortex-M4 core is powered down, OpenOCD might interpret it incorrectly and act as if M4 was stopped at an unknown location. If you encounter this behavior, try resuming debugging until both cores are running.
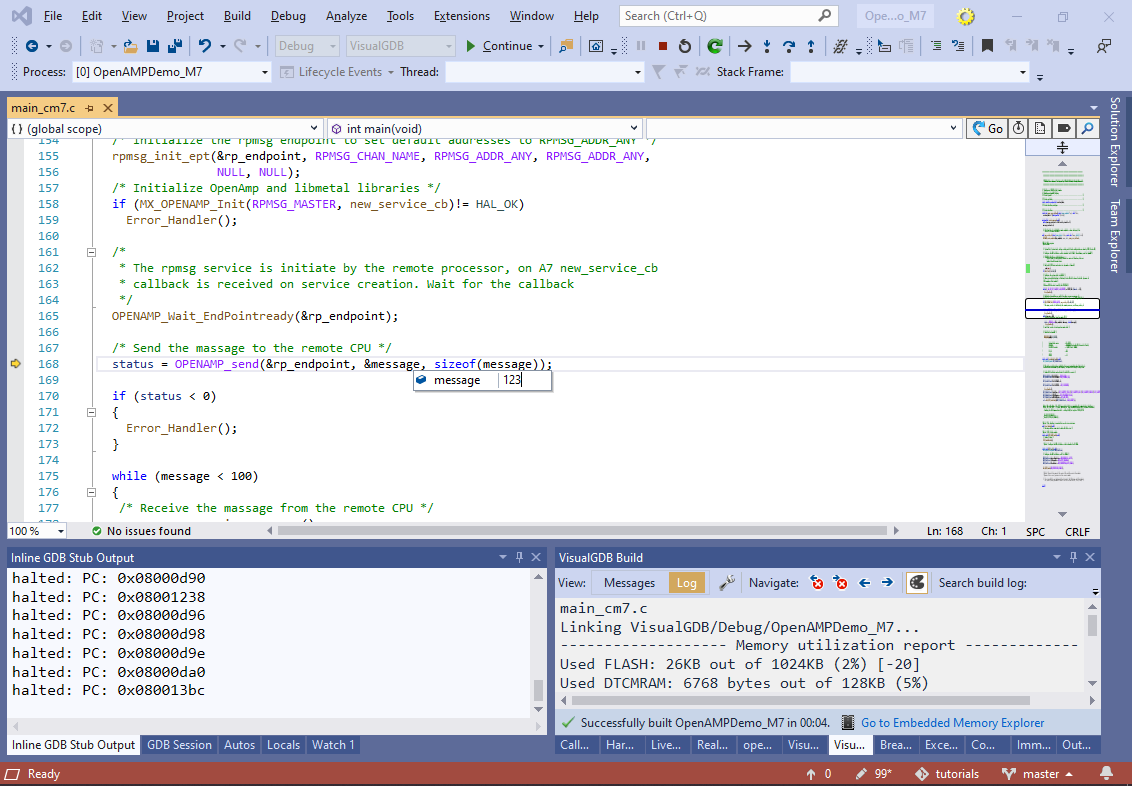
 - You can now debug both cores independently (each Visual Studio instance will debug one of the cores). E.g. try setting a breakpoint before the first call to OPENAMP_send() in the Cortex-M7 project, change the value of the message, and step over the send call:
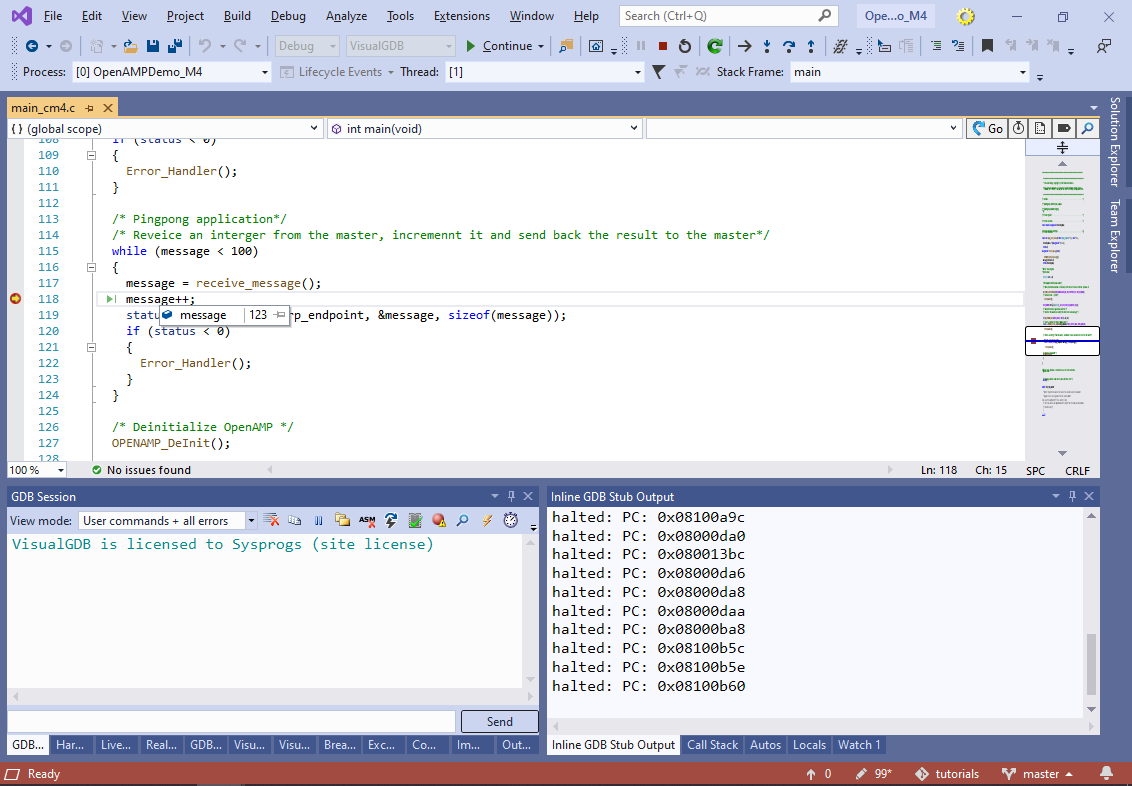
- The Cortex-M4 project will receive the modified message as expected:
If you are planning to explore other project examples for the multi-core STM32H7 devices, always remember to create both Cortex-M7 and Cortex-M4 projects. Programming just the Cortex-M7 part (while keeping the Cortex-M4 logic from the previous project) may lead to unpredictable behavior.
To facilitate multi-core debugging, we recommend removing the timeout check from the Cortex-M7 initialization logic in the debug builds of your projects, as we have done in this tutorial.