Debugging the ARM Cortex-M4 Core of the STM32MP1 Devices
This tutorial shows how to create a basic project for the Cortex-M4 core of the STM32MP1 device and debug it via the on-board ST-Link device in both engineering and production modes. We will create a basic “Blinking LED” project using Visual Studio and VisualGDB and will show how to upload it to the STM32MP1 device and debug it. Before you begin, ensure you have VisualGDB 5.4R11 or later installed.
- Start Visual Studio and open the VisualGDB Embedded Project Wizard:

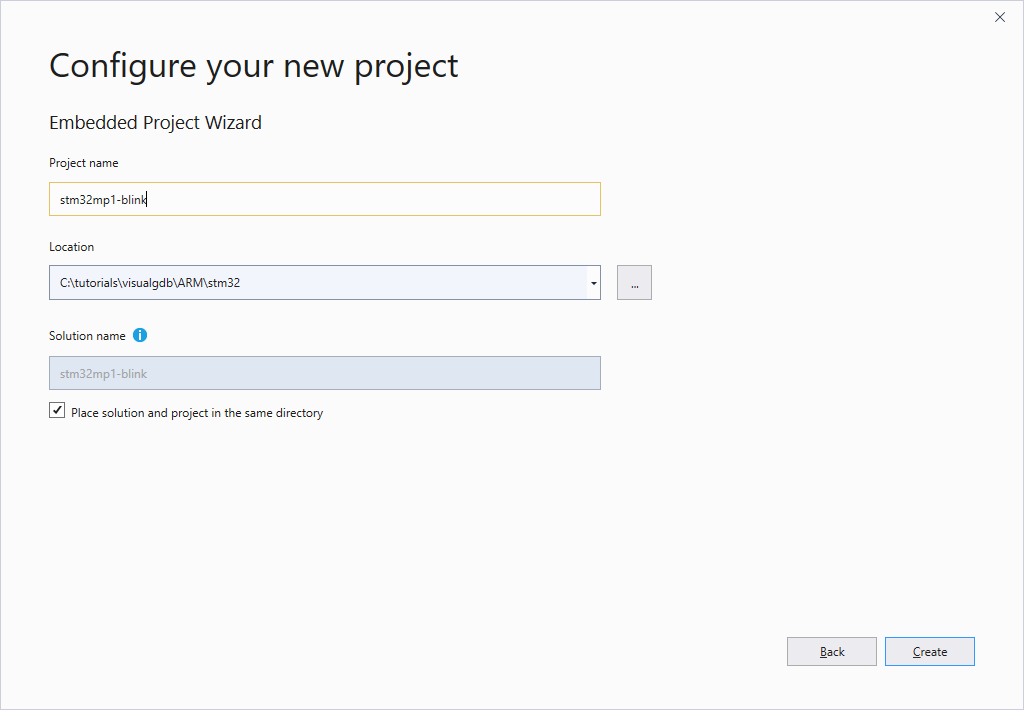
- Specify the location and the name for the project that is going to be created:
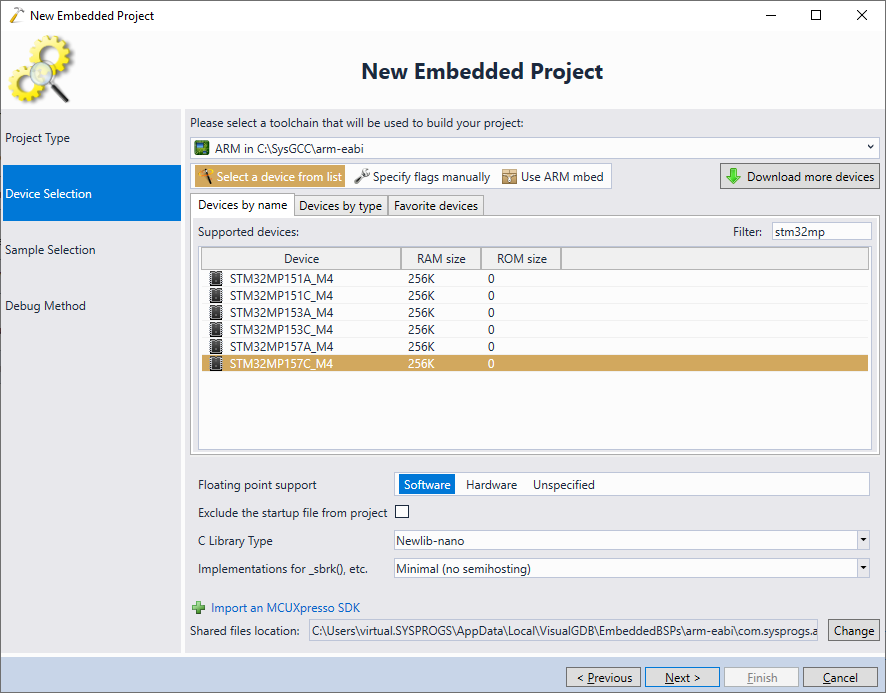
- Proceed with the default settings on the first page of the VisualGDB’s wizard and click “Next” to go the next page:

- On the Device Selection page choose the ARM toolchain and select your STM32MP1 device from the list. If you have not created STM32MP1 projects before, click the “Install” button to automatically download the necessary files to your computer:
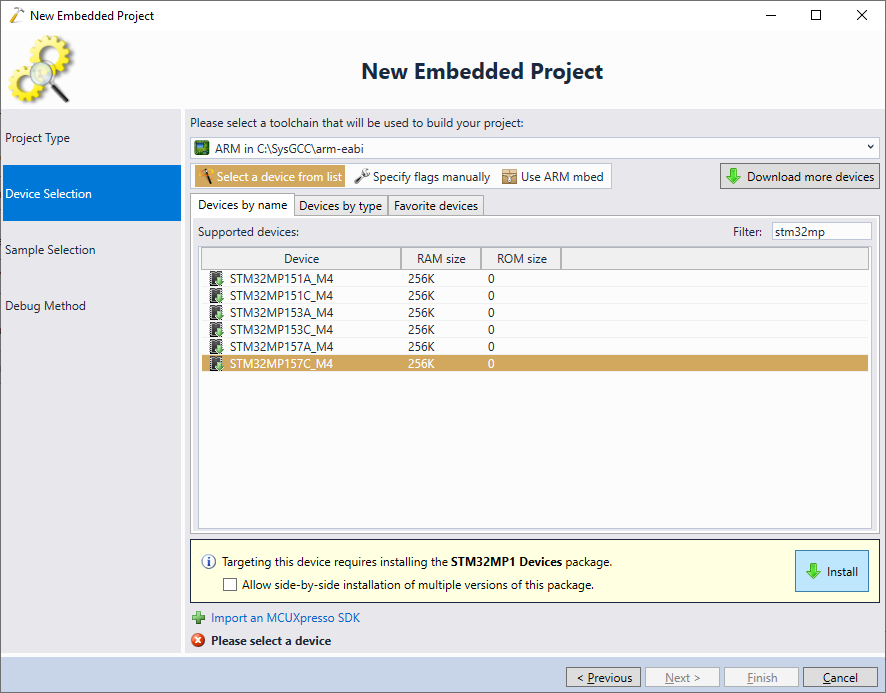
- In this tutorial we will use the STM32MP157C-DK2 board, hence we select the STM32MP157C device. If you are using a different board, select the device that matches your board:
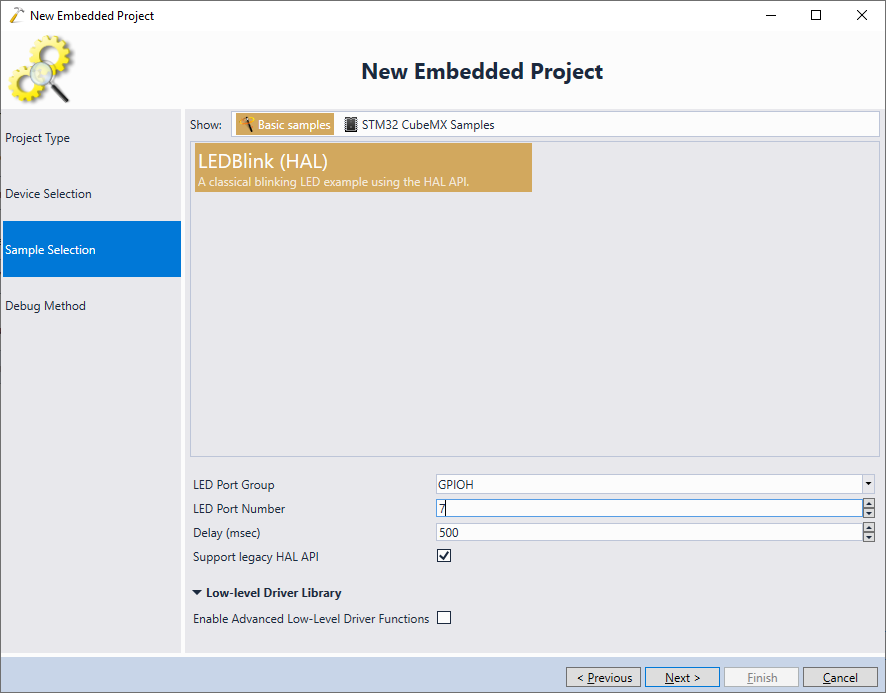
- On the next page select the default “LEDBlink” example and pick the GPIO group and pin where the LED is connected. On the STM32MP157C-DK2 board the LED is connected to GPIOH7:
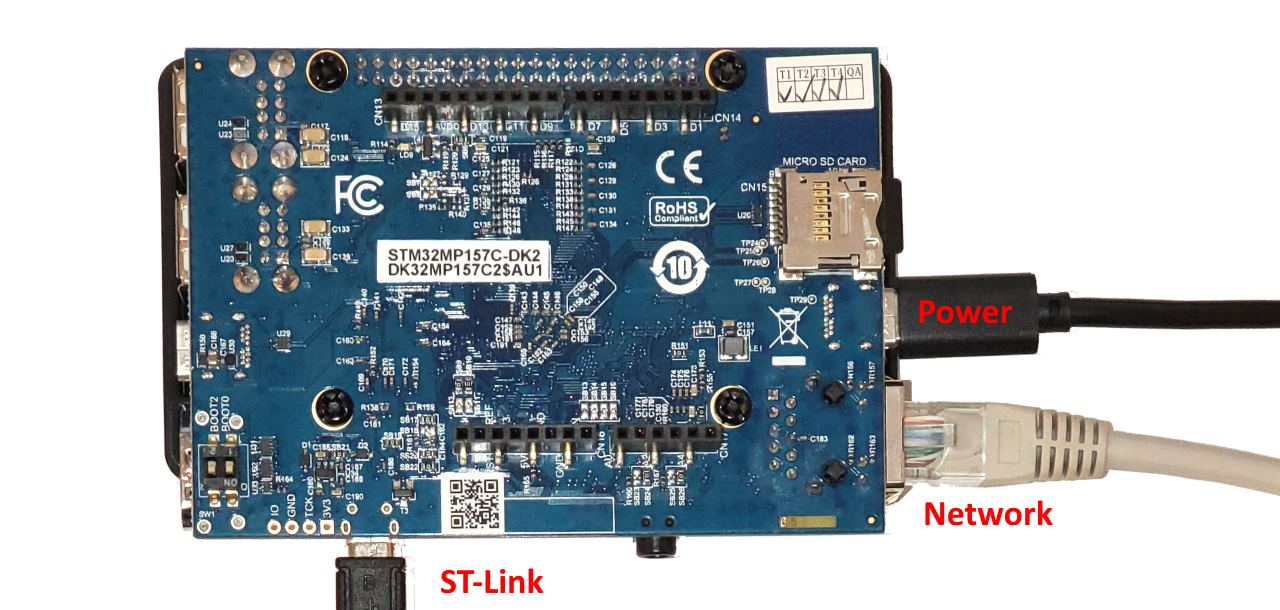
- Switch the board into engineering mode via the boot jumpers and connect the power and ST-Link USB connectors as shown below:
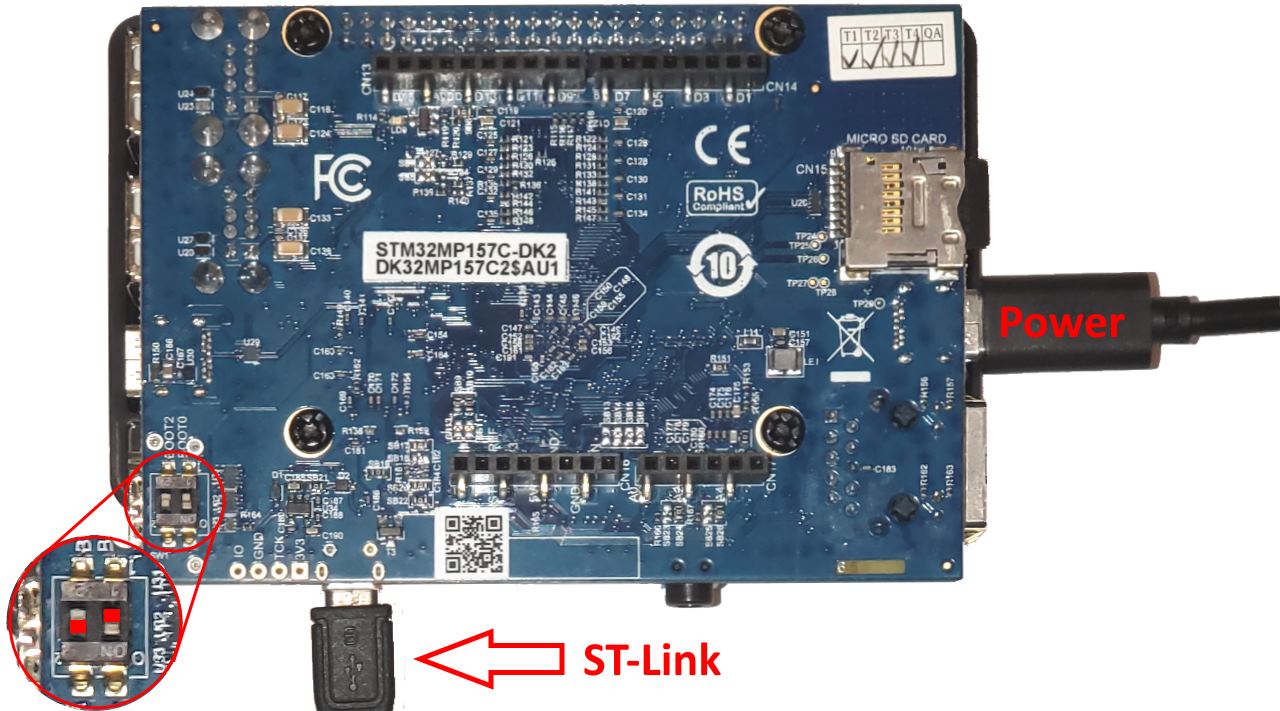
- In engineering mode, the Cortex-M4 core will be automatically started once you power the board and the Cortex-A core will not run the regular SD card boot process. This allows quickly prototyping Cortex-M4 firmware without configuring the Linux-level settings (we will show those settings later in the tutorial). Ensure ST-Link is detected on the Debug Method page of the VisualGDB’s project wizard and select “STM32MP1xx (Engineering Mode)” as the debugged device:
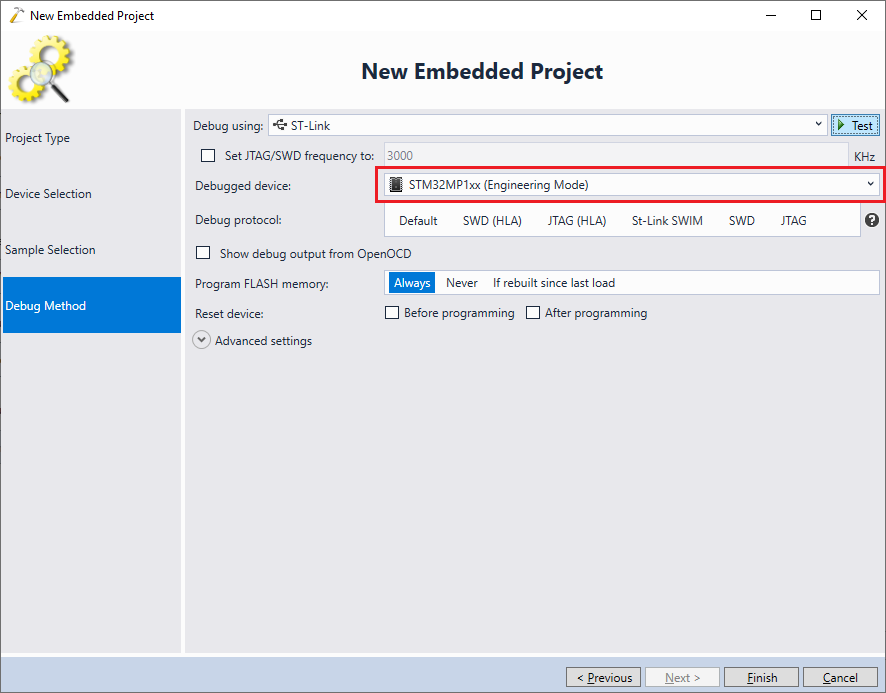
- Press the “Test” button to verify the JTAG connection to the board. As the Cortex-A core is suspended in engineering mode, VisualGDB will display a warning about the registers having zero values (that would normally imply a JTAG issue). Ignore the warning and press “Finish” to create the project:

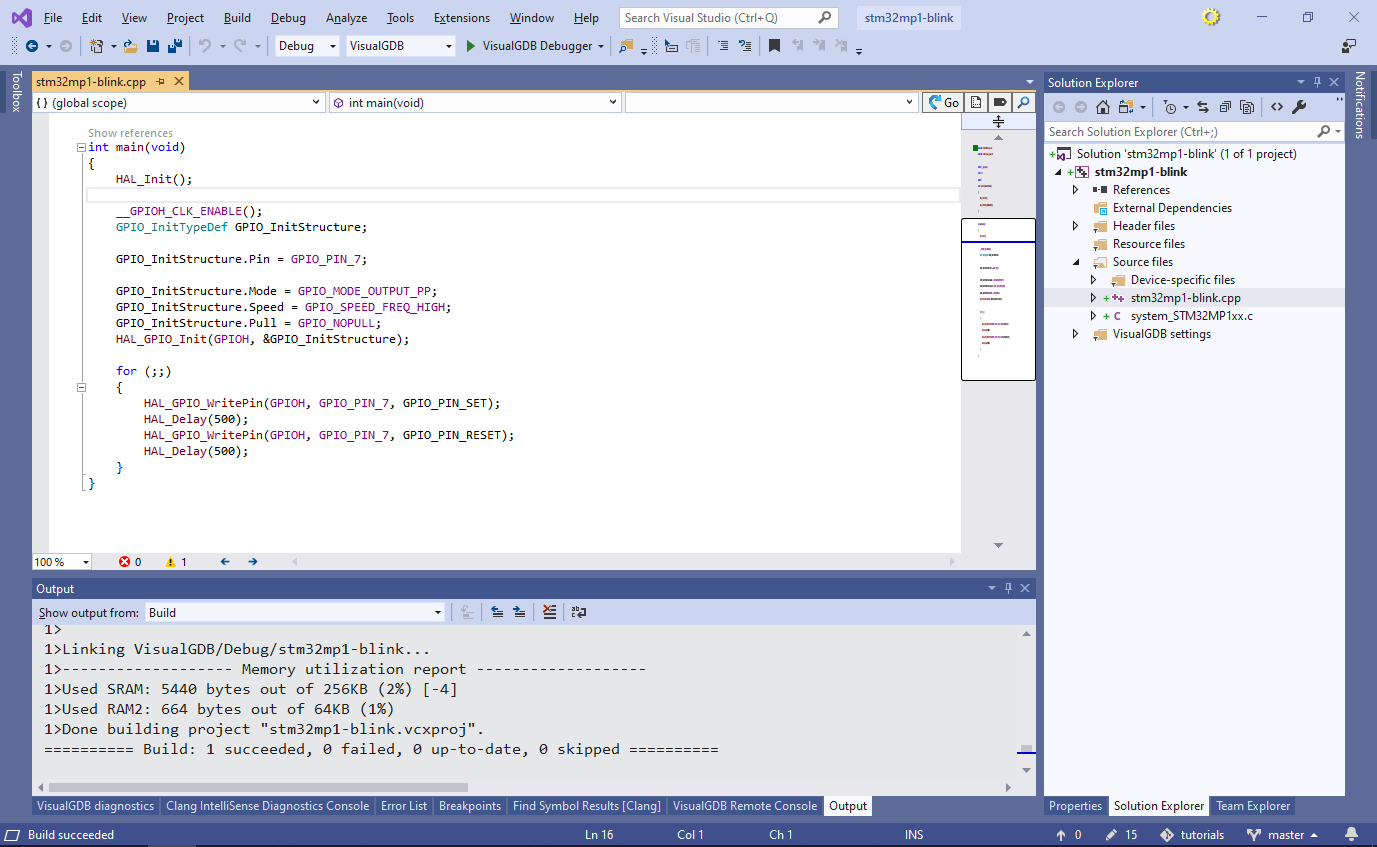
- Once the project is created, build it by pressing Ctrl-Shift-B:
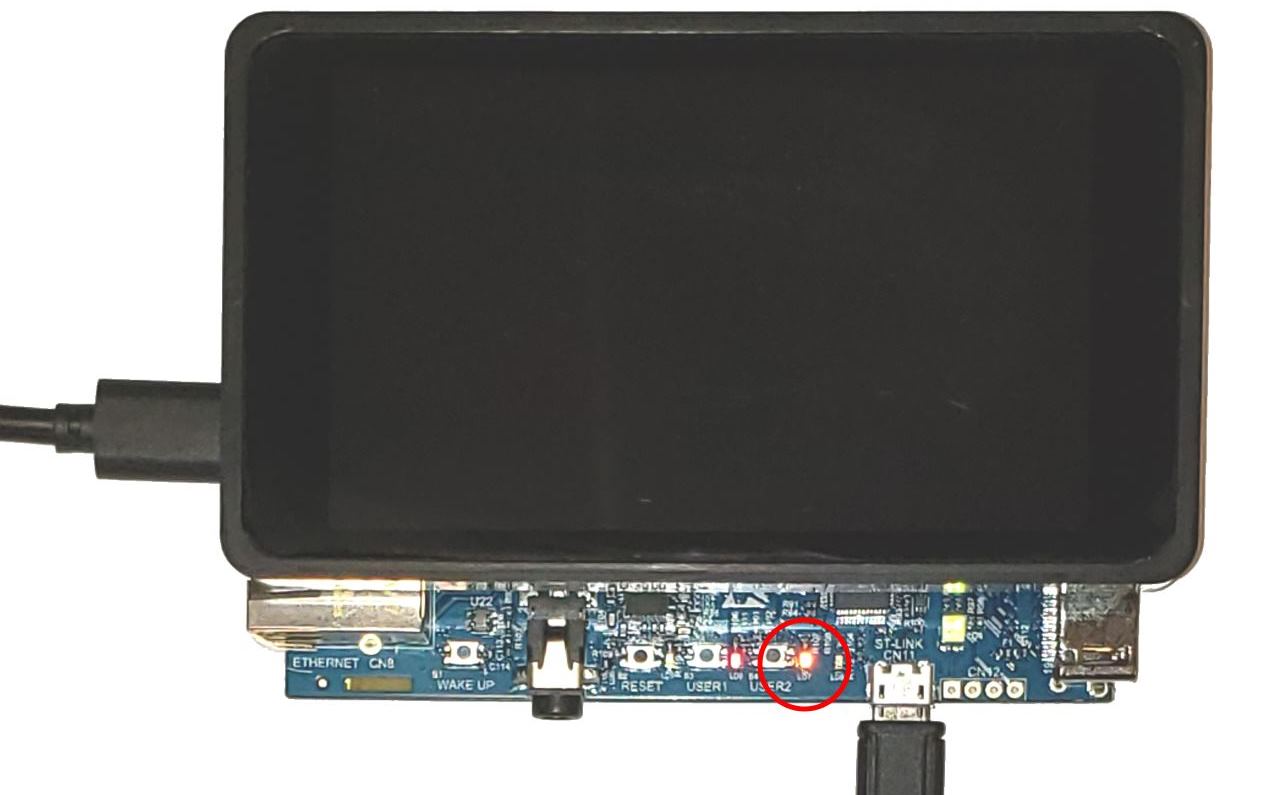
- Press F5 to start debugging. Observe how the on-board LED begins to blink:
- Set a breakpoint inside the loop in main() and wait for it to trigger. Once the debugging session stops at the breakpoint, you will be able to step through the code and evaluate variables as usual:

- Now we will show how to control the STM32MP1’s Cortex-M4 core from the Linux running on the Cortex-A core and how to debug this setup. First of all, switch the board’s boot jumpers back to the default state, plug in the network connector and wait for the board to boot the Linux:
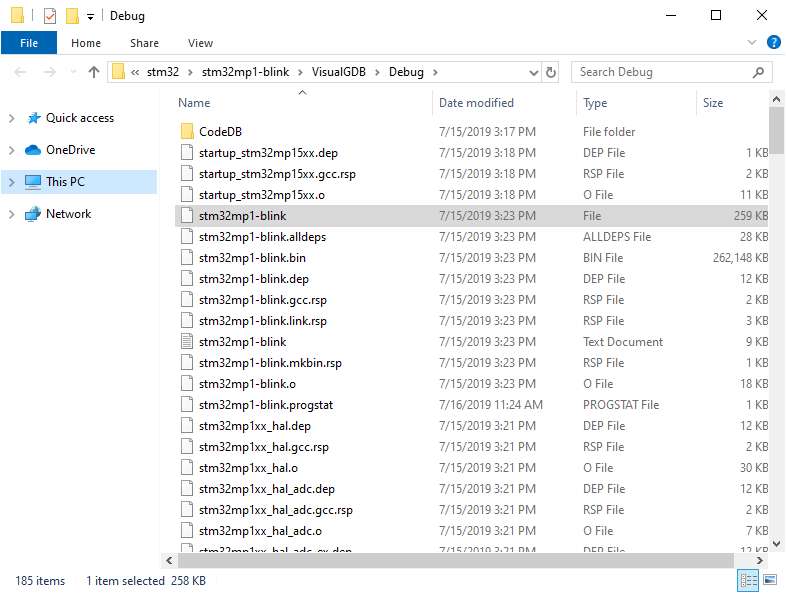
- Locate the ELF file produced by VisualGDB (it will normally be located under <Project folder>\VisualGDB\Debug\<Project Name> and will have no extension):
- Upload the file into the /lib/firmware folder on your STM32MP1 board (you can use SmarTTY to do this via a simple drag-and-drop). Then you will be able to use the following commands to control the Cortex-M4 core from the Linux running on the Cortex-A core:
Action Command Stop and disable the Cortex-M4 core echo stop > /sys/class/remoteproc/remoteproc0/state Set the name of the firmware file that will be loaded into the Cortex-M4 core once it is started echo [name of the file in /lib/firmware] > /sys/class/remoteproc/remoteproc0/firmware Load the firmware file specified earlier to the Cortex-M4 core and start it echo start > /sys/class/remoteproc/remoteproc0/state  Note that if the core was already stopped, the “echo stop” command will return an error that can be safely ignored.
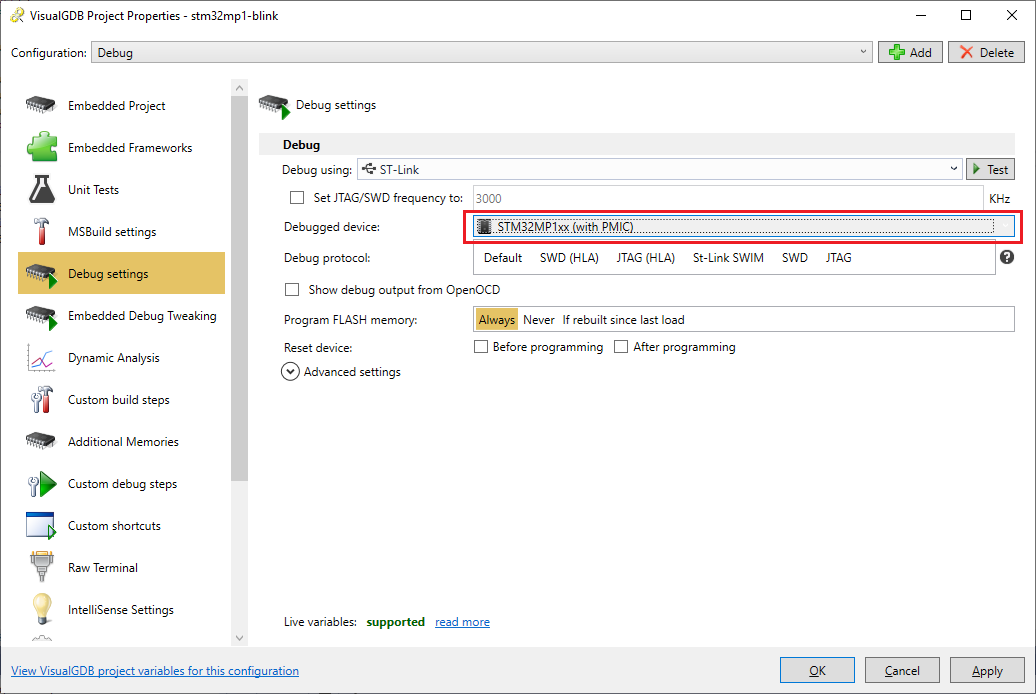
 - Verify that the LED started blinking the same way it did in the engineering mode. Then open VisualGDB Project Properties and switch the Debugged Device from STM32MP1 (Engineering Mode) to STM32MP1 (with PMIC):
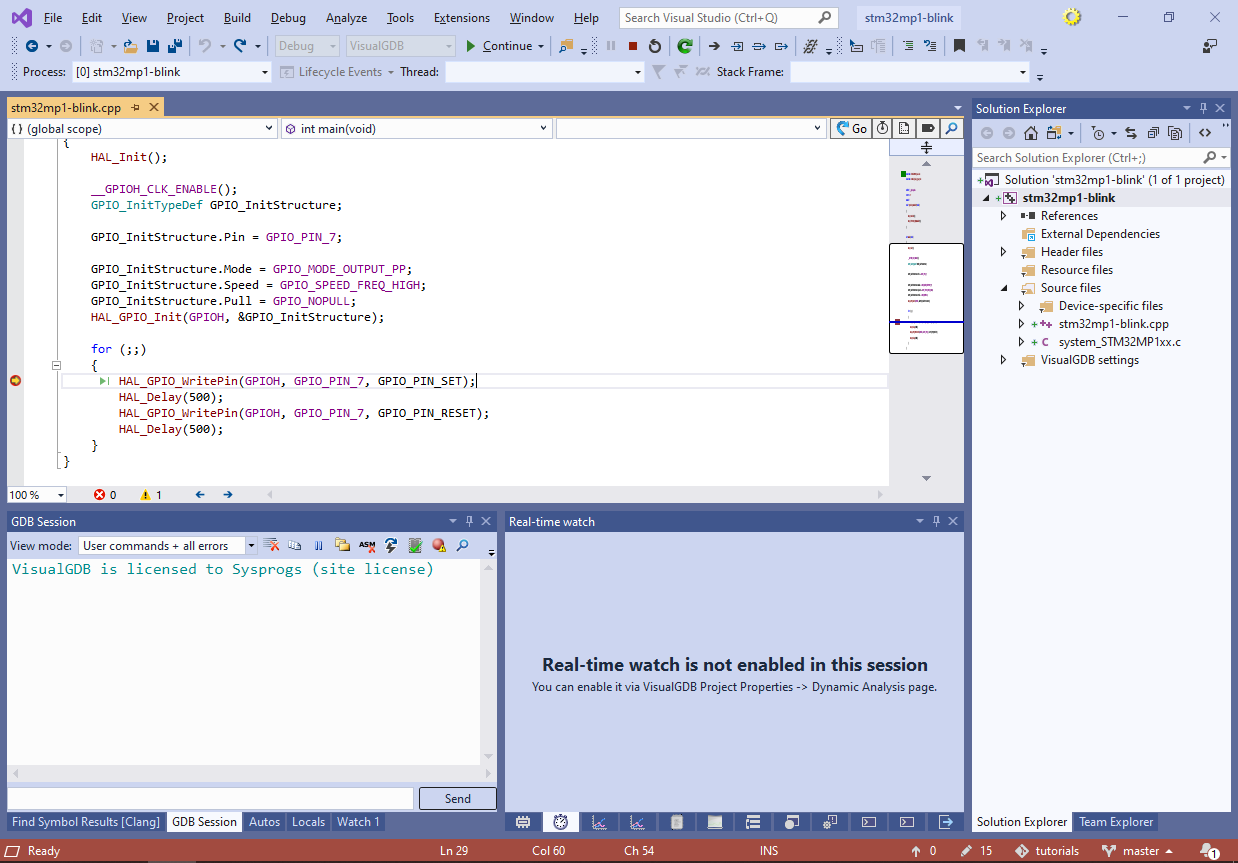
- Start the debug session. VisualGDB will automatically reload and restart the firmware in the Cortex-M4 core, allowing you to debug it:
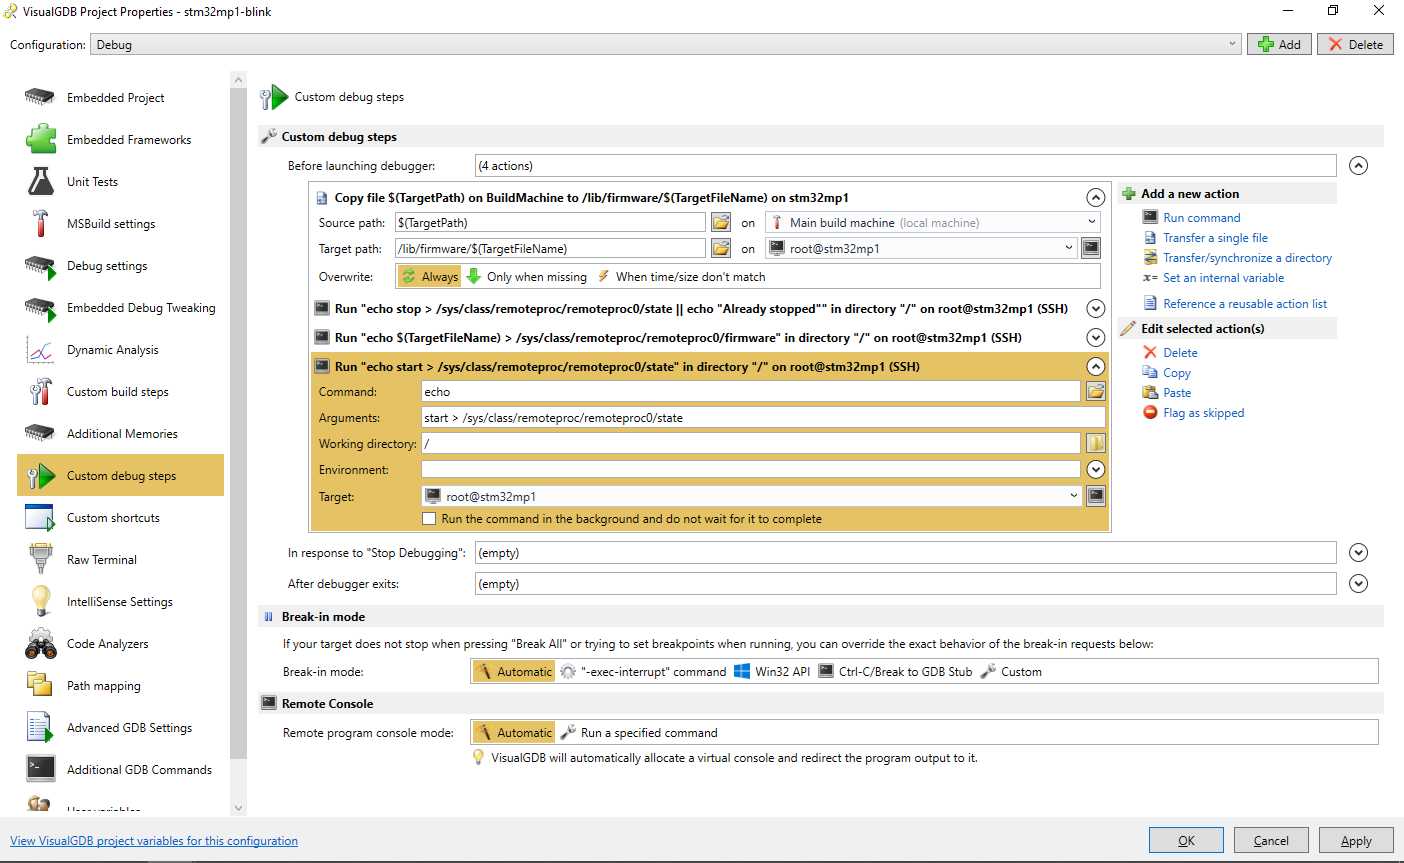
- If you are using the Custom edition of VisualGDB, you can configure it to automatically upload the firmware and run the Linux-side commands each time you start debugging. To do this, open VisualGDB Project Properties on the Custom Debug Steps page and add the following actions:
- Copy $(TargetPath) to /lib/firmware/$(TargetFileName) on root@stm32mp1
- Run “echo stop >/sys/class/remoteproc/remoteproc0/state || echo “Already stopped”” in “/” on root@stm32mp1. Note that the ” || echo “Already Stopped”” part is needed to prevent VisualGDB from aborting the debug session when the “stop” command fails if the firmware was already running.
- Run “echo $(TargetFileName) > /sys/class/remoteproc/remoteproc0/firmware“
- Run “echo stop >/sys/class/remoteproc/remoteproc0/state“.
 You can copy the following text to the Clipboard and then use the “Paste” button in the Custom Debug Steps editor to automatically paste the actions into VisualGDB project Properties:
<?xml version="1.0" encoding="utf-16"?> <ArrayOfCustomActionBase xmlns:xsi="http://www.w3.org/2001/XMLSchema-instance" xmlns:xsd="http://www.w3.org/2001/XMLSchema"> <CustomActionBase xsi:type="FileTransferAction"> <SkipWhenRunningCommandList>false</SkipWhenRunningCommandList> <SourceHost> <HostName>BuildMachine</HostName> <Transport>BuiltinShortcut</Transport> </SourceHost> <DestinationHost> <HostName>stm32mp1</HostName> <Transport>SSH</Transport> <UserName>root</UserName> </DestinationHost> <SourceFilePath>$(TargetPath)</SourceFilePath> <DestinationFilePath>/lib/firmware/$(TargetFileName)</DestinationFilePath> <OverwriteTrigger>Always</OverwriteTrigger> </CustomActionBase> <CustomActionBase xsi:type="CommandLineAction"> <SkipWhenRunningCommandList>false</SkipWhenRunningCommandList> <RemoteHost> <HostName>stm32mp1</HostName> <Transport>SSH</Transport> <UserName>root</UserName> </RemoteHost> <Command>echo</Command> <Arguments>stop > /sys/class/remoteproc/remoteproc0/state || echo "Already stopped"</Arguments> <WorkingDirectory>/</WorkingDirectory> <BackgroundMode>false</BackgroundMode> </CustomActionBase> <CustomActionBase xsi:type="CommandLineAction"> <SkipWhenRunningCommandList>false</SkipWhenRunningCommandList> <RemoteHost> <HostName>stm32mp1</HostName> <Transport>SSH</Transport> <UserName>root</UserName> </RemoteHost> <Command>echo</Command> <Arguments>$(TargetFileName) > /sys/class/remoteproc/remoteproc0/firmware</Arguments> <WorkingDirectory>/</WorkingDirectory> <BackgroundMode>false</BackgroundMode> </CustomActionBase> <CustomActionBase xsi:type="CommandLineAction"> <SkipWhenRunningCommandList>false</SkipWhenRunningCommandList> <RemoteHost> <HostName>stm32mp1</HostName> <Transport>SSH</Transport> <UserName>root</UserName> </RemoteHost> <Command>echo</Command> <Arguments>start > /sys/class/remoteproc/remoteproc0/state</Arguments> <WorkingDirectory>/</WorkingDirectory> <BackgroundMode>false</BackgroundMode> </CustomActionBase> </ArrayOfCustomActionBase>