Using ESP32 Arduino Core as a Component in ESP-IDF Projects
This tutorial shows how to use the ESP32 Arduino core as a component in the Advanced ESP-IDF-based projects. This setup allows combining the easy Arduino-style APIs with the advanced libraries and configuration options of the ESP-IDF. However, it requires additional initial setup that will be shown in this tutorial.
Before you begin, install VisualGDB 5.4R6 or later.
- Start Visual Studio and open the VisualGDB ESP32 Project Wizard:

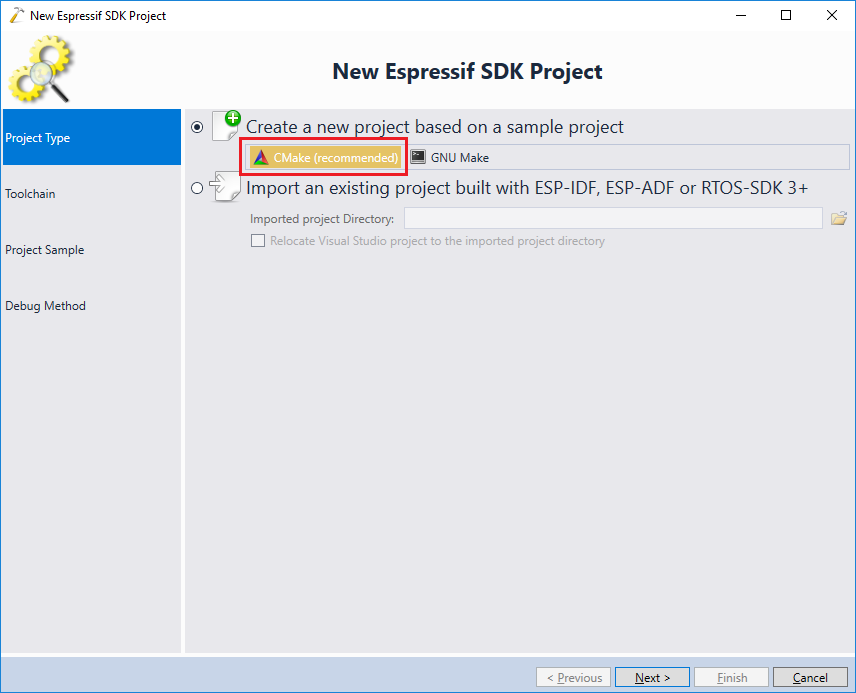
- On the first page of the wizard select the CMake build subsystem instead of GNU Make and click “Next”:
- Then select the toolchain you would like to use. For the best development experience, it is always recommended to use the latest available toolchain:
 Update: For better compatibility with the latest ESP32 tools, we recommend selecting the consolidated toolchain instead.
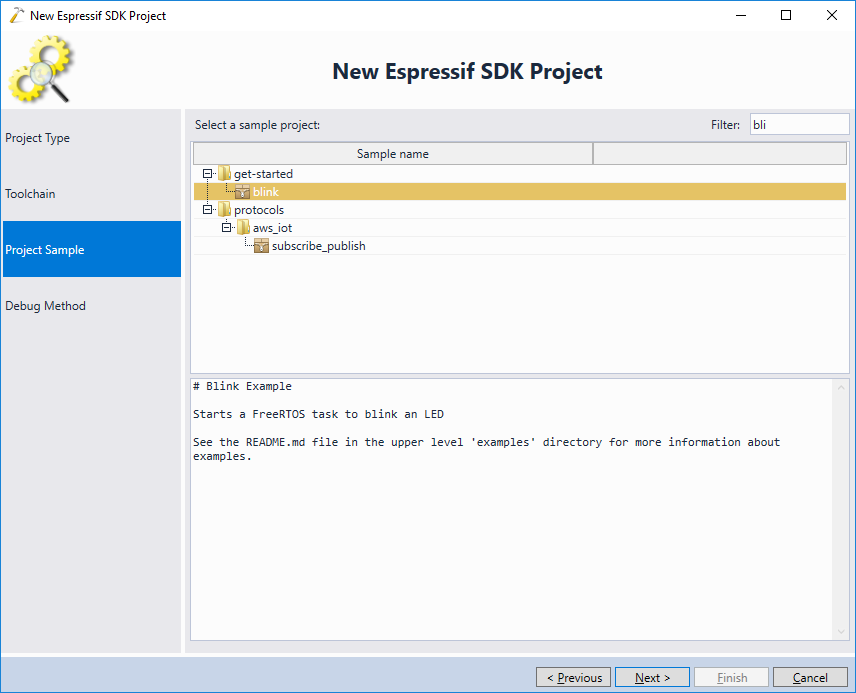
 - On the next page select the “blink” sample project. We will later replace the code of the main source file with an equivalent version using the Arduino APIs:
- Finally, select Debug parameters that are compatible with your hardware. Use the “Test” button to verify that all the underlying tools work as expected:

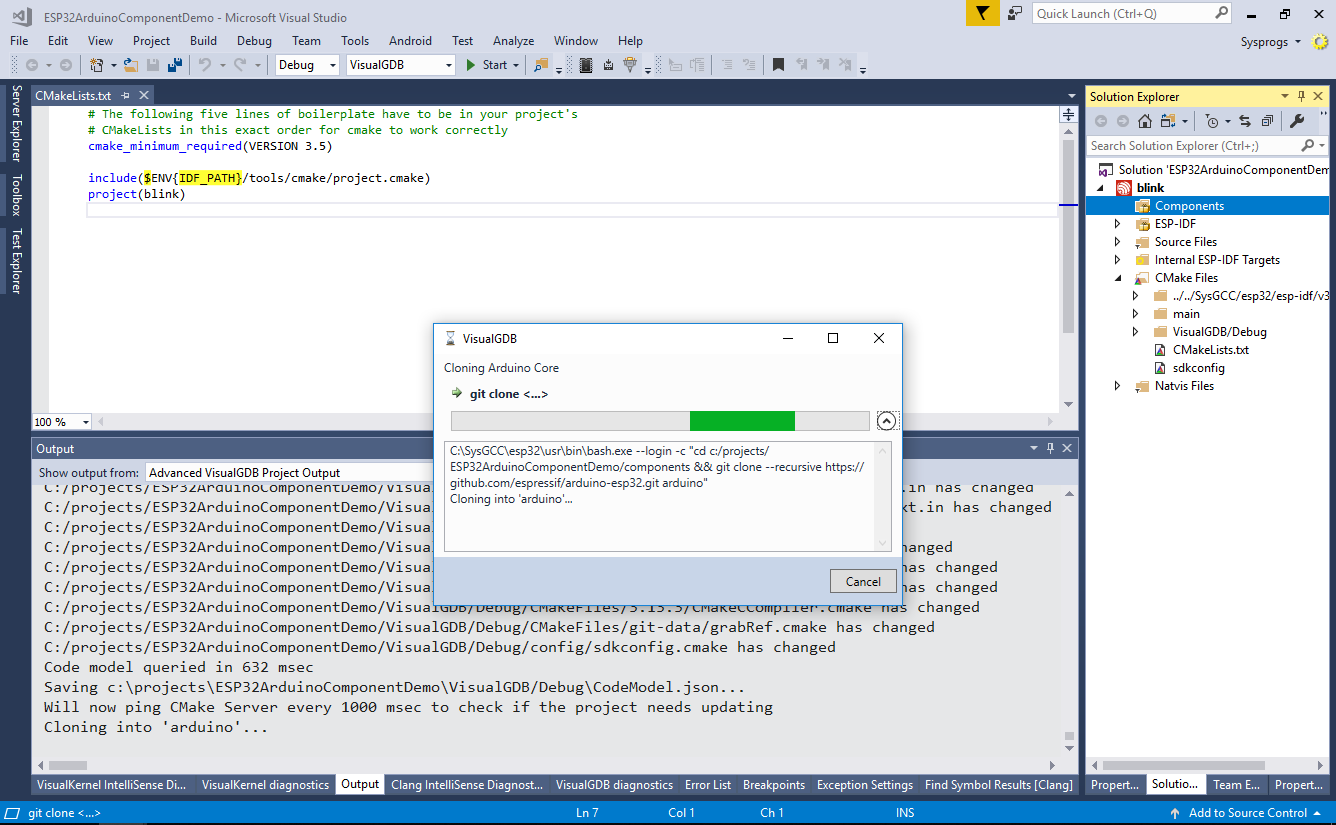
- Press “Finish” to generate the project and wait for Visual Studio to load it. Once the project is loaded, right-click on the “Components” item in Solution Explorer and select “Add->Reference ESP32 Arduino Core”:

- VisualGDB will automatically clone the ESP32 Arduino Core into the <Project Directory>\components\arduino folder and will ensure that the ESP-IDF build system can find it:
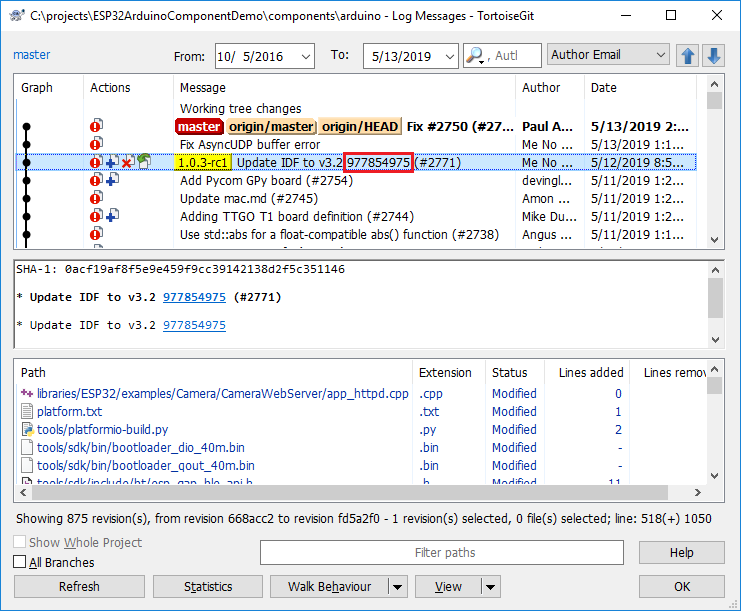
- Before you proceed with building the project, we recommend switching your ESP-IDF checkout to the specific commit that was used by Espressif to develop the core. Open the git history for the <Project Folder>\components\arduino folder and locate the most recent record that mentions ESP-IDF update. Take a note of the git commit ID (e.g. in this example the commit ID is is 977854975):
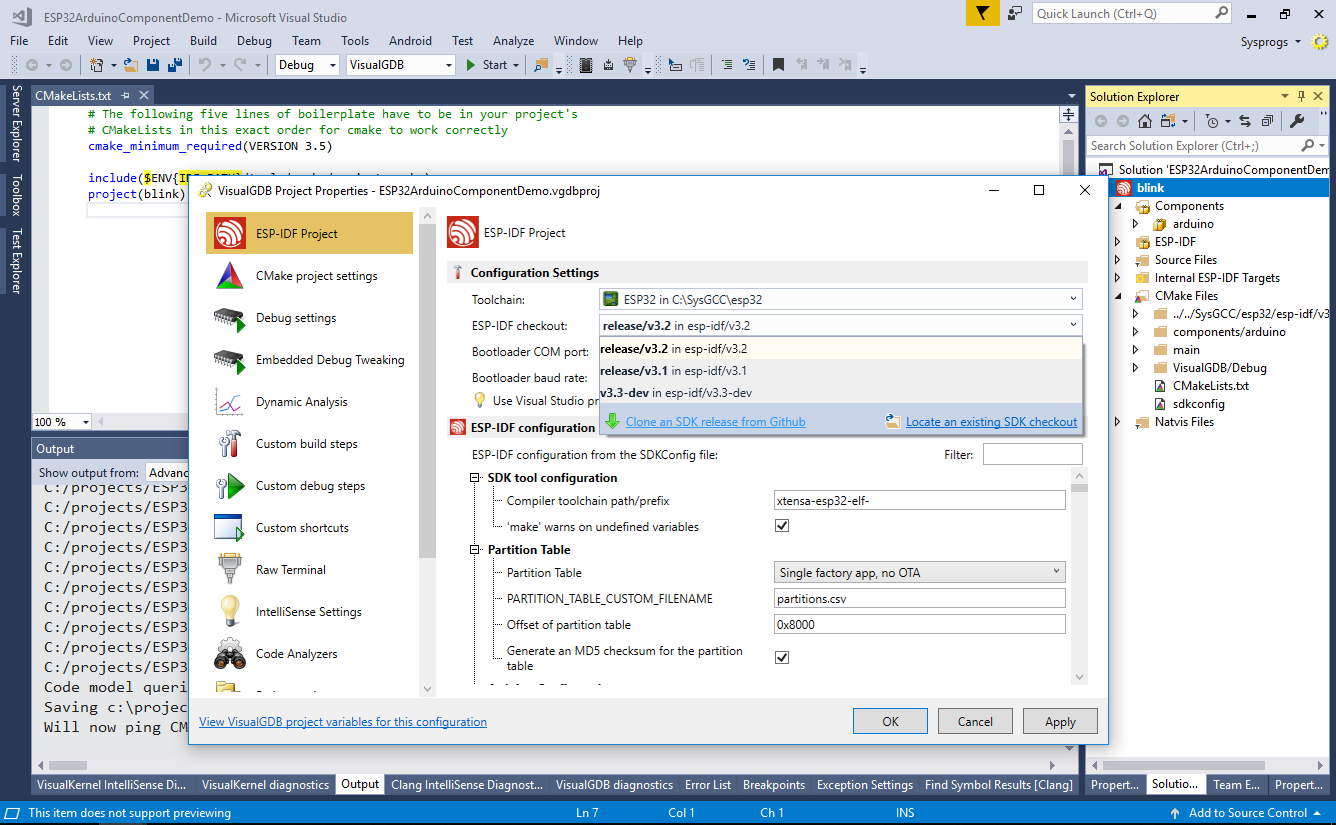
- Open VisualGDB Project Properties -> ESP-IDF Project -> Toolchain and click “Clone an SDK release from GitHub”:
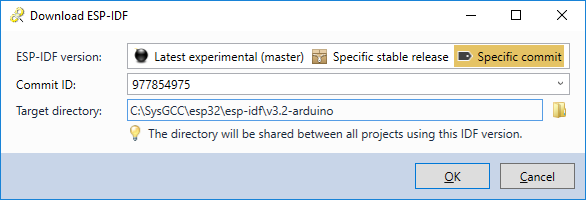
- In the release clone window select “Specific commit” and enter the commit ID from the Arduino core log:
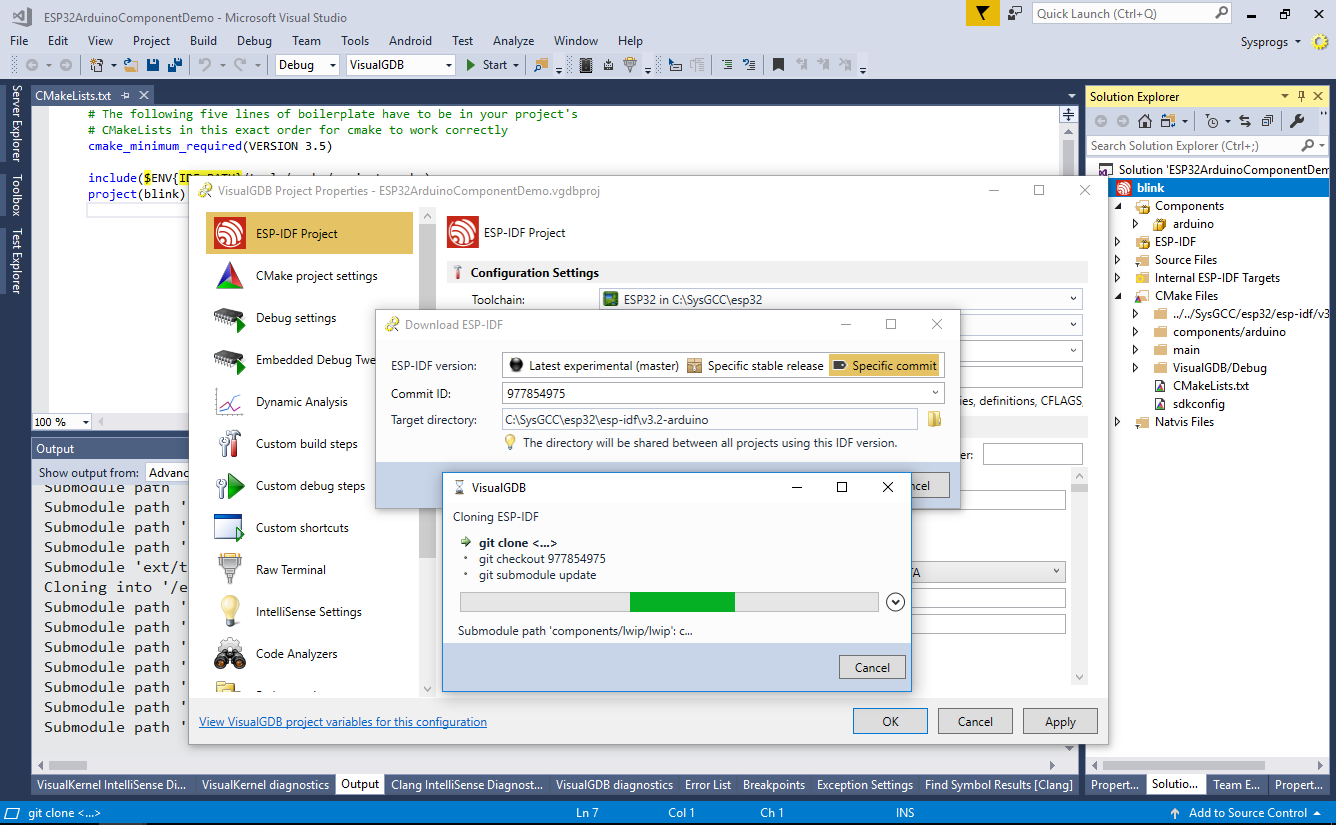
- Confirm the checkout by pressing “OK”. VisualGDB will begin checking out the selected commit as a separate ESP-IDF checkout:
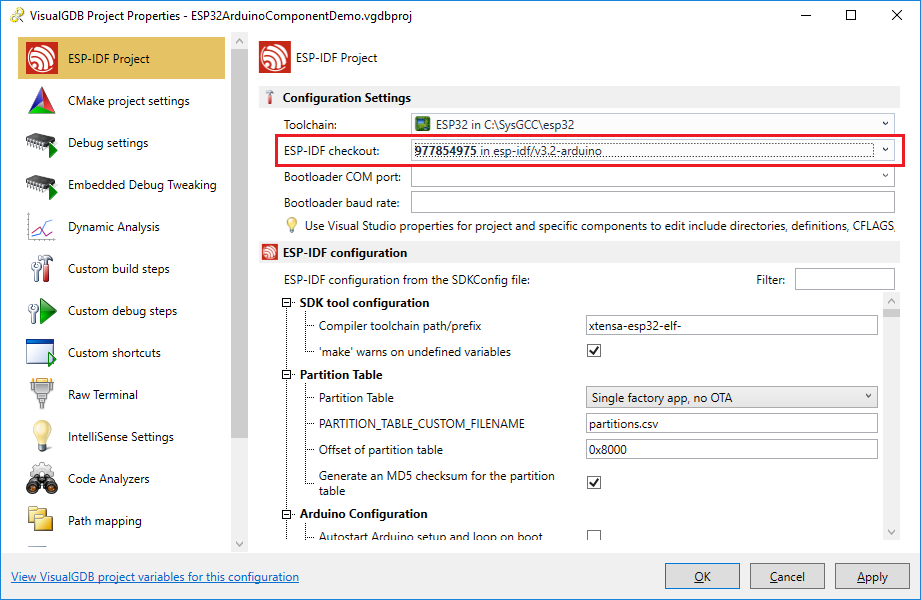
- Once the checkout is completed, ensure that it is shown in the “ESP-IDF checkout” field in VisualGDB Project Properties and click “OK” to apply the changes:
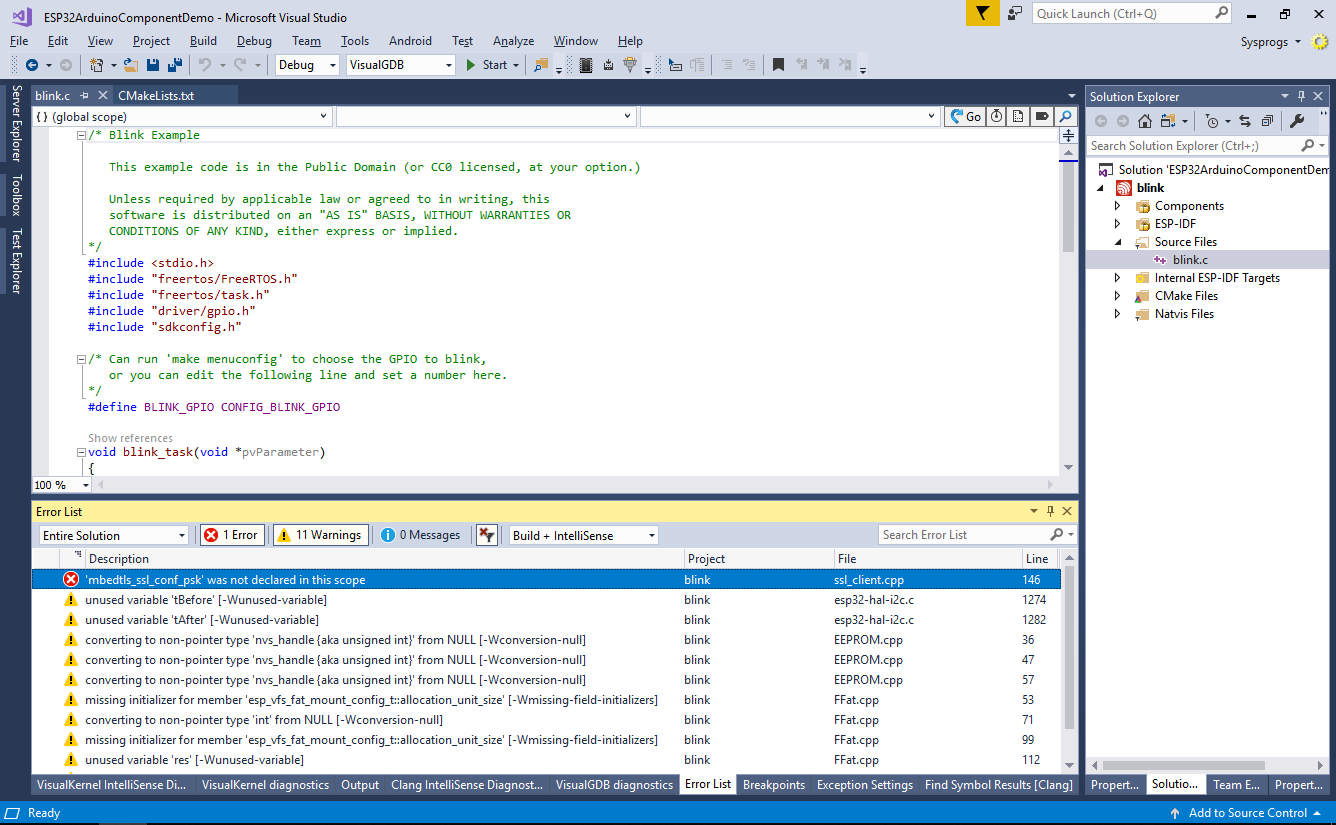
- Now you can build the project. Depending on the configuration of the initial project sample and the Arduino core version, you may need additional steps to get the project to build correctly. We will show the steps required as of June 2019 below. The first build problem would be the missing “mbedtls_ssl_conf_psk” function used by the Arduino core:
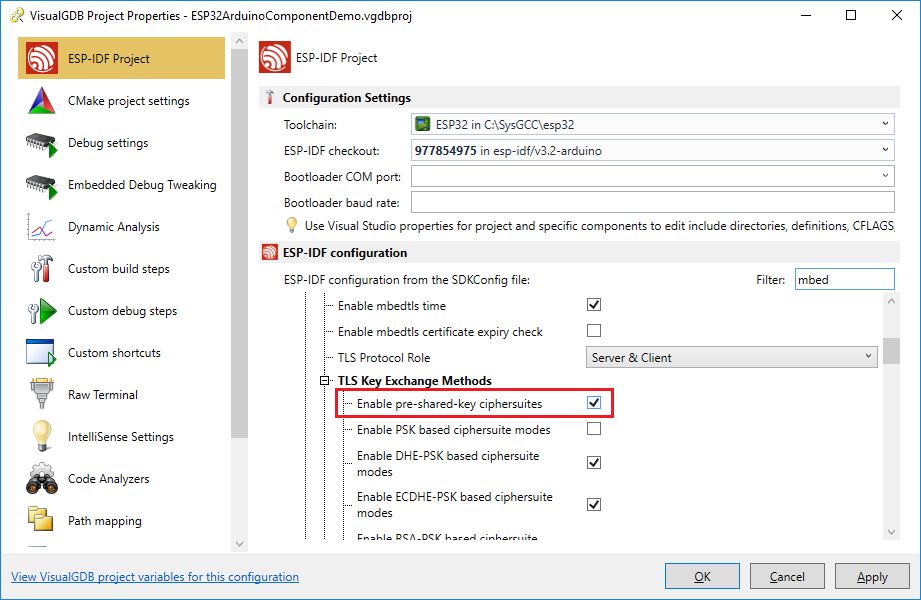
- It can be enabled by checking the “Enable pre-shared-key ciphersuites” checkbox in VisualGDB Project Properties:
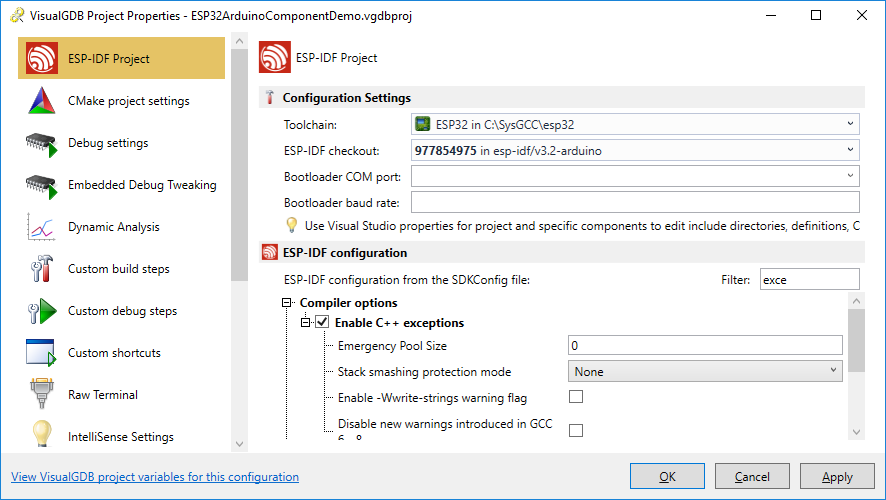
- The second issue would be the miss
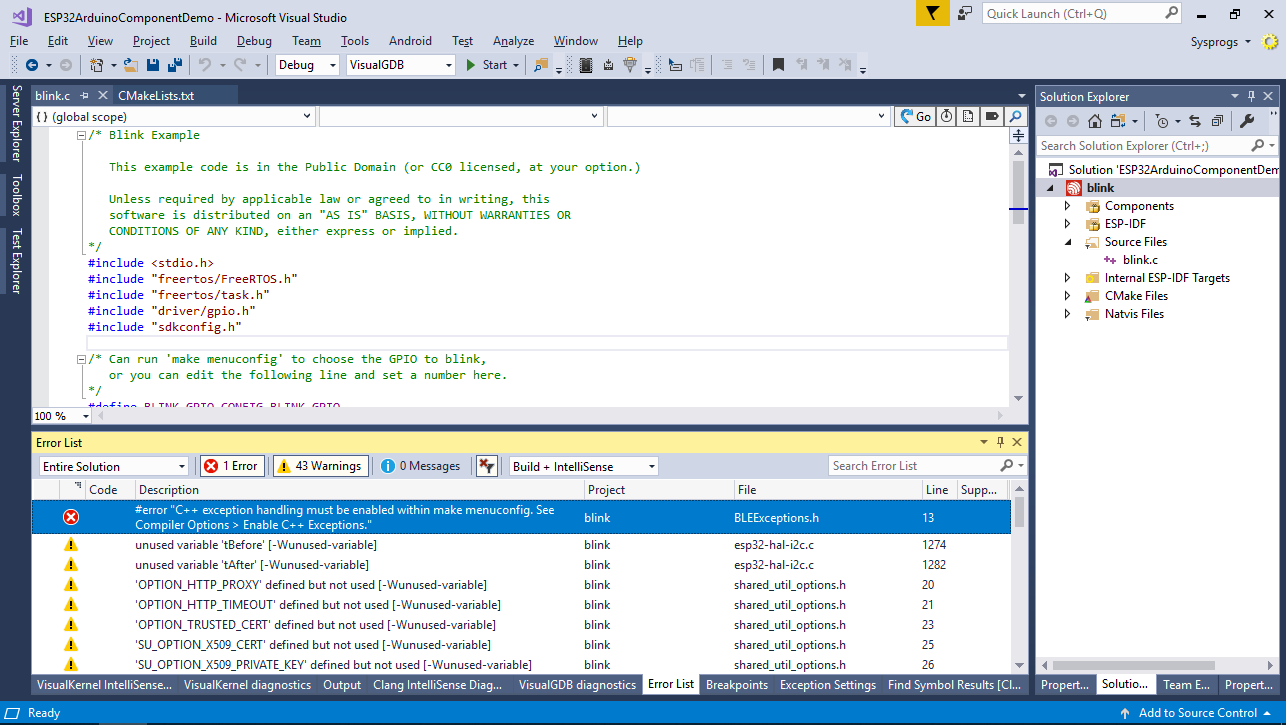
- It can be enabled via VisualGDB Project Properties -> ESP-IDF Configuration -> Enable C++ exceptions:
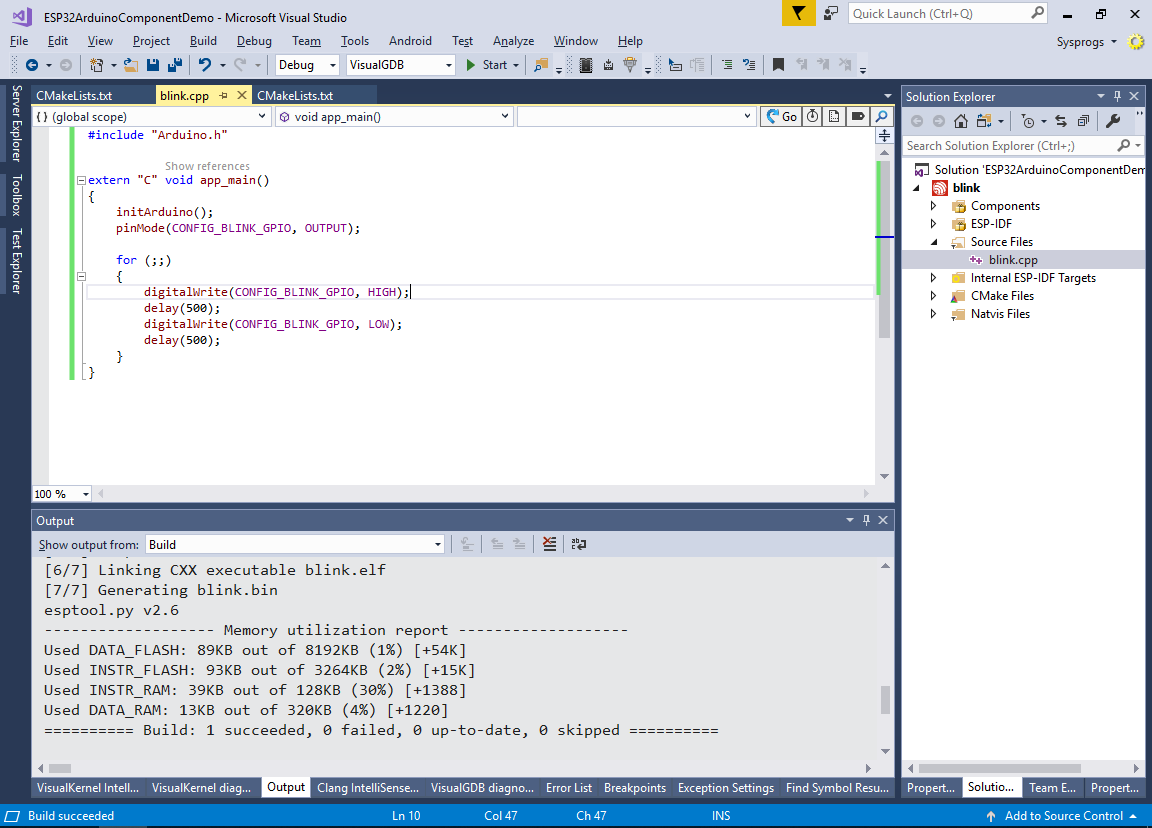
- Once the project builds without errors, we can begin modifying the source code of the main file. Rename blink.c to blink.cpp and click “Refresh” when VisualGDB suggests updating the file status:

- Replace the contents of the main file with the following code:
#include "Arduino.h"

extern "C" void app_main()
{
    initArduino();
    pinMode(CONFIG_BLINK_GPIO, OUTPUT);

    for (;;)
    {
        digitalWrite(CONFIG_BLINK_GPIO, HIGH);
        delay(500);
        digitalWrite(CONFIG_BLINK_GPIO, LOW);
        delay(500);
    }
}
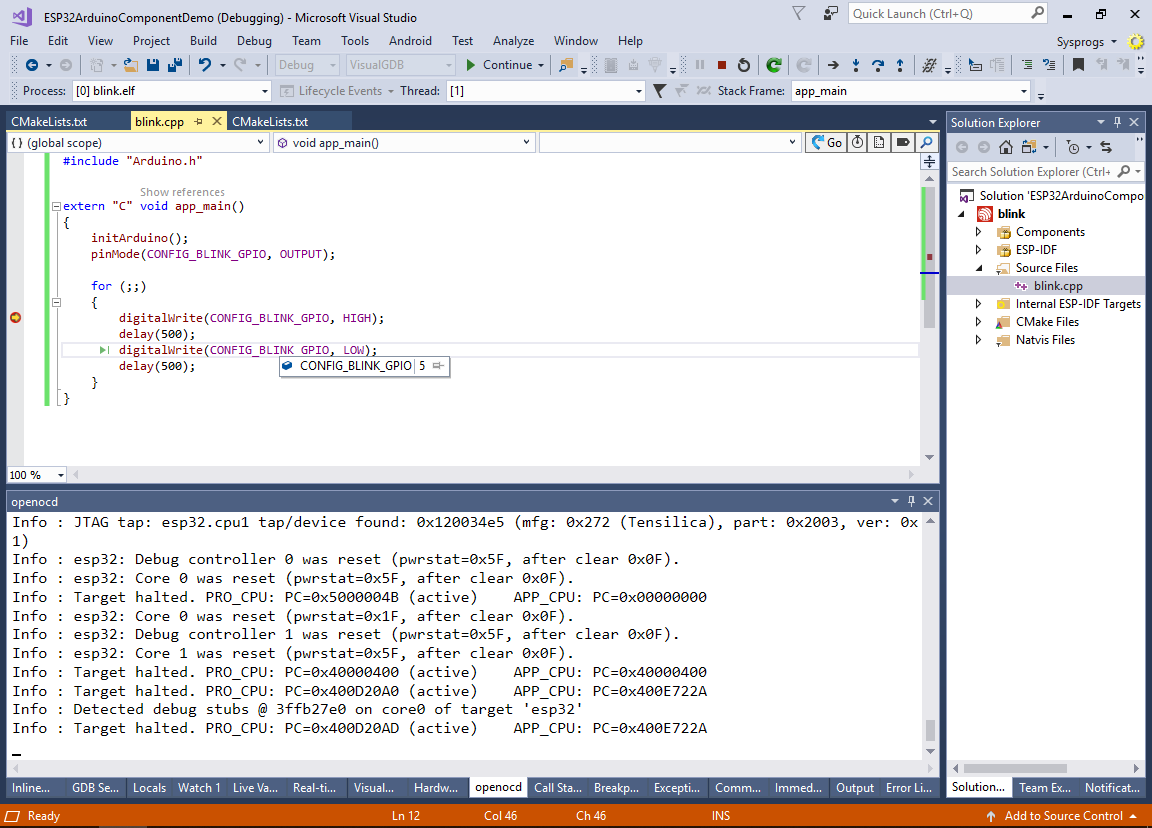
- Press F5 to build the project and begin debugging it. Ensure that the LED starts blinking when controlled by the Arduino-style digitalWrite() functions:
- If you are porting an existing Arduino-based project, consider enabling the “Autostart Arduino setup and loop on boot” setting:
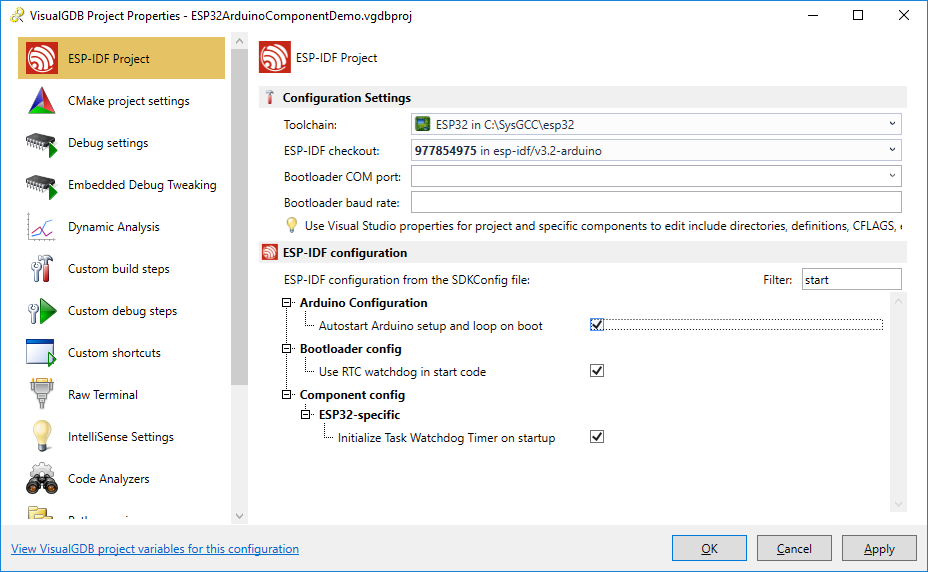
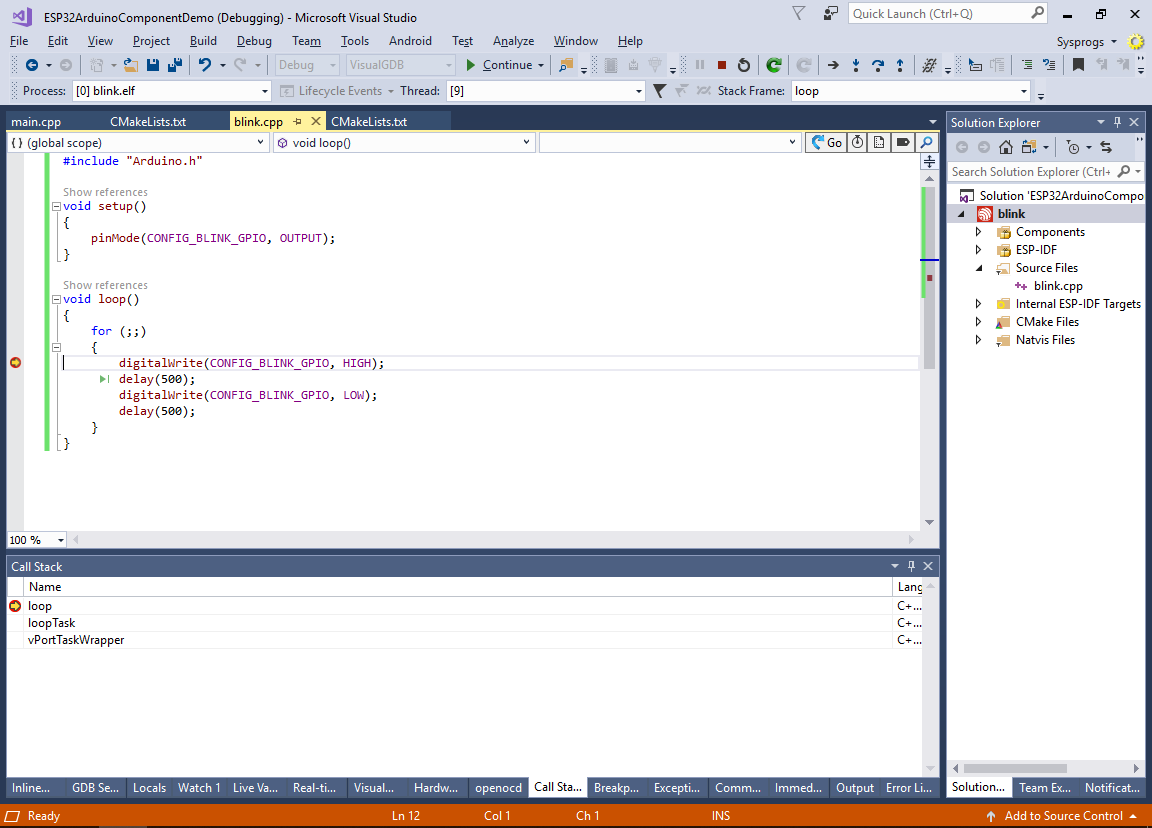
- This allows structuring your code into the setup() and loop() functions similar to the Arduino projects:
#include "Arduino.h"

void setup()
{
    pinMode(CONFIG_BLINK_GPIO, OUTPUT);
}

void loop()
{
    for (;;)
    {
        digitalWrite(CONFIG_BLINK_GPIO, HIGH);
        delay(500);
        digitalWrite(CONFIG_BLINK_GPIO, LOW);
        delay(500);
    }
}
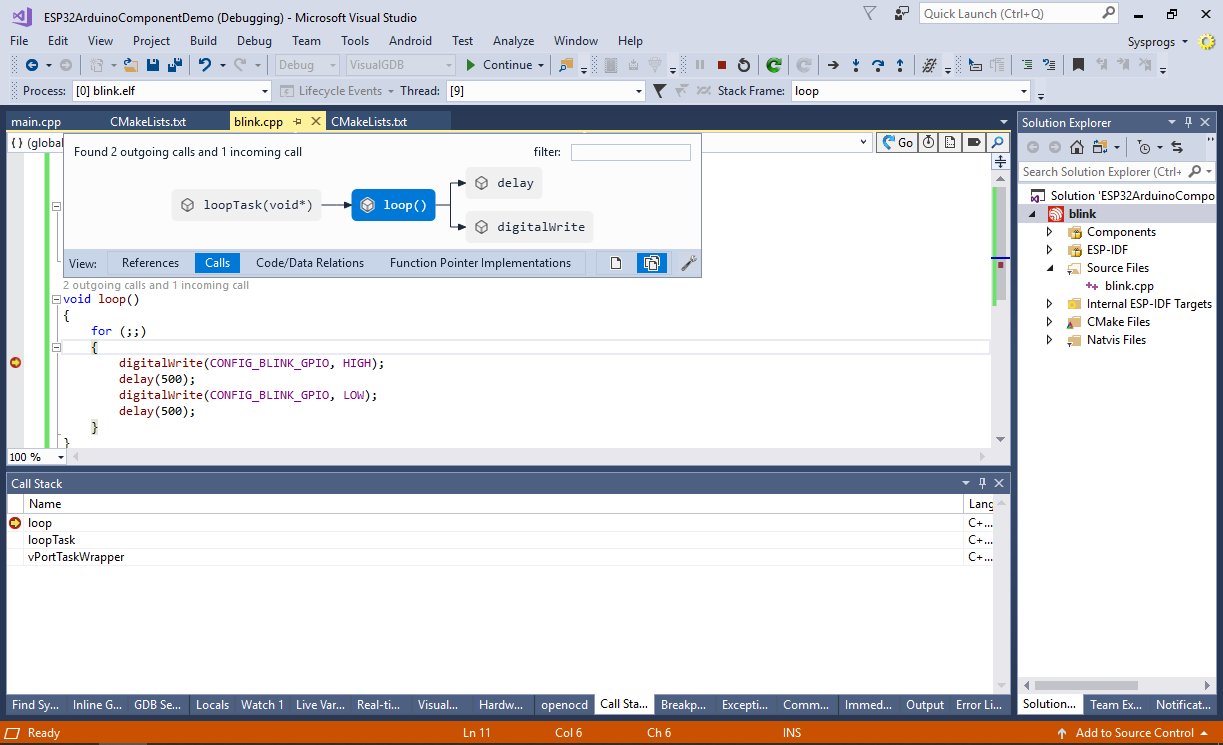
- The VisualGDB’s IntelliSense engine will automatically index both ESP-IDF and the ESP32 Arduino core, so you can use the Code Map or CodeJumps to quickly explore the relations between different functions or methods:
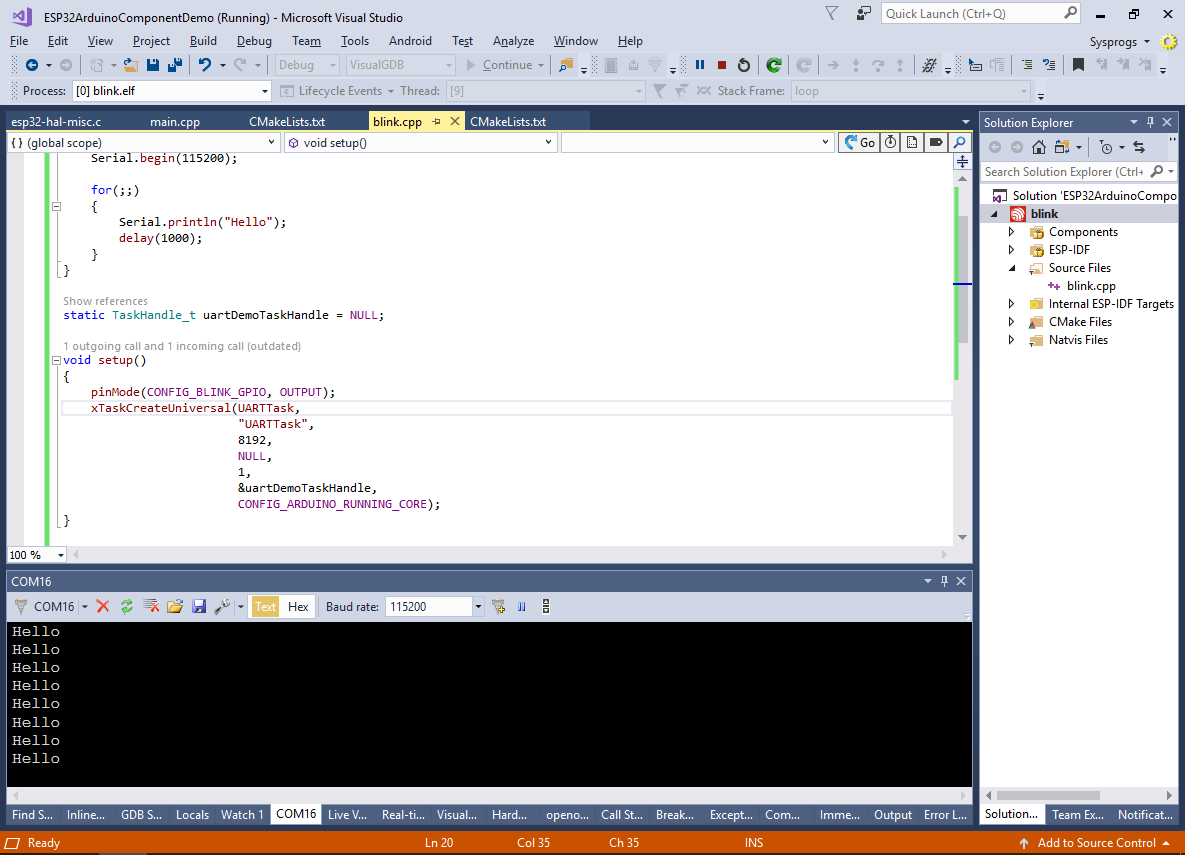
- Because the project is using both the Arduino core and the ESP-IDF framework, your code can use both of the APIs, as long as it doesn’t cause conflicts. E.g. use the following code to add another FreeRTOS thread printing “Hello” messages to the serial port while the LED is being controlled by the main Arduino-style loop:
#include <FreeRTOS.h>

void UARTTask(void *)
{
    Serial.begin(115200);

    for(;;)
    {
        Serial.println("Hello");
        delay(1000);
    }
}

static TaskHandle_t uartDemoTaskHandle = NULL;

void setup()
{
    pinMode(CONFIG_BLINK_GPIO, OUTPUT);
    xTaskCreateUniversal(UARTTask,
                         "UARTTask",
                         8192,
                         NULL,
                         1,
                         &uartDemoTaskHandle,
                         CONFIG_ARDUINO_RUNNING_CORE);
}