Developing Remote Linux Projects with VisualGDB and VirtualBox
This tutorial shows how to use VisualGDB to develop and debug C/C++ code on Linux virtual machines running on VirtualBox. We will show how to create a virtual machine, configure the network settings and setup VisualGDB to access it. Before you begin, download and install VirtualBox, Visual Studio and VisualGDB. Also choose a Linux distro you want to install on the VirtualBox and download an ISO image of the install DVD. If you are unfamiliar with Linux distros, we recommend using a 64-bit Kubuntu.
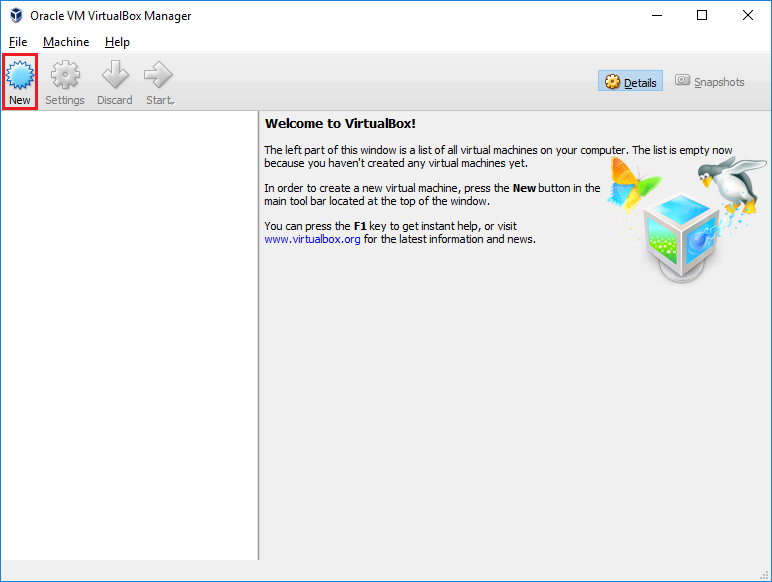
- First we will show how to create a new Linux Virtual Machine. Start VirtualBox and click “New” to create a new Virtual Machine:
- Enter the name for the VM, set the type to “Linux” and the version according to the distro you are going to use:

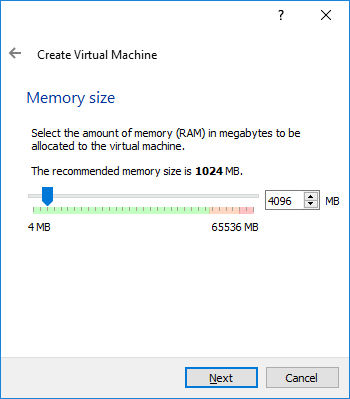
- On the next page select the memory size you want to allocate for your VM:
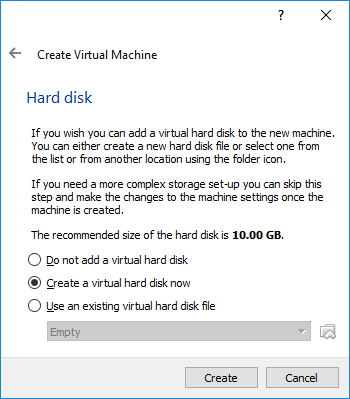
- Select “Create a virtual hard disk now”:
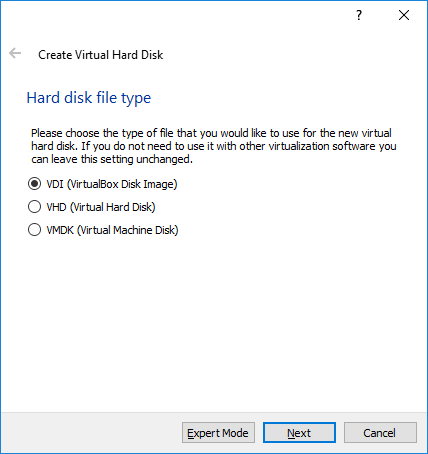
- Proceed with the default “VDI” disk format:
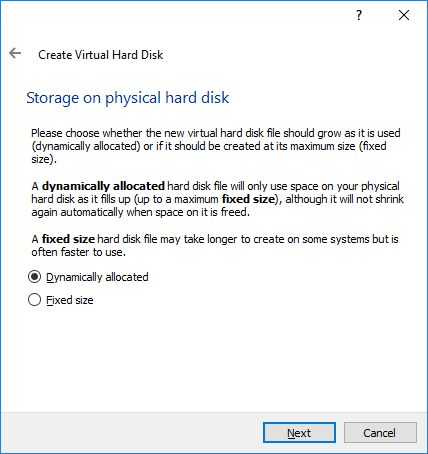
- Select “Dynamically allocated” and click “Next”:
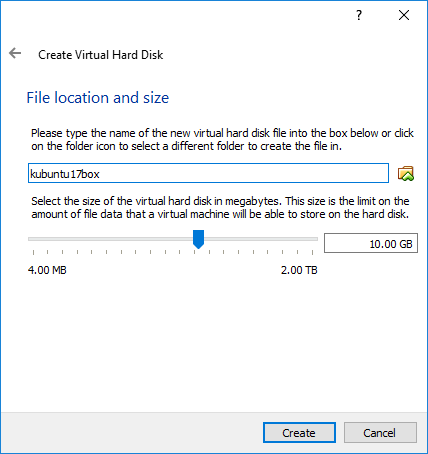
- Set the disk size based on the amount of applications and data you want to have on the VM:
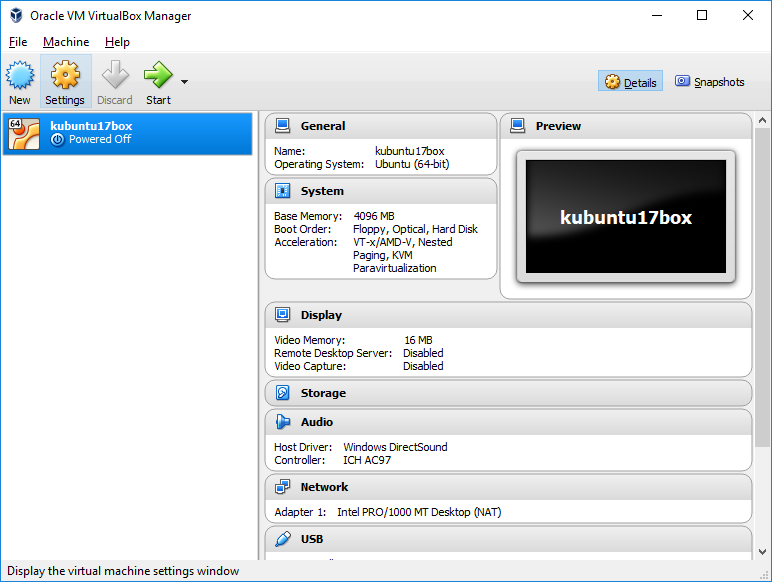
- Press “Create” to create the new virtual machine. Once it is created, click on “Start”:
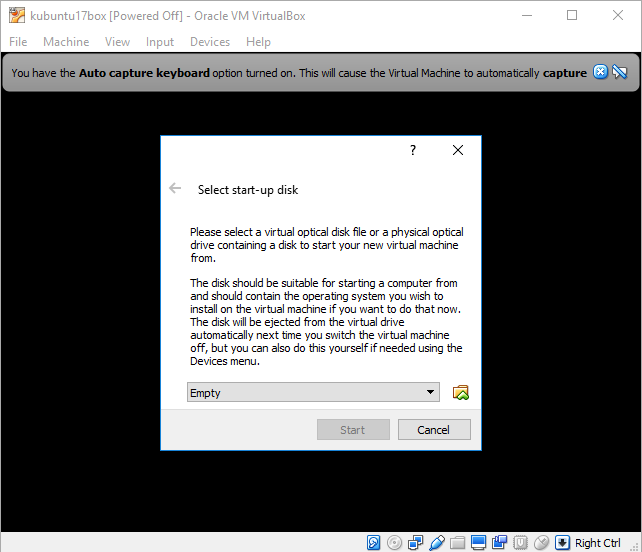
- VirtualBox will ask for the start-up disk that will install Linux on your virtual machine. Select the ISO image with the Linux installer you have previously downloaded and click “Start”:
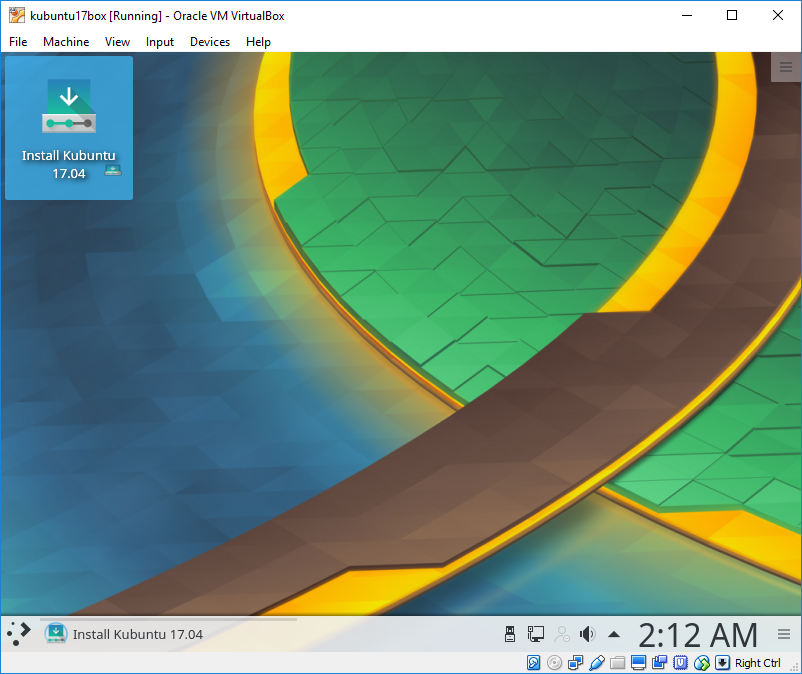
 The virtual machine will boot from the installer ISO. The next steps of this tutorial will be specific to Kubuntu and might slightly vary if you are using a different Linux distro.
 - Double-click on the “Install Kubuntu” shortcut:
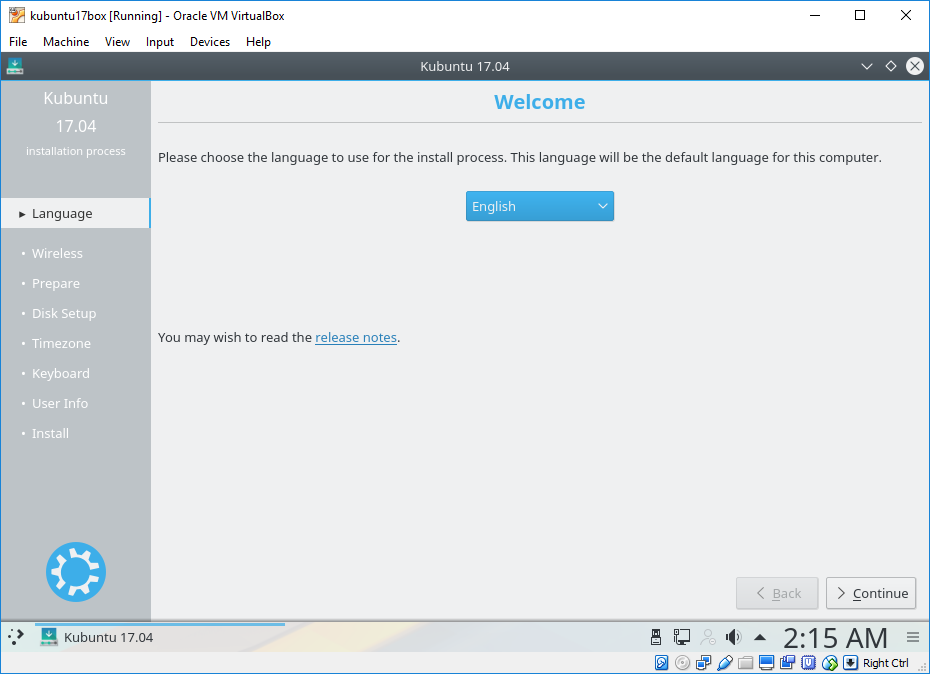
- The Kubuntu installation wizard will start. Select your language on the first page and click “Continue”:
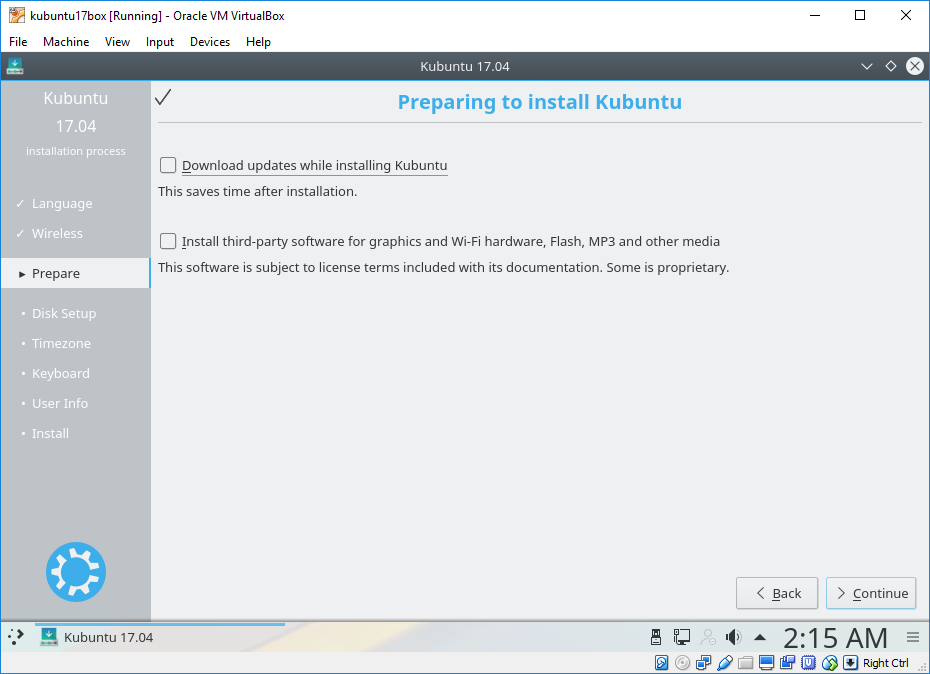
- We recommend keeping the default settings on the next page. Click “Continue” to proceed:
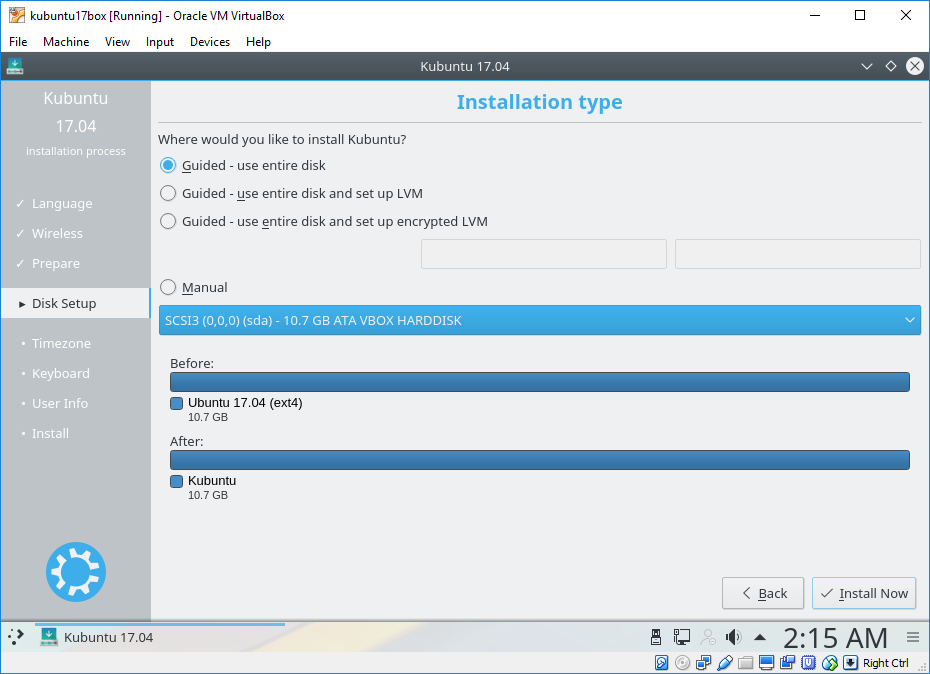
- Select “Guided – use entire disk” and click “Install Now”:
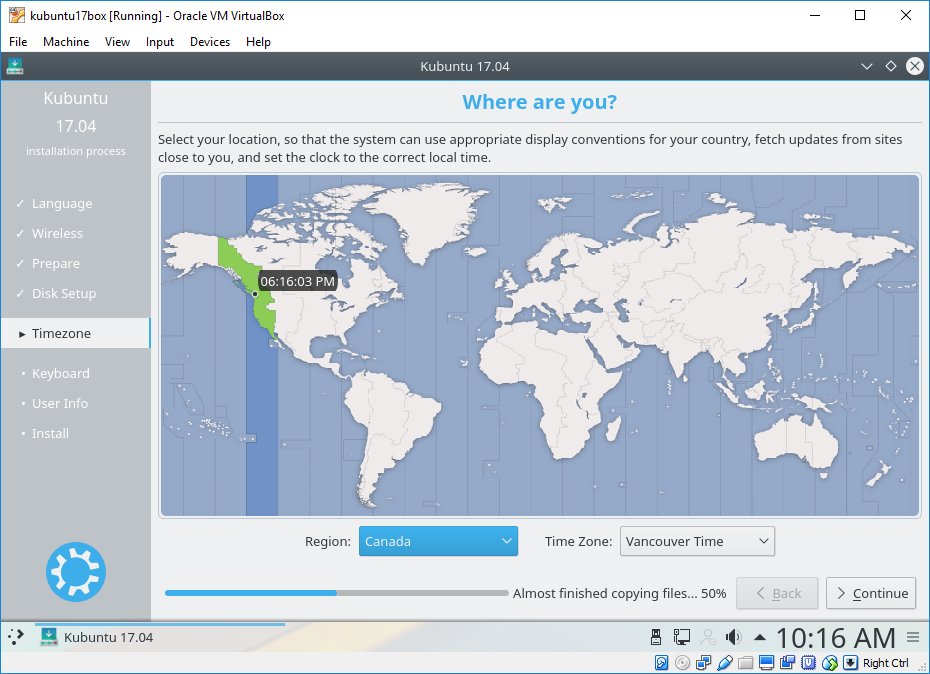
- Select your time zone and click “Continue”:
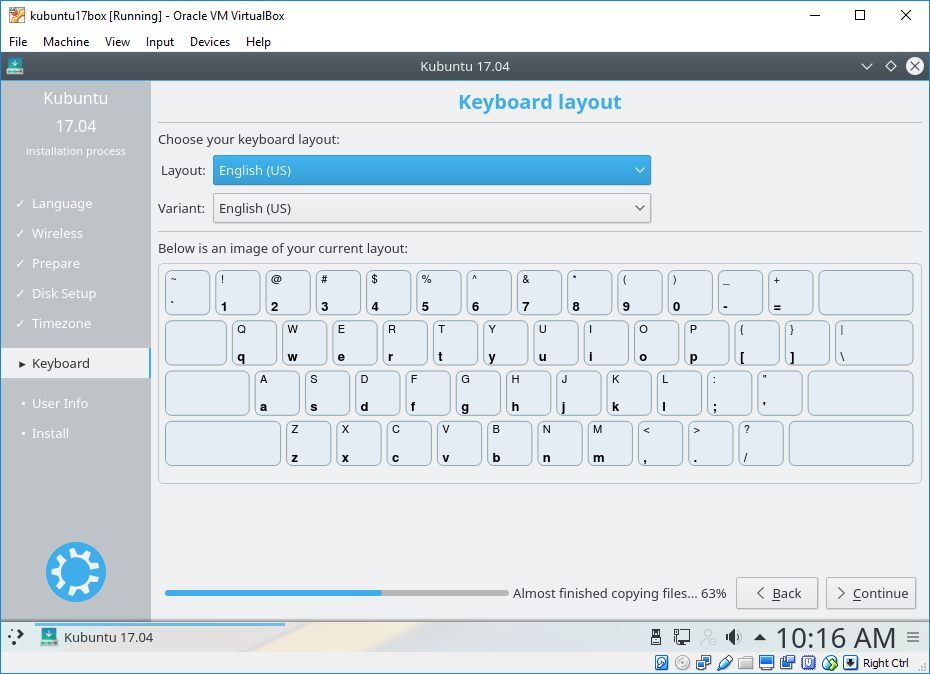
- On the next page confirm your keyboard layout:
- Finally set your user name, password and a machine name. The machine name specified here will be reported to your DHCP server and hence can be used to find the machine from VisualGDB if your DHCP server is configure to create a DNS record for it:

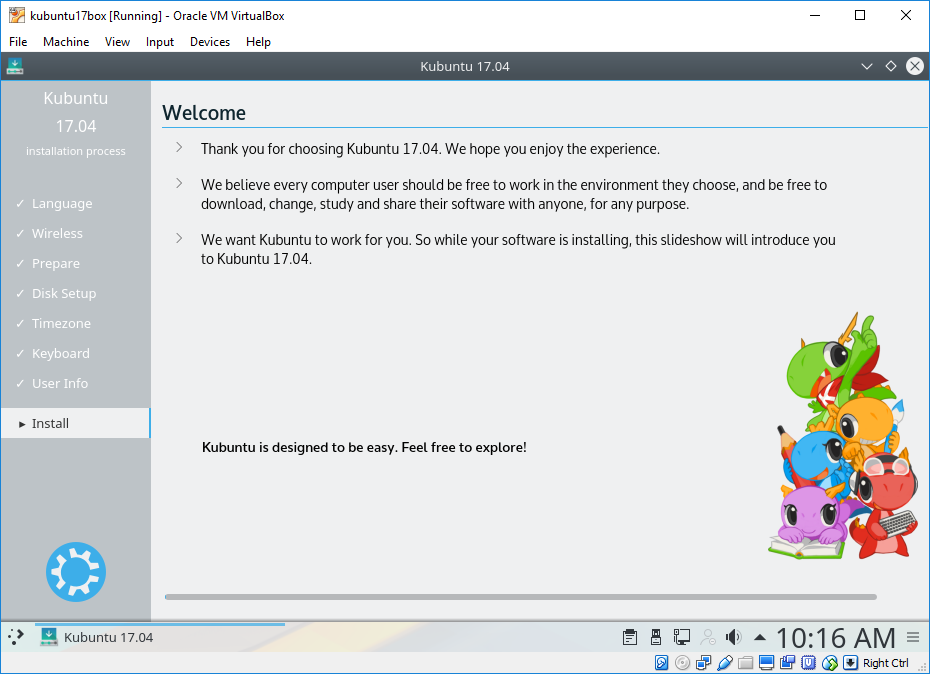
- Wait for the installation to complete:
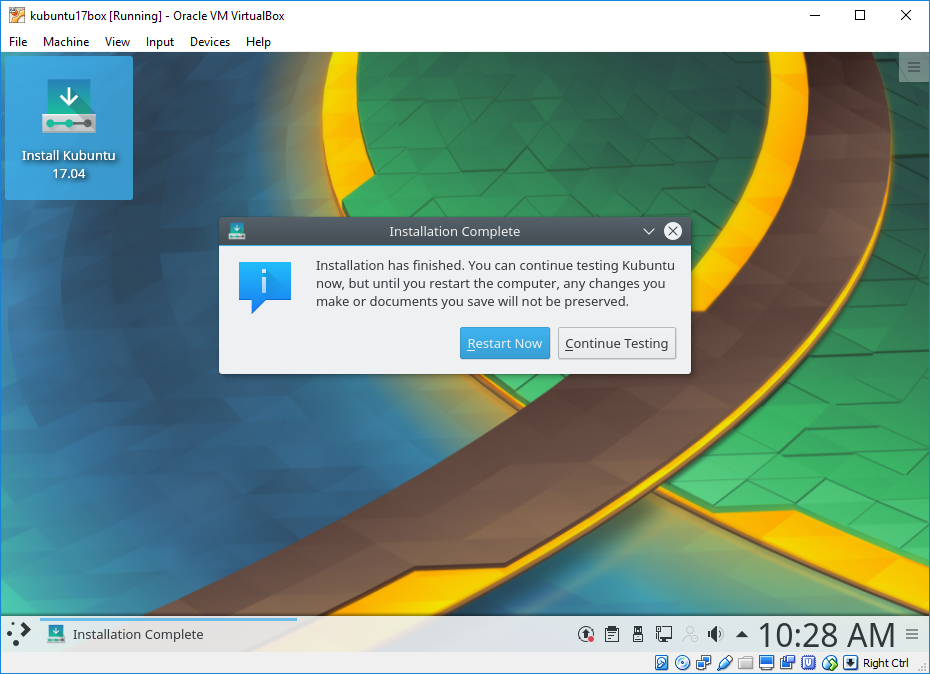
- Once Kubuntu is installed, click “Restart now”:
 The VM will now restart and boot into the newly created Linux installation. Now we will show how to configure the network settings so that you can access your virtual machine remotely.
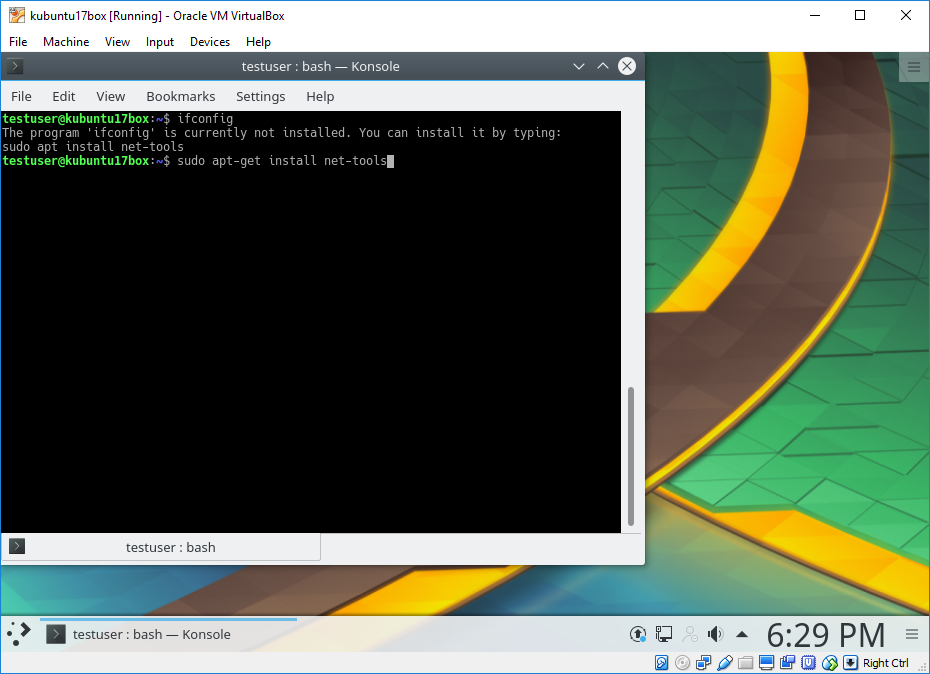
 - Open a terminal on your VM and run “ifconfig” if it’s not installed, run the following command to install it:
sudo apt-get install net-tools
- Ifconfig will display the current IP address of the VM, however in the default configuration this address won’t be reachable from your Windows machine:

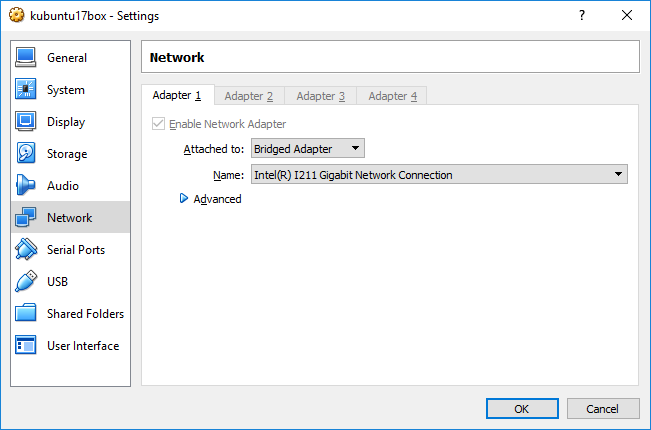
- Open the VM settings and switch the network to “Bridged”. Ensure that the underlying adapter corresponds to your physical network adapter:
- Ensure your network has a functioning DHCP server and run “sudo dhclient -v” to acquire an IP address for the VM:
 If you don’t have a DHCP server, you would need to configure the IP address manually and ensure it doesn’t conflict with any other machines on your network.
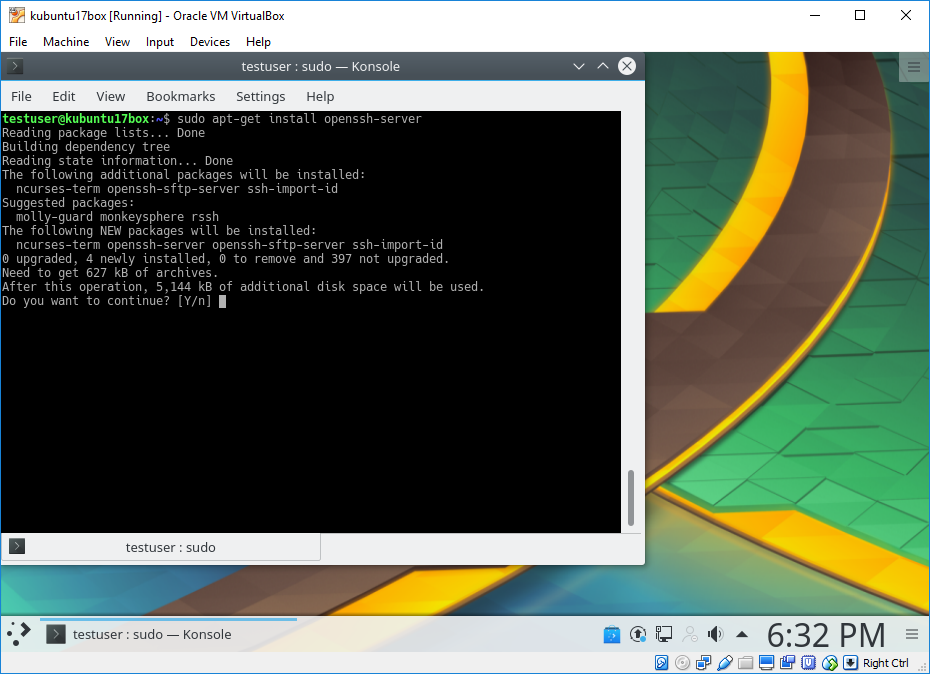
 - In order to access the Linux machine over network, install the OpenSSH Server package by running the following command:
sudo apt-get install openssh-server
- Try pinging the VM from the Windows machine using the name specified during Linux installation (not the name entered when creating the VM in VirtualBox):
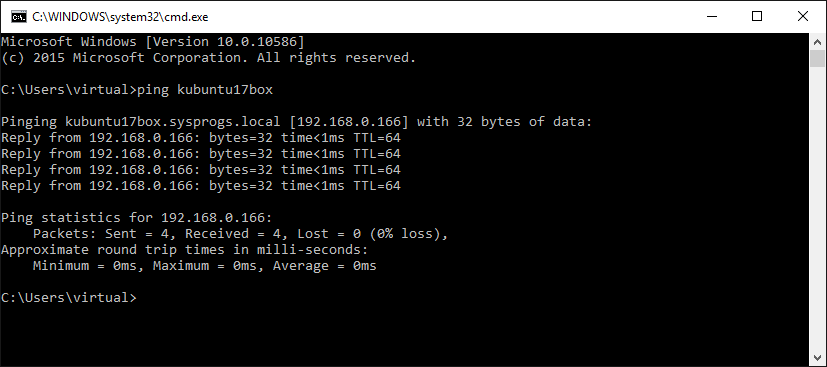 If it doesn’t work, try using the IP address shown by dhclient instead. If this doesn’t work either, double-check that the VM is attached to the correct network adapter.
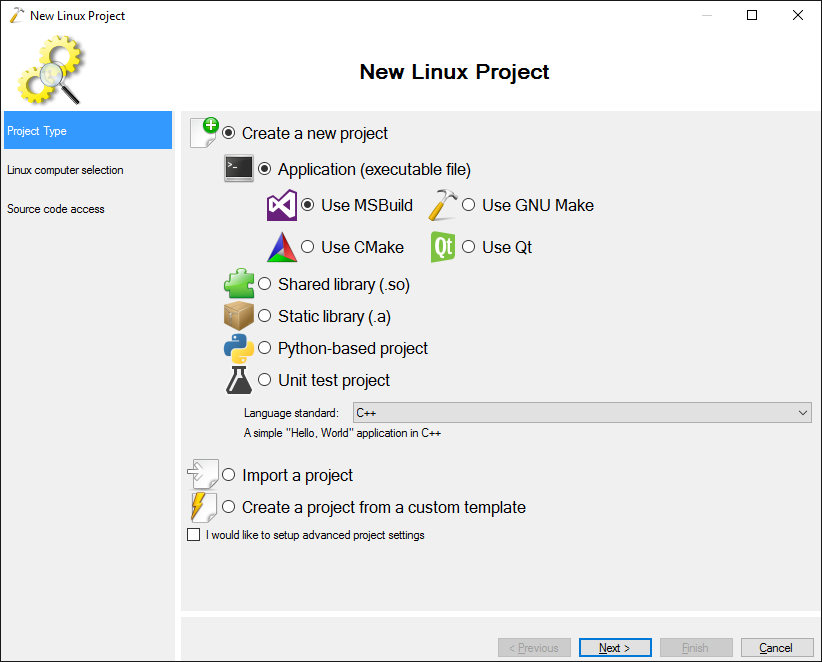
 - Now you are ready to create your first C/C++ project for this machine with VisualGDB. Start Visual Studio and launch the VisualGDB Linux Project Wizard:

- Proceed with the default MSBuild subsystem:
- On the next page click “Create a new SSH connection”:
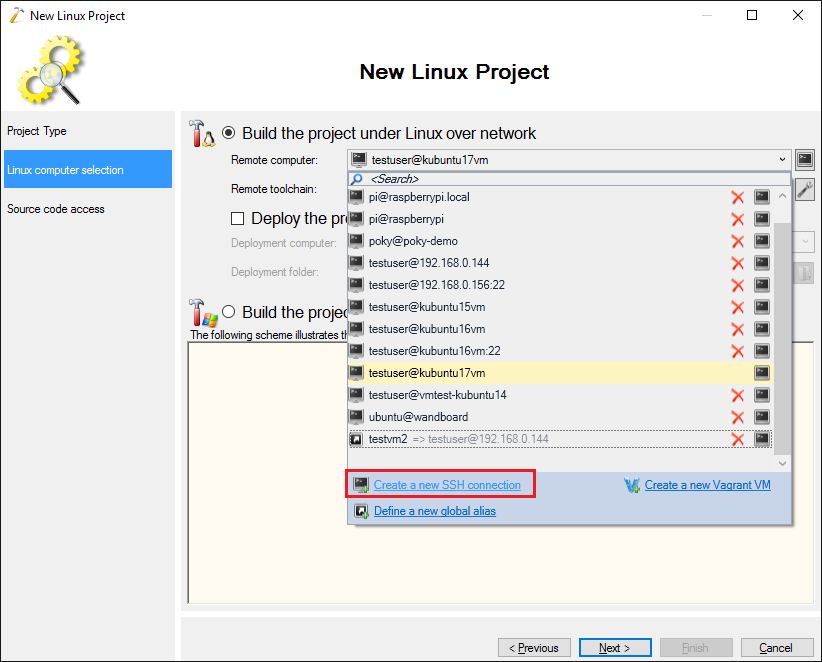
- Enter the host name (verified by pinging it) and the user name/password:

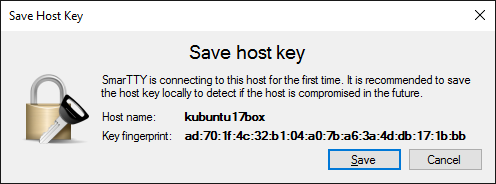
- Click “Create” to begin connecting. VisualGDB will ask whether you want to save the host key. Confirm it by pressing “Save”:
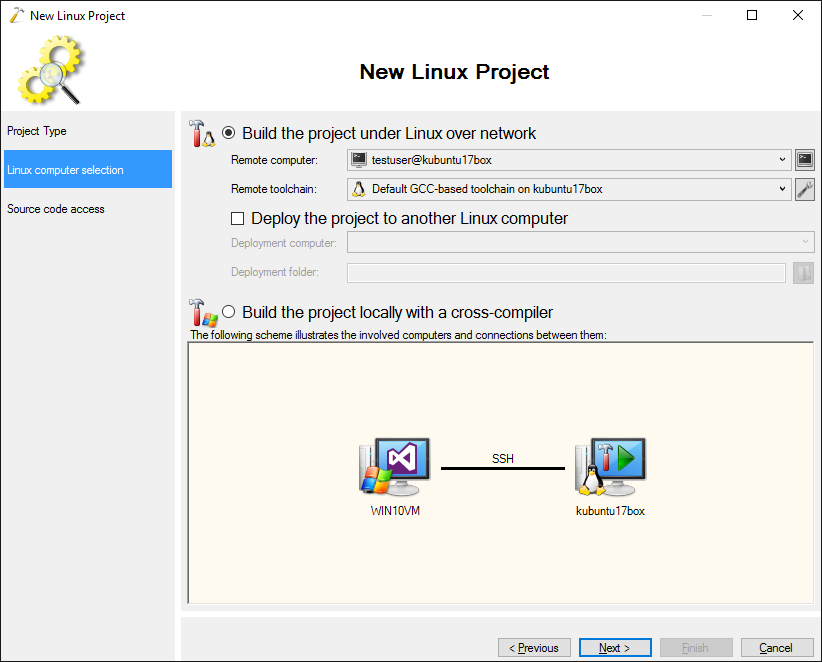
- Once the VM is selected in the wizard, click “Next”:
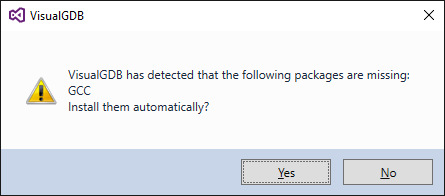
- VisualGDB will check the VM for the packages required to create your project and suggest installing them automatically. Click “yes”:
- Proceed with the default settings for storing the source files and click “Finish” to create your project:

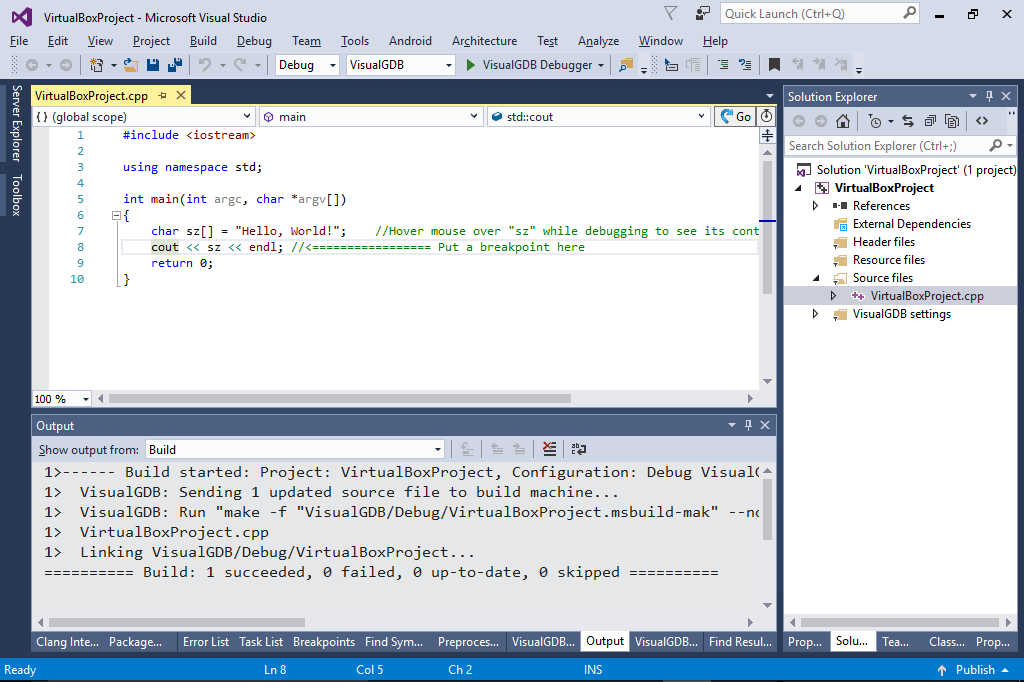
- Try building the project with Ctrl-Shift-B:
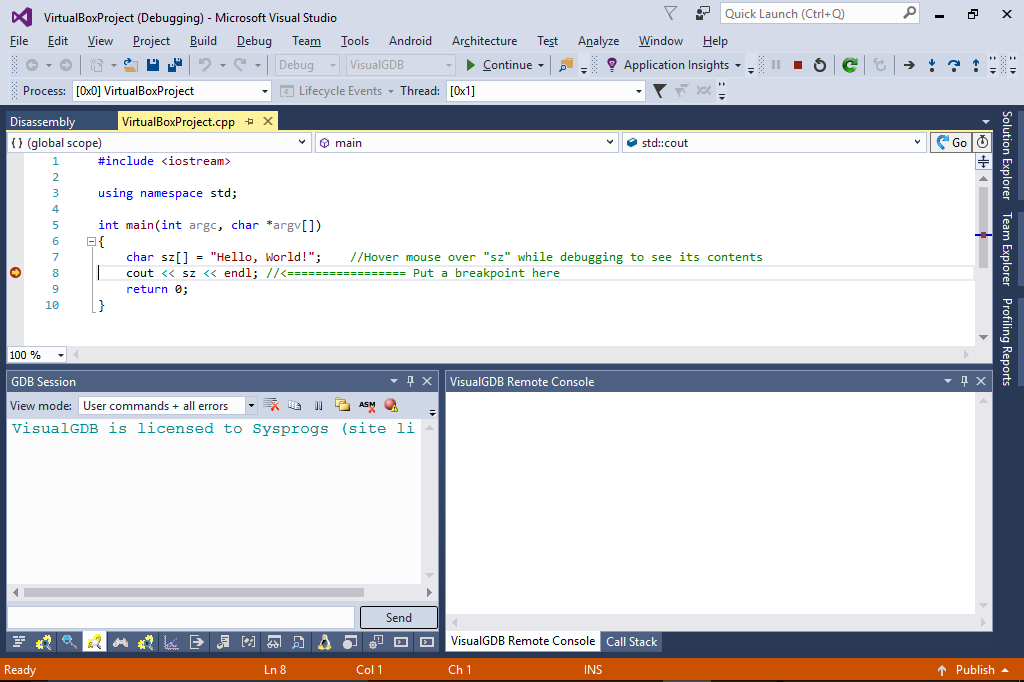
- Set a breakpoint in the function outputting the “Hello, World” line and press F5 to start debugging:
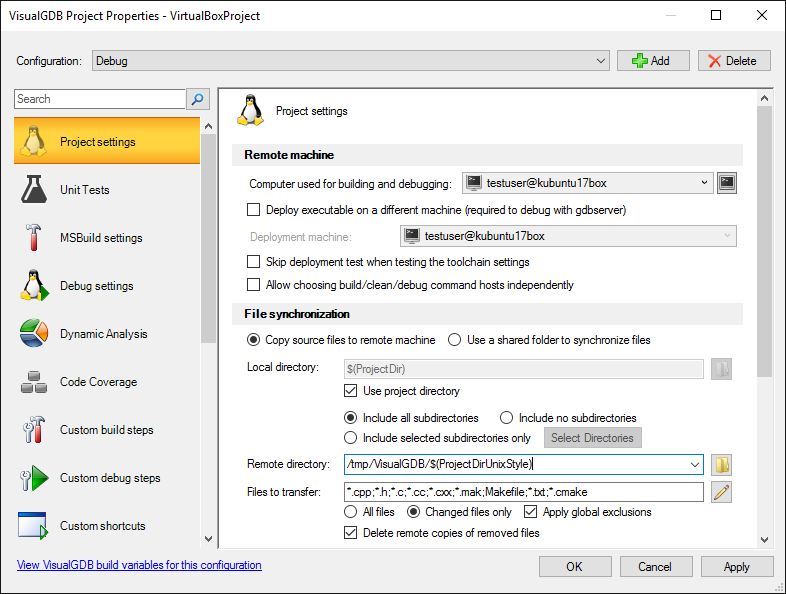
- You can customize various advanced settings for your project by right-clicking on it in Solution Explorer and selecting “VisualGDB Project Properties”: