Developing unit tests for Linux with GoogleTest
This tutorial shows how to use the GoogleTest framework to develop unit tests for Linux with VisualGDB. We will create a basic remotely built Linux project and will show how to use different GoogleTest assertion macros to test for various conditions.
Before you begin, install VisualGDB 5.2.
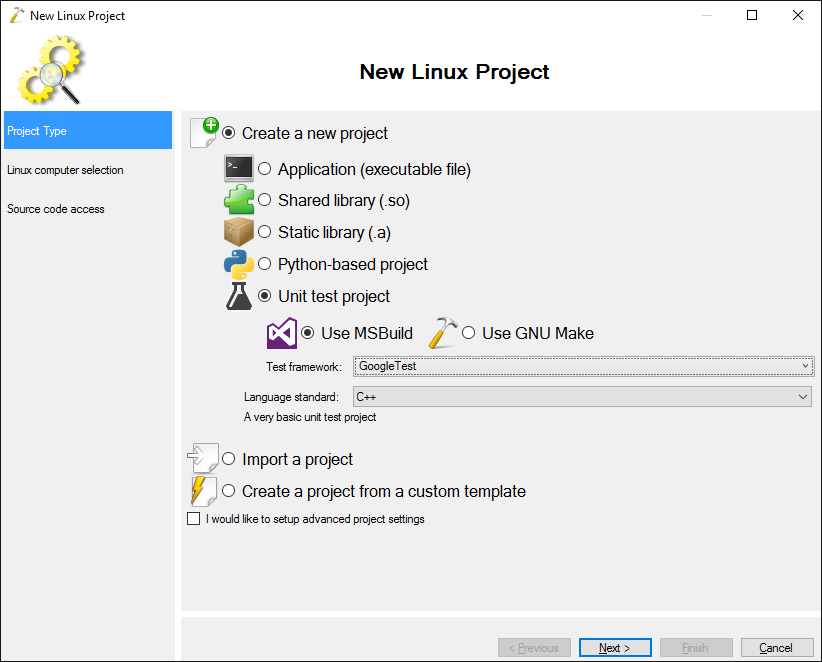
- Start Visual Studio and open the VisualGDB Linux Project Wizard:

- Select “New Project -> Unit test project -> MSBuild”:
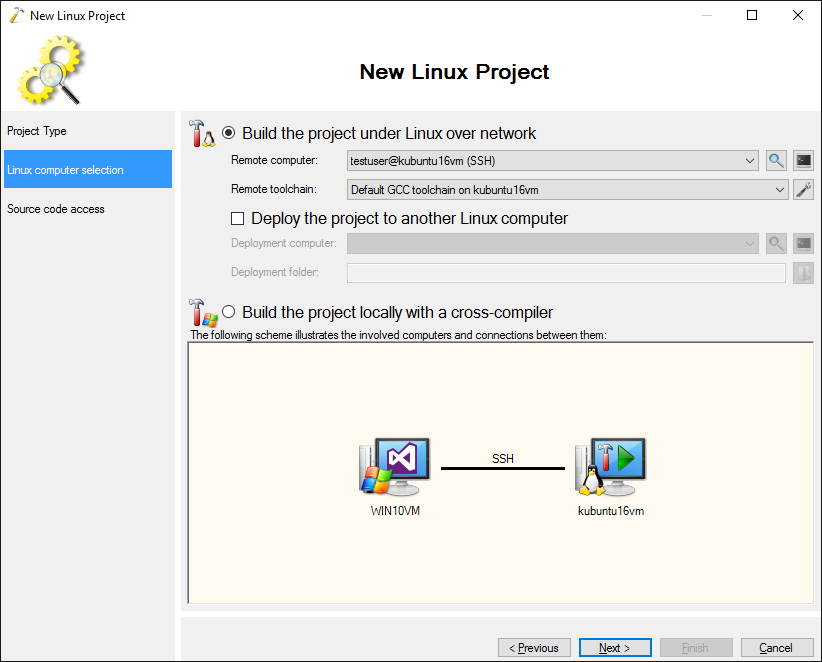
- Select the computer that you want to use for building. The steps described here will work for remotely built projects as well as for the projects built with cross-toolchains:
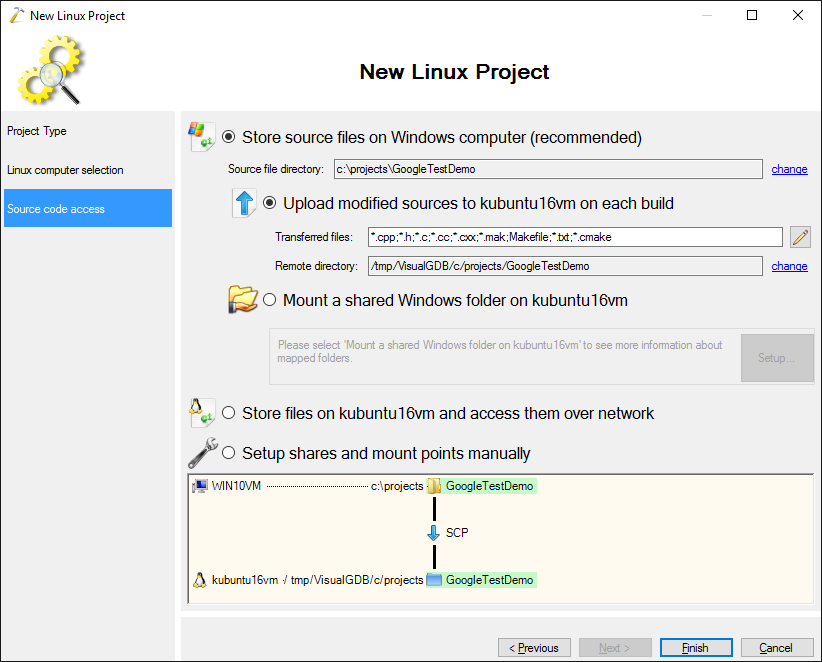
- Proceed with the default settings on the next page:
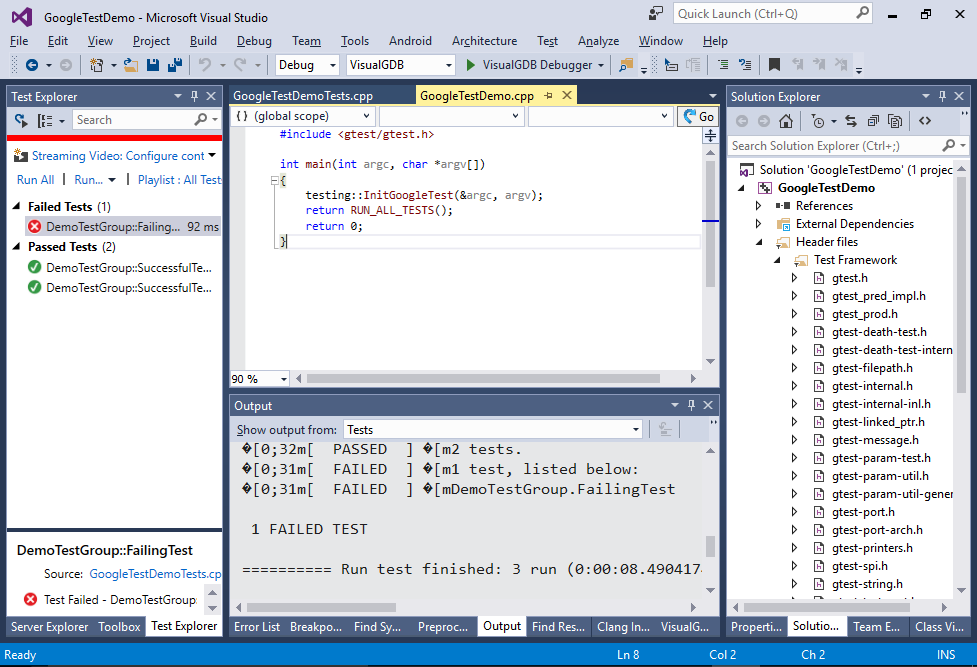
- Press “Finish” to generate the project. Build it via Ctrl-Shift-B and ensure that VisualGDB recognizes the sample tests generated by the wizard:
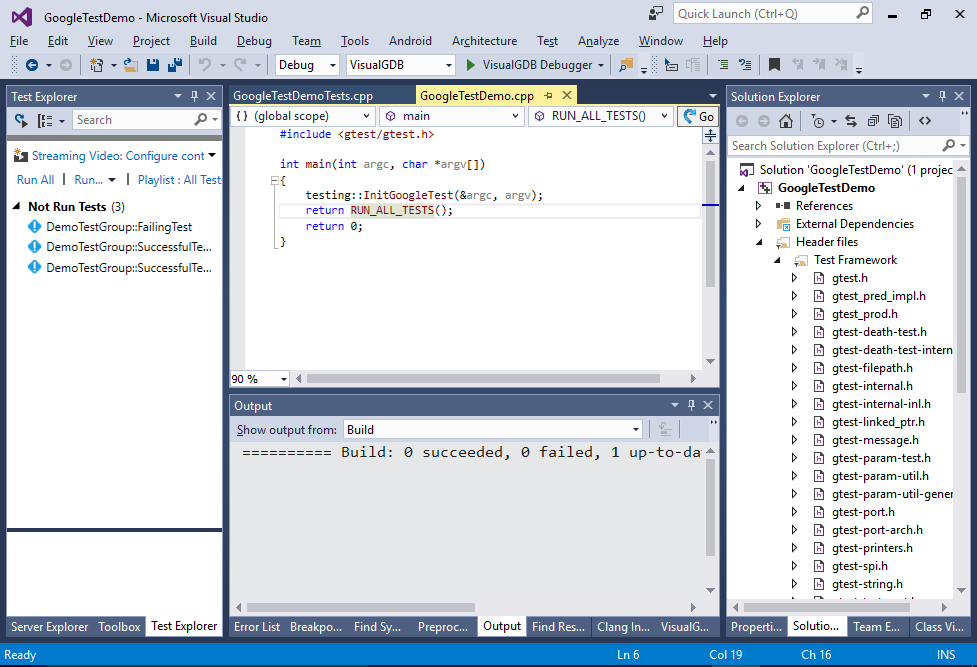
- Select Test->Run All to automatically launch the tests. Ensure that the FailingTest() reports a failure and the two other tests succeed:
- Now we will show how to use the most common GoogleTest macros to check for common conditions. Remove the auto-generated tests and put the following contents into the <Project Name>Tests.cpp file:
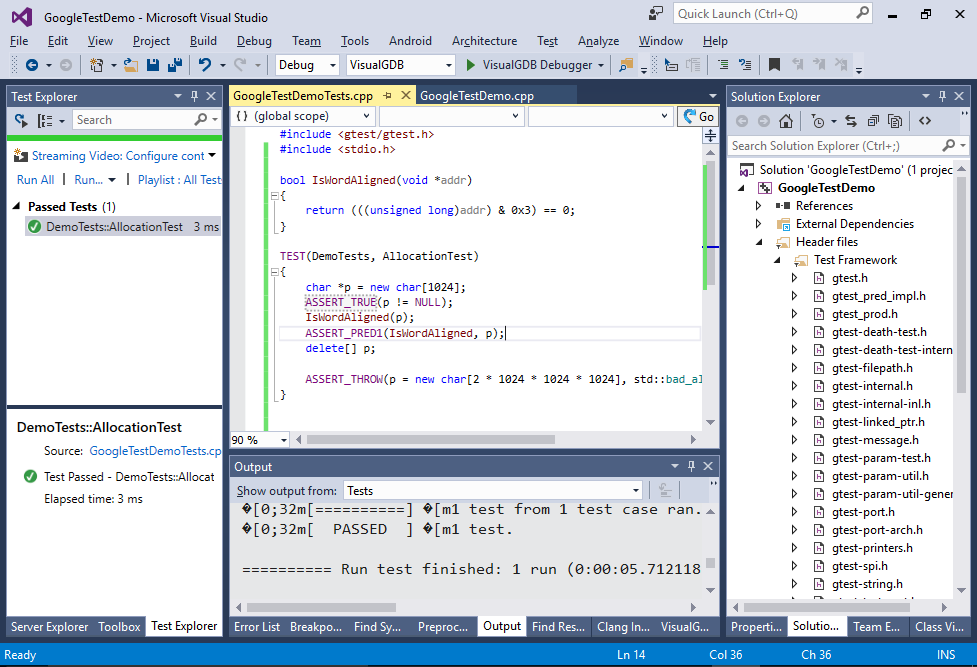
#include <gtest/gtest.h>
#include <stdio.h>

bool IsWordAligned(void *addr)
{
    return (((unsigned long)addr) & 0x3) == 0;
}

TEST(DemoTests, AllocationTest)
{
    char *p = new char[1024];
    ASSERT_TRUE(p != NULL);
    ASSERT_PRED1(IsWordAligned, p);
    delete[] p;

    ASSERT_THROW(p = new char[2 * 1024 * 1024 * 1024], std::bad_alloc);
}
The code above shows 3 different assertion macros:
- ASSERT_TRUE() is used to quickly check that a condition is true. Note that ASSERT_NE() will not work with NULL due to limitations of GoogleTest.
- ASSERT_PRED1() is used to check the value with a custom check function (a.k.a. predicate)
- ASSERT_THROW() is used to verify that the checked expression throws an exception (we check that trying to allocate too many bytes results in a std::bad_alloc)
- Build the project and run the test. Ensure that it passes:
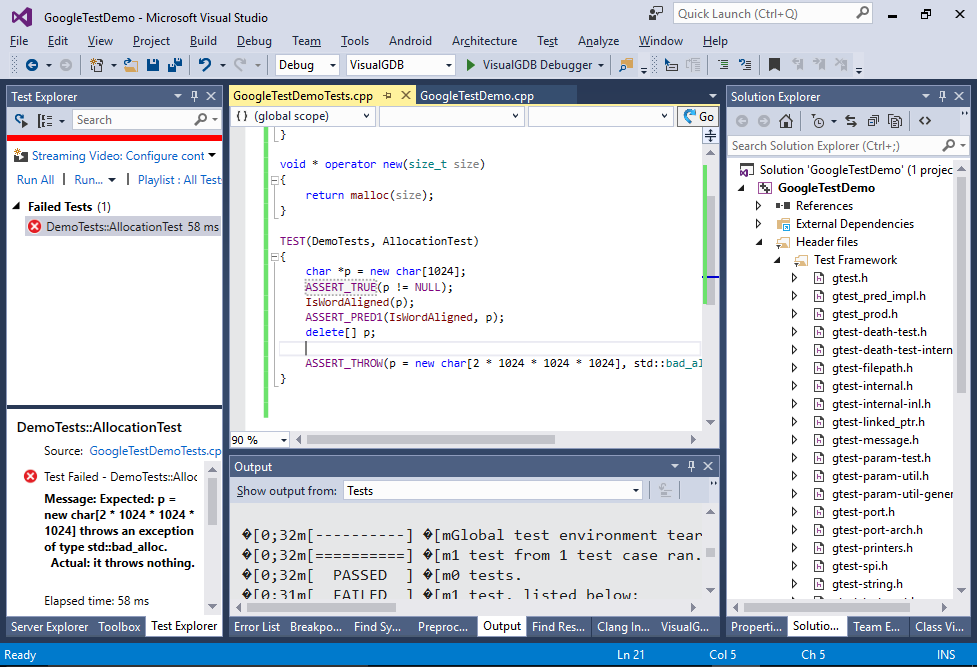
- Now we will provide a custom implementation of the new() operator that will simply call malloc() and will see if the our test can catch this:
void * operator new(size_t size)
{
    return malloc(size);
}
- Run the test and see how the test report provides a detailed message on what went wrong:
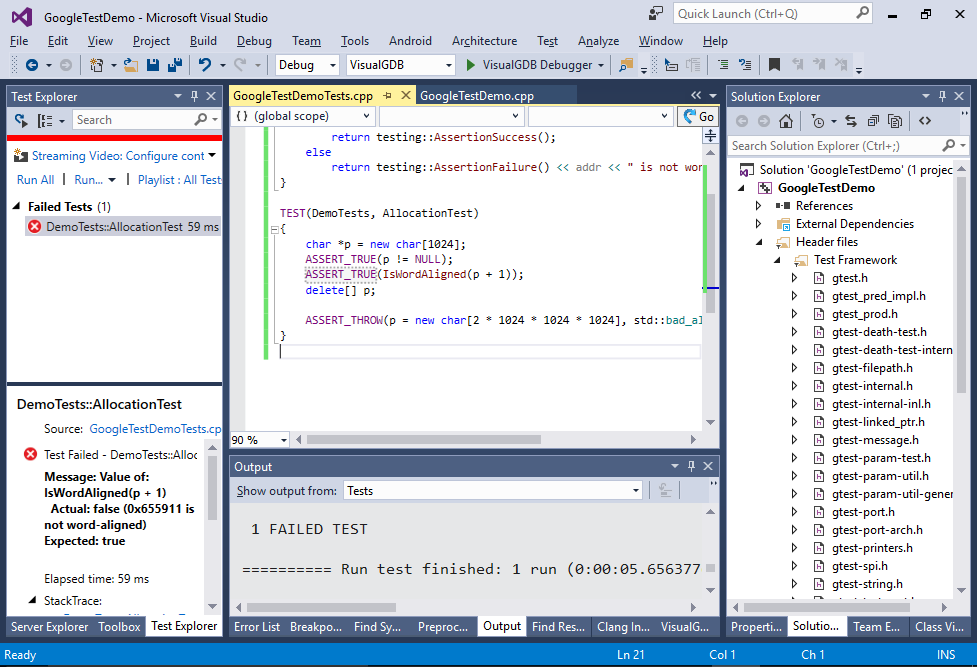
- Now we will cause the IsWordAligned() check to fail by adding 1 to the allocated pointer:
ASSERT_PRED1(IsWordAligned, p + 1);
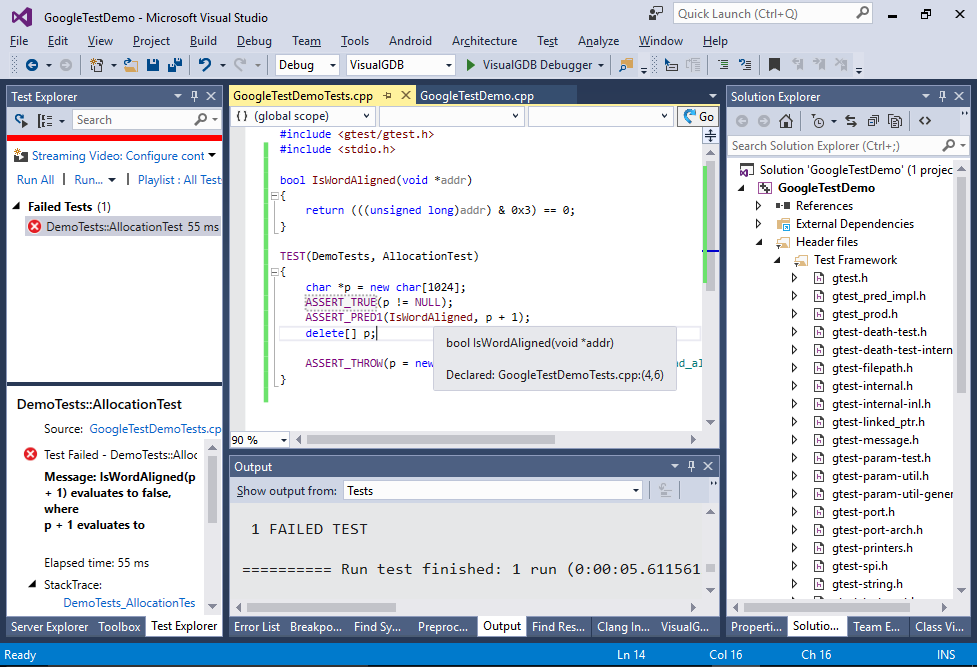
- Note how the test now fails, but the shown message is not very informative. You could improve its readability by changing IsWordAligned() to return testing::AssertionResult with some additional information instead of just bool:
testing::AssertionResult IsWordAligned(void *addr)
{
    if ((((unsigned long)addr) & 0x3) == 0)
        return testing::AssertionSuccess();
    else
        return testing::AssertionFailure() << addr << " is not word-aligned";
}
Change the line calling IsWordAligned() as follows:
ASSERT_TRUE(IsWordAligned(p + 1));
- The error message will now be more meaningful and will show the mismatched value:
- Now we will show how to use test fixtures to define initialization and cleanup code shared between several tests. Start with defining the following class:
class RNGTests : public::testing::Test
{
protected:
    virtual void SetUp() override
    {
        srand(123);
    }
};
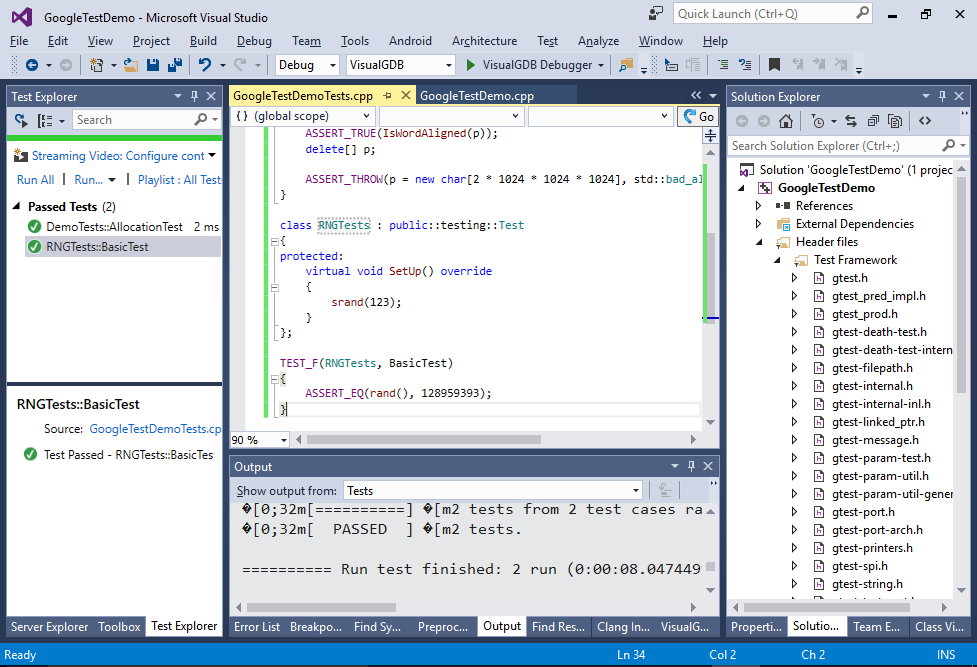
- Then define a basic test that will check the first value returned by rand():
TEST_F(RNGTests, BasicTest)
{
    ASSERT_EQ(rand(), 128959393);
}
Note that we used TEST_F() instead of just TEST() to declare the test. This will ensure that the RNGTests::SetUp() will be called before the test and RNGTests::TearDown() will be called after the test.
- Run the test and ensure it passes:
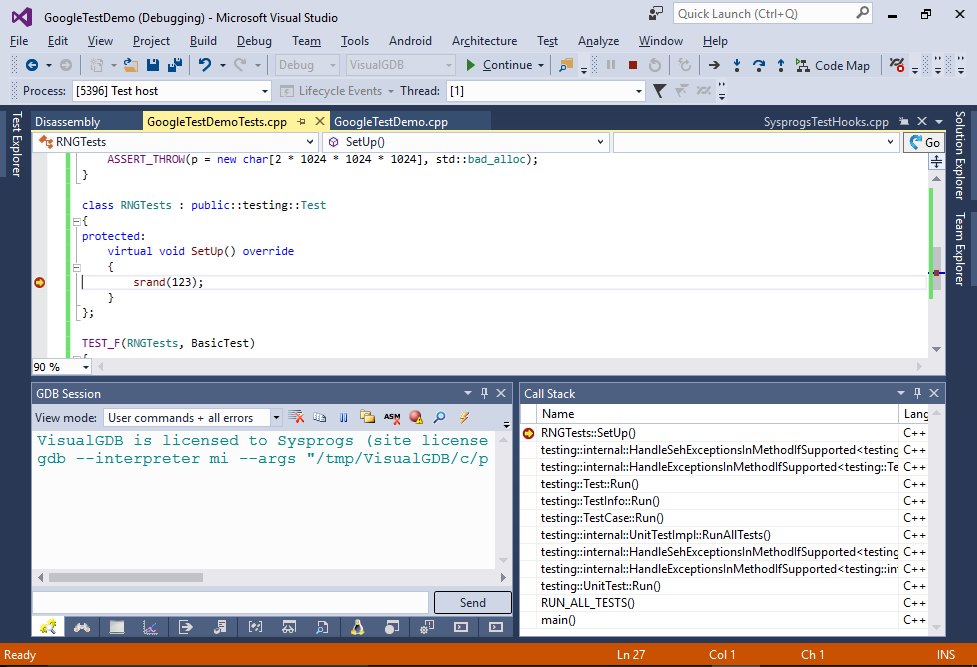
 The value returned by rand() may not match the one shown here, as different implementations of rand() may work differently. If this happens, edit the test accordingly.
 - You can use the Debug Tests command to quickly verify that srand() actually gets called:
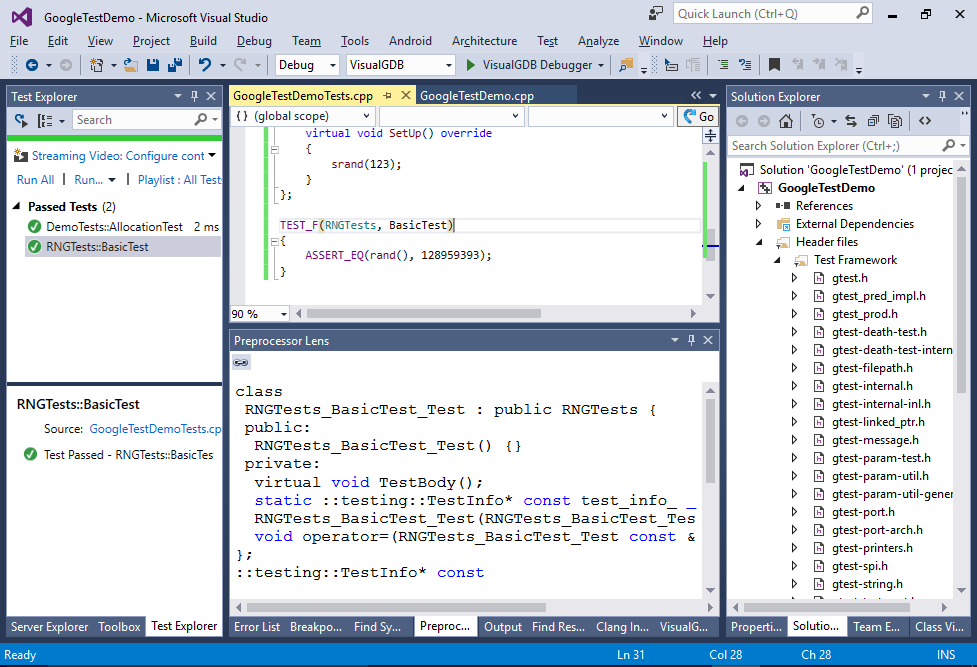
- To understand how exactly GoogleTest handles the fixtures, you can right-click on the line defining your test and select “Preprocess Selected Lines”. VisualGDB will show that defining a test with TEST_F() simply defines a class derived from your fixture class:
- If you are not using C++11 or later, you may encounter strange IntelliSense errors:
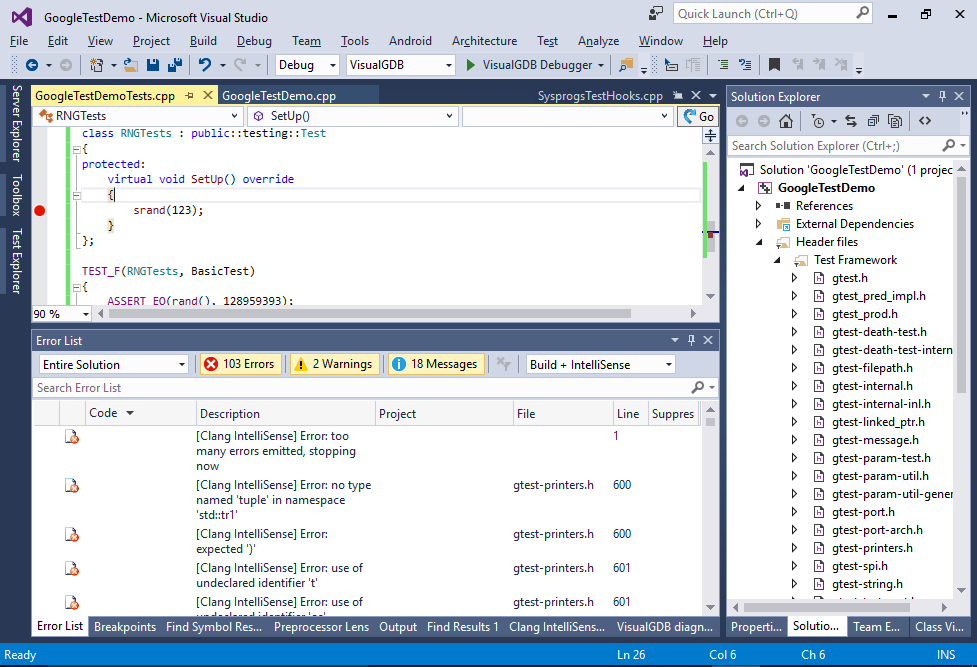
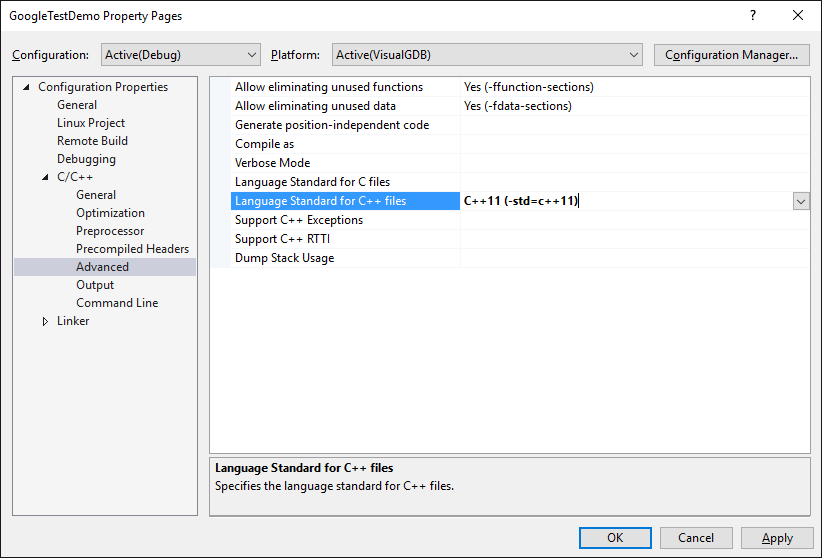
- The easiest way to fix those is to switch the language standard to C++11 or later:


You can read more about the advanced features of the GoogleTest framework here or look through this tutorial to see how to use VisualGDB with CppUTest.