Analyzing STM32 Memory Performance with Chronometer
This tutorial shows how to use the Chronometer feature to quickly understand the timing of the critical parts of your embedded code without using heavy profiling frameworks or introducing any other overhead. We will create a basic “LCD demo” project for the STM32F7Discovery board, show 4 different techniques of copying data from the FLASH memory to the framebuffer, measure their relative performance and explain the reasons for it.
Before you begin, install VisualGDB 5.3 or later.
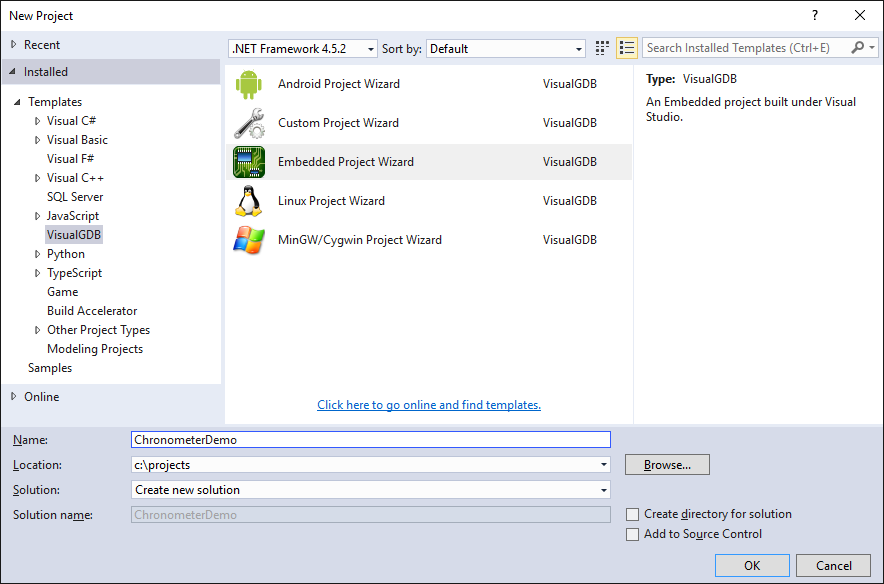
- Start Visual Studio and open the VisualGDB Embedded Project Wizard:
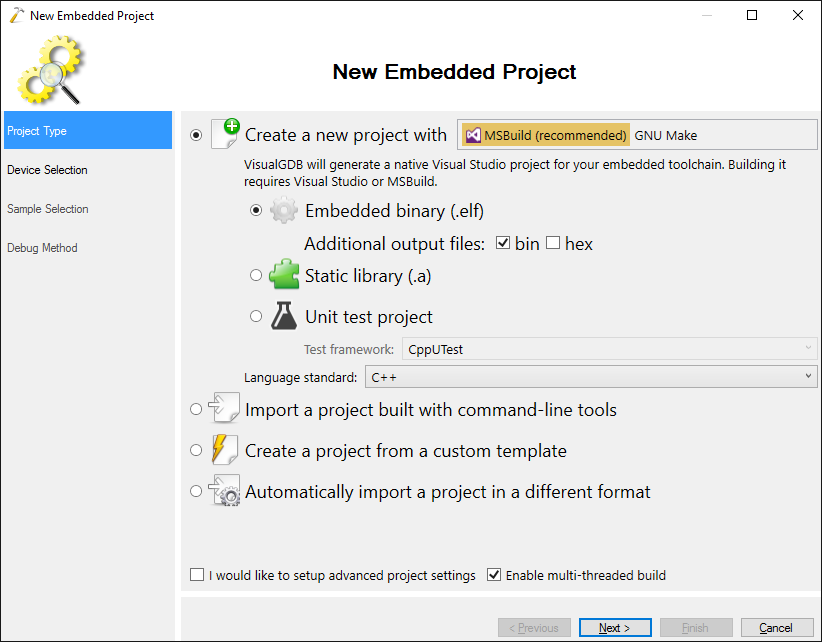
- Proceed with the default settings on the first page:
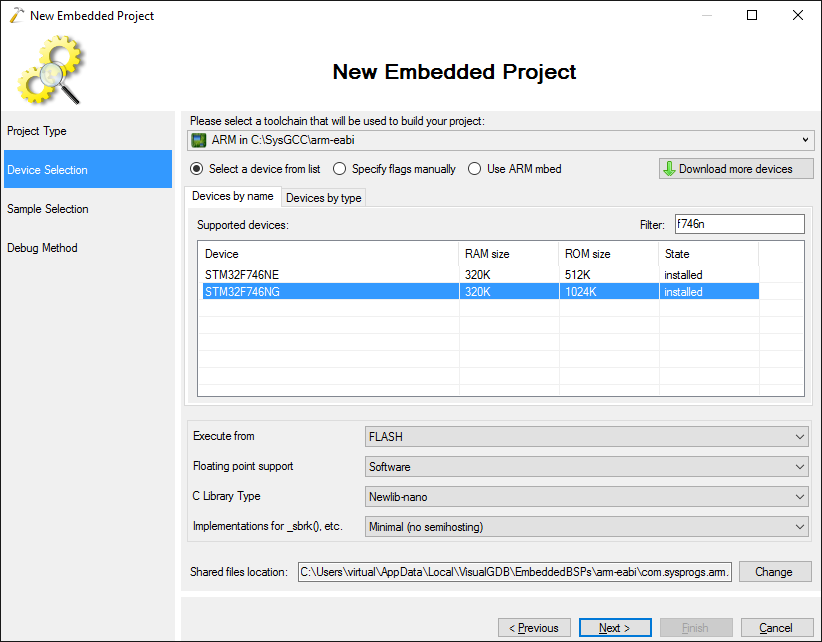
- On the next page select the ARM toolchain and pick your microcontroller. In this tutorial we will use the STM32F7Discovery board featuring the STM32F746NG controller, however the techniques shown here will work for any other microcontroller that has a hardware cycle counter as well:
- Select the “STM32F7Discovery LCD Demo” sample and click “Next”:
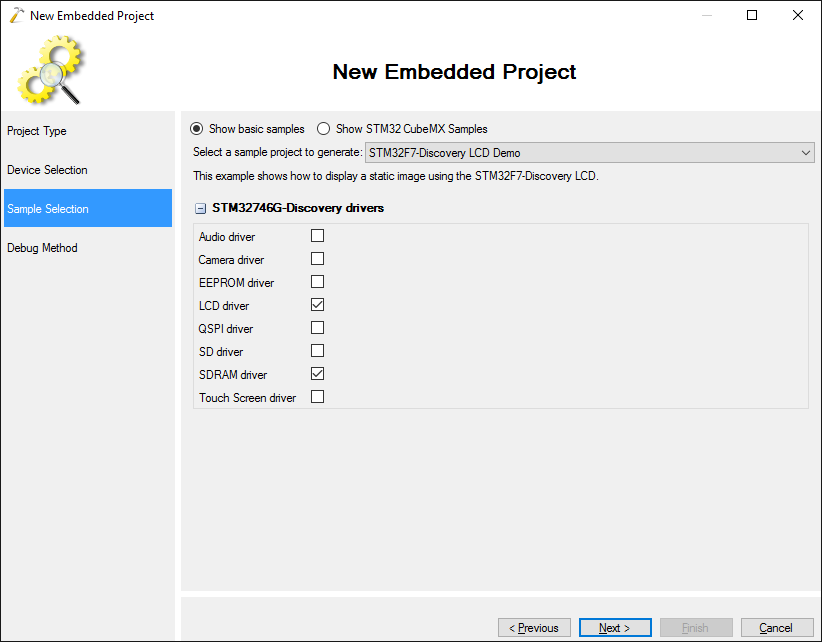
- Connect your board to your computer via USB. VisualGDB will automatically detect the on-board ST-Link and configure everything automatically:
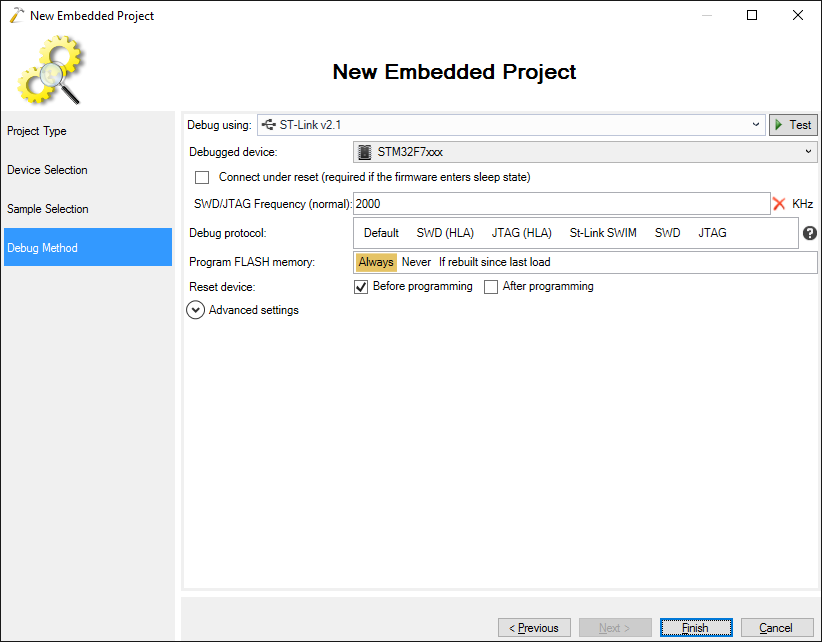
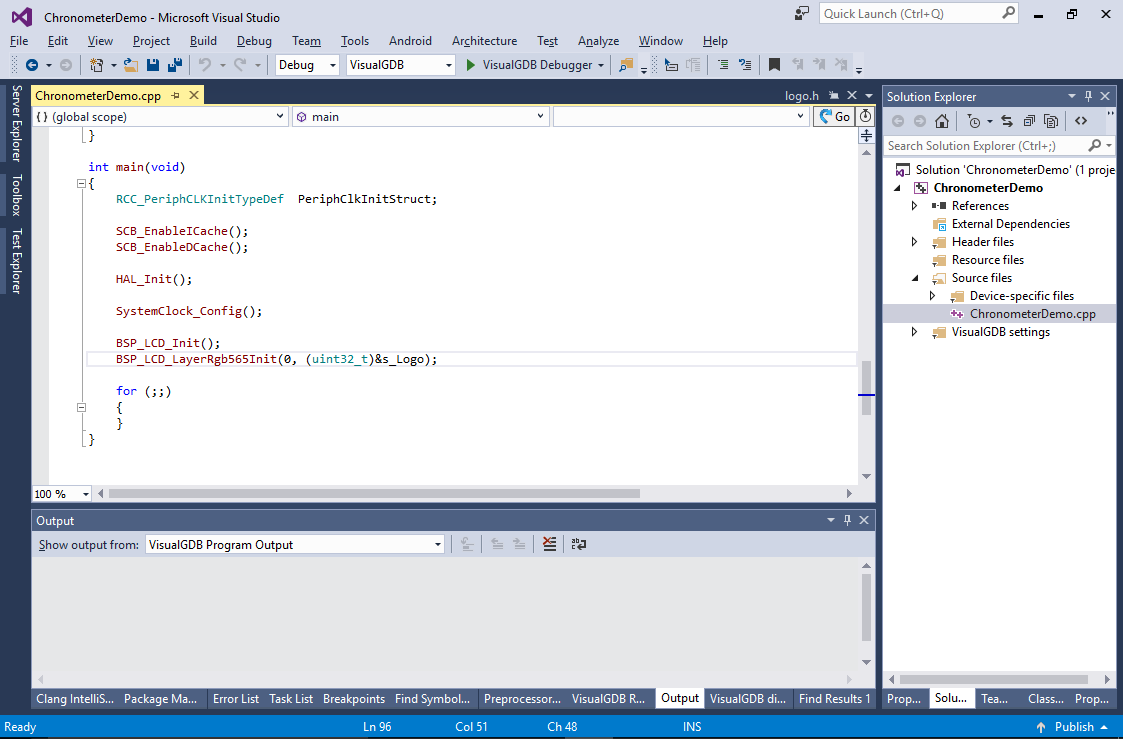
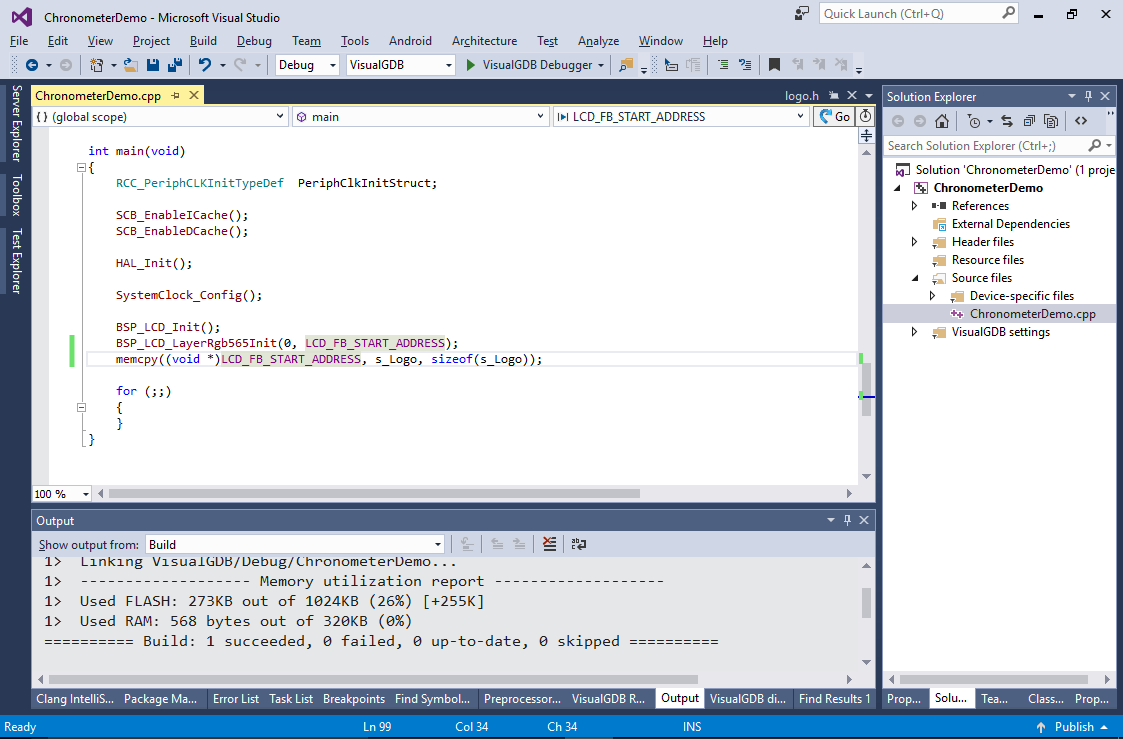
- Press “Finish” to generate the project. VisualGDB will create a basic main() function that will display a static image on the LCD screen by configuring the LCD controller to use the image in the FLASH memory as a framebuffer:
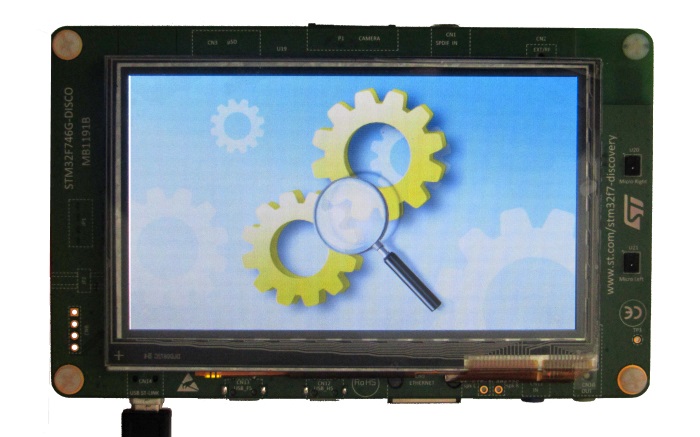
- If you run the project, the LCD screen should show the picture:
- Now we will modify the program to use a frame buffer in the DRAM memory and copy the picture there from the FLASH memory:
    BSP_LCD_LayerRgb565Init(0, LCD_FB_START_ADDRESS);
    memset((void *)LCD_FB_START_ADDRESS, 0, sizeof(s_Logo));
 Run the new program and ensure that the picture is still shown correctly.
 - Now we will try several different techniques of copying the data between the FLASH memory and the frame buffer and compare their performance. You could measure the run time of your functions by reading the ARM Cortex cycle count register (DWT_CYCCNT) and converting cycles to real time, however VisualGDB provides an automatic way of doing this – chronometer. Open VisualGDB Project Properties, go to the Embedded Debug Tweaking page, enable the “Record timestamps of debug events” checkbox and enter your ticks per second value:
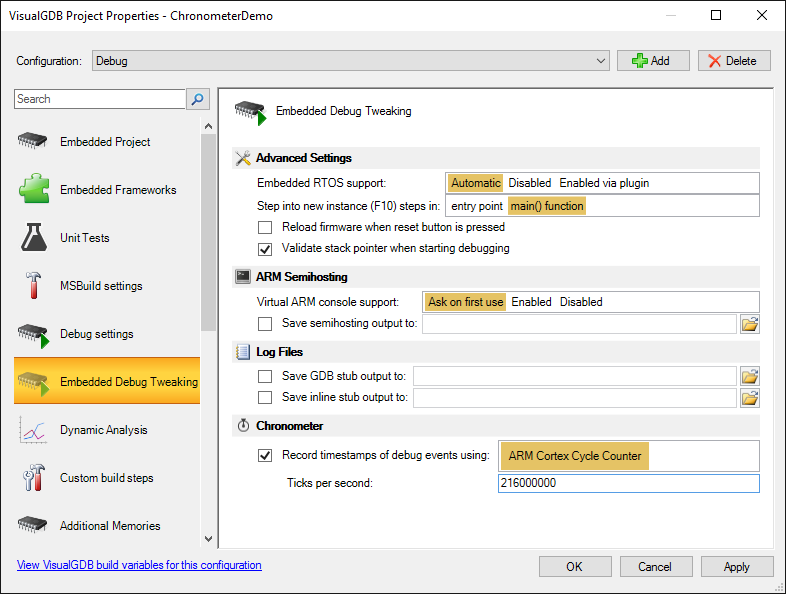 You can find out the number of ticks per second by evaluating the SystemCoreClock variable.
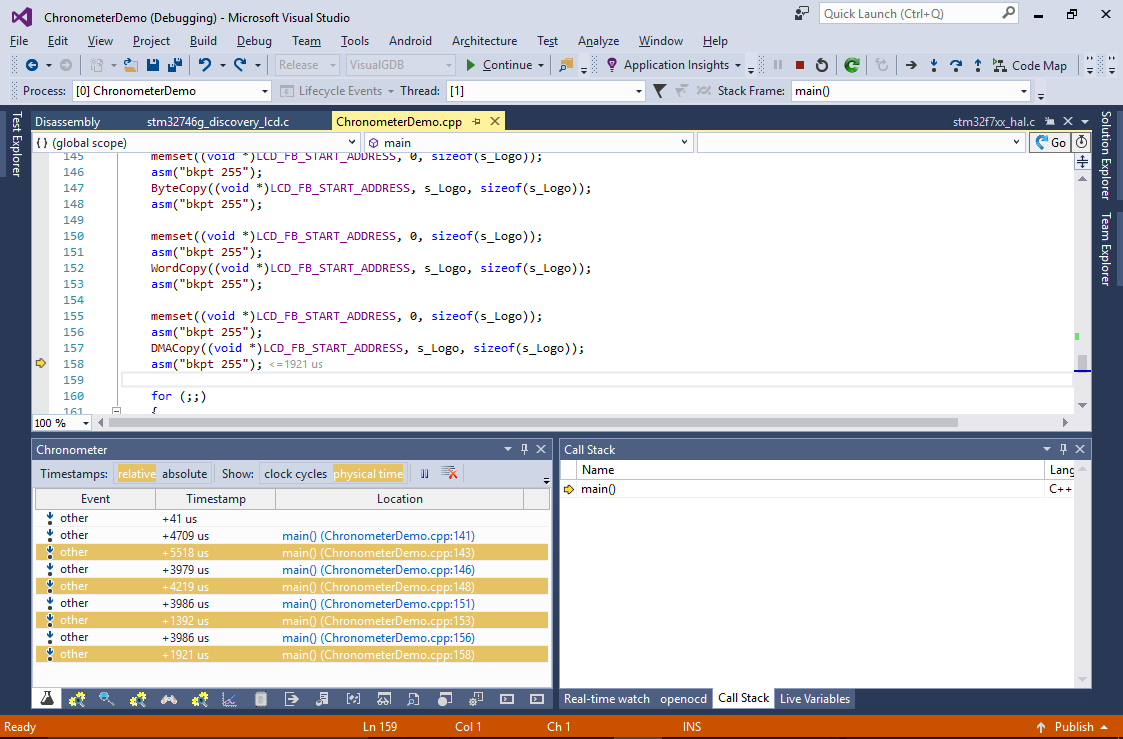
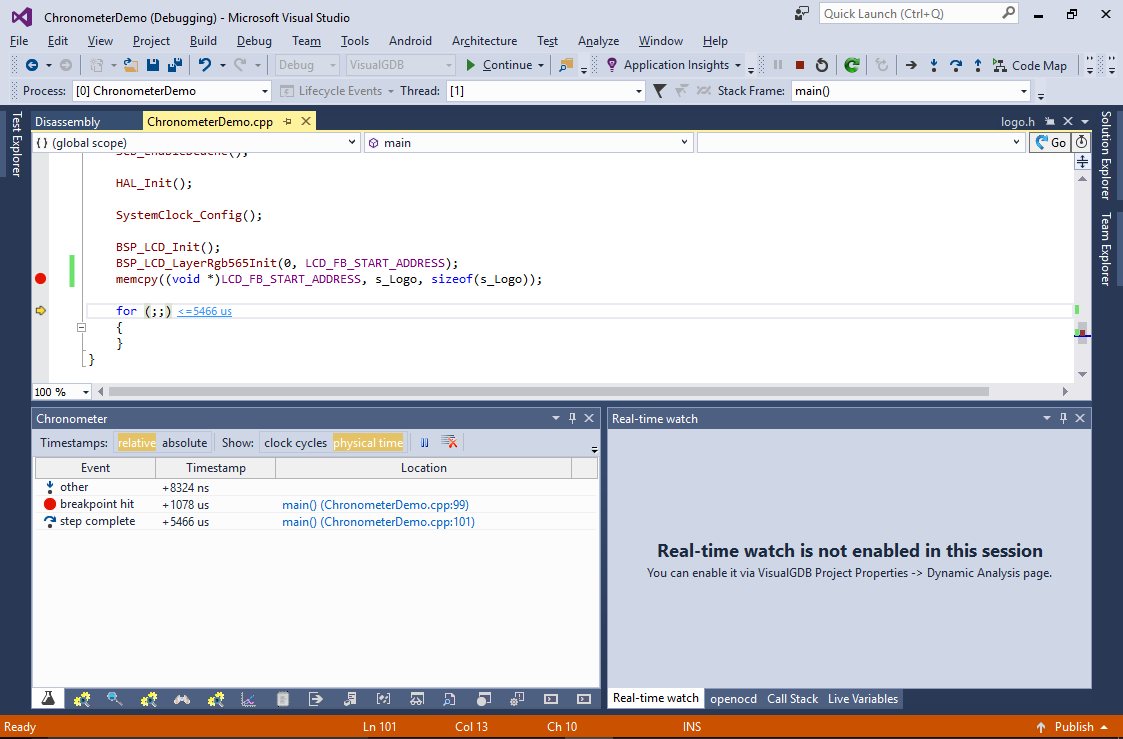
 - Try stepping over the memcpy() function. VisualGDB will now show the time elapsed since the last debug event in the current line. Click on the time label, so that VisualGDB will open the Chronometer window showing all events that occurred during the session:
- Now we will try out several alternatives to memcpy() and compare their performance. The first 2 methods will copy the data in a loop, either one byte or one 4-byte word at a time:
#include <string.h>

void ByteCopy(void *pDestination, const void *pSource, int sizeInBytes)
{
    for (int i = 0; i < sizeInBytes; i++)
        ((char *)pDestination)[i] = ((char *)pSource)[i];
}

void WordCopy(void *pDestination, const void *pSource, int alignedSizeInBytes)
{
    for (int i = 0; i < alignedSizeInBytes / 4; i++)
        ((unsigned *)pDestination)[i] = ((unsigned *)pSource)[i];
}
- The third method will use the DMA mechanism (direct memory access) that should copy the data word-by-word without using the CPU at all:
void DMACopy(void *pDestination, const void *pSource, int alignedSizeInBytes)
{
    DMA_HandleTypeDef  g_DmaHandle;

    __DMA2_CLK_ENABLE();
    g_DmaHandle.Instance = DMA2_Stream1;

    g_DmaHandle.Init.Channel  = DMA_CHANNEL_0;
    g_DmaHandle.Init.Direction = DMA_MEMORY_TO_MEMORY;
    g_DmaHandle.Init.PeriphInc = DMA_PINC_ENABLE;
    g_DmaHandle.Init.MemInc = DMA_MINC_ENABLE;
    g_DmaHandle.Init.PeriphDataAlignment = DMA_PDATAALIGN_WORD;
    g_DmaHandle.Init.MemDataAlignment = DMA_MDATAALIGN_WORD;
    g_DmaHandle.Init.Mode = DMA_NORMAL;
    g_DmaHandle.Init.Priority = DMA_PRIORITY_HIGH;
    g_DmaHandle.Init.FIFOMode = DMA_FIFOMODE_DISABLE;
    g_DmaHandle.Init.FIFOThreshold = DMA_FIFO_THRESHOLD_HALFFULL;
    g_DmaHandle.Init.MemBurst = DMA_MBURST_SINGLE;
    g_DmaHandle.Init.PeriphBurst = DMA_PBURST_SINGLE;

    HAL_DMA_Init(&g_DmaHandle);
    HAL_DMA_Start(&g_DmaHandle, (uint32_t)pSource, (uint32_t)pDestination, alignedSizeInBytes / sizeof(unsigned));
    HAL_DMA_PollForTransfer(&g_DmaHandle, HAL_DMA_FULL_TRANSFER, HAL_MAX_DELAY);
}
- For the first test we will disable data and instruction caching by commenting out the corresponding lines in main():
    //SCB_EnableICache();
    //SCB_EnableDCache();
Then disable the interrupts and invoke different copy operations one after another:
    asm("cpsid i");

    memset((void *)LCD_FB_START_ADDRESS, 0, sizeof(s_Logo));
    asm("bkpt 255");
    memcpy((void *)LCD_FB_START_ADDRESS, s_Logo, sizeof(s_Logo));
    asm("bkpt 255");

    memset((void *)LCD_FB_START_ADDRESS, 0, sizeof(s_Logo));
    asm("bkpt 255");
    ByteCopy((void *)LCD_FB_START_ADDRESS, s_Logo, sizeof(s_Logo));
    asm("bkpt 255");

    memset((void *)LCD_FB_START_ADDRESS, 0, sizeof(s_Logo));
    asm("bkpt 255");
    WordCopy((void *)LCD_FB_START_ADDRESS, s_Logo, sizeof(s_Logo));
    asm("bkpt 255");

    memset((void *)LCD_FB_START_ADDRESS, 0, sizeof(s_Logo));
    asm("bkpt 255");
    DMACopy((void *)LCD_FB_START_ADDRESS, s_Logo, sizeof(s_Logo));
    asm("bkpt 255");
We have used the “bkpt 255” instruction before and after each copy operation as the optimizer will likely inline some of the calls, making the ‘step over’ functionality less precise.
- Switch to the release configuration, enable chronometer for it and run through your program:
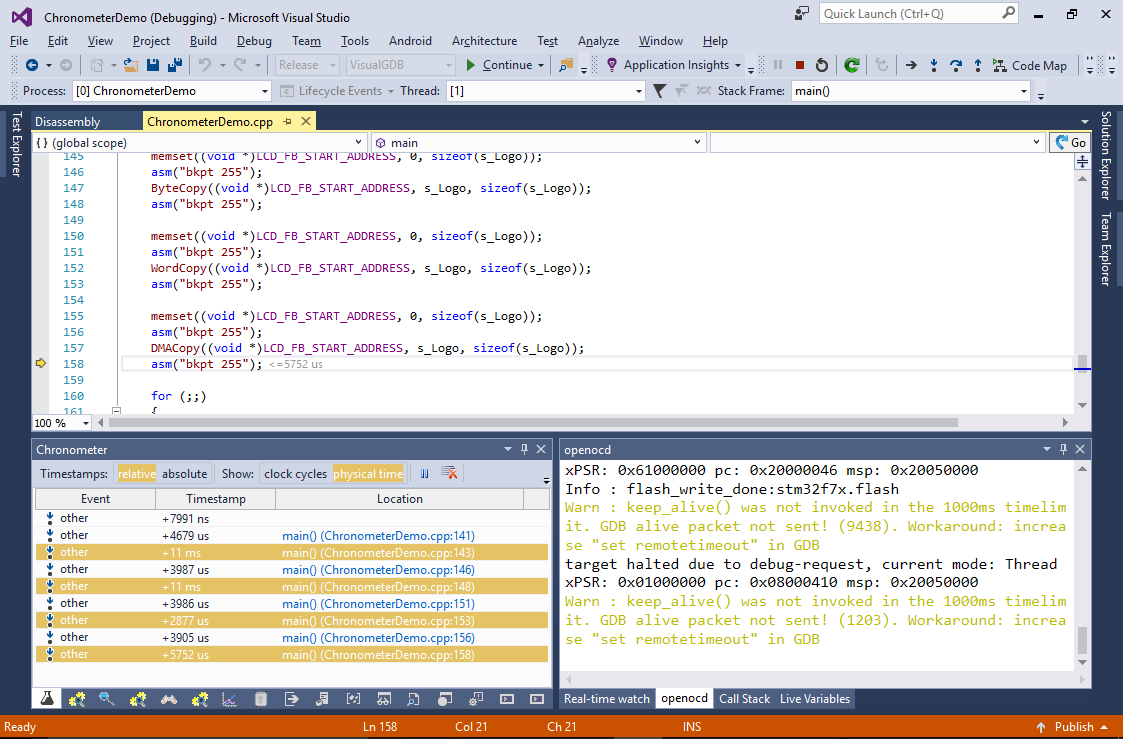 Observe the times shown in the Chronometer window. In our experiments the memcpy() function was as slow as copying the image byte-by-byte; copying it word-by-word was ~4x faster and using DMA was actually slower than a word-by-word copy.
 - DMA being slower than a copy loop looks counter-intuitive, so we can easily investigate it using the Chronometer. Use the ‘set next statement’ command to get back into the line calling DMACopy() and then step into it. Measure the time it takes to setup DMA and the time for actually waiting for it to complete (from line 120 to line 121):
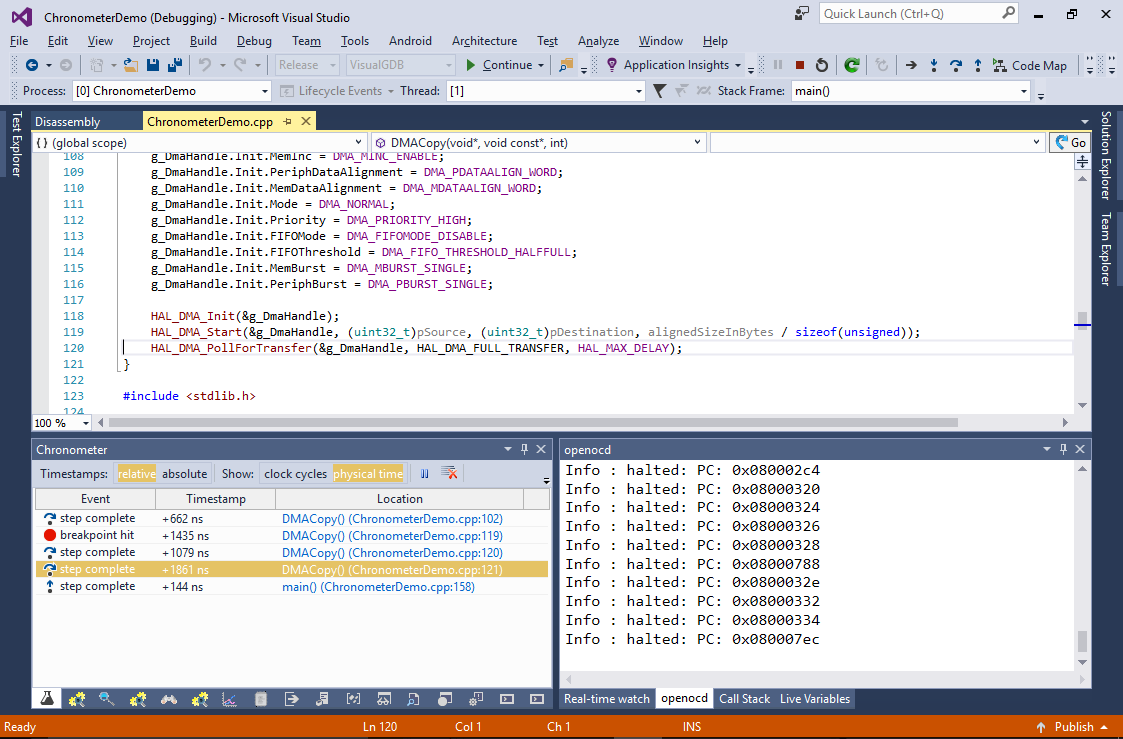 The chronometer quickly shows that the DMA is generally ~30% faster than the copy loop, however the time spent on setting it up outweighs any performance benefits.
 - Try enabling the cache by uncommenting the SCB_EnableICache() and SCB_EnableDCache() calls. See how the byte-by-byte copying performance has greatly improved (as most of the single-byte reads now immediately return the data cached during the previous read), but the word-by-word copying is still faster than any other method: