Debugging Python 3 code on Raspberry Pi with Visual Studio
This tutorial shows how to use Visual Studio with VisualGDB to debug the Python code running on Raspberry Pi remotely.
As of February 2018, the pre-built Python package provided with the Raspbian distro contains optimizations preventing the debugger from interpreting the Python frames correctly. In this tutorial we will show how to build a debuggable version of Python on your Raspberry Pi and use Visual Studio to debug scripts running under it.
- Locate the source package for the latest Python version on the downloads page. In this tutorial we will use Python 3.6.4 (requires VisualGDB 5.4) as version 3.7.0 doesn’t build correctly on Raspberry Pi. If you are using VisualGDB 5.3 or earlier, please use Python 3.5 instead.
- Start your Raspberry Pi and connect to it using SmarTTY or any other SSH client.
- If your Python code depends on SSL support (e.g. required to use pip), install the libssl-dev package before you begin building the new Python environment:
sudo apt-get install libssl-dev
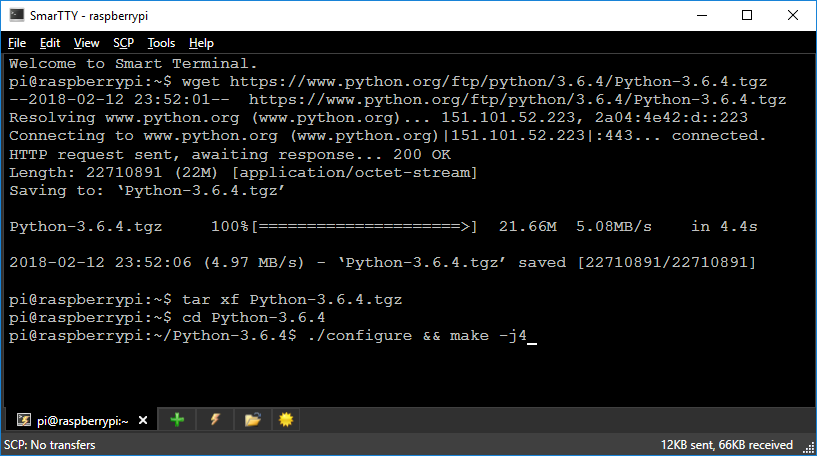
- Run the following commands to download, unpack and build the Python interpreter:
wget https://www.python.org/ftp/python/3.6.4/Python-3.6.4.tgz
tar xf Python-3.6.4.tgz
cd Python-3.6.4
./configure && make -j4
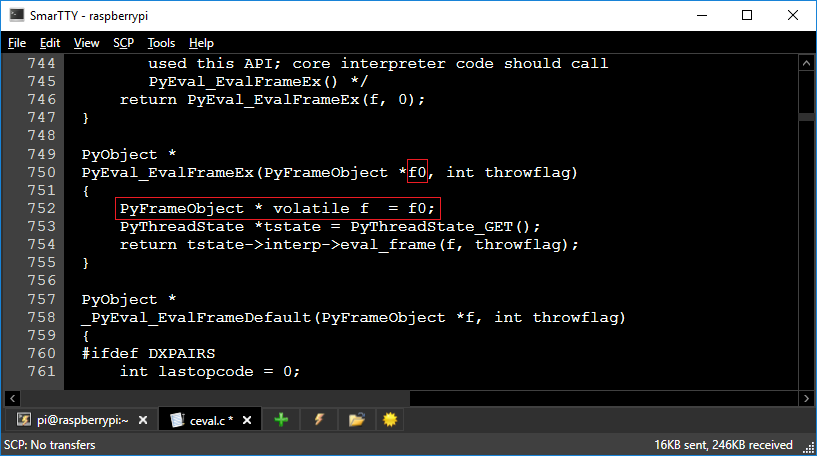
- Ensure that the initial build succeeds. Now we will patch the ceval.c file to allow the debugger to interpret the Python frames. Open it in a text editor and replace the function body with the following:
PyObject *
PyEval_EvalFrameEx(PyFrameObject *f0, int throwflag)
{
 PyFrameObject * volatile f = f0;
 PyThreadState *tstate = PyThreadState_GET();
 return tstate->interp->eval_frame(f, throwflag);
}
- Build the Python interpreter again (it will only rebuild 1 file) and install it:
make -j4
sudo make install -j4
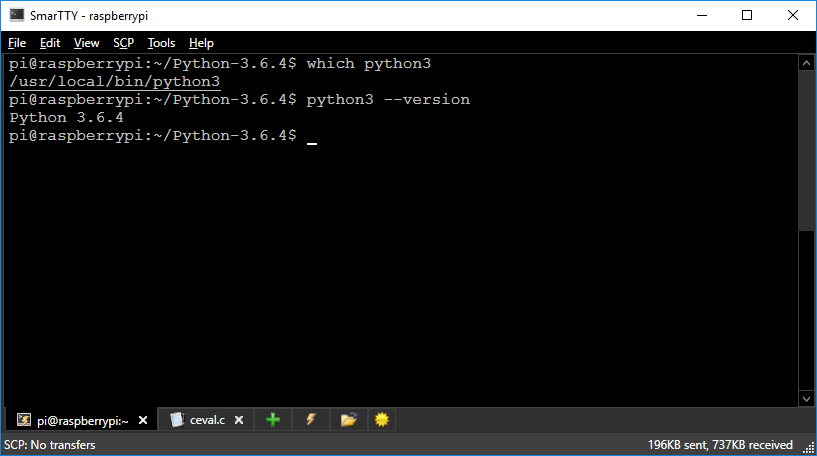
- The Python executable will normally be installed under /usr/local/bin. You can double-check this by running “which python3” followed by “python3 –version”:
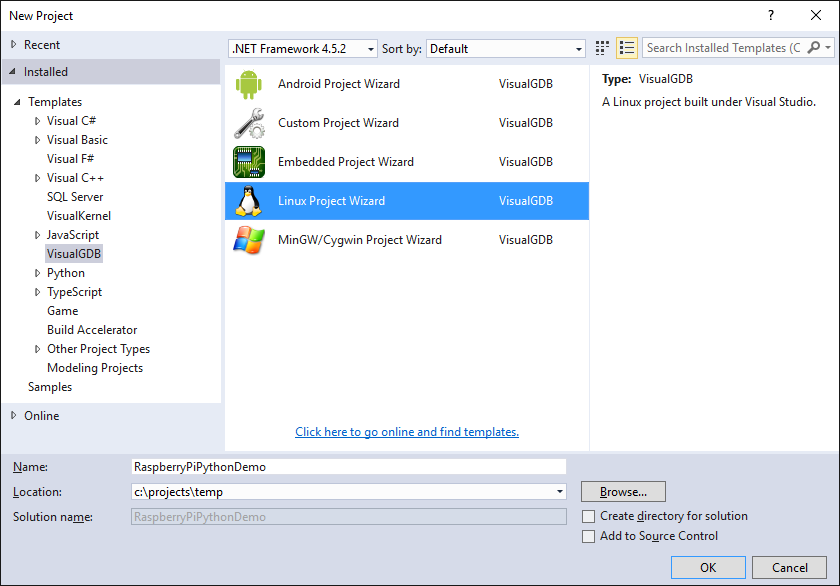
- Start Visual Studio and open VisualGDB Linux Project Wizard:
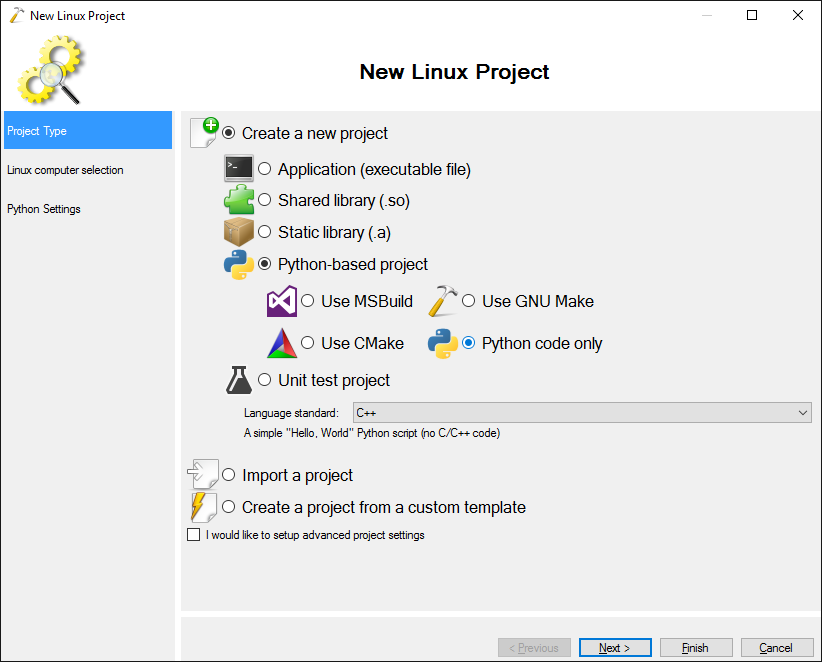
- On the first page of the wizard select the Python-based project:
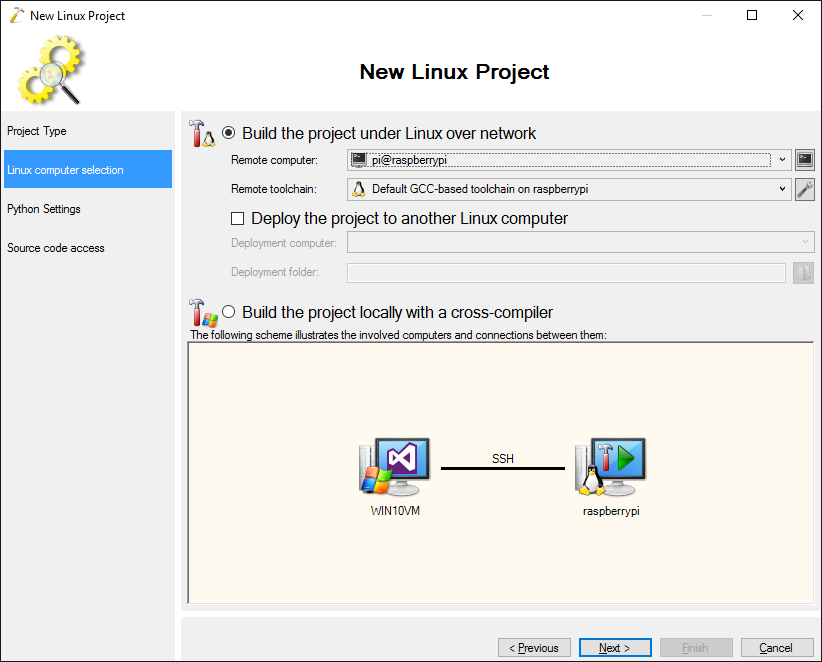
- On the next page click “Build the project under Linux” and select your Raspberry Pi in the “Remote computer” field:
- On the next page enter “python3” or the full path to the installed Python executable in the “Python executable” field. If you have the pre-packaged Python installed as well, we recommend entering the full path to avoid confusion:
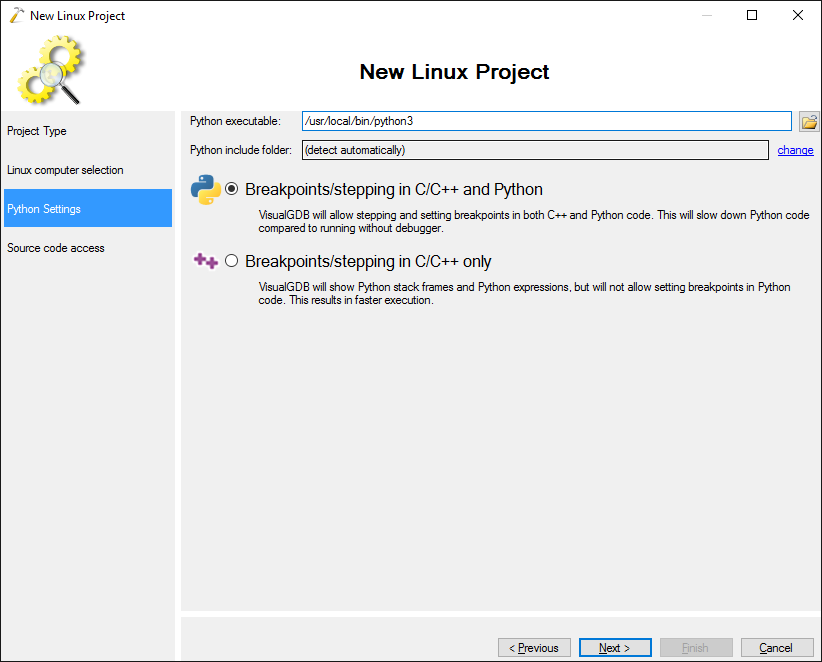 Press “Next”. If you are using VisualGDB 5.4 or later, it will automatically detect Python-related settings and check that all the necessary components are present. If you are using version 5.3 or earlier, you may need to specify the Python header directory manually.
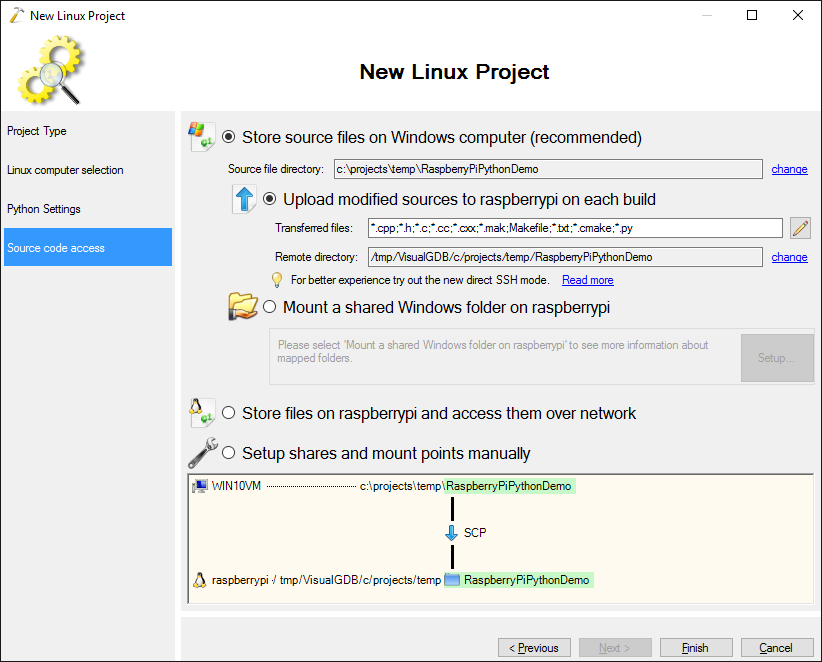
 - Proceed with the default file synchronization settings. In this mode VisualGDB will keep a local copy of all source files in the project directory and will upload the modified ones before you begin debugging:
- Press “Finish” to create the project. VisualGDB will generate a basic Python scripts demonstrating the use of classes and variables:
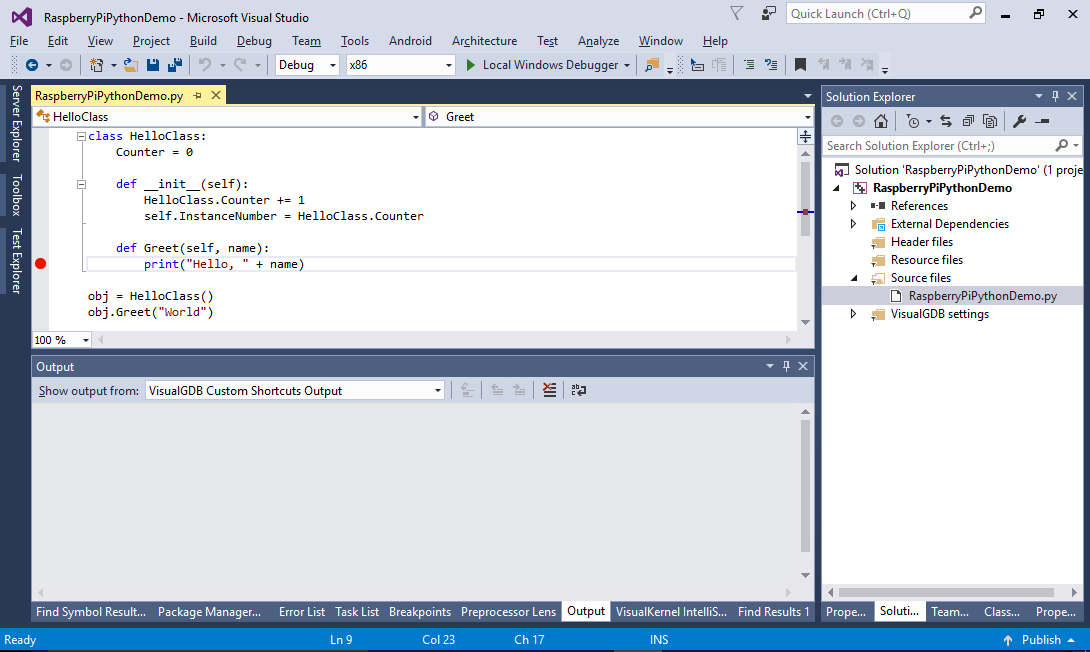
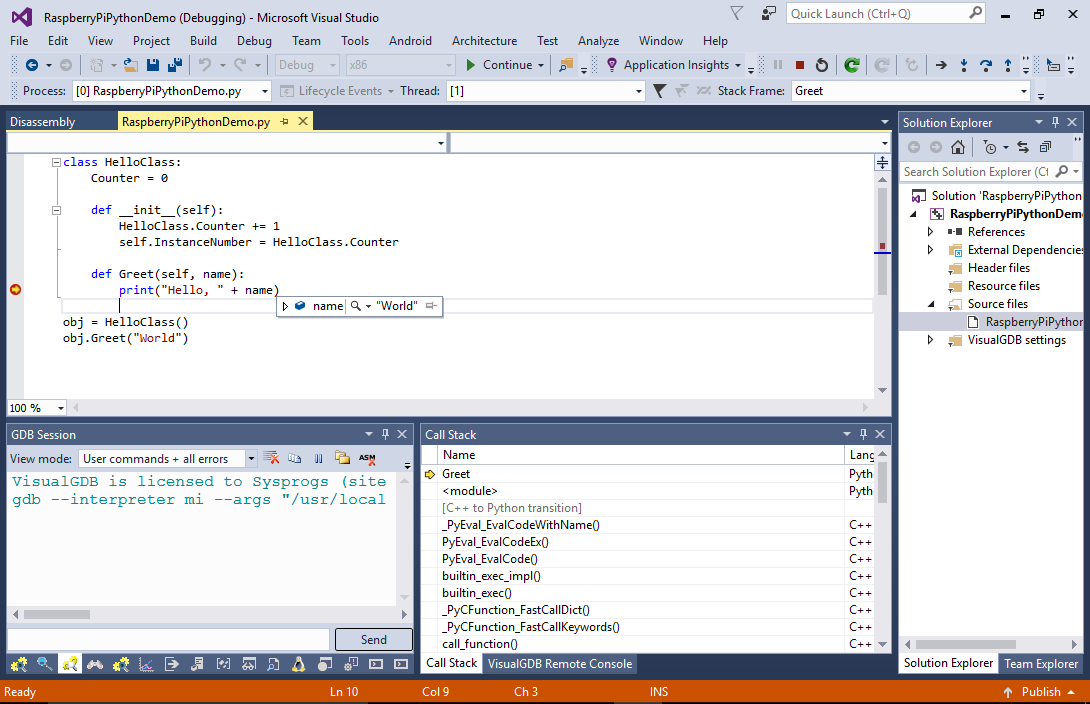
- Set a breakpoint in the Greet() function and press F5 to begin debugging. VisualGDB will automatically upload your sources and launch Python remotely. Once the breakpoint is hit, you will be able to debug your program as if it was a regular C/C++ program: