Advanced Arduino Project Structure
This page explains the structure of Arduino-based VisualGDB projects, shows how to change various global and per-project settings, and also how to troubleshoot common problems.
Contents
Overview
Typical Structure
Libraries
Global Settings
Project Settings
Managing Targets
Debugging
Observing Output
Troubleshooting
Overview
Arduino-based VisualGDB projects are built on top of the Arduino cores and libraries published by various device manufacturers. Out-of-the-box integration with many useful libraries and code examples makes them perfect for extremely fast prototyping of simple hardware projects.
The Arduino projects are built directly using our fork of the official Arduino Builder tool. The tool automatically manages various build parameters same way it does with the regular Arduino IDE. This ensures that the output of VisualGDB Arduino projects is equivalent to the files produced by the Arduino IDE.
VisualGDB includes out-of-the-box support for the original Arduino targets, as well as ESP32, ESP8266, STM32, Bluno M3 and Maixduino devices using vendor-supplied Arduino cores.
Arduino projects are created via the VisualGDB Arduino Project Wizard and can be recognized by the Arduino icon in Solution Explorer: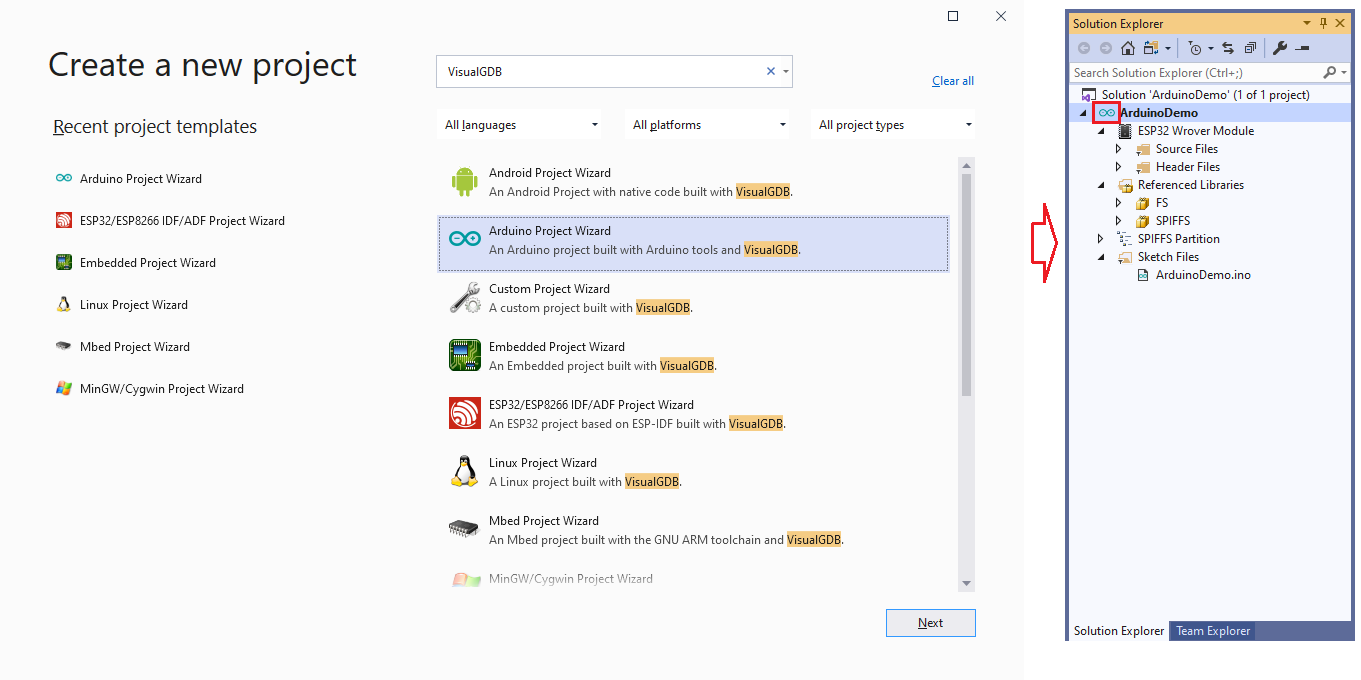
Typical Structure
A typical Arduino project consists of the components shown below: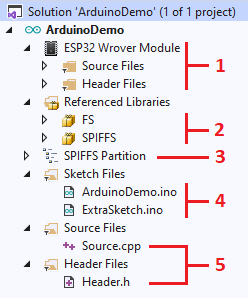
- The Arduino Core. It is provided by the device manufacturer and contains hardware initialization code, as well as drivers for various peripherals.
- One or more Arduino libraries referenced by the project. They are typically either bundled together with the Arduino core, or are contributed by other users.
- SPIFFS partition that can store data files used by the project. This is only supported when using the ESP32 Arduino core.
- Sketch files. These files are similar to C++ source files with a few exceptions:
- Arduino build tools automatically create forward declarations for all functions declared in sketch files. E.g. ExtraSketch.ino could contain the following function:
int foo(int bar)
{
    return bar;
}
Code in any other sketch file (and in any part of ExtraSketch.ino) could simply call this function without declaring it:
foo(123);
Arduino build tools would automatically generate a forward declaration for it and make sure it is parsed before compiling any code in .ino files. You DO NOT need to do it manually.
- Including header files from libraries like <SPIFFS.h> will automatically reference the corresponding library, pulling in the source files from that library as well.
- Arduino build tools automatically create forward declarations for all functions declared in sketch files. E.g. ExtraSketch.ino could contain the following function:
- Regular C++ source/header files. They work the same way as for regular C/C++ projects and can be copied from/to them.
Libraries
The Arduino build system automatically locates libraries referenced by a project by scanning sketch files for #include<> statements. Including a header file published by a library will automatically pull the entire library into the project.
The build process will look for Arduino libraries in the following locations:
- The package containing the currently used Arduino core.
- Global library directories specified via Global Settings.
- Per-project library directories specified via Project Settings.
VisualGDB will automatically pick up libraries discovered by the Arduino build tools and will configure IntelliSense to use them. You can also use the VisualGDB GUI to create custom libraries, download libraries contributed by other users, or clone Git repositories with libraries: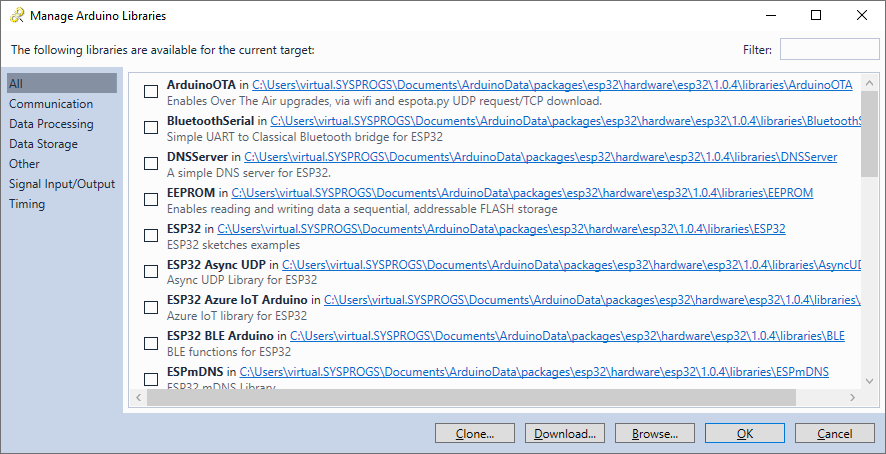
Follow our Arduino Library Tutorial for a detailed step-by-step introduction to Arduino libraries.
Global Settings
VisualGDB will normally try to follow the library/package directory layout of the Arduino IDE. Note that you do not need to install the Arduino IDE: VisualGDB will automatically download the necessary packages from online repositories. However, if you already have it installed, VisualGDB will pick up the previously downloaded packages automatically. You can manage the exact Arduino directories used by VisualGDB via Tools->VisualGDB->Arduino Settings: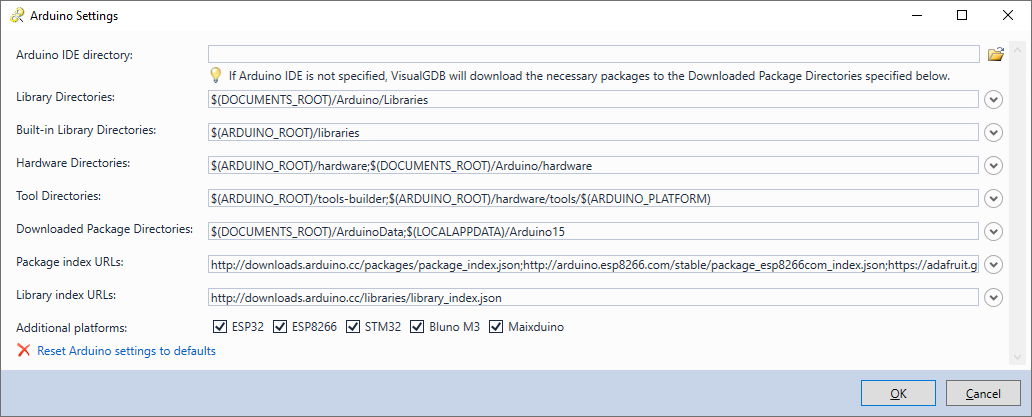
An overview of currently installed and available Arduino platform and library packages can be found via Tools->VisualGDB->Manage VisualGDB Packages. Note that having multiple versions of the same package can sometimes cause weird build errors. In this case, consider deleting the old package via the VisualGDB Package Manager: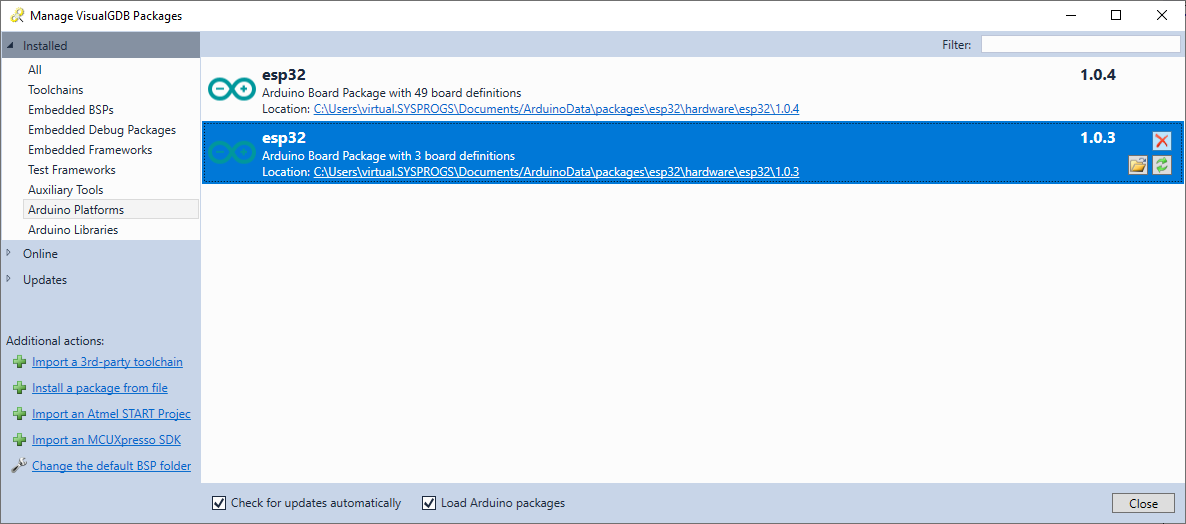 You can reset global Arduino settings (e.g. package directories) via the button at the bottom of the Arduino Settings window, or by deleting the %LOCALAPPDATA%\VisualGDB\ArduinoSettings.xml file.
Project Settings
Arduino-based VisualGDB projects offer 2 mechanisms for editing various settings: VisualGDB Project Properties and regular Visual Studio Property Sheets. VisualGDB Project Properties allow tweaking the build process by defining additional preprocessor macros, flags or library directories (1) and also allow changing core settings defined by the device vendor (2):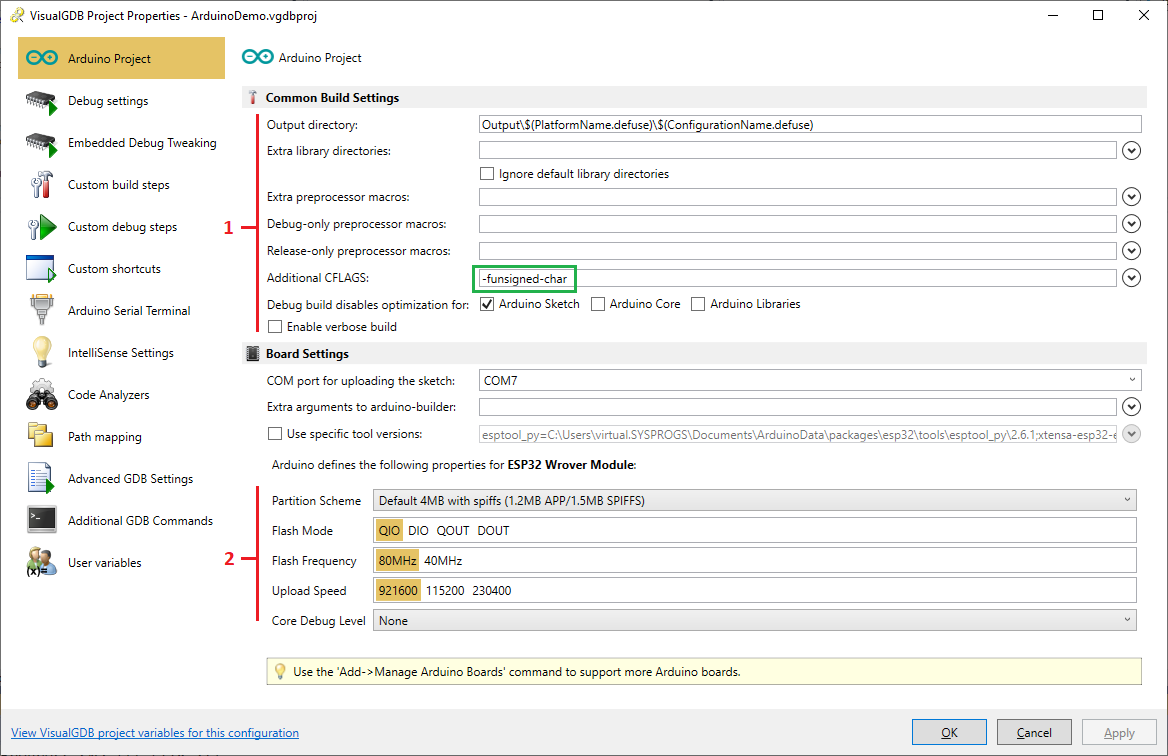
Visual Studio property sheets for Arduino projects are mapped to the Additional CFLAGS setting in VisualGDB Project Properties and allow editing it in a way that is consistent with other project types: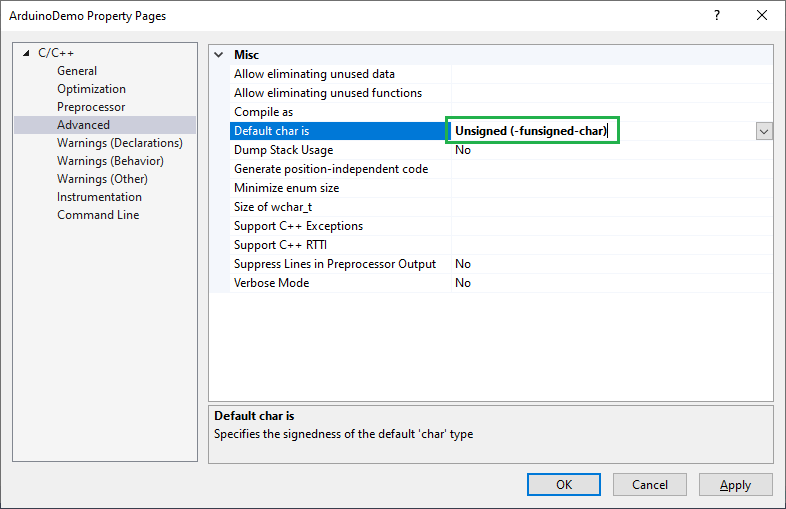
Managing Targets
Each Arduino project can target multiple boards via separate project/solution platforms. You can customize the targets supported by a specific project by right-clicking on the project in Solution Explorer and selecting Add->Manage Arduino Boards: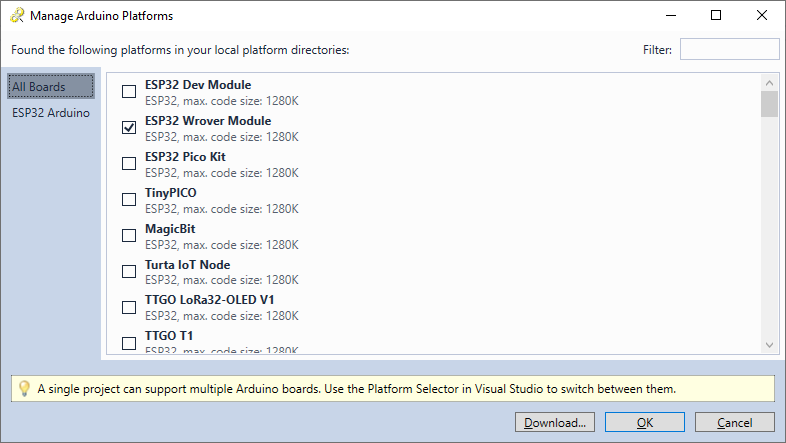 Once a project supports multiple platforms, you can switch the current platform via Visual Studio’s Platform selector:
Debugging
Arduino-based projects support the same debugging methods as the regular Embedded Projects. You can edit various debugging settings via VisualGDB Project Properties -> Debug Settings: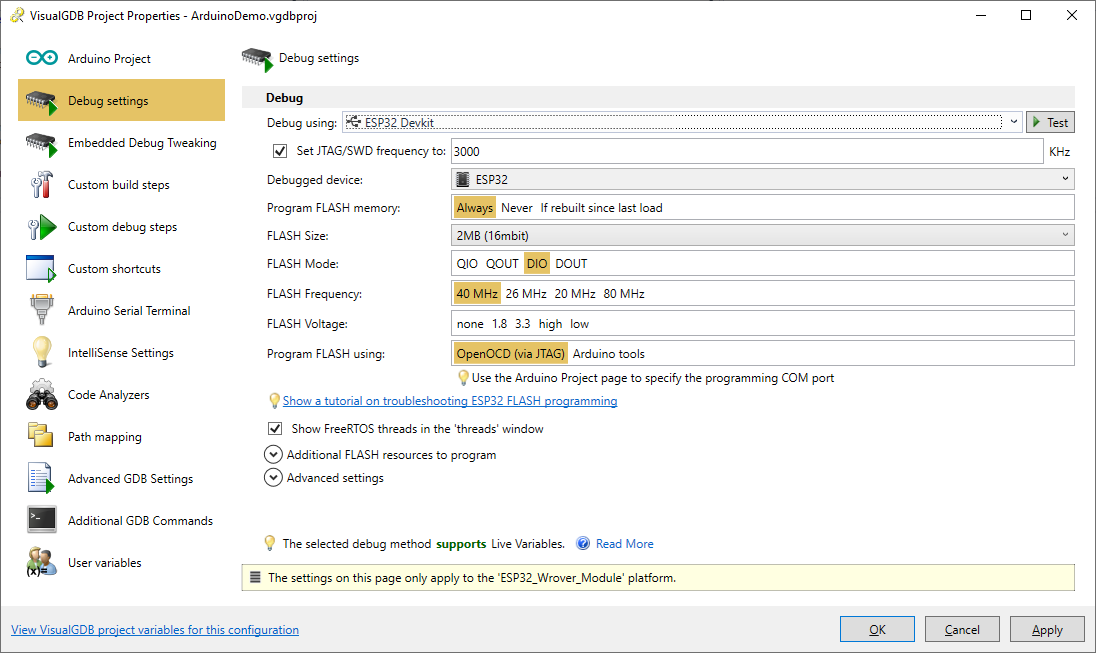
Observing Output
Most Arduino boards include a USB-based virtual COM port where the board will print various debugging output. You can configure VisualGDB to automatically connect to this port via VisualGDB Project Properties -> Arduino Serial Terminal: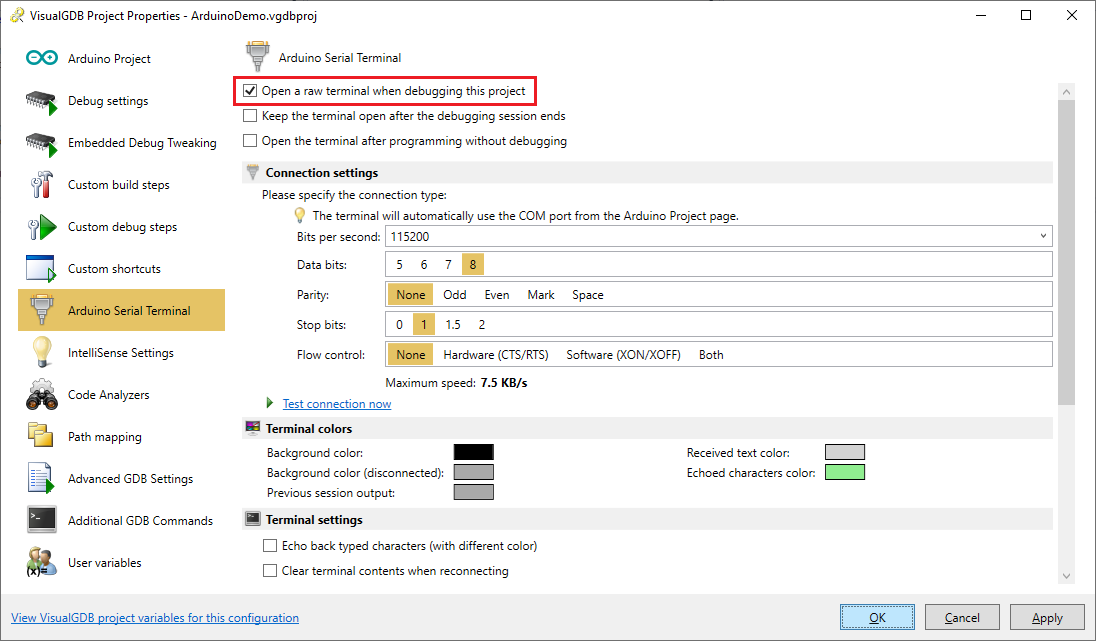 The exact COM port can be selected via the Arduino Project page of VisualGDB Project Properties:
 If enabled, VisualGDB will automatically open the serial terminal when debugging Arduino projects, or after you program the FLASH memory via context menu in Solution Explorer. You can also open it explicitly by selecting “Open Serial Terminal” in the context menu of the project node or via the VisualGDB Arduino toolbar in Visual Studio:
![]() The exact code used to output data to the on-board COM port varies between different Arduino platforms. You can normally find some examples by searching online for “<Specific Arduino board or platform> Arduino Serial Port“.
The exact code used to output data to the on-board COM port varies between different Arduino platforms. You can normally find some examples by searching online for “<Specific Arduino board or platform> Arduino Serial Port“.
Note that because the Arduino projects are built directly using Arduino tools, they are not compatible with VisualGDB’s semihosting/profiler framework. Hence, the advanced semihosting, profiling, code coverage and dynamic analysis functionality will not work for them. If you would like to use these advanced features, please consider using regular embedded projects instead.
Troubleshooting
VisualGDB builds the Arduino projects using the original Arduino tools. This ensures that the output of VisualGDB projects is equivalent to the output of Arduino IDE. If you encounter problems building an Arduino-based project that otherwise works with the Arduino IDE, most likely you have specified conflicting settings via either Global Arduino Settings or Project-Level Arduino Settings. You can troubleshoot the build issues by dumping the exact build command used by VisualGDB (including environment variables) to a batch file and experimenting with it afterwards: 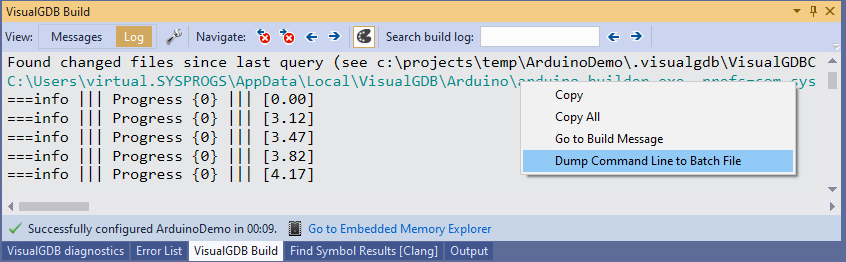 See our Arduino Troubleshooting Tutorial for detailed step-by-step instructions on troubleshooting Arduino projects.