Sharing VisualGDB Projects Between Multiple Users
This tutorial shows how to share Embedded VisualGDB projects between multiple users with different settings, such as toolchain paths. The relocation features shown here are available starting from VisualGDB 5.4.
We will create a basic project for the CC3200 device and show how to access it from 2 different users. Note that we selected the CC3200 device for this tutorial as it has a relatively small BSP compared to other device families so you can easily clone it from our Github repository. The steps described here will also work for other BSPs, however placing a larger BSP (e.g. STM32) under a source control would take longer.
- Start Visual Studio and open the VisualGDB Embedded Project Wizard:
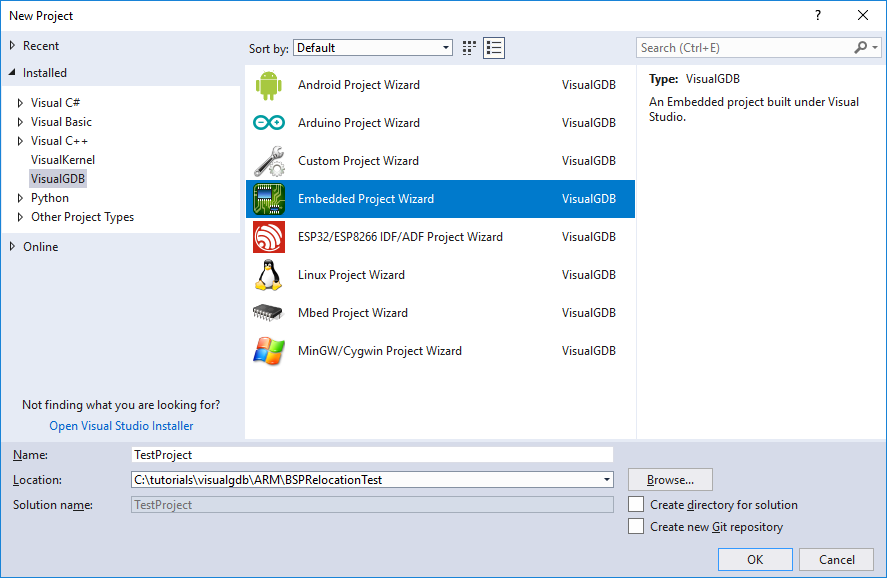
- Select “Create a new project -> Embedded Binary -> MSBuild”:

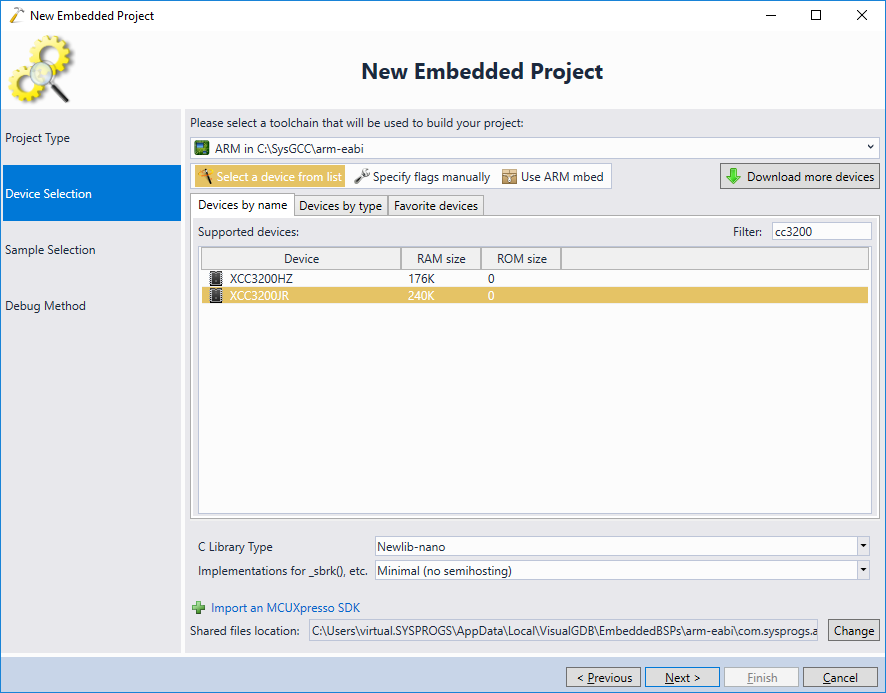
- On the next page select the toolchain and the device you want to target. If the toolchain or BSP is not yet installed, VisualGDB can download it automatically:
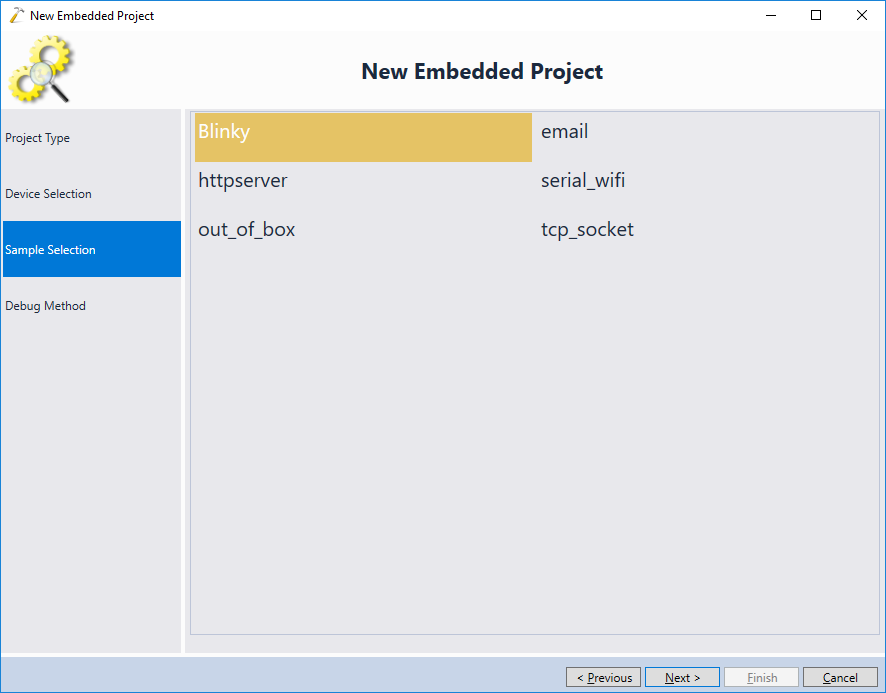
- On the next page select a sample to use as a template for your project:
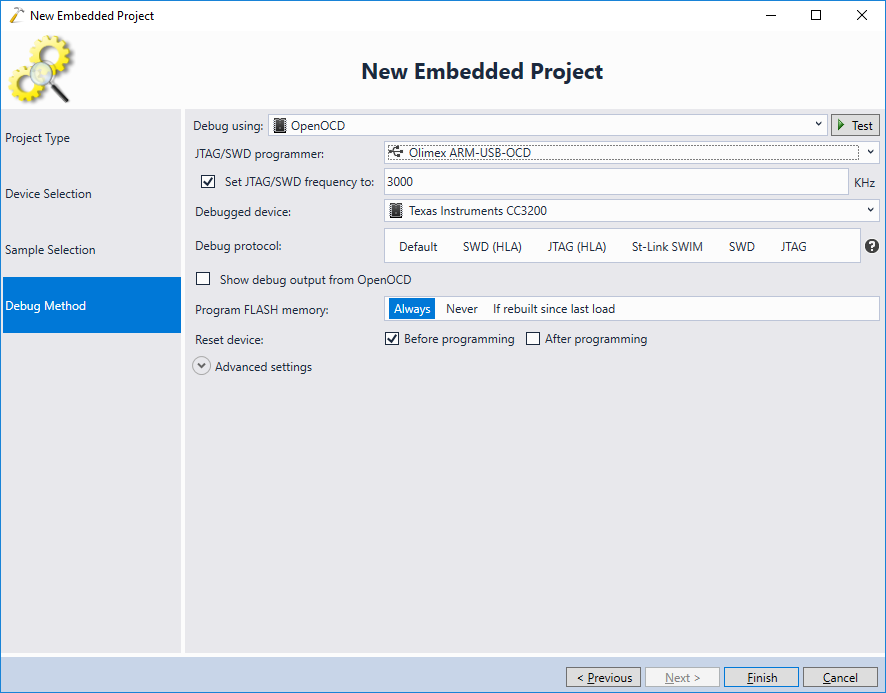
- Finally select a debug method:
- Press “Finish” to generate the project. Aside from the source code of the project itself, the following 2 components will also be needed to build the project:
- A toolchain (i.e. GCC). It includes the compiler and common headers/libraries like stdlib.h. The toolchains are normally installed under c:\SysGCC.
- A BSP (board support package). It includes device-specific files (e.g. linker scripts or libraries supplied by the device vendor). BSPs are normally installed under %LOCALAPPDATA%\VisualGDB\EmbeddedBSPs.
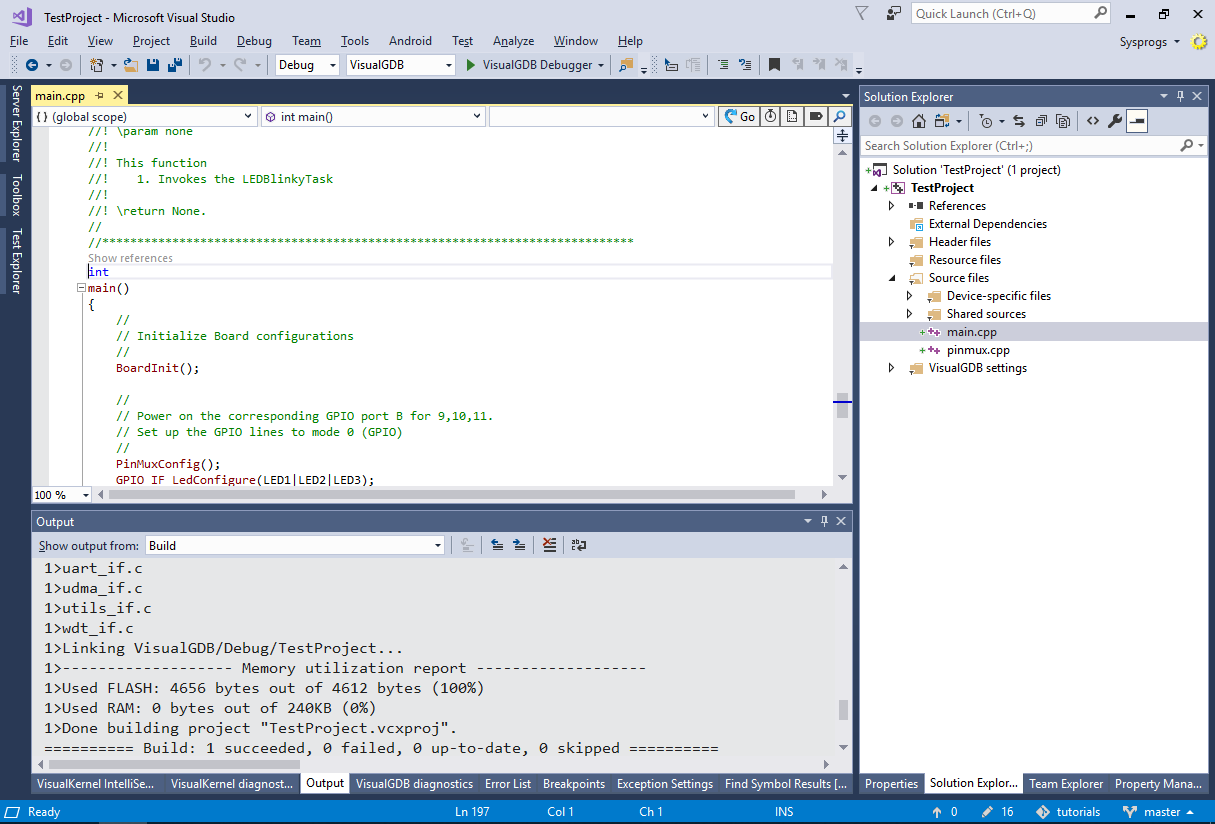
- Open the .vcxproj file in a text editor. See how it uses the $(BSP_ROOT) variable to refer to the files from the BSP and does not hardcode any absolute paths on your machine. Press Ctrl-Shift-B to build the project:
- You can get an overview of toolchains, BSPs and other packages managed by VisualGDB via Tools->VisualGDB->Manage VisualGDB Packages:

- Now we will add the folder containing your project and your shared files to a source control system. Aside from the sources, you will need to add the following files:
Files Meaning *.sln Solution files *.vcxproj Project files *.filters Definitions of virtual source folders (e.g. “Source Files” and “Header Files”) *.vgdbsettings VisualGDB-specific settings *.xml; *.props VisualGDB-generated files for MSBuild-based projects *.xml; *.mak VisualGDB-generated files for Make-based projects CMakeLists.txt;*.cmake VisualGDB-generated files for CMake-based projects If you are using git, it would be easier to simply add the masks for the temporary files .gitignore and check in everything else:
Debug
Release
VisualGDB
*.opensdf
*.sdf
*.suo
*.old
.vs
VisualGDBCache
CodeDB
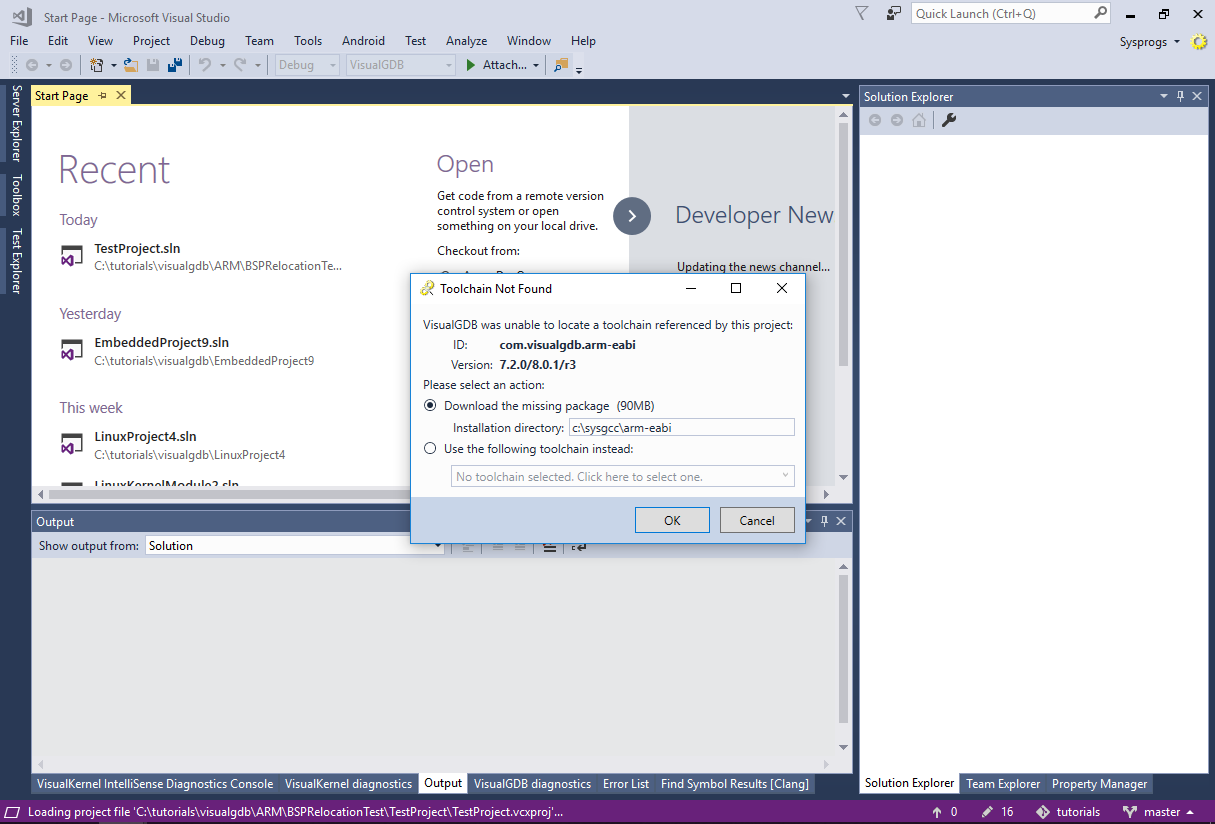
- On a different computer clone the git repository to a local directory and try opening the project. If you don’t have the toolchain installed, VisualGDB will automatically suggest downloading it:
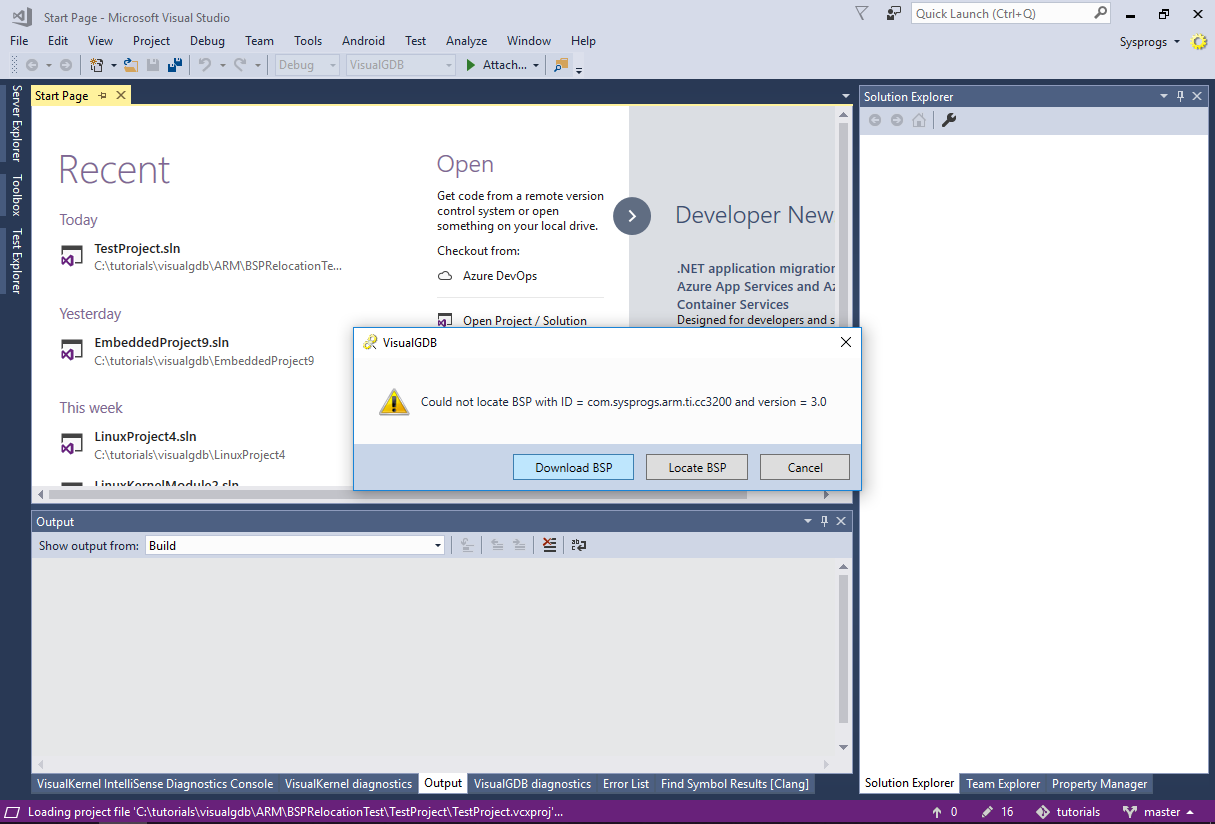
- Similarly, VisualGDB will suggest downloading the missing BSP:
 The paths where you install the toolchain and the BSP don’t have to be the same across different machines. VisualGDB will automatically locate both the toolchain and BSP and use the correct paths each time you open a project.
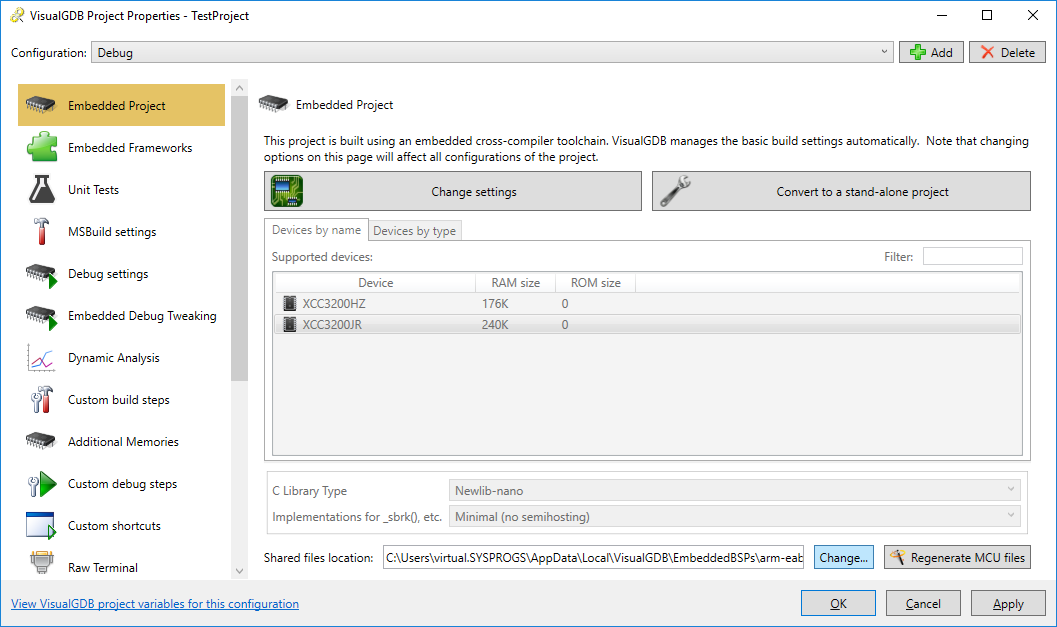
 - Now we will show how to check in the BSP under the source control. This will allow making changes to the BSP and automatically sharing them across all machines in your environment. Open VisualGDB project Properties and go to the Embedded Project page, then click “Change” near the Shared Files Location label (Custom edition and higher):
- Place the BSP under your source control directory:
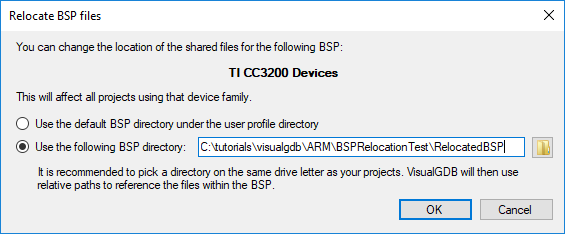 Confirm the BSP location so that VisualGDB can remember it for other projects.
 - If you open the project on a machine where you haven’t used this BSP yet, click “Locate BSP” and point VisualGDB to the BSP.XML file in the relocated BSP directory:

- VisualGDB will then update the BSP references (depending on your VS version, you may need to restart it to reset any cached values) and you will be able to build the project without any changes to the project file itself: