Creating CMake Linux projects with Visual Studio
This tutorial shows how to create, build and debug a simple CMake-based project with Visual Studio and use the Advanced CMake Project Subsystem to automatically update the CMakeLists.txt files when editing the project.
Before you begin, make sure that VisualGDB 5.3 or later is installed.
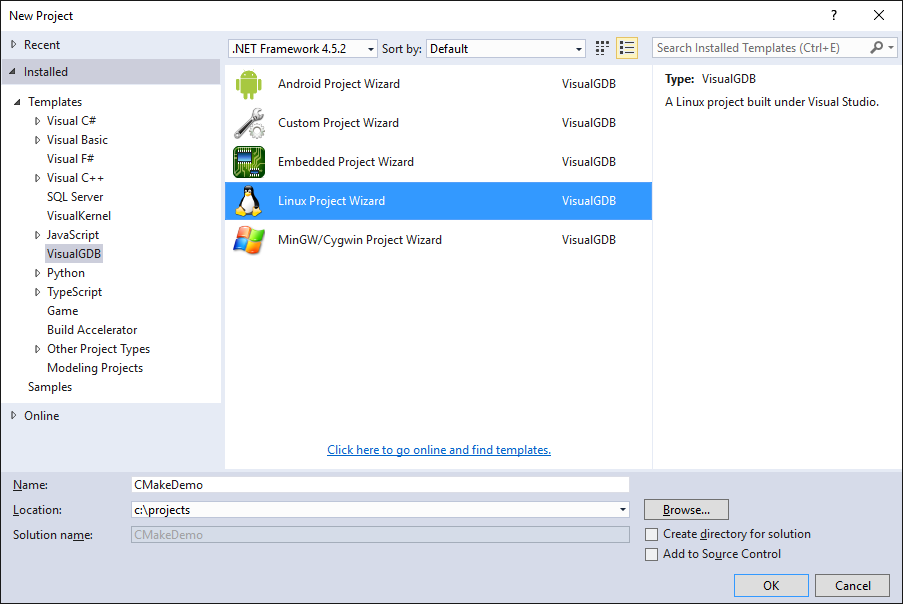
- Start Visual Studio and open the “New Project” dialog. Select the Linux Project Wizard from VisualGDB folder:
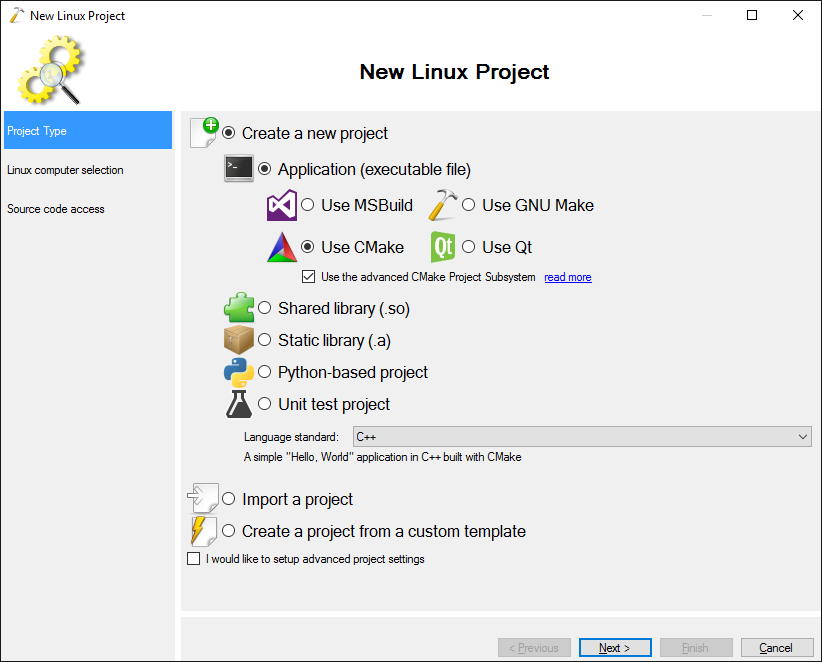
- On the first wizard page ensure that “Create a new project” is selected and then select the “Use CMake” and check the “Use the advanced CMake Project Subsystem” checkbox:
- On the next page select the Linux computer you want to target and press “Next”. If you have not configured the connection to that computer with VisualGDB yet, follow the generic Linux tutorial to set it up.

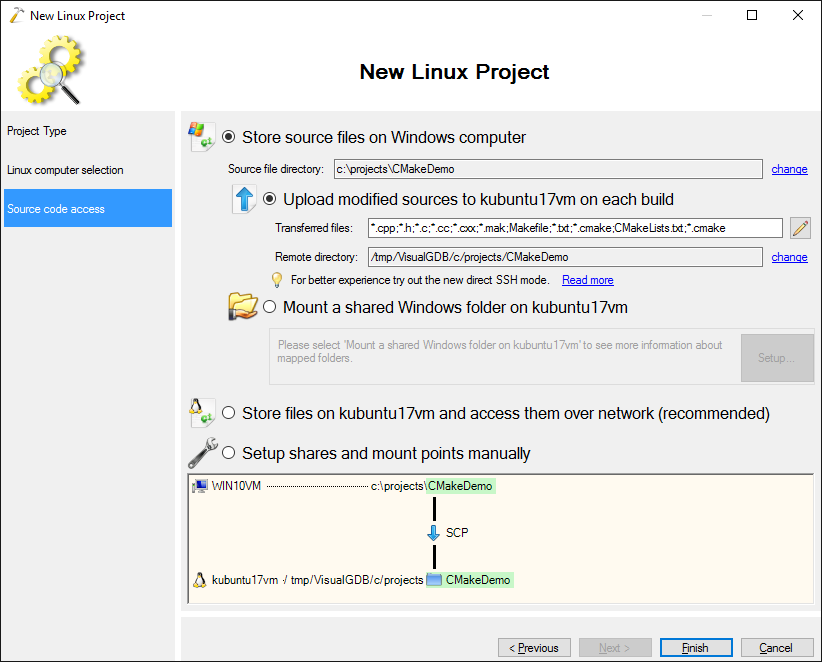
- On the next page specify how should the Linux machine access the source code. The easiest way would be to proceed with the default settings of uploading the modified sources to the Linux machine:
 You can also configure VisualGDB to store the sources directly on the Linux machine and access them via SSH. Follow this tutorial for more details.
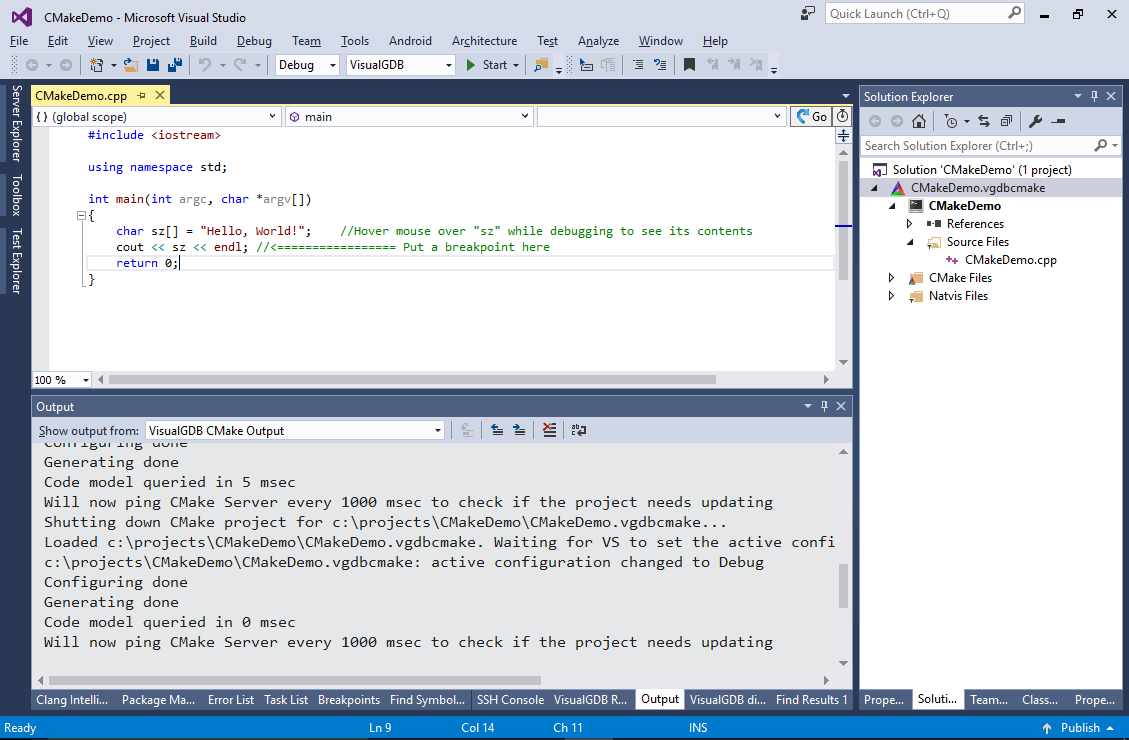
 - Once the project is created, press Ctrl-Shift-B to build your solution:
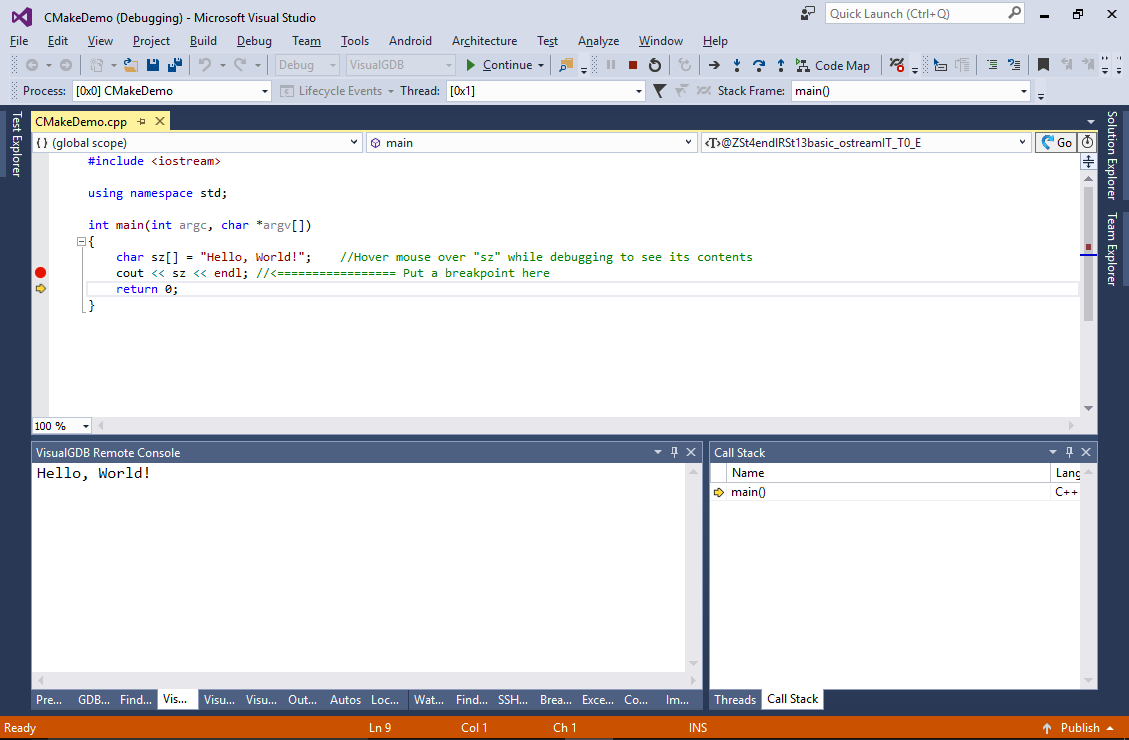
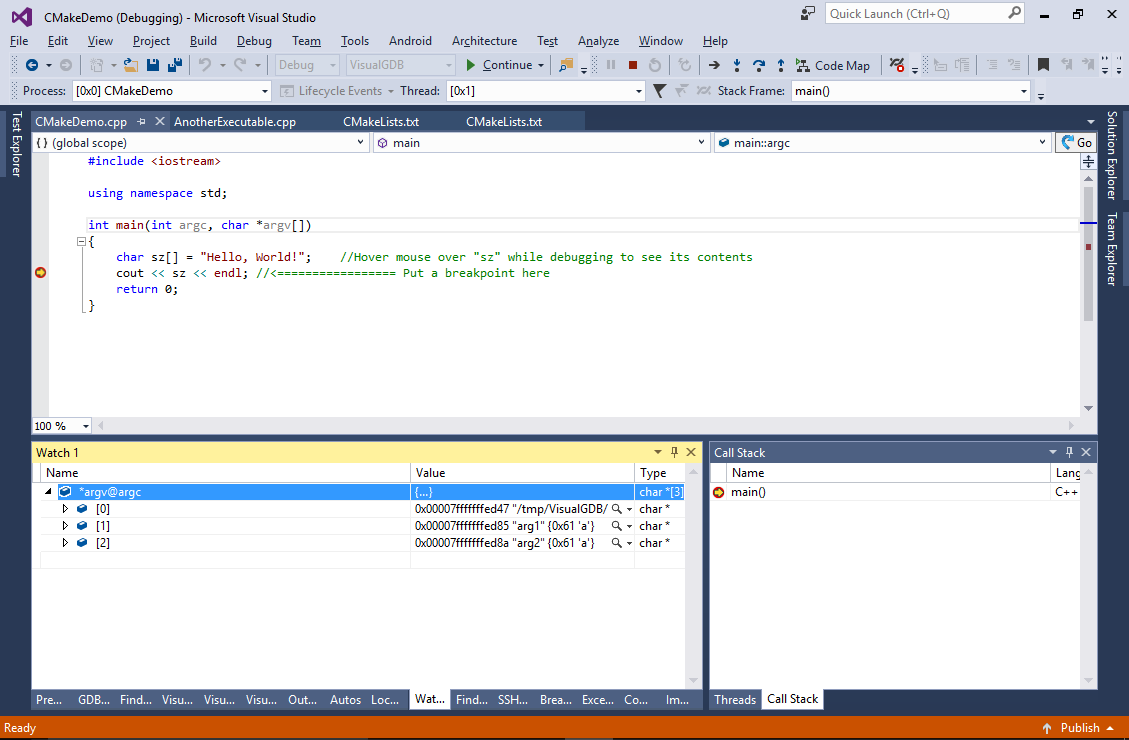
- Set a breakpoint in main() and press F5 to ensure that you can debug the project:
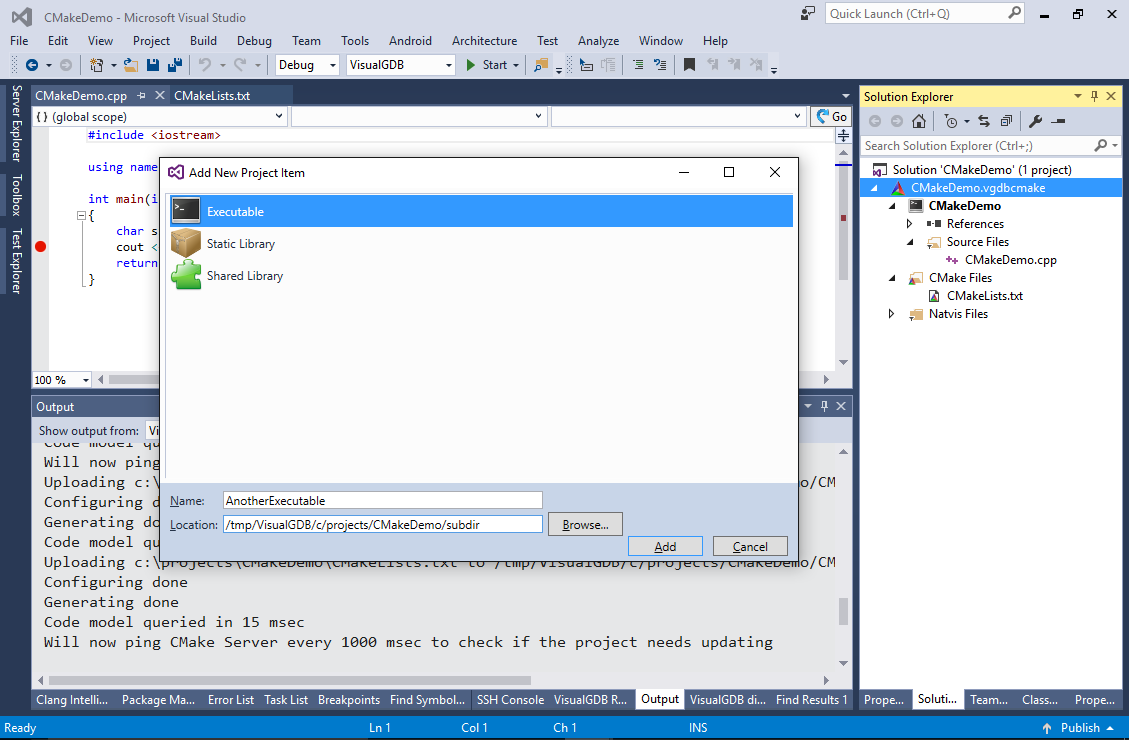
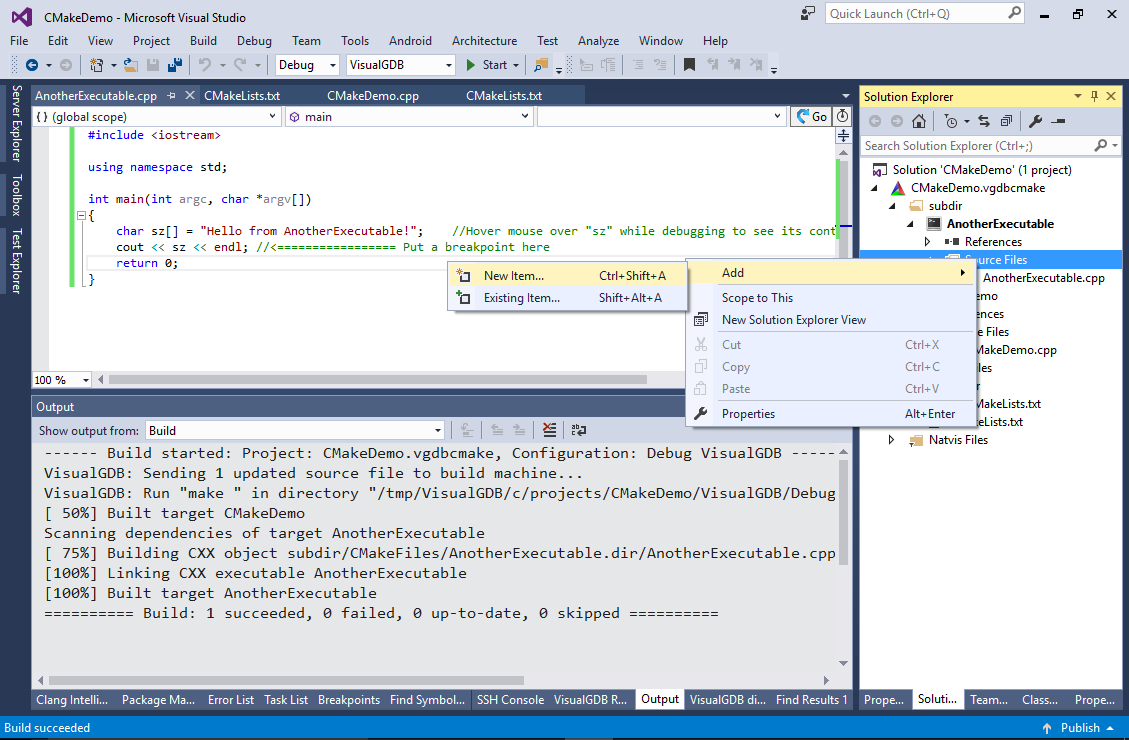
- Now we will show how to manage project targets and edit various settings using the GUI. First we will create another executable target. Right-click on the .vgdbcmake node in Solution Explorer and select Add->New Item. Then pick “Executable” and add “/subdir” to the location:
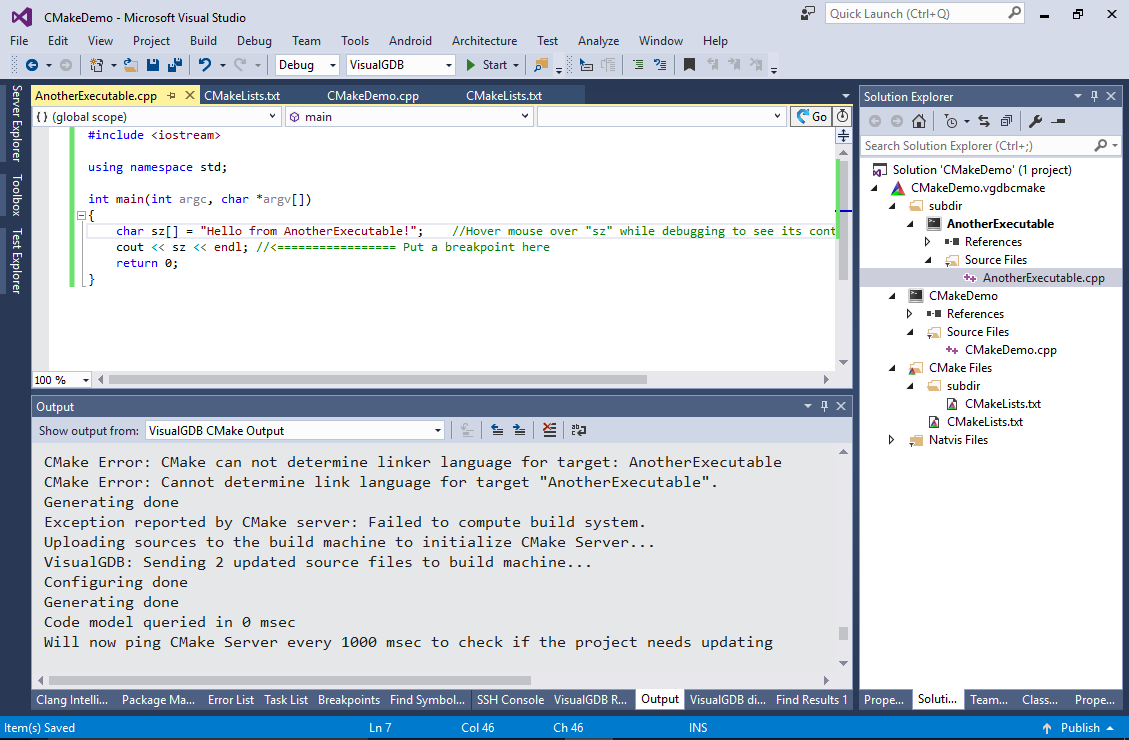
- VisualGDB will automatically create the “subdir” folder, put a CMakeLists.txt file there and reference it from the main CMakeLists file. Copy the contents of the main .cpp file to the new target’s file (optionally replacing the hello message) and build the project:
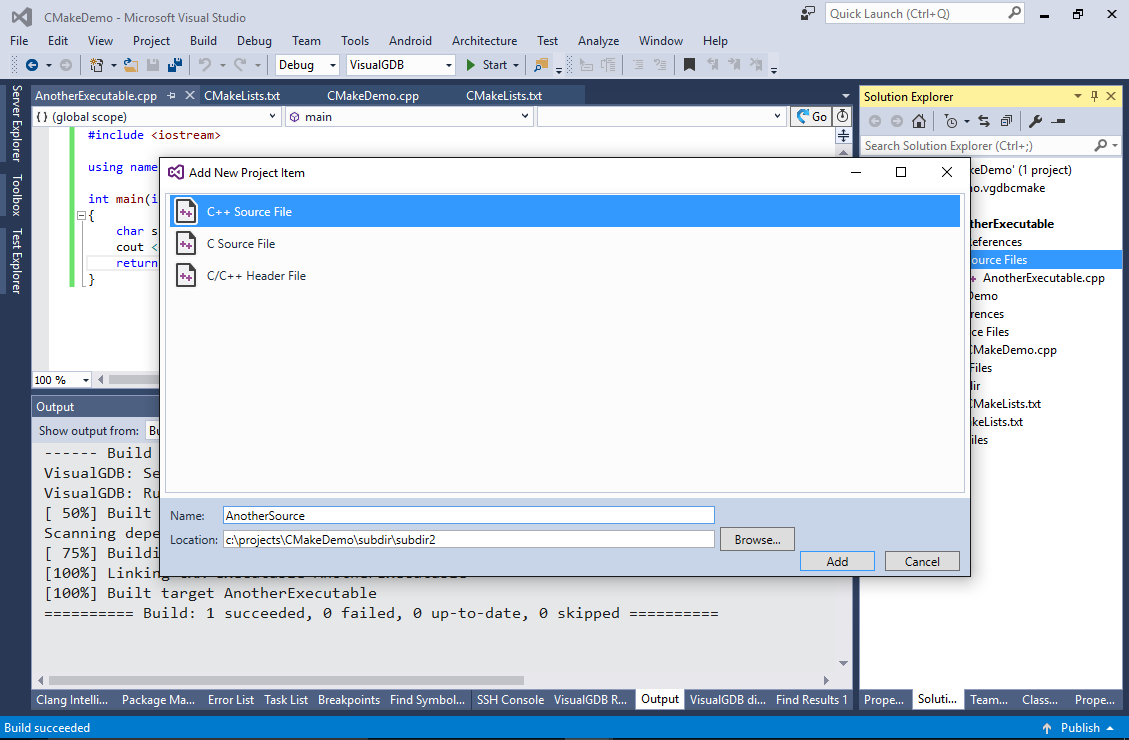
- Add another source file to the new target:
- This time add “subdir2” to the source file path:
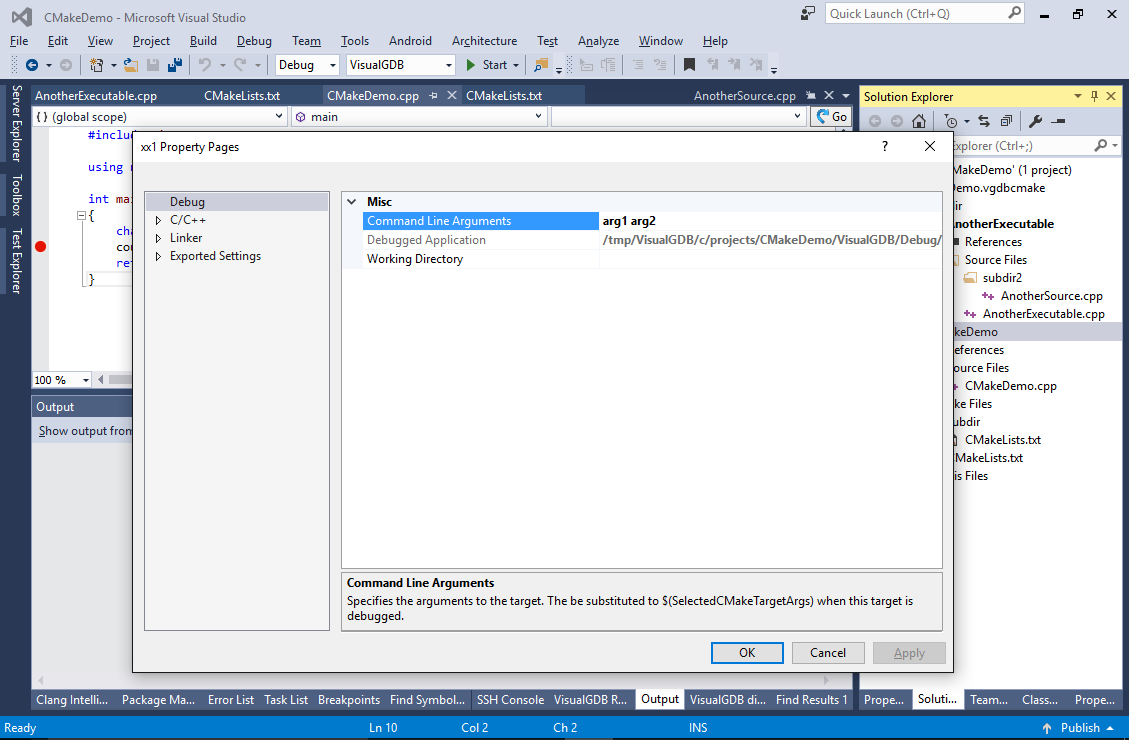
- Each CMake target under the VisualGDB CMake Project can have an independent set of properties. Debug-related properties like command-line arguments will be stored in the project file itself. Build-related properties like include directories will be automatically saved to CMakeLists.txt files. Open the VS Project Properties (alt-Enter) for the main target and set the command-line arguments to a non-empty value:
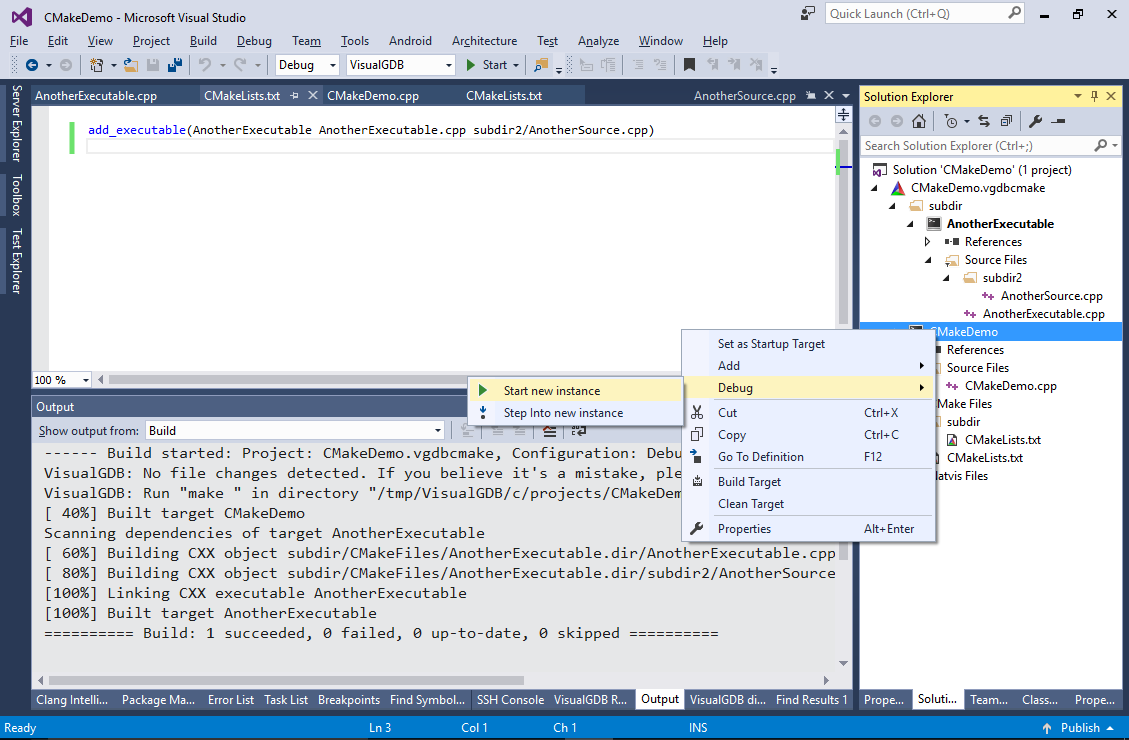
- Right-click on the main target and select Debug->Start a new instance to begin debugging it:
- See how VisualGDB starts the selected target and how the command-line arguments match the ones set via Target Settings:
- Open Visual Studio Properties for the project itself (.vgdbcmake node). You can use the settings in the “Sorting/Grouping” category to control how VisualGDB groups the sources or targets. E.g. try setting the “Group Sources By Types” to “False”:
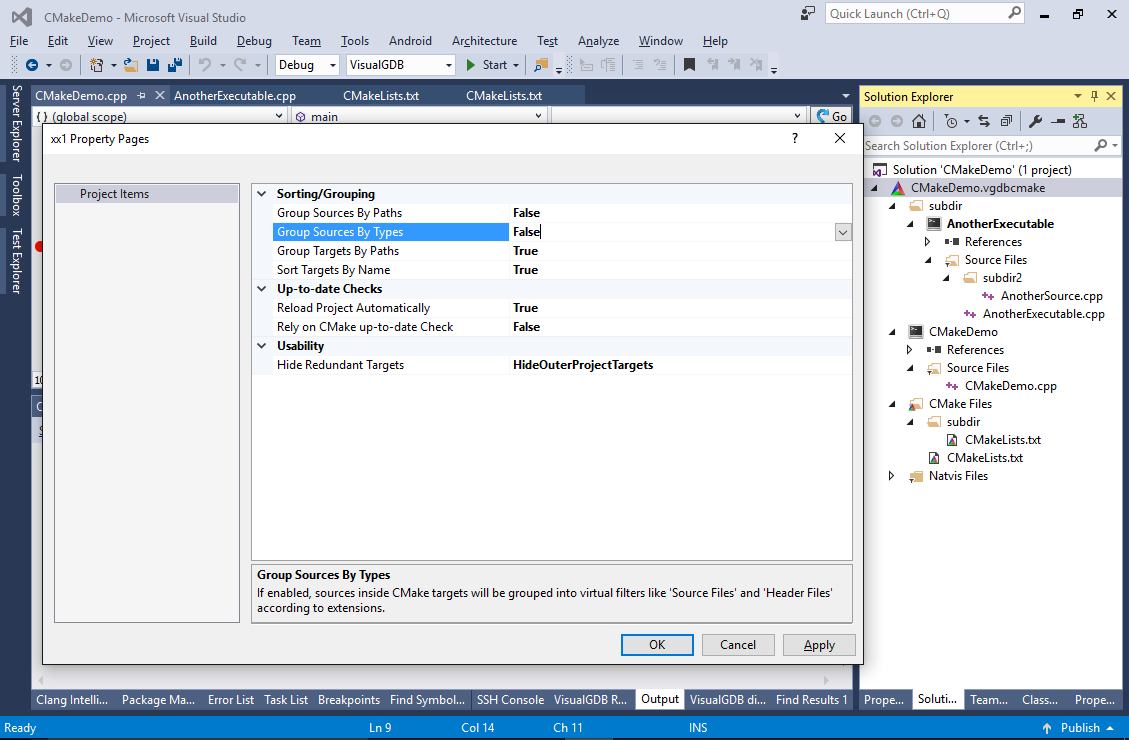
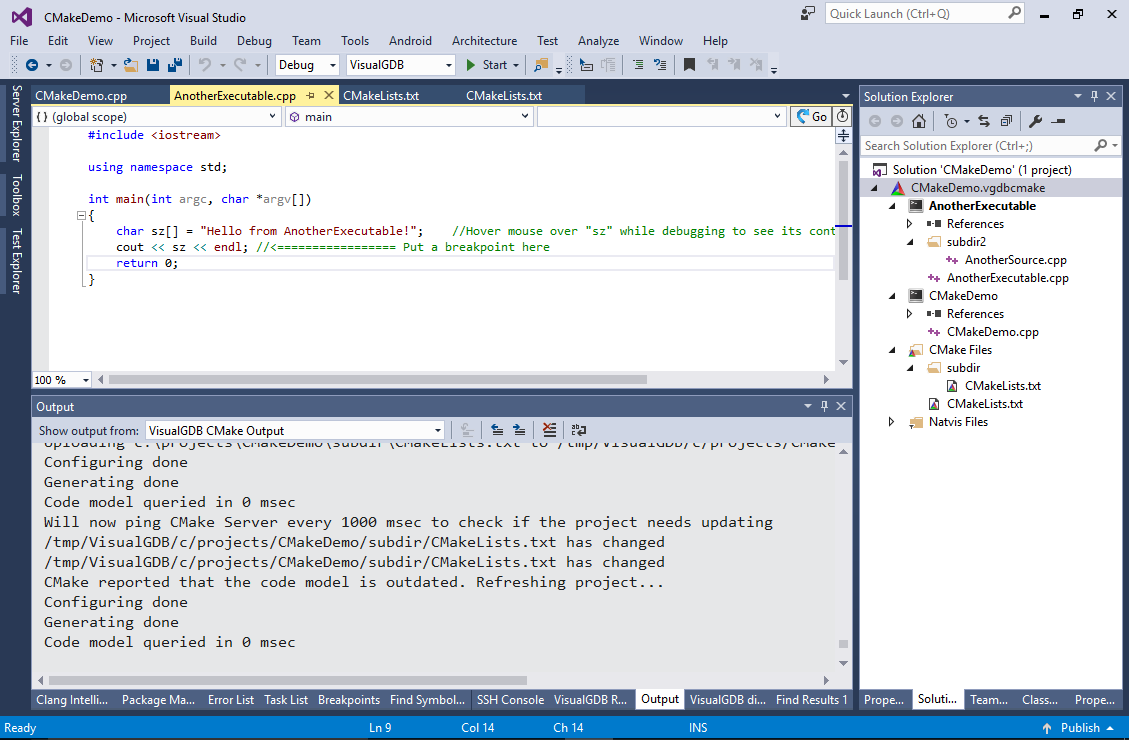
- See how the “Source Files” nodes have disappeared and the sources are shown directly under the target nodes:
- Now we will show how CMake handles subprojects. Open the CMakeLists.txt file from the subdirectory and add the following line there:
project(subproj)
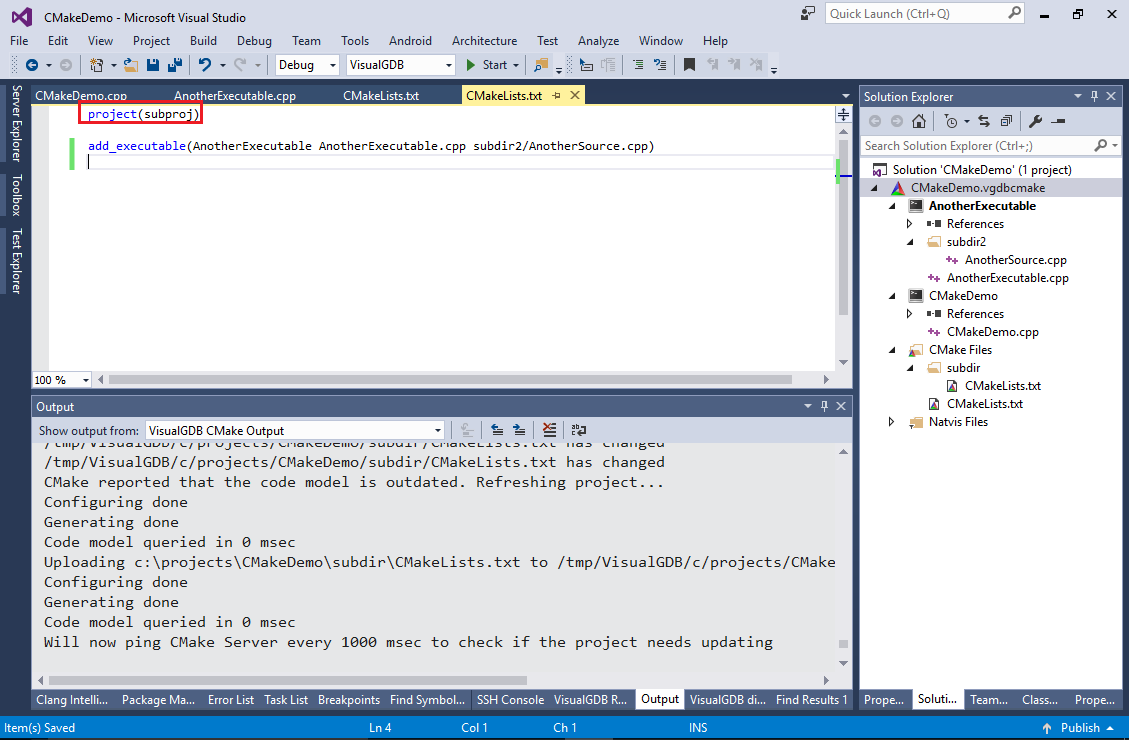
- Save the CMakeLists file and look at the Solution Explorer. See how it now shows 2 project nodes, one for each project() statement:

- If a CMake project includes another project, CMake would normally report the targets of the included project (a.k.a. inner project) twice – once as a part of the including (a.k.a. outer) project and once as a part of the including project. As this is not very convenient, VisualGDB automatically hides redundant target instances. You can control how filtering works using the “Hide Redundant Targets” setting in the VS settings for the .vgdbcmake project:
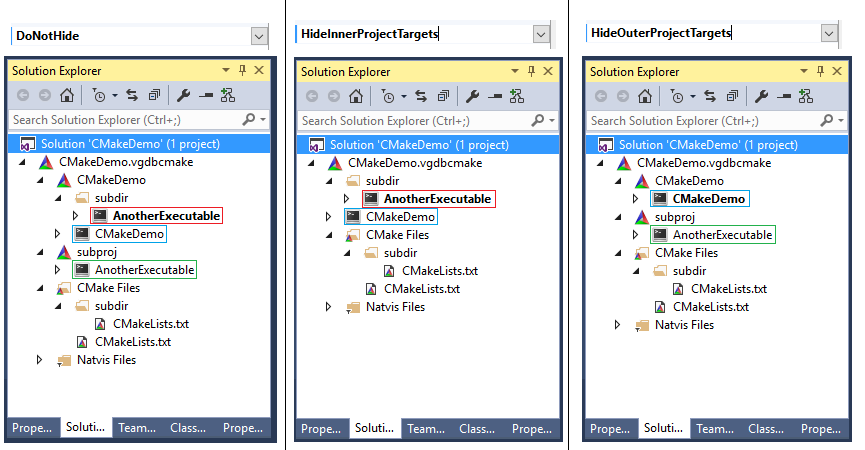 If HideInnerProjectTargets is selected, all targets will be shown as if they were defined in the outer project (i.e. as if there were no nested project() statements). If HideOuterProjectTargets is selected, VisualGDB will show the targets inside the inner project nodes.
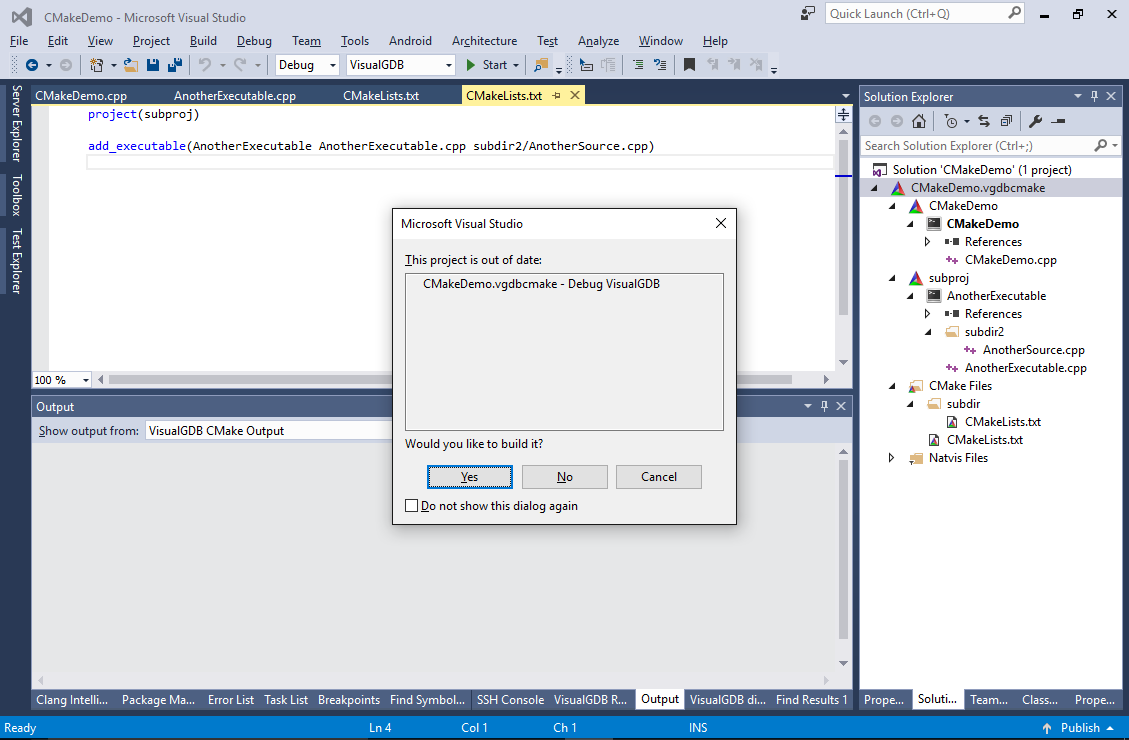
 - Unlike MSBuild projects, CMake projects won’t automatically detect whether they are out-of-date unless you attempt an actual build, so trying to debug a project will always result in a prompt to build it:
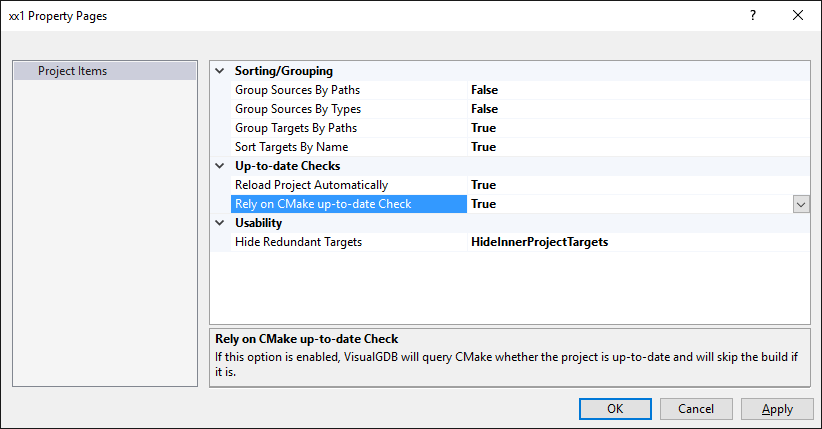
- You can change this behavior by turning on the “Rely on CMake up-to-date Check” setting and reloading the project:
 However beware that CMake often mistakingly considers large projects outdated even if they aren’t, so this mechanism may not always work. You can use the View->Output->VisualGDB CMake Output pane to view the diagnostic output from CMake.
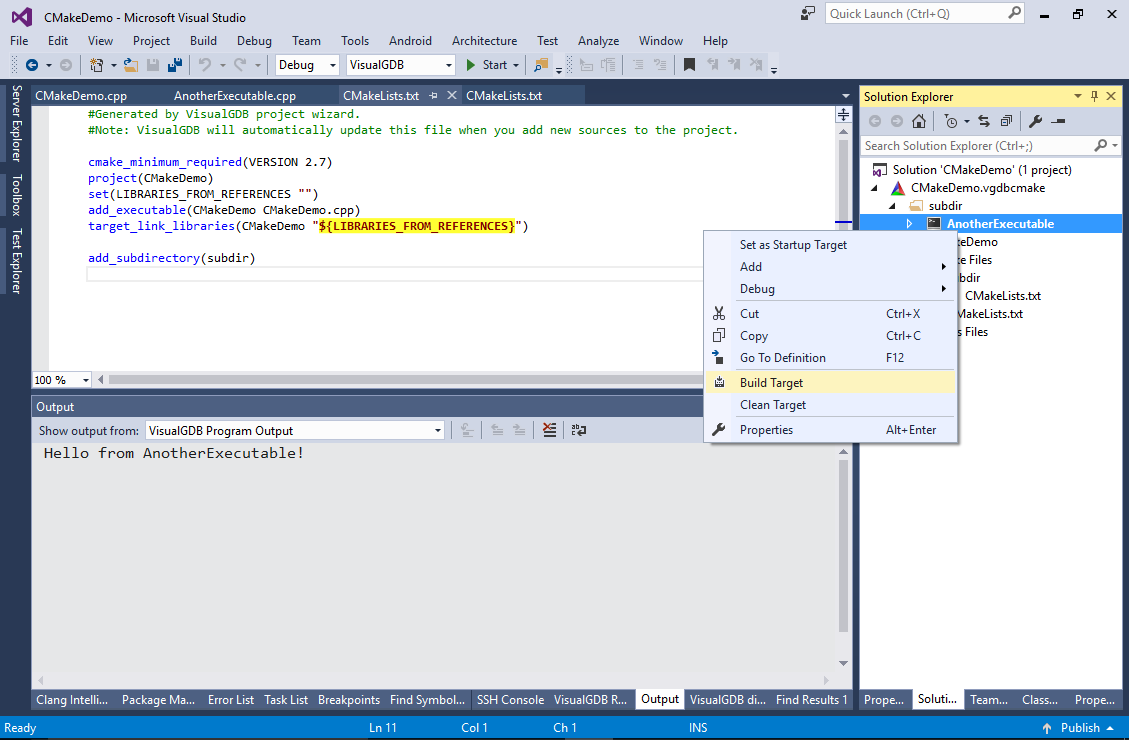
 - If your CMake project contains multiple targets in multiple directories, you can limit the build to selected directories only by right-clicking on the target nodes and selecting “Build Target”:
 Note that if the same directory contains multiple targets, the “Build Target” command will build all targets in that directory.
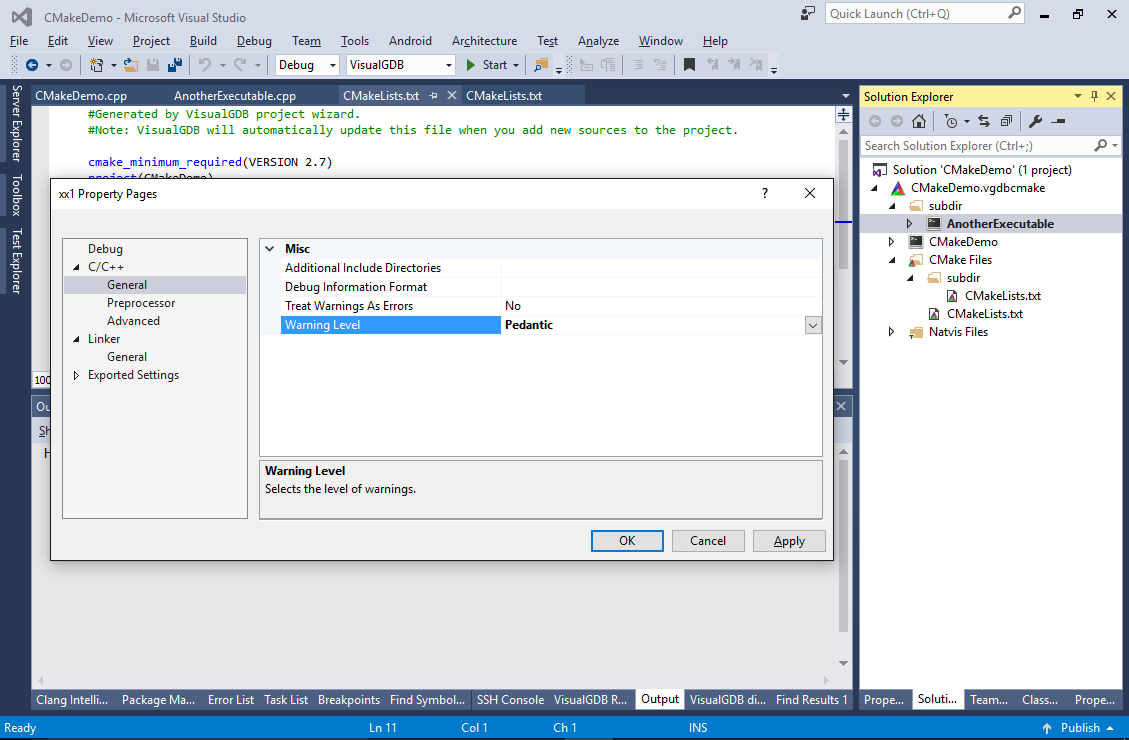
 - Now we will show how to edit the target properties. Open Visual Studio Project Properties for one of the targets and set the Warning Level to Pedantic:
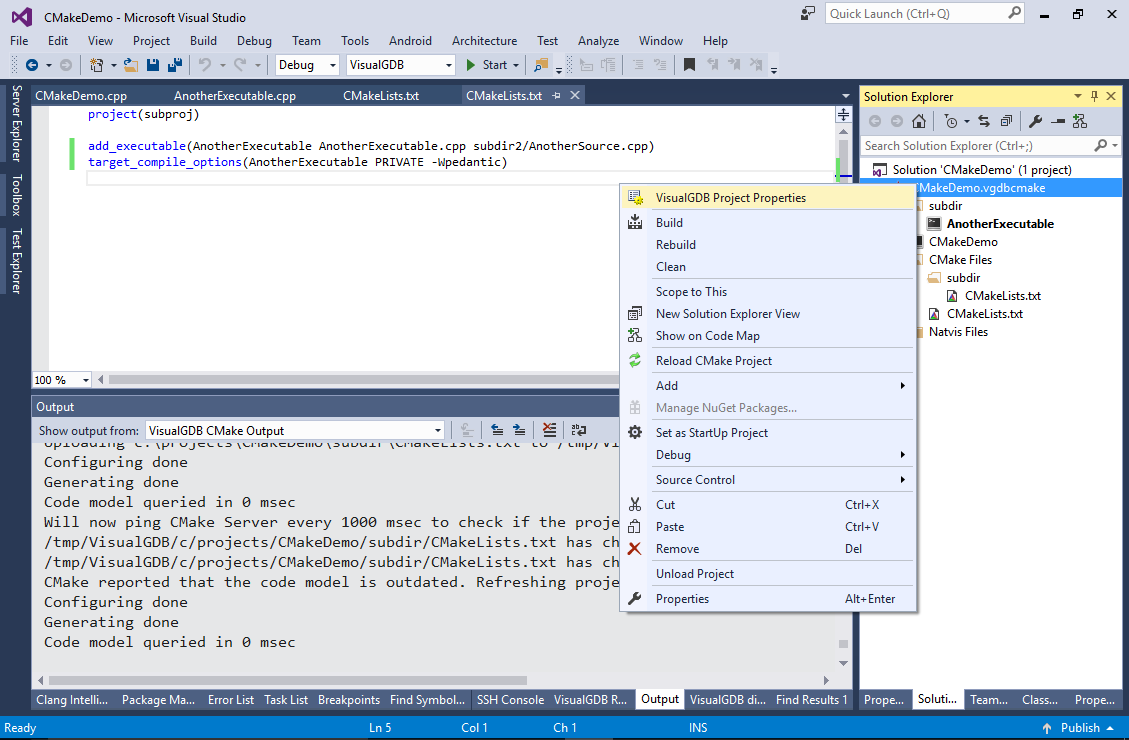
- See how VisualGDB automatically inserted the target_compile_options() statement into the corresponding CMakeLists file:

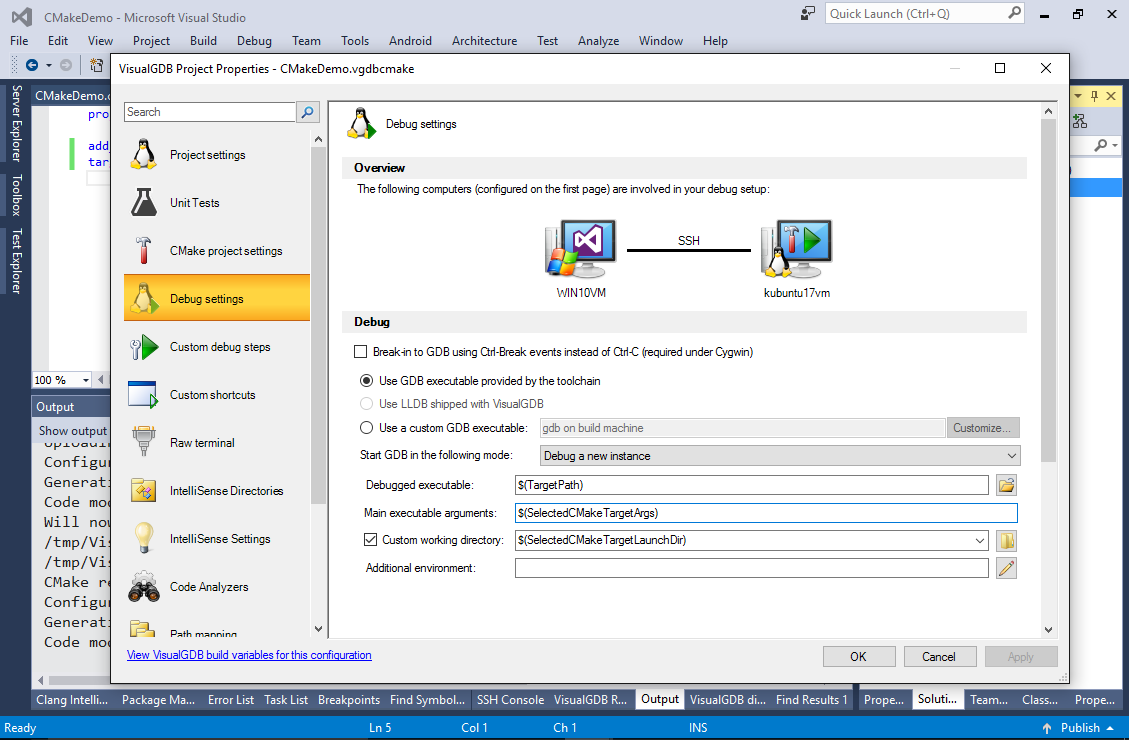
- Finally we will show how to configure various global settings for your VisualGDB CMake Project. Right-click on the project node and select “VisualGDB Project Properties”:
- You can use the VisualGDB Project Properties window to configure various settings (e.g. IntelliSense, static code analysis or debug/deployment settings):