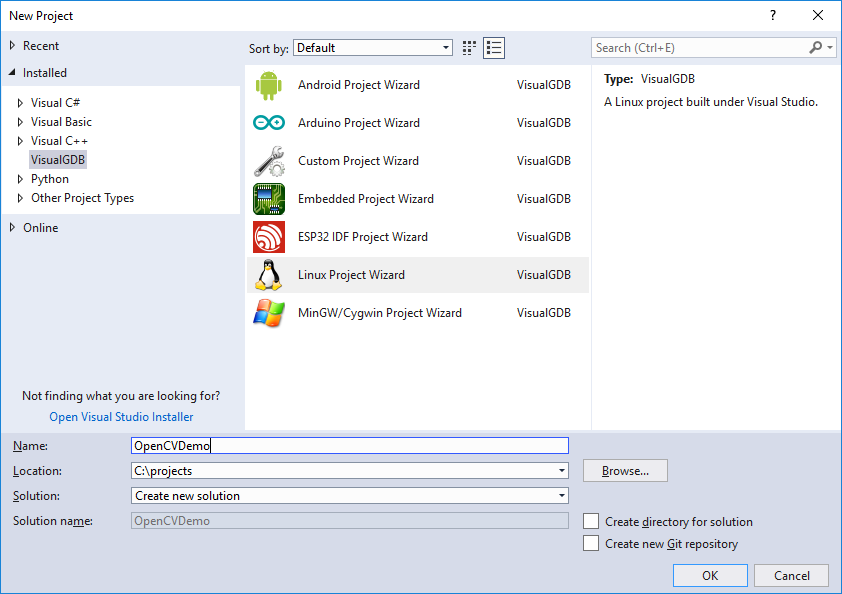
Cross-compiling OpenCV 3 for Raspberry Pi 2
This tutorial shows how to cross-compile the OpenCV library for Raspberry Pi to allow stepping through its source code and searching through it using Find-All-References and Code Map.
Before you begin, download the Latest Raspberry Pi SD card image and write it to the SD card. Then get a cross-toolchain compatible with the image from the gnutoolchains.com website. Then download the source code of OpenCV for Linux to your Windows machine and unpack it. Then install VisualGDB 5.4 or later.
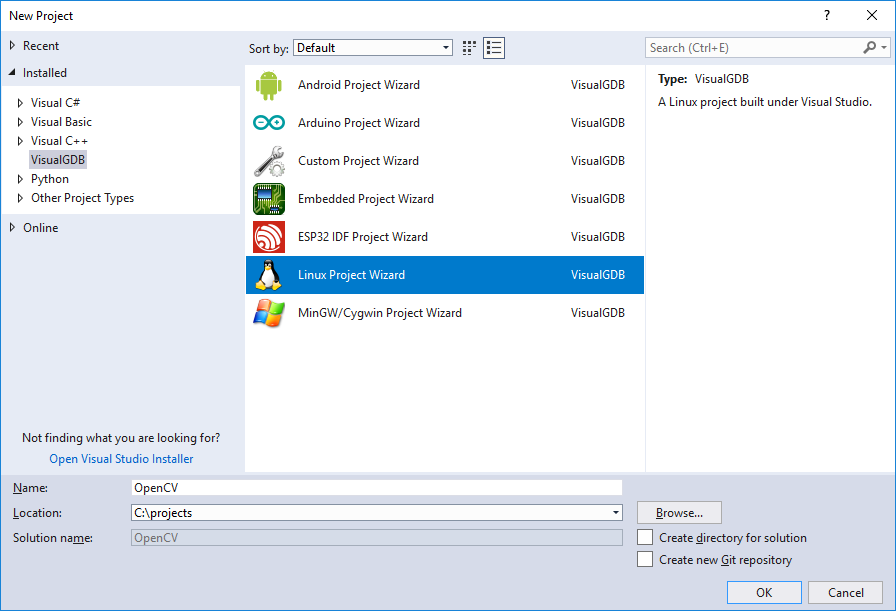
- Start Visual Studio and select File->New->Project. Then pick the VisualGDB Linux Project Wizard:
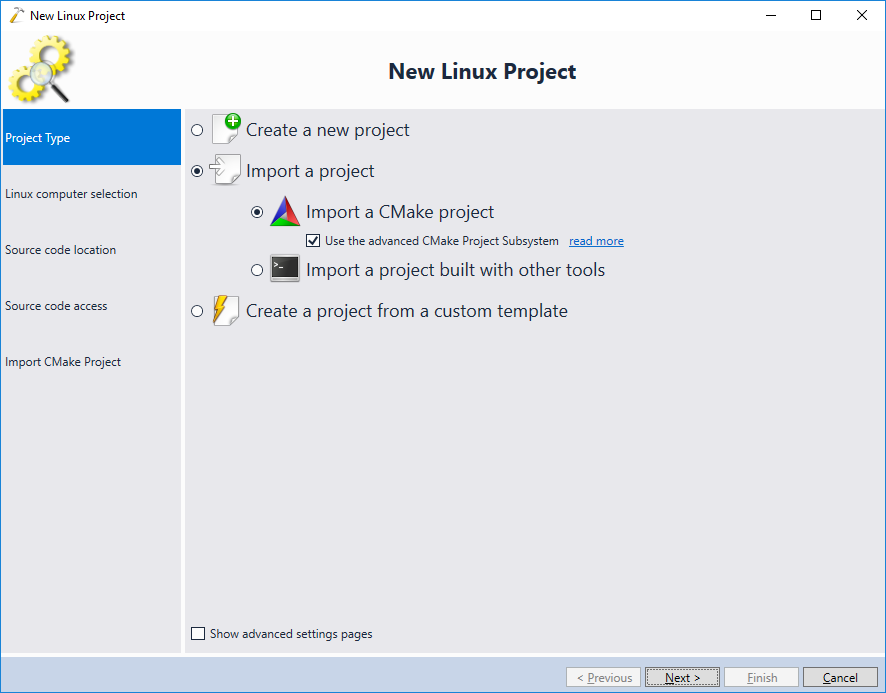
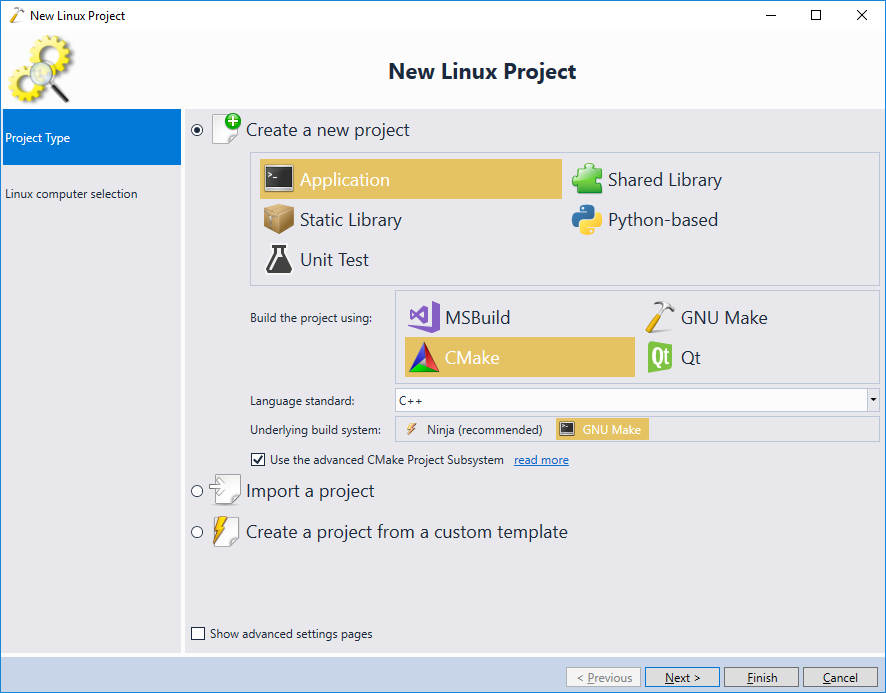
- Select “Import a project -> Import a CMake project”. Ensure you have the “Use the advanced CMake Project Subsystem” checkbox checked:
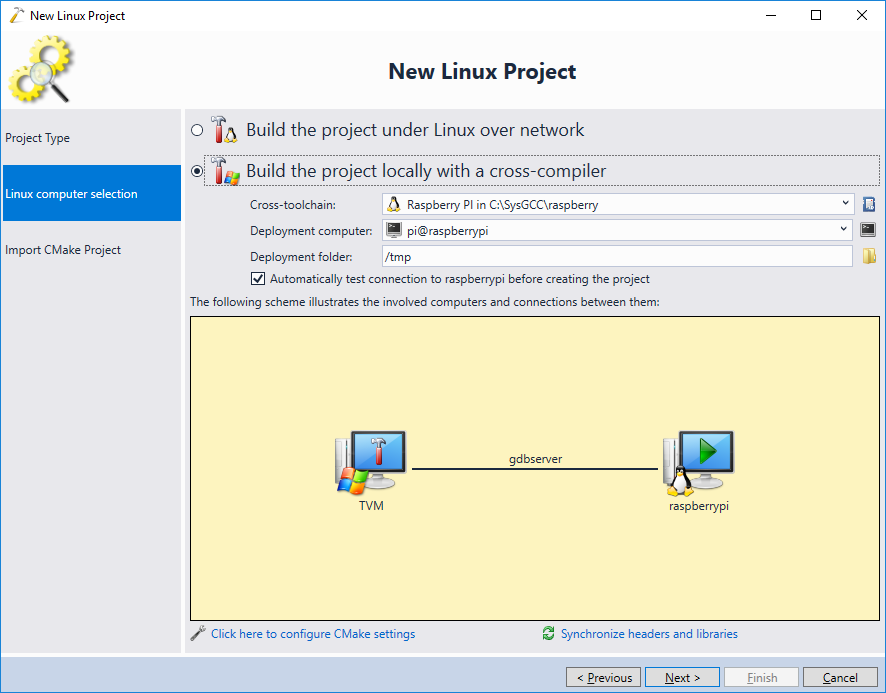
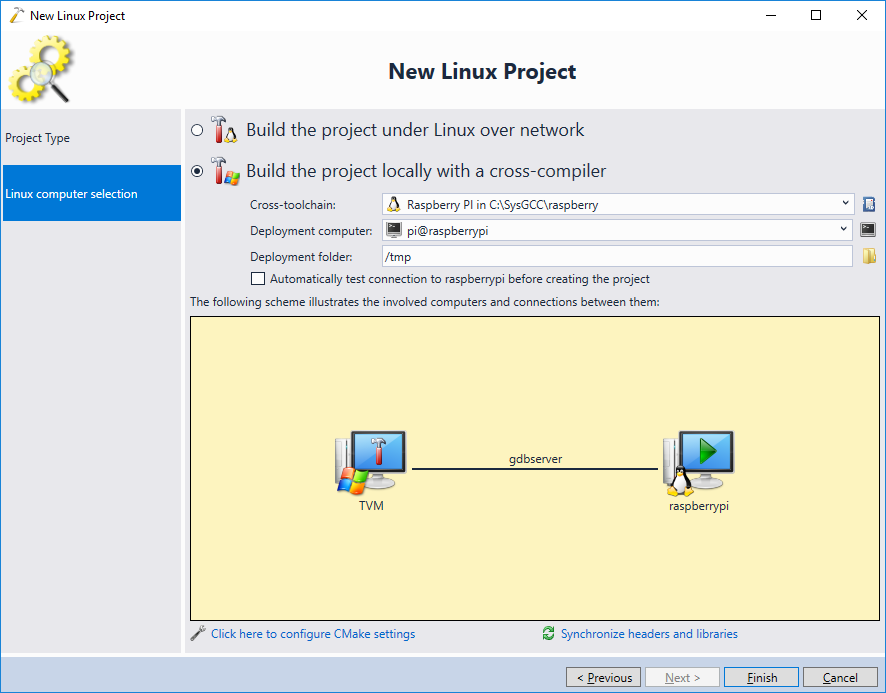
- Select “Build the project locally with a cross-compiler” and choose your Raspberry Pi board in the “Deployment computer” field:
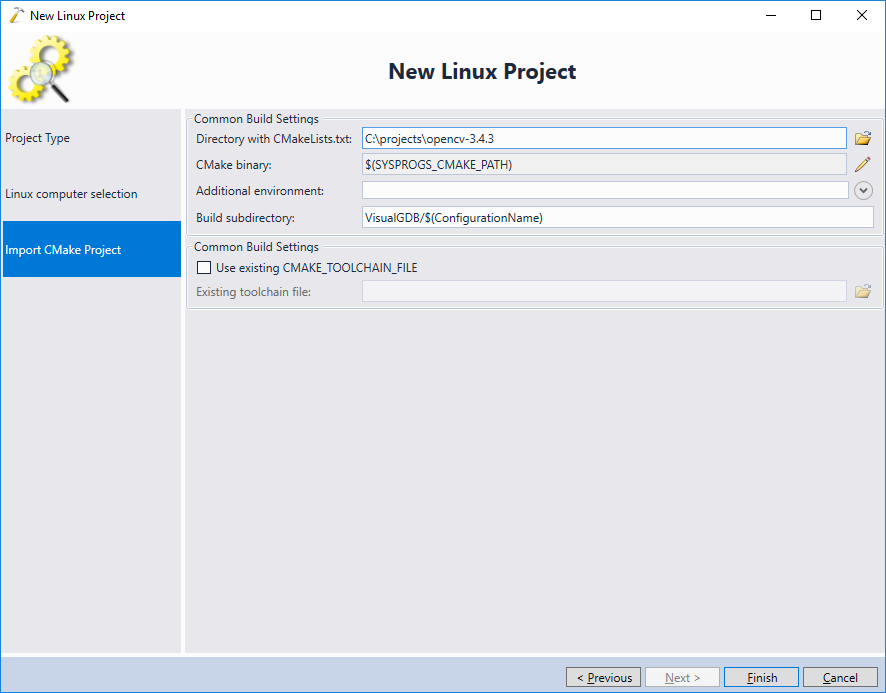
- Specify the directory where you have unpacked the OpenCV source code and click “Finish” to import the project:
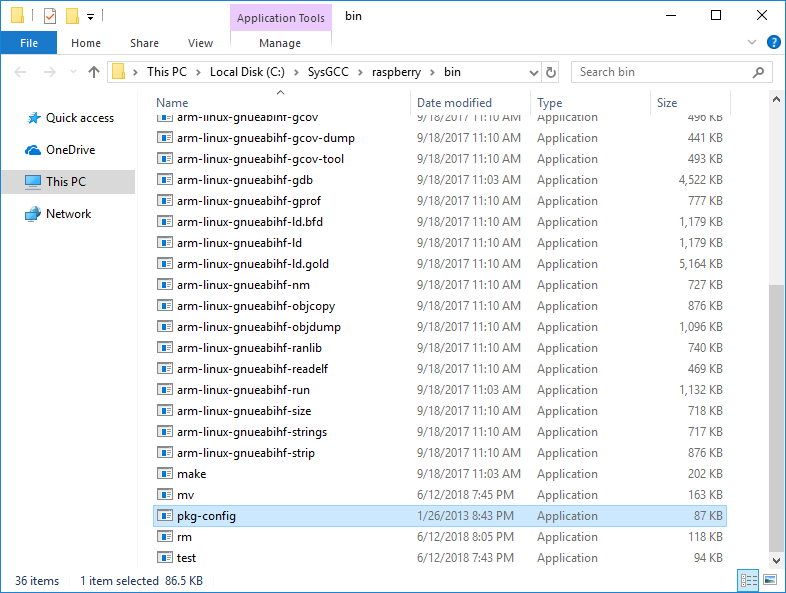
- If we build OpenCV now, it will not recognize the GTK+ library and the GUI-related API will not work. To ensure OpenCV builds with GTK+ support, first download pkg-config-lite for Windows and extract the pkg-config.exe executable into the <sysgcc>\Raspberry\bin directory:
- Before you can build the code using the GTK3 headers and libraries, you need to install the libgtk3.0-dev package on your Raspberry Pi. The easiest way to do this is to use the SmarTTY‘s
package installation GUI:
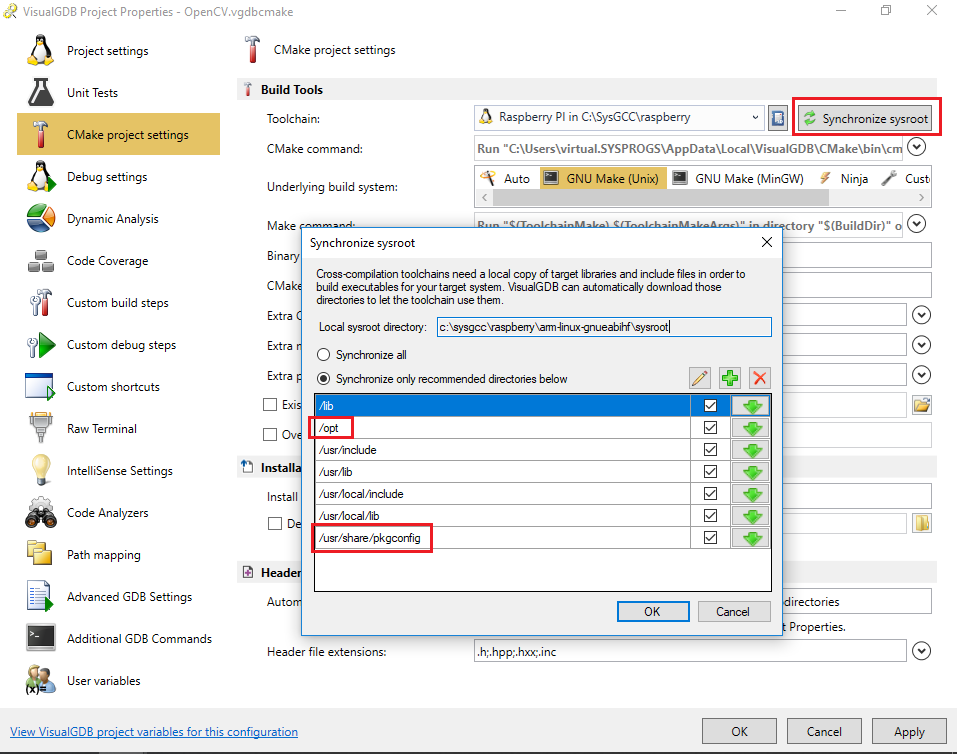
- Once you install the libgtk3-dev package, open VisualGDB Project Properties for the recently created project, and resynchronize the toolchain sysroot to ensure that all headers and libraries end are copied to the Windows machine. Ensure that you include the /usr/share/pkgconfig and /opt directories:
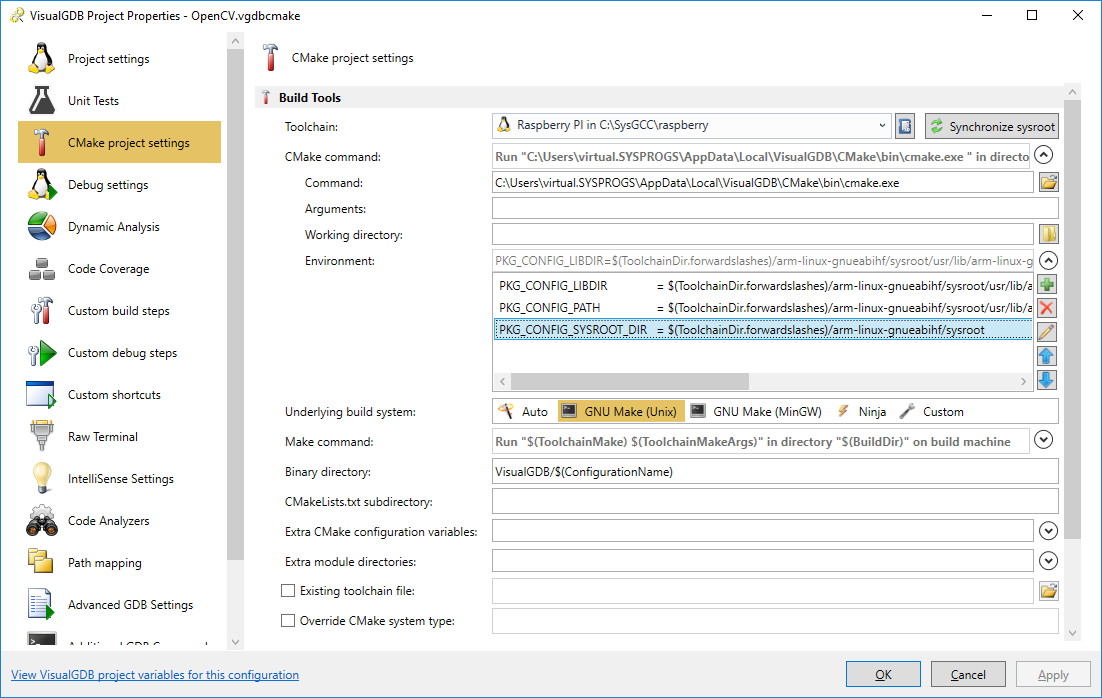
- Before you can start the build, you need to set the environment variables so that pkg-config knows how to find the information about the packages. Set the following environment variables for the CMake command:
PKG_CONFIG_LIBDIR=$(ToolchainDir.forwardslashes)/arm-linux-gnueabihf/sysroot/usr/lib/arm-linux-gnueabihf/pkgconfig
PKG_CONFIG_PATH=$(ToolchainDir.forwardslashes)/arm-linux-gnueabihf/sysroot/usr/lib/arm-linux-gnueabihf/pkgconfig;$(ToolchainDir.forwardslashes)/arm-linux-gnueabihf/sysroot/usr/share/pkgconfig
PKG_CONFIG_SYSROOT_DIR=$(ToolchainDir.forwardslashes)/arm-linux-gnueabihf/sysroot
Replace “C:\SysGCC\Raspberry” with your toolchain directory and do not forget to replace the backward slashes (‘\’) with forward slashes (‘/’):
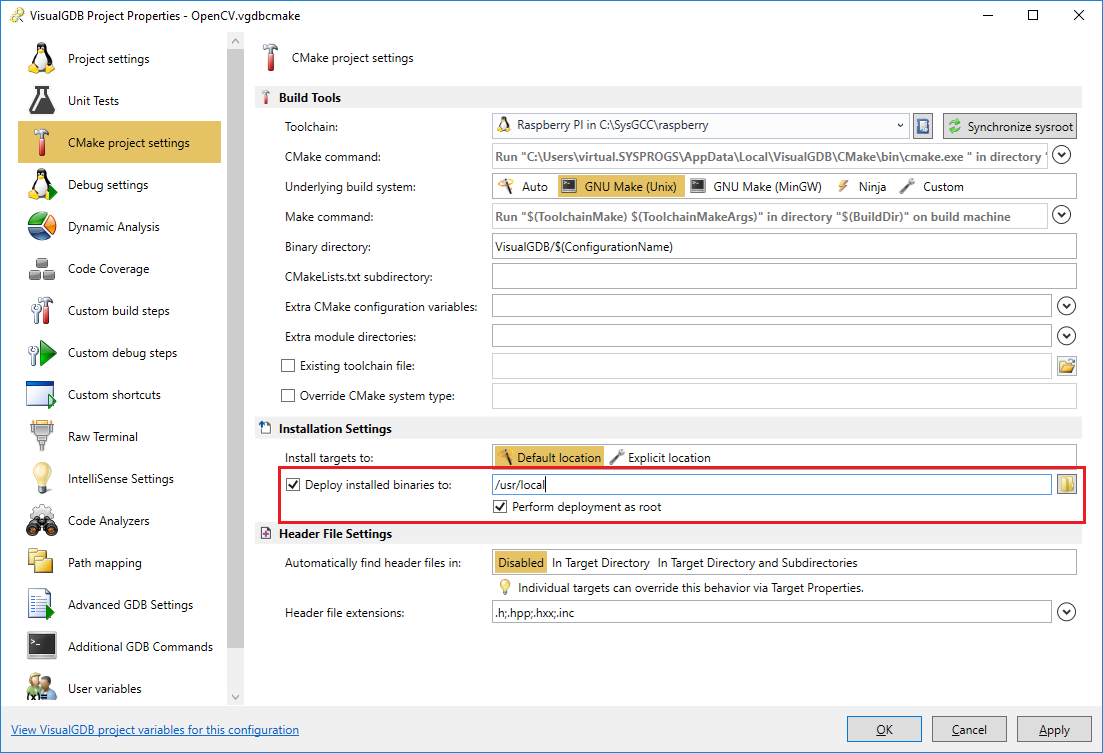
- In order to automatically install the built OpenCV libraries to your Raspberry Pi, set the deployment options as shown below:
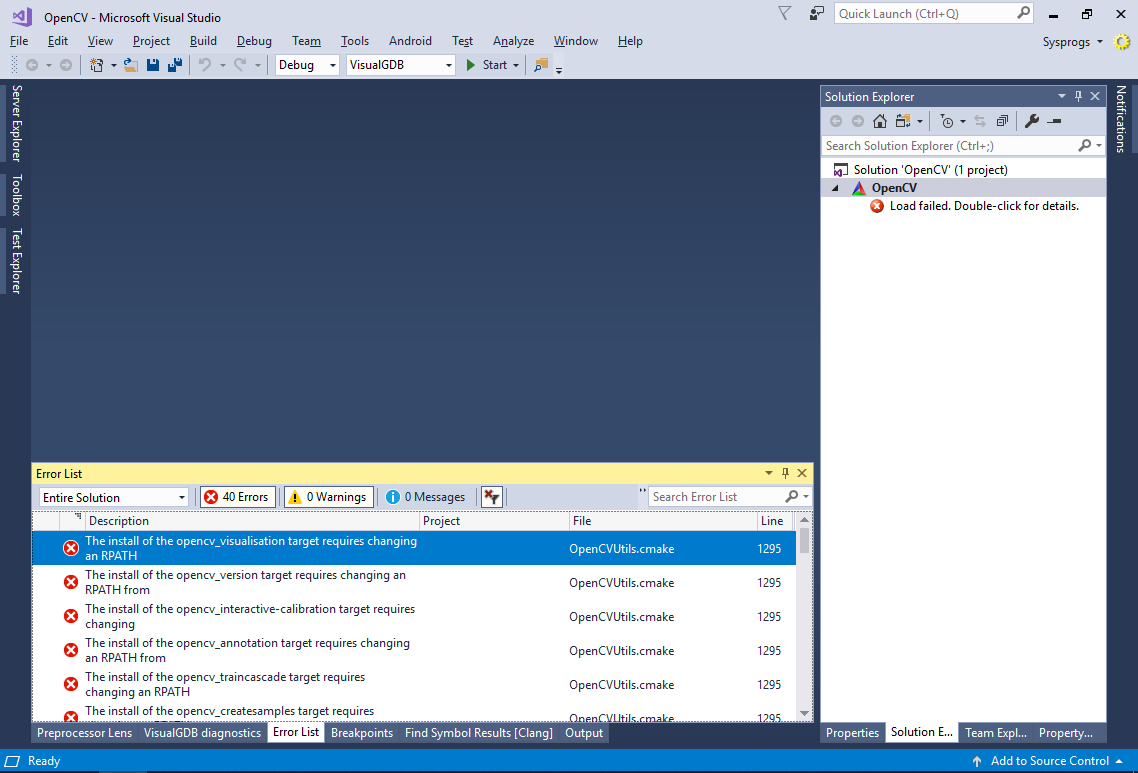
- Once you close the VisualGDB Project Properties, the project will be automatically reloaded. If you were using the Ninja build subsystem, the load may fail as OpenCV doesn’t support Ninja out-of-the-box:
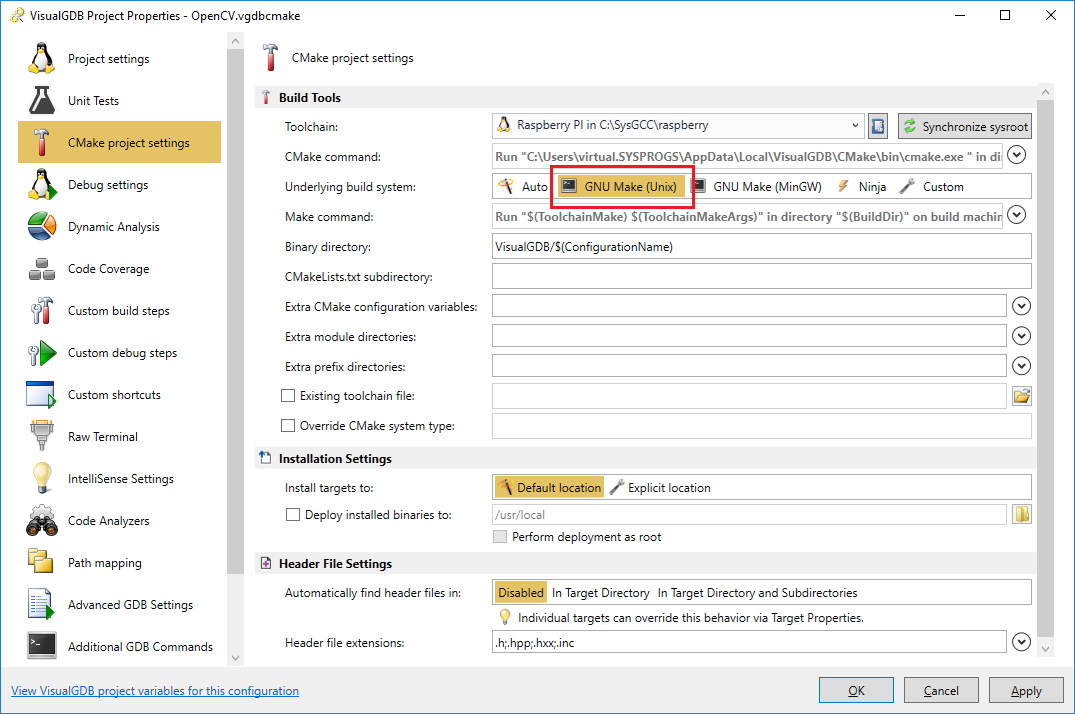
- If this happens, double-check that you are using GNU Make, not Ninja:
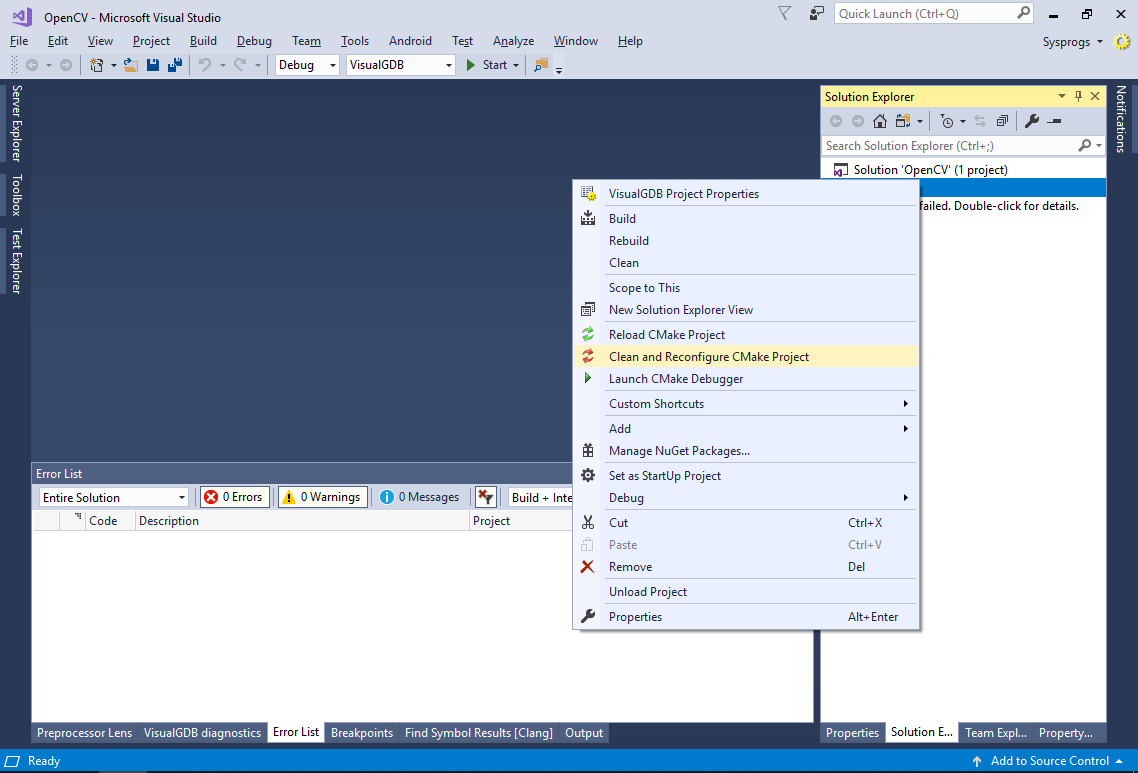
- If you get errors due to incompatible values cached from the previous build, use the :Clean and Reconfigure CMake Project” command to clear all caches:
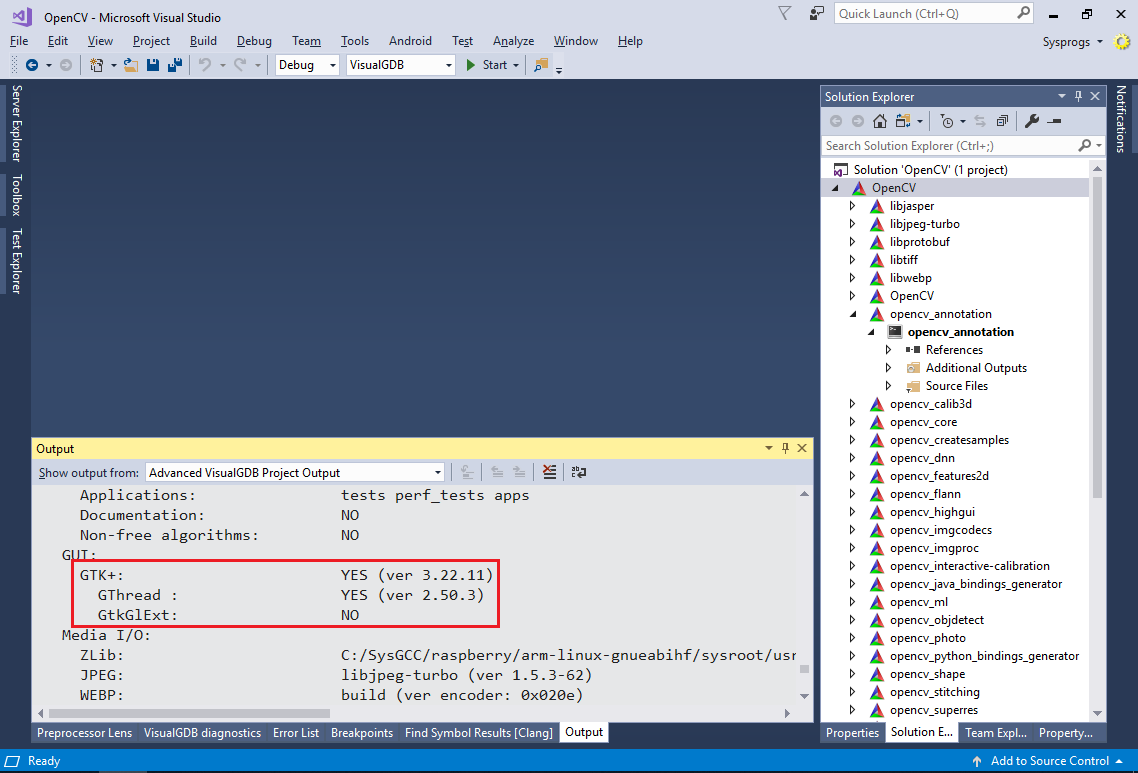
- Once the project is configured, double-check that GTK is found:
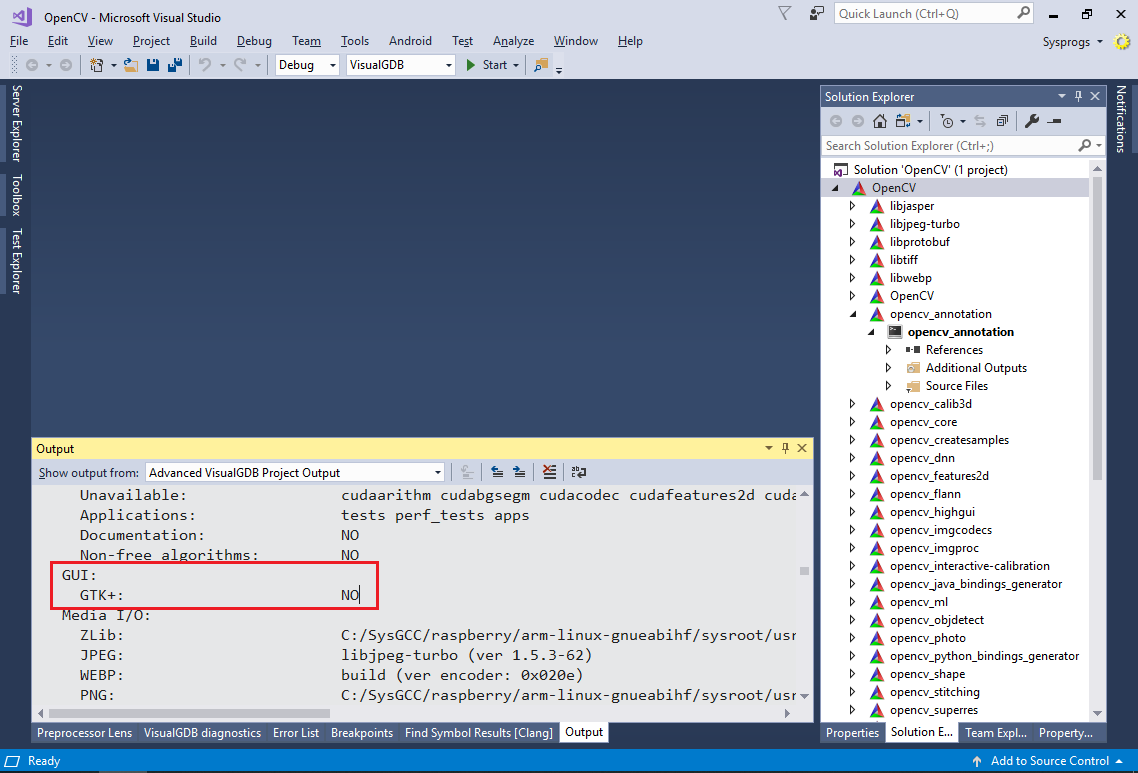
- Now we will show how to use the CMake Script Debugger to diagnose problems related to locating GTK. You can trigger an error here by temporarily removing the PKG_CONFIG_PATH variable definition and ensuring that GTK is now not found:
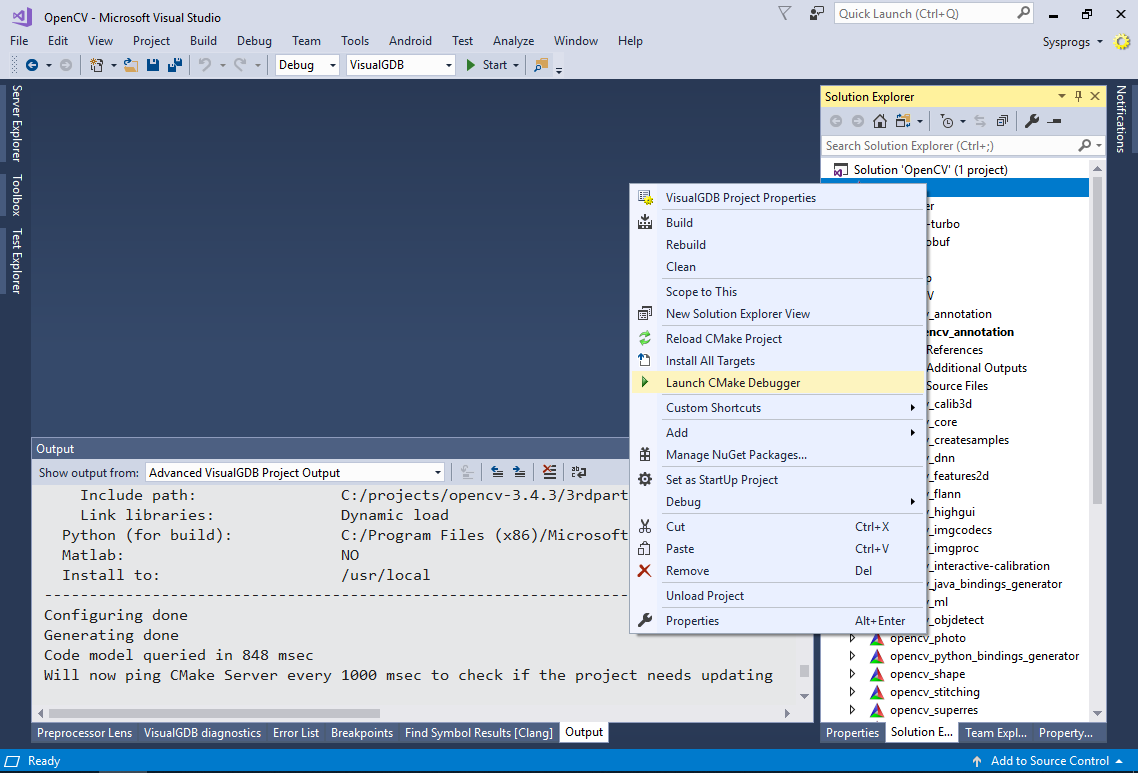
- Right-click on the project in Solution Explorer and select “Launch CMake Debugger”:
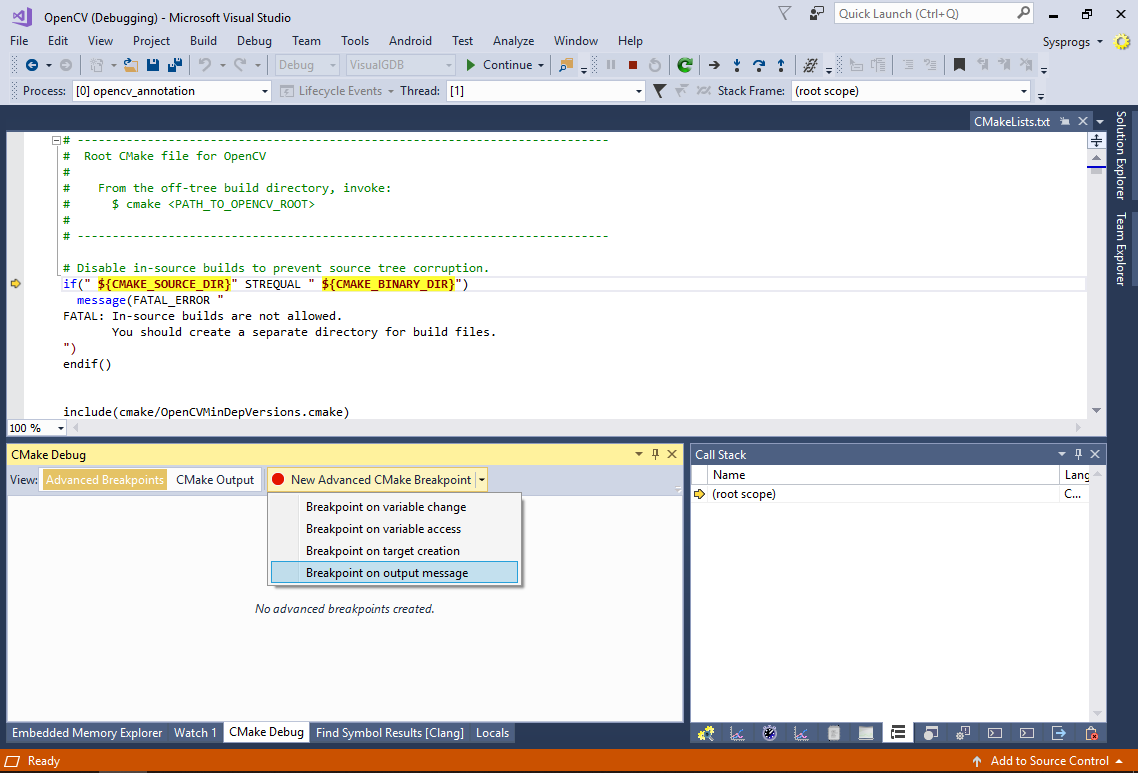
- VisualGDB will step into the top-level CMakeLists.txt file. Set a breakpoint on output message:
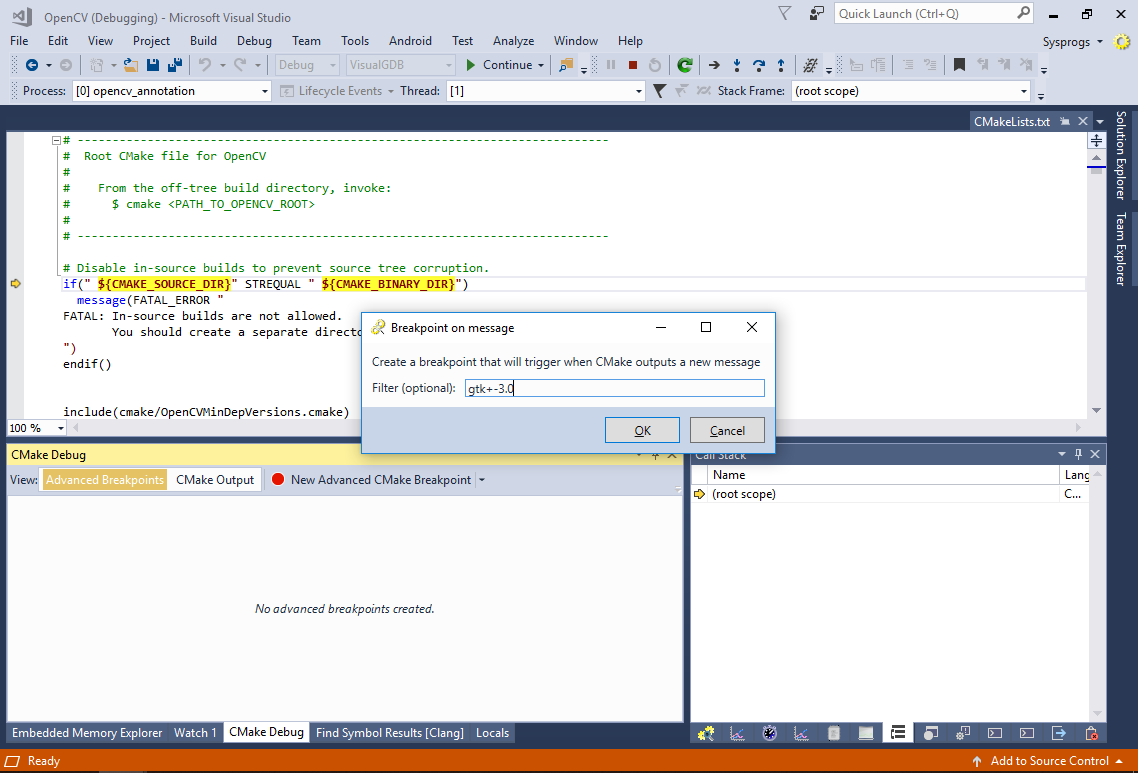
- Specify “gtk-3.0” as the message filter:
- Press F5 to continue debugging CMake. Once the build logic reaches the gtk checks, the breakpoint will trigger:
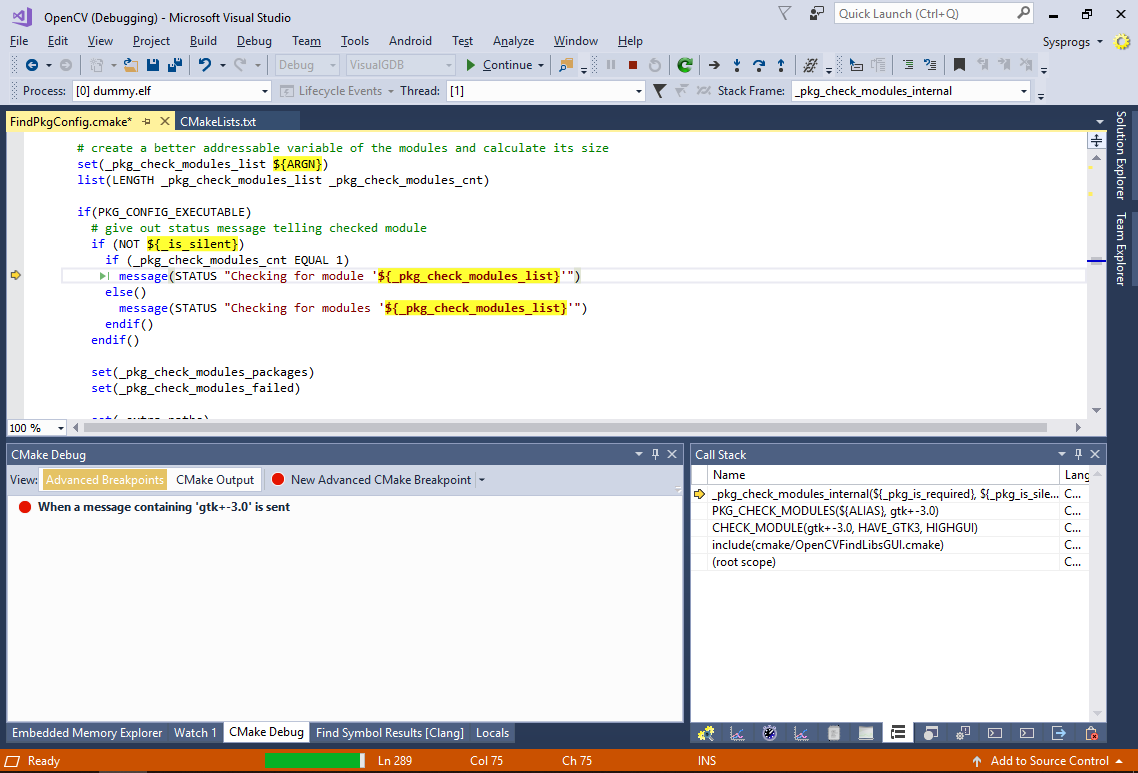
- Step through the check code until you reach the execute_process() statement (or simply set a breakpoint there). Check the environment and the pkg-config arguments used by CMake:

- If the output from pkg-config doesn’t match your expectations, try running it manually from command prompt:
set PKG_CONFIG_PATH=<...>
set PKG_CONFIG_SYSROOT_DIR=<...>
pkg-config --print-errors --short-errors --exists gtk+-3.0 && echo found
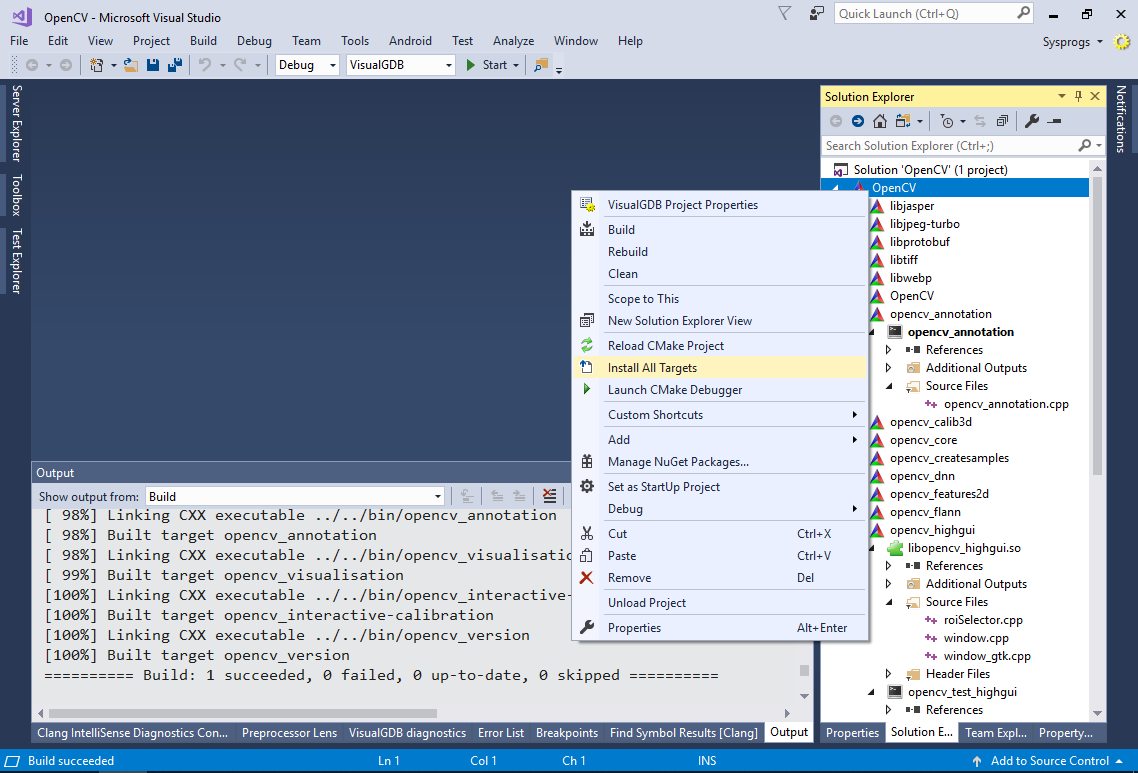
- Once you ensure that gtk 3.0 is found, select Solution->Build Solution to start building OpenCV. The library is relatively big, so the build may take 15 minutes or more. Once the build completes, right-click on the project node in Solution Explorer and select “Install all targets”:
- If you have configured deployment settings on the CMake page of VisualGDB Project Properties, VisualGDB will automatically deploy the OpenCV binaries to the correct locations under /usr/local:

- Now we will create a new project based on an OpenCV sample called findContours_demo. Close the solution and start the VisualGDB Linux Project Wizard again:
- Select “New Project” -> “Application” -> “CMake” and ensure that the advanced Cmake Project Subsystem and GNU Make are enabled:
- Select the same cross-toolchain that you used when building OpenCV itself:
- Press “Finish” to generate the project. Replace the contents of the main .cpp file with the contents of the <OpenCV folder>\samples\cpp\tutorial_code\ShapeDescriptors\findContours_demo.cpp file:
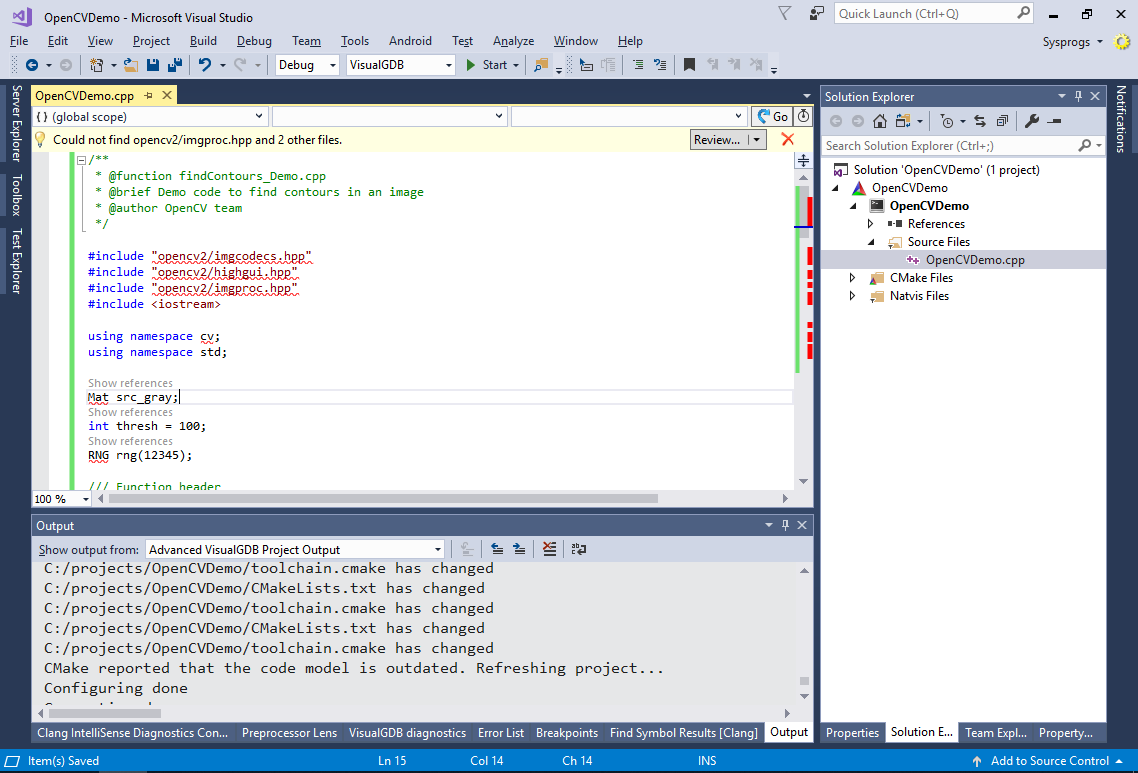 Note that as we haven’t referenced OpenCV from the project yet, it won’t find the include files and libraries.
 - Edit the CMakeLists.txt file of the new project as shown below to reference OpenCV:
find_package(OpenCV REQUIRED)

ocv_include_directories("${OpenCV_SOURCE_DIR}/include")
ocv_include_modules_recurse(${OPENCV_CPP_SAMPLES_REQUIRED_DEPS})

<...>

target_link_libraries(OpenCVDemo ${OpenCV_LIBS} "${LIBRARIES_FROM_REFERENCES}")
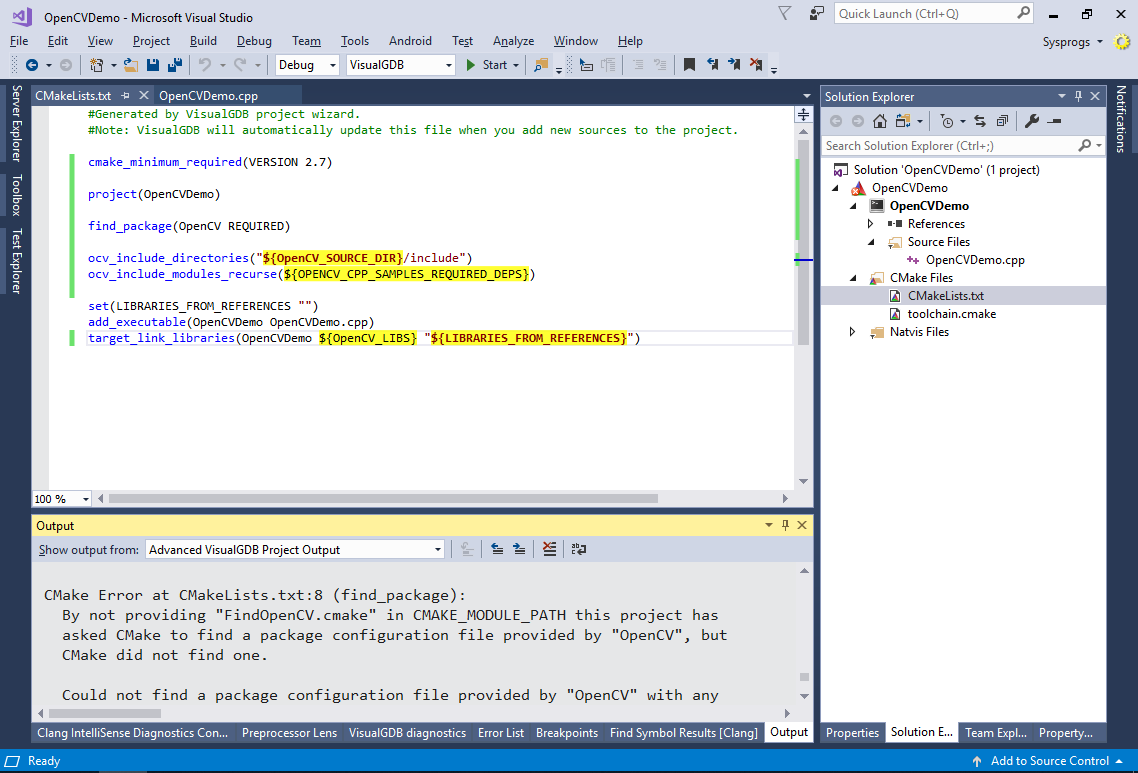
Once you save the CMakeLists.txt file, CMake will report that the OpenCV package is missing:
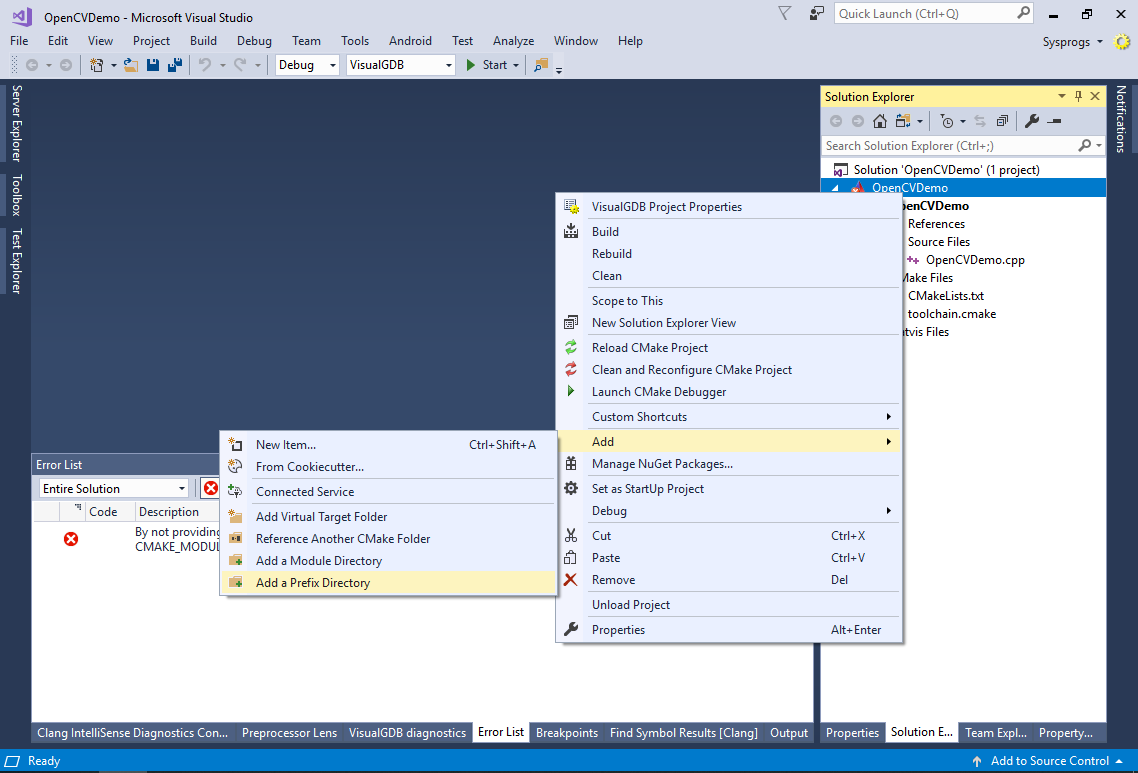
- Right-click on the project in Solution Explorer and select “Add->Add a Prefix Directory”:
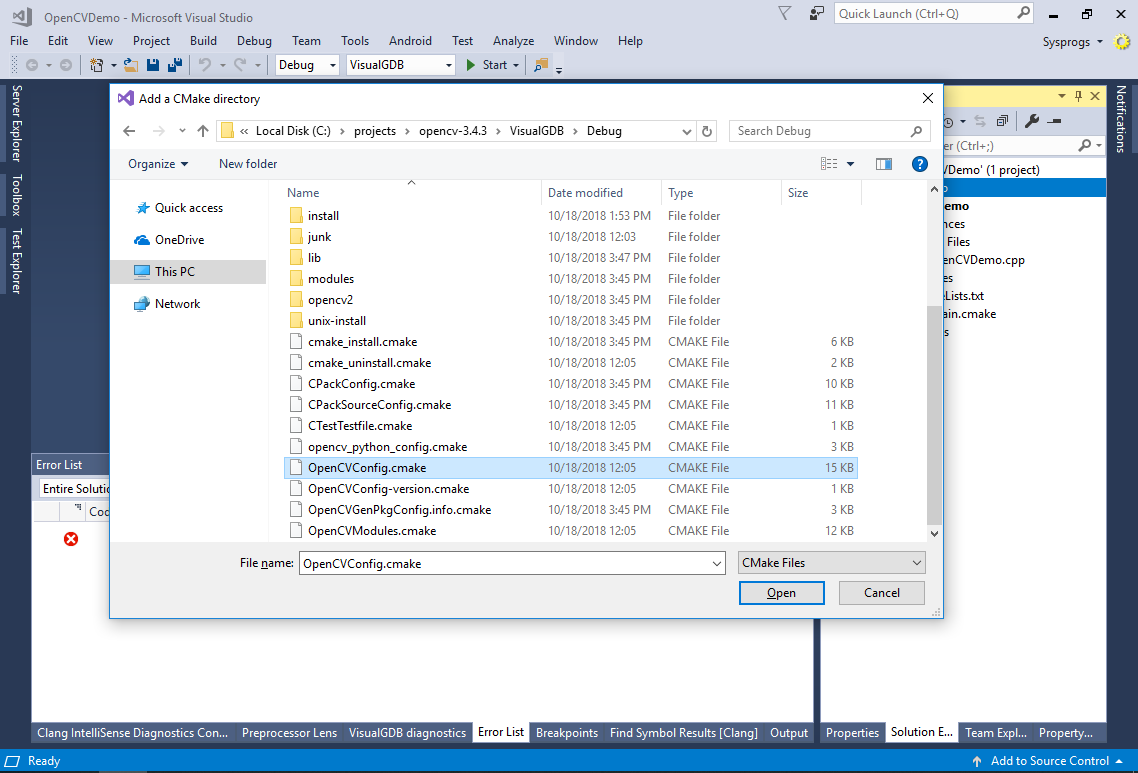
- Go to the <OpenCV directory>\VisualGDB\Debug folder and pick any file in it:
- Now CMake will locate the OpenCV libraries and the configuration will succeed. Build the project via Ctrl-Shift-B:

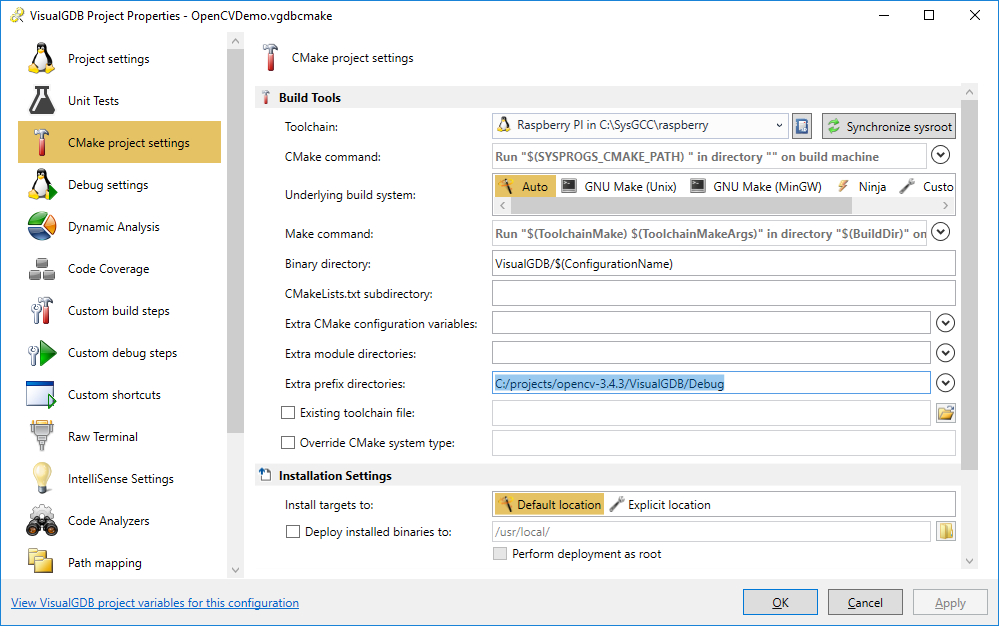
- The prefix directory added in the previous step is stored in the project file itself (not in CMakeLists.txt files) and can be changed via VisualGDB Project Properties:
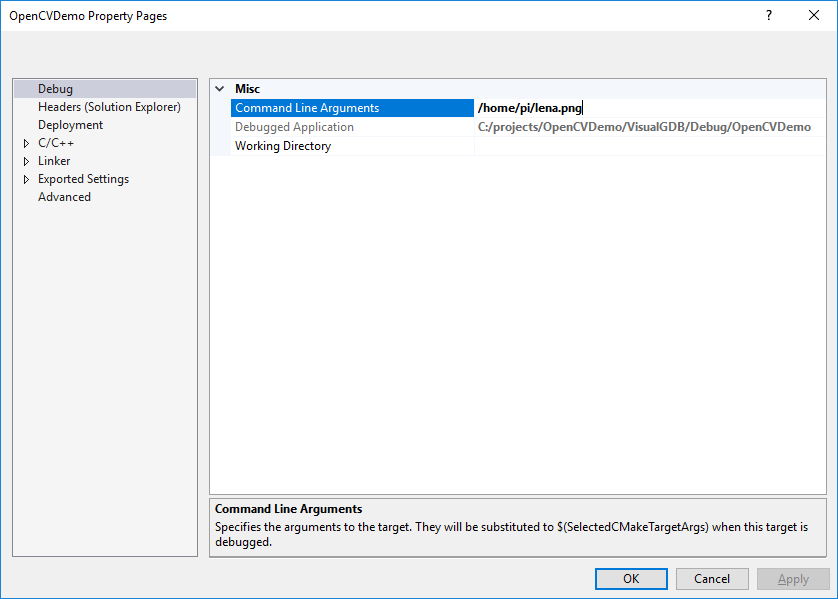
- Now we will run the demo program and step through it. The demo opens an image specified via command line and tries to detect contours on it. To show the program, we will use the Lena image from <OpenCV>\samples\wp8\OpenCVXaml\OpenCVXaml\Assets\Lena.png. First of all, upload it to your Raspberry Pi using SmarTTY. Then specify the path to the image in the command-line arguments of your application:
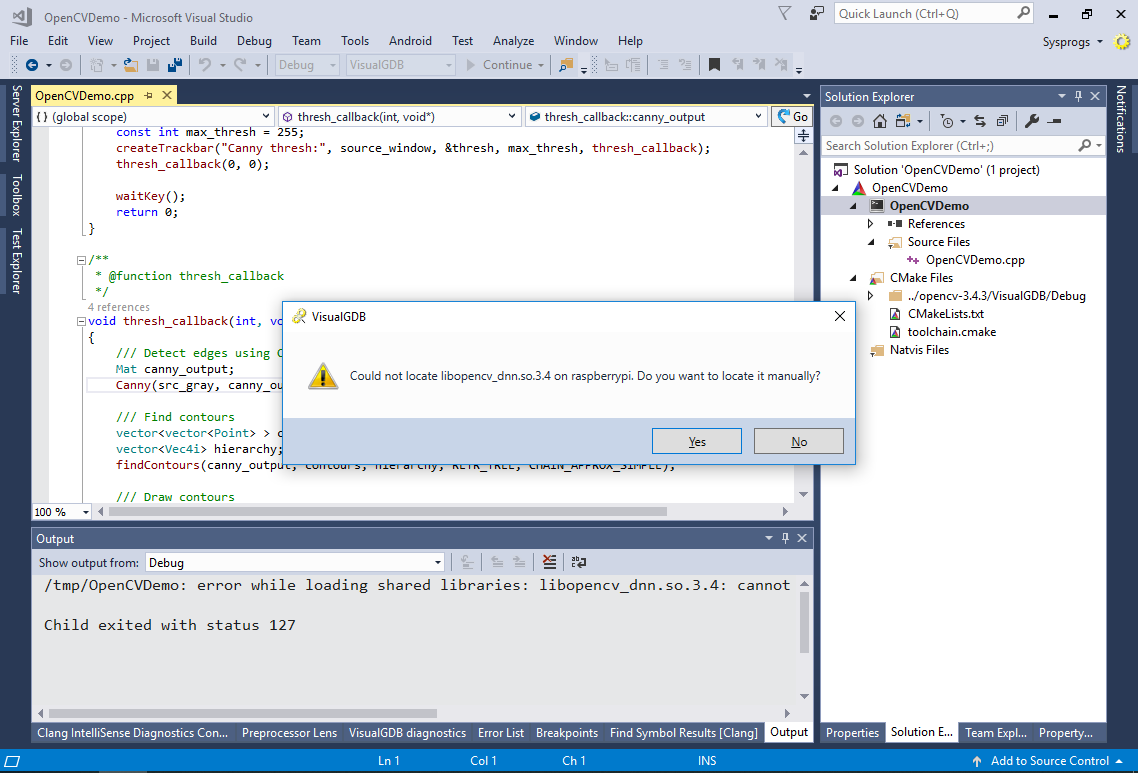
- Press F5 to start debugging. As long as you are using VisualGDB 5.4 with the Advanced CMake Project Subsystem, it will automatically discover the locations of the OpenCV libraries on your Windows machine and issue the set solib-search-path command command to GDB so that it can load the symbols from them. However the OpenCVDemo project does not specify where to find the libraries on the target, hence the first debug session will fail due to missing libraries:
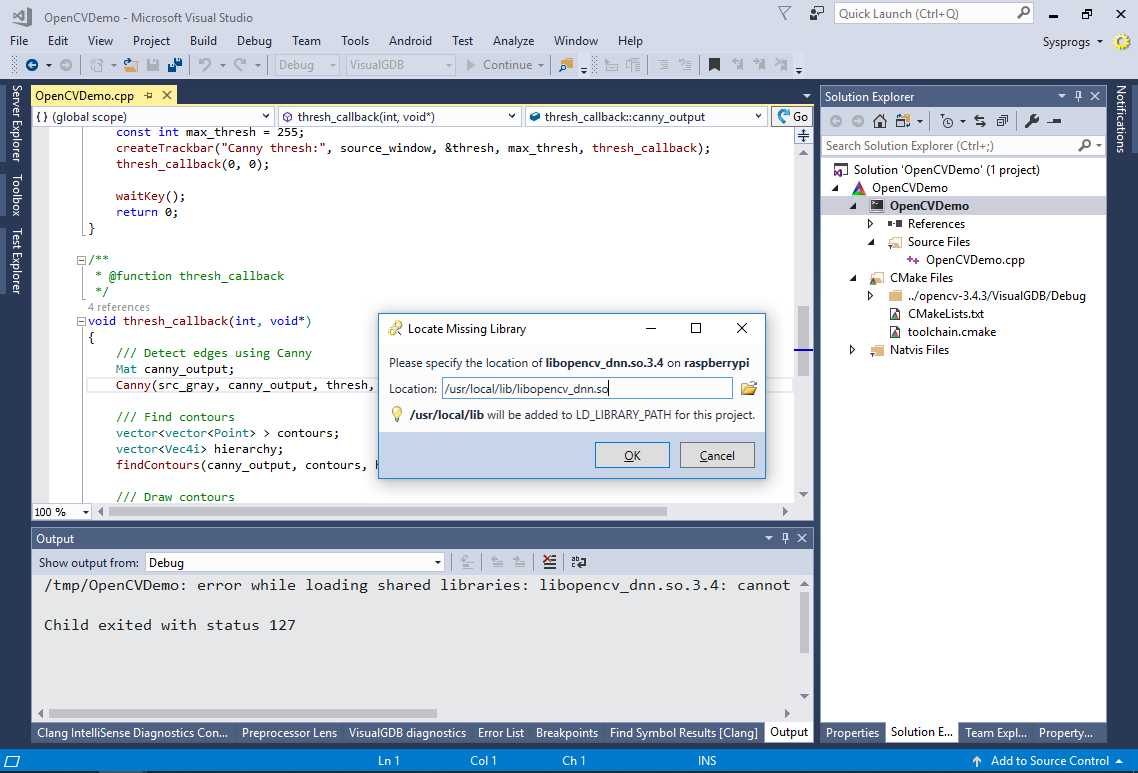
- Locate the missing library on the target (in this tutorial is should be installed under /usr/local/lib) and press “OK”:
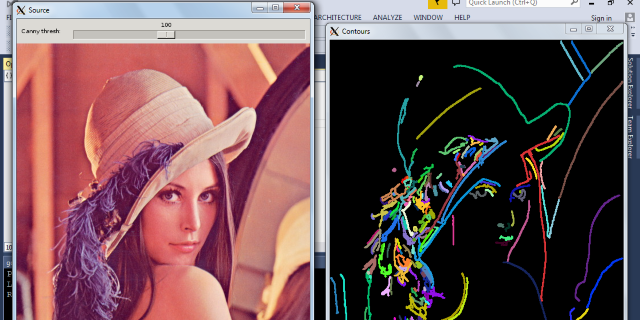
- Hit F5 again to start another debug session. The sample program will start successfully and will run the edge detection algorithm on the image:
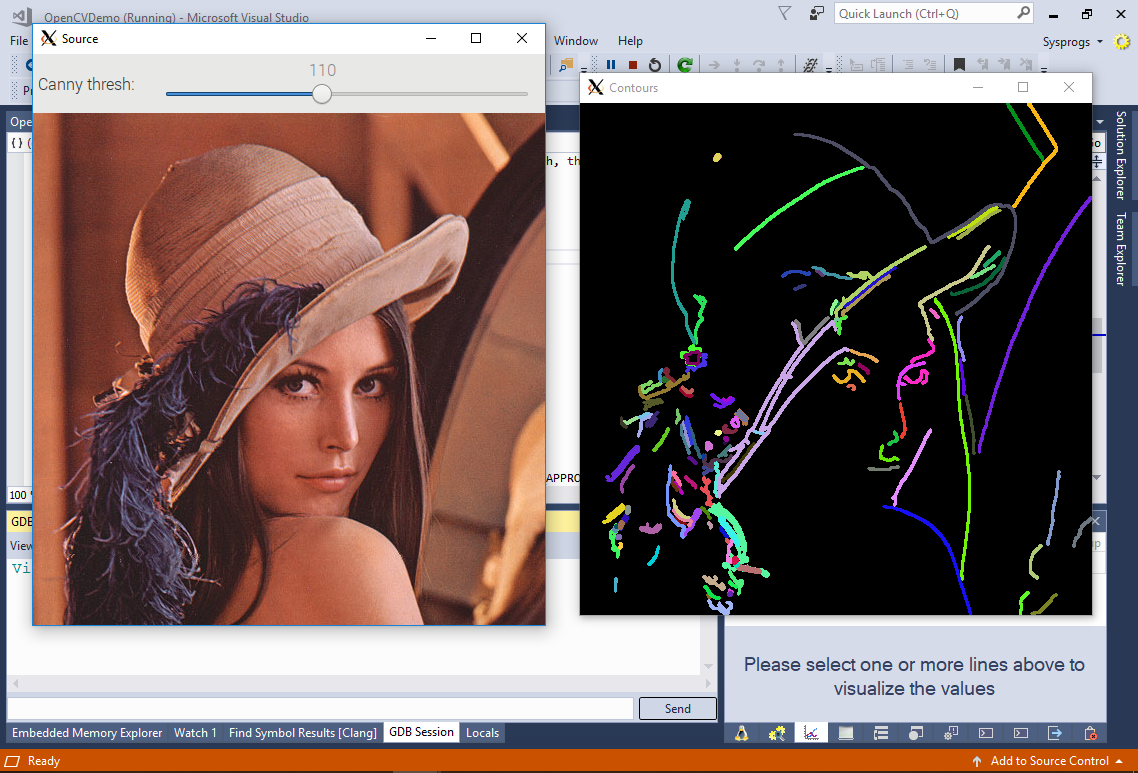
- Set a breakpoint inside the thresh_callback() function and move the slider in the left window. The breakpoint will get hit:
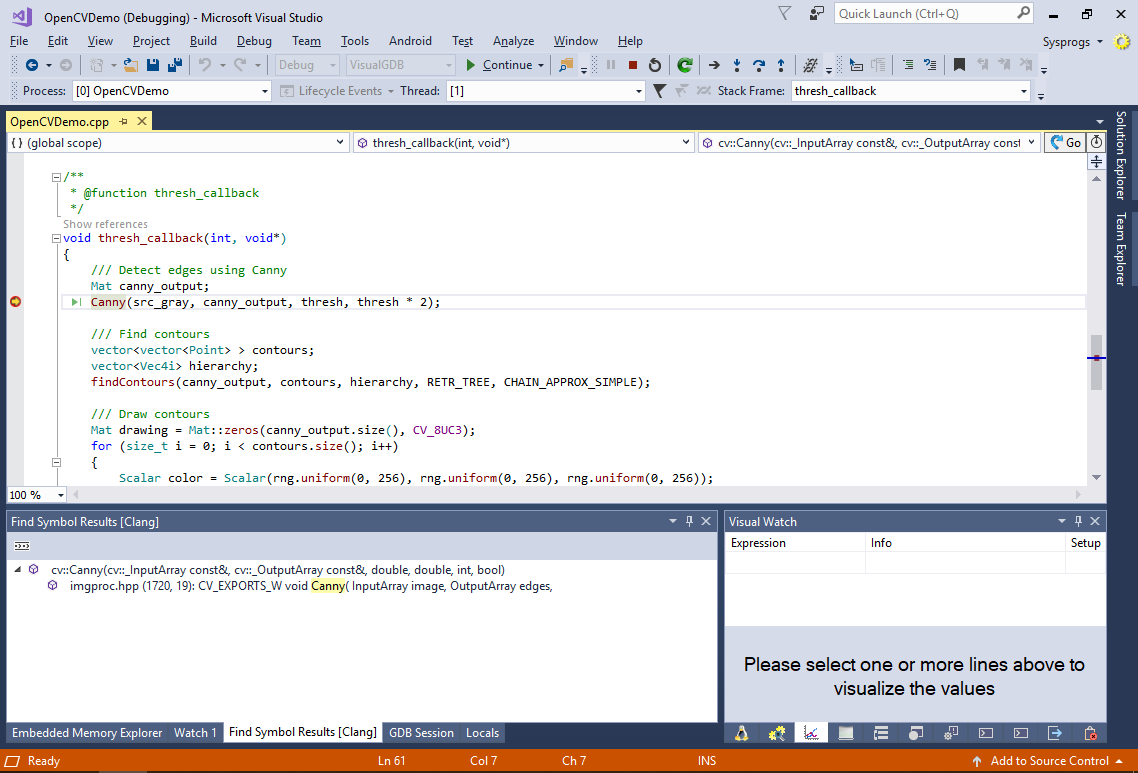
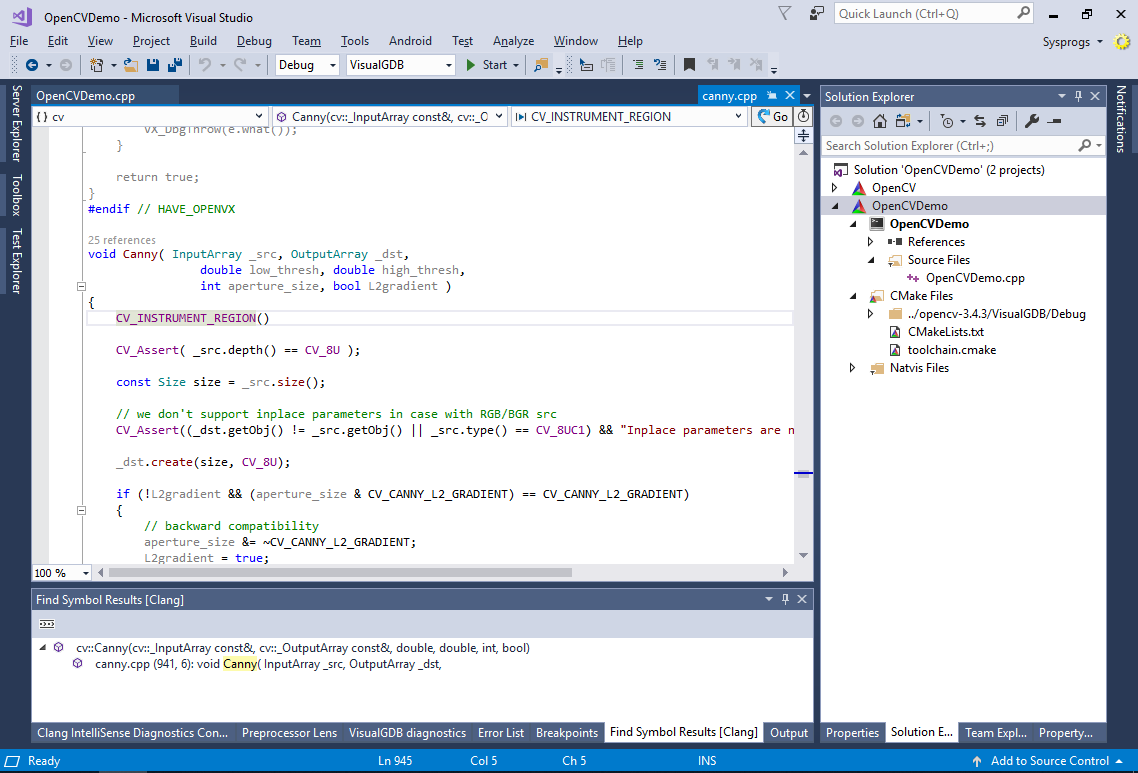
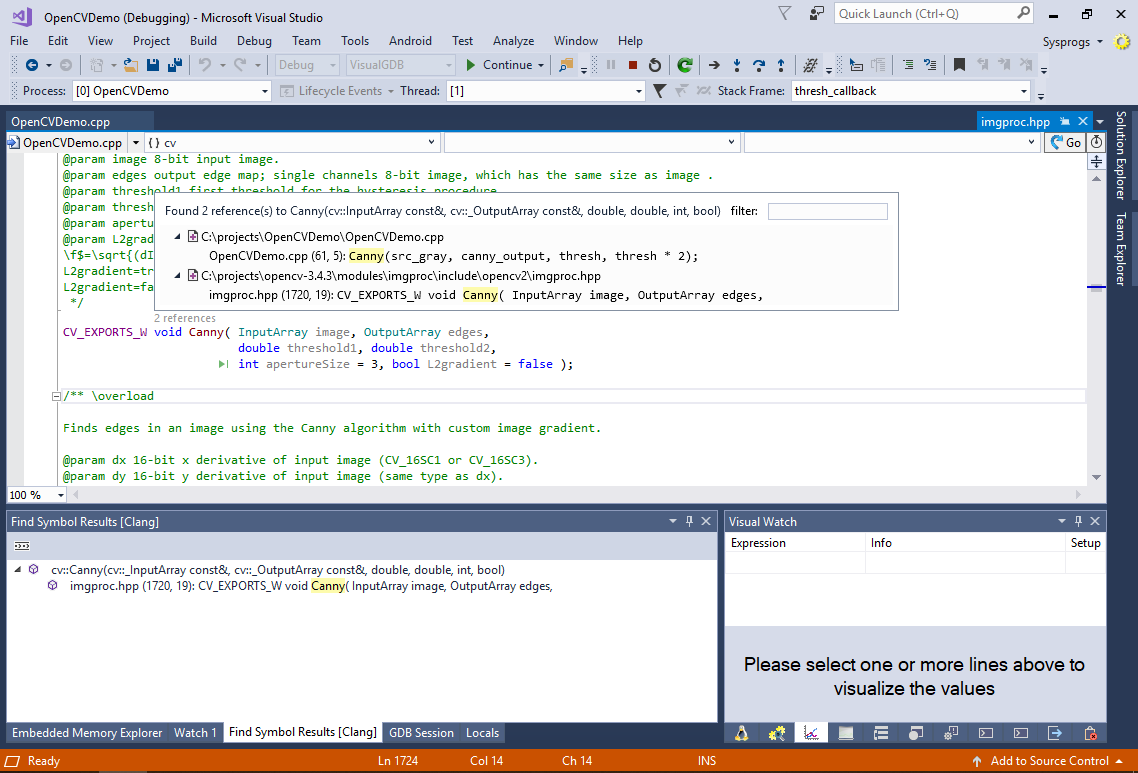
- You should be able to step into the Canny() function by pressing F11 (you would need to do it several times to step out of several implicit constructors), however as we have imported OpenCV as a package, IntelliSense won’t know where to find its source files and will only find references to various OpenCV functions inside the demo project:
- There are 2 ways to make the OpenCV sources available to IntelliSense while developing the demo project:
- We could import it using CMake logic using the add_subdirectory() command. This would import all OpenCV targets into the current project, greatly increasing the build time.
- We could also add the original VisualGDB project created earlier in this tutorial to the solution and configure Visual Studio to not build it. This will make all sources available to IntelliSense and will note increase the build time, as the OpenCV targets will not be rechecked unless you explicitly build the OpenCV project.
- Right-click in the solution element in Solution Explorer and select “Add->Existing Project”. Then pick the .vgdbcmake file corresponding to the imported OpenCV project. VisualGDB will add it side-by-side with the demo project (OpenCVDemo):
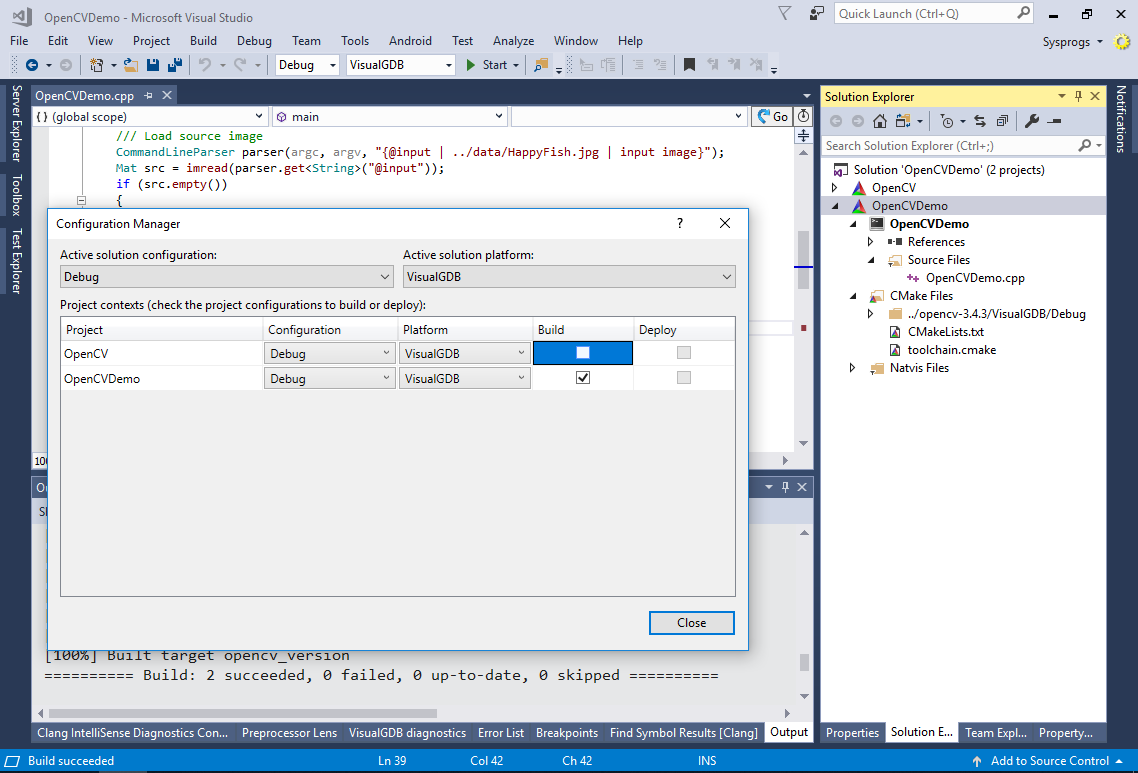
 Note that each CMake project (i.e. both OpenCV and OpenCVDemo) can contain multiple targets. The Solution Explorer nodes with the CMake icon correspond to CMake projects and subprojects, while nodes with the console icon correspond to specific executables built by each project.
 - Use the Visual Studio’s configuration manager to disable building of the OpenCV project and only build OpenCVDemo:
- Now IntelliSense will be able to index all the source files in both the sample project and the OpenCV library, so you will be able to use go-to-definition, Code Map, Code Jumps and other IntelliSense features: