Using OpenCV with Raspberry Pi 2 Camera
This tutorial shows how to use the OpenCV library to process the images obtained from the OpenCV camera. Before you begin, follow this tutorial to cross-compile the OpenCV library for Raspberry Pi or this one to use a pre-built one and this tutorial to setup the raspicam library that allows obtaining images from the Raspberry Pi camera.
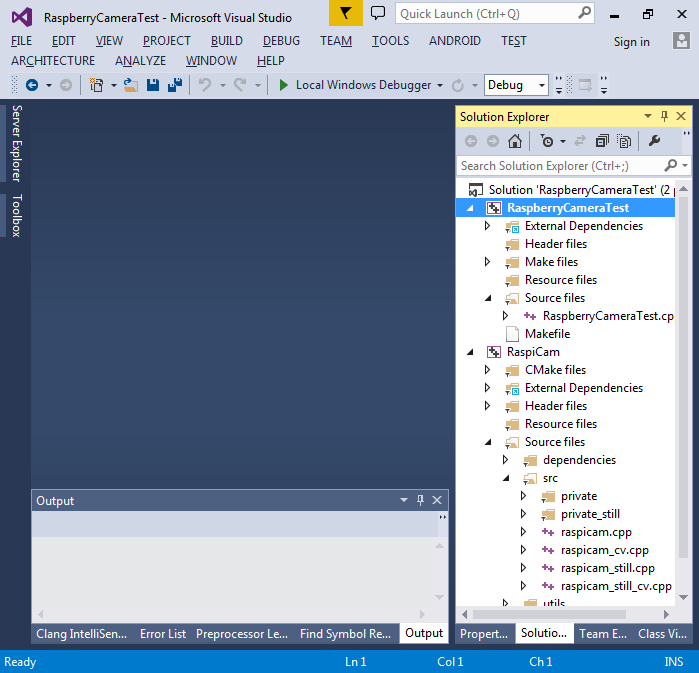
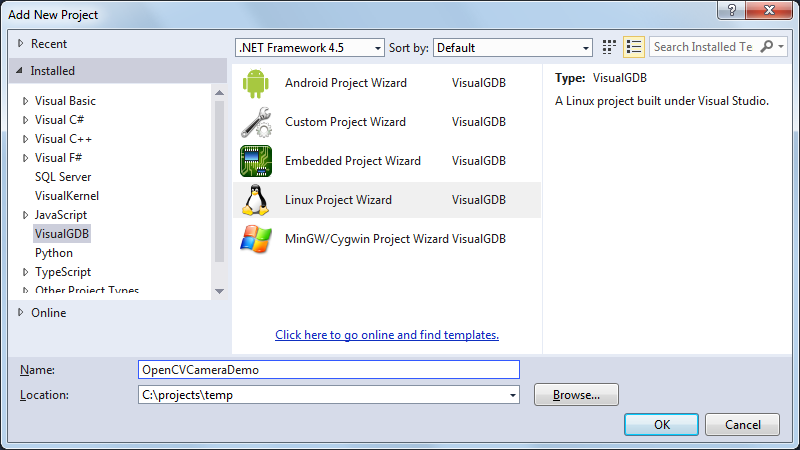
- Start Visual Studio and open the project created during the Raspberry Pi camera tutorial:
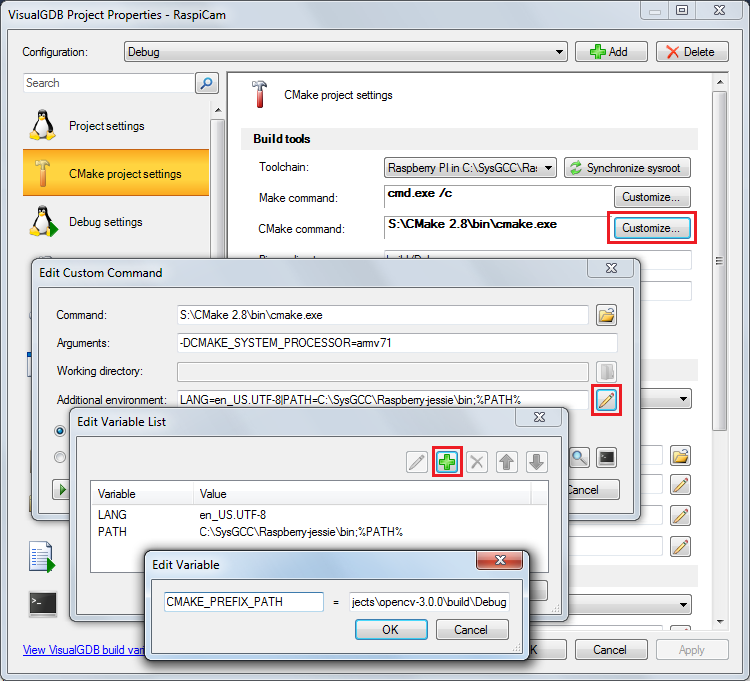
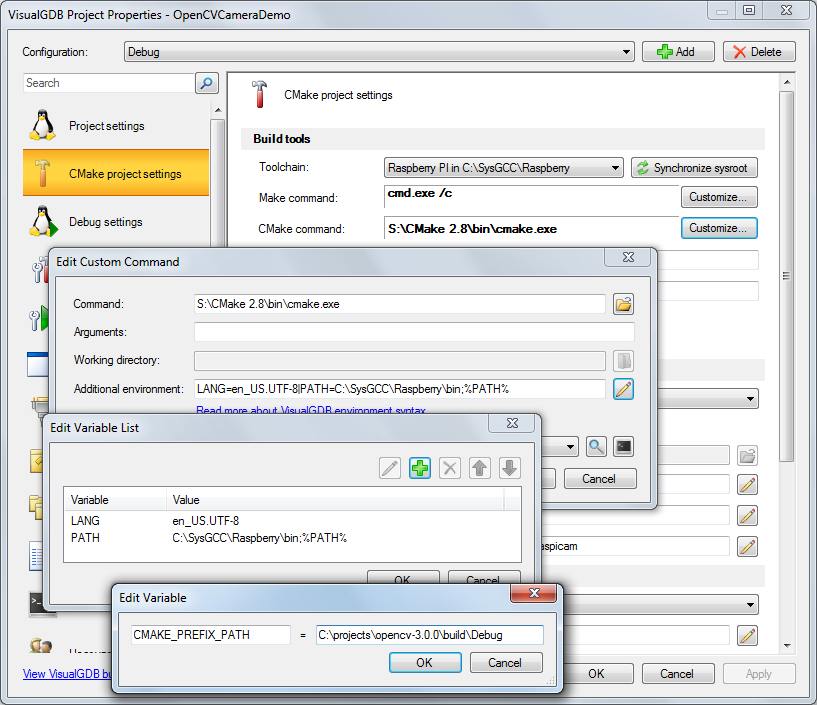
- Our first step will be to modify the RaspiCam project to support OpenCV. Open the VisualGDB Project Properties for it and add the OpenCV build directory from this tutorial (or <sysroot>\usr\share\OpenCV if using a pre-built OpenCV) to the CMAKE_PREFIX_PATH variable for the CMake command:
- Rebuild the RaspiCam project. Ensure that OpenCV is detected:
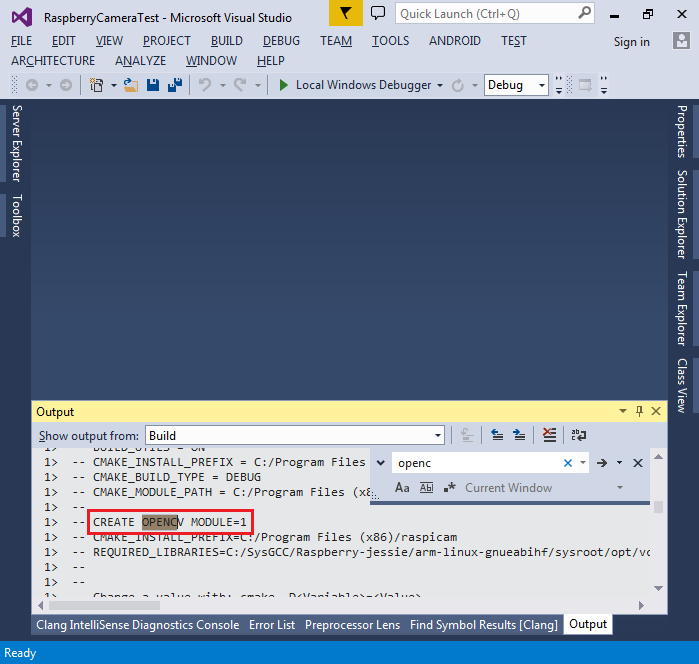 If OpenCV is not detected, double-check that the directory specified in the previous step contains the OpenCVConfig.cmake file.
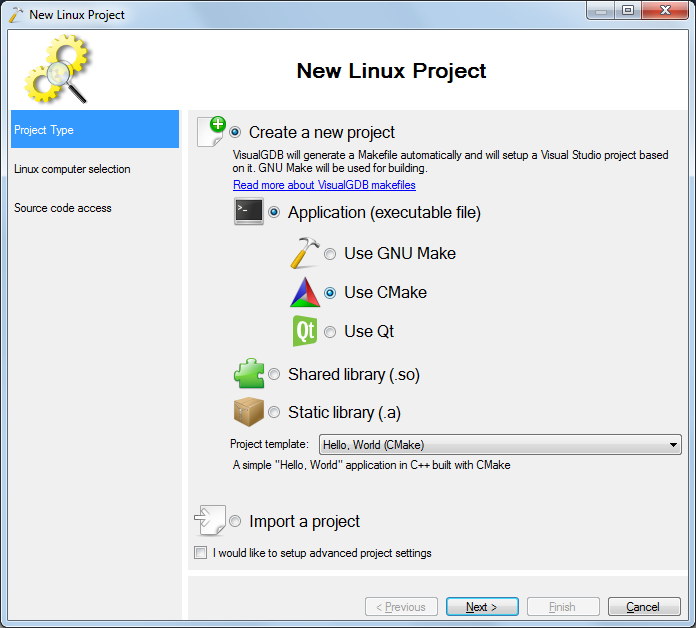
 - Add another project to the solution using the VisualGDB Linux Project Wizard:
- Select “New Project->Application->CMake”:
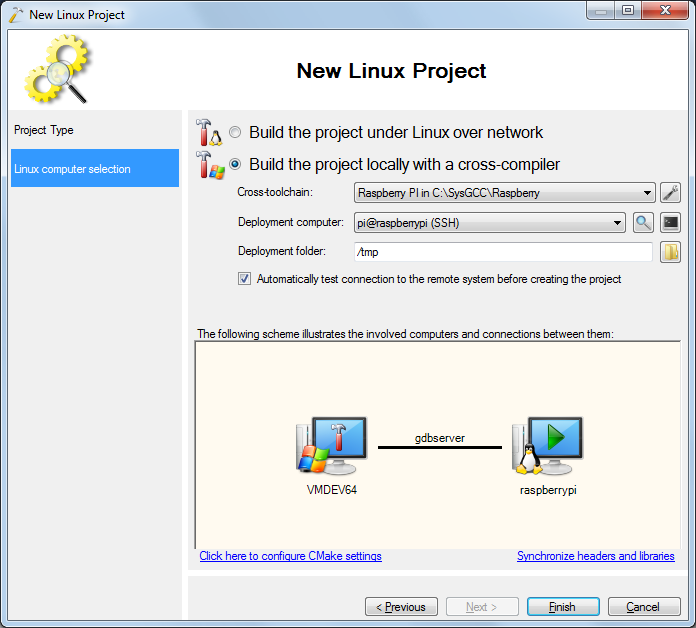
- Then select “Build the project locally” and ensure that Raspberry Pi is still selected as the deployment machine:
- Once the project is created, add the OpenCV build directory (or <sysroot>\usr\share\OpenCV) to the CMAKE_PREFIX_PATH variable of the CMake command for the newly created project:
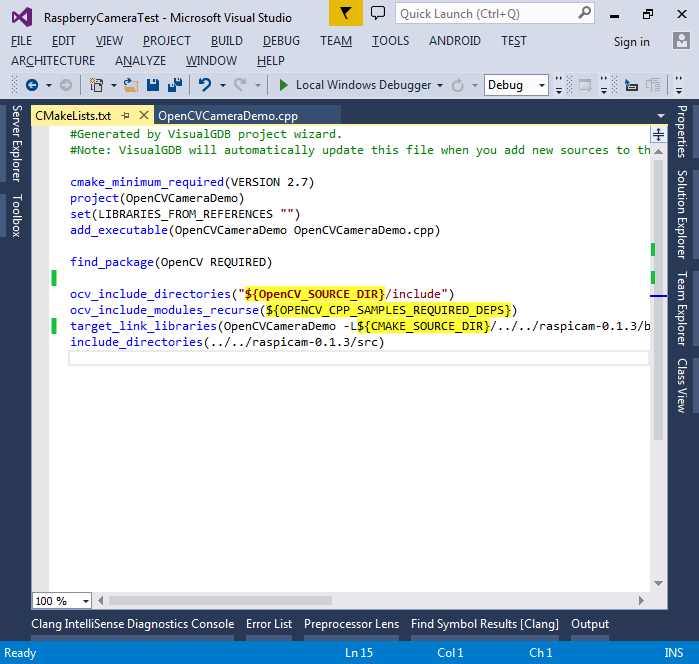
- Add the following lines to CMakeLists.txt in the new project:
find_package(OpenCV REQUIRED)

ocv_include_directories("${OpenCV_SOURCE_DIR}/include")
ocv_include_modules_recurse(${OPENCV_CPP_SAMPLES_REQUIRED_DEPS})
target_link_libraries(OpenCVCameraDemo -L${CMAKE_SOURCE_DIR}/../../raspicam-0.1.3/build/Debug/src ${OpenCV_LIBS} raspicam_cv raspicam "${LIBRARIES_FROM_REFERENCES}")
include_directories(../../raspicam-0.1.3/src)
Replace ../../raspicam-0.1.3 with the relative path to the raspicam project:
 If you are using OpenCV 2.x, use ocv_include_modules() instead of ocv_include_modules_recurse().
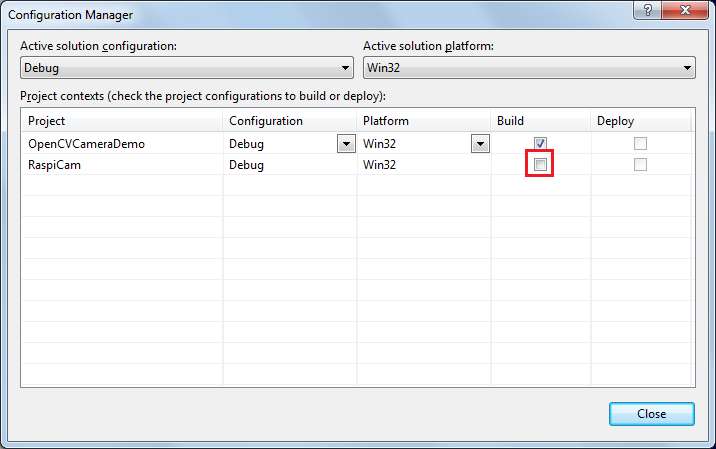
 - To speed up building the solution, you can remove the non-OpenCV demo project and disable building for the RaspiCam library:
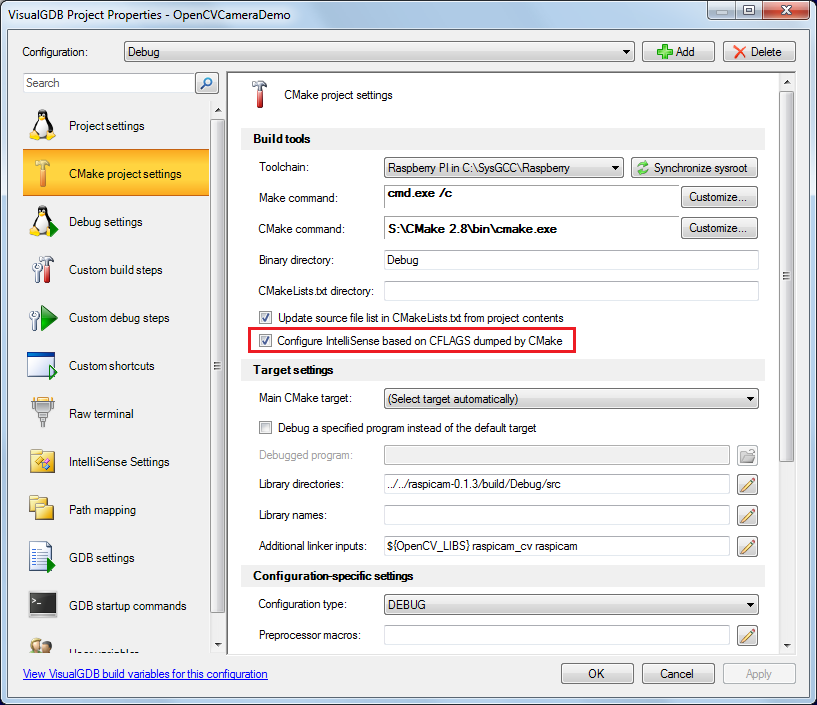
- As the new camera demo project uses complex CMake macros that cannot be parsed without querying CMake explicitly, enable the corresponding checkbox for the newly created project and rebuild it:
- First of all, we will create a very basic program that will grab images from the camera and display them using the OpenCV API:
- First we will create and initialize a raspicam::RaspiCam_Cv object.
- Then we will call the grab() method on the object to grab the images.
- Then the retrieve() method will be used to save the images into an OpenCV-supported image container.
- Finally we will use the cv::imshow() function to show the image on the screen.
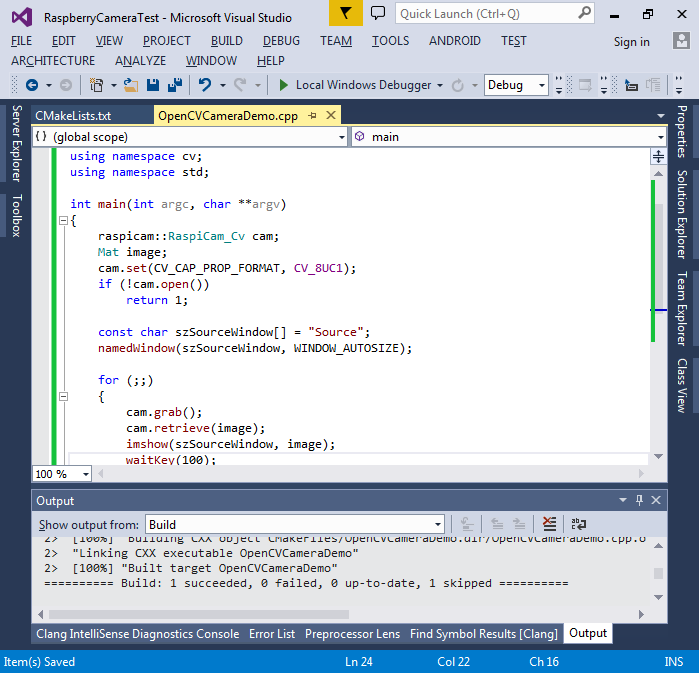
The full source code of the first basic program is shown below. Copy it to the main source file of the new project:
#include <ctime>
#include <iostream>
#include <raspicam_cv.h>

using namespace cv;
using namespace std;

int main(int argc, char **argv)
{
    raspicam::RaspiCam_Cv cam;
    Mat image;
    cam.set(CV_CAP_PROP_FORMAT, CV_8UC1);
    if (!cam.open())
        return 1;

    const char szSourceWindow[] = "Source";
    namedWindow(szSourceWindow, WINDOW_AUTOSIZE);

    for (;;)
    {
        cam.grab();
        cam.retrieve(image);
        imshow(szSourceWindow, image);
        waitKey(100);
    }

    cam.release();
    return 0;
}
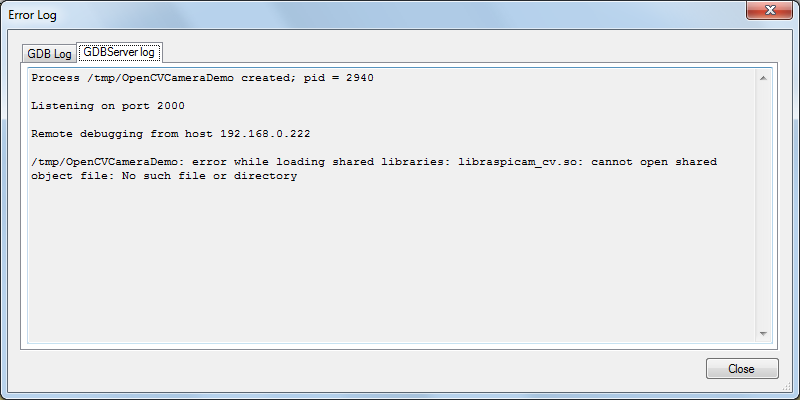
- If you start debugging now, VisualGDB will show that the program has exited immediately and the GDBServer log will contain an error message about a missing library:
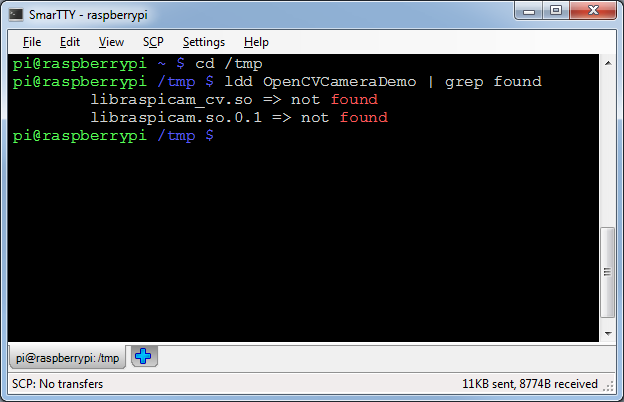
- You can get the list of missing libraries by running “ldd <deployed project file> | grep found” via SSH:
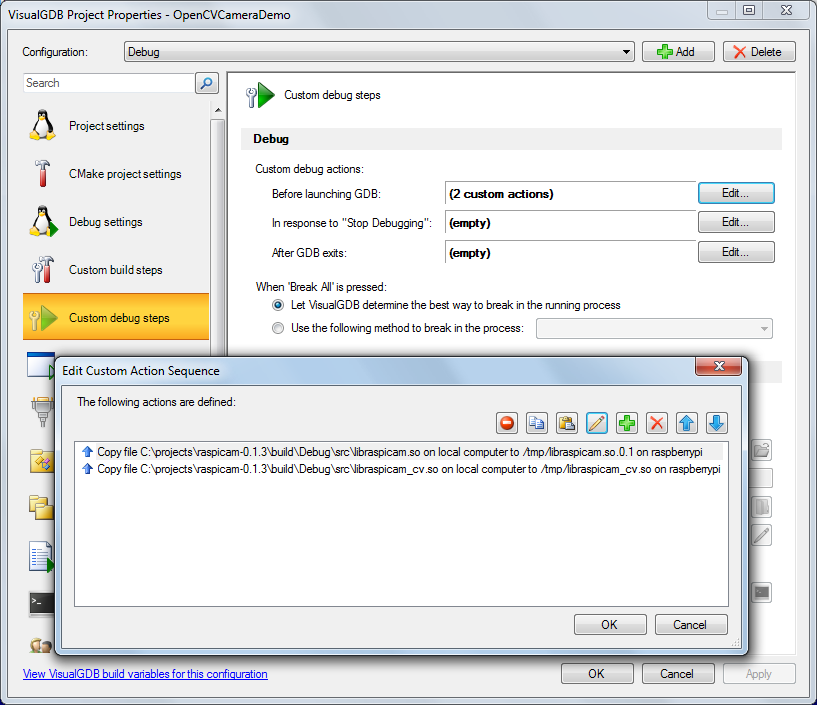
- You can fix this either by uploading the libraries manually, or by adding custom pre-debug actions to upload the necessary libraries:
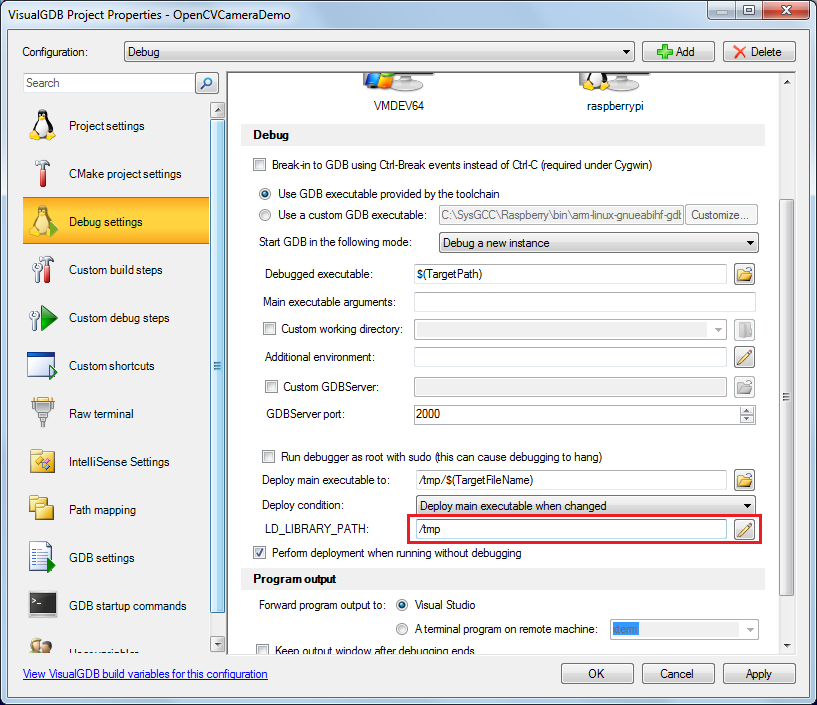
- If you upload the libraries outside the normal library directories, do not forget to add the target directory to LD_LIBRARY_PATH:
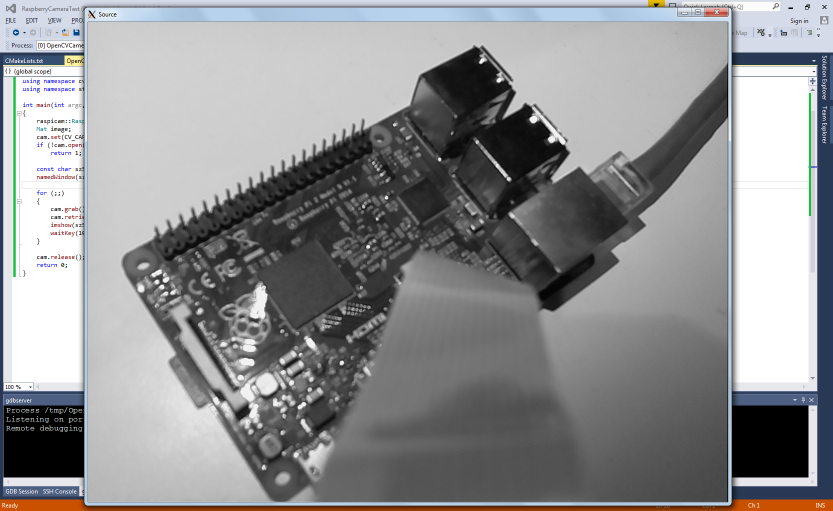
- Now you can start debugging by hitting F5. You will see a window forwarded from your Raspberry Pi that will show the video stream from the camera:
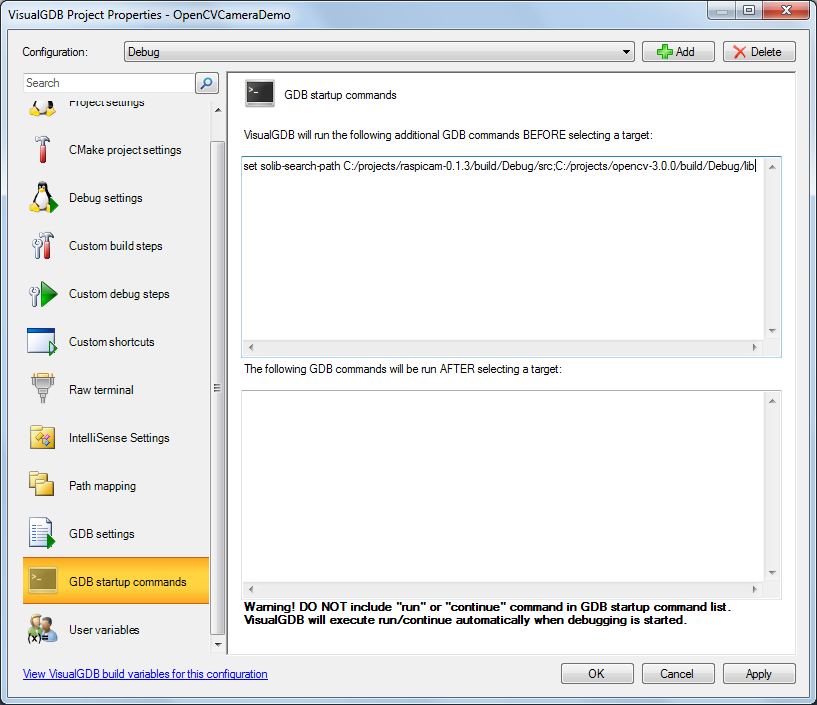
- In order to step into RaspiCam and OpenCV functions, add the directories containing the library files to GDB shared library search path by adding the set solib-search-path command to startup commands:
- Then you can try stepping into grab() or retrieve() to see what happens inside them:

- Now we will add code for running the contour detection algorithm similar to the one shown in the OpenCV tutorial:
- For each captured image we will first call resize() to halve its size.
- Then we will run the Canny edge detector on the image by calling the Canny() function.
- After detecting the edges, we will run the contour extraction algorithm by calling findContours().
- We will then draw the contours on a separate blank image by calling drawContours().
- Finally, we will display both the original image and the visualization of the contours by calling imshow().
The code implementing the procedure described above is shown below:
#include <ctime>
#include <iostream>
#include <raspicam_cv.h>
#include "opencv2/highgui/highgui.hpp"
#include "opencv2/imgproc/imgproc.hpp"

using namespace cv;
using namespace std;

int main(int argc, char **argv)
{
    int threshold = 100;
    const int frameDelay = 100, maxContours = 500;

    raspicam::RaspiCam_Cv cam;
    Mat image;
    cam.set(CV_CAP_PROP_FORMAT, CV_8UC1);
    if (!cam.open())
        return 1;

    const char szSourceWindow[] = "Source", szContoursWindow[] = "Contours";
    namedWindow(szSourceWindow, WINDOW_AUTOSIZE);
    namedWindow(szContoursWindow, WINDOW_AUTOSIZE);
    createTrackbar("Threshold:", szSourceWindow, &threshold, 255, NULL);

    for (;;)
    {
        RNG rng(12345);
        cam.grab();
        cam.retrieve(image);
        Mat smallImage;
        resize(image, smallImage, Size(), 0.5, 0.5);
        imshow(szSourceWindow, smallImage);

        Mat canny_output;
        vector<vector<Point> > contours;
        vector<Vec4i> hierarchy;
        Canny(smallImage, canny_output, threshold, threshold * 2, 3);
        findContours(canny_output, contours, hierarchy, RETR_TREE, CHAIN_APPROX_SIMPLE, Point(0, 0));

        Mat drawing = Mat::zeros(canny_output.size(), CV_8UC3);
        for (size_t i = 0; i < std::min(contours.size(), (size_t)maxContours); i++)
        {
            Scalar color = Scalar(rng.uniform(0, 255), rng.uniform(0, 255), rng.uniform(0, 255));
            drawContours(drawing, contours, (int)i, color, 2, 8, hierarchy, 0, Point());
        }

        imshow(szContoursWindow, drawing);
        waitKey(frameDelay);
    }
    cam.release();
}
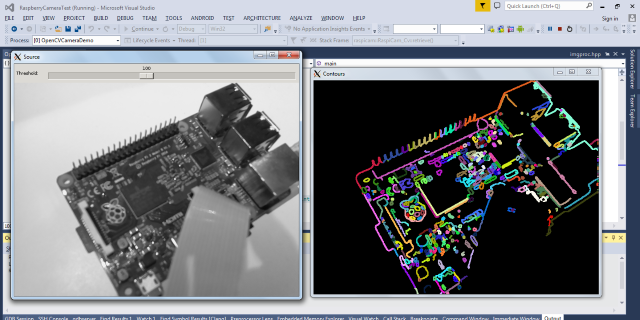
- Build and run the modified program. You will see two X11 windows: one with the original frames from the camera and another one with the contours extracted from them:
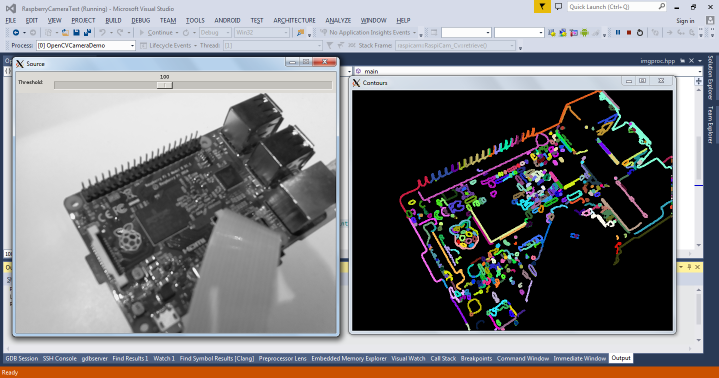 You can change the threshold value for the Canny edge detection algorithm by moving the trackbar in the left window. When done, press Shift-F5 in Visual Studio to end debugging.


