Developing CC3220 Wi-Fi Projects with Visual Studio
This tutorial shows how to use VisualGDB to create, build and debug a basic WiFi-enabled application for the CC3220S chip. We will start with creating a simple “Blinking LED” application, show how to verify the debug settings and then proceed to making and exploring a simple WiFi application.
Before you begin, install VisualGDB.
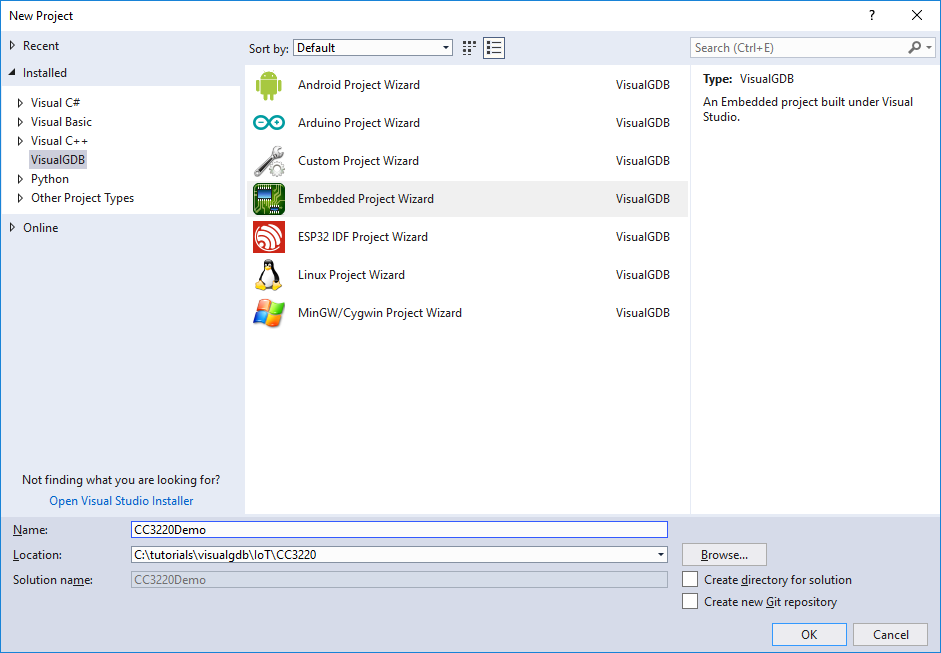
- Start Visual Studio and select File->New Project->VisualGDB->Embedded Project Wizard:
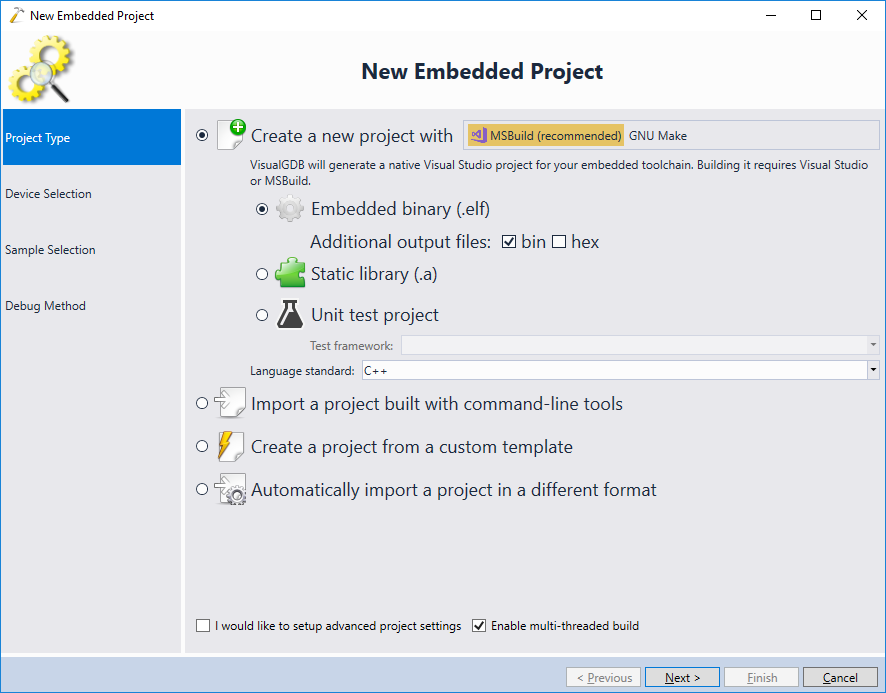
- Proceed with the “Create a new project -> Embedded Binary” choice:
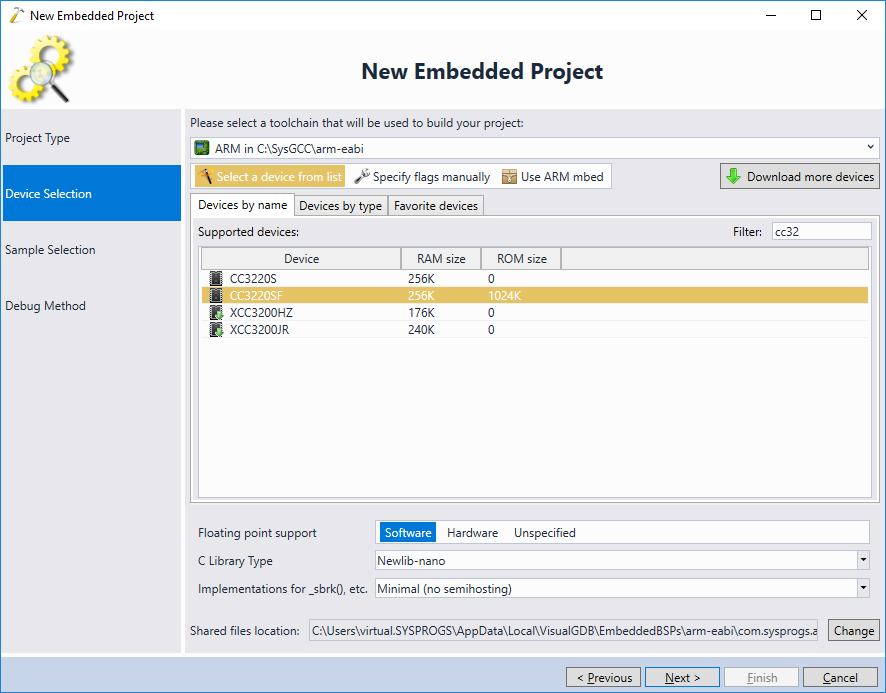
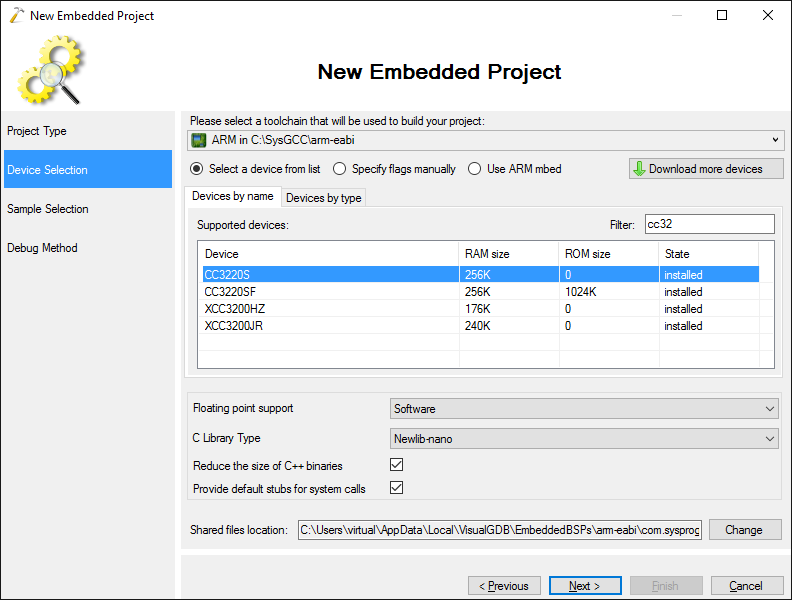
- On the next page select the ARM toolchain and choose the CC3200S device. In this tutorial we will be using the CC3220SF-Launchpad board with the CC3220SF device featuring 1MB of FLASH memory, so ensure you select the ‘CC3220SF’ version:
- On the next page select the “Network Terminal” sample:

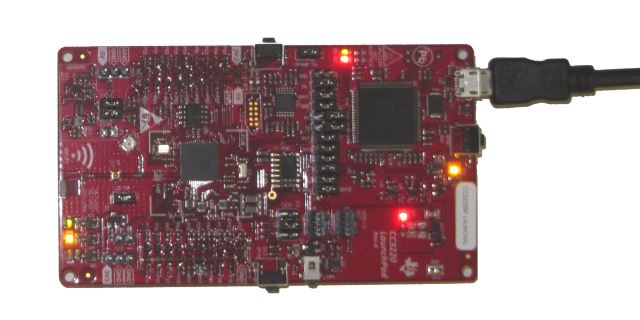
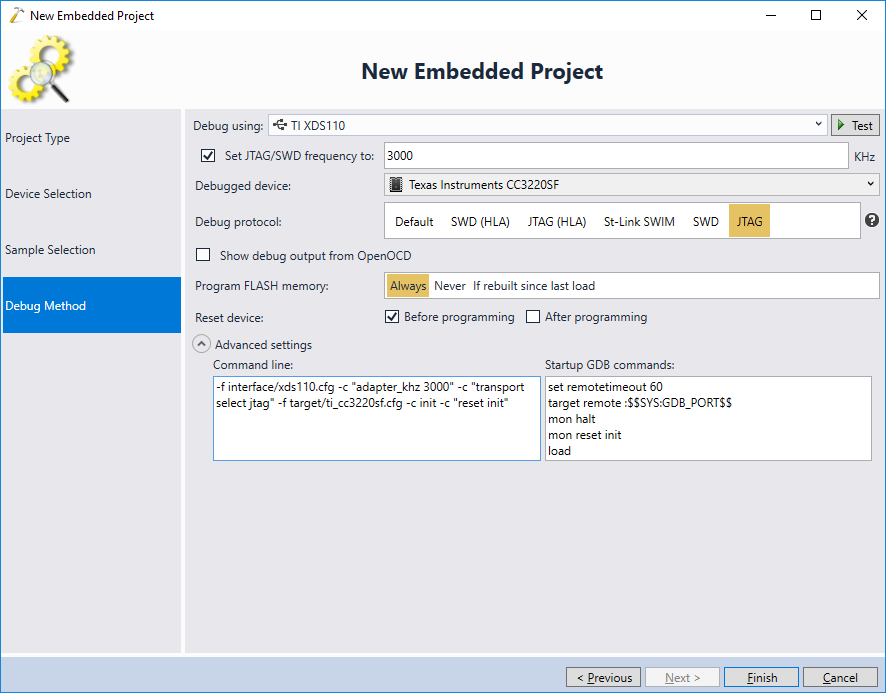
- Go to the Debug Method page and connect the board to your computer via USB. If you are using the latest OpenOCD package, VisualGDB will automatically recognize the TI XDS110 debug probe and the CC3220SF device and will configure OpenOCD accordingly:
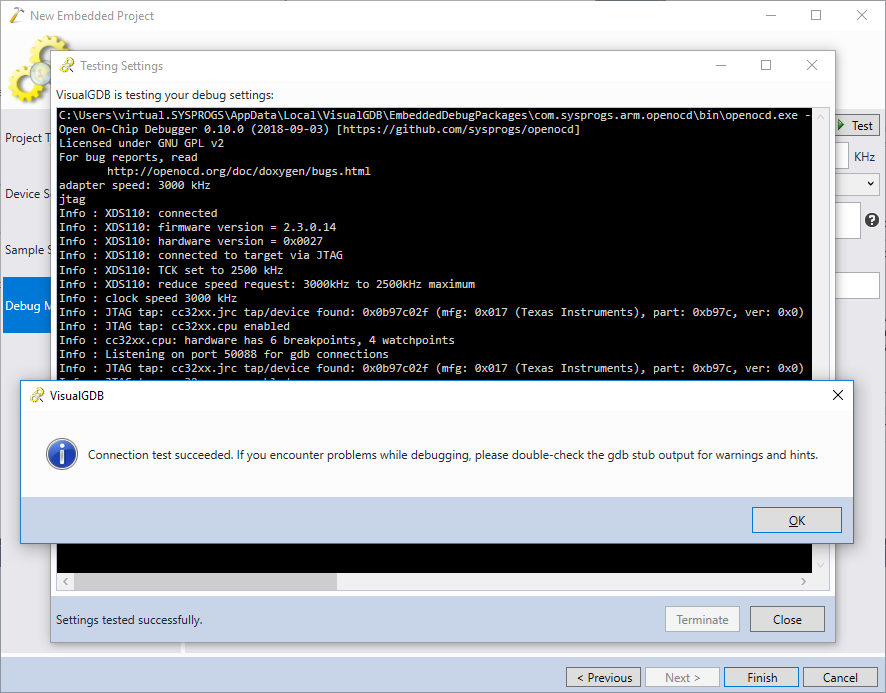
- Press “Test” to verify the settings. VisualGDB will launch OpenOCD and ensure that the chip can be debugged:
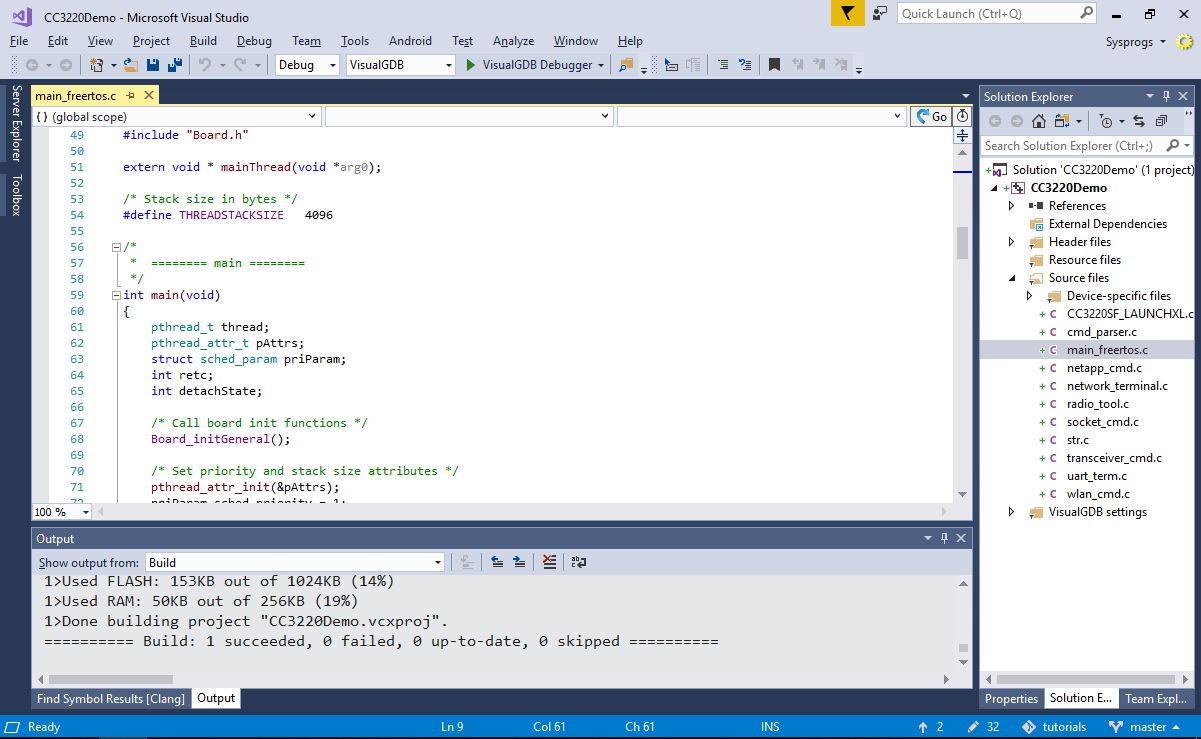
- Press “Finish” to create the project and build it by pressing Ctrl-Shift-B:
- The network terminal sample will accept user commands over the on-board COM port. If you are using the Custom edition or higher, configure the Raw Terminal to open on the “XDS110 Class Application/User UART” port:
 If you are using a lower edition of VisualGDB, you can use our free SmarTTY tool to open the COM port outside Visual Studio.
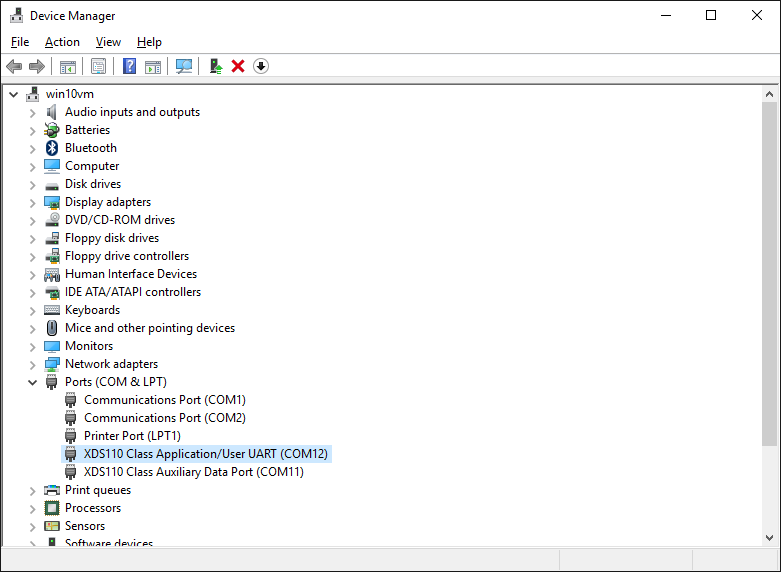
 - If the port doesn’t show up, try installing the latest XDS110 drivers from TI and double-check the ports in Device Manager:
- Start debugging your project and note how the program shows the help screen via the COM port:

- Run the following command to create a new Wi-Fi network:
wlan_ap_start -s CC3220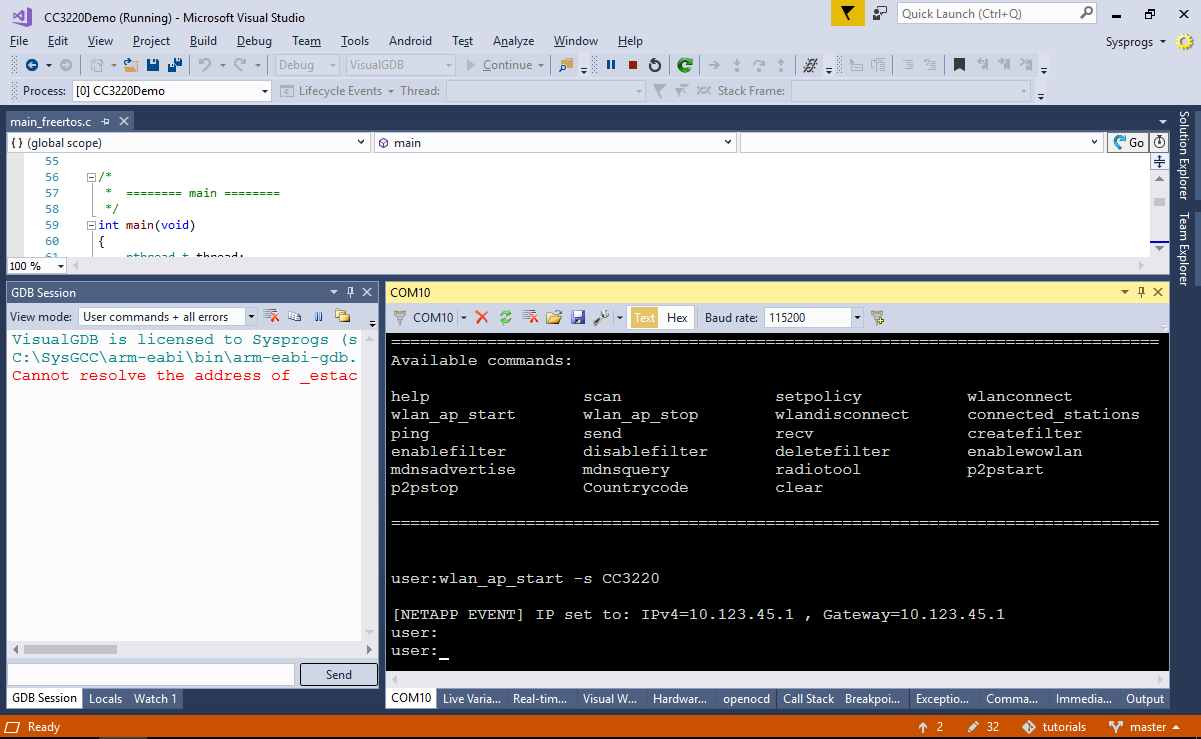
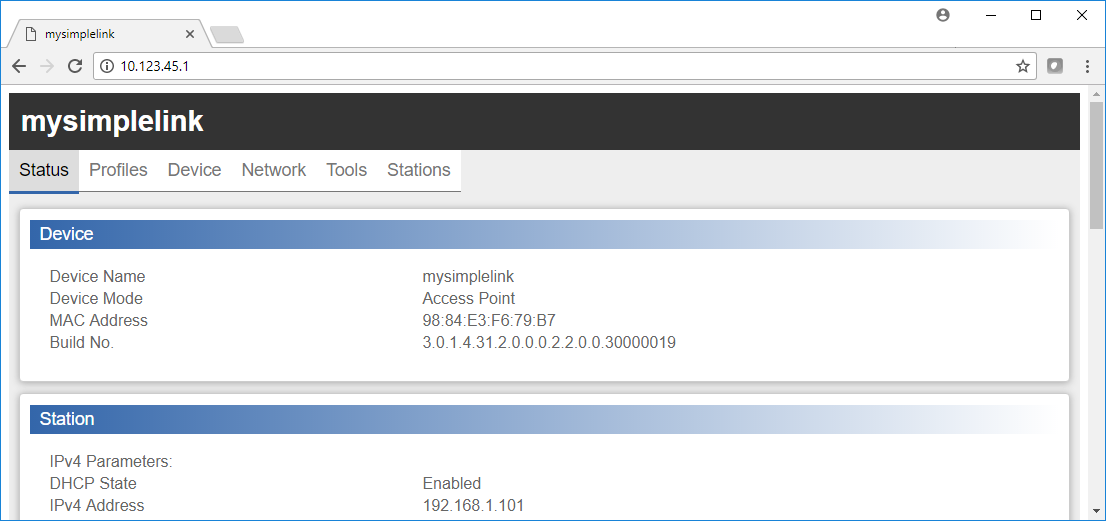
- Note the IP address reported by the demo program. Then connect to the CC3220 Wi-Fi network from your computer and open that address in a browser:
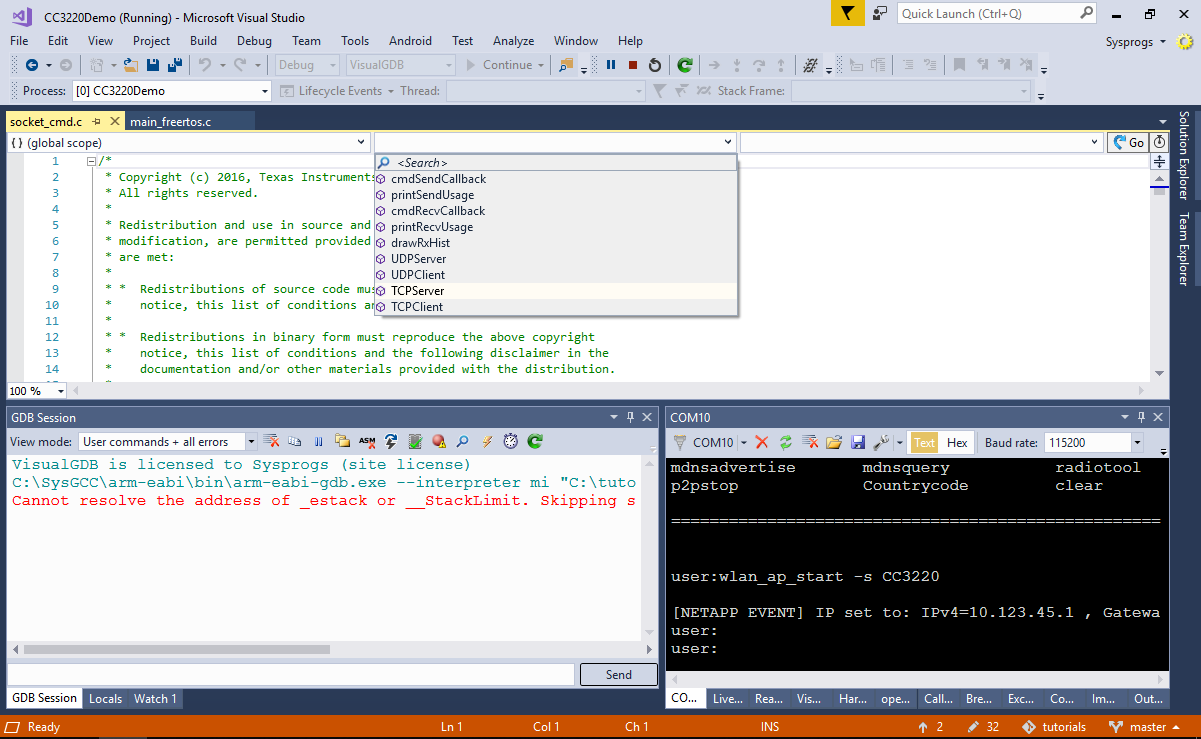
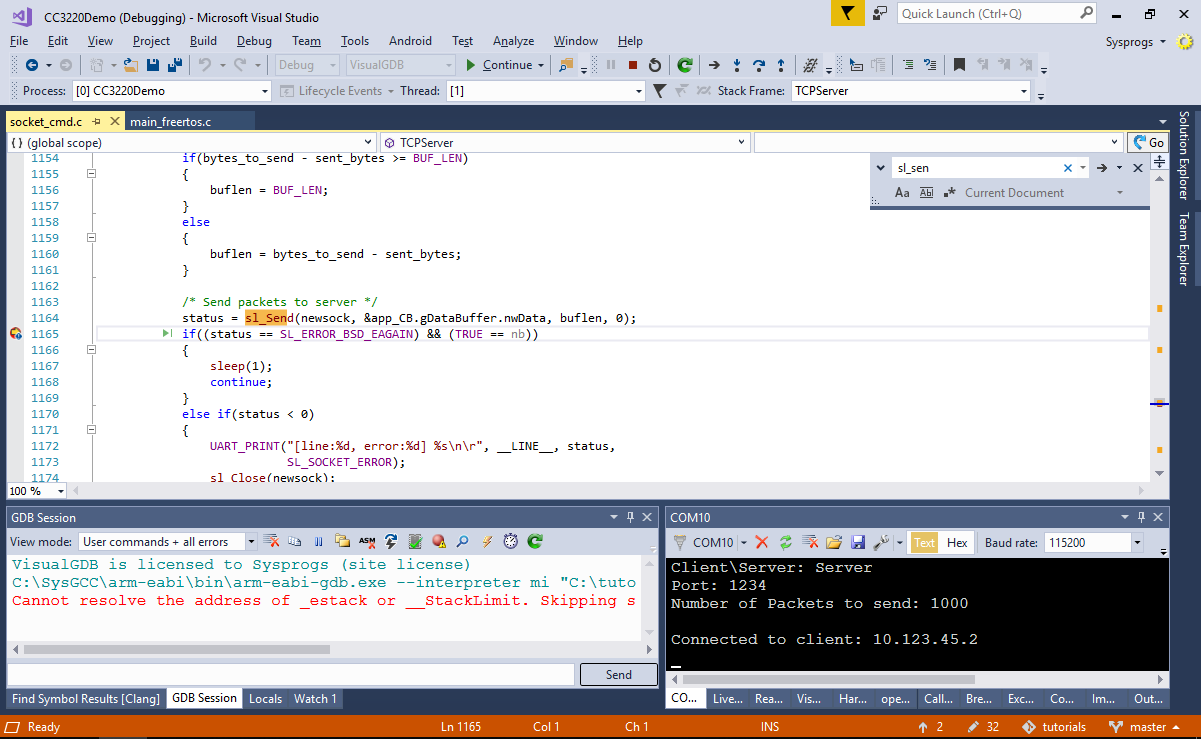
- Now we will show how to run a basic TCP/IP test. Open the socket_cmd.c file and locate the TCPServer() function:
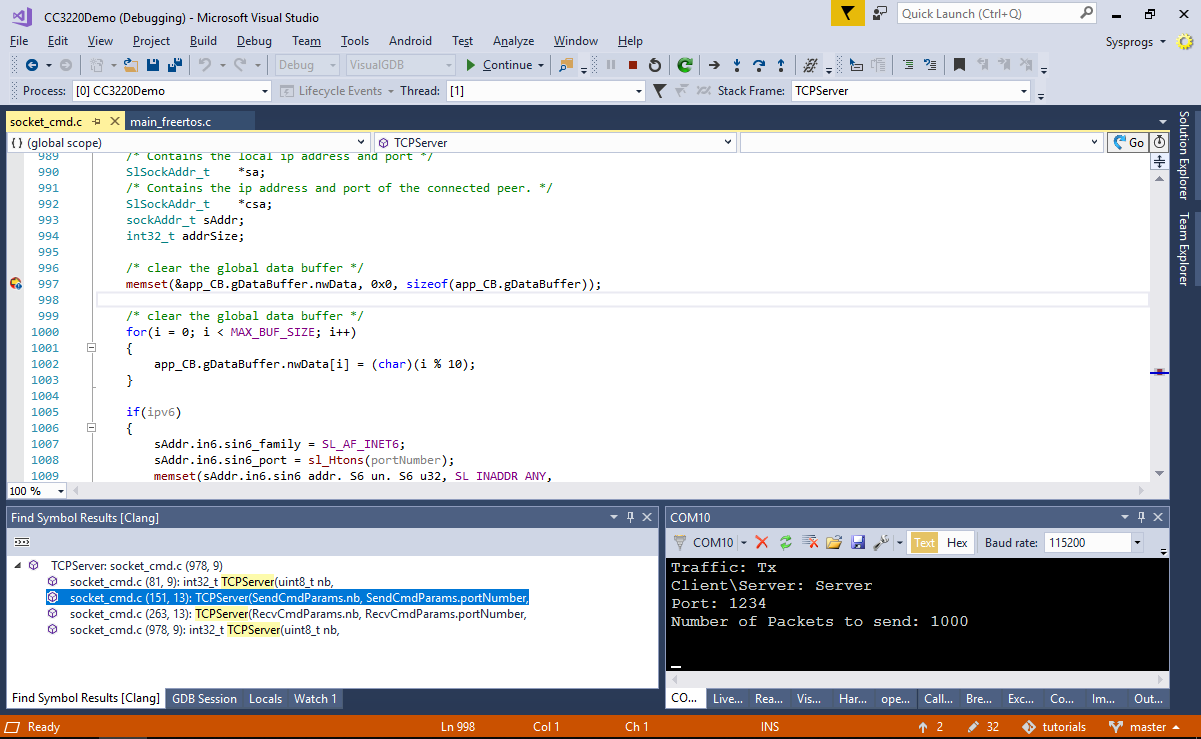
- Use the “find all references” command to find that TCPServer() is called by the cmdSendCallback() function that is in turn registered as a callback for the “send” command. Set a breakpoint in the beginning of the TCPServer() function and type “send -p 1234” in the network terminal console:
- Run “telnet <IP address of the board> 1234” to connect to the board. Note how the sl_Send() function will get called to send test data via the connection:
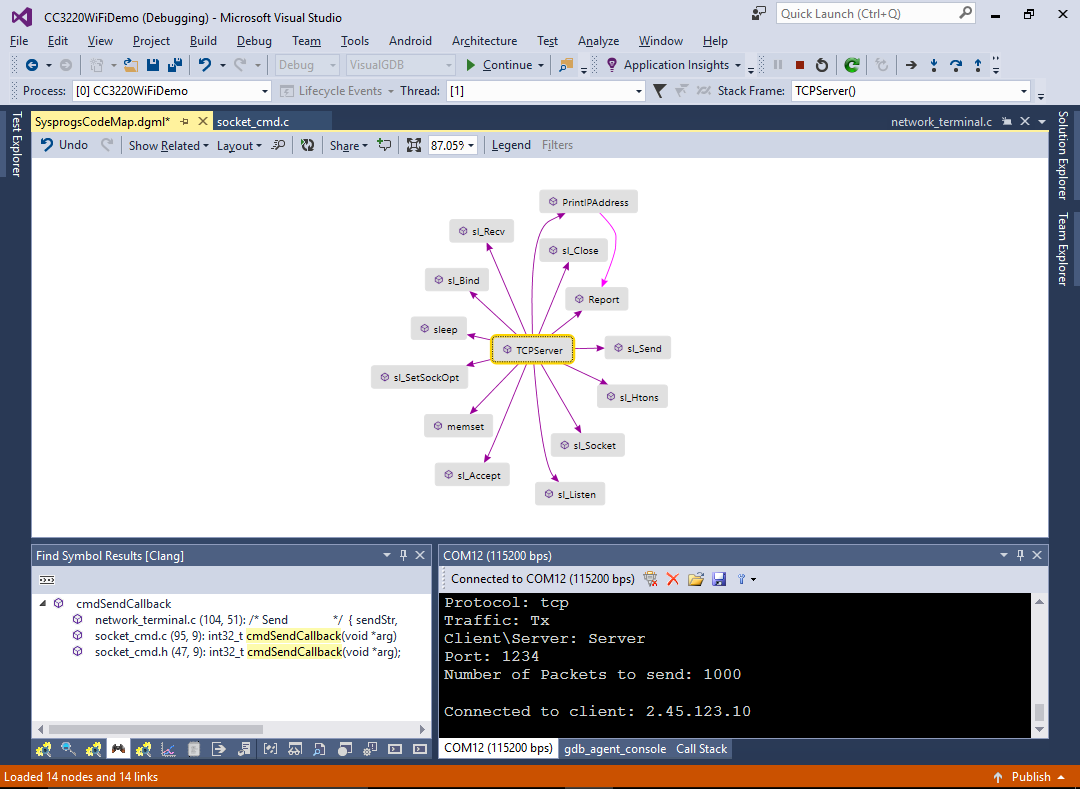
- You can use the Code Map provided by the VisualGDB Clang IntelliSense engine to quickly find out the functions called by TCPServer() to get a quick overview of the TCP-related CC3220 API: