Creating Embedded CMake Projects with VisualGDB
This tutorial shows how to create, build, debug and edit Embedded CMake projects with VisualGDB. We will create a basic FreeRTOS-based project for the STM32F4Discovery board, and will then show how to create additional library targets and change various project properties. Before you begin, install VisualGDB 5.5 or later.
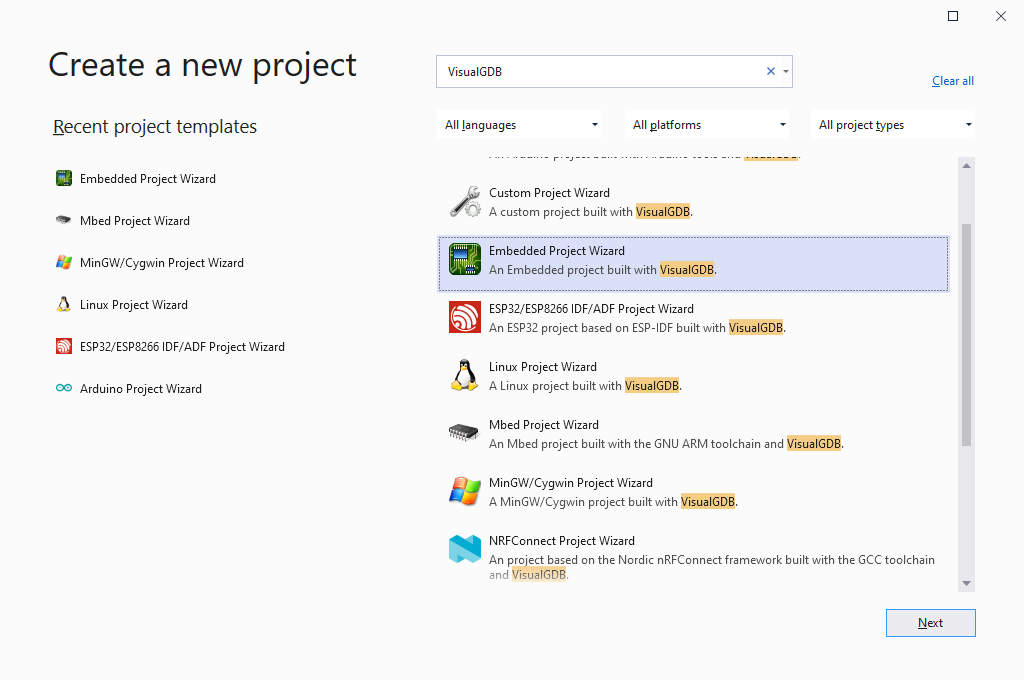
- Start Visual Studio and open the VisualGDB Embedded Project Wizard:
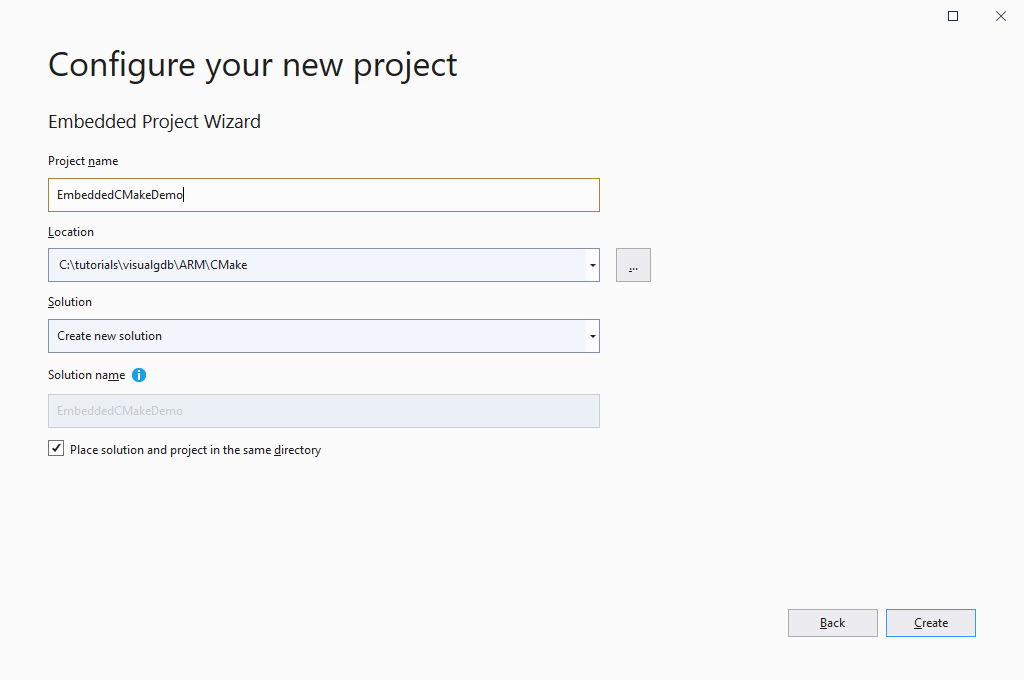
- Enter the name and location of the project you would like to create:
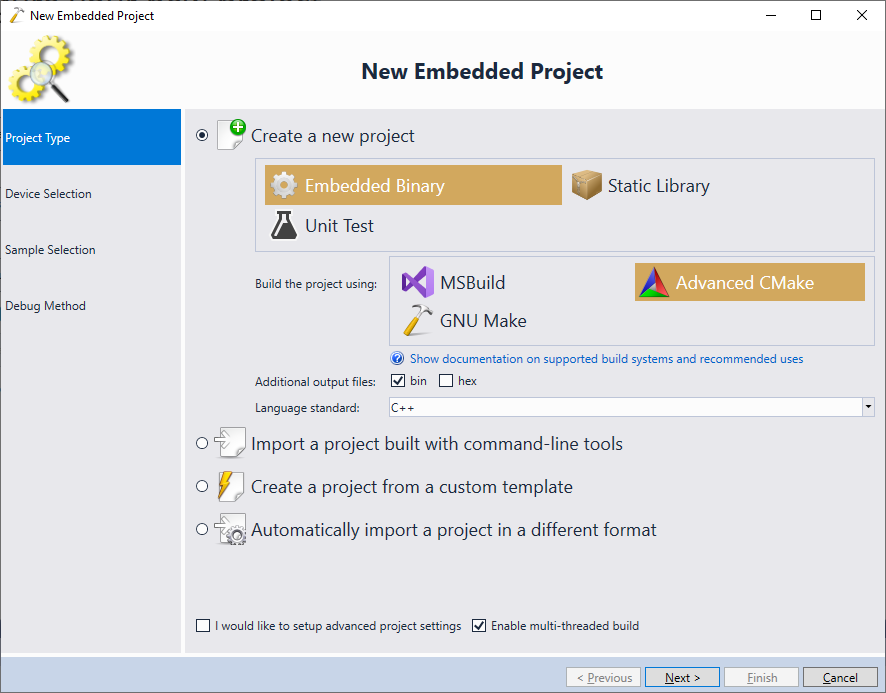
- On the first page of the VisualGDB-specific portion of the wizard, select “Create a new project -> Embedded Binary -> Advanced CMake” and click “Next”:
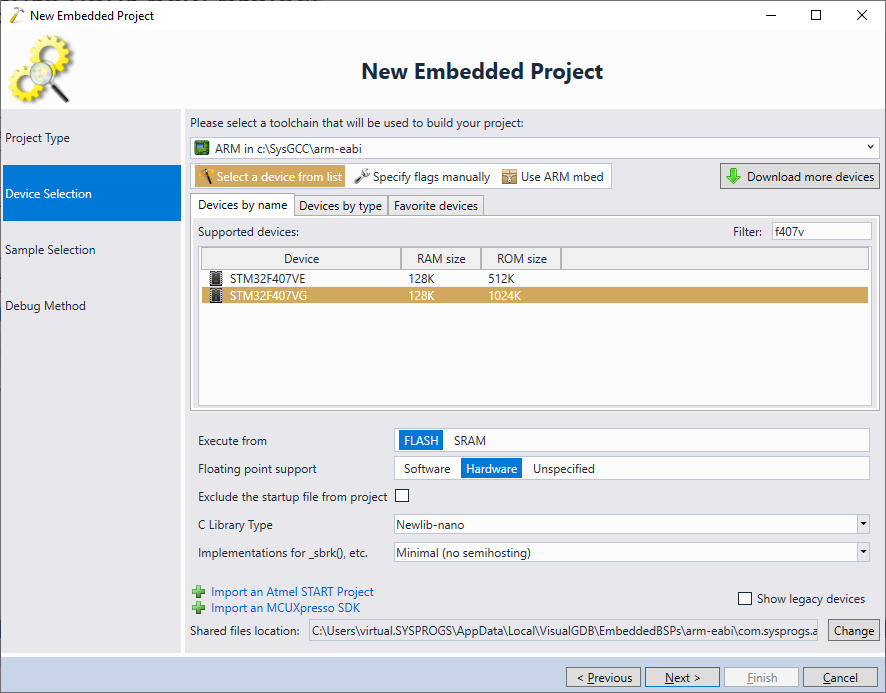
- On the next page select the ARM toolchain and pick your device. In this tutorial we will target the STM32F4Discovery board that uses the STM32F407VG device:
 Although this tutorial uses the GCC compiler to build the project, the Advanced Embedded Project Subsystem also supports the Keil (both ARMCC and ARMClang) and IAR compilers.
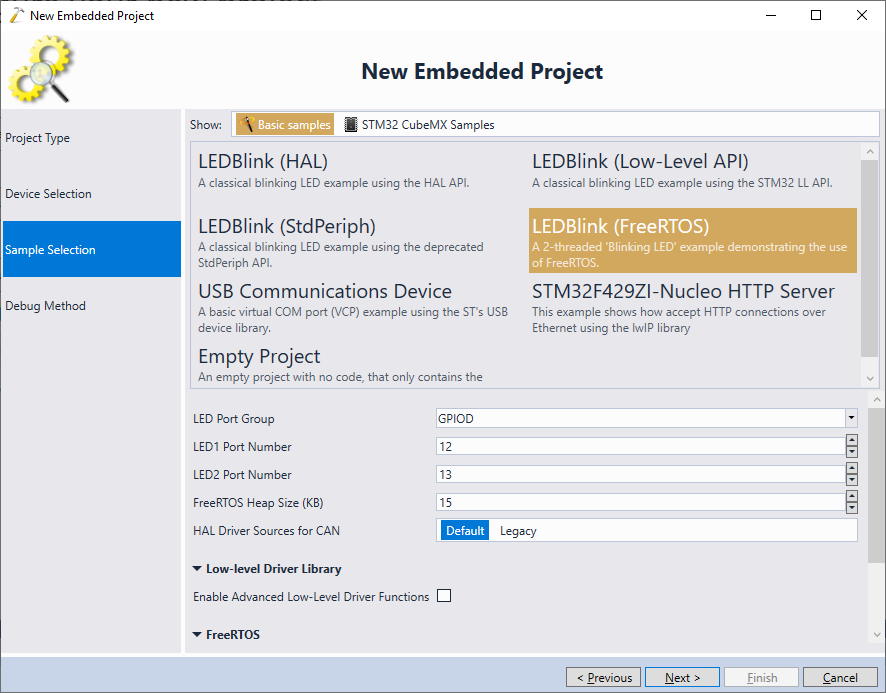
 - The next page of the wizard allows selecting a sample project that will be used as a template. You can choose between a few generic VisualGDB-supplied samples and a huge selection of board-specific samples imported from the STM32 SDK. In this tutorial we will use the generic FreeRTOS LEDBlink sample with the default parameters:
- Finally, choose the debug method that works with your setup. In most cases, you can simply plug in the board and let VisualGDB automatically detect the parameters:
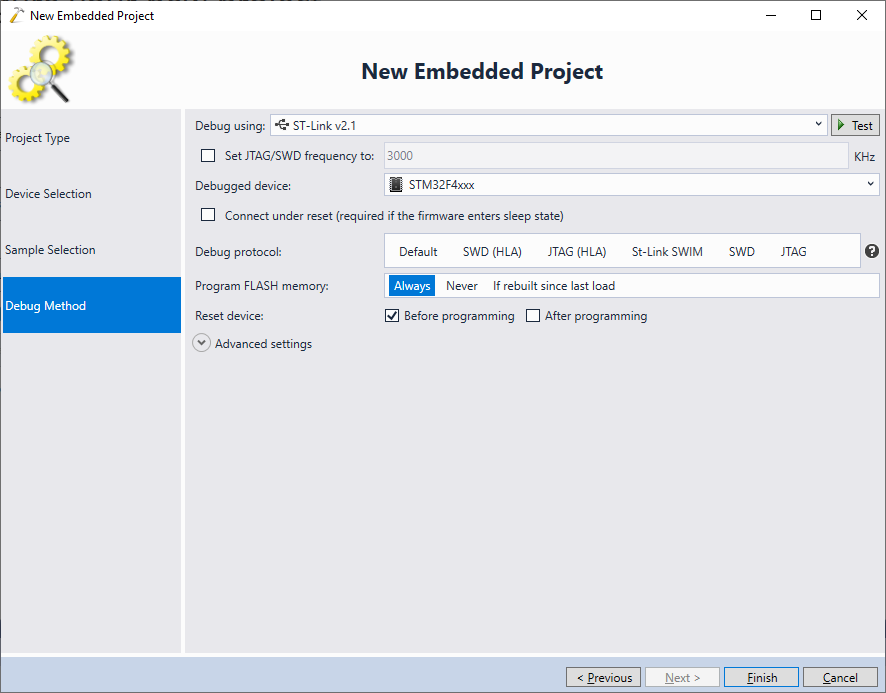 Once the debug settings are selected, click “Finish” to create a project.
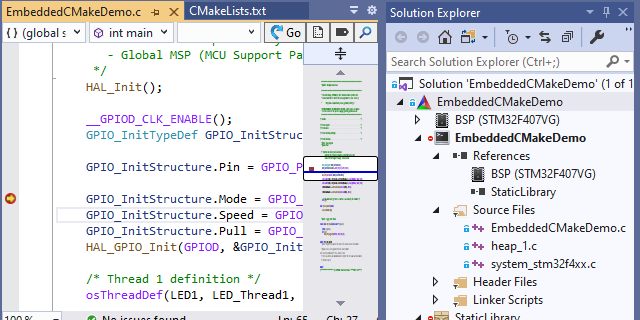
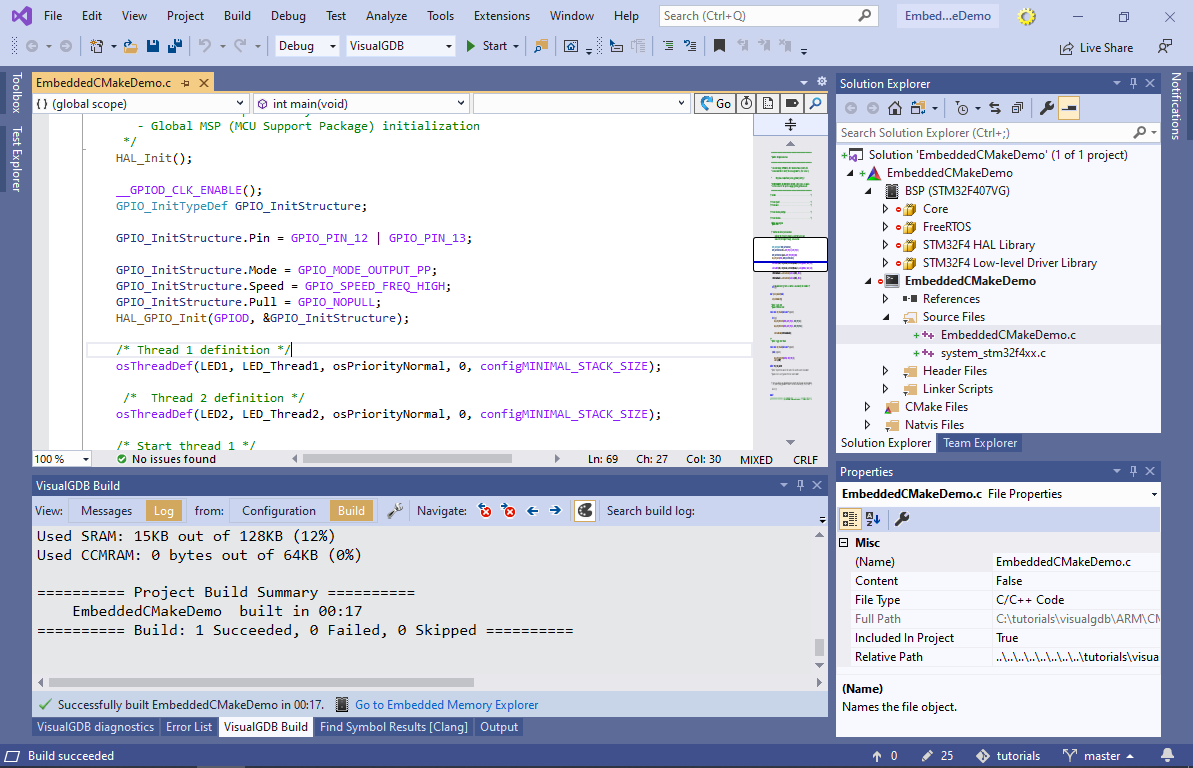
 - VisualGDB will generate a basic Embedded CMake project consisting of the main application (terminal icon) and the BSP that includes several frameworks (such as FreeRTOS). Press Ctrl-Shift-B to build the application:
- Set a breakpoint inside the main() function and press F5 to begin debugging. VisualGDB will automatically program the FLASH memory and start the application. Once the breakpoint triggers, you will be able to view and change the variable values, and also step through the program:

- Press F5 to resume the application. While it is running, use the Debug->Windows->Live Watch command to examine its state in a non-intrusive way. If you are using the Custom edition or higher, you can see the FreeRTOS threads, their state, stack usage, and other parameters in real time using the FreeRTOS view:
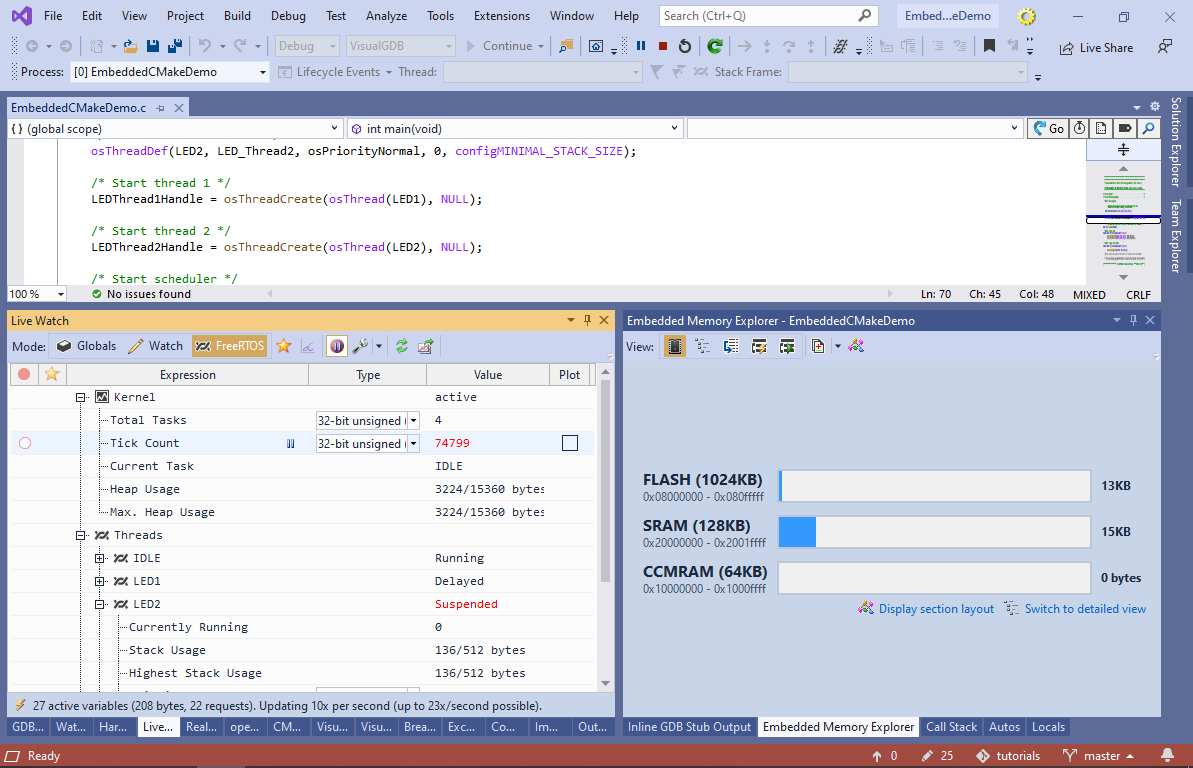 You can read more about Live Watch in VisualGDB Documentation.
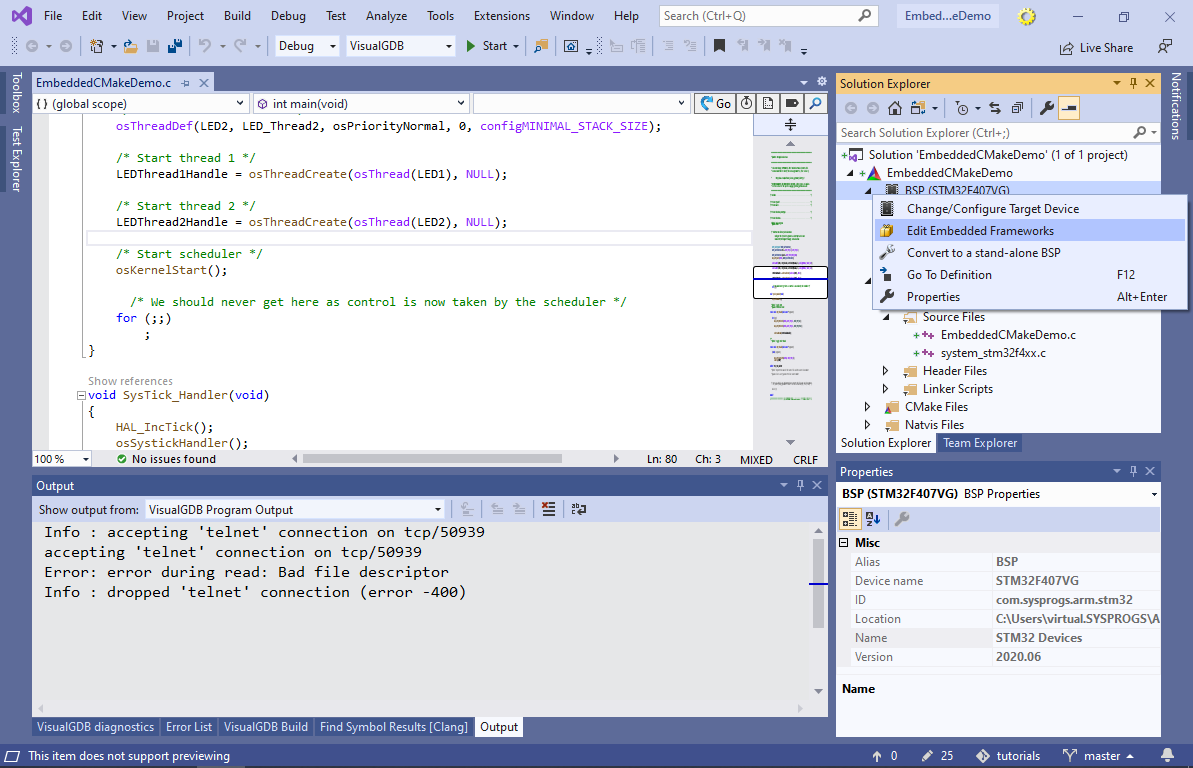
 - Press Shift-F5 to stop debugging. We will now show how to change the embedded frameworks used by the project. Right-click on the BSP node in Solution Explorer and select “Edit Embedded Frameworks”:
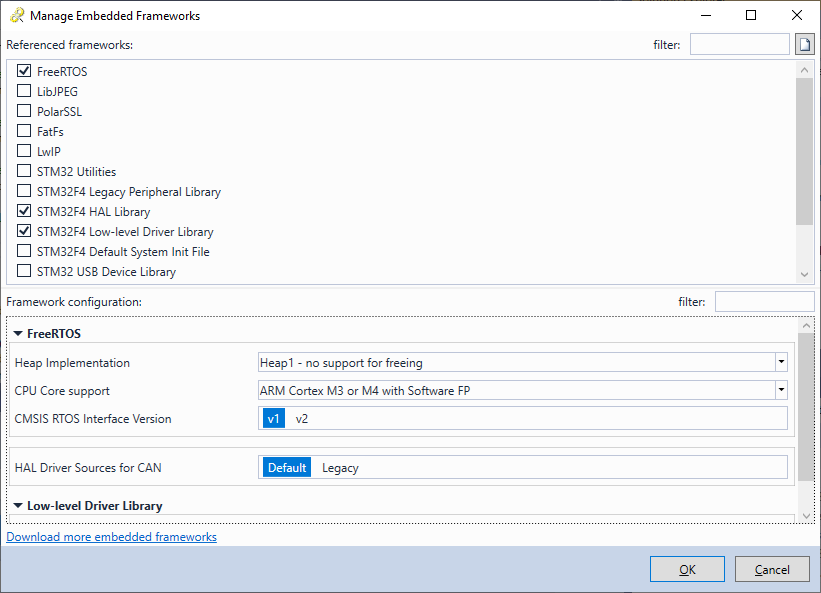
- VisualGDB will display a list of frameworks included in the STM32 BSP, letting you select and customize specific ones. Try switching the Heap Implementation to Heap1:
- Open View->Embedded Memory Explorer and switch to Details view. Then build the project (applying the heap implementation change) and open Memory Explorer again. VisualGDB will show the functions affected by the recent change. You can use the “Show Only Differences” button to hide the symbols that were not affected by the change:
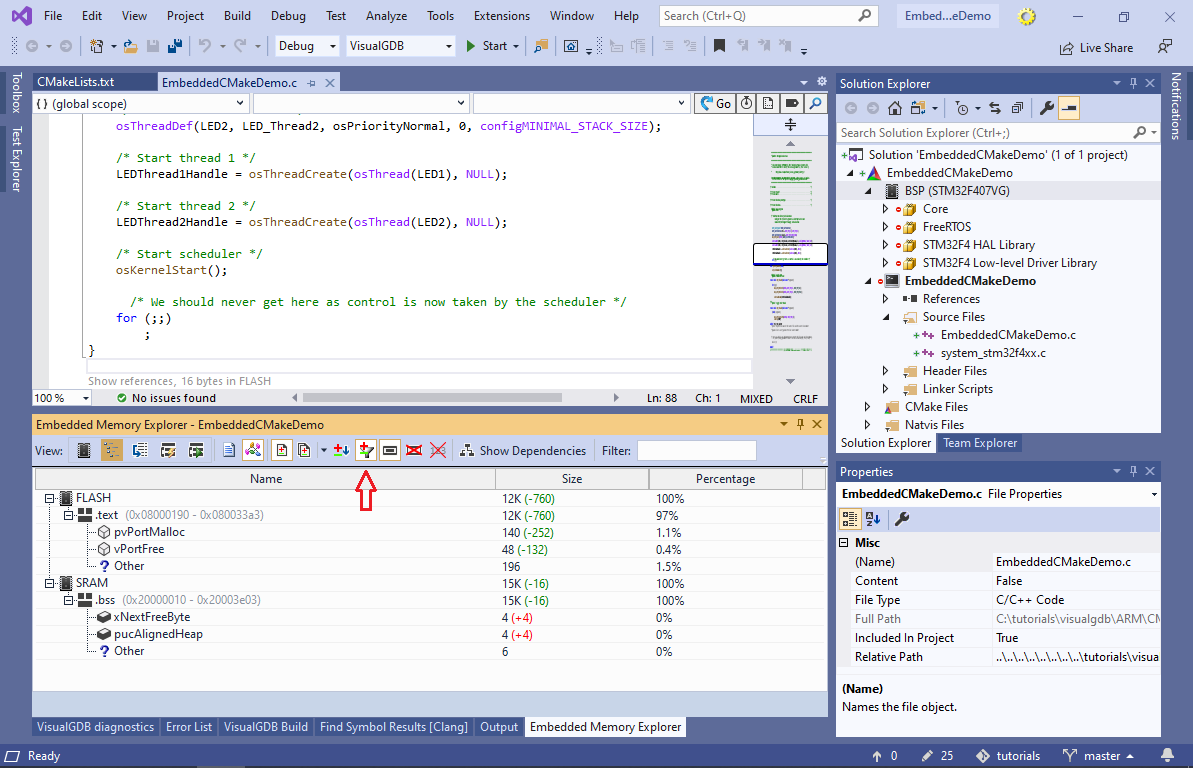 See our Embedded Memory Explorer documentation for a detailed listing of Memory Explorer features and modes.
 - Now we will show how to add a static library to the project and reference it from the main application. Right-click on the project node in Solution Explorer (CMake icon) and select Add->New Item:
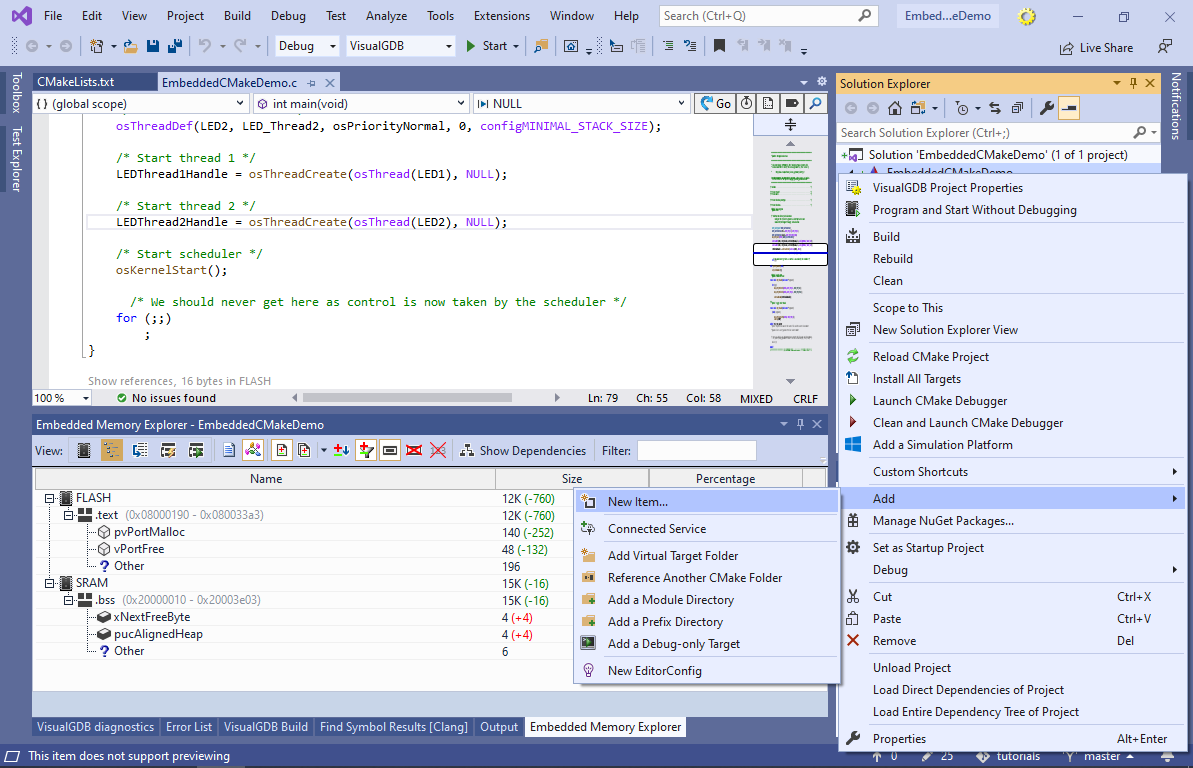
- Select “Embedded Static Library” and click “Add“:

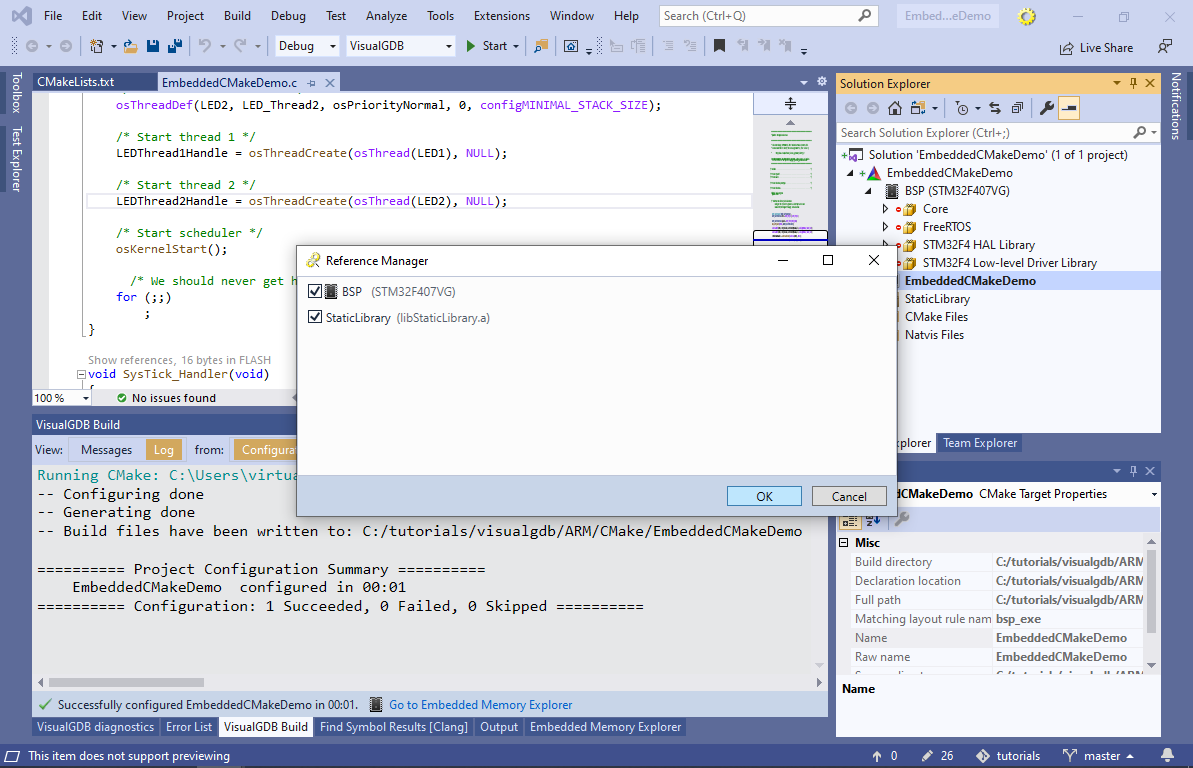
- Once the library is added, reference it from the main application via Add->Add Reference:
- To demonstrate the use of libraries, move the LED_Thread1() function to the library and mark it with extern “C” (you can find the exact code here):
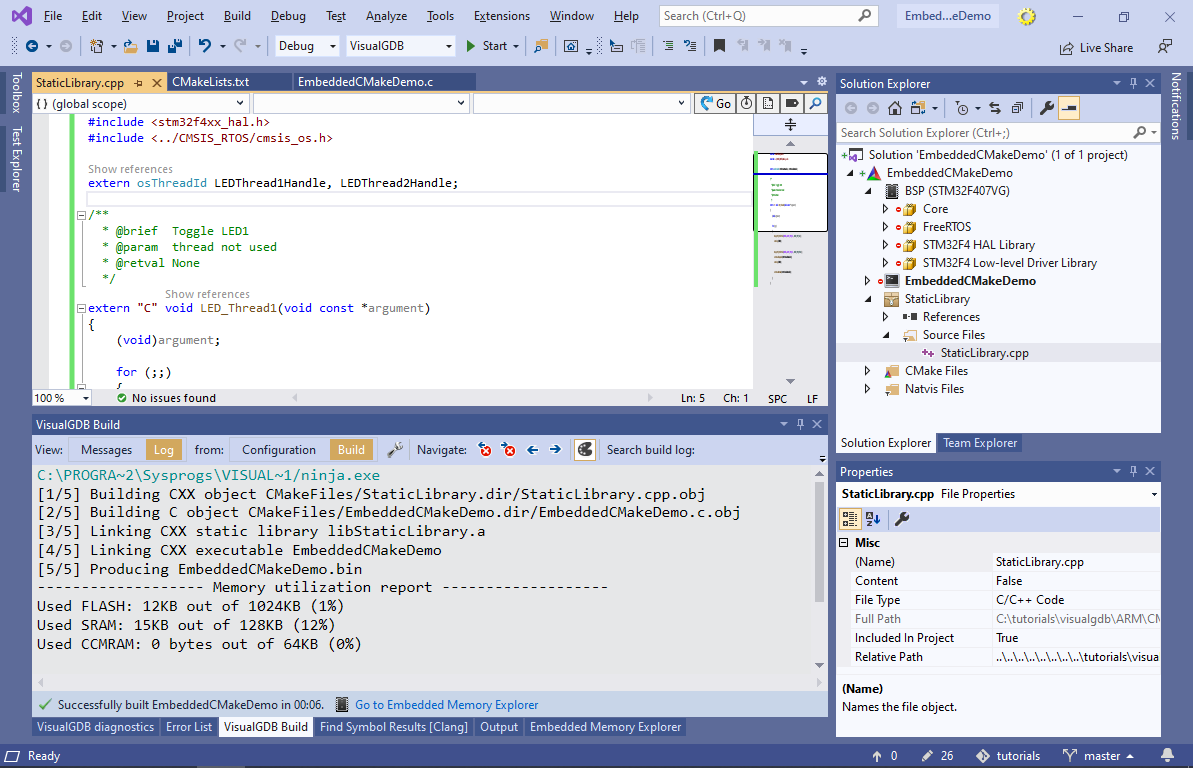 Make sure the project builds successfully by pressing Ctrl-Shift-B.
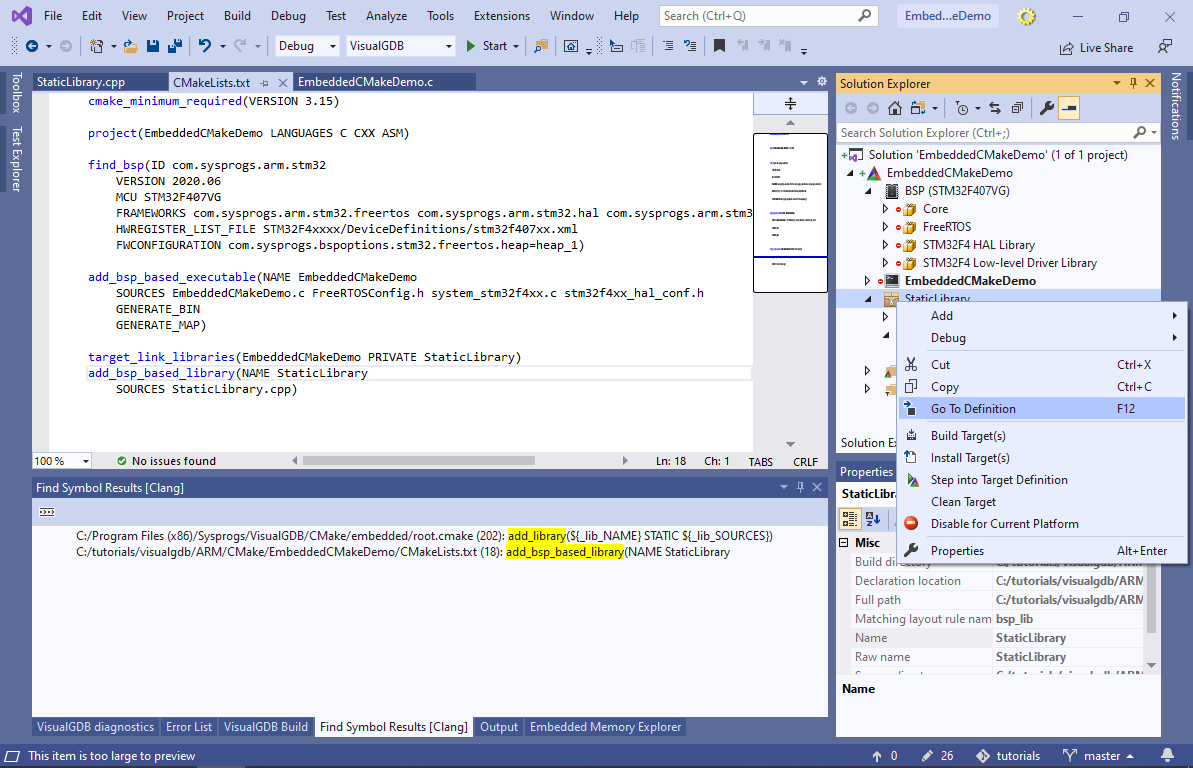
 - The structure of the Embedded CMake-based projects is stored in CMakeLists.txt files and is not duplicated to any other files (such as .vcxproj). Hence editing the project structure via Solution Explorer will always have the same effect as editing CMakeLists.txt files directly (see our Embedded CMake Framework Reference for an exhaustive list of supported statements). Right-click on the StaticLibrary in Solution Explorer and select “Go to Definition” to open the CMakeLists.txt file declaring the library:
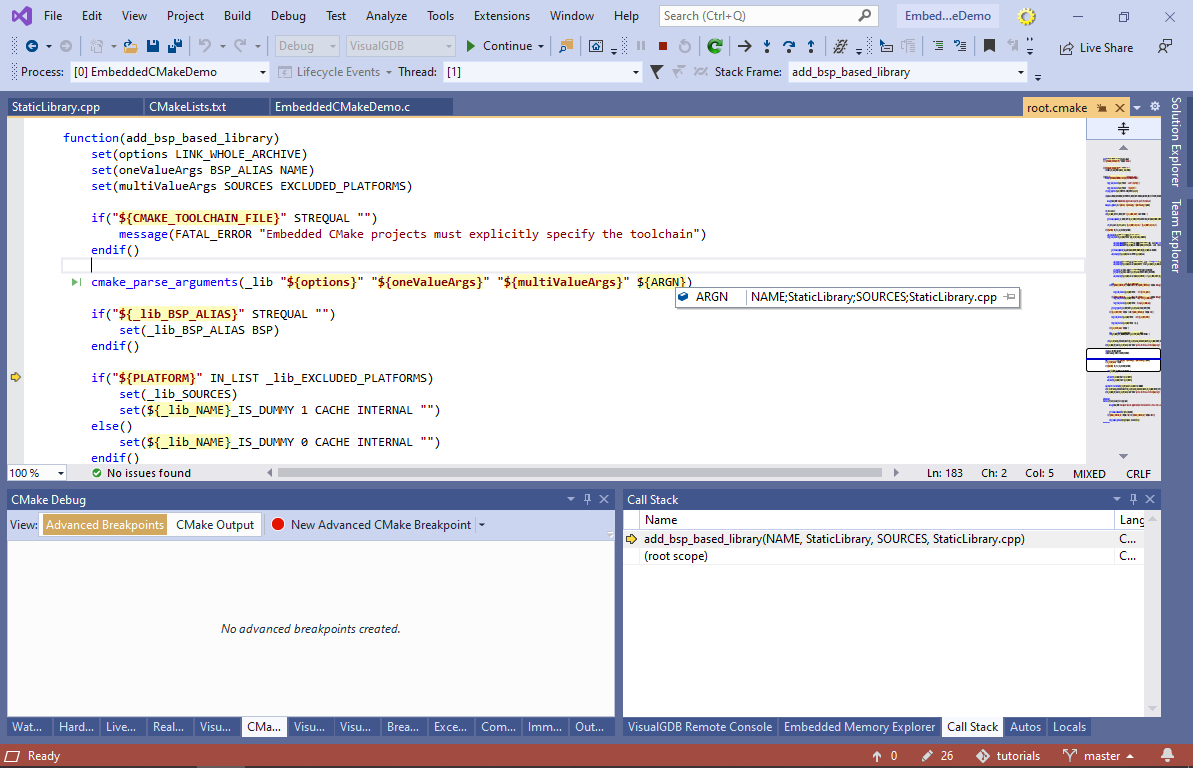
- VisualGDB includes a CMake debugger that allows stepping through CMakeLists.txt files. Right-click on the project node in Solution Explorer and select “Launch CMake Debugger“:

- You will now be able to step through functions like add_bsp_based_library(), set breakpoints and evaluate variables:
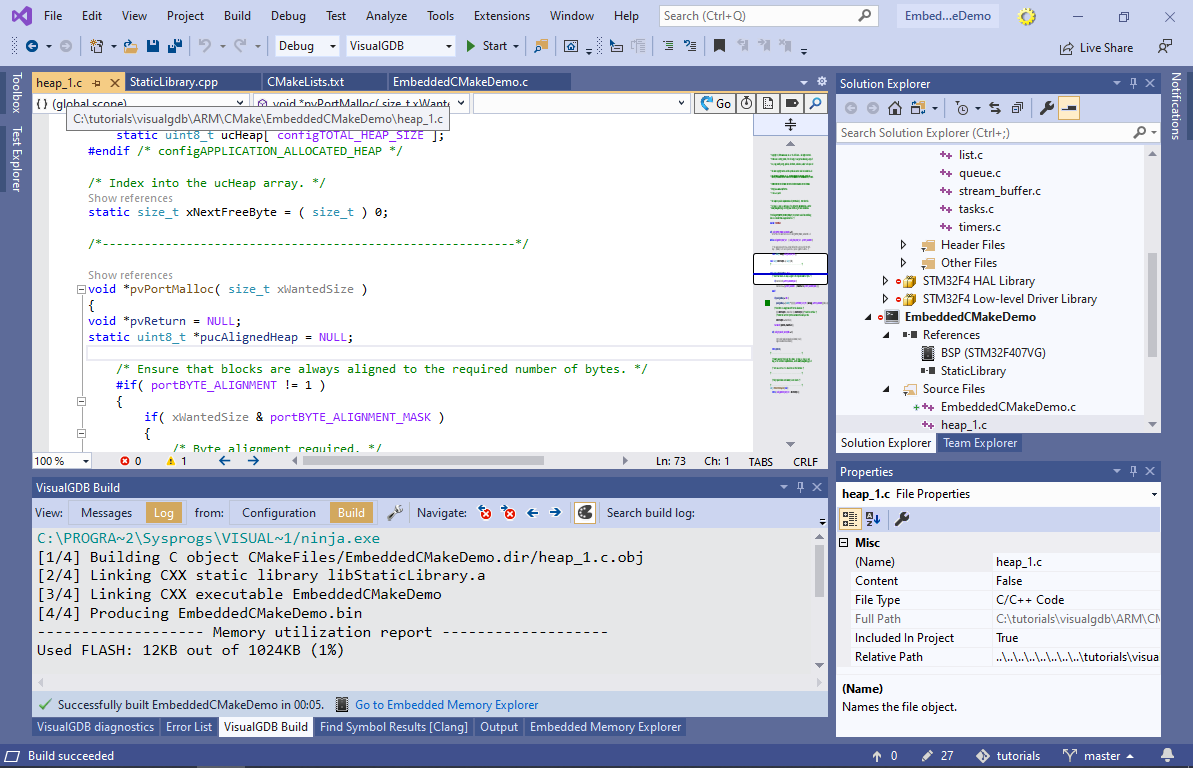
- Embedded CMake projects allow cloning BSP-supplied files (e.g. FreeRTOS heap implementation) so that you introduce project-specific patches to them. Right-click on the heap_1.c file and select “Copy to Project Directory”:
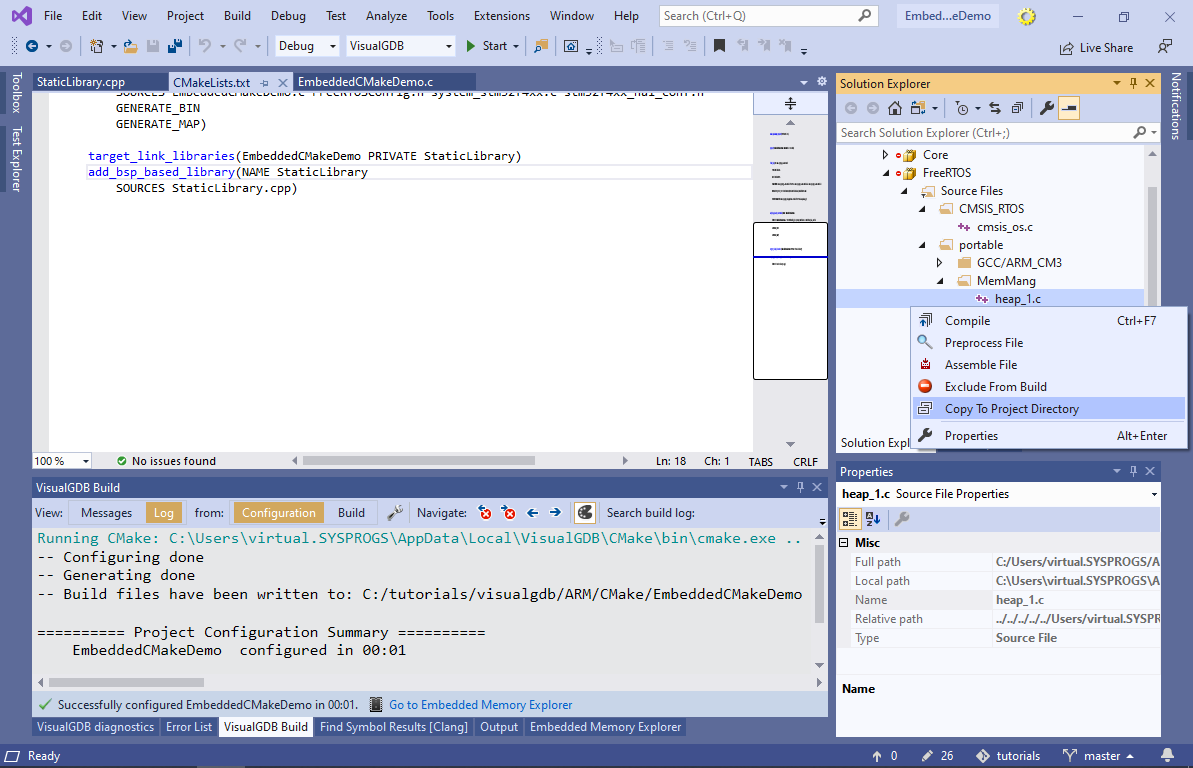
- VisualGDB will copy the heap_1.c file into the project directory, directly reference it from the EmbeddedCMakeDemo application, and will also mark the original shared file as “excluded from build”. You can now patch heap_1.c to add any project-specific modifications to the heap implementation:
 WARNING! If you clone and patch individual source files from the BSP, DO NOT switch the project to a newer version of that BSP, unless you are prepared to merge the changes. Device vendor-supplied SDKs often add new functionality and change function implementations across versions. Combining the new BSP with the files cloned from the old BSP will very likely cause undefined behavior.
You can find the code shown in this tutorial in our tutorials repository on GitHub. A detailed reference of VisualGDB-specific CMake statements can be found here.