Embedding Binary Resources into Embedded Projects
This tutorial shows how to easily embed binary files into your Embedded VisualGDB projects and access them from your code. We will modify the basic STM32F7Discovery LCD example to display 3 custom icons on top of the background image and will show how to easily embed them in your project. Before you begin, install VisualGDB 5.2 Beta 2 or later.
- Start Visual Studio and open VisualGDB Embedded Project Wizard:
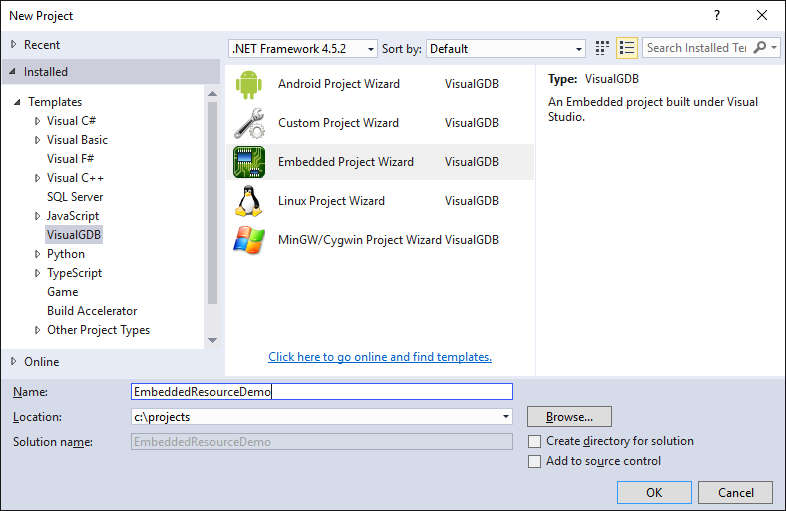
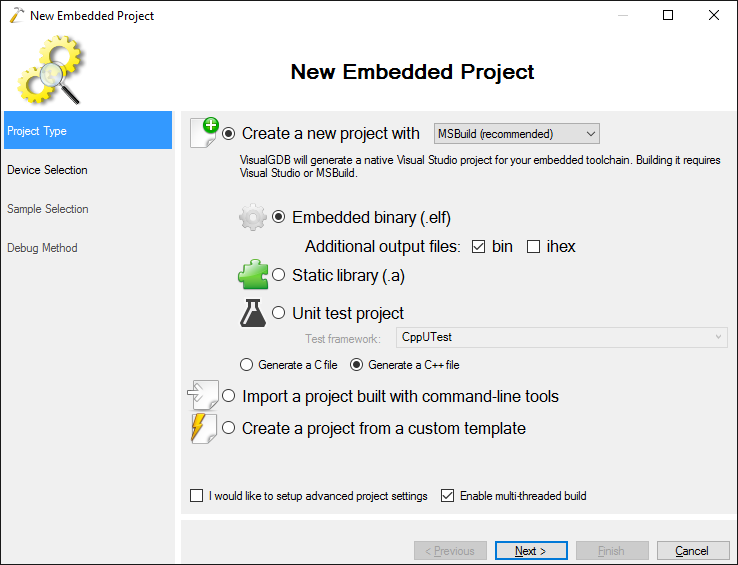
- On the first page select “Create a new project” and ensure that the MSBuild system is selected:
- On the next page of the wizard select your device. In this example we will use STM32F746NG that is installed on the STM32F7Discovery board:

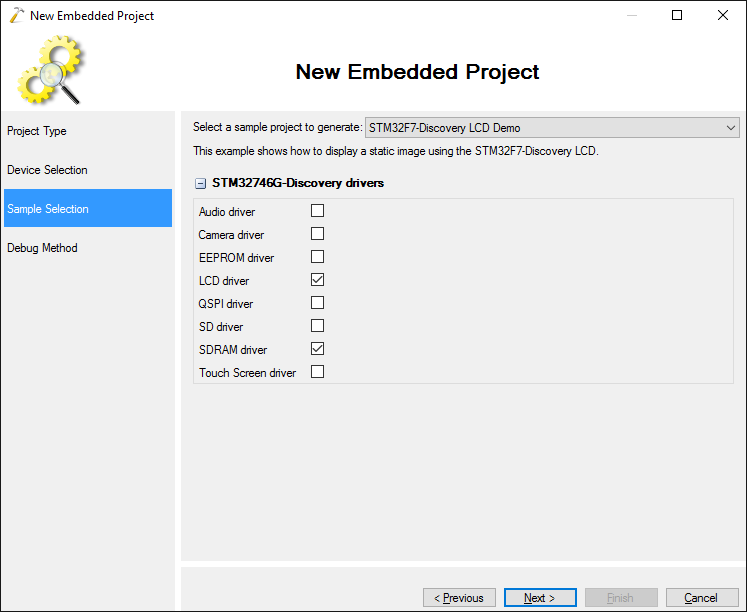
- On the Sample Selection page choose the LCD Demo sample and proceed with the default sample configuration:
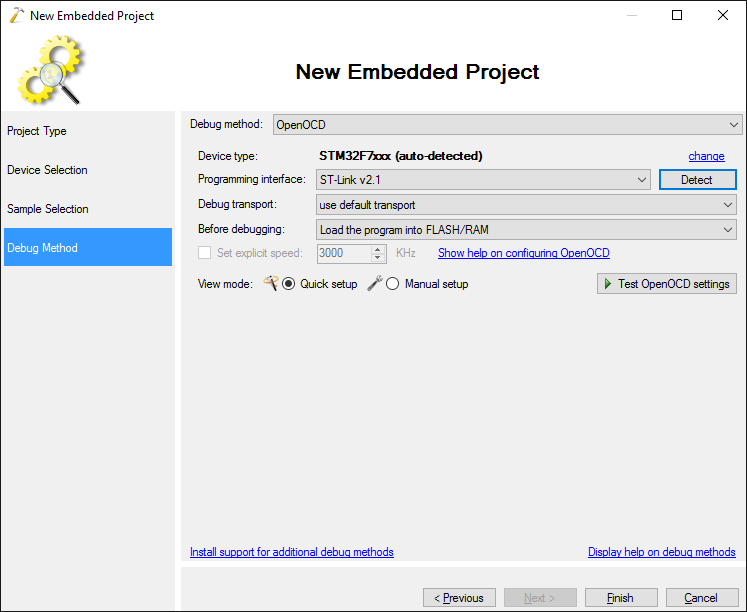
- Finally select your debug method on the Debug Method page. We recommend using OpenOCD or Segger J-Link:
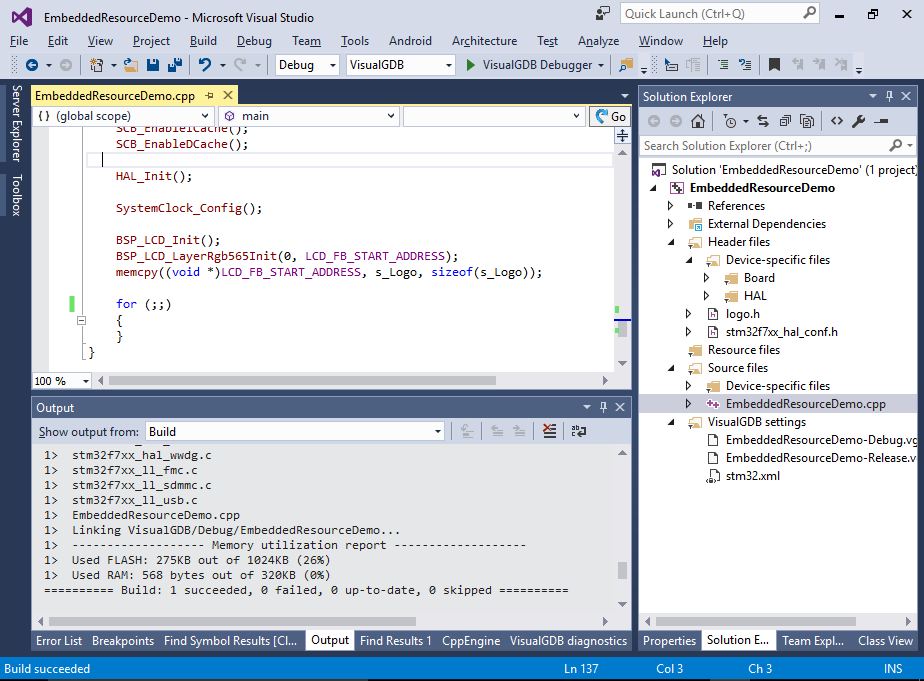
- Modify the main() function to use LCD_FB_START_ADDRESS as the layer address and copy the background image (s_Logo) to it:
    BSP_LCD_LayerRgb565Init(0, LCD_FB_START_ADDRESS);
    memcpy((void *)LCD_FB_START_ADDRESS, s_Logo, sizeof(s_Logo));
Then build your project:
- If you run it now, the board will show the VisualGDB logo taken from s_Logo:

- Now we will modify the program to display 3 icons from the Oxygen icon theme on top of the background image. To avoid decompressing the png format on the device, we will convert the PNG files into a simple binary format. You can do that with a simple C# tool:
using System.Collections.Generic;
using System.Drawing;
using System.IO;

namespace ImageConverter
{
    class Program
    {
        static void Main(string[] args)
        {
            Bitmap bmp = new Bitmap(args[0]);
            List<byte> data = new List<byte>();
            for (int y = 0; y < bmp.Height; y++)
                for (int x = 0; x < bmp.Width; x++)
                {
                    Color pixel = bmp.GetPixel(x, y);

                    data.Add(pixel.A);
                    data.Add(pixel.R);
                    data.Add(pixel.G);
                    data.Add(pixel.B);
                }
            File.WriteAllBytes(Path.ChangeExtension(args[0], ".dat"), data.ToArray());
        }
    }
}
You can download an archive with the original .png files and the converted .dat files here.
- Add the following functions to your main file to draw the raw images on the screen:
void DrawLineWithTransparency(uint16_t *pDst, const uint32_t *pSrc, int pixels)
{
    for (int i = 0; i < pixels; i++)
    {
        uint16_t oldPixel = pDst[i];
        uint32_t value = pSrc[i];
        int oldR = ((oldPixel >> (5 + 6)) & 0x1F) << 3;
        int oldG = ((oldPixel >> 5) & 0x3F) << 2;
        int oldB = (oldPixel & 0x1F) << 3;

        int picWeight = value & 0xFF;
        int oldWeight = 256 - picWeight;

        int picR = (value >> 8) & 0xFF;
        int picG = (value >> 16) & 0xFF;
        int picB = (value >> 24) & 0xFF;

        int newR = (oldR * oldWeight + picR * picWeight) / 256;
        int newG = (oldG * oldWeight + picG * picWeight) / 256;
        int newB = (oldB * oldWeight + picB * picWeight) / 256;

        newR >>= 3;
        newG >>= 2;
        newB >>= 3;

        uint16_t rgb565 = (ushort)(newB | (newG << 5) | (newR << (5 + 6)));
        pDst[i] = rgb565;
    }
}


void DrawImageWithTransparency(const uint32_t *pImage, int X, int Y, int width, int height)
{
    const int ScreenWidth = 480;

    uint16_t *pStartAddr = (uint16_t*)LCD_FB_START_ADDRESS + Y * ScreenWidth + X;
    for (int i = 0; i < height; i++)
    {
        DrawLineWithTransparency(pStartAddr + i * ScreenWidth, pImage + i * width, width);
    }
}
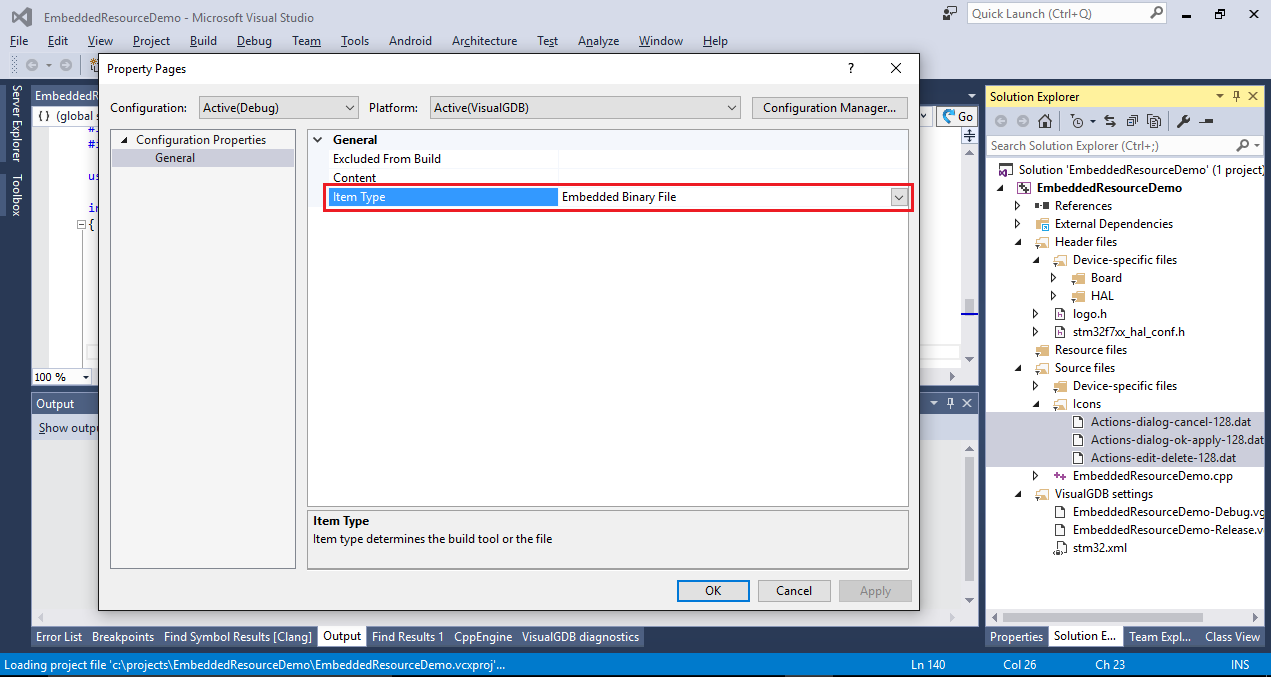
- Copy the .dat files into a subdirectory inside your project directory and add them to Solution Explorer. Ensure that the Item Type for those files is set to “Embedded Binary File” (default for .dat files):
- Build your project. VisualGDB will automatically convert the binary files to object files, link them together with your program and generate a file called EmbeddedResources.h with a list of resource names. Include the EmbeddedResources.h file from your main file and use IntelliSense to check the contents of the EmbeddedResources namespace:
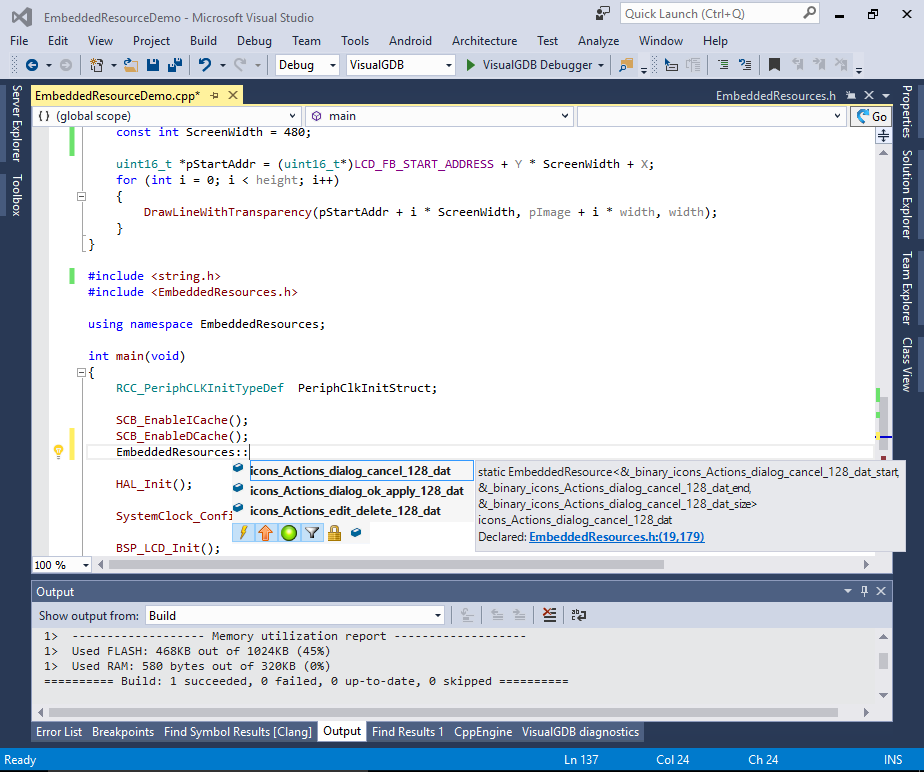 If these were the first resources added to your project, you will need to reopen it in order for IntelliSense to locate the generated header file.
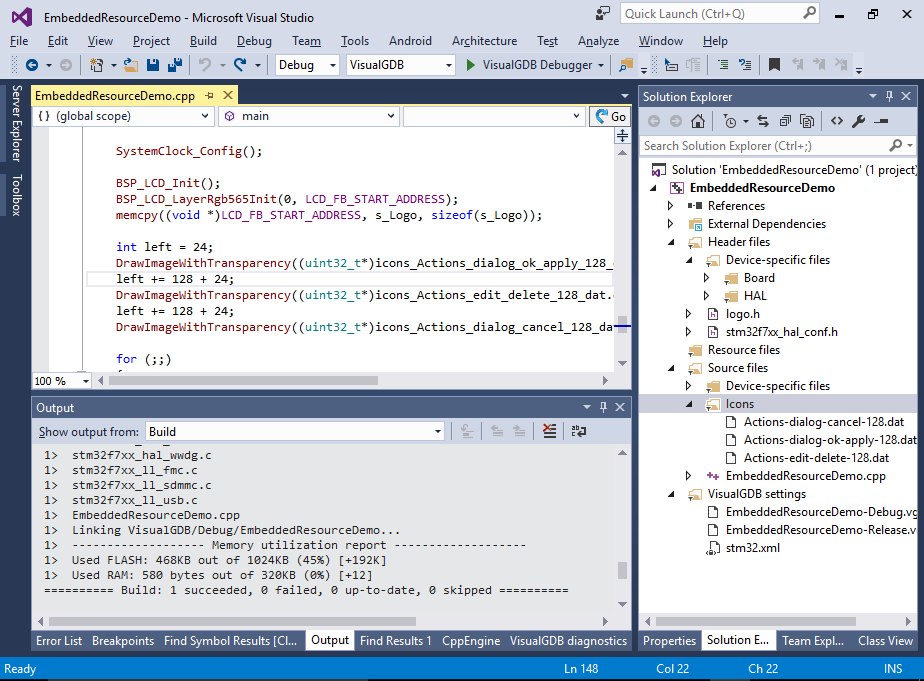
 - Add the following lines to your main() function to draw the resources:
    int left = 24;
    DrawImageWithTransparency((uint32_t*)icons_Actions_dialog_ok_apply_128_dat.data(), left, 72, 128, 128);
    left += 128 + 24;
    DrawImageWithTransparency((uint32_t*)icons_Actions_edit_delete_128_dat.data(), left, 72, 128, 128);
    left += 128 + 24;
    DrawImageWithTransparency((uint32_t*)icons_Actions_dialog_cancel_128_dat.data(), left, 72, 128, 128);
- Build your project and note how the FLASH utilization increased considerably after adding the large icons:
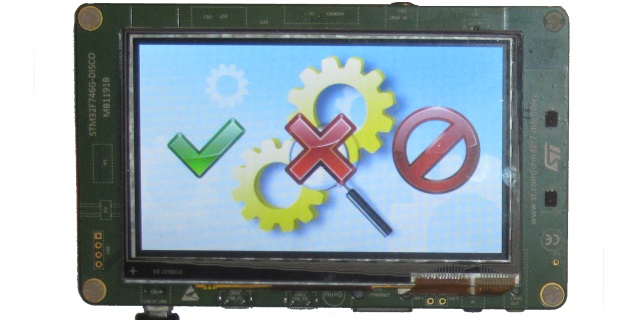
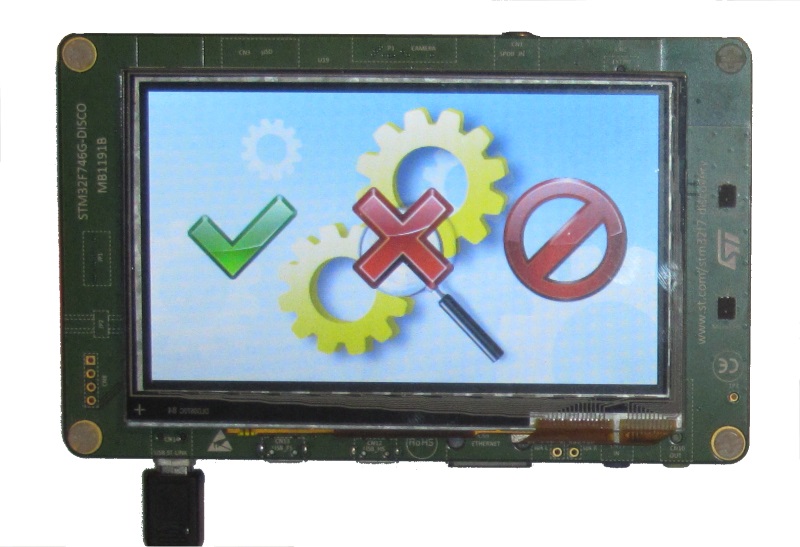
- Build the program and run it. You will see the new icons drawn on top of the background image:
- The generated EmbeddedResources.h file will look similar to this:
#pragma once

extern void *_binary_icons_Actions_dialog_cancel_128_dat_start, *_binary_icons_Actions_dialog_cancel_128_dat_end, *_binary_icons_Actions_dialog_cancel_128_dat_size;
extern void *_binary_icons_Actions_dialog_ok_apply_128_dat_start, *_binary_icons_Actions_dialog_ok_apply_128_dat_end, *_binary_icons_Actions_dialog_ok_apply_128_dat_size;
extern void *_binary_icons_Actions_edit_delete_128_dat_start, *_binary_icons_Actions_edit_delete_128_dat_end, *_binary_icons_Actions_edit_delete_128_dat_size;

#ifdef __cplusplus
#ifndef CUSTOM_EMBEDDED_RESOURCE_CLASS
template <void **_Start, void **_End, void **_Size> class EmbeddedResource
{
public:
    void *data() { return _Start; }
    void *end() { return _End; }
    unsigned size()  { return (unsigned)_Size; }
};
#endif

namespace EmbeddedResources
{
    static EmbeddedResource<&_binary_icons_Actions_dialog_cancel_128_dat_start, &_binary_icons_Actions_dialog_cancel_128_dat_end, &_binary_icons_Actions_dialog_cancel_128_dat_size> icons_Actions_dialog_cancel_128_dat;
    static EmbeddedResource<&_binary_icons_Actions_dialog_ok_apply_128_dat_start, &_binary_icons_Actions_dialog_ok_apply_128_dat_end, &_binary_icons_Actions_dialog_ok_apply_128_dat_size> icons_Actions_dialog_ok_apply_128_dat;
    static EmbeddedResource<&_binary_icons_Actions_edit_delete_128_dat_start, &_binary_icons_Actions_edit_delete_128_dat_end, &_binary_icons_Actions_edit_delete_128_dat_size> icons_Actions_edit_delete_128_dat;
}
#endif
The lines starting with “extern” declare the symbols like _binary_<name>_start that are automatically generated by GNU linker when linking binary files into your program. You can use those from your plain C code. The EmbeddedResource class provides a convenient C++ wrapper that can be used to access the resource from C++ code. You can use the resource_name.data() syntax to get a pointer to the beginning of an embedded resource and the resource_name.size() syntax to get the size of a resource.
- If you want to add more functionality to the EmbeddedResource class, you can redefine it in your own header file and define the CUSTOM_EMBEDDED_RESOURCE_CLASS macro there:
#define CUSTOM_EMBEDDED_RESOURCE_CLASS
template <void **_Start, void **_End, void **_Size> class EmbeddedResource
{
public:
    void *data() { return _Start; }
    void *end() { return _End; }
    unsigned size()  { return (unsigned)_Size; }
    template<class _Type> _Type *get() {return (_Type*)_Start;}
};
As long as the class still accepts 3 template arguments corresponding to the start, end and size of the block, you can use it instead of the original one:
DrawImageWithTransparency(icons_Actions_dialog_ok_apply_128_dat.get<uint32_t>(), left, 72, 128, 128);
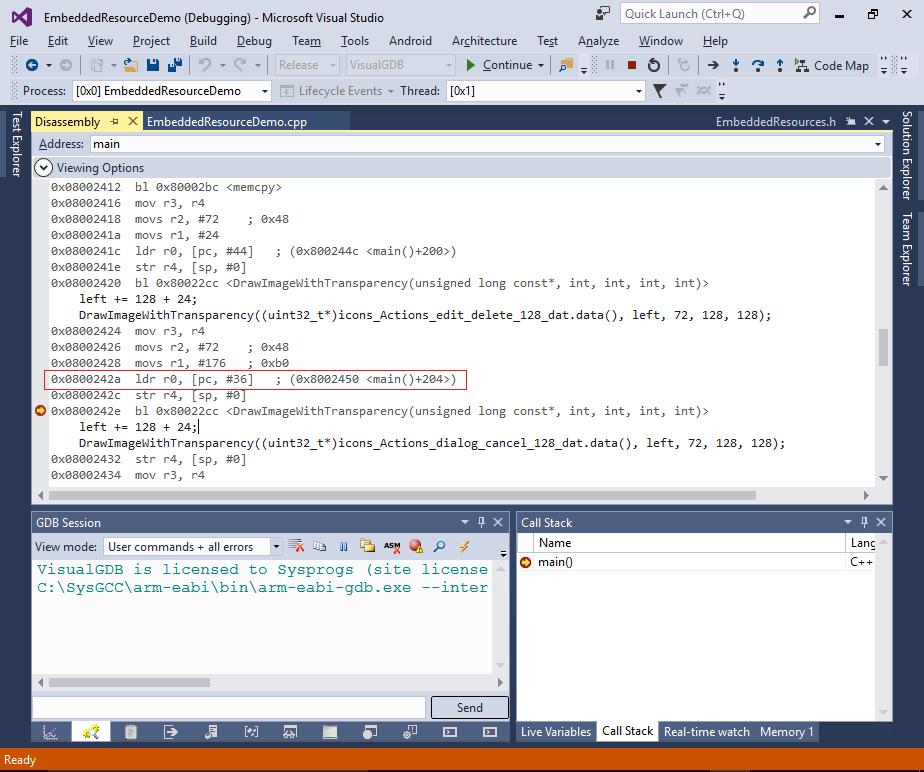
- The template-based implementation does not result in any extra overhead compared to the plain C version. If you compile your program in the release mode and look into disassembly, you will see that the call to data() or the newly added get() method gets inlined into a single “load constant” instruction: