STM32-Nucleo-F411RE tutorial with Visual Studio
This tutorial shows how to create a simple project for the STM32-Nucleo-F411RE board with Visual Studio.
You will need the following hardware and software to follow this tutorial:
- Microsoft Visual Studio
- VisualGDB 4.3 or later
- STM32-Nucleo-F411RE board
We will create a simple ‘blinking LED’ project, build it, step through it in debugger and use the Code Map to visualize the structure of the HAL library.
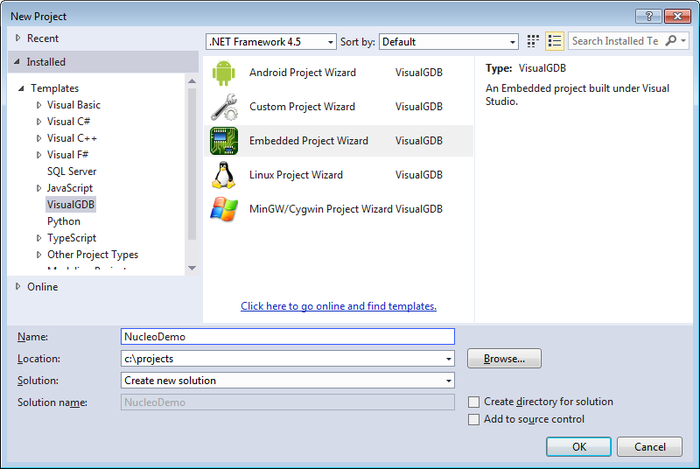
- Start Visual Studio. Select File->New->Project and select the Embedded Project Wizard from the VisualGDB wizards.
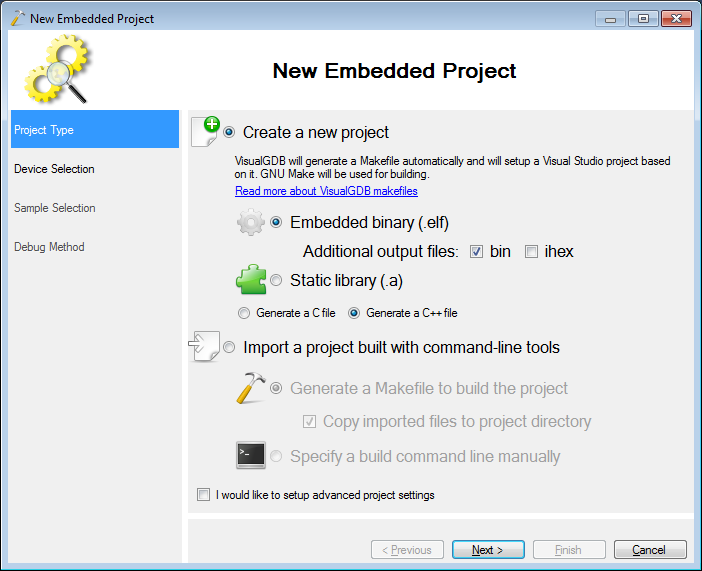
- Proceed with the default “binary” settings on the first page:
- On then next page select the ARM toolchain. If it is not present, VisualGDB will download it automatically:
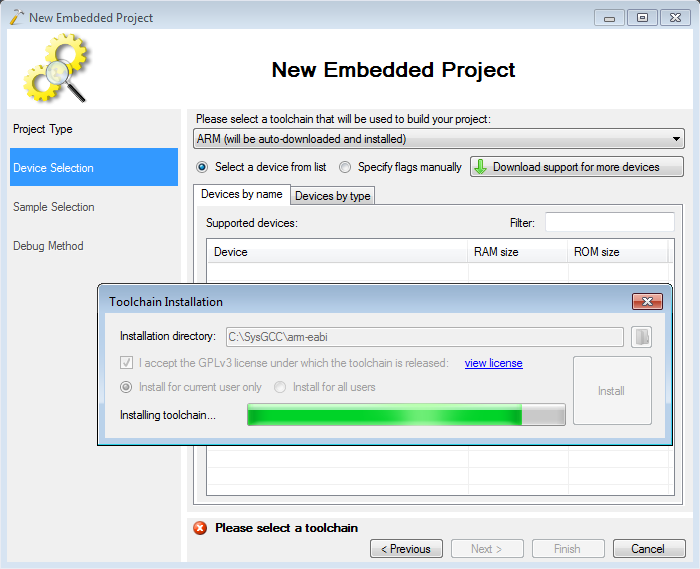
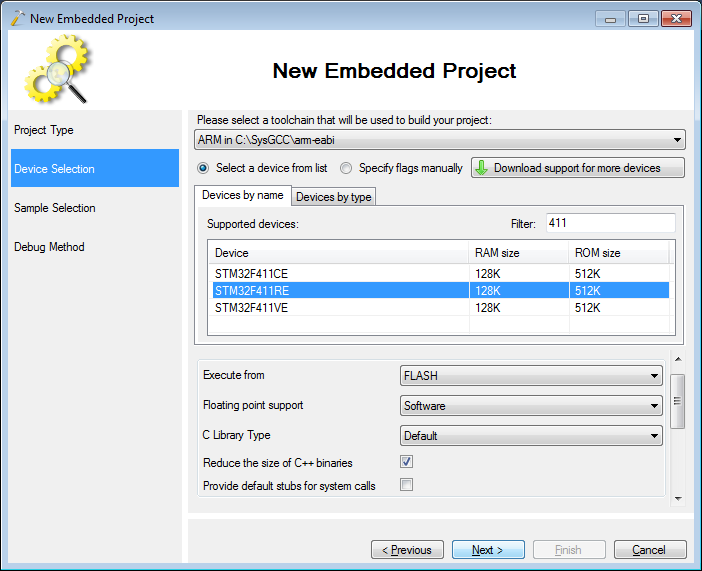
- Select the STM32F411RE device from the device list. If it is not available, click “download support for more devices”:
- On the next page proceed with the default LEDBlink sample and specify the LED port according to the STM32-Nucleo-F411RE schematics:

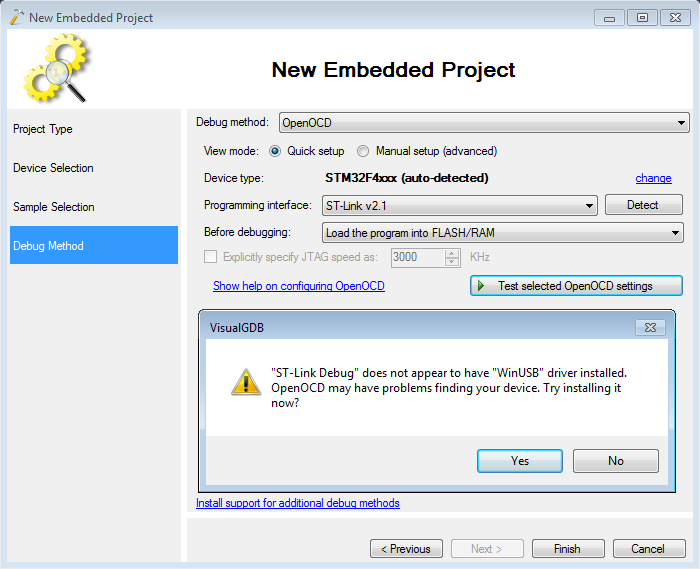
- On the next page select OpenOCD as the debug method, connect your board, press “detect” and “test selected OpenOCD settings”. If VisualGDB suggests installing the WinUSB driver, proceed with it:
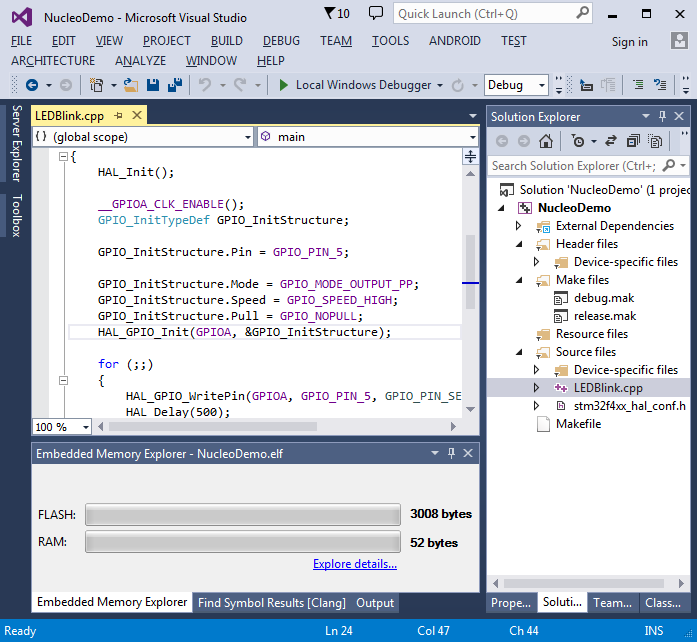
- Press Finish to create your project. You can build it by pressing Ctrl-Shift-B:
- Set a breakpoint on the HAL_GPIO_WritePin() call and press F5 to begin debugging:
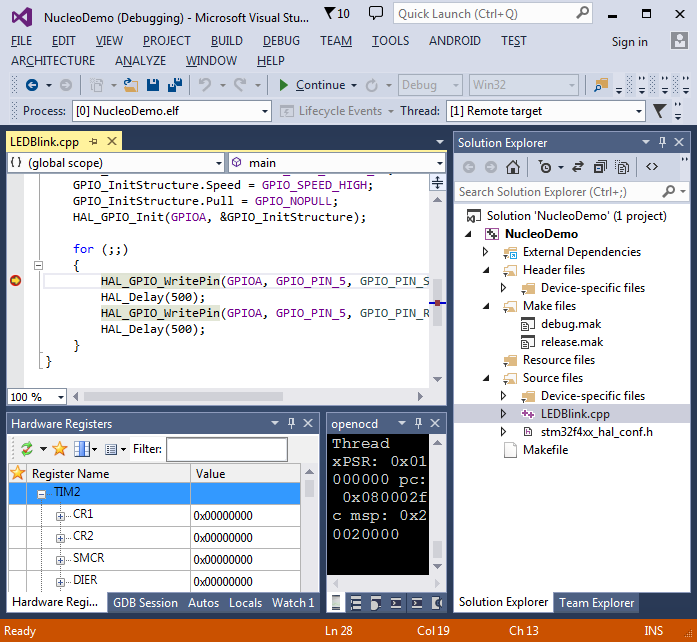
- Verify that the green LED on the board is off:
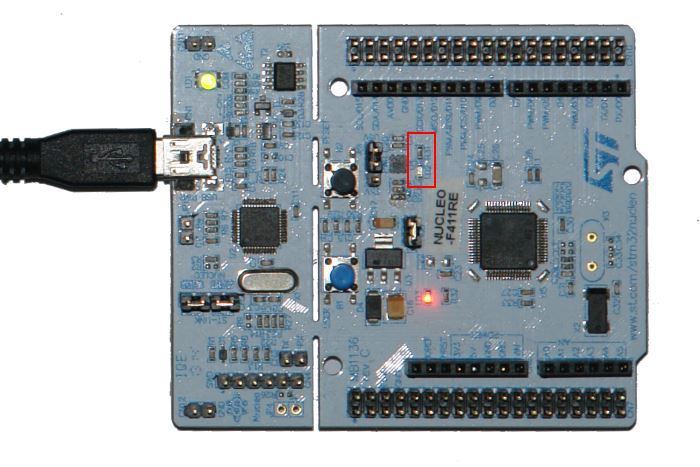
- Press F10 to step over HAL_GPIO_WritePin() and verify that the LED turns on:

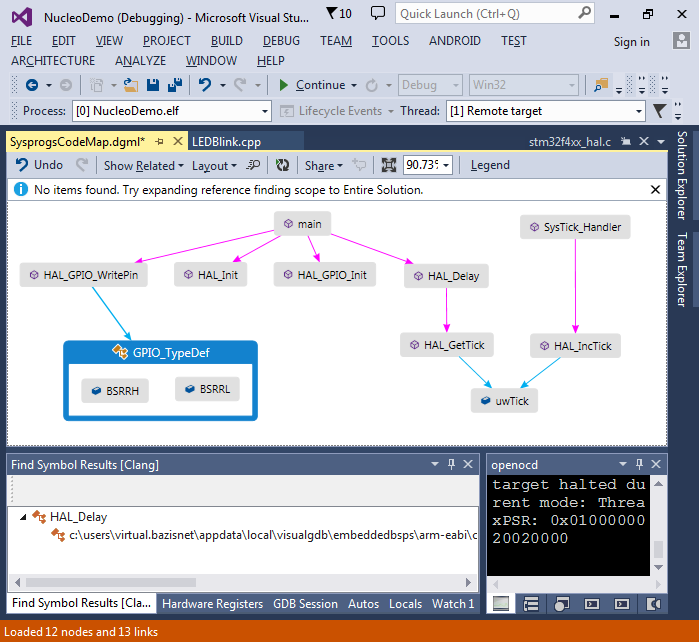
- You can right-click on a function or variable in the code and select “Show on Code Map” to explore its role in your source code (requires VisualGDB 5.0+):
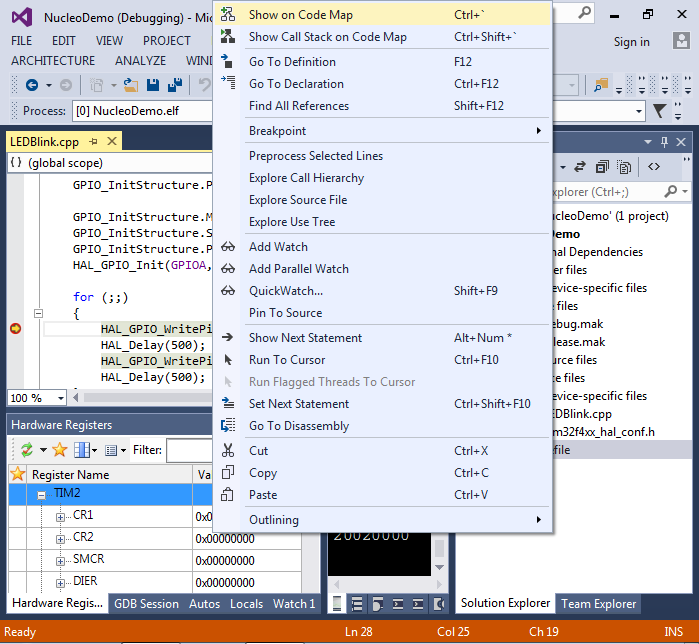
- E.g. you can see how HAL_Delay depends on the uwTick variable that is also modified by HAL_IncTick() called by SysTick_Handler():