Extending VisualGDB to support custom target transports
This tutorial shows how to use the VisualGDB extensibility interfaces to support a custom target transport instead of SSH. We will show how to create a target plugin to support the telnet protocol instead of SSH and how to create, build and debug a basic program using this interface.
Warning: the Telnet protocol is very limited compared to SSH. It does not support reliably detecting when a command exits and it does not support downloading and uploading files. The Telnet target shown in this tutorial uses several unreliable workarounds to provide that functionality and may not work reliably in real-world scenarios. Hence we only recommend using the Telnet plugin as an example for developing your own target plugins based on more reliable protocols.
A VisualGDB target plugin is a .Net assembly that provides a class implementing the ICustomTargetFactory interface. Before we go into the details of the plugin interfaces, we will show how to download and build the Telnet plugin.
- Ensure you are using VisualGDB 5.3 or later. Older versions do not support the custom target interfaces.
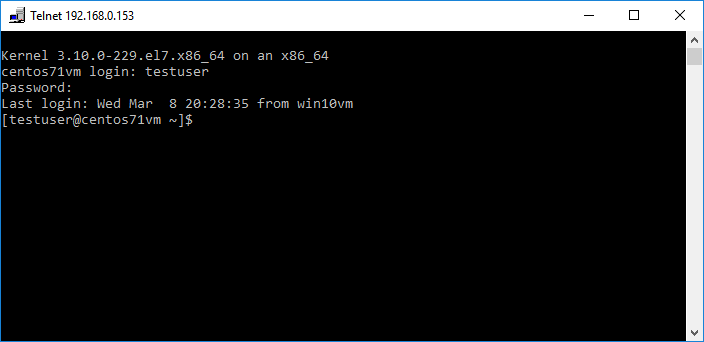
- Install the telnet server to your Linux machine (e.g. sudo apt-get install telnetd) and ensure you can connect to it from Windows by running “telnet <IP address>”:
- Check out the VisualGDBExtensibilityExamples repository to a directory on your hard disk and open the TelnetDemo.sln file in Visual Studio.
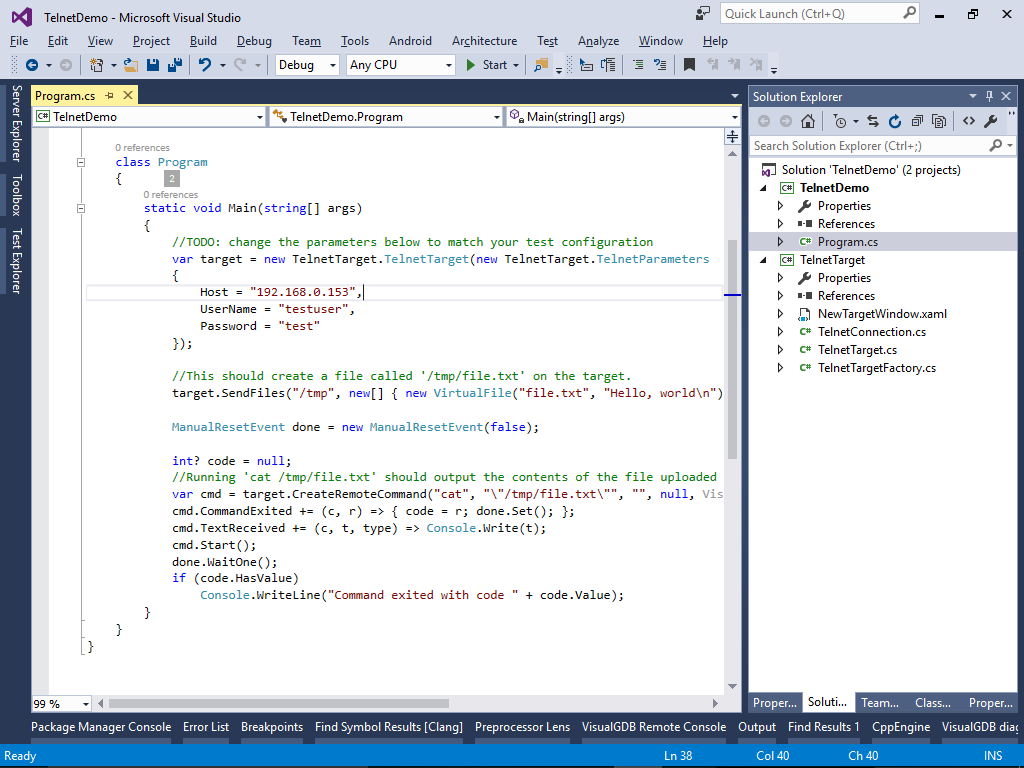
- Open the Program.cs file in the TelnetDemo project and edit the target settings (Host, UserName and Password) to match the settings on your Linux machine.
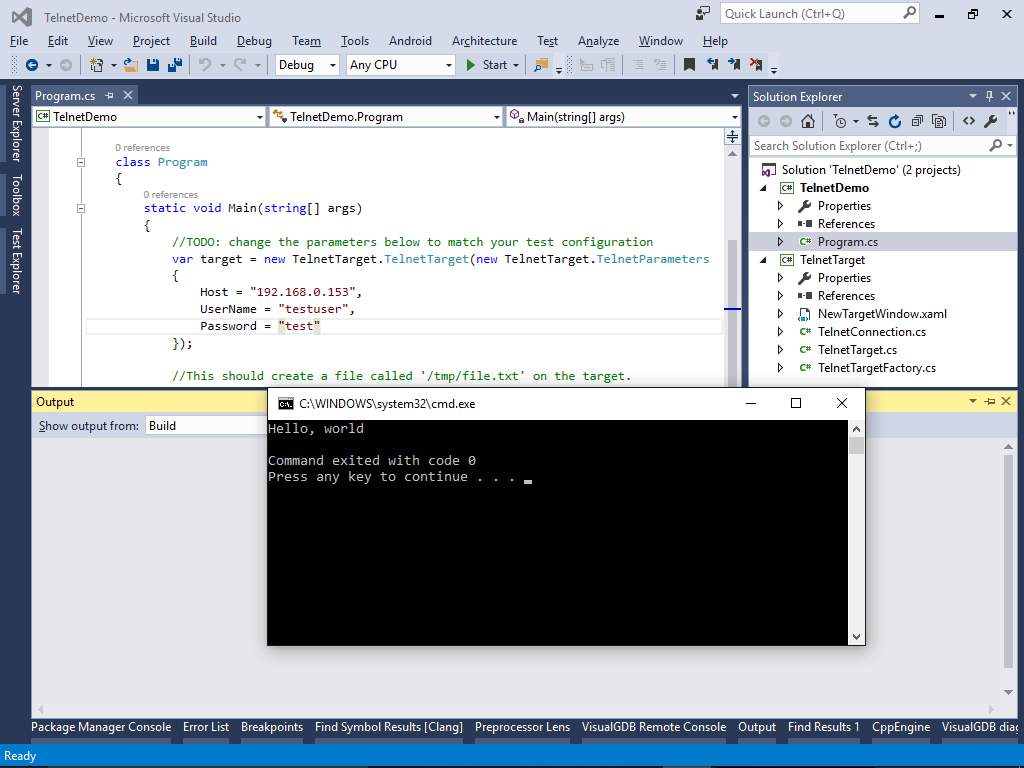
- Press Ctrl-F5 to start the program without debugging. If it works correctly, it should display the following output:
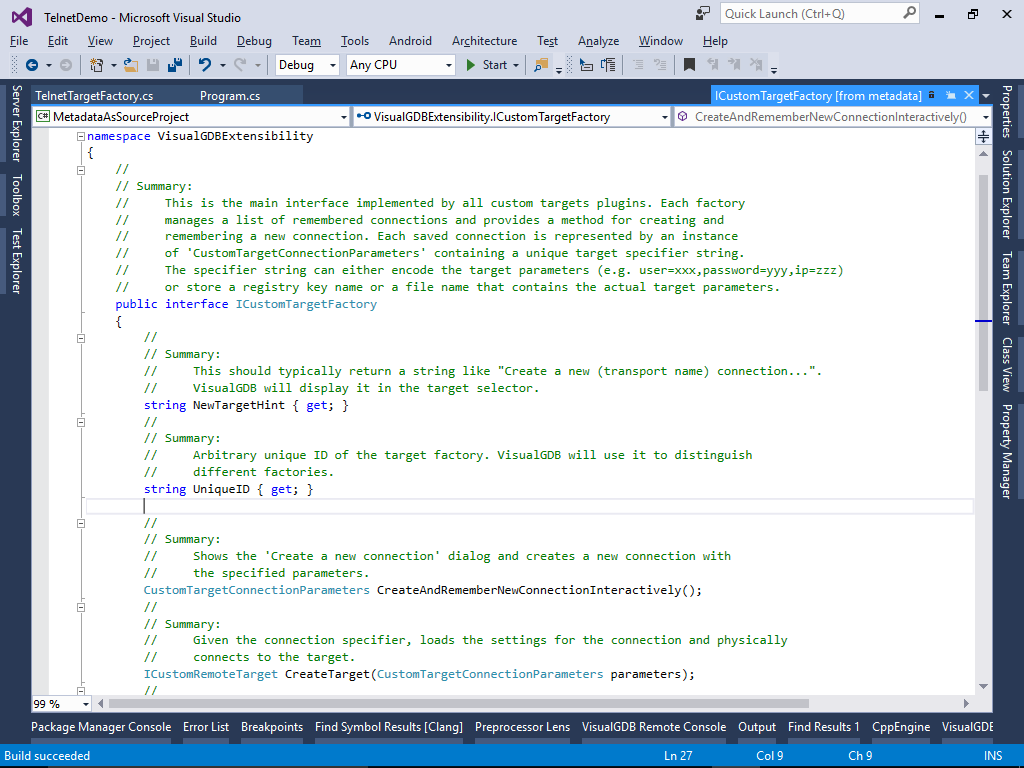
- Now we will outline the main interfaces implemented by the Telnet target plugin. Locate the TelnetTargetFactory class and navigate to the ICustomTargetFactory interface it implements by pressing F12. Visual Studio will display the interface members and the relevant documentation:
- The main interfaces used by the VisualGDB target plugins are shown below:
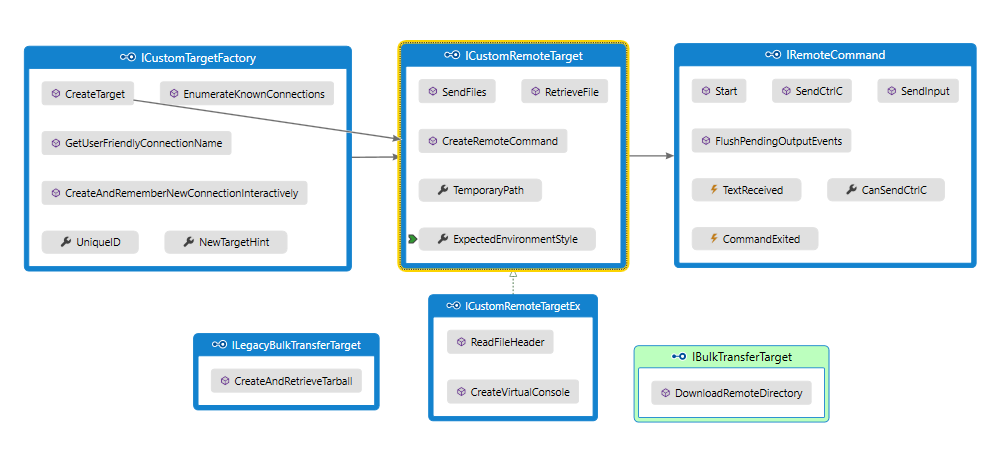
- The ICustomTargetFactory interface is implemented by the target factory. A target factory is responsible for remembering the used connections (e.g. different machines), helping the user to setup a new connection and actually connecting to the targets.
- The ICustomRemoteTarget interface represents a physical connection to a target. It must support running remote commands and can support sending/receiving files. The target class can also implement the ICustomRemoteTargetEx interface and either IBulkTransferTarget or ILegacyBulkTransferTarget if the target supports downloading entire directory trees.
- The IRemoteCommand interface represents a command that was launched on the target. Its semantics is similar to the System.Diagnostics.Process class and it supports sending input to the process and receiving the output from it.
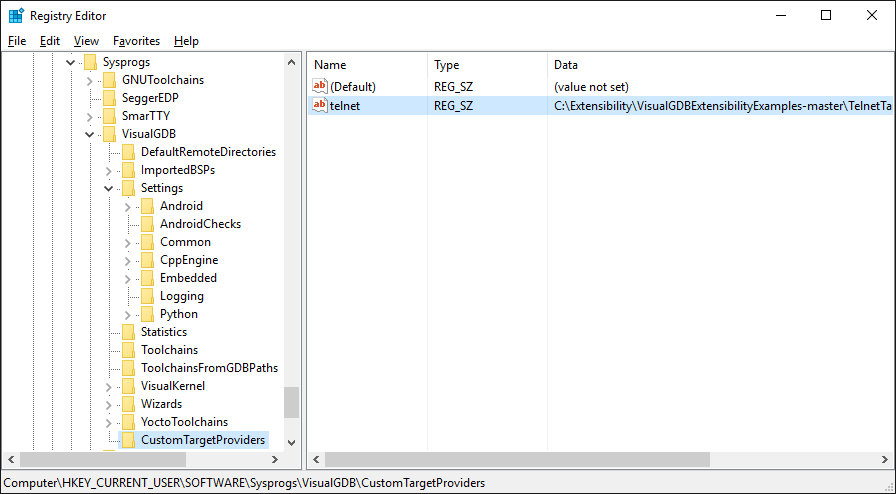
- Register the target plugin by adding a value into registry under HKCU\Software\Sysprogs\VisualGDB\CustomTargetProviders. The value should contain the full path to the plugin file (e.g. C:\Extensibility\VisualGDBExtensibilityExamples-master\TelnetTarget\TelnetTarget\bin\Debug\TelnetTarget.dll):
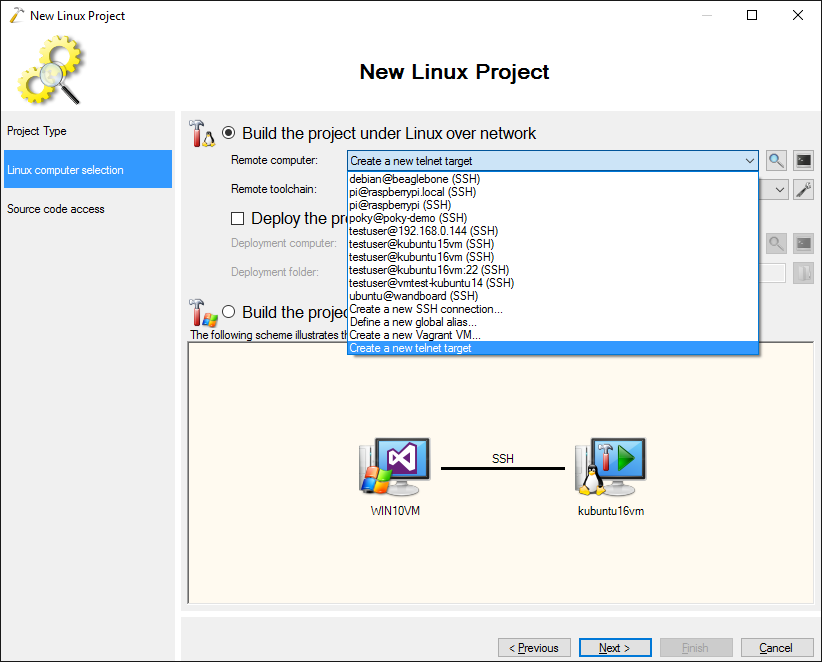
- Now you can try out the telnet plugin. Start another instance of Visual Studio and open the VisualGDB Linux Project Wizard. On the Computer Selection page you should see a new option called “Create a new telnet target”:
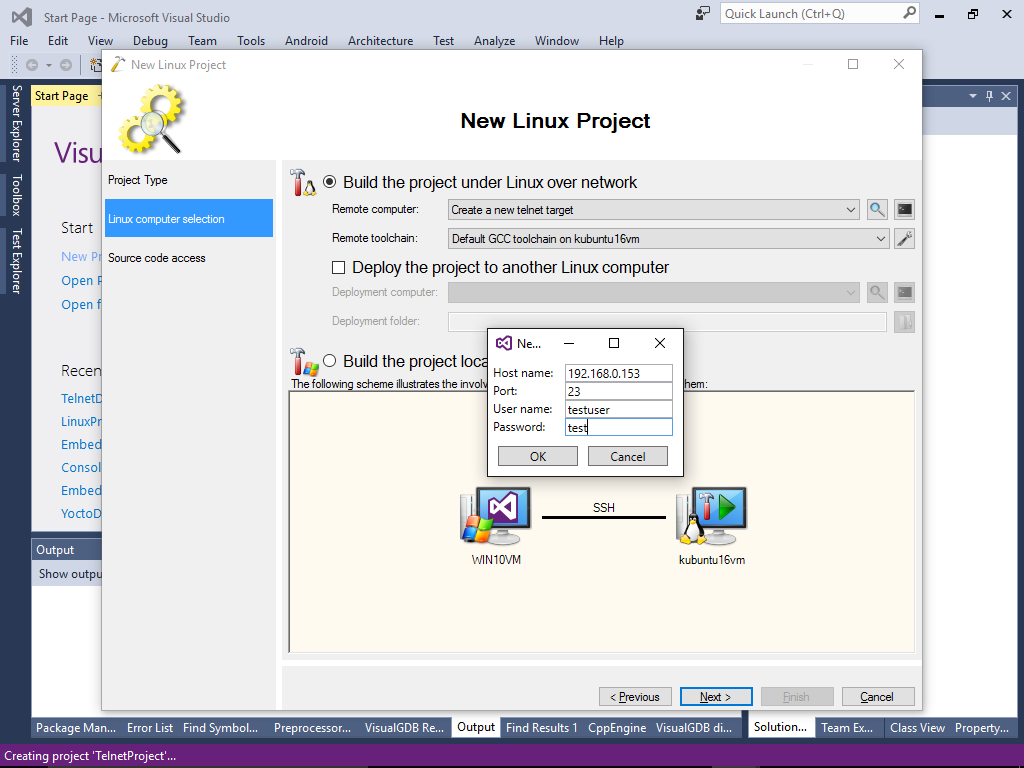
- Once you select that option, you will see a custom dialog shown by the telnet plugin. Enter your target settings there:
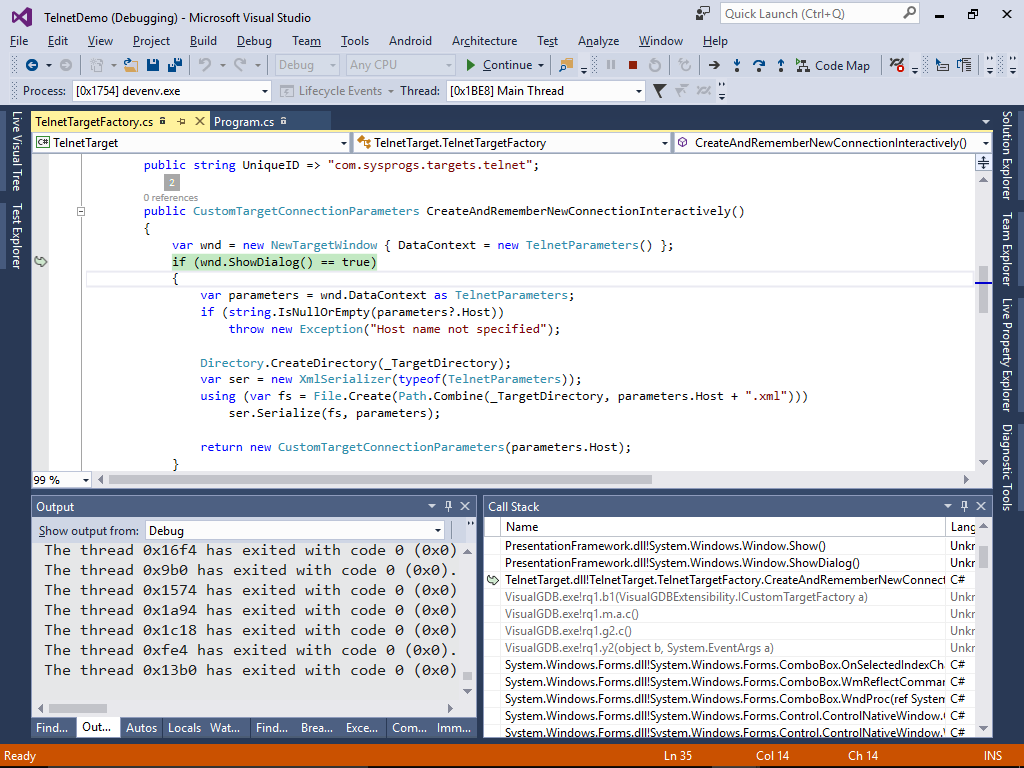
- You can now attach the first instance of Visual Studio to the one running VisualGDB and see how the CreateAndRememberNewConnectionInteractively() method was called by VisualGDB in response to selecting the “new telnet target” item:
- Once you press “OK” in the “New Telnet Connection” window, VisualGDB will create and remember the new connection:
 The list of saved connections is maintained by each target plugin independently. The telnet plugin simply stores the connection settings in XML files in the %LOCALAPPDATA%\VisualGDB\TelnetConnections folder.
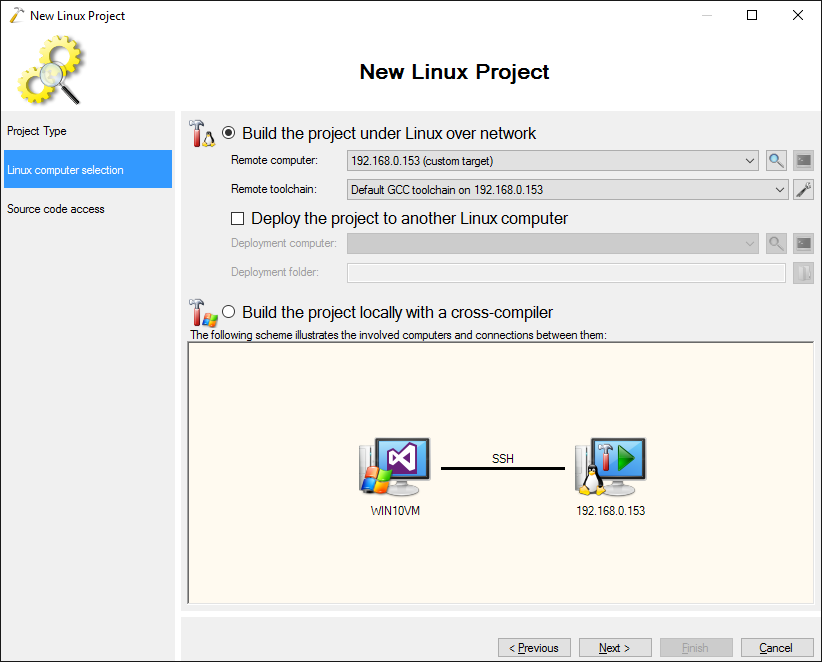
 - Once you click “next”, VisualGDB will use the telnet-based target the same way as if it was an SSH target. It will support uploading the source files, downloading include directories and detecting various tool settings:

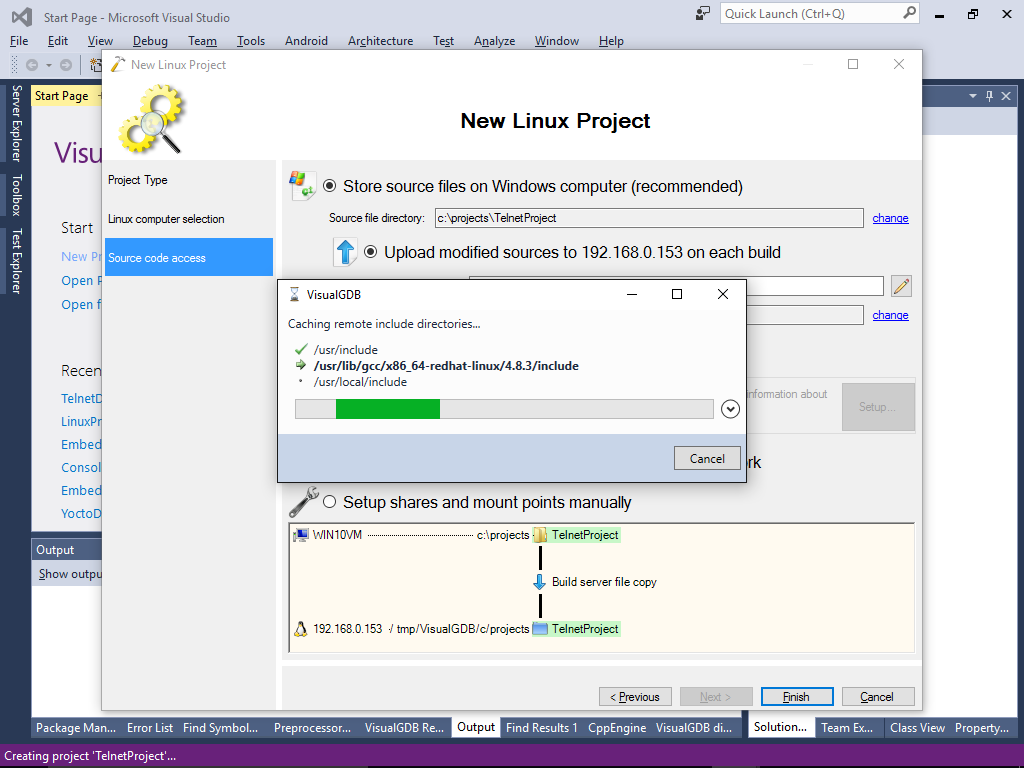
- Note that as the telnet target uses a very simplified interface to download the include directories, the actual download progress won’t appear:
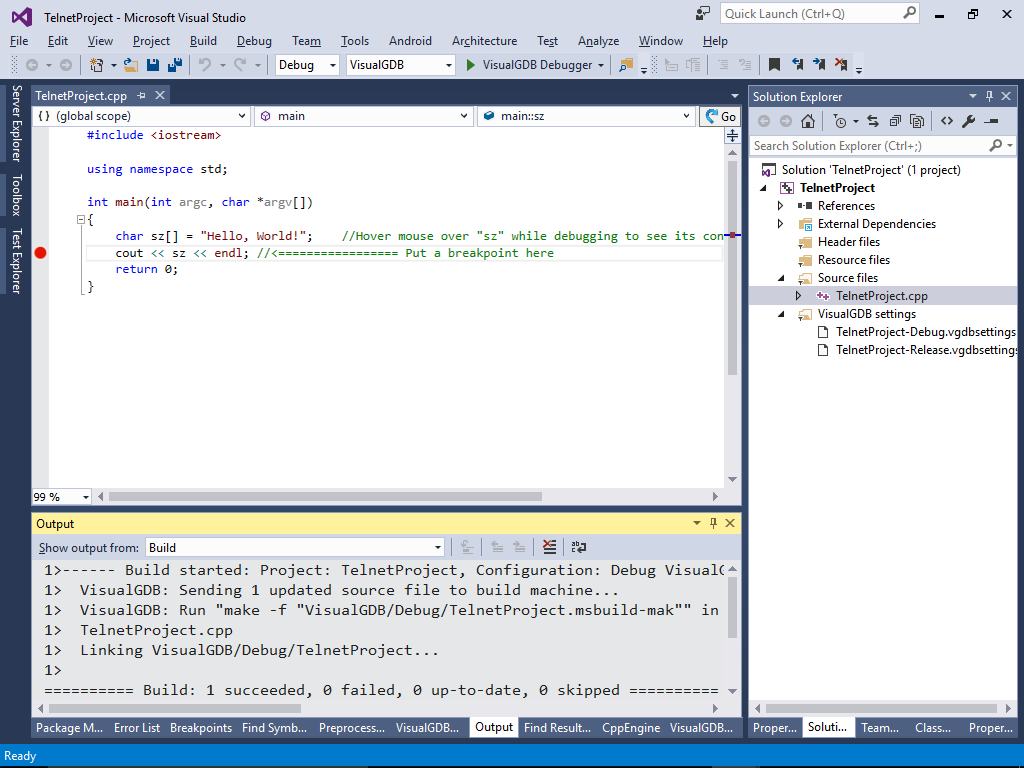
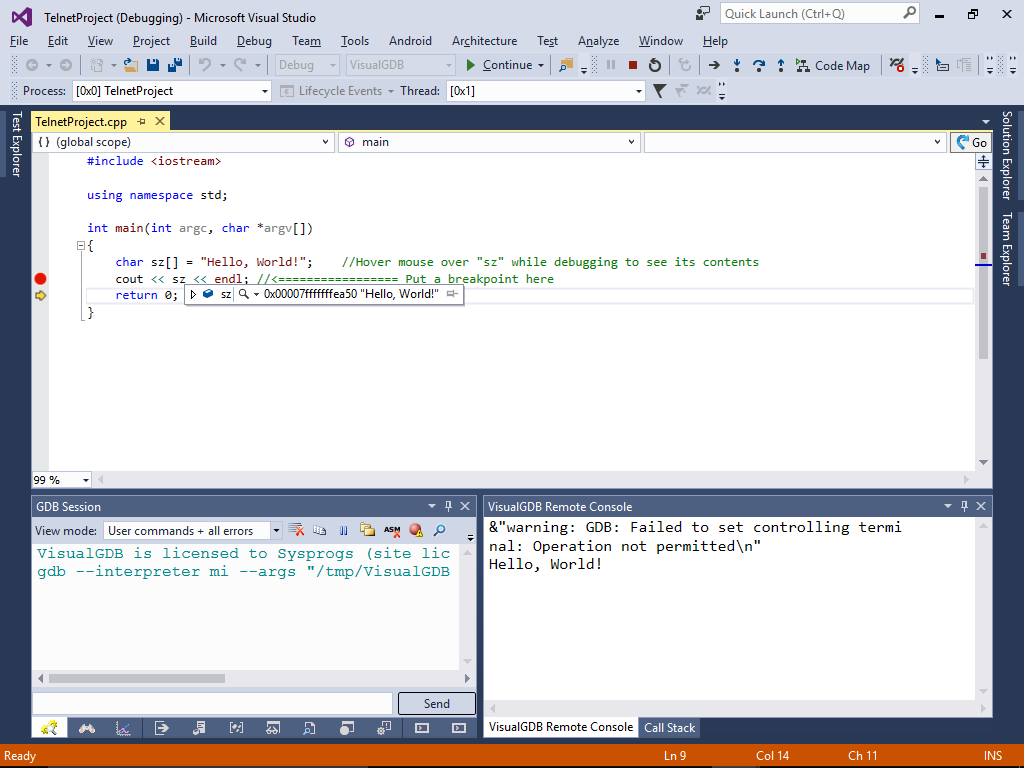
- Once the project is created, you can build it with Ctrl-Shift-B and debug it with F5:
- Most of the functionality should work the same way as for the SSH targets, although some minor features may not work as expected:
In the remaining part of the tutorial we will outline the internals of the telnet target and show how to troubleshoot common problems.
- If you experience connection problems, try stepping through the constructor of the TelnetConnection() class. It expects the target to print certain strings like “login:” and “password:” and will not work if the strings look different:

- If the commands launched over telnet tend to hang, locate the thread labeled Telnet command readout thread in the Threads window and check the call stack:
 Typically each command goes through the following cycle:
- Create a new telnet connection and enter login/password. Alternatively find a recently used one in the connection pool and reuse it.
- Run a special command formatted as “echo <start marker> ; <command> ; echo <end marker>?$E”
- Wait until the <start marker> appears on the output from the telnet session
- Treat the rest of the output as the command output. Once the <end marker> appears on the output, read the exit code printed in the expansion of the $? expression and parse it.
Using a different shell from bash or having a slightly different target configuration may cause the command execution logic to hang indefinitely.
- If the file uploading does not work, try stepping through the TelnetTarget.SendFiles() method. The telnet plugin implements file uploading by running “base64 -d > file_name” and then sending the base64-encoded file contents as if it was typed from the keyboard. If the base64 tool is missing on the target, this will not work.