Creating ESP-ADF Projects with Visual Studio
This tutorial shows how to use Visual Studio with VisualGDB to create C/C++ projects for ESP32 devices using the ESP-ADF (Audio Development framework).
We will show how to create a basic project, upload it into the FLASH memory of the ESP32-LyraT board and test it out.
Before you begin, install VisualGDB 5.4 or later.
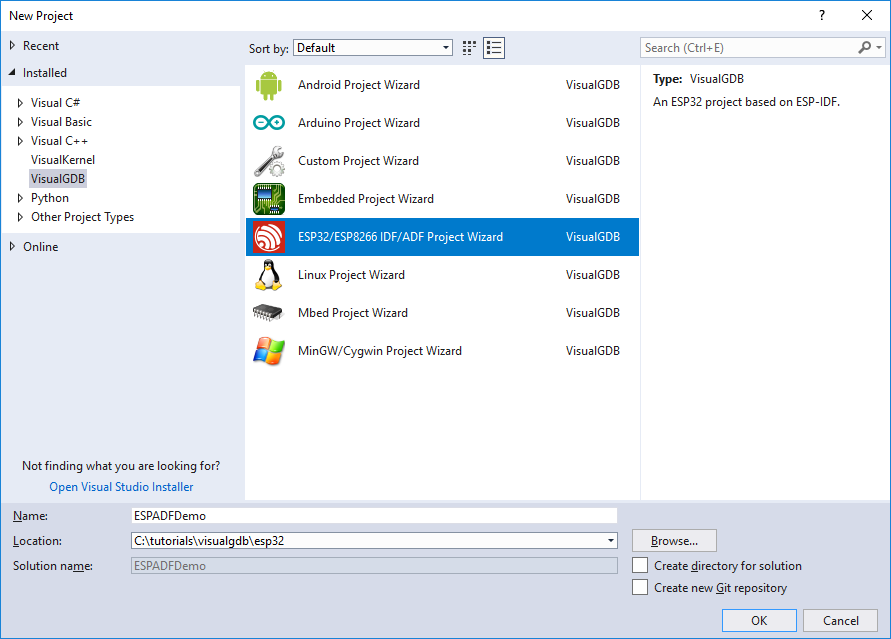
- Start Visual Studio and open the VisualGDB ESP-IDF/ADF Project Wizard:
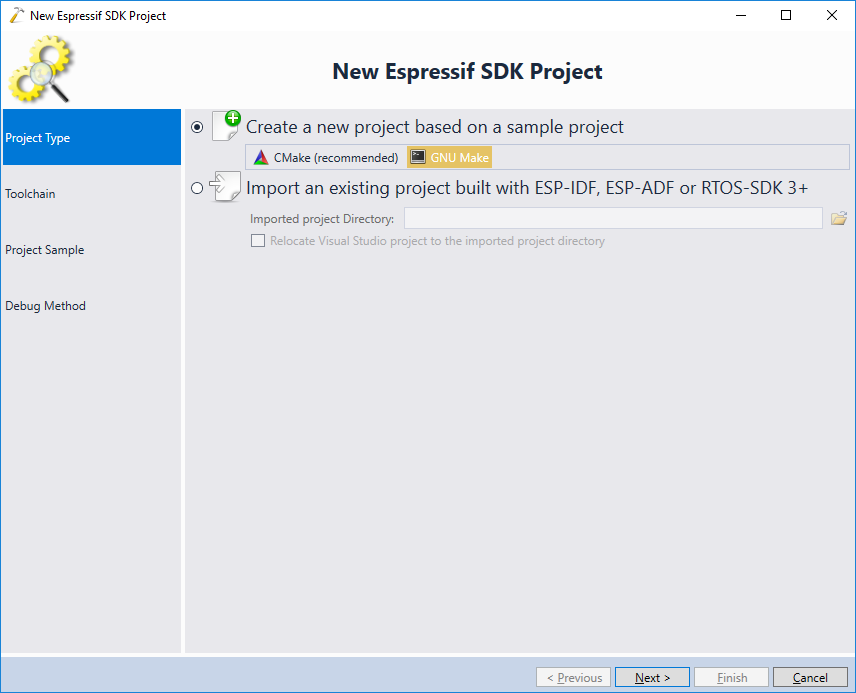
- If you would like to use ESP-ADF 1.x that does not support CMake, select GNU Make on the first page. If you are using ESP-ADF 2.x, select CMake:
- On the next page select the ESP32 toolchain and click “Clone an SDK release from Github”:
 Update: For better compatibility with the latest ESP32 tools, we recommend selecting the consolidated toolchain instead.
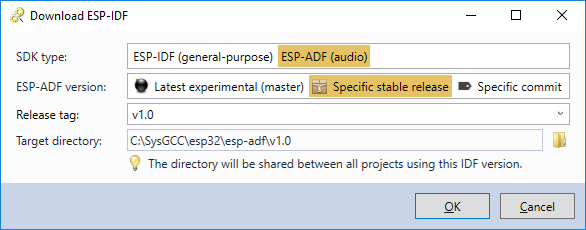
 - Select “ESP-ADF (audio)” as the SDK type and pick the latest stable release. Then click “OK” to import the SDK into VisualGDB:
 WARNING: Each ESP-ADF release will only work with a specific ESP32 toolchain. You can find it out by looking up the ESP-IDF version bundled with ESP-ADF here, and then manually downloading an ESP32 toolchain compatible with that ESP-IDF.
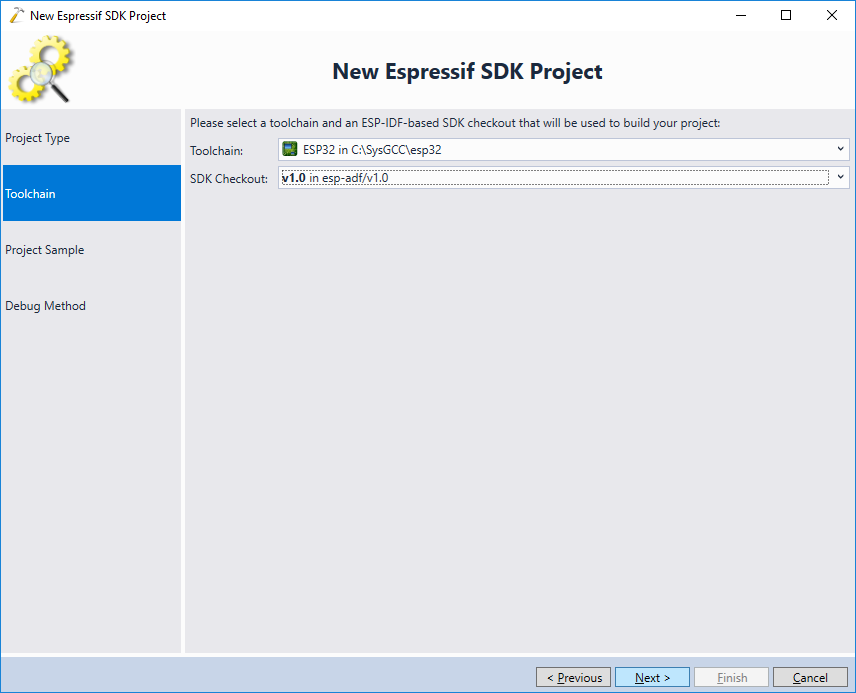
- Once VisualGDB finishes checking out ESP-ADF, ensure it is selected in the “SDK Checkout” field and click “Next”:
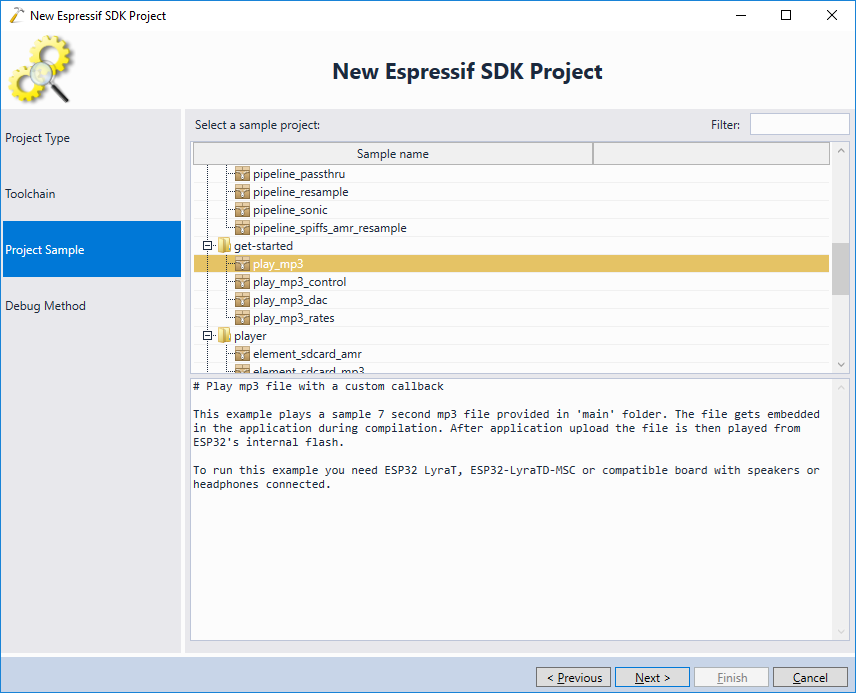
- The next page of the wizard allows selecting a project sample that will be cloned when creating the new project. Select the play_mp3 sample in the get-started folder:
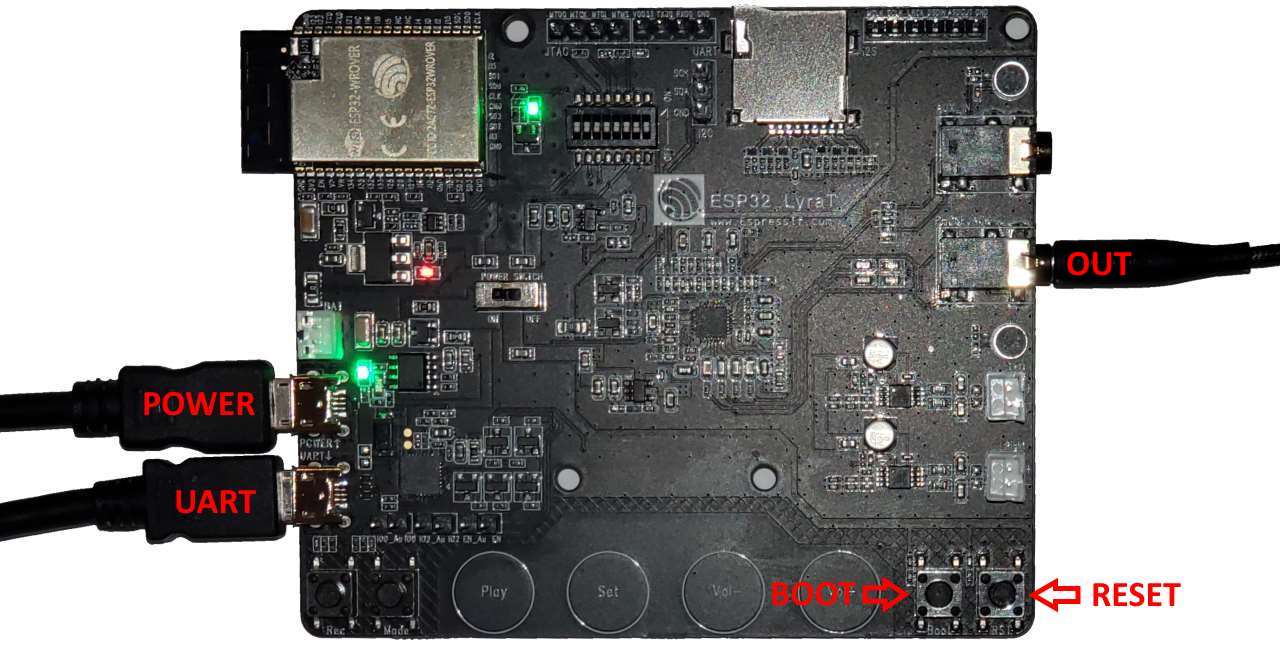
- Debugging the ESP32-LyraT board via JTAG requires a separate JTAG programmer and additional wiring setup, so in this tutorial we will not use JTAG debugging, focusing on building and configuring the project. Connect both power and UART ports of the board to USB and plug in headphones into the analog output port as shown below:
- Select the COM port of the board on the “Debug Method” page of the wizard so that VisualGDB can program the FLASH memory via this port:

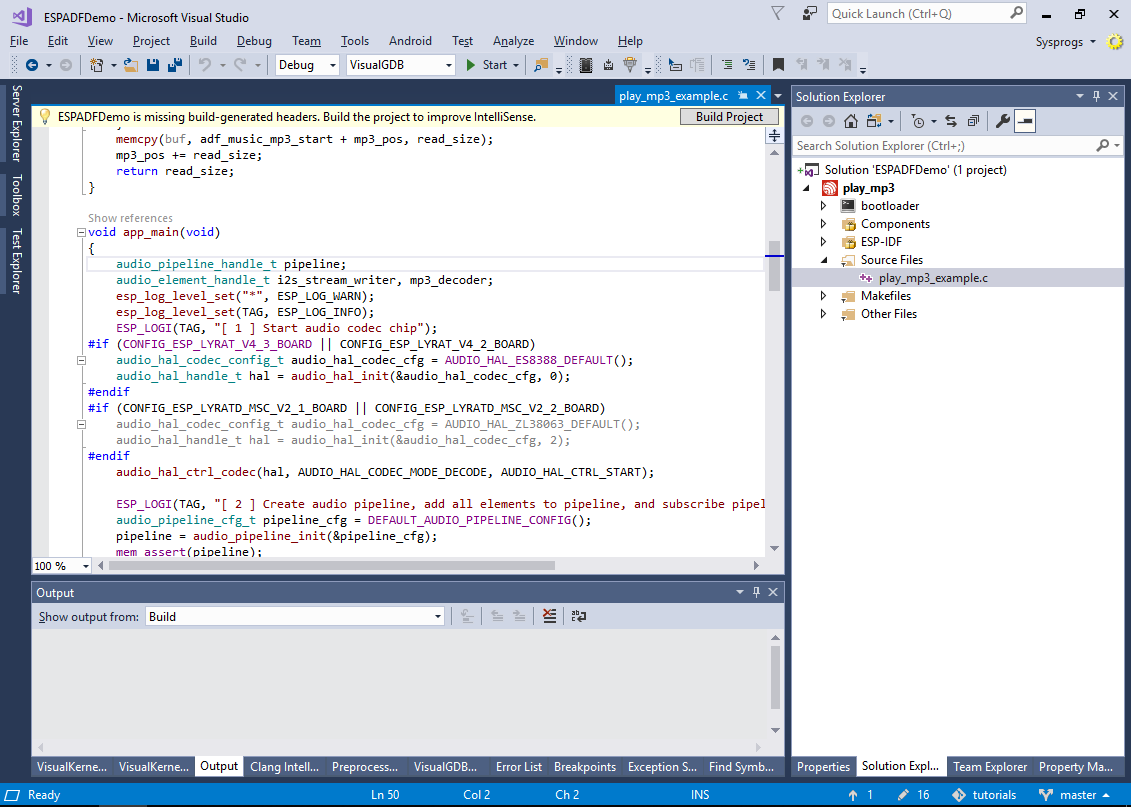
- Press “Finish” to generate the project. VisualGDB will clone the selected example and query its detailed structure from the ESP-ADF framework, reflecting it in Solution Explorer:
 WARNING: if the project does not load or does not build, please make sure you are using the ESP32 toolchain based on GCC 5.2.0. ESP-ADF does not support the newer toolchains based on GCC 8.x.
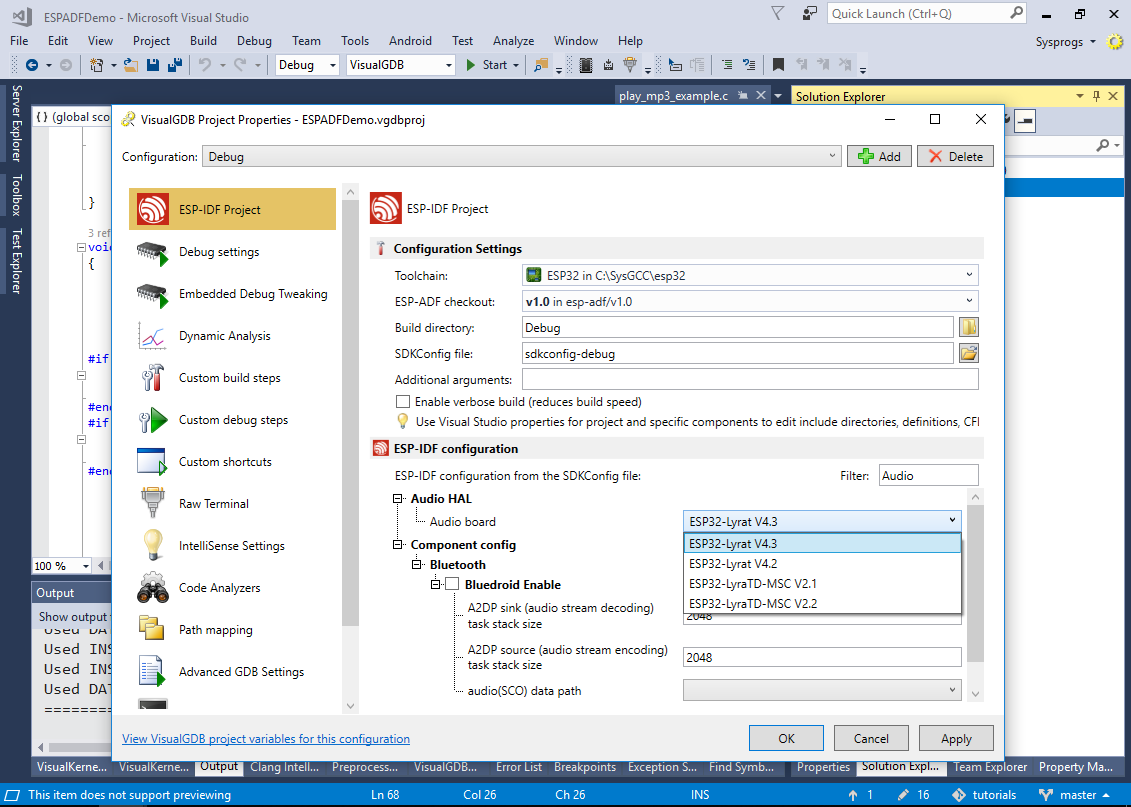
- Open VisualGDB Project Properties and go to the ESP-IDF Configuration section on the first page. Ensure that the Audio Board setting matches the board you are using:
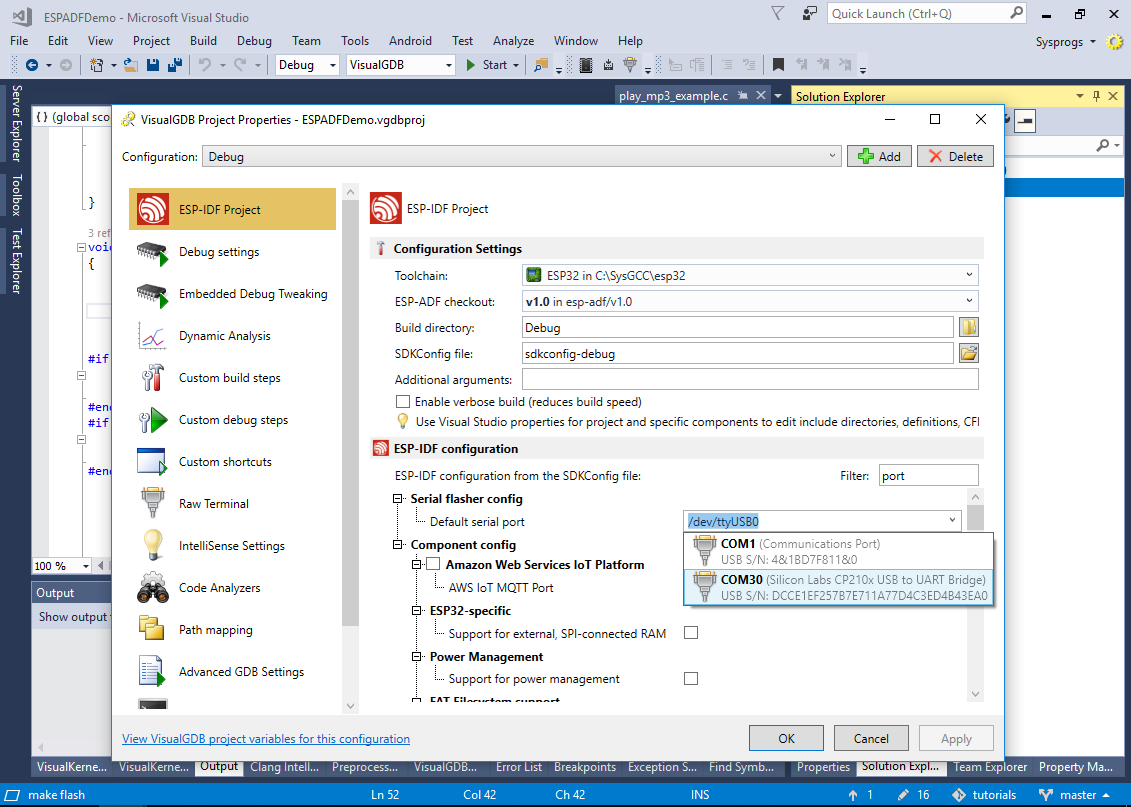
- We also recommend setting the Default serial port to the COM port of your board to allow programming it using the context menu in Solution Explorer:
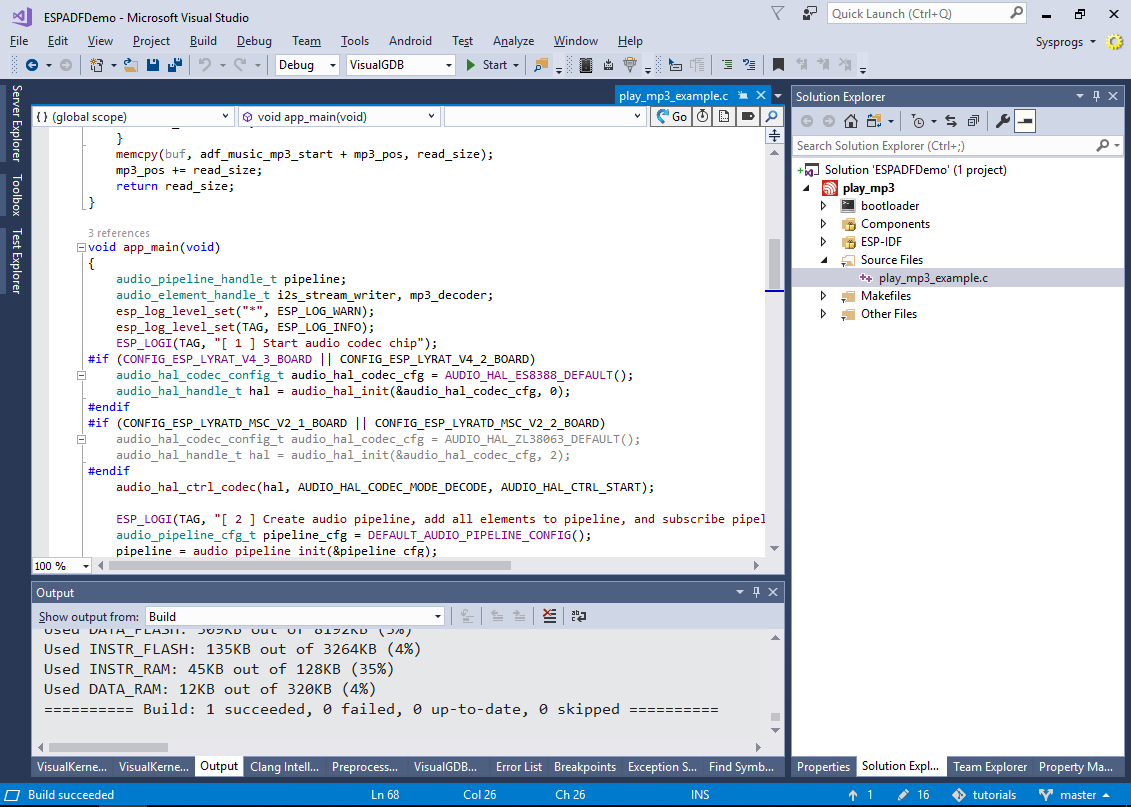
- Build the project by pressing Ctrl-Shift-B and ensure the build succeeds:
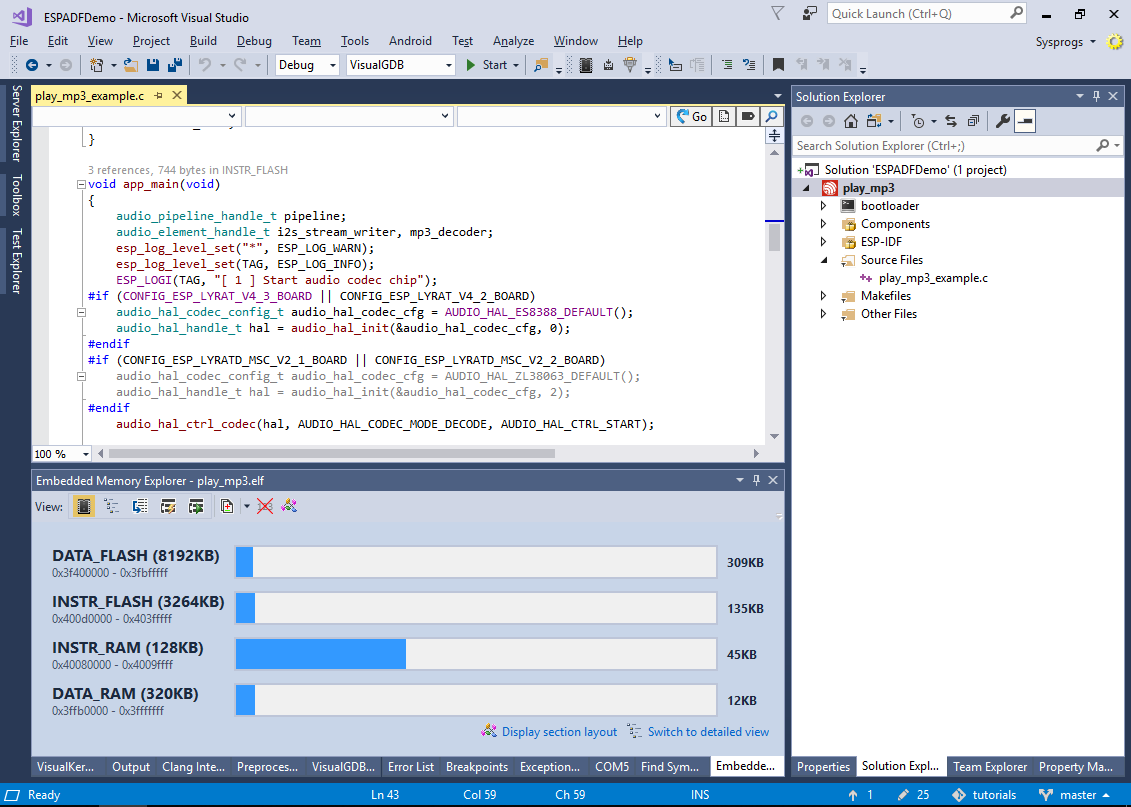
- You can use the View->Embedded Memory Explorer command to get a detailed overview of the project’s memory footprint:
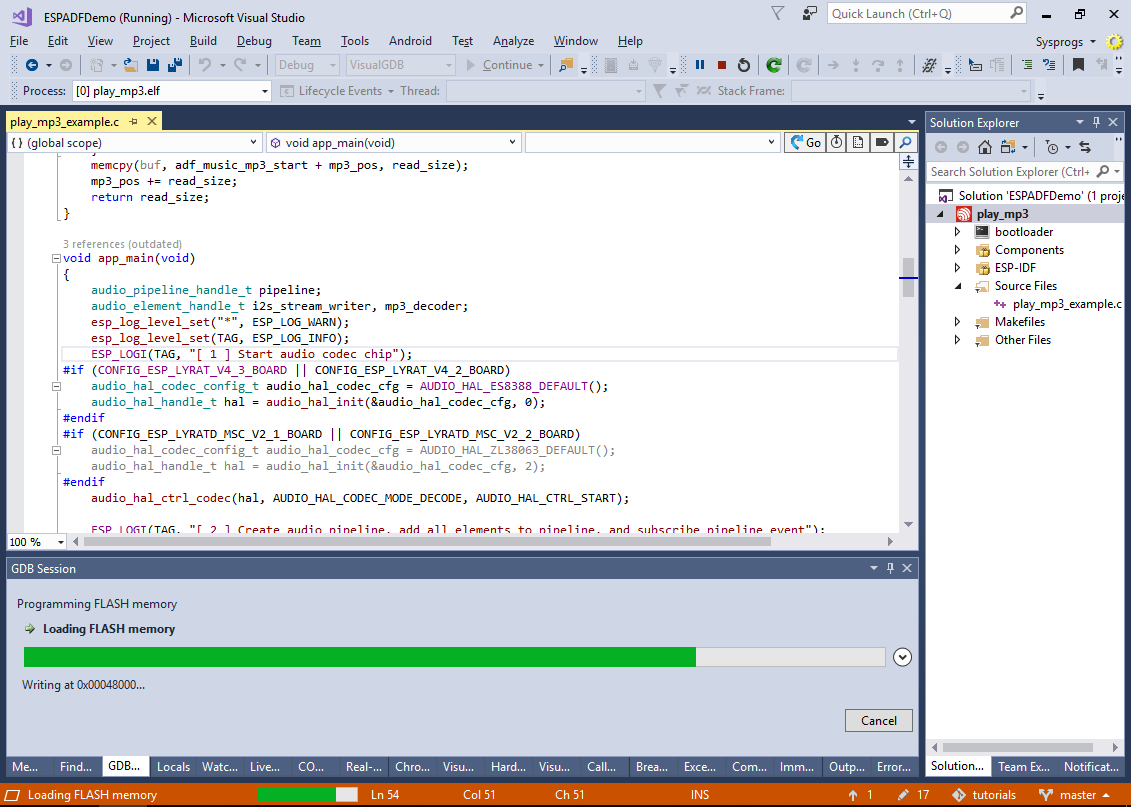
- The ESP32-LyraT board does not include the wiring to automatically switch the ESP32 chip into the bootloader mode. This needs to be done manually by holding the Boot button, pressing and releasing the RST button and finally releasing the Boot button. Once this is done, press F5 to begin programming the FLASH memory via the COM port:
- Once VisualGDB reports that the memory has been programmed, the board will start playing a sample MP3 file into the headphones connected to the audio output jack:
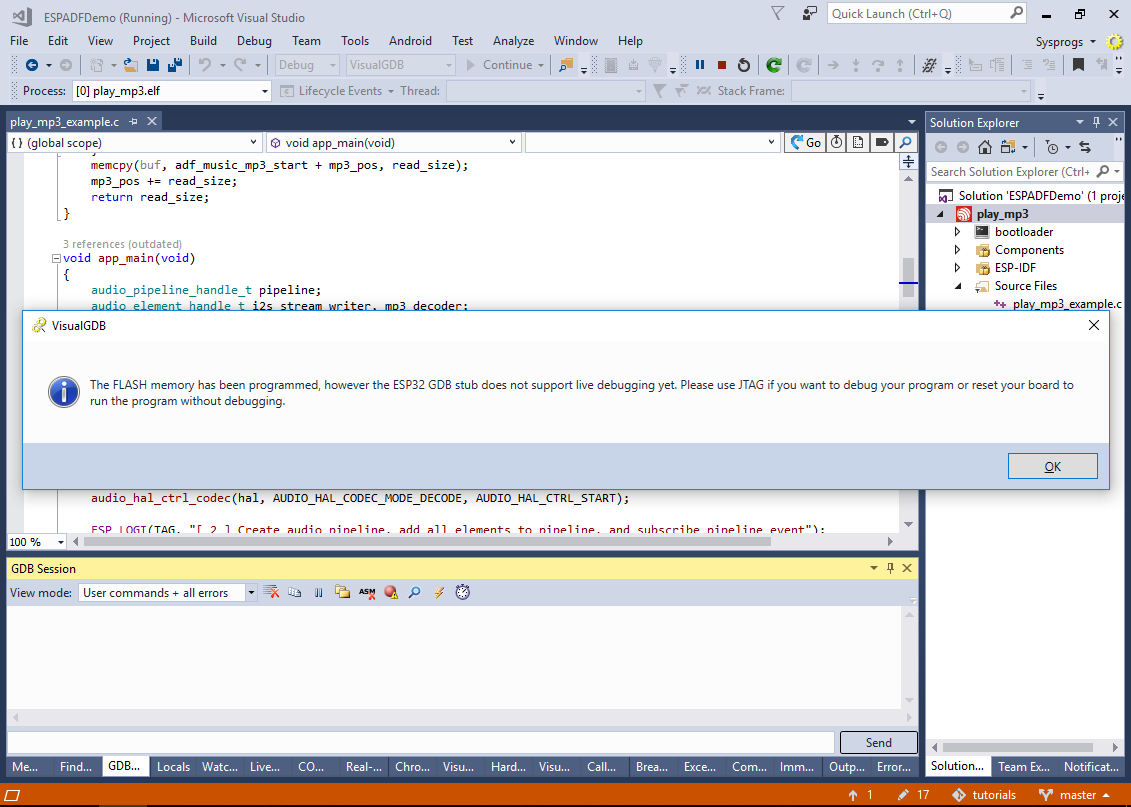 If you do not hear the playback via the headphones, try resetting the board by pressing the RST button.
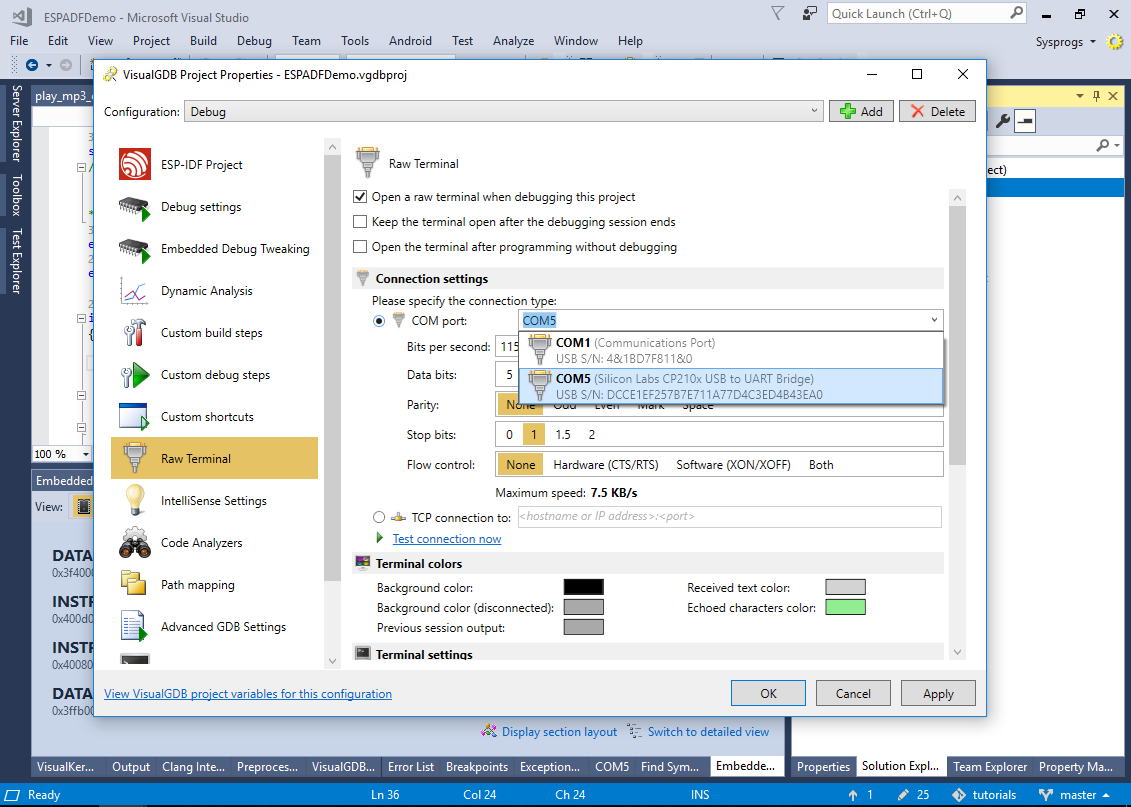
 - You can configure VisualGDB to display the output from board’s COM port via the Raw Terminal page of VisualGDB Project Properties (Custom edition and higher):
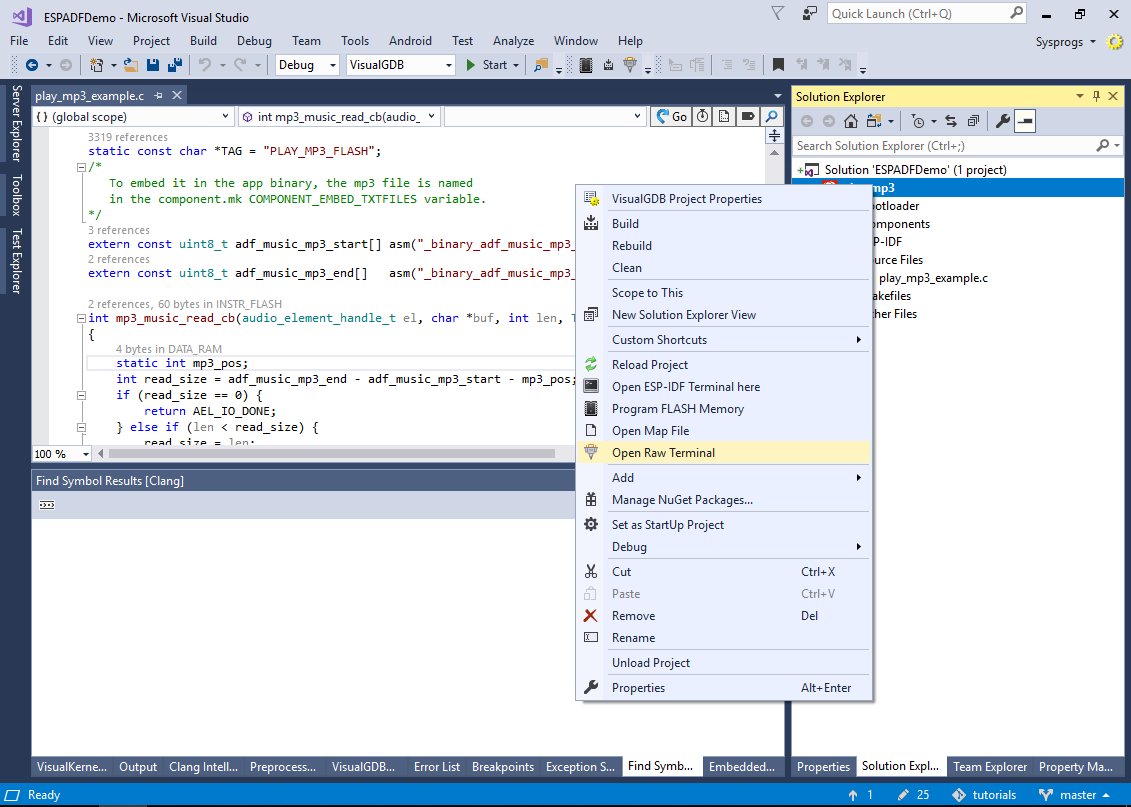
- Once the port is configured, use the context menu in Solution Explorer to connect to the port:
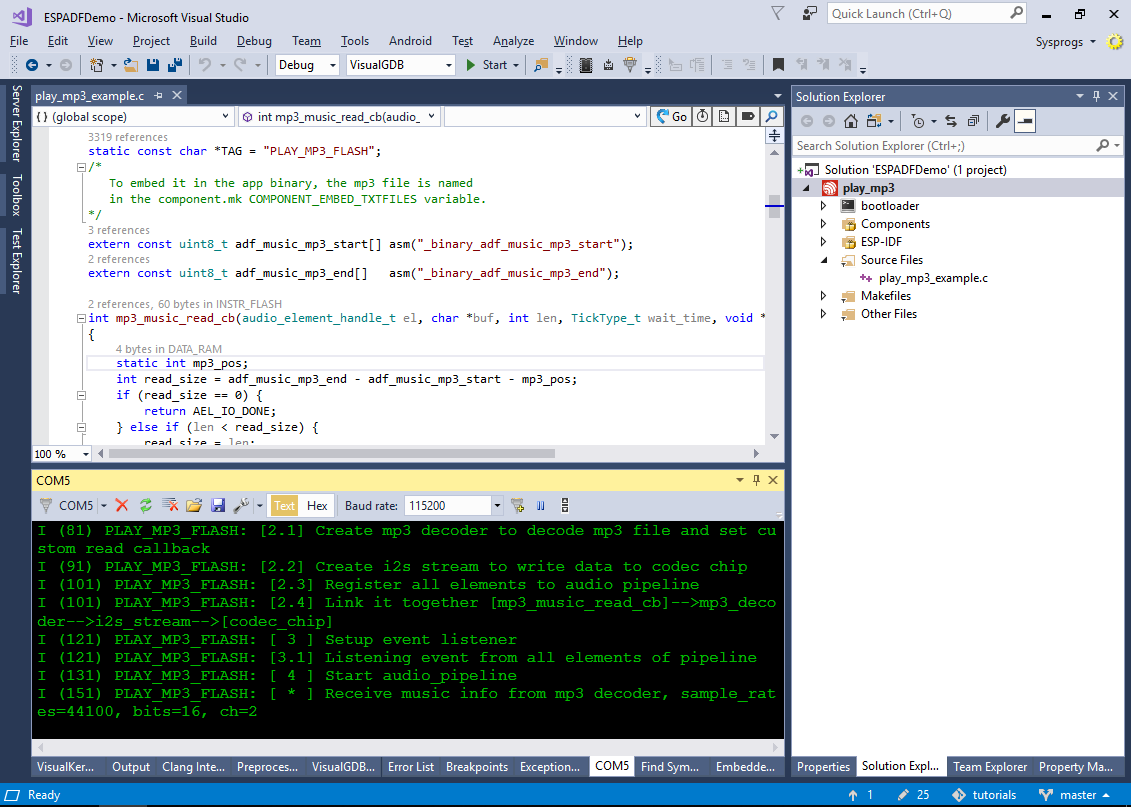
- VisualGDB will then connect to the board’s COM port and display the output produced by the ESP-ADF framework:
If you would like to debug your ESP-ADF-based firmware on the ESP32-LyraT board via JTAG, follow this tutorial to get JTAG to work.