Organizing and Reusing C/C++ Library Projects with CMake
This tutorial shows how to create library projects with CMake and reference the from other projects. We will create a basic shared library for Raspberry Pi using a cross-toolchain, make it export a few settings and import it from a different project.
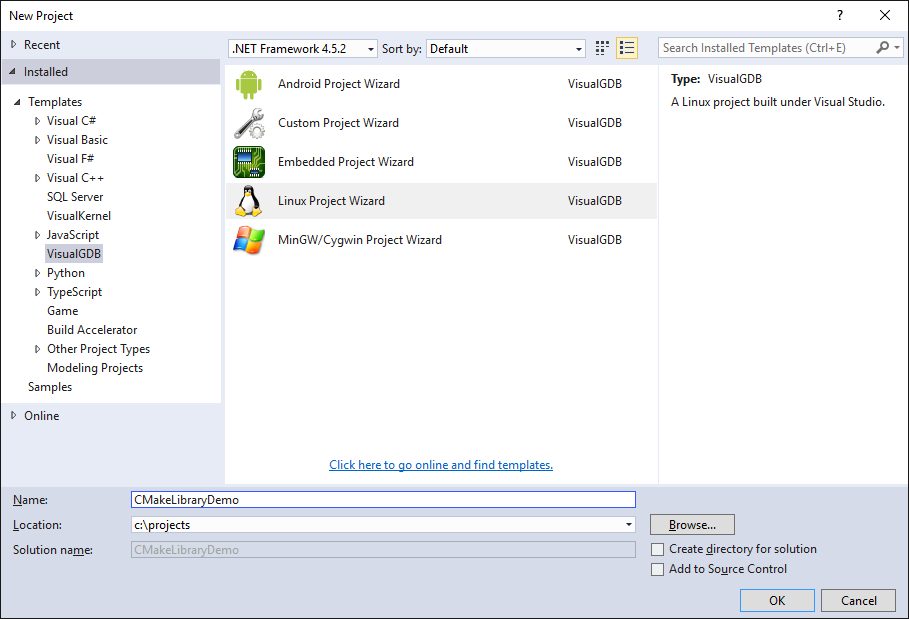
Before you begin, install VisualGDB 5.3 or later.
- Start Visual Studio and open the VisualGDB Linux Project Wizard:
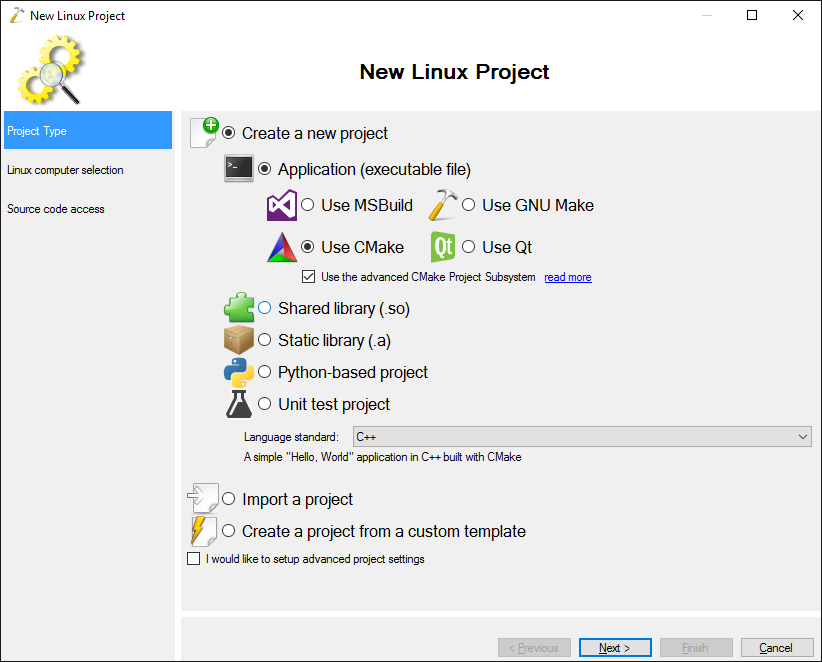
- Select “Create a new project -> Application -> Use CMake” and check the “Use the advanced CMake Project System” checkbox:
 We will change the project type to a shared library once the project is created.
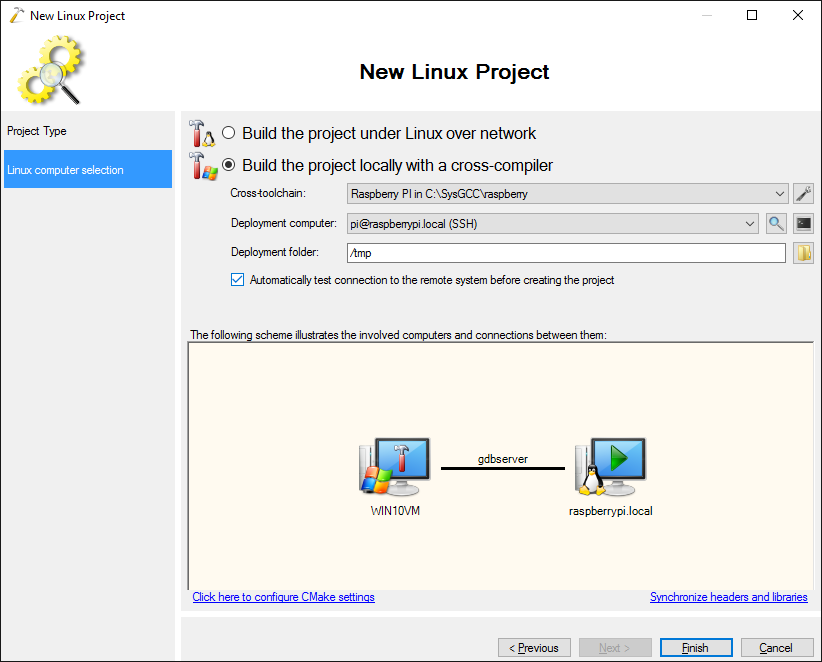
 - On the next page select “Build the project locally with a cross-compiler” and pick the “Raspberry Pi” cross-toolchain. If it’s not installed, VisualGDB will download and install it automatically. Then select your Raspberry Pi in the “Development computer” field:
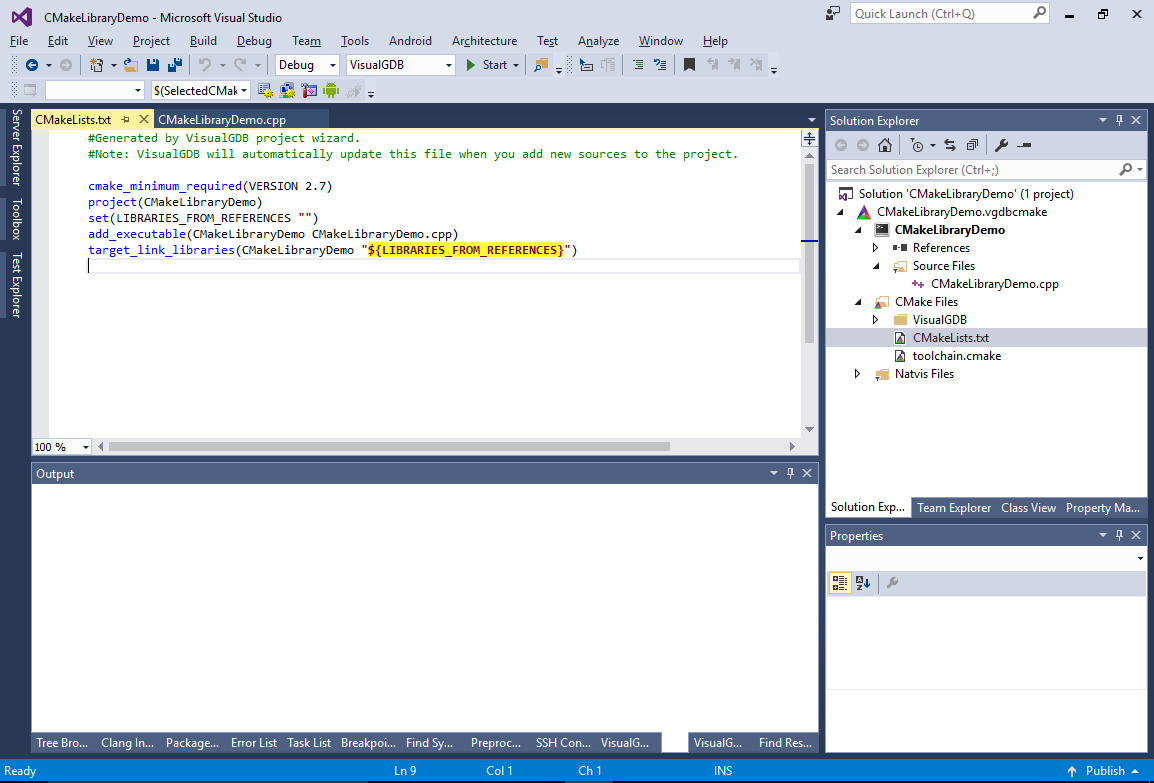
- Press “Finish” to generate the project. Open the generated CMakeLists.txt file and find the add_executable() statement:
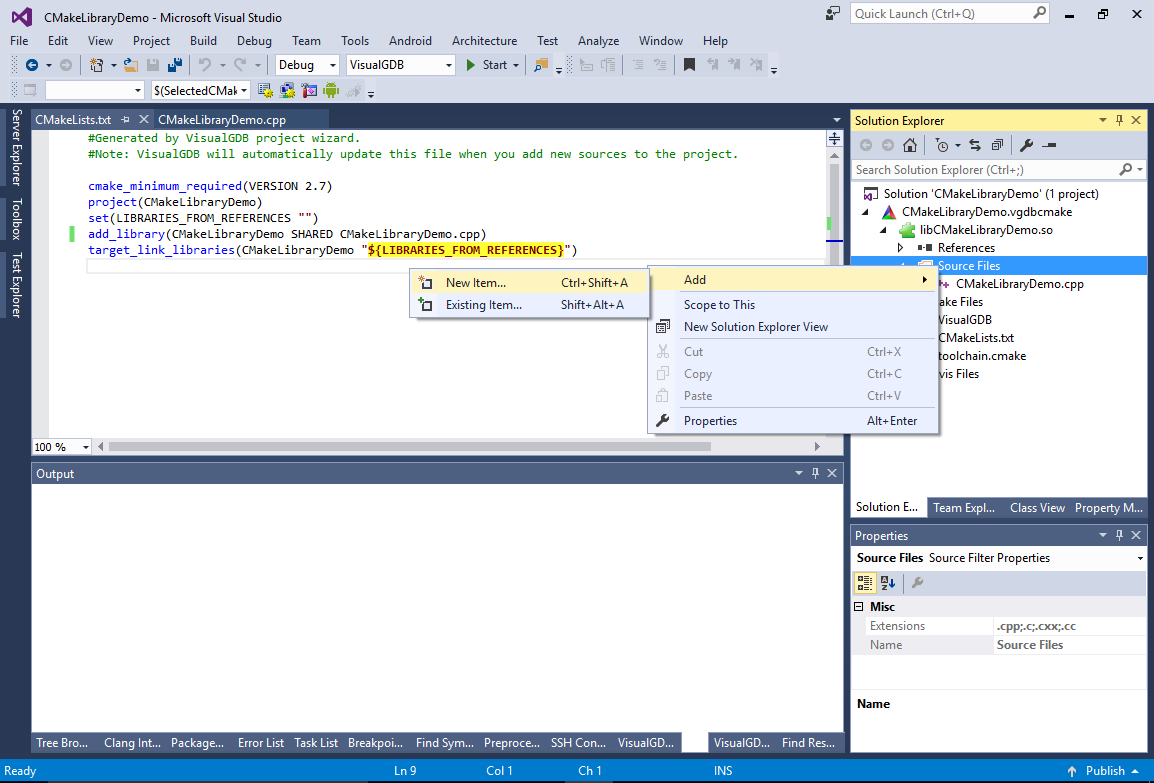
- Replace “add_executable(…)” with “add_library(<name> SHARED <…>)” and save the CMakeLists.txt file so that Solution Explorer picks up the update. Then right-click on the “Source files” folder and select “Add->New Item”:
- Add the following files to the library:
- private/PrivateHeader.h:
#pragma once
#include <stdio.h>

static void PrivateFunction()
{
    printf("Hello from PrivateFunction()\n");
}
- public/PublicHeader.h:
#pragma once

void PublicFunction();
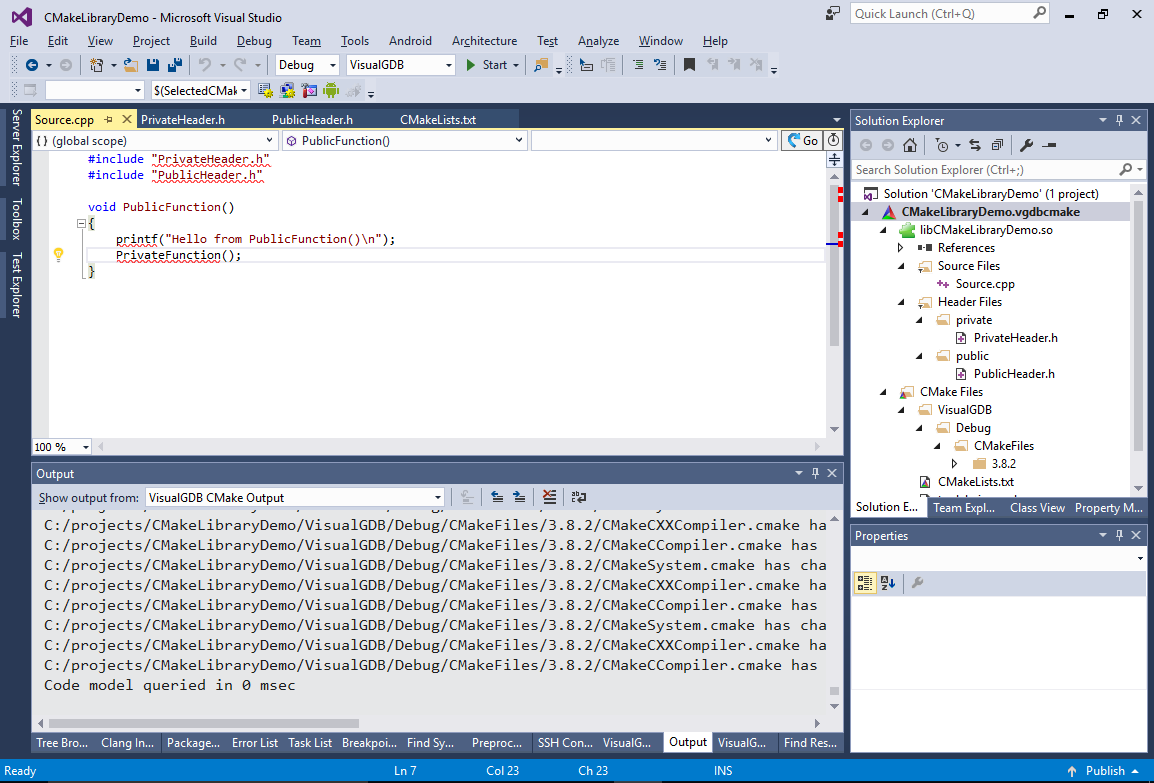
- Replace the main source file contents with this:
#include "PrivateHeader.h"
#include "PublicHeader.h"

#ifdef USING_CMAKE_LIBRARY_DEMO
#error This should not happen
#endif

void PublicFunction()
{
    printf("Hello from PublicFunction()\n");
    PrivateFunction();
}
This illustrates the concept of public and private header files. Private headers are headers only visible to the library itself. Public headers are headers visible to any program that uses the library and typically contain declarations for exported library functions.
- private/PrivateHeader.h:
- As we have not set any include directories, the PrivateHeader.h and PublicHeader.h files will appear as missing:
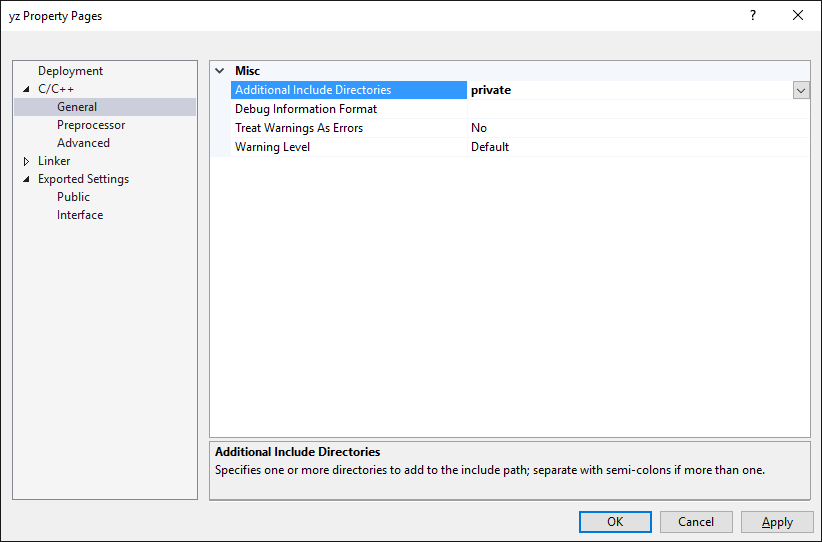
- Open Visual Studio properties for the library and add “private” to the Additional Include Directories field:
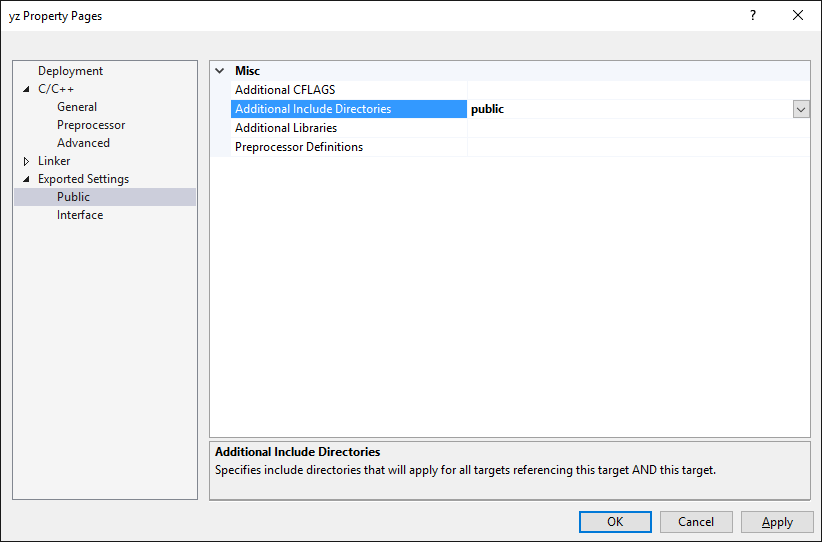
- Then add “public” to the Exported Settings -> Public -> Additional Include Directories:
- Finally add “USING_CMAKE_LIBRARY_DEMO” to the Exported Settings->Interface->Preprocessor Definitions:
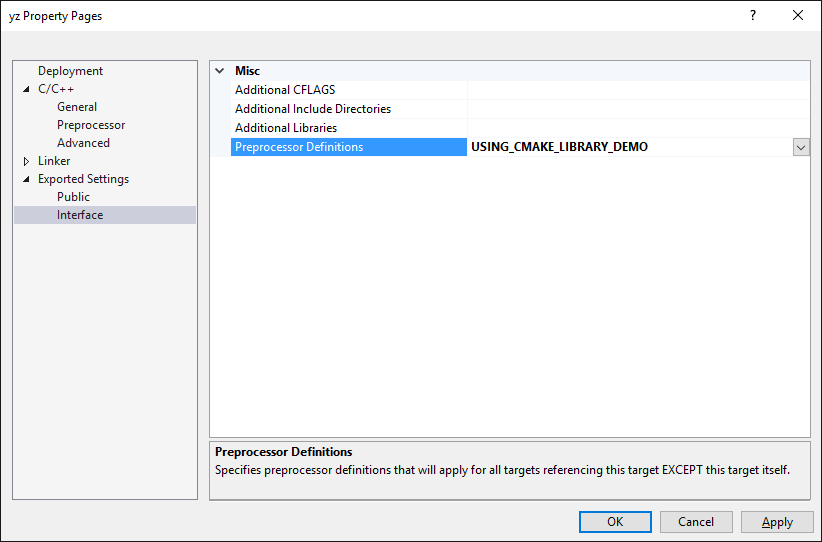 The difference between Public and Interface settings is that Public settings are applied to both the library and the applications using it, while the Interface settings are only applied to the library users. I.e. the USING_CMAKE_LIBRARY_DEMO macro will not be defined when compiling the library itself.
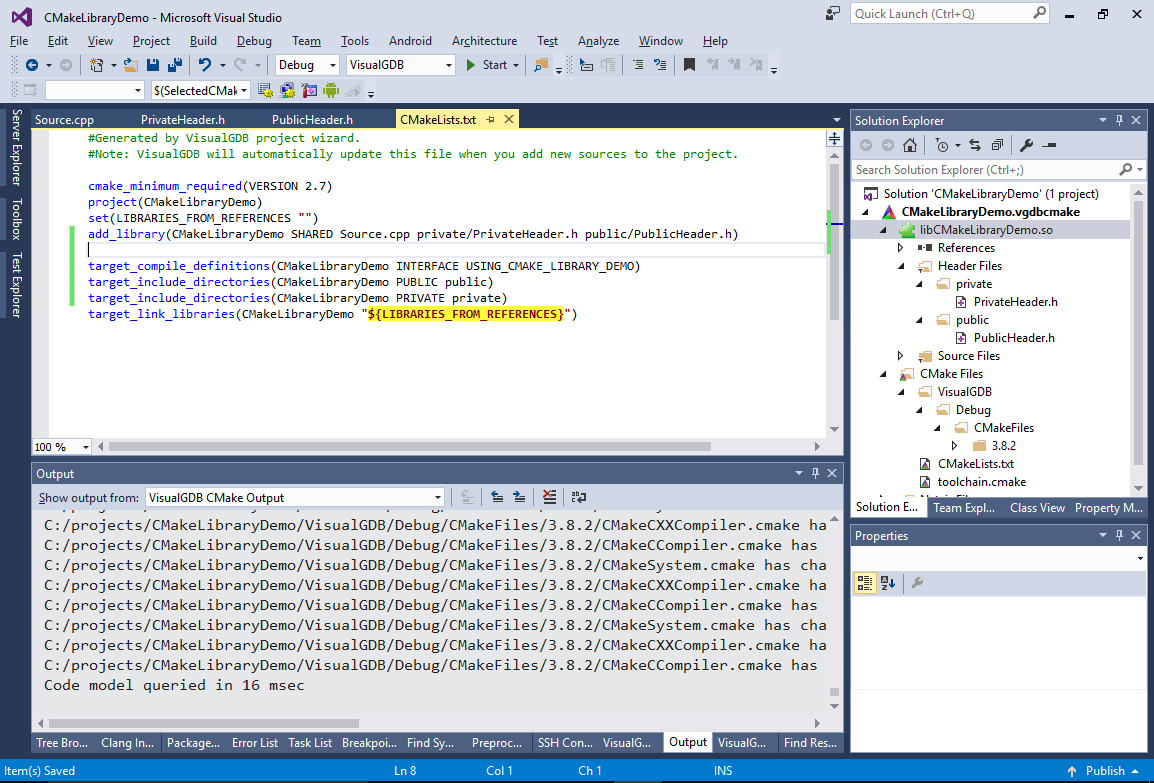
 - Apply the settings and ensure that CMakeLists.txt got edited accordingly:
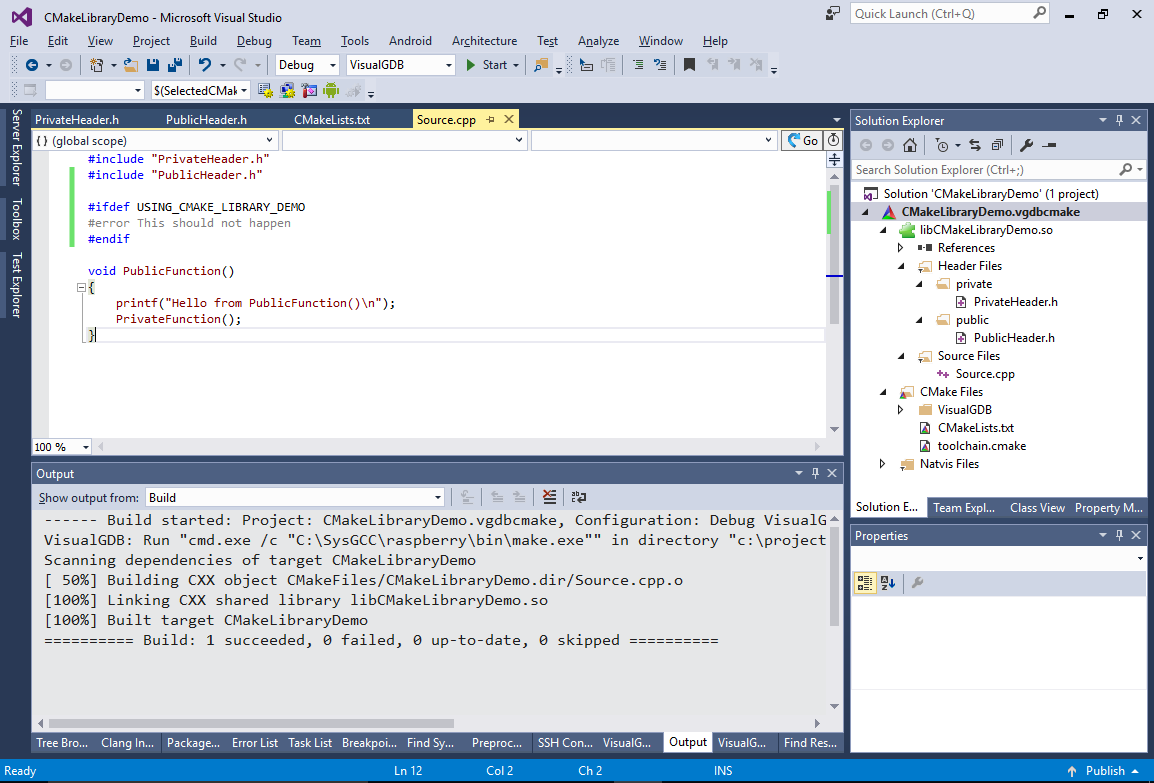
- The main source file should now compile without problems:
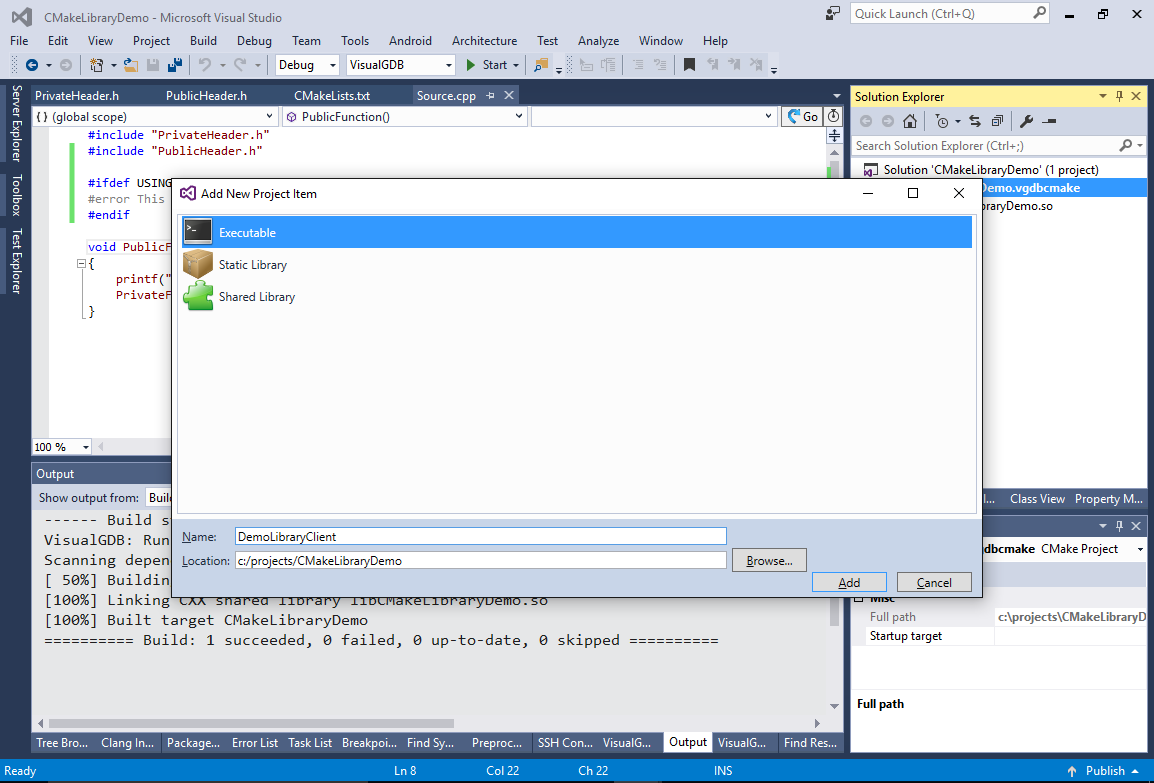
- Now we show how to use the library from other projects. First we will add a small demo application to the same CMake project. Then we will show how to import the library from a different project. Right-click in the .vgdbcmake project item and select Add->New Item. Then pick “Executable”:
- Replace the main file contents for the newly created executable with this:
#include "PublicHeader.h"

#ifndef USING_CMAKE_LIBRARY_DEMO
#error CMakeLibraryDemo is missing
#endif

int main()
{
    PublicFunction();
    return 0;
}
- Note that initially the PublicHeader.h won’t be found:

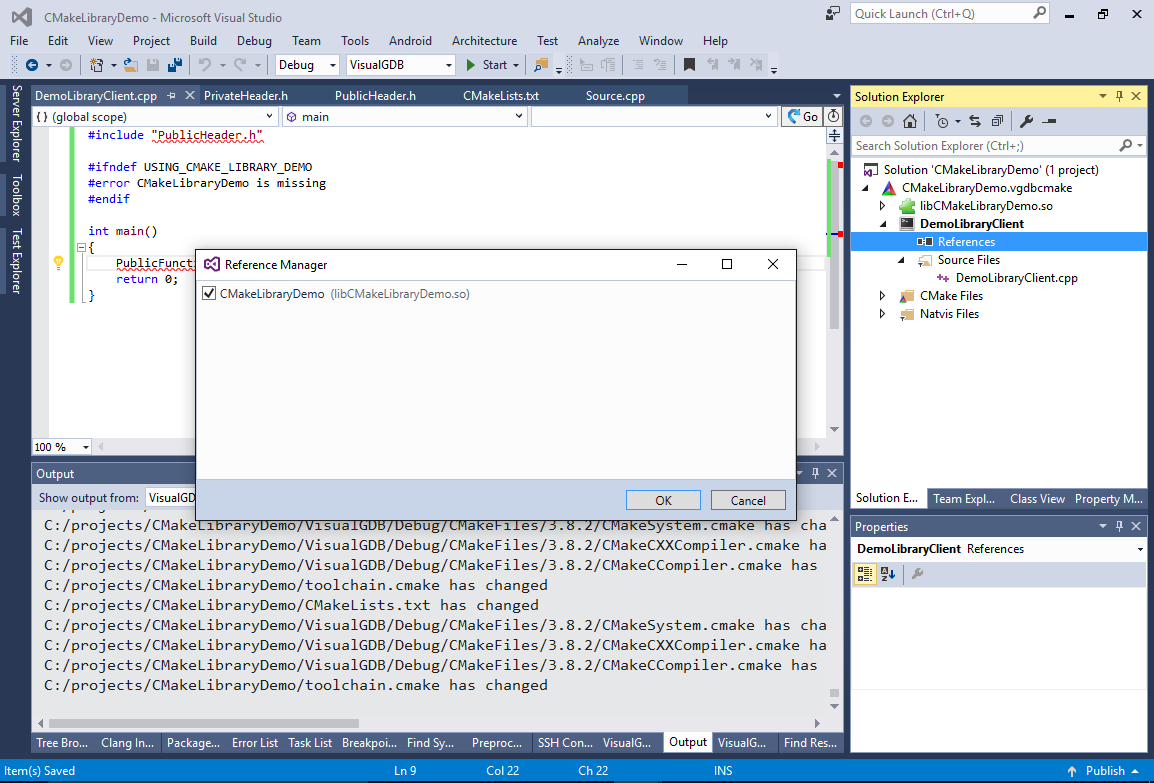
- Right-click on the References node in Solution Explorer and add a reference from the test application to CMakeLibraryDemo:
- Now the test application should build properly. Try debugging it by pressing F5:
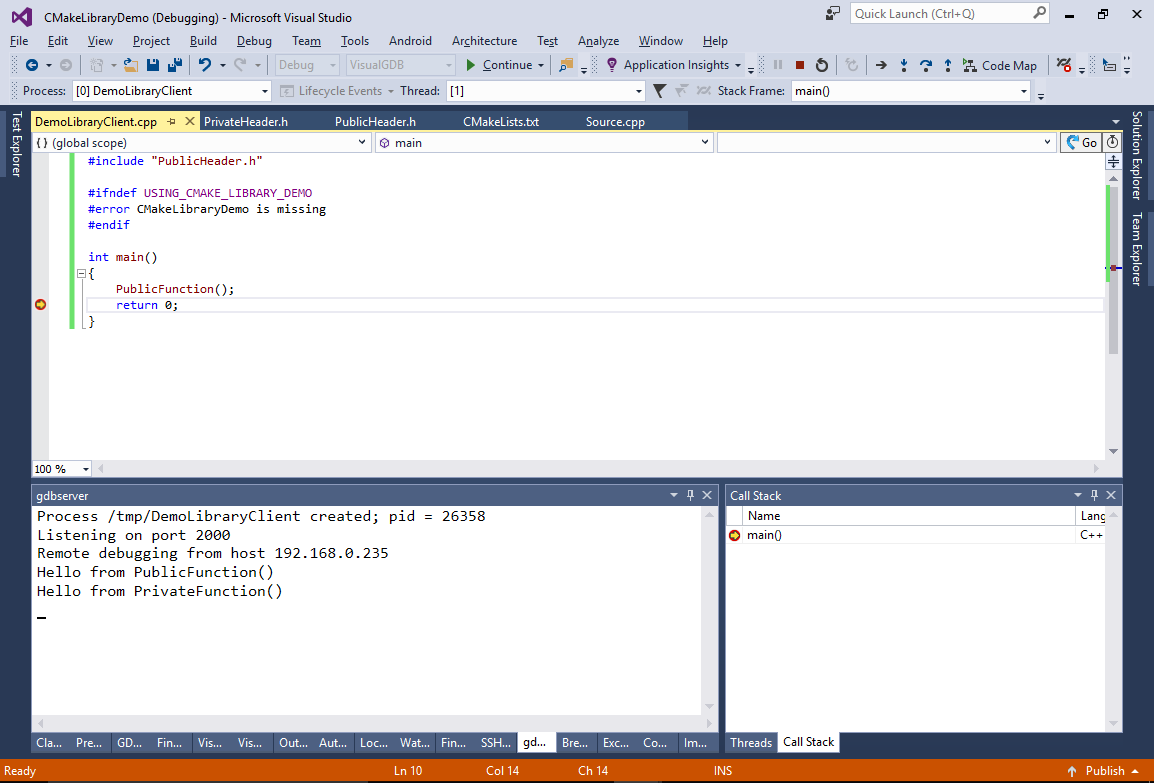
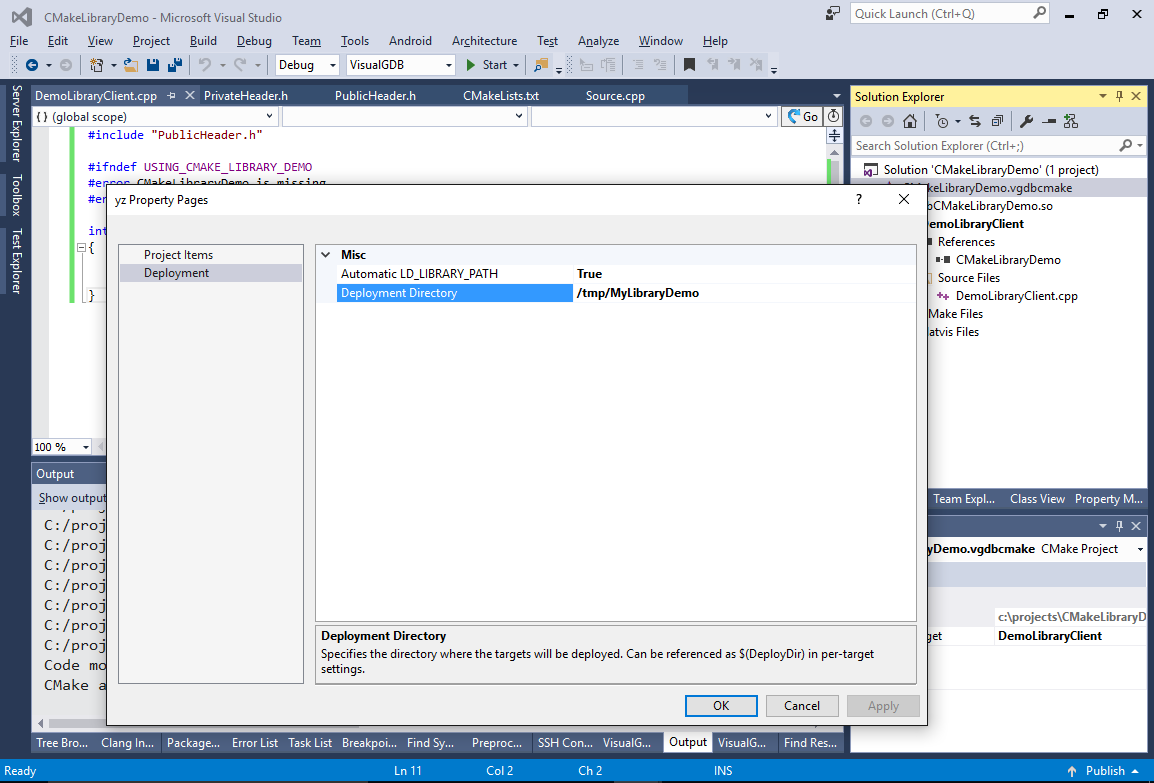
- Note how both DemoLibraryClient and libCMakeLibraryDemo.so got deployed to /tmp on your Raspberry Pi. You can change the deployment directory for the entire project via Visual Studio Project Properties for the .vgdbcmake project in Solution Explorer. Try changing it to /tmp/MyLibraryDemo:
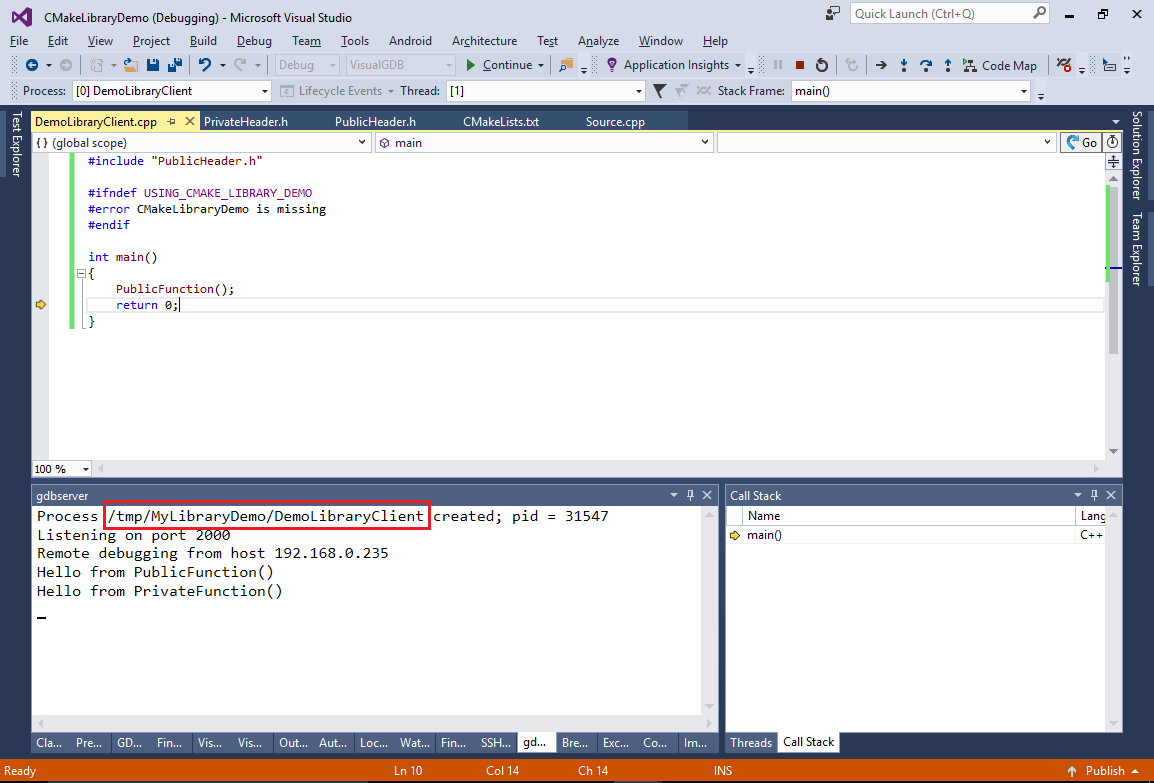
- Now both the library and the application will be deployed to the new directory:
- Now we will show how to reference the library from a completely different project. Start the VisualGDB Linux Project Wizard again and create another CMake-based application in a different directory:

- Replace the main source file contents with this:
#include <stdio.h>

#ifdef USING_CMAKE_LIBRARY_DEMO
#include "PublicHeader.h"
#endif


int main(int argc, char *argv[])
{
#ifdef USING_CMAKE_LIBRARY_DEMO
    PublicFunction();
#else
    printf("Compiled without CMakeLibraryDemo\n");
#endif
}
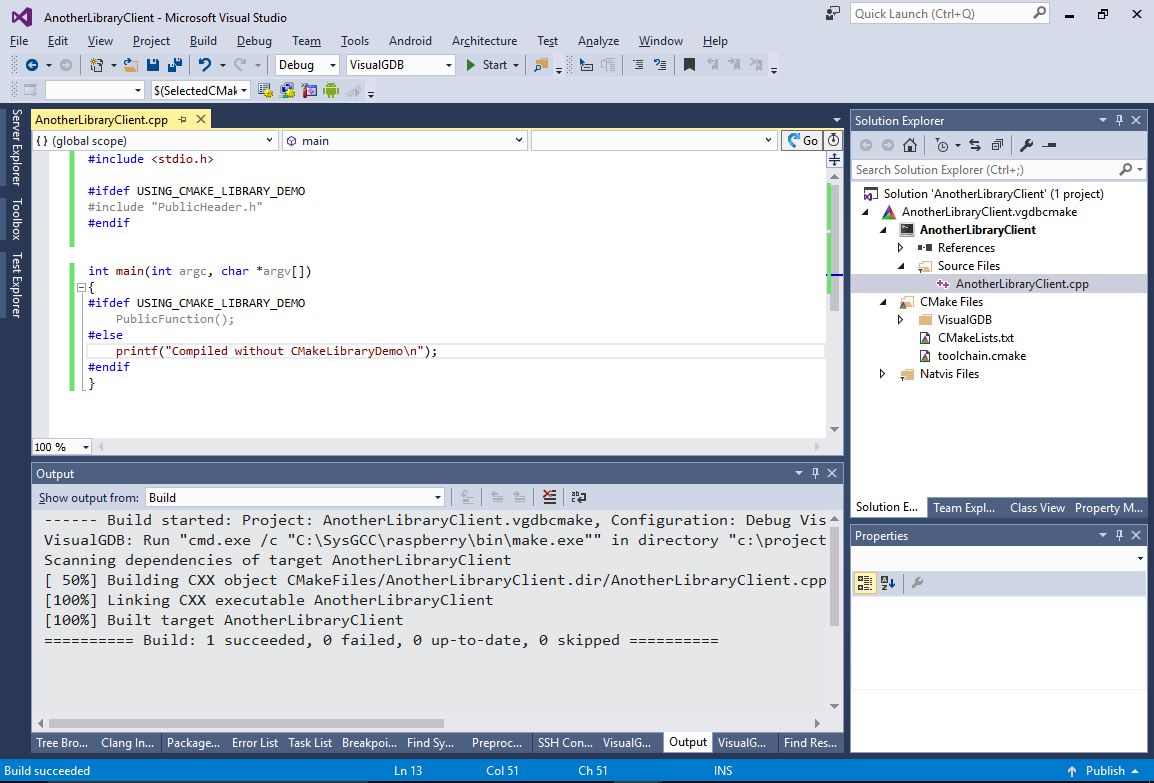
- As we have not referenced the library yet, the part printing “Compiled without CMakeLibraryDemo” will be active:
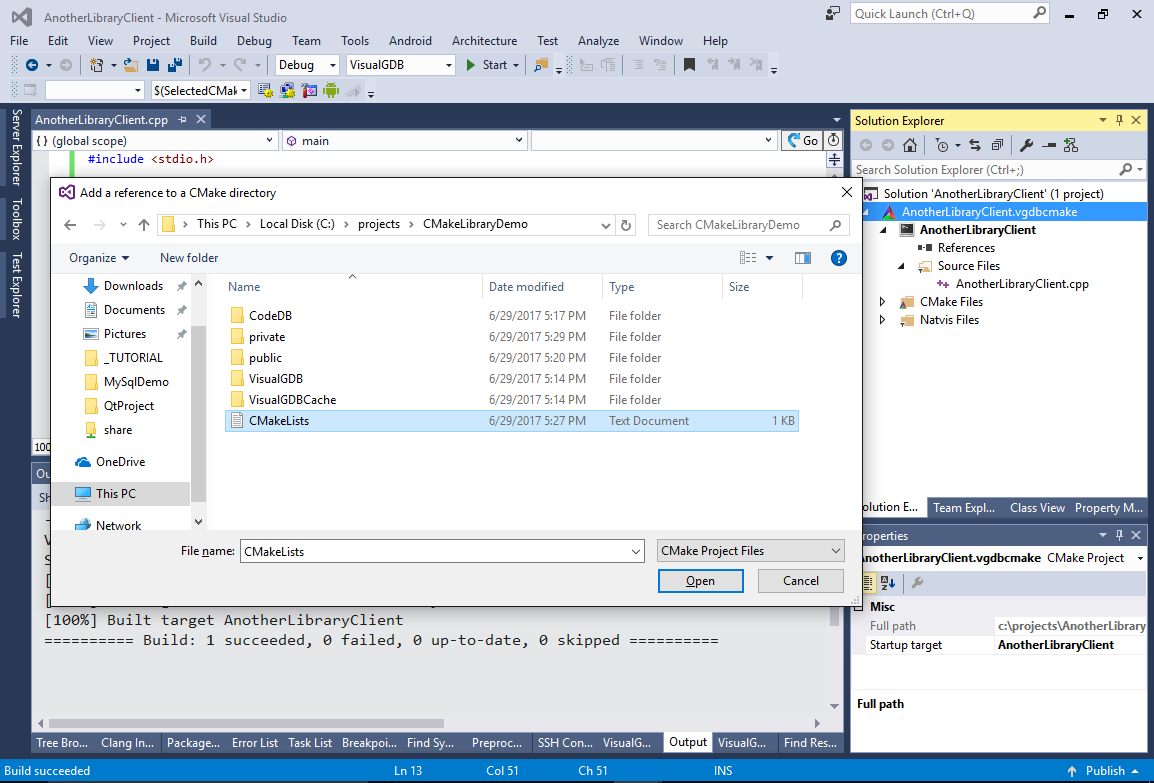
- Before we can reference the library from this project, we need to add a reference to the corresponding CMakeLists.txt file. Right-click on the .vgdbcmake project in Solution Explorer and select Add->Reference Another CMake Folder:

- Point to the CMakeLists.txt file belonging to the library project:
- This will insert an “add_subdirectory” statement to the new project’s CMakeLists.txt file referencing the library project’s directory:
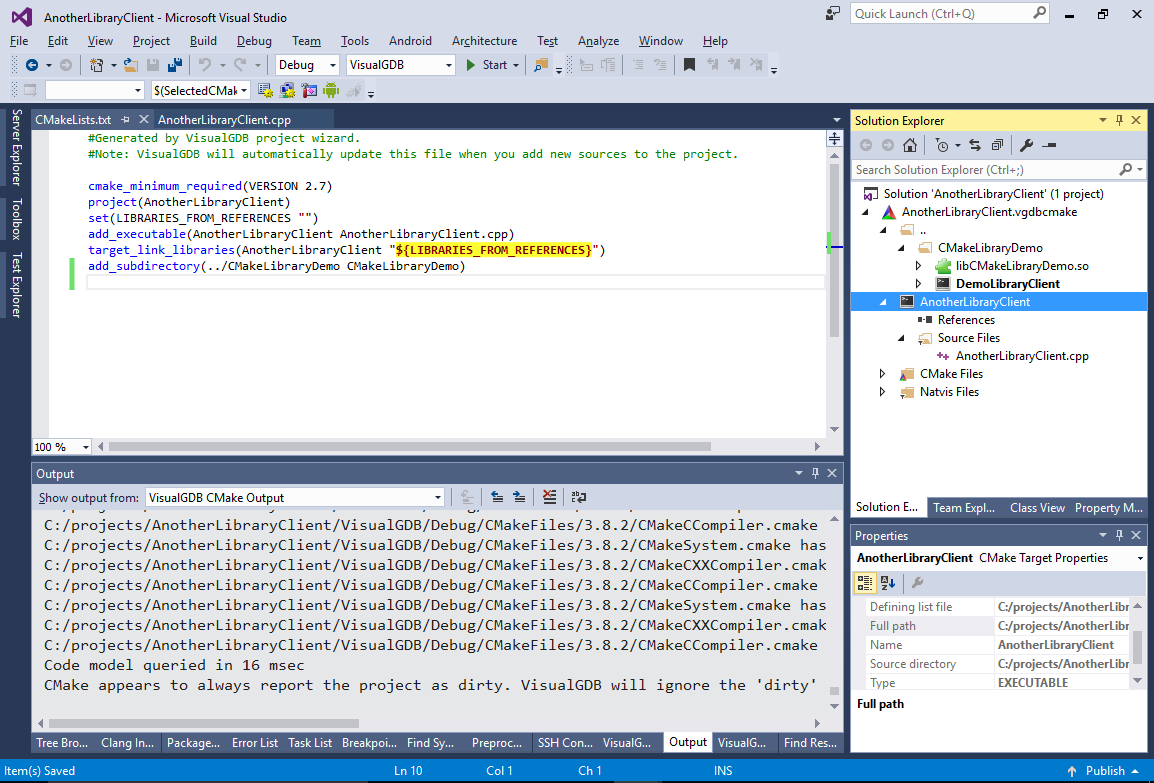
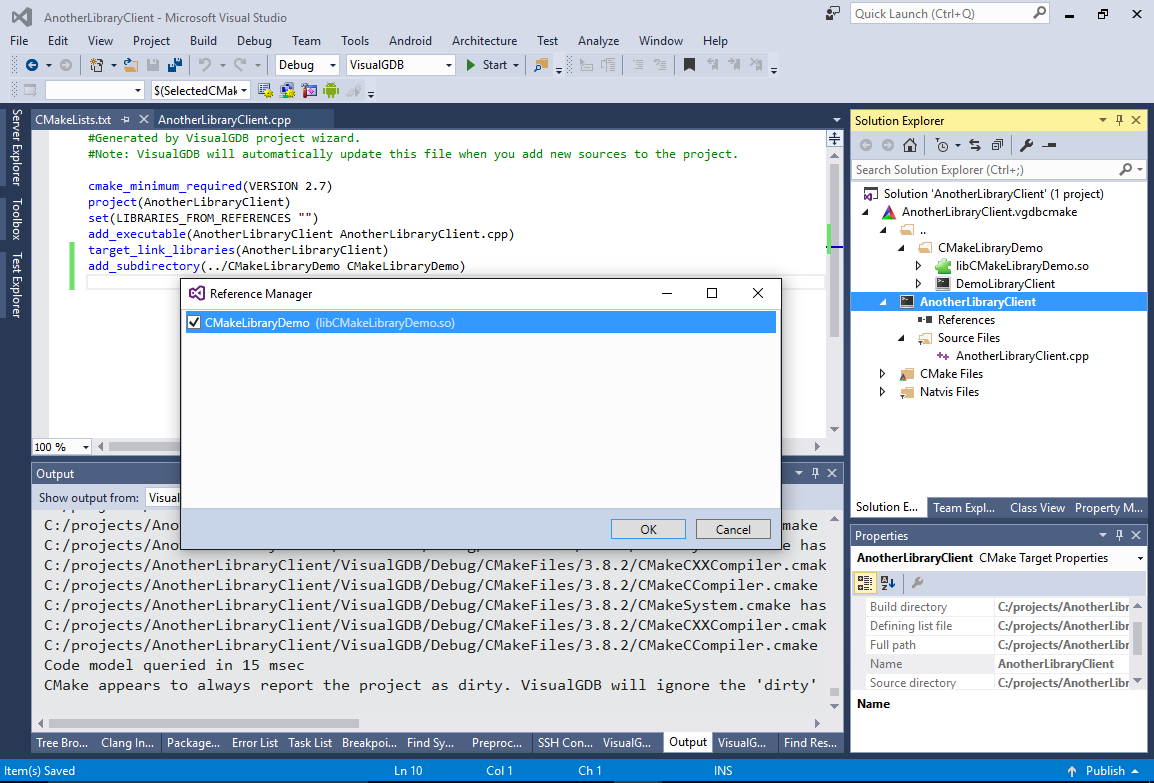
- Save the CMakeLists.txt file to update Solution Explorer. Now you can add a reference to CMakeLibraryDemo using the normal Add Reference command:
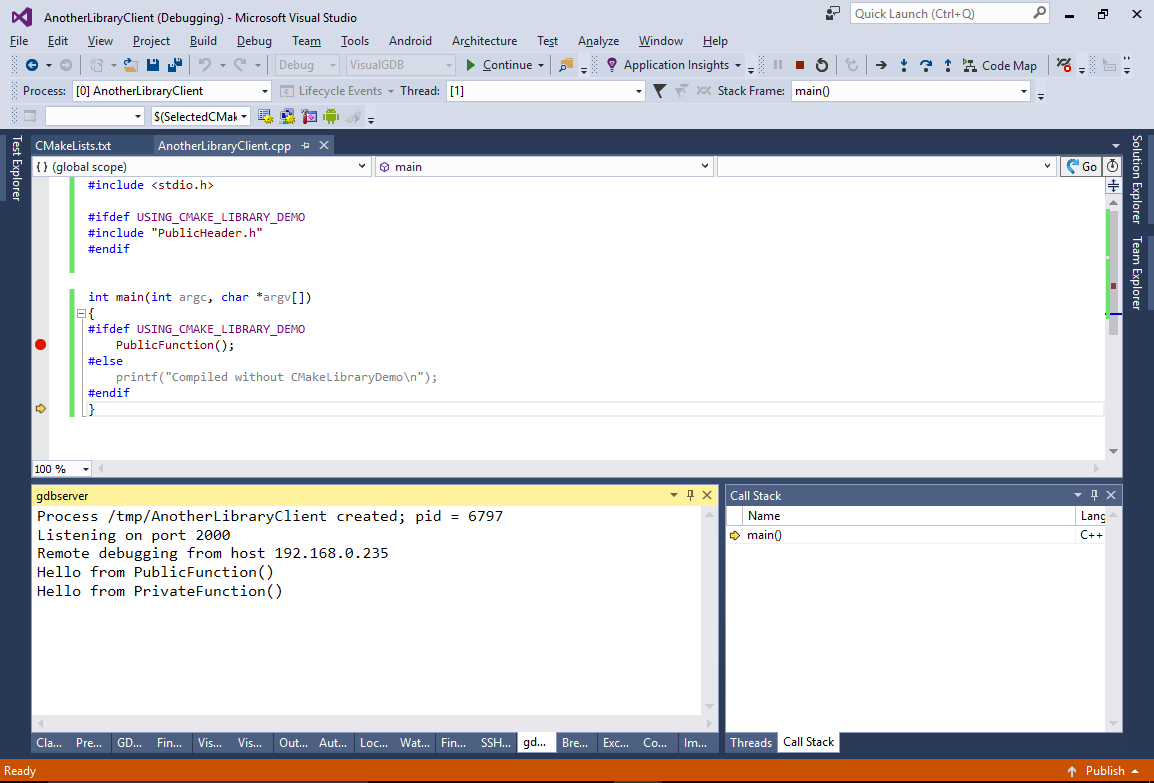
- Build the project and see how PublicFunction() is now invoked:
- The “add reference” command translated to adding CMakeLibraryDemo to the target_link_libraries() statement in CMakeLists.txt:
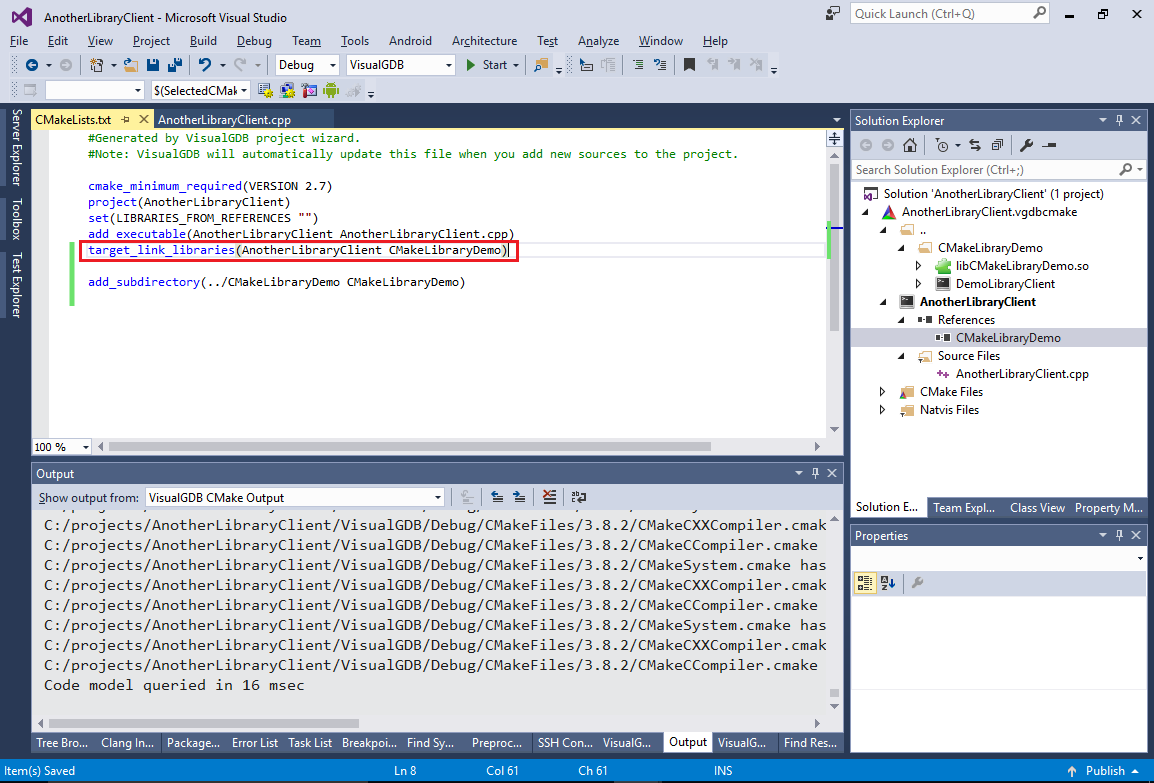 Once we did that, CMake automatically picked up the USING_CMAKE_LIBRARY_DEMO macro and the public include directory from the exported settings in the library project, so we did not need to specify them by hand.
Note that each time you build the project, CMake will check the dependencies of the CMakeLibraryDemo project and build it if needed. If your library project is too complicated and you want to avoid rechecking/building it each time, consider creating a CMake package. See this tutorial for a detailed example on using packages.