Creating Linux Libraries with Visual Studio
This tutorial shows how create static and dynamic Linux libraries with Visual Studio and debug them with VisualGDB. We will create a simple Linux application with VisualGDB, add one static and one dynamic library to it and test both in the debugger.
To proceed with the tutorial you will need a Windows machine and a Linux machine. You can use 2 physical computers, a Windows computer running Linux inside VirtualBox/VMWare or vice versa.
Before you begin, install VisualGDB on your Windows machine.
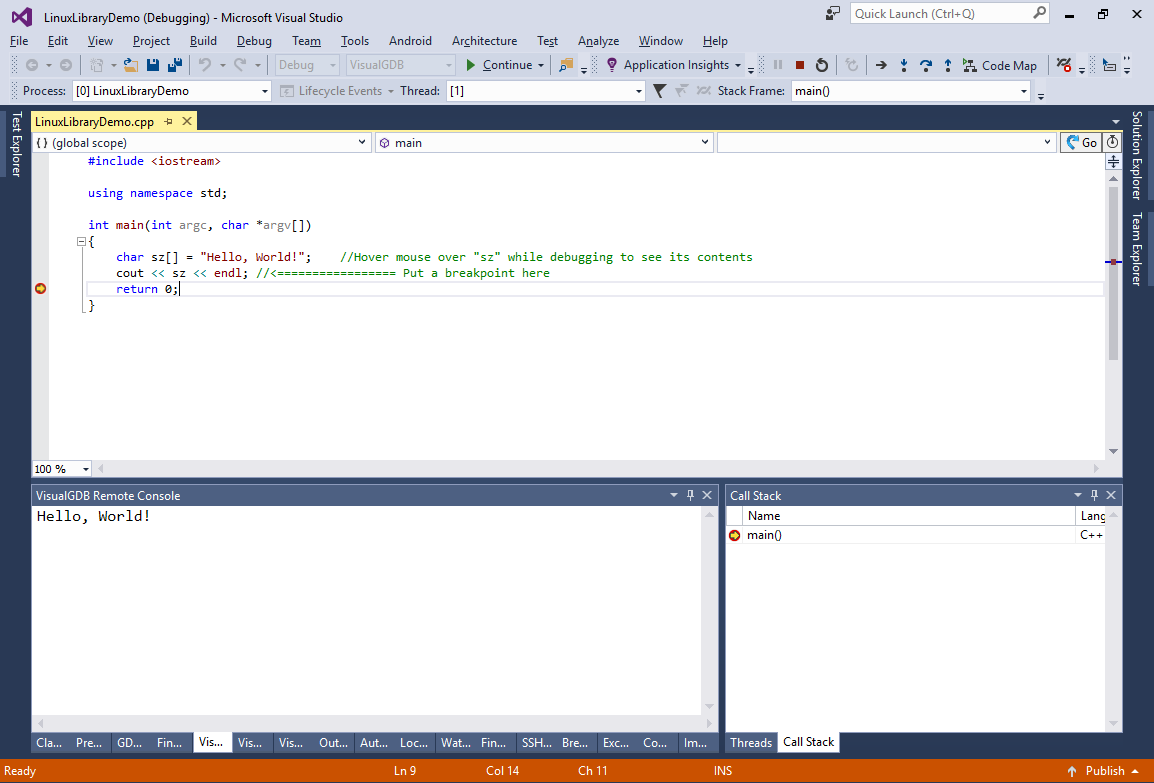
- Follow the Linux Application tutorial to create a simple Linux app with Visual Studio. We will use LinuxApp as the project name. Build the app and ensure that you can debug it.
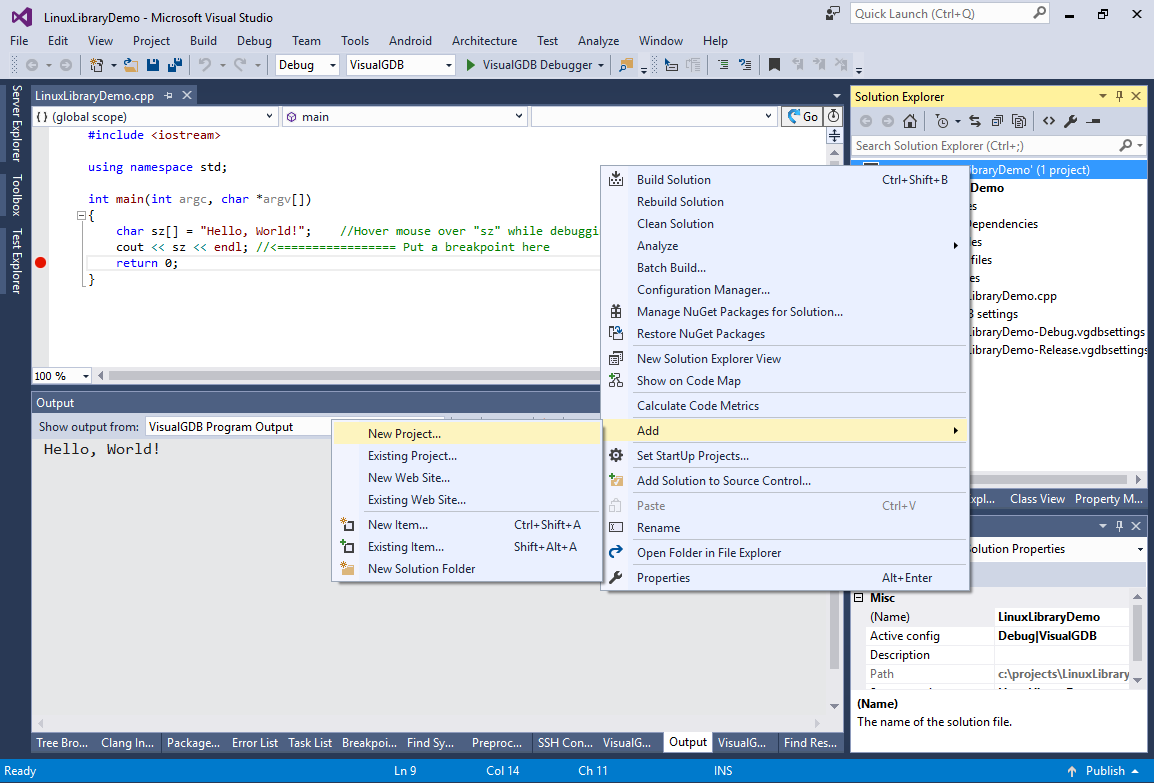
- Right-click on the solution item in the Solution Explorer and select “Add->New Project”:
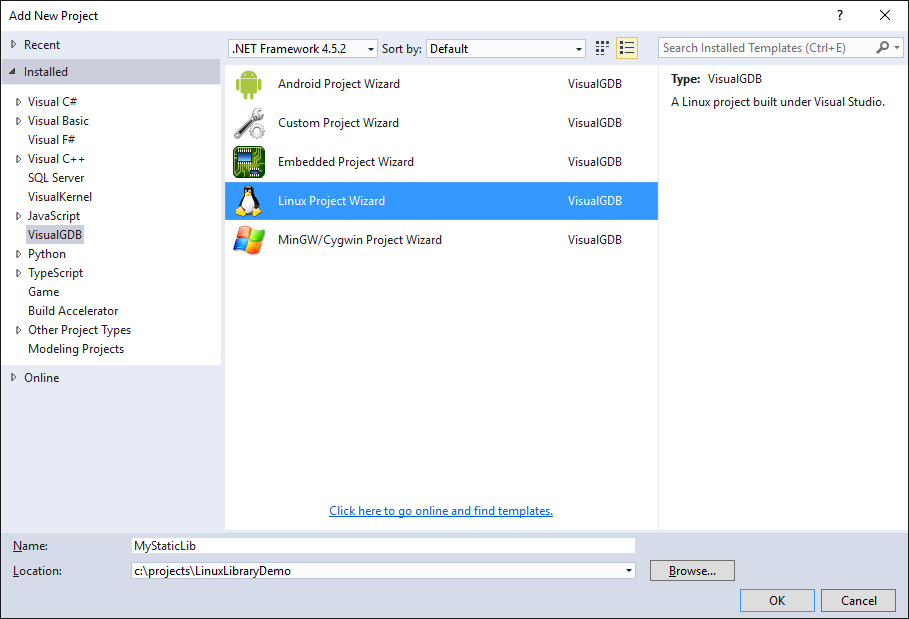
- We will now create a static library project. Ensure that VisualGDB wizard is selected, enter MyStaticLib as the project name and press OK:
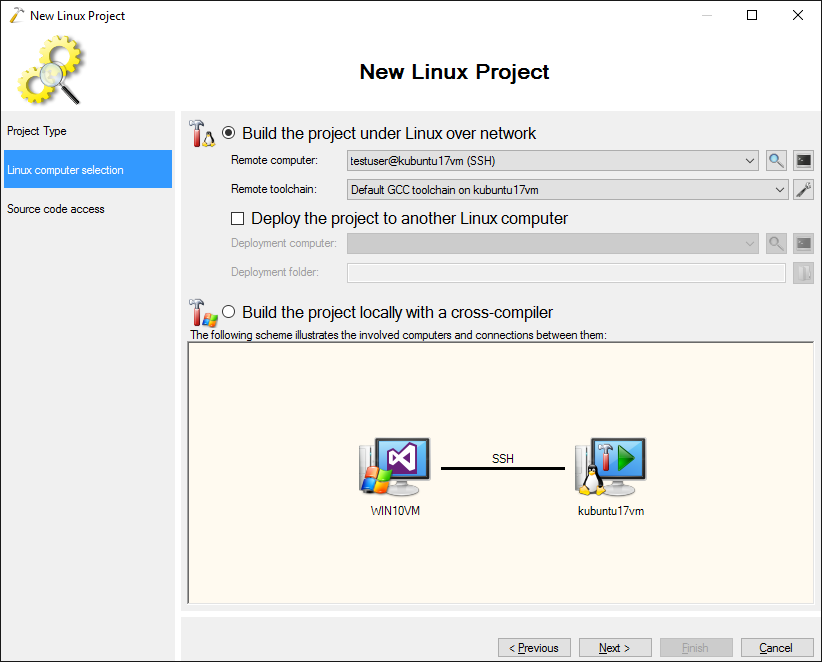
- Select “Create a new project” ->”Static library” -> Use MSBuild”. Press on ‘Next’.

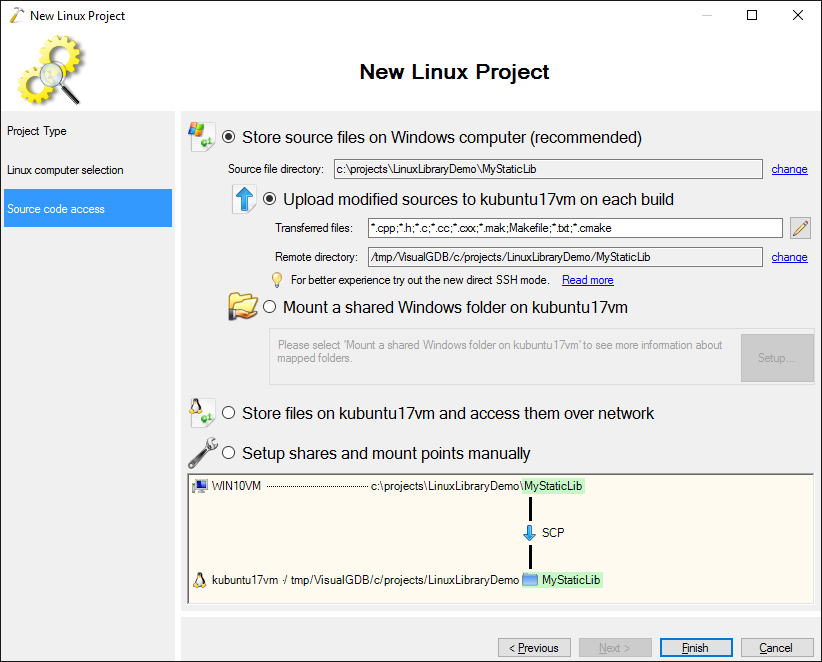
- On the next page select the remote Linux machine. Ensure that the machine is the same as for the application project.
- Finish with the default source transfer.
- You have now created a new static library project. Modify the main source file of your application as follows:
#include <iostream>
#include "MyStaticLib/MyStaticLib.h"

using namespace std;

int main(int argc, char *argv[])
{
    char sz[] = "Hello, World!";    //Hover mouse over "sz" while debugging to see its contents
    cout << sz << MyStaticLibTest() << endl;    //<================= Put a breakpoint here
    return 0;
}
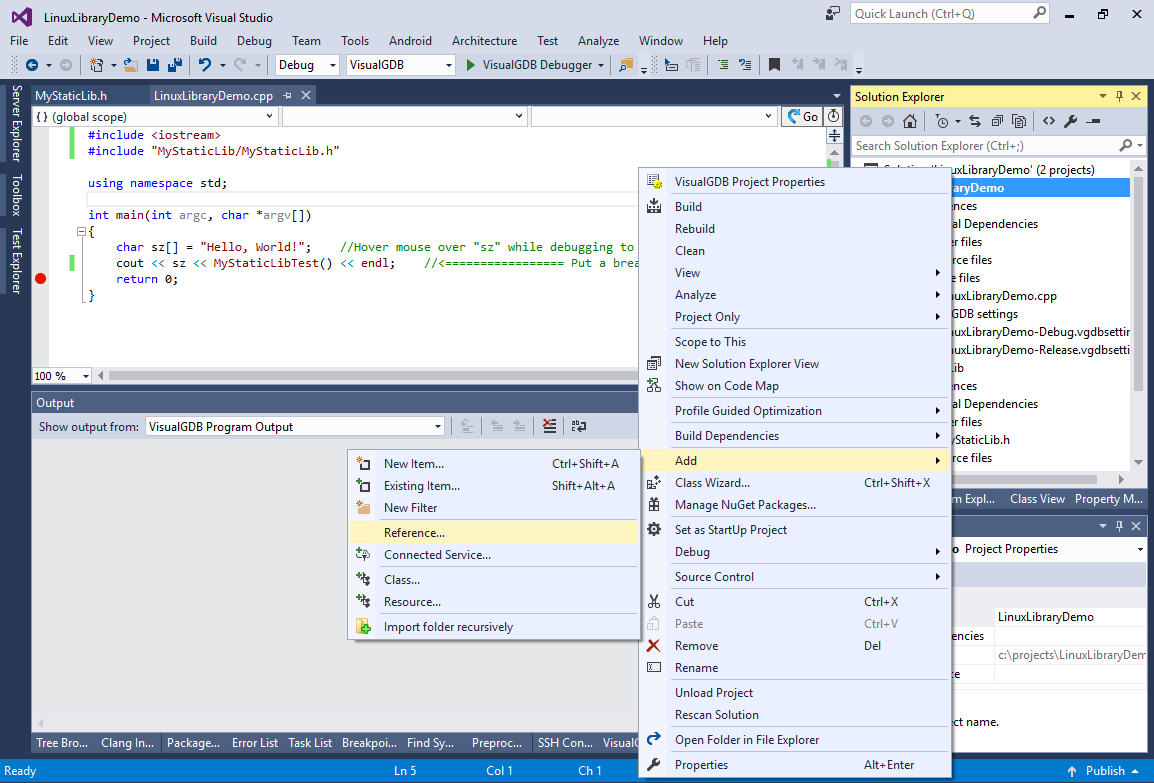
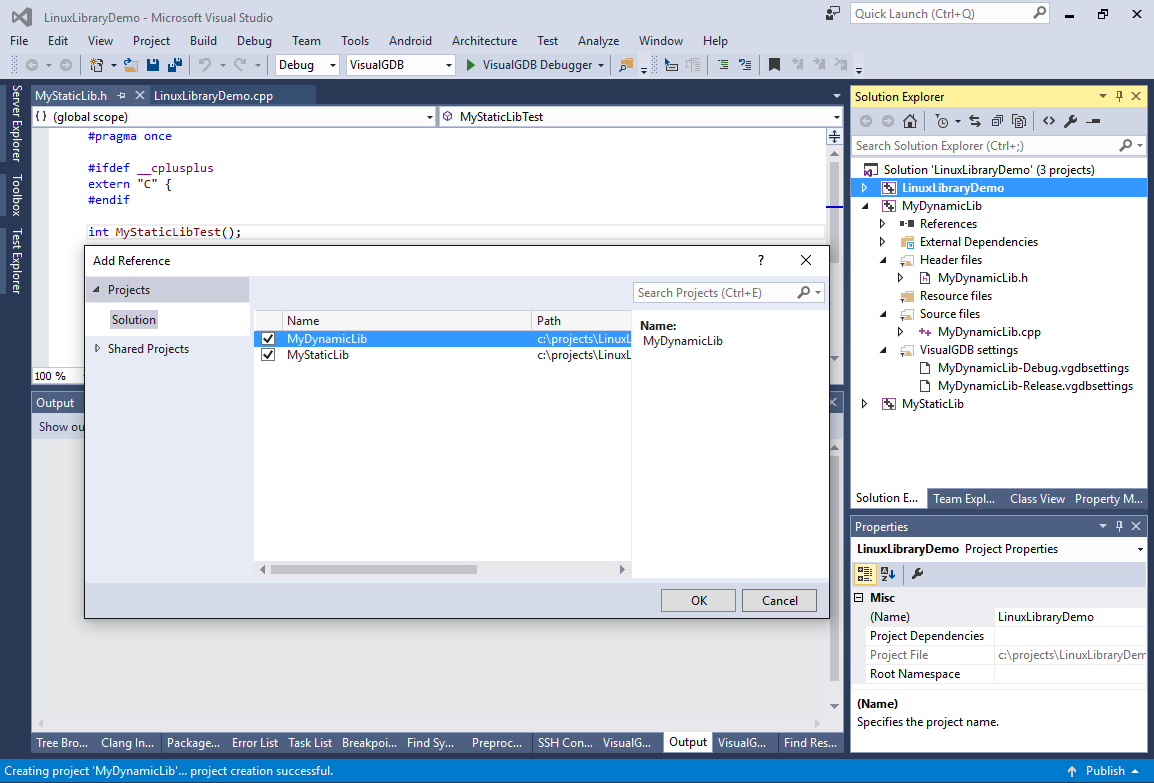
- Before this code can compile, we need to add a reference from the application project to the library project:
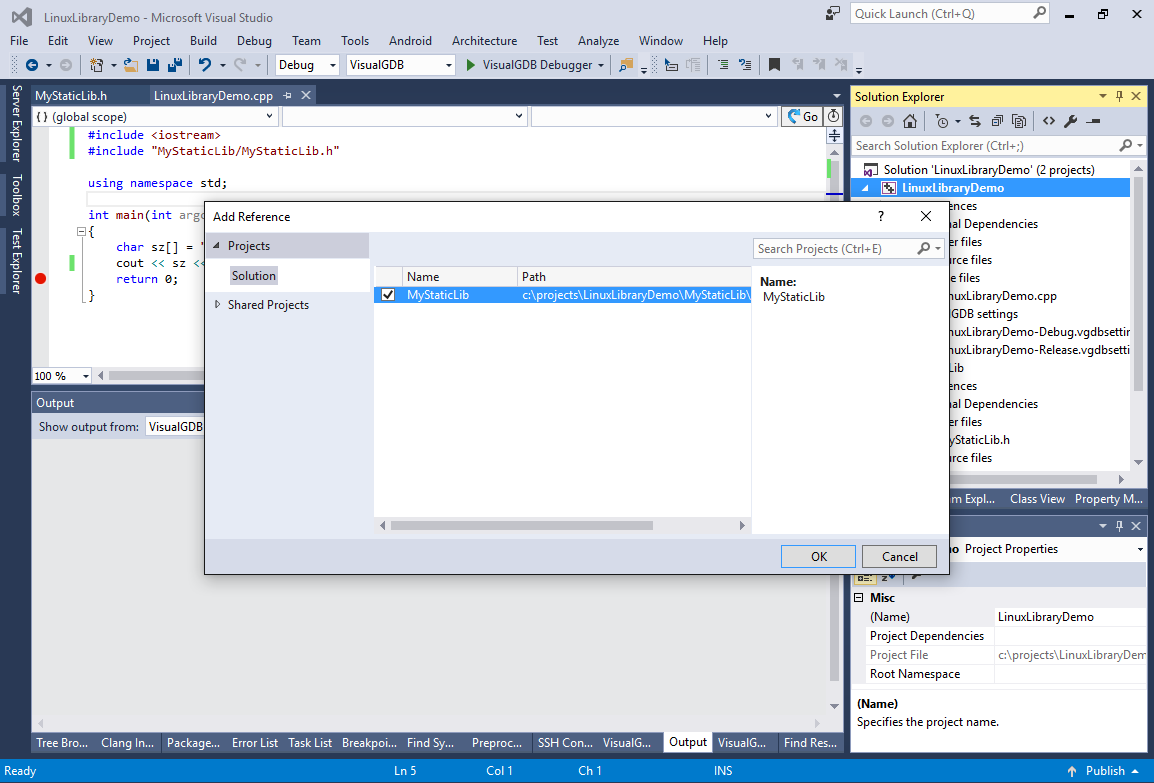
- Check the MyStaticLib checkbox in the Add Reference window:
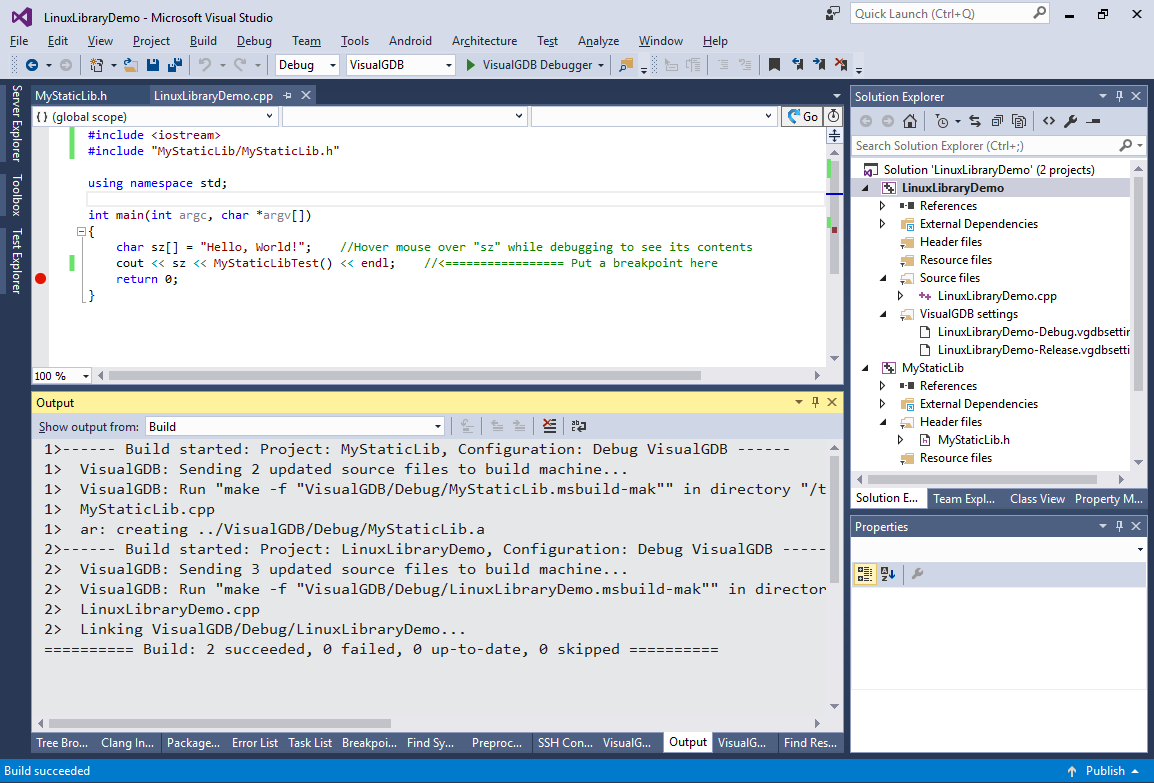
- Build the solution:
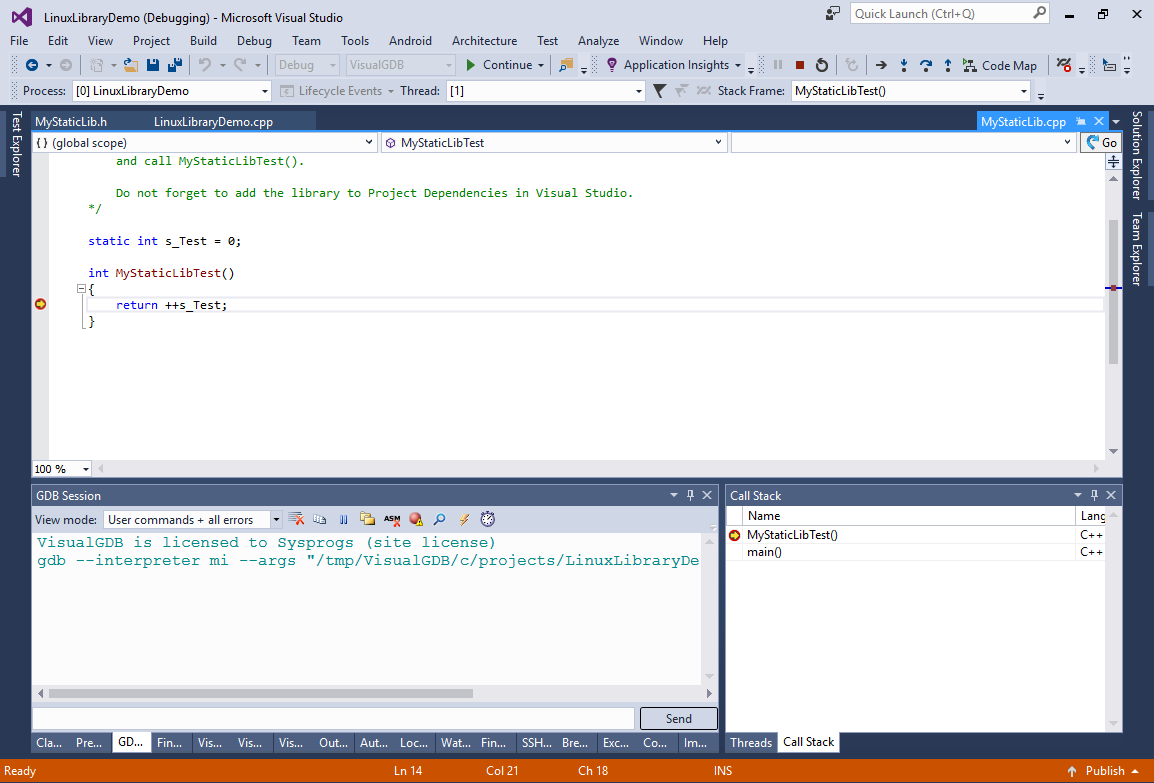
- Put a breakpoint to MyStaticLibTest() and start debugging. The breakpoint will be hit. You can use call stack window to see the the static library function was called from main():
- Add a new dynamic library to the solution. Use the MyDynamicLib name and select “Shared Library” on the Project Type page.
- Reference the dynamic library from the main project:
- Add a call to MyDynamicLibTest() to the applications’ main source file:
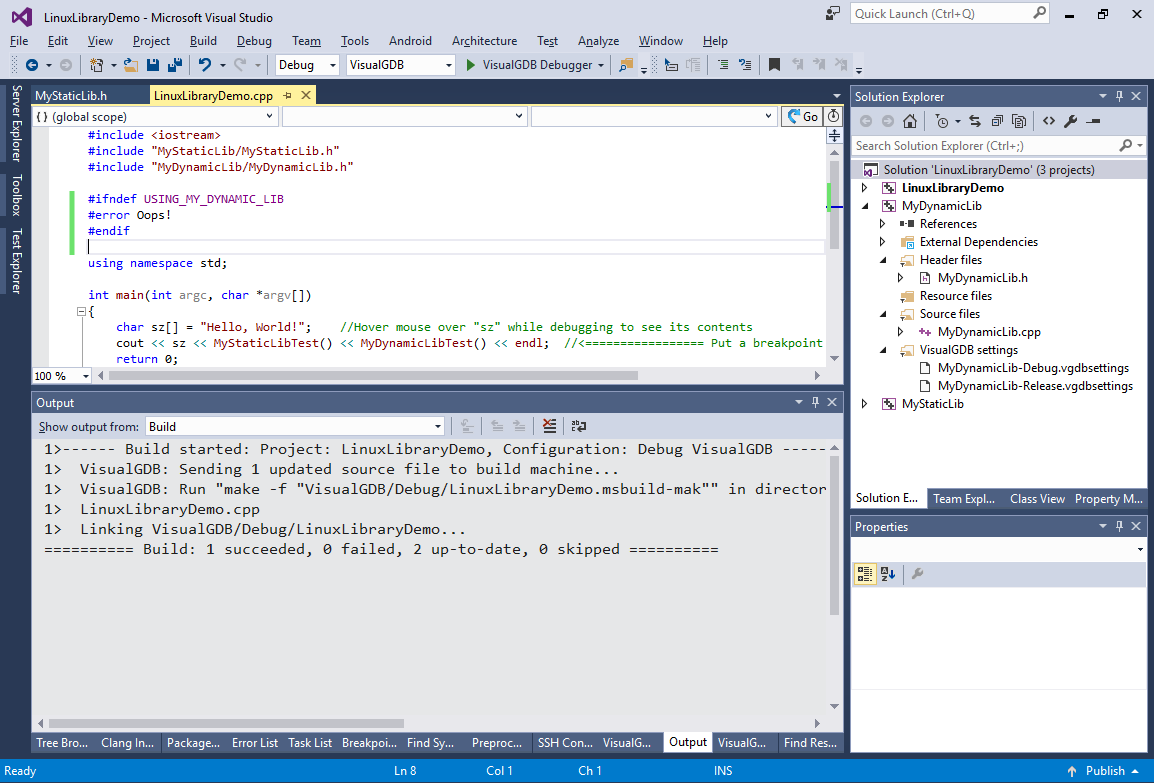
#include <iostream>
#include "MyStaticLib/MyStaticLib.h"
#include "MyDynamicLib/MyDynamicLib.h"

using namespace std;

int main(int argc, char *argv[])
{
    char sz[] = "Hello, World!";    //Hover mouse over "sz" while debugging to see its contents
    cout << sz << MyStaticLibTest() << MyDynamicLibTest() << endl;    //<================= Put a breakpoint here
    return 0;
}
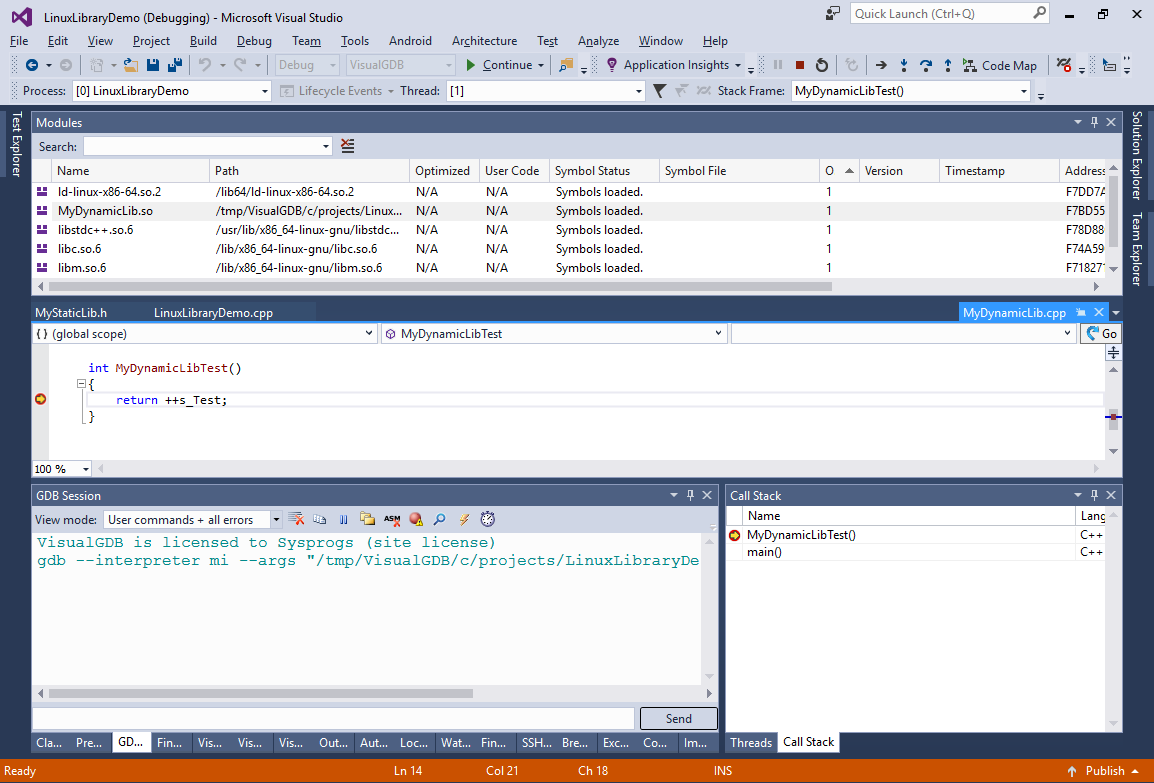
- Build the solution. Put a breakpoint to MyDynamicLibTest() and start debugging. When the breakpoint is hit you can use the Module window in Visual Studio to see your dynamic library among the loaded modules:
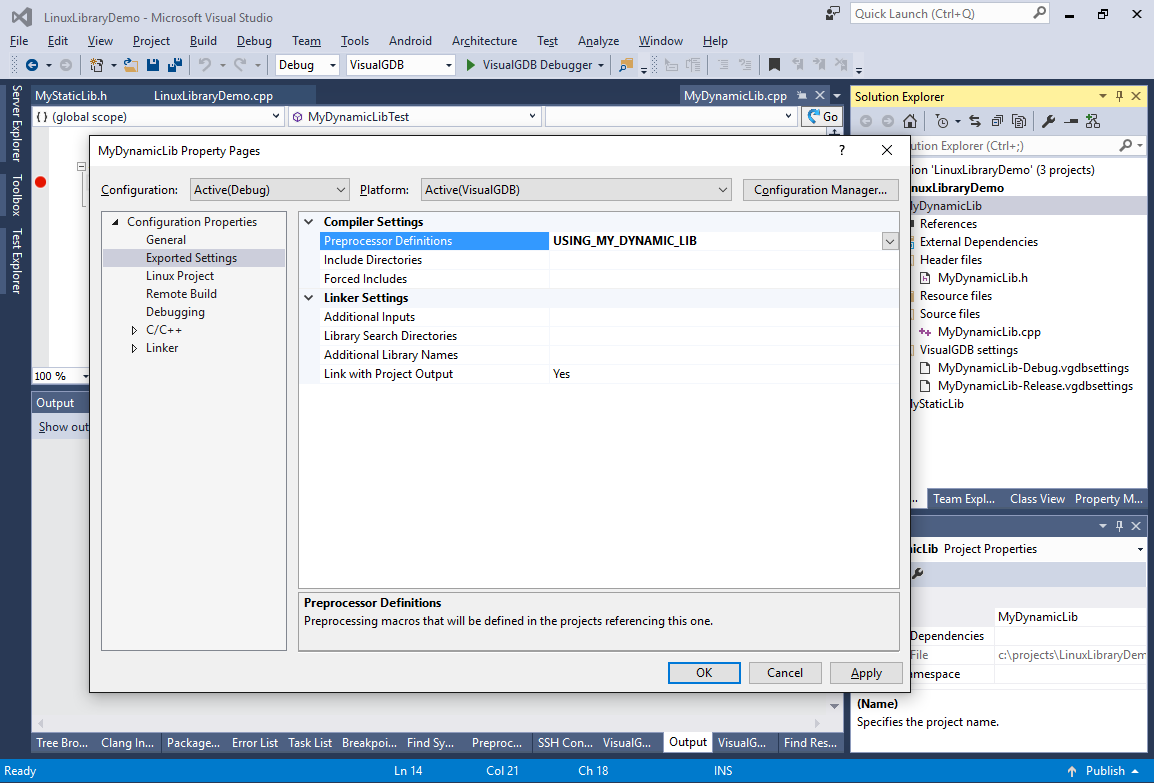
- You can configure a VisualGDB-based library to “export” some build settings so that they are automatically added to all projects referencing it. Try adding “USING_MY_DYNAMIC_LIB” to the exported Preprocessor Definitions for the library project:
- Try checking the new macro with an #ifdef in the main project. Ensure that it builds:
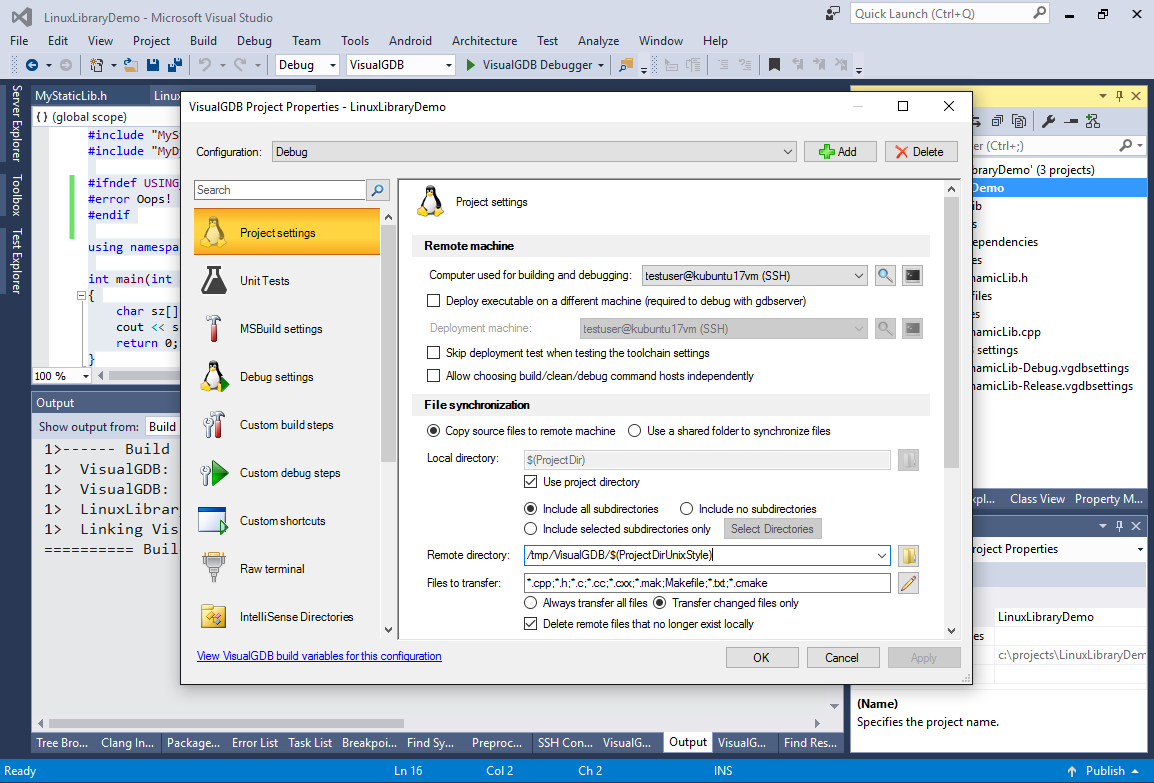
- You can configure various VisualGDB-related settings for each project via right-click -> VisualGDB Project Properties:
If you prefer an environment where multiple libraries share the same common settings (e.g. deployment paths), try creating CMake-based projects instead by following this tutorial. VisualGDB transparently integrates CMake into Visual Studio and will automatically edit CMakeLists.txt files in response to various changes in Solution Explorer.