Building an OpenSTLinux SDK for STM32MP1 Devices
This tutorial shows how to build an OpenSTLinux SDK for the STM32MP1 devices. The SDK includes the SD card images for common development boards, a cross-toolchain and the headers/libraries necessary to cross-compile Linux applications that will run on the Cortex-A cores of the STM32MP1 device. We will show how to use the repo and bitbake tools to generate the SDK and how to use it the SDK to compile Linux applications for the STM32MP1 device.
- The OpenSTLinux build process depends on a large and relatively fragile ecosystem of Linux tools and hence requires using a specific version of Linux to be running on the build machine. The openstlinux-4.19-thud-mp1-19-02-20 version shown in this tutorial requires the Ubuntu 18.04.2, so we recommend creating a Linux VM based on ubuntu-18.04.2-desktop-amd64.iso with at least 80GB of disk space. To speed up the build, ensure the VM has as many CPU cores as your host machine does.
- Connect to your build machine via SSH and run the following command to install the packages required by the OpenSTLinux tools:
sudo apt-get install sed wget curl cvs subversion git-core coreutils unzip texi2html texinfo docbook-utils gawk python-pysqlite2 diffstat help2man make gcc build-essential g++ desktop-file-utils chrpath libxml2-utils xmlto docbook bsdmainutils iputils-ping cpio python-wand python-pycryptopp python-crypto libsdl1.2-dev xterm corkscrew nfs-common nfs-kernel-server device-tree-compiler mercurial u-boot-tools libarchive-zip-perl ncurses-dev bc linux-headers-generic gcc-multilib libncurses5-dev libncursesw5-dev lrzsz dos2unix lib32ncurses5 repo libssl-dev
Then confirm the package installation:
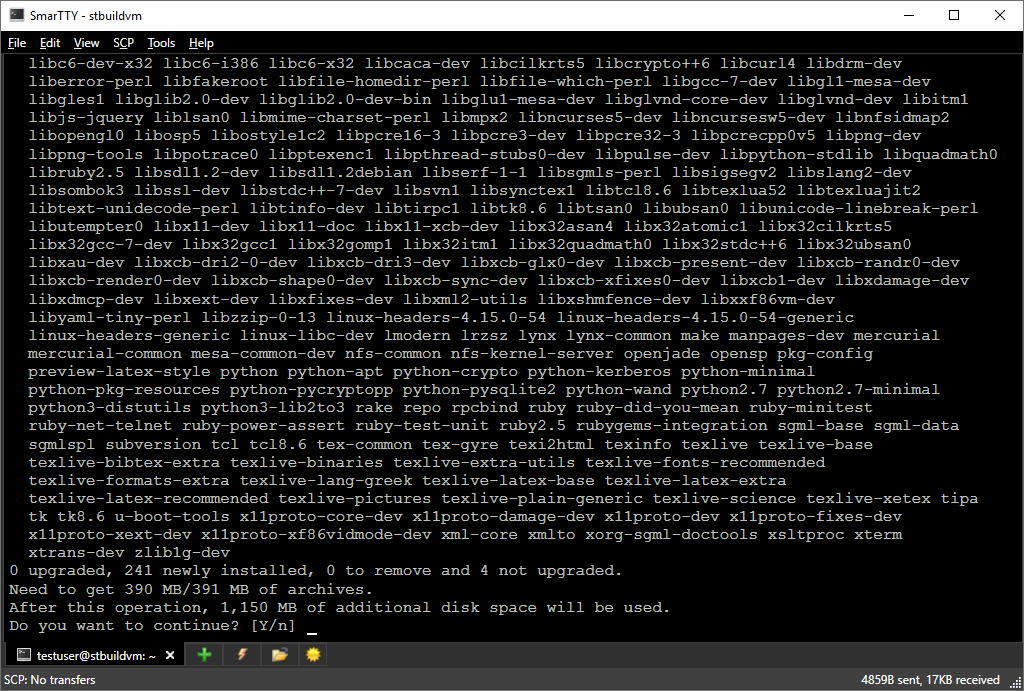
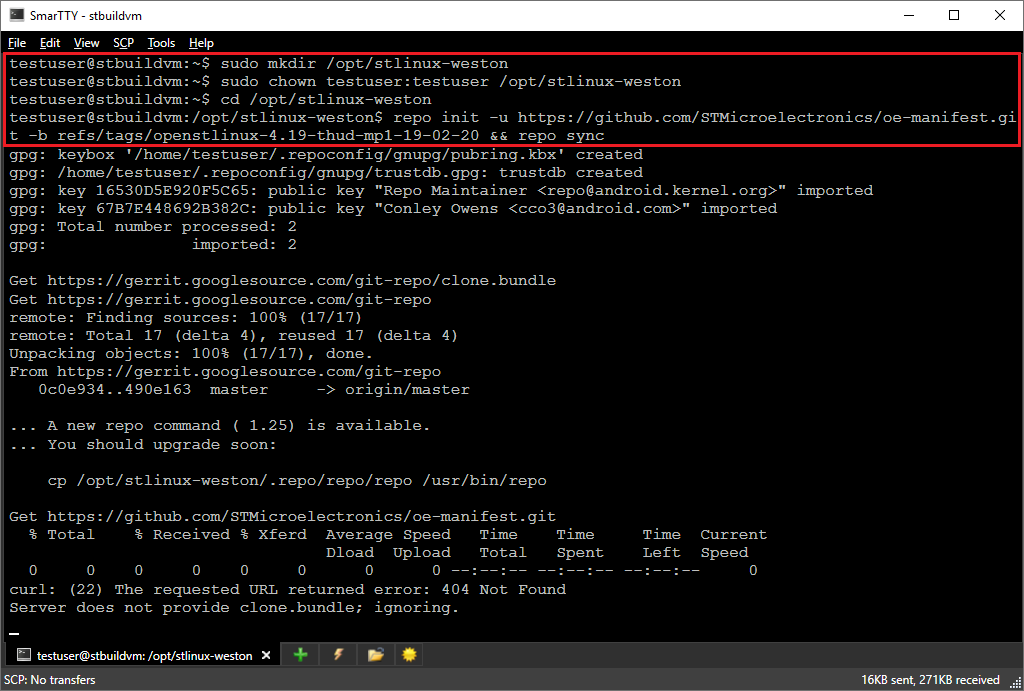
- Create a directory for the OpenSTLinux distro you are going to build (e.g. /opt/stlinux-weston) and ensure your user account can write to it. Then clone and initialize the OpenSTLinux repository:
sudo mkdir /opt/stlinux-weston
sudo chown <username>:<groupname> /opt/stlinux-weston
cd /opt/sylinux-weston
repo init -u https://github.com/STMicroelectronics/oe-manifest.git -b refs/tags/openstlinux-4.19-thud-mp1-19-02-20 && repo sync
You can safely ignore the 404 errors during the repo initialization as long as the repo sync command completes successfully:
- Once the repository is initialized, the repo tool will show the list of available tags:

- Now you are almost ready to start building the OpenSTLinux SDK. Run the following command to setup the necessary environment:
DISTRO=openstlinux-weston MACHINE=stm32mp1 source layers/meta-st/scripts/envsetup.sh
Note the image name shown by the envsetup.sh script:
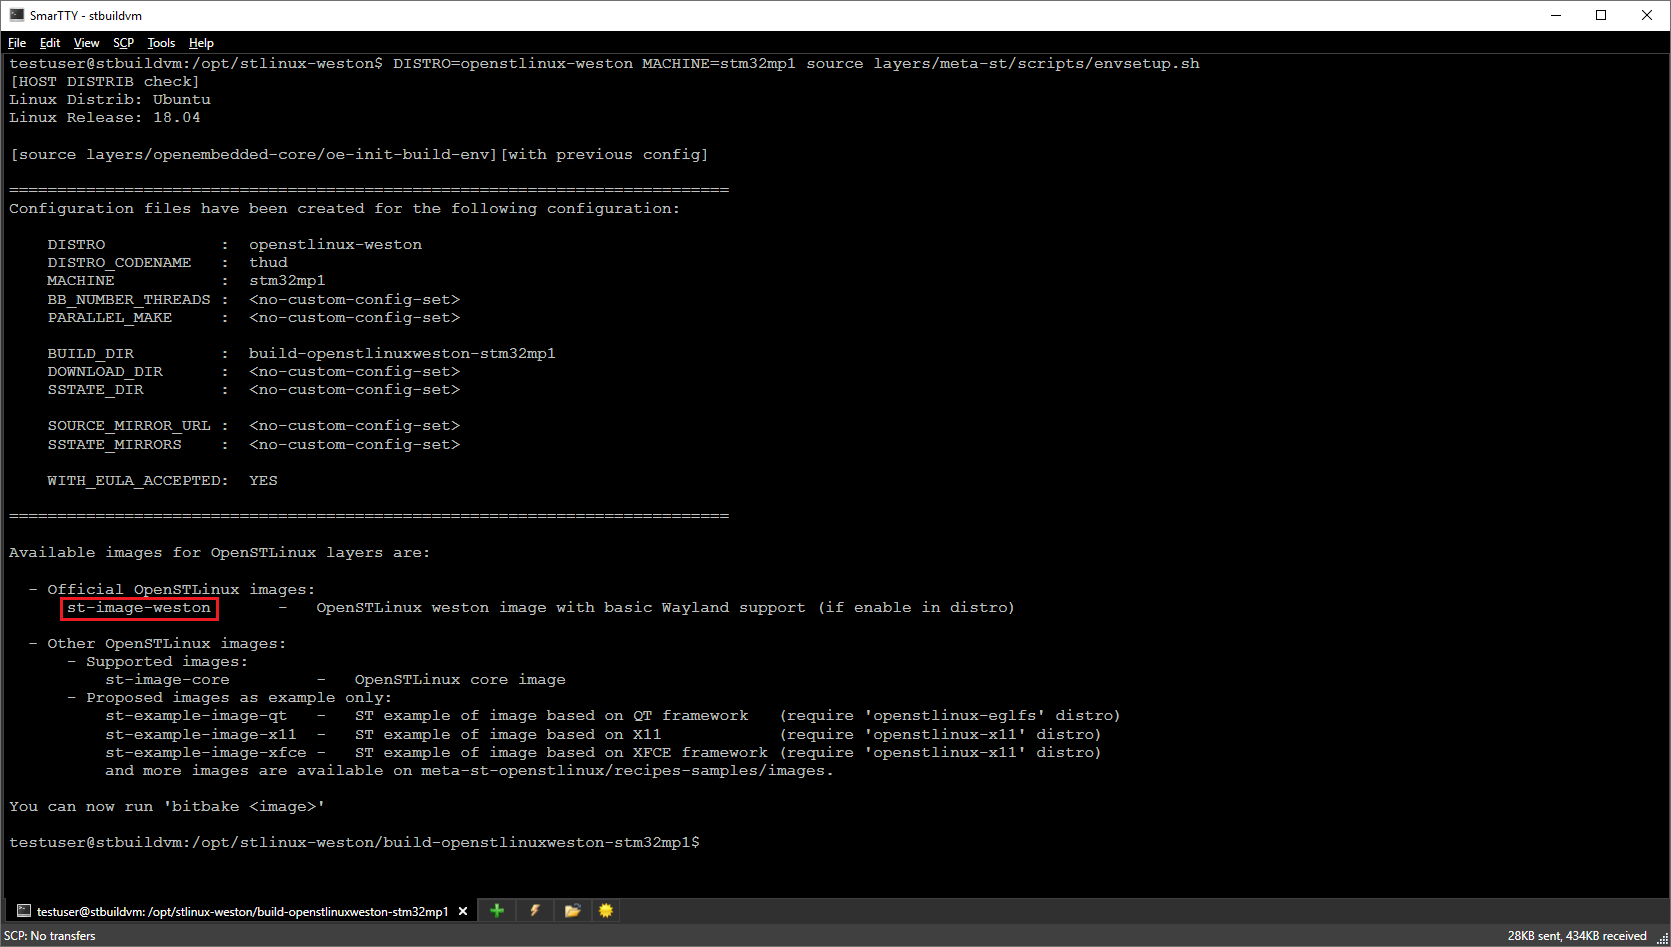
- Now it’s time to build the SDK. Run the following command to begin the build:
bitbake st-image-weston
Note that if your VM has insufficient RAM, the build will fail with the following error:
ERROR: Worker process (21931) exited unexpectedly (-9), shutting down...
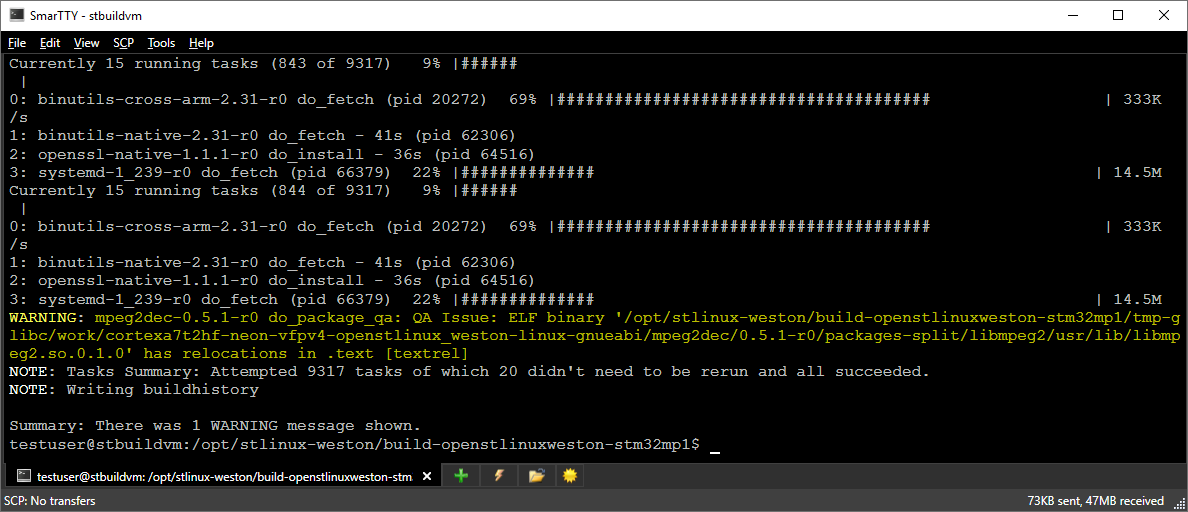
If this happens, try increasing the RAM size of your VM, or decrease the amount of its CPU cores. Otherwise, the build will successfully complete after several hours and may produce a few warnings that can be ignored:
- Go to the /opt/stlinux-weston/build-openstlinuxweston-stm32mp1/tmp-glibc/deploy/images/stm32mp1 directory and obtain a list of all files there:
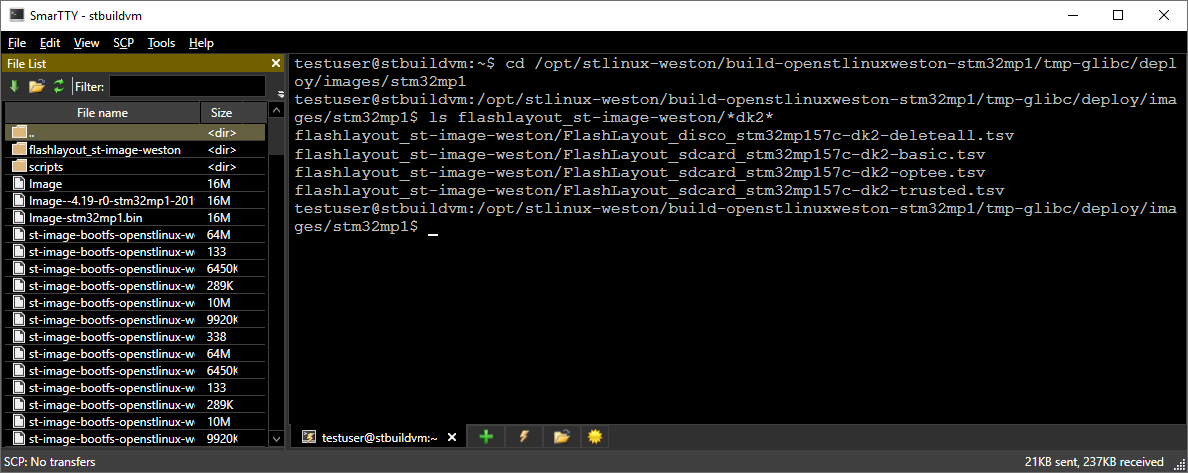
- Note that the stm32mp1 directory itself contains multiple binary files, while the flashlayout_st-image-weston subdirectory contains text files that describe how the binaries should be mapped to different memories (e.g. partitions on the SD card):
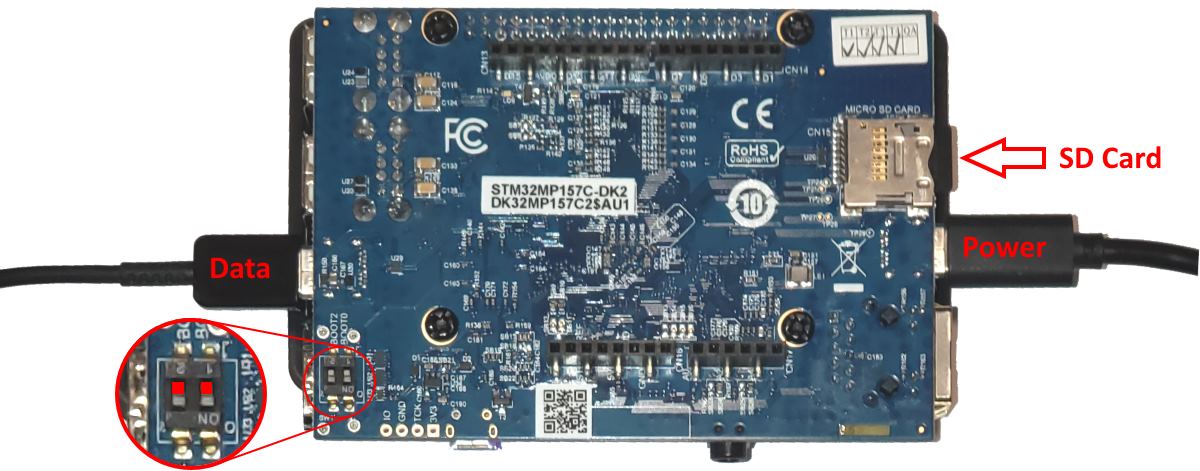
- Now we will program the SD card on the board. In this tutorial we are using Windows, so we will copy the entire /opt/stlinux-weston/build-openstlinuxweston-stm32mp1/tmp-glibc/deploy/images/stm32mp1 directory to the Windows side (use SmarTTY to handle symlinks automatically). Switch your board into the bootloader mode via the jumpers and connect both power and data USB connectors:
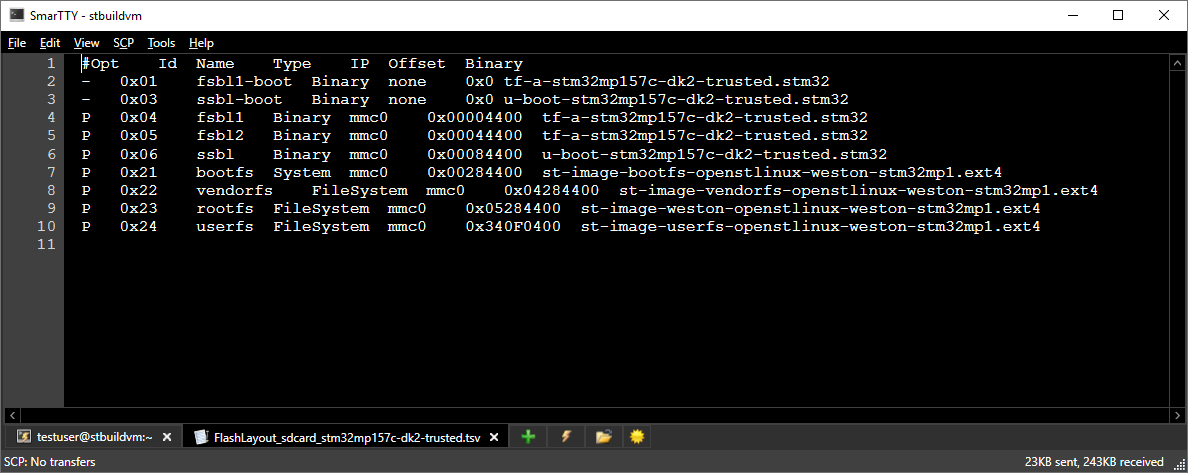
- Locate the FLASH layout file that matches your board. It should typically contain the board name and the word “trusted” indicating the trusted bootchain in the name (e.g. FlashLayout_sdcard_stm32mp157c-dk2-trusted.tsv). Then program it using our FLASH Programming tool for STM32WB1 devices:

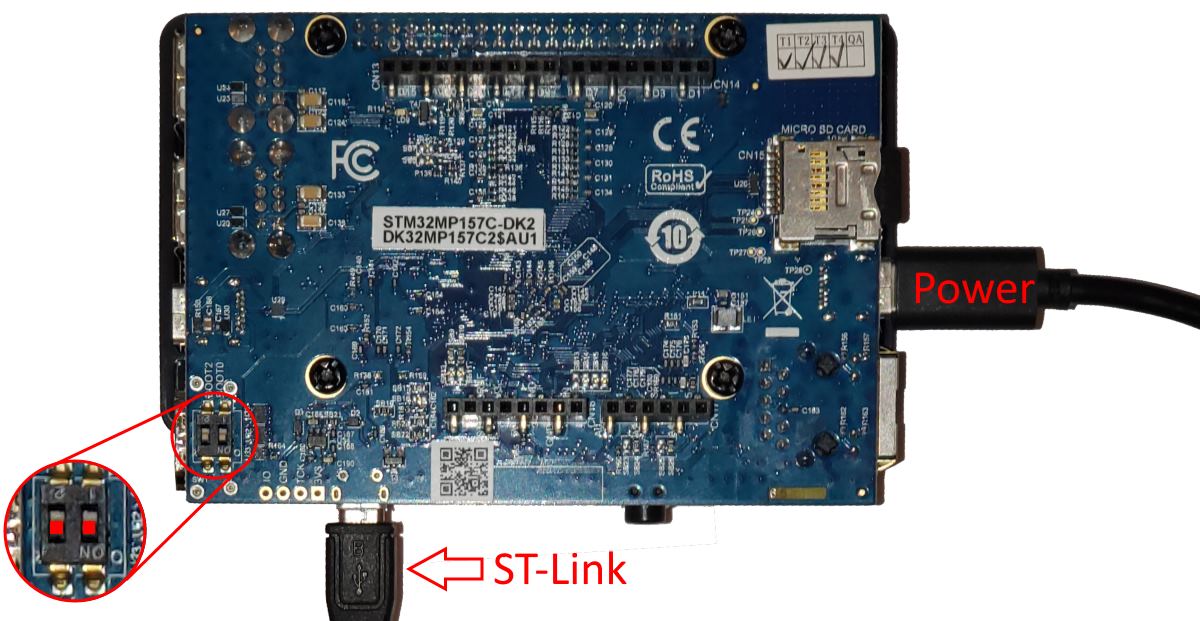
- Once the SD card image has been programmed, switch the board back to “boot from SD card” mode and connect the power and the on-board ST-Link:
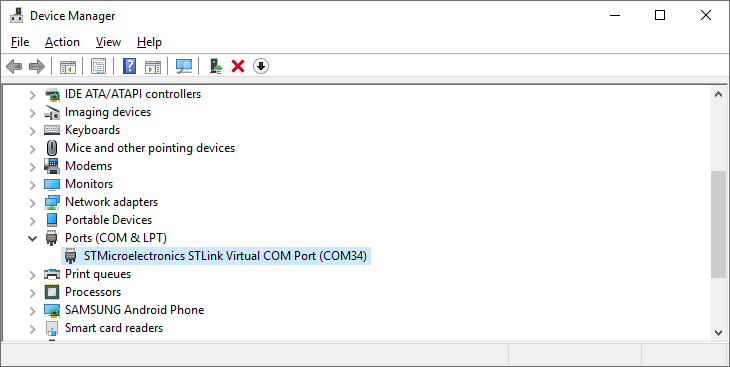
- The on-board ST-Link includes a COM port connected to one of the STM32MP1’s UART ports. Locate it in the Device Manager:
- Then connect to the port (use a baud rate of 115200) via a terminal program and reset the board. The board will start up and open a root terminal:

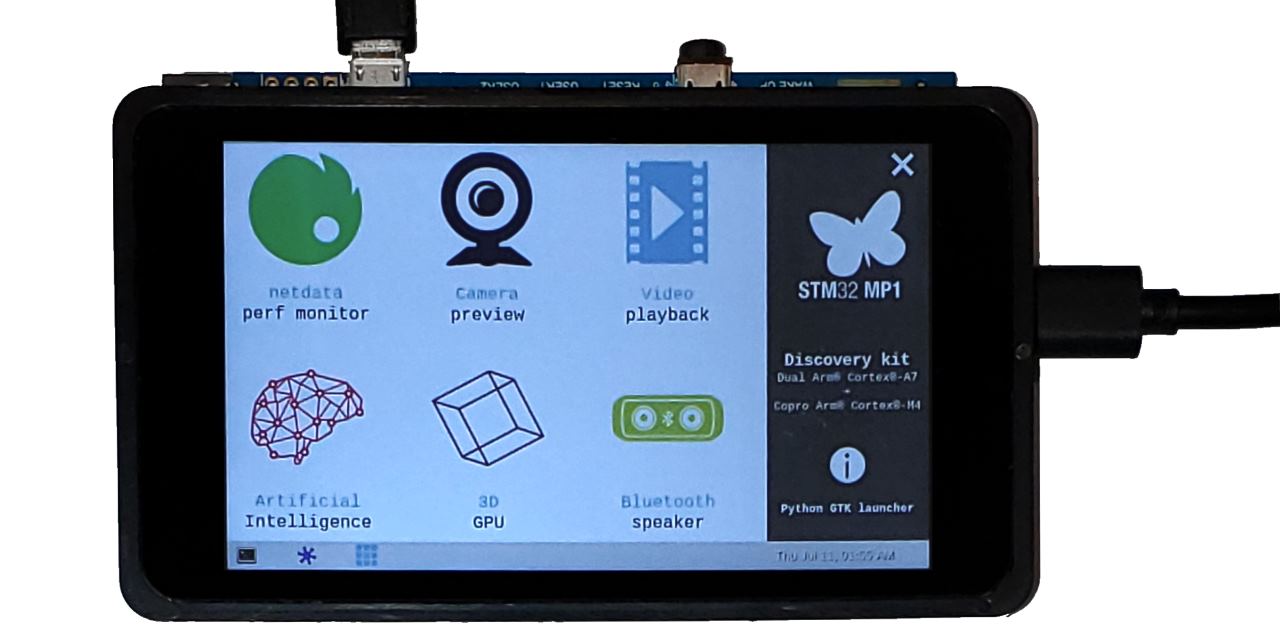
- The on-board LCD screen will display a demo application:
- Finally, we will build an SDK that allows compiling C/C++ Linux applications that will run on the STM32MP1 device. Switch back to the build environment (started by running envsetup.sh on the build machine) and run the following command:
bitbake -c populate_sdk st-image-weston

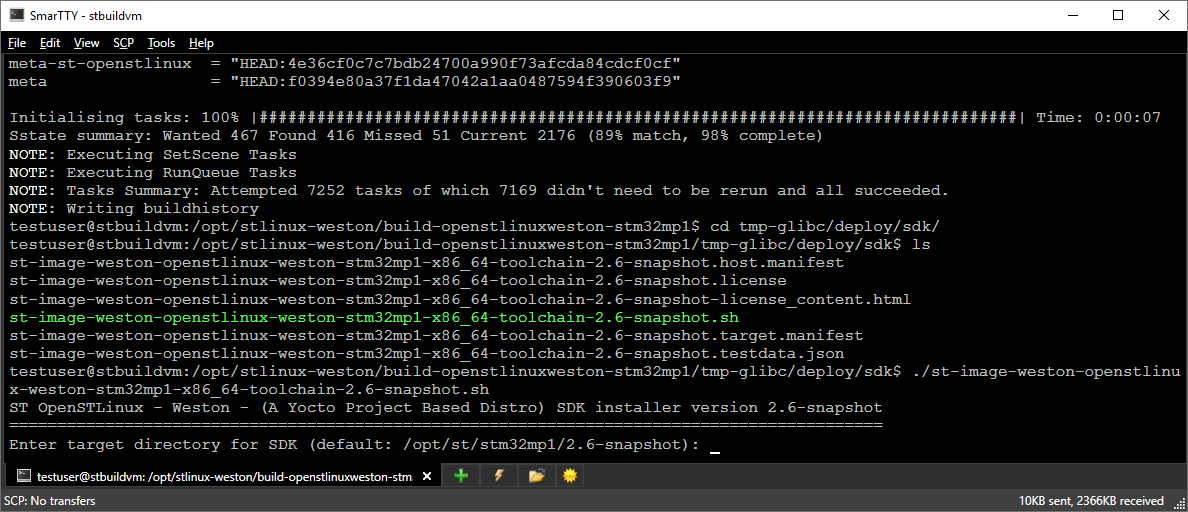
- This command will build an SDK installer (a self-extracting .sh file under the tmp-glibc/deploy/sdk directory). Locate the installer script and run it to extract the SDK for the previously built image:
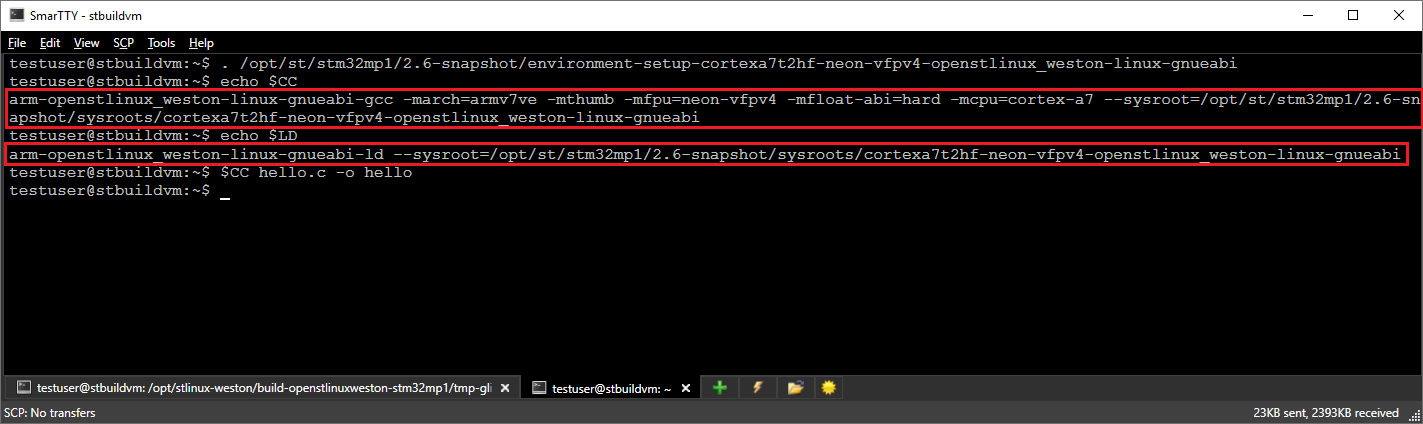
- In order to build C/C++ programs for the board, load the environment from the <sdk location>/environment-setup-cortexa7t2hf-neon-vfpv4-openstlinux_weston-linux-gnueabi file. This will set the CC, LD and other common environment variables to point to the correct SDK tools including all flags. Then you can simply invoke $CC instead of the regular gcc executable to produce binaries compatible with the STM32MP1 board: