Using the LCD Display of the ESP32-WROVER Board
This tutorial shows how to use the on-board display on the ESP32-WROVER board. We will clone a basic LCD example project from the ESP-IDF, show the role of different components of the sample and modify it to continuously download a JPG picture from an arbitrary online URL and display it on the screen.
Before you begin, install Visual Studio and VisualGDB 5.4 or later.
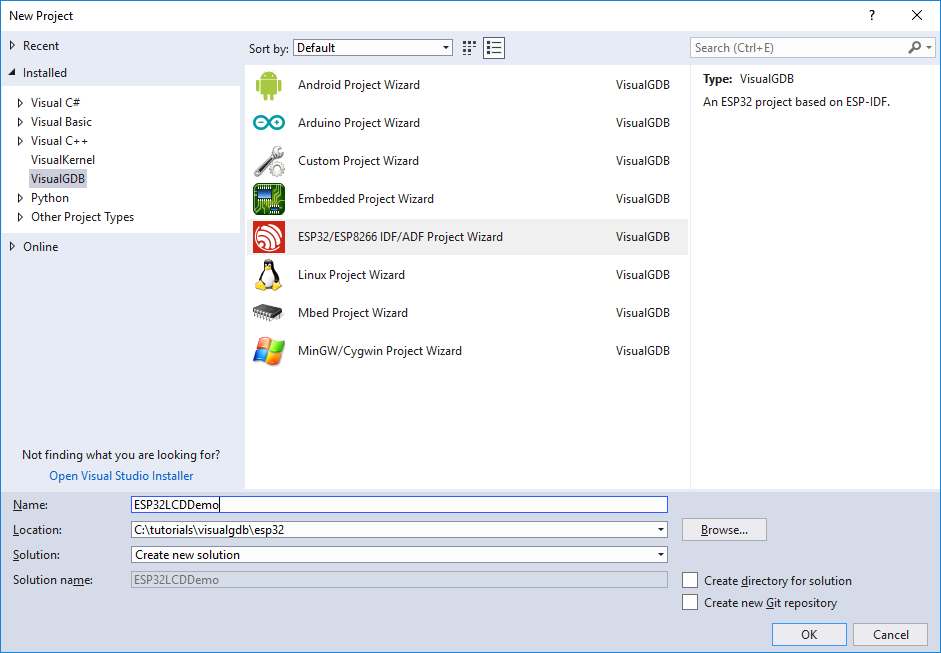
- Start Visual Studio and open the VisualGDB ESP32 Project Wizard:
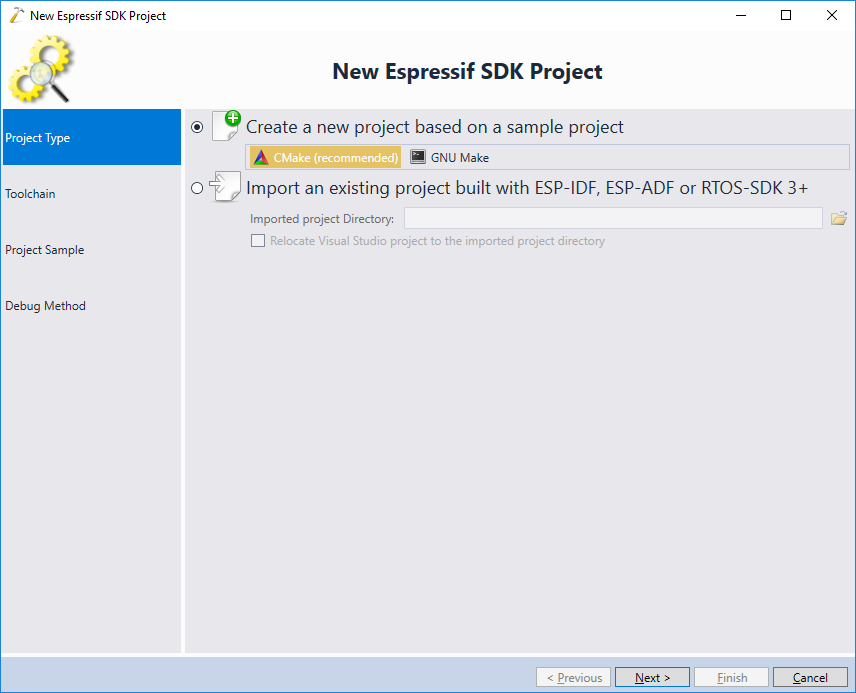
- On the first page of the wizard select the recommended CMake build subsystem:
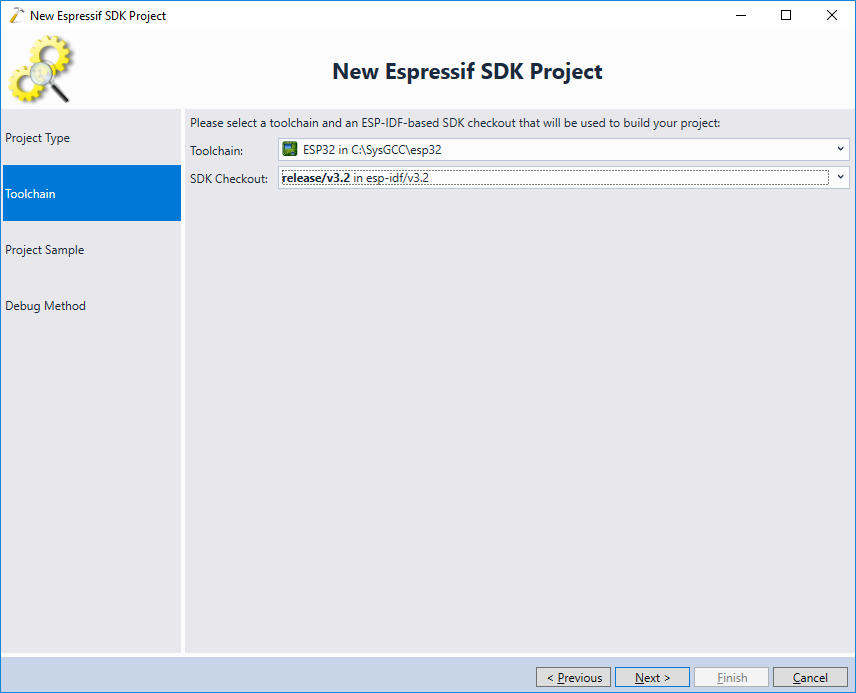
- On the next page pick your toolchain and an ESP-IDF checkout. For all new projects we recommend always using the latest toolchain and the latest stable ESP-IDF release:
 Update: For better compatibility with the latest ESP32 tools, we recommend selecting the consolidated toolchain instead.
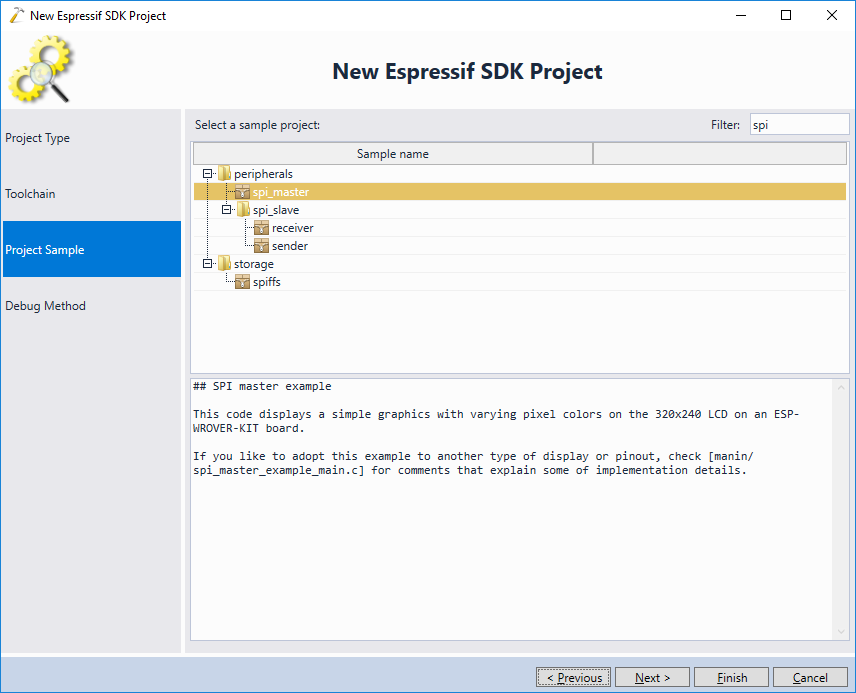
 - On the Project Sample page pick the spi_master sample. VisualGDB will automatically clone it into a new project when you complete the wizard:
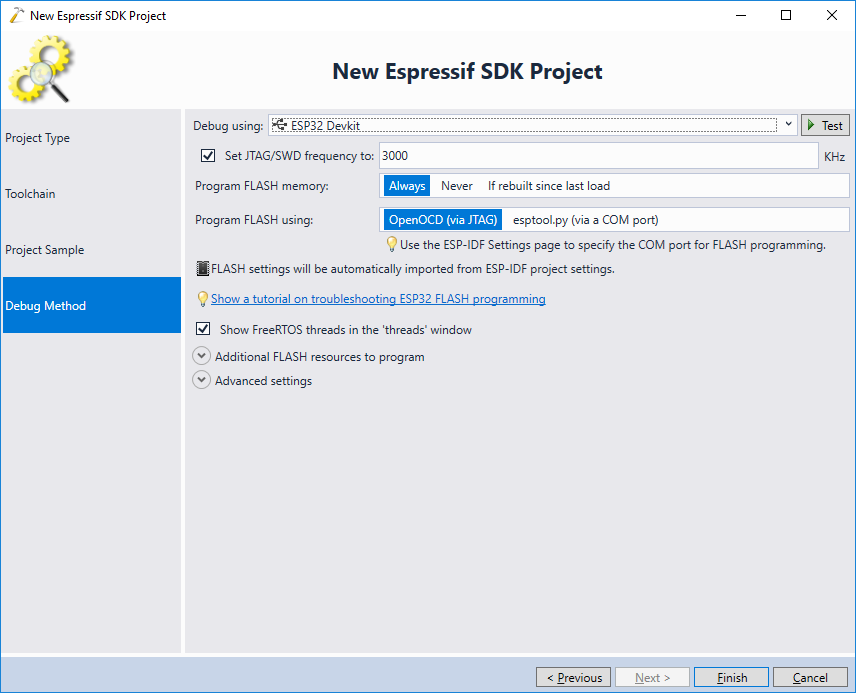
- Finally, choose the debugging settings that match your target. The ESP32-WROVER module comes with an on-board JTAG programmer, so enabling JTAG debugging via jumpers and plugging the board in should be sufficient for VisualGDB to detect it. In case of any problems, follow our ESP32-WROVER tutorial to get debugging to work:
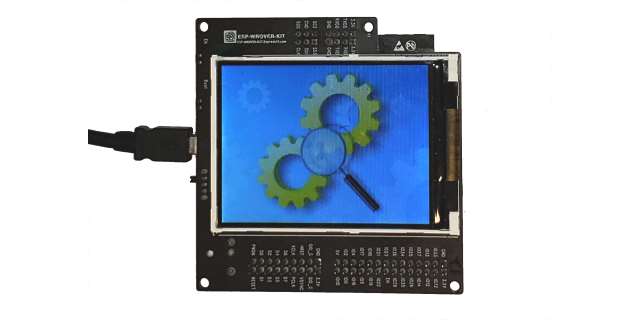
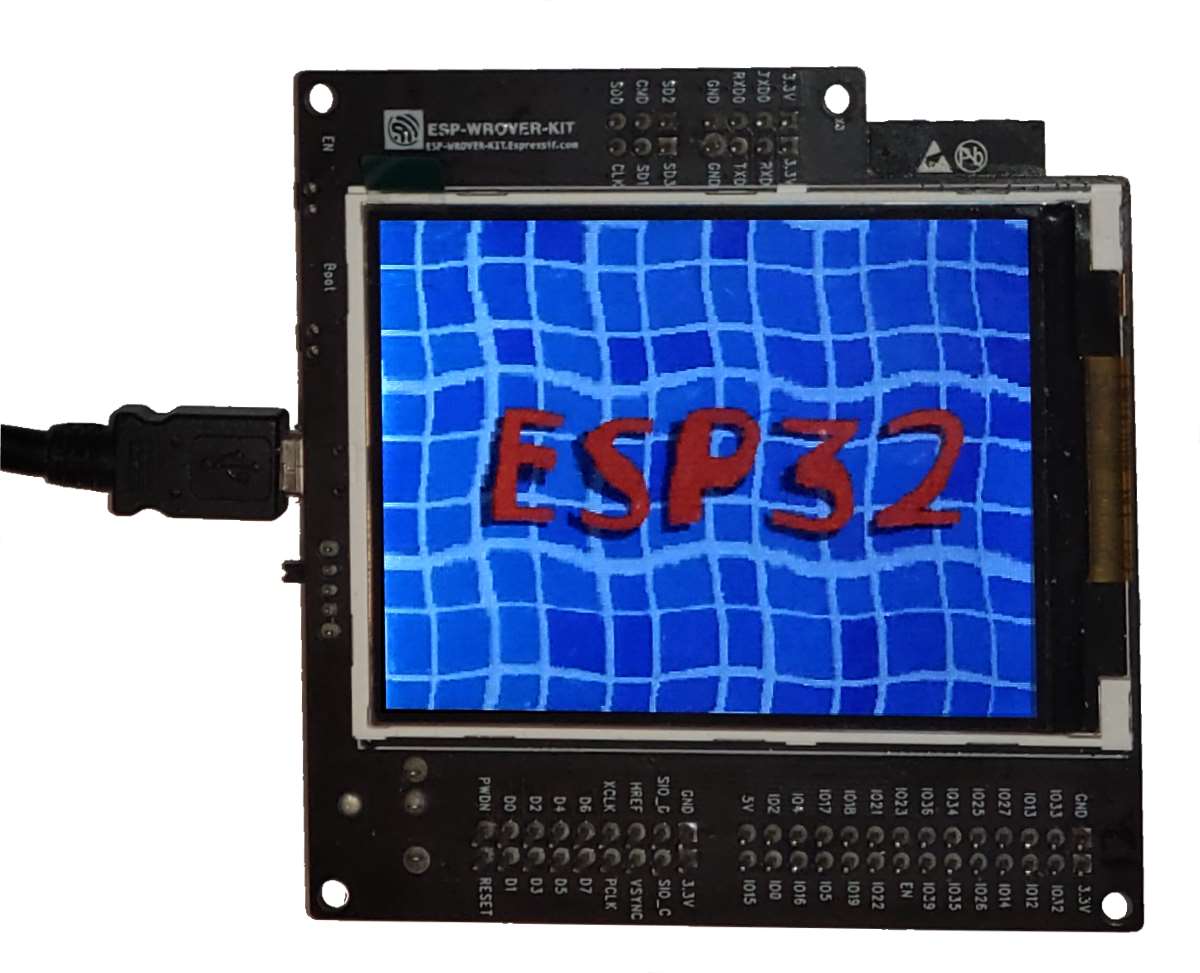
- Press “Finish” to create the project. Once it has been created, press F5 to build and run it and observe the LCD screen of the WROVER module. You should see waves going over the “ESP32” text :
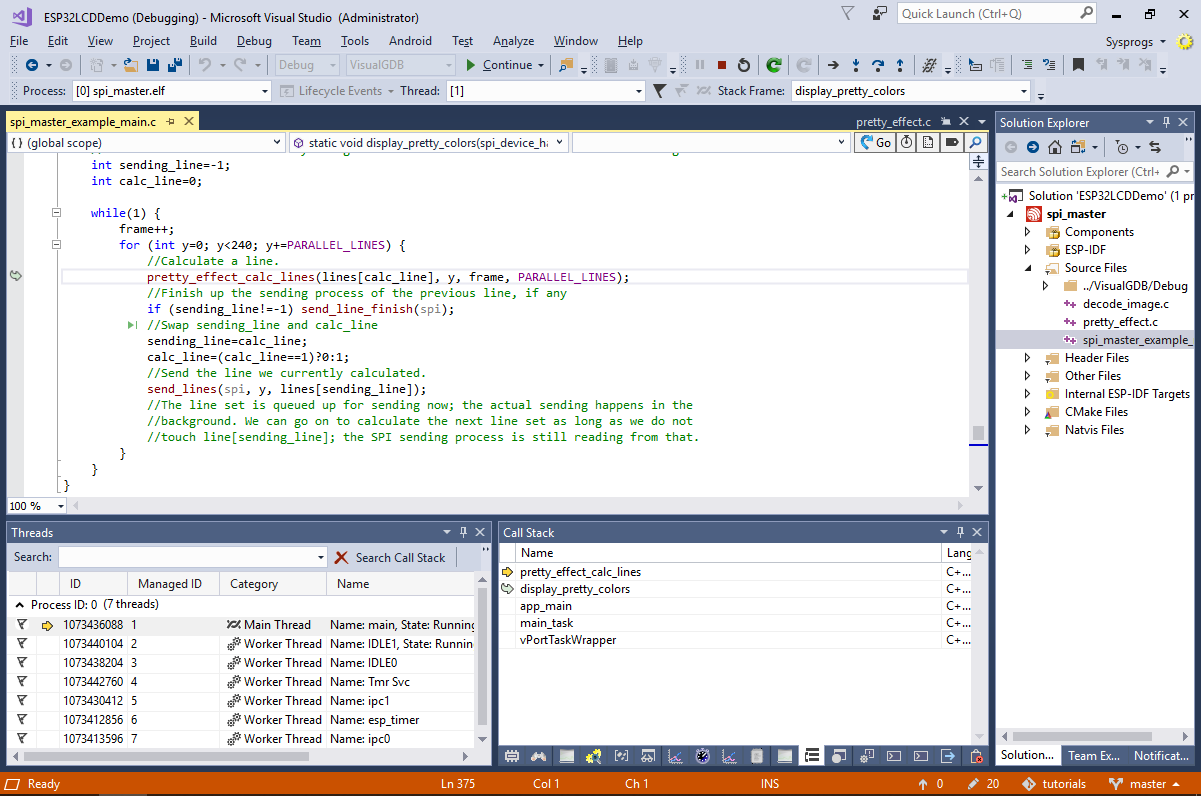
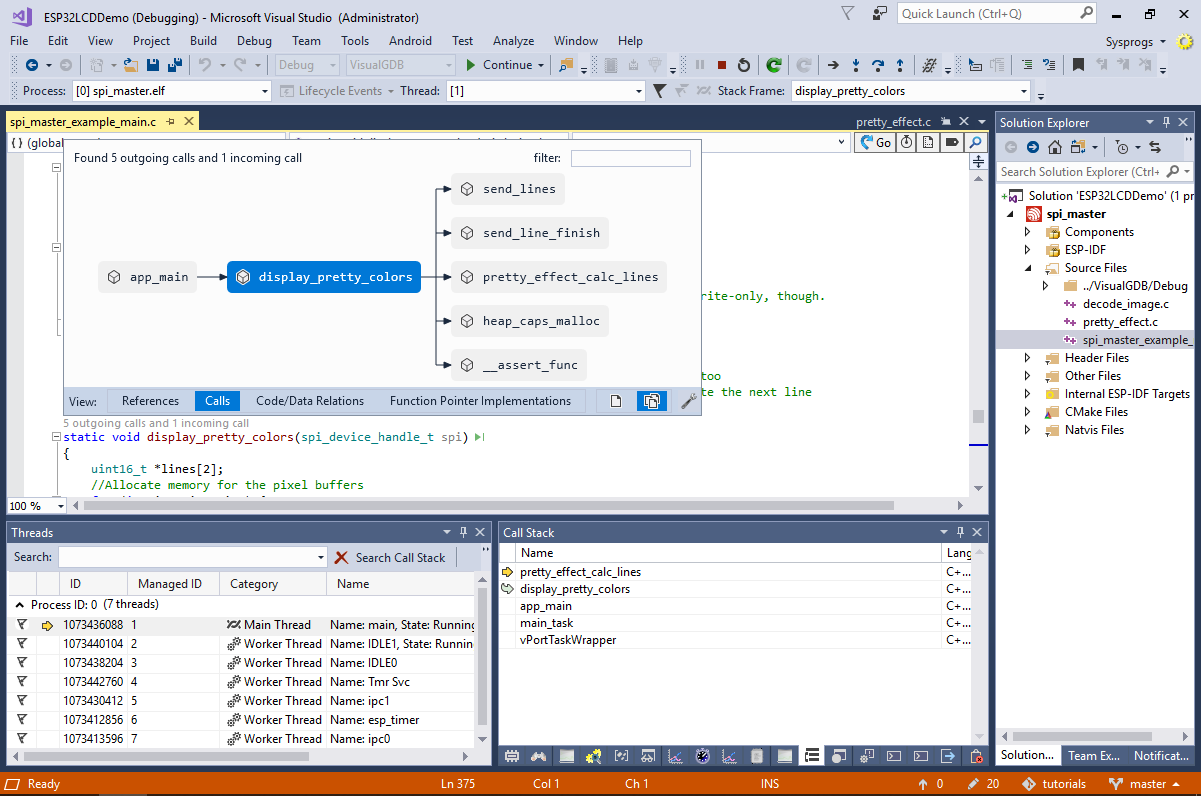
- Now we will look into the internals of the example to understand the involved components. Run the Debug->Break All command and switch to the main thread via the Threads view. You should see the pretty_effect_calc_lines() function being called by display_pretty_colors():
- You can use the CodeJumps navigation (clickable links on top of function names) to quickly jump between the functions calling each other:
- In this example, the following logic is used to display the image on the LCD screen:
- The FLASH image generated by the project contains a copy of the image.jpg (this is done by setting the COMPONENT_EMBED_FILES variable in CMakeLists.txt)
- At startup, app_main() calls pretty_effect_init() that in turn calls the decode_image() function that decodes the image.jpg file from the FLASH memory.
- Then, app_main() calls display_pretty_colors() that starts applying the wave effect to the image. More specifically, it does the following
- Allocates space for 16 lines of the image using the heap_caps_malloc() function (note the MALLOC_CAP_DMA flag that ensures that the allocated memory can be used by the DMA engine).
- Splits the image into 16-line sections. Then it uses double-buffering to optimize the image updating:
- If the previous iteration has computed some pixel values, display_pretty_colors() starts sending them to the display via a background DMA transfer.
- At the same time, it uses the CPU to compute the values for the next batch of pixels.
- We will now change the example to download the image from a specific URL instead of hardcoding it in the FLASH memory. First of all, add the code below to the main source file:
#include "freertos/FreeRTOS.h"
#include "freertos/task.h"
#include "freertos/event_groups.h"
#include "esp_system.h"
#include "esp_wifi.h"
#include "esp_event_loop.h"
#include "esp_log.h"
#include "nvs_flash.h"

static EventGroupHandle_t s_WifiEventGroup;
const int WIFI_CONNECTED_BIT = BIT0;

static esp_err_t event_handler(void *ctx, system_event_t *event)
{
    switch (event->event_id)
    {
    case SYSTEM_EVENT_STA_START:
        esp_wifi_connect();
        break;
    case SYSTEM_EVENT_STA_GOT_IP:
        xEventGroupSetBits(s_WifiEventGroup, WIFI_CONNECTED_BIT);
        break;
    case SYSTEM_EVENT_STA_DISCONNECTED:
        esp_wifi_connect();
        xEventGroupClearBits(s_WifiEventGroup, WIFI_CONNECTED_BIT);
        break;
    default:
        break;
    }
    return ESP_OK;
}

void wifi_init_sta()
{
    s_WifiEventGroup = xEventGroupCreate();
    esp_err_t ret = nvs_flash_init();

    if (ret == ESP_ERR_NVS_NO_FREE_PAGES || ret == ESP_ERR_NVS_NEW_VERSION_FOUND)
    {
        ESP_ERROR_CHECK(nvs_flash_erase());
        ret = nvs_flash_init();
    }

    ESP_ERROR_CHECK(ret);
    tcpip_adapter_init();
    ESP_ERROR_CHECK(esp_event_loop_init(event_handler, NULL));
    wifi_init_config_t cfg = WIFI_INIT_CONFIG_DEFAULT();
    ESP_ERROR_CHECK(esp_wifi_init(&cfg));

    wifi_config_t wifi_config = {
        .sta = {
            .ssid = "espnet",
            .password = "sysprogs"},
    };

    ESP_ERROR_CHECK(esp_wifi_set_mode(WIFI_MODE_STA));
    ESP_ERROR_CHECK(esp_wifi_set_config(ESP_IF_WIFI_STA, &wifi_config));
    ESP_ERROR_CHECK(esp_wifi_start());
}
Then replace the SSID and password with the values corresponding to your Wi-FI network and add the following lines to main() before the call to display_pretty_colors():
    wifi_init_sta();
    xEventGroupWaitBits(s_WifiEventGroup, WIFI_CONNECTED_BIT, pdFALSE, pdFALSE, portMAX_DELAY);
This will make the WROVER board connect to a Wi-Fi network and set the bit #0 in the s_WifiEventGroup object once the board get assigned an IP address. The call to xEventGroupWaitBits() will wait for that bit to be set.
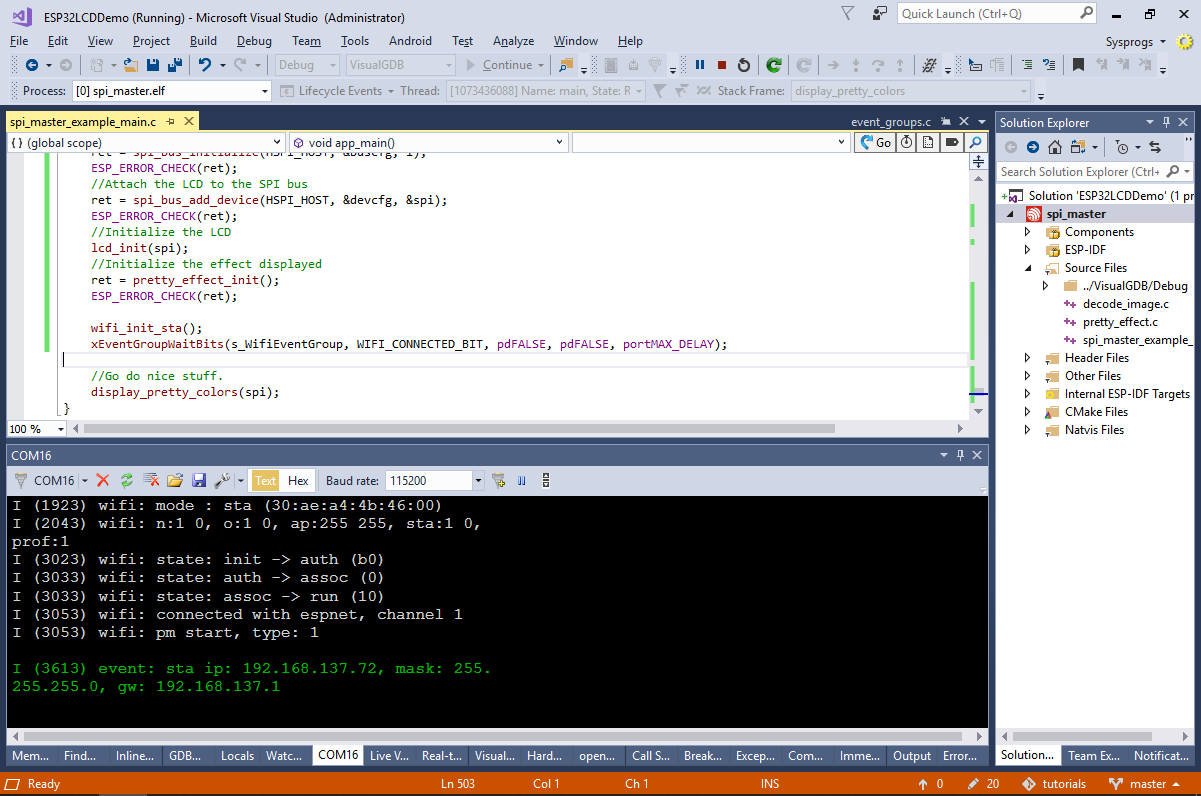
- Before we add the logic for downloading the JPG file from a given URL, run the current version of the firmware to test the Wi-Fi connection. If you are using the custom version of VisualGDB, try enabling the raw terminal on the WROVER’s COM port so that you can see the diagnostic messages from the board:

- Run your program and ensure it connects to the Wi-Fi network (the display will stay blank until the connection is established):
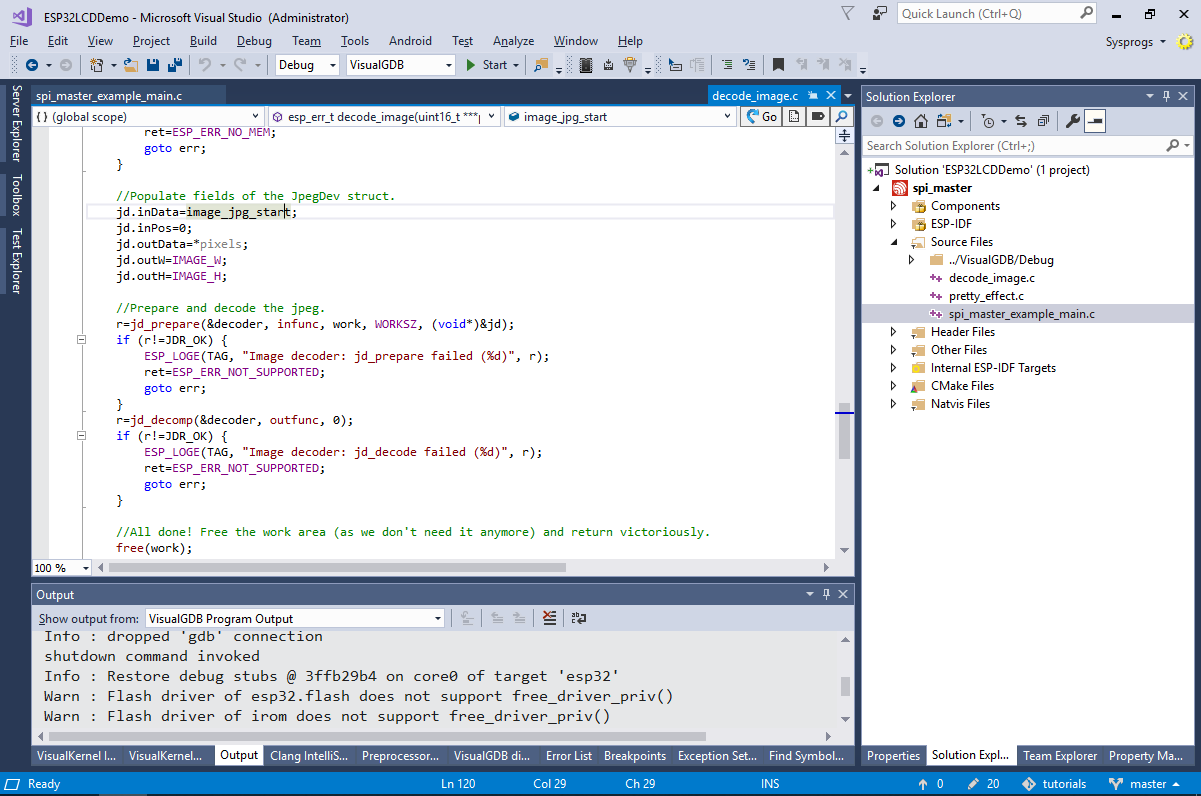
- Add the buffer and size parameters to decode_image() and modify it to use the buffer argument instead of the hardcoded JPG file (don’t forget to update the header file as well):
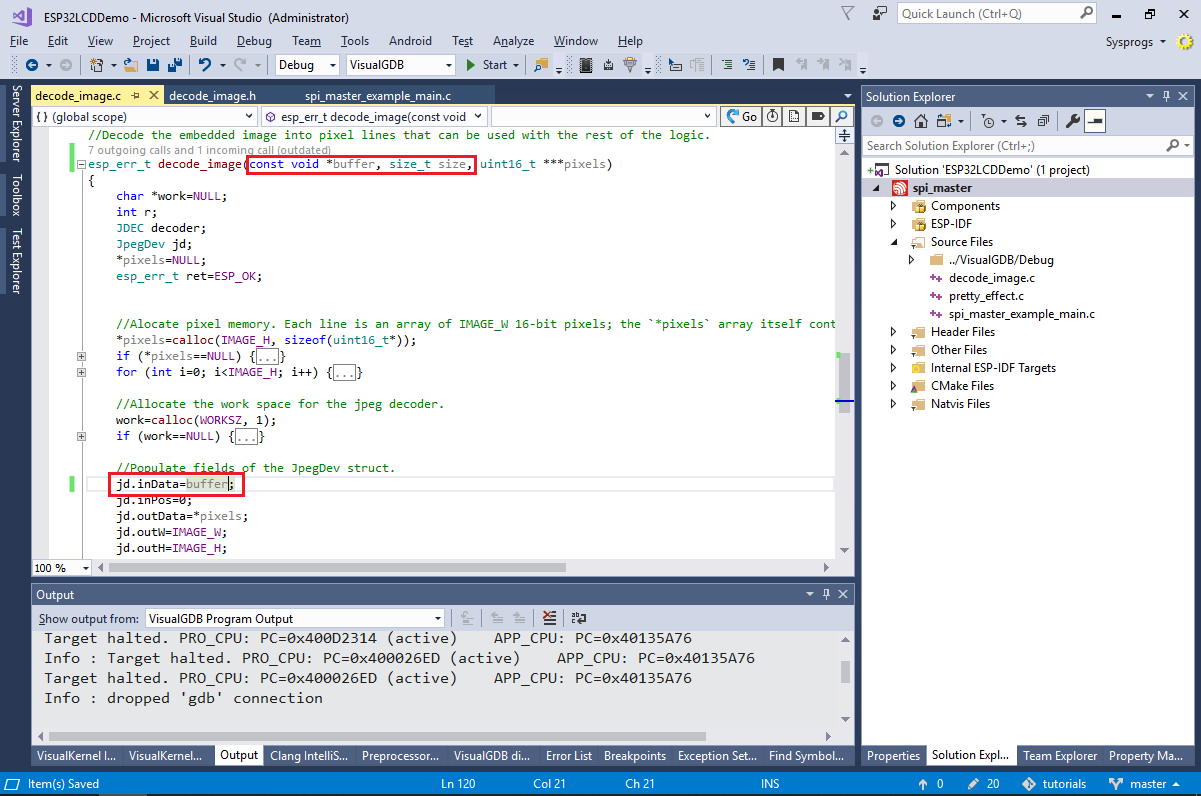 The decode_image() function will automatically provide the necessary callbacks to the jd_decomp() function ensuring that the image gets decoded to the raw format compatible with the ESP32-WROVER’s LCD display.
 - Finally, add the DownloadAndDisplay() function below to the main source file and call it from app_main() instead of display_pretty_colors():
#include "esp_http_client.h"
#include "decode_image.h"

static void DownloadAndDisplay(spi_device_handle_t spi)
{
    const int kMaxJpegFileSize = 32768;
    char *pBuf = (char *)malloc(kMaxJpegFileSize);
    uint16_t *pDMABuf = heap_caps_malloc(320 * PARALLEL_LINES * sizeof(uint16_t), MALLOC_CAP_DMA);

    for (;;)
    {
        esp_http_client_config_t config = {
            .url = "http://visualgdb.com/demo/vgdb320.jpg",
        };

        esp_http_client_handle_t client = esp_http_client_init(&config);
        esp_http_client_open(client, 0);
        int content_length = esp_http_client_fetch_headers(client);
        int total_read_len = 0, read_len = 0;
        if (total_read_len < content_length && content_length <= kMaxJpegFileSize)
            read_len = esp_http_client_read(client, pBuf, content_length);
        esp_http_client_close(client);
        esp_http_client_cleanup(client);

        if (read_len)
        {
            uint16_t **decoded = NULL;
            esp_err_t rc = decode_image(pBuf, read_len, &decoded);
            if (!rc)
            {
                for (int y = 0; y < 240; y += PARALLEL_LINES)
                {
                    for (int yo = 0; yo < PARALLEL_LINES; yo++)
                        memcpy(pDMABuf + yo * 320, decoded[y + yo], 320 * sizeof(uint16_t));
                    send_lines(spi, y, pDMABuf);
                    send_line_finish(spi);
                }
            }

            if (decoded)
            {
                for (int i = 0; i < 256; i++)
                {
                    free((decoded)[i]);
                }
                free(decoded);
            }

            vTaskDelay(5000 / portTICK_RATE_MS);
        }
    }
}
Also remove the pretty_effect_init() function and the call from app_main() to it as it is no longer required.
- The code we have added creates a DMA-accessible buffer similar display_pretty_colors() and the following actions in an infinite loop:
- Downloads the http://visualgdb.com/demo/vgdb320.jpg image into a temporary buffer (note the 32KB size limit).
- If the image has been downloaded successfully, it is decoded using the decode_image() that was previously used to load the image from the FLASH memory.
- Finally, the image is copied to the DMA-accessible memory and sent to the on-board display. For simplicity, our example does not use double-buffering.
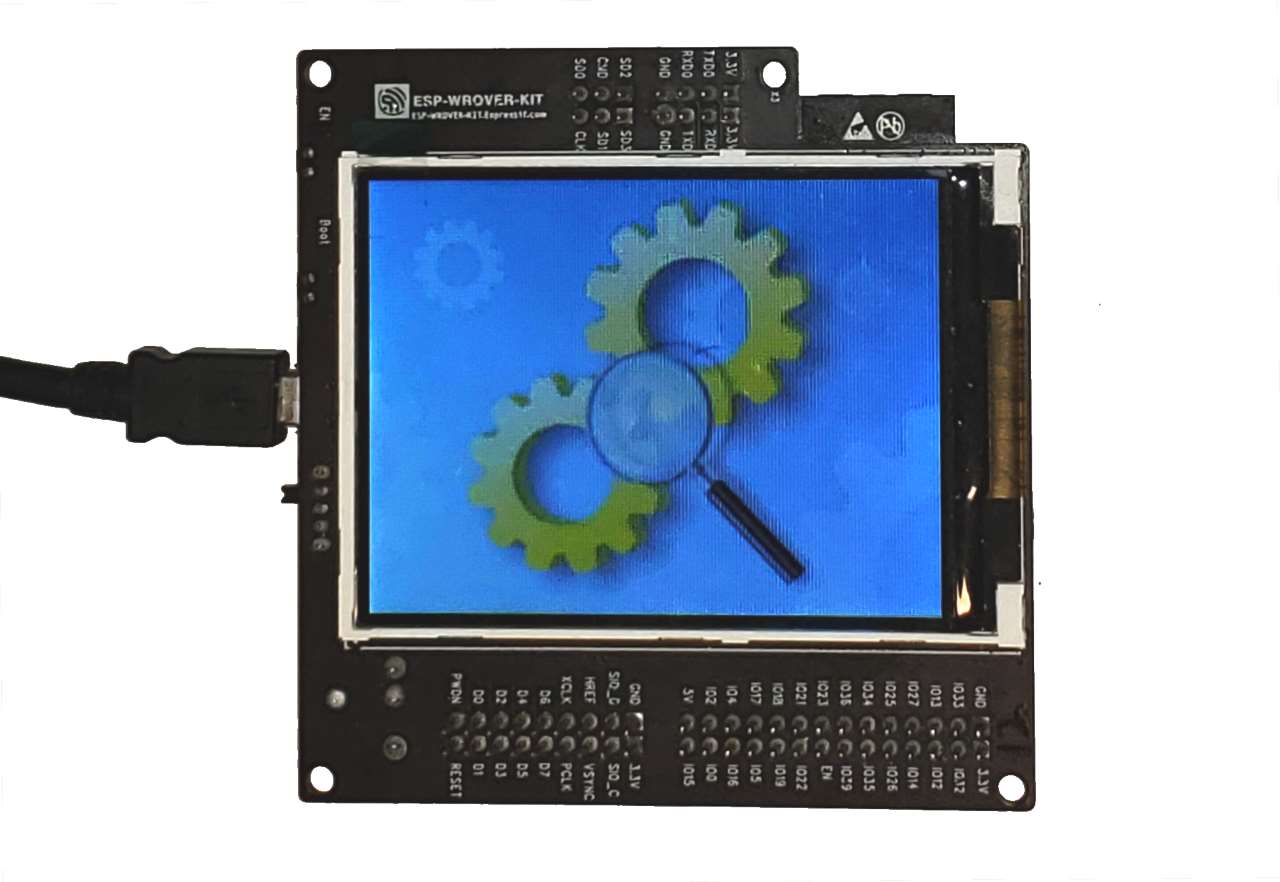
When you run the final version of the example, it will download the demo image from visualgdb.com and will show it on the on-board LCD display: